Val
Val-
New Tools
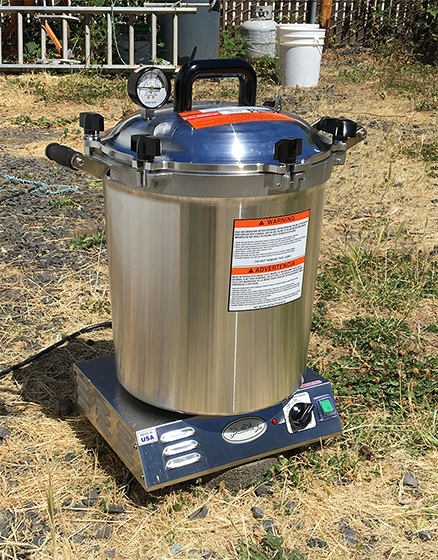
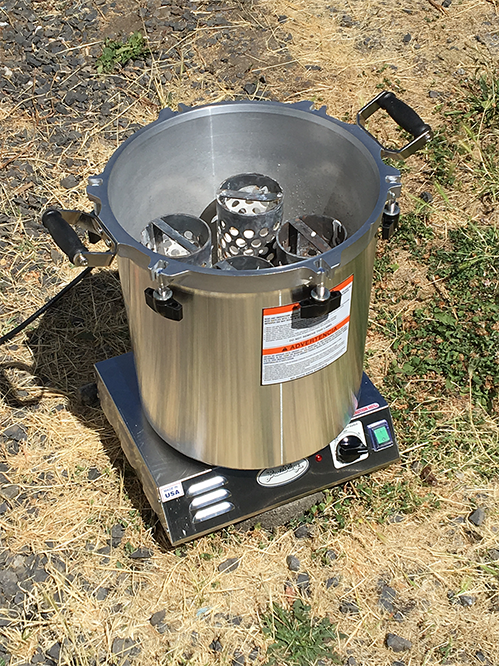
07/29/2017 at 22:08 • 0 commentsI love new tools, especially ones that improve the process. After consulting with a jewelry teacher, I got a pressure cooker for steaming wax out of invested flasks:
![]()
![]()
The steamer collects the wax on the bottom as a large disc that looks like a vinyl and you throw the disk away (or re-melt) after a 2-3 hour steam cycle on hi. Flasks go in the kiln with wax already removed, and the only thing left to do is get the water out of investment so there is no scary fire or heavy black smoke.
I also contracted a welder to make two tall 4" flasks out of four short ones. This takes care of all the long parts in the suit, mostly arm bones. I will still need custom box flasks welded for the chest piece and the hips because those are tall and wide at the same time.![]()
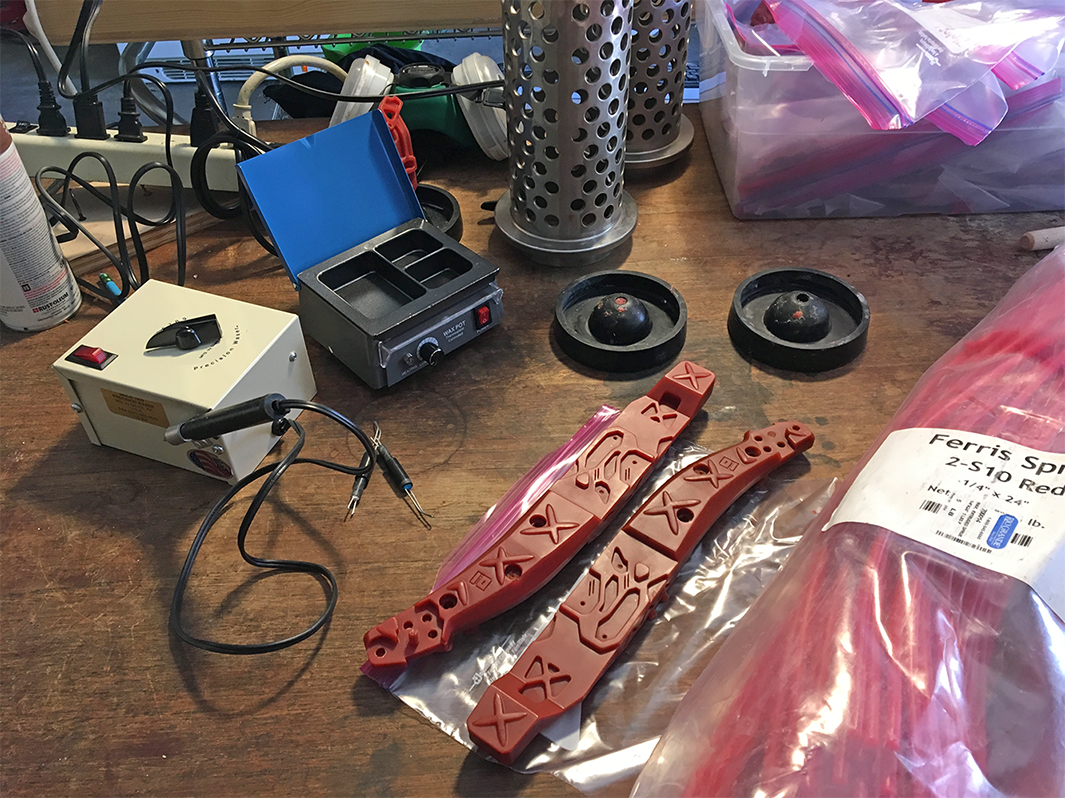
Since the major reason I still have defects are internal mold fractures, I got jewelry waxing tools to perform detailed cleanup on the wax parts before they are invested:
![]()
...another reason was that water still left in the investment if not completely evaporated during the 300 F step will start boiling at 700F and generate steam that will push its way out of investment pores and take pieces of surface detail with it, destroying cosmetic surfaces. For larger parts, 300 F has to be held longer.
-
Quest for quality and repeatability
07/18/2017 at 19:47 • 0 commentsLooks like there are still a few issues with repeatability left to solve but I got pointed to new tools and processes which might help. I also had a lengthy discussion with a Rio Grande dealer about how I am doing my investing, so I think I have a good chance of increasing the number of good casts out of each batch.
![]()
Some interesting things that came up:
- When putting sprues on, both the sprues and the model have to be very clean (i.e. trim all imperfections with hot knife and exacto knife). Investment will get in those and then break off during burn-out, fall on cosmetic surfaces as dust and jagged particles and get imprinted in the casting.
- Fewer sprues is actually better, because that will create less turbulence of streams of metal mixing together and possibly destroying more investment on the inside.
- More investment & less water for heavy pieces.
- Instead of doing the complete burn out inside a kiln (which so far has cost me $300/month due to having to replace burnt out coils, not to speak of black smoke that gets everywhere), flasks can be boiled in a pressure cooker/canner, which gets most of the wax out in a very clean way. It can then be collected from the bottom of the cooker in one piece and thrown away
- Jewelers use flex-shaft tools for chasing and finishing work, which are stronger than dremels - got one to try it out
- Got sticky wax and a wax warming pot (that looks like a little food tray with sections and a built-in hot plate). Apparently sticky wax, besides helping to put the sprues on quicker, is a much stronger bond after cooling (not flexible). Got a hot knife also (waxer pen with tips and a wire going to the power supply with potentiometer).
- Got more pre-made sprue sizes
- Longer burnouts are necessary both for larger flasks and for detailed parts. The longer burnout will harden investment more and not let metal destroy small details when swirling inside.
- It's good that I've been using risers, that still helps even with vacuum casting -
Metal casting success
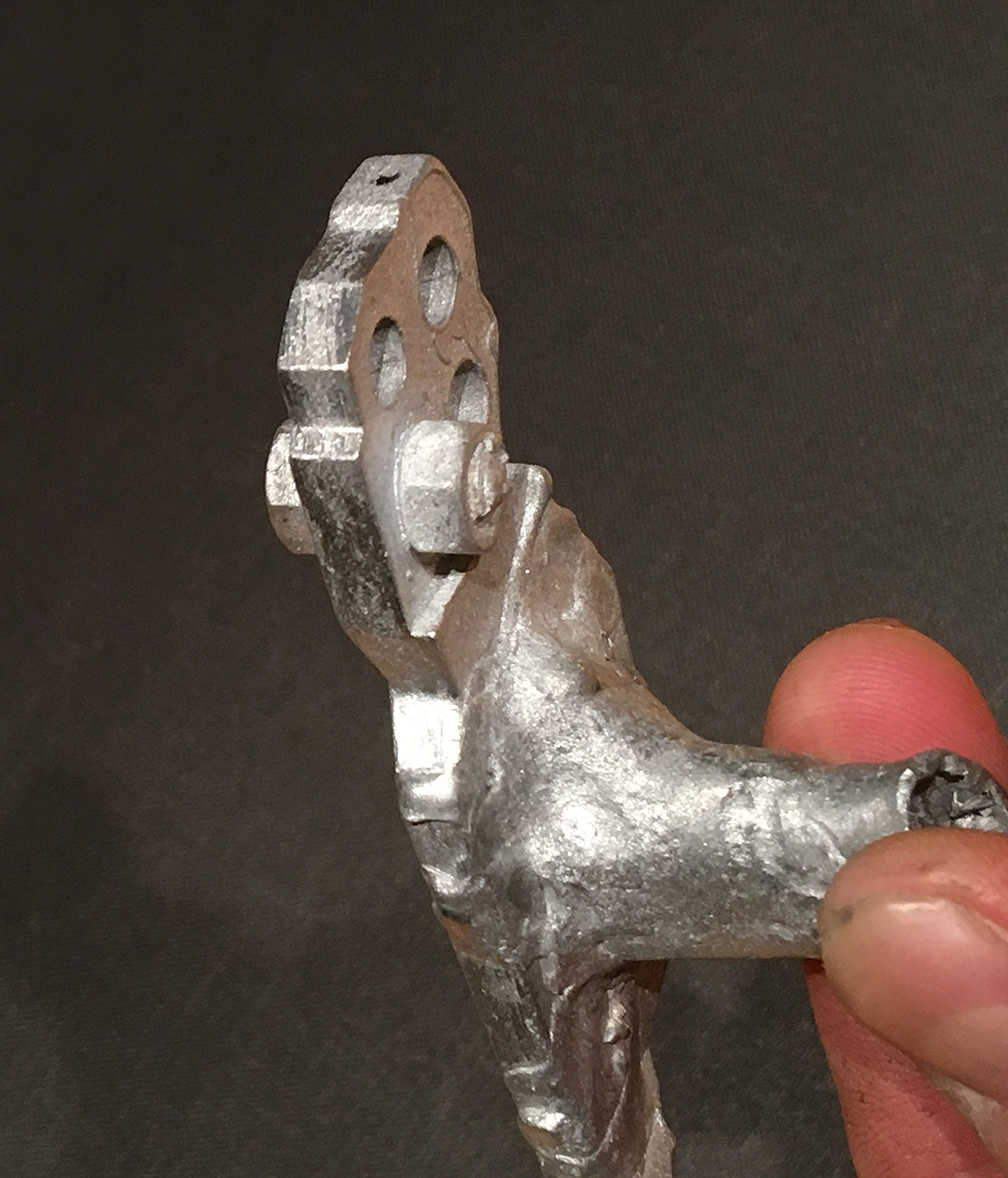
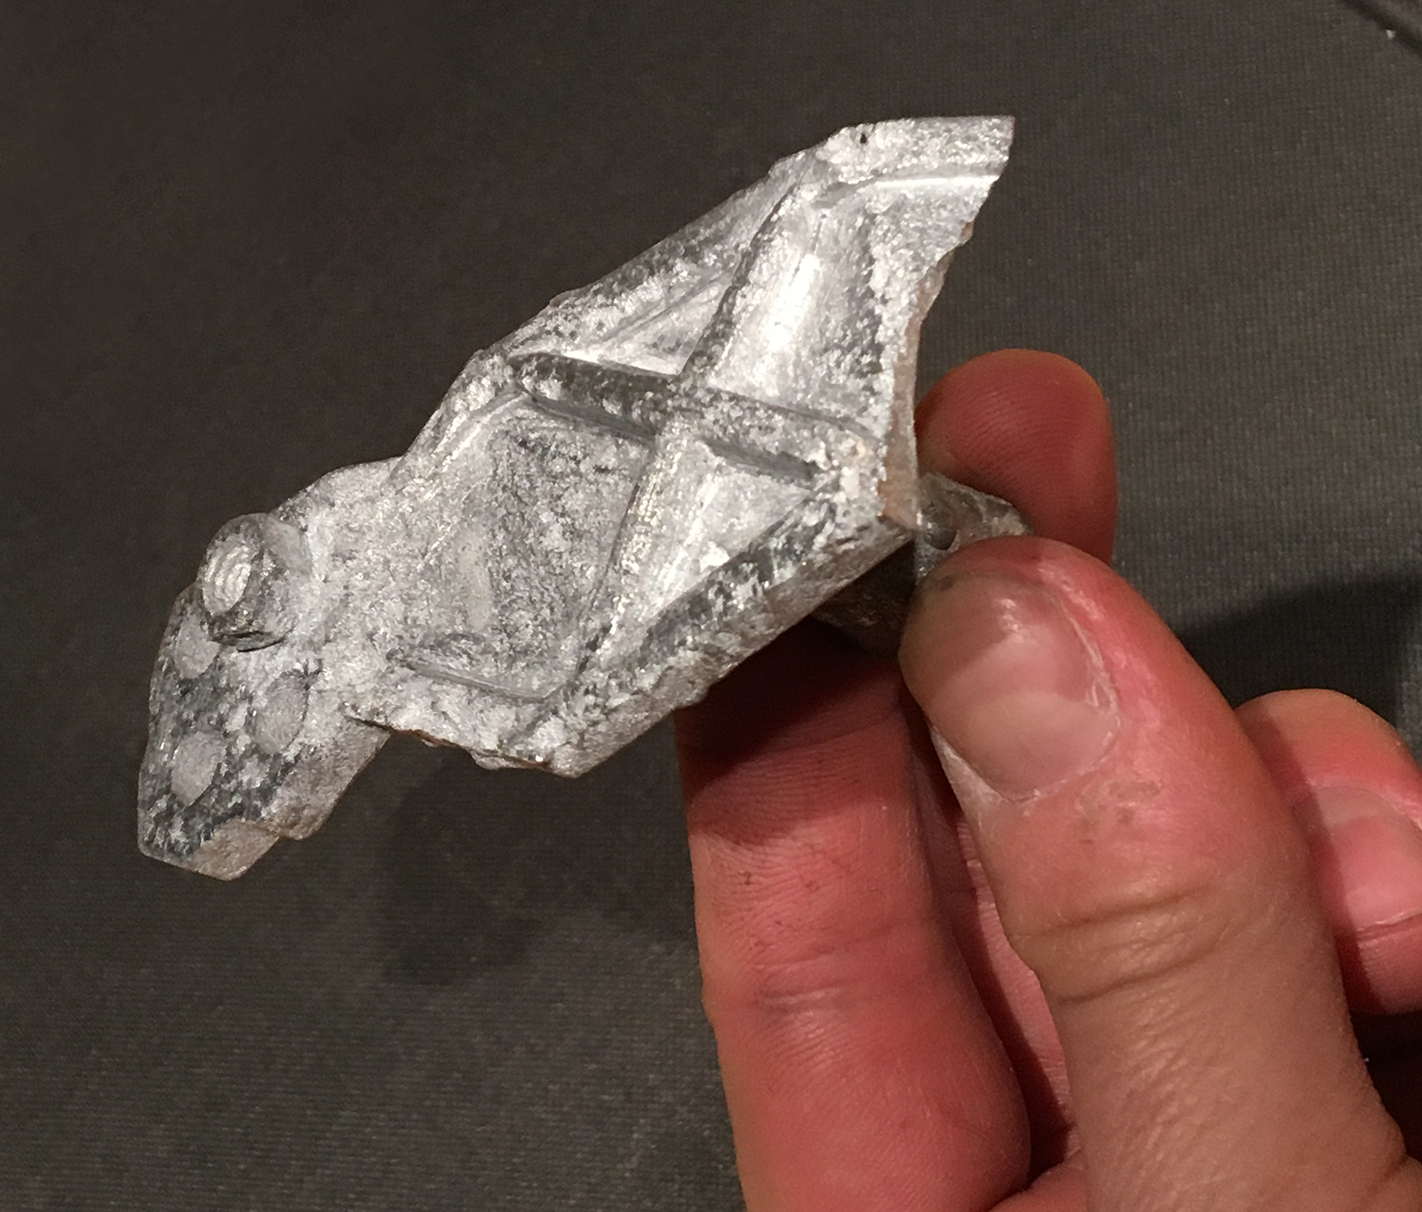
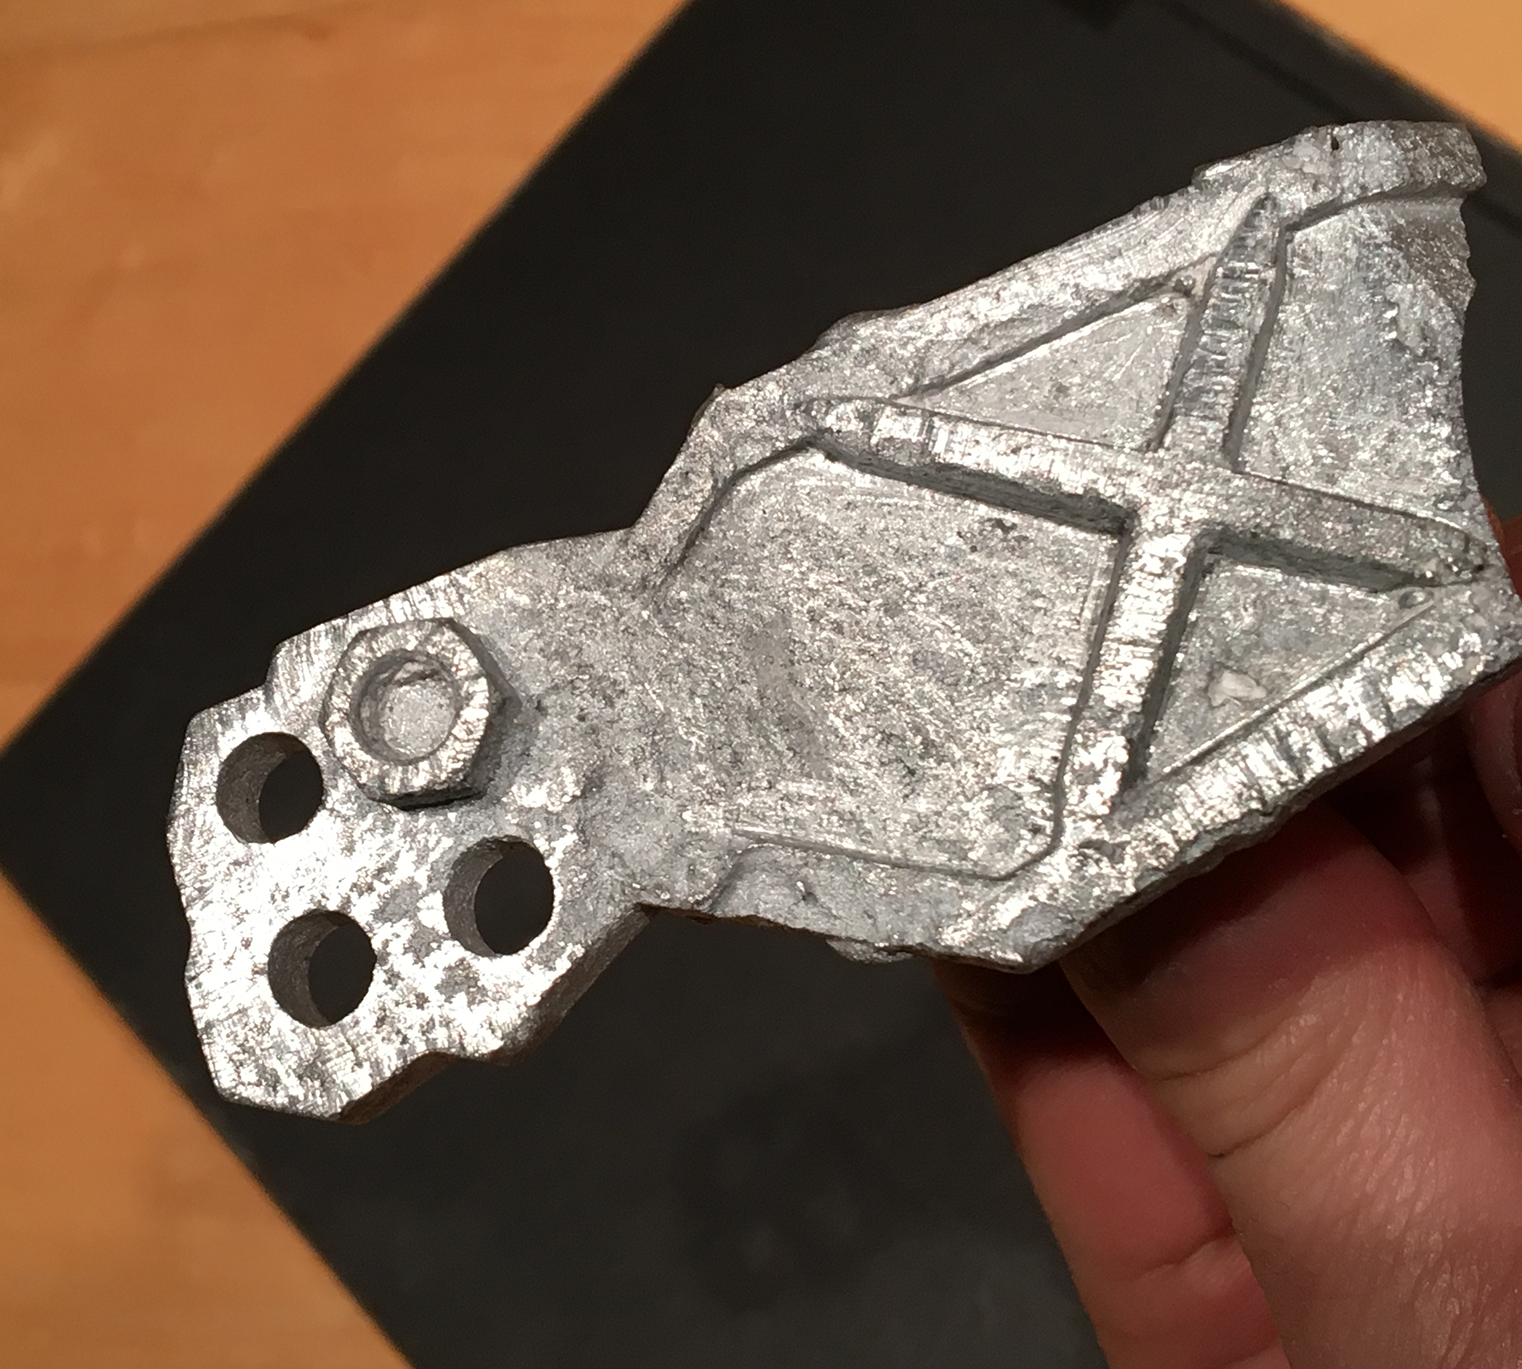
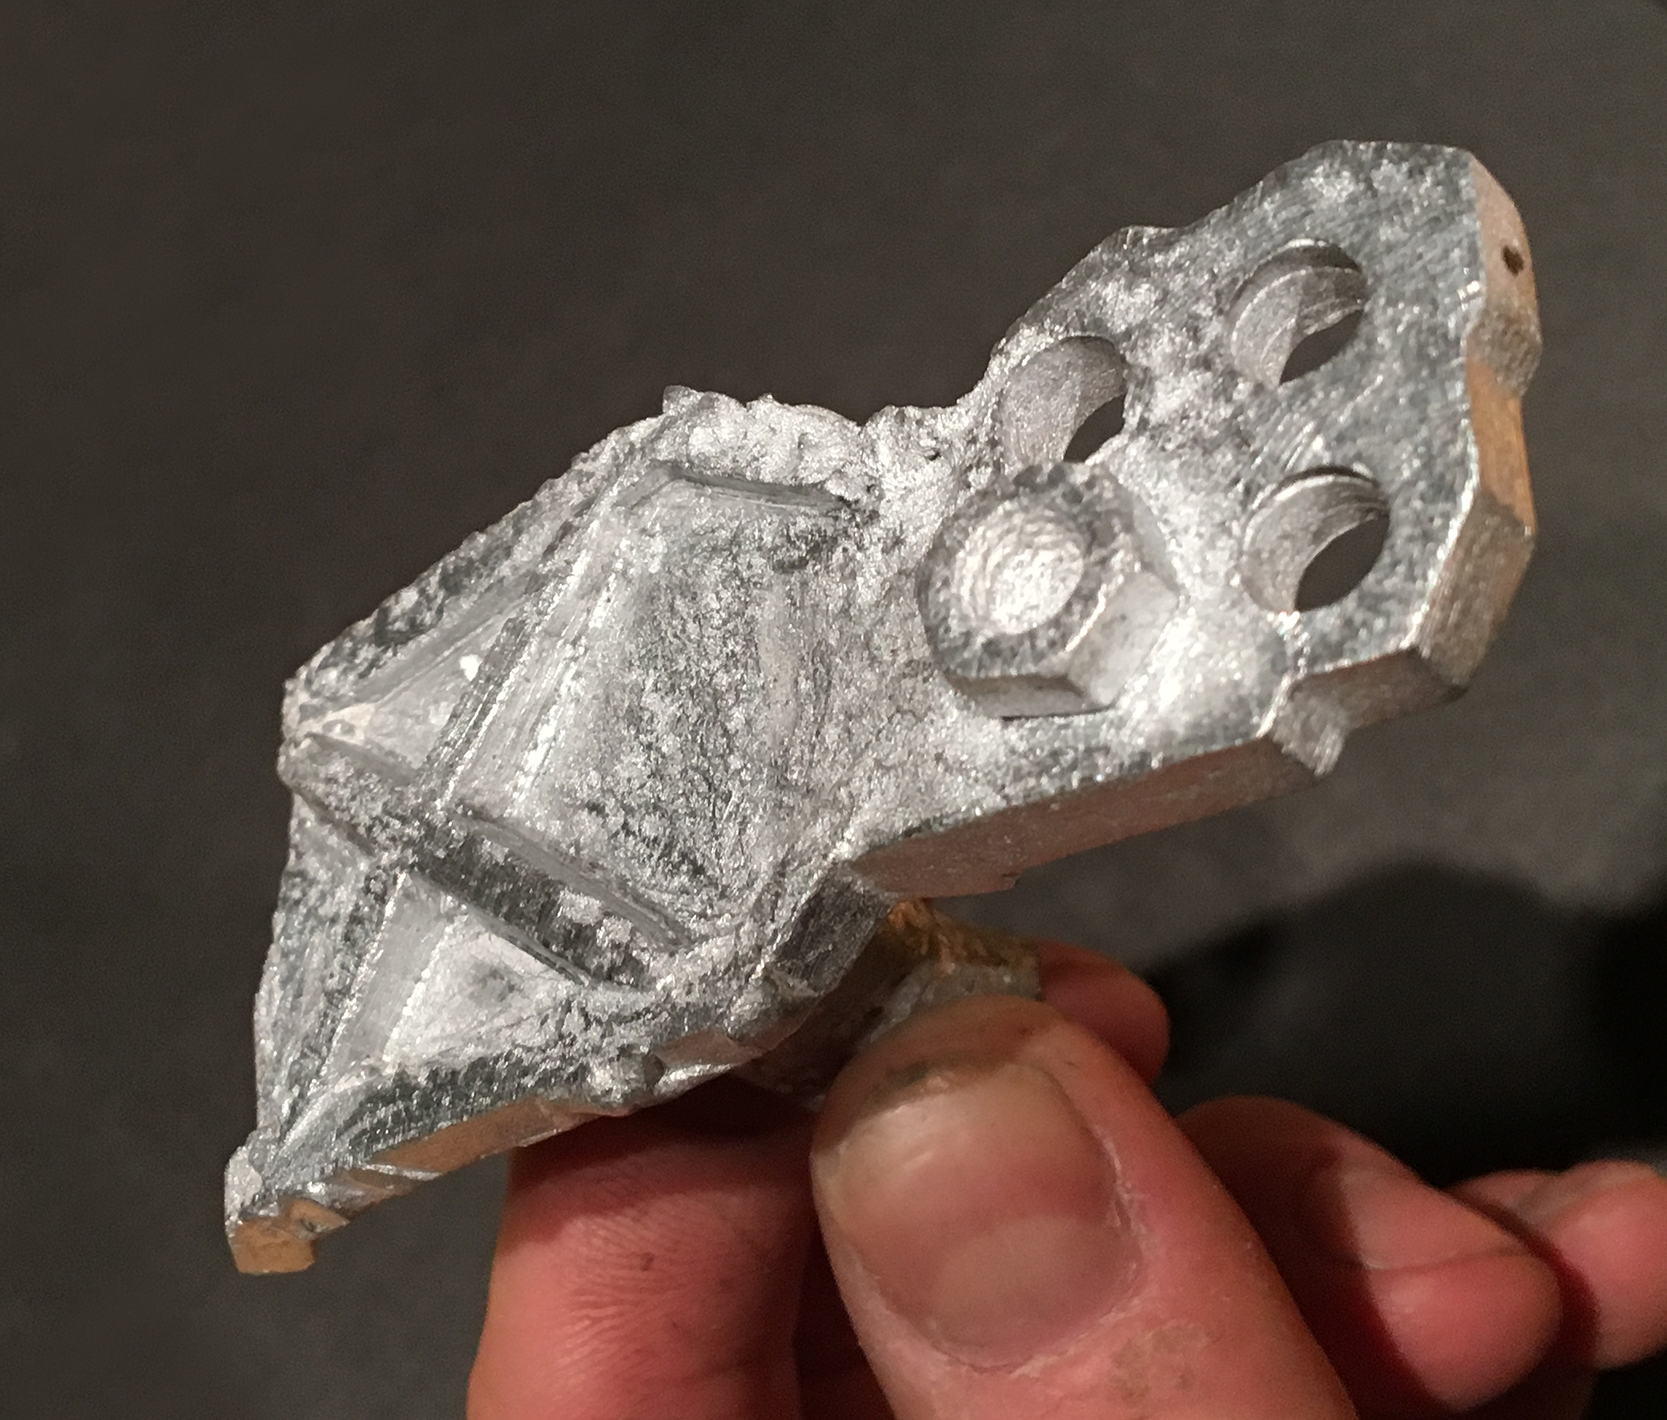
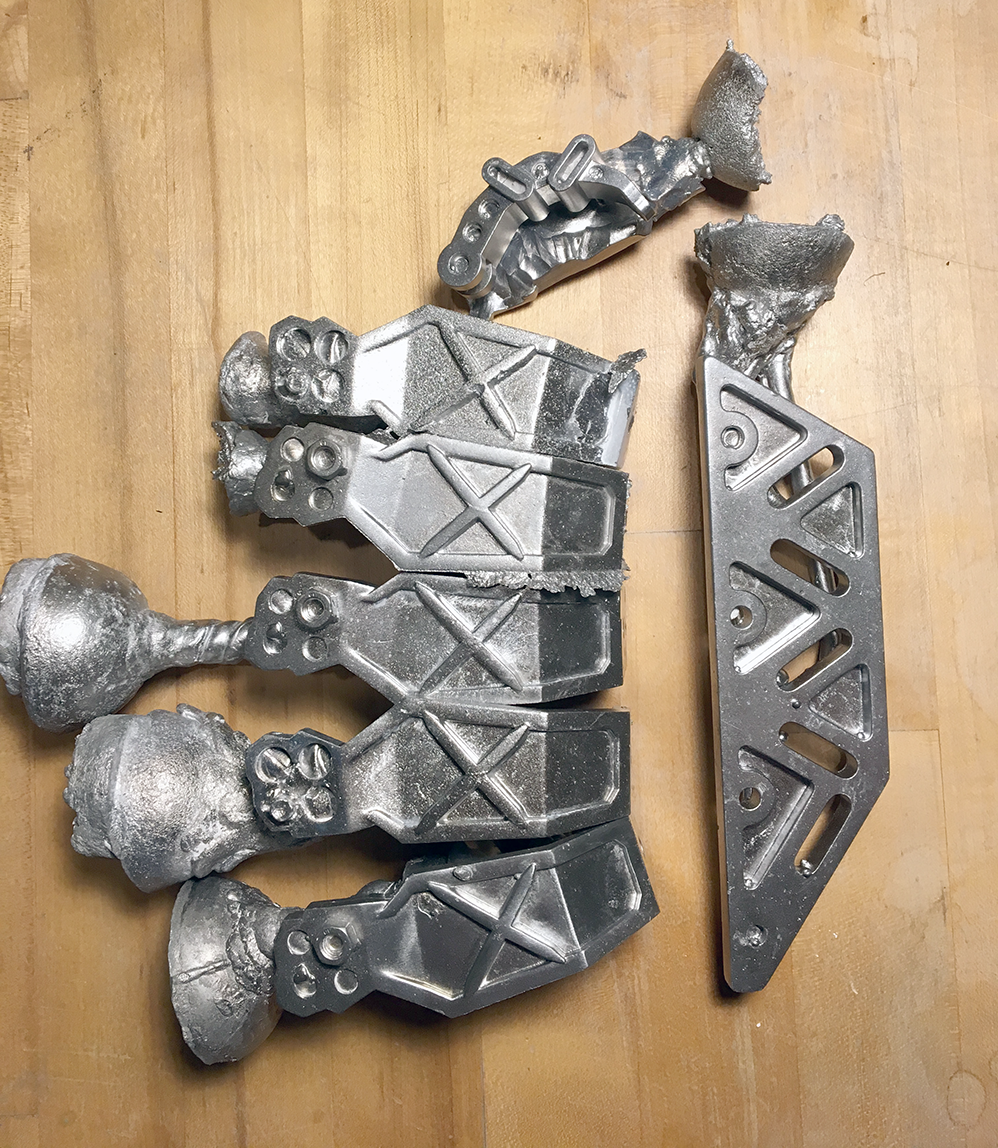
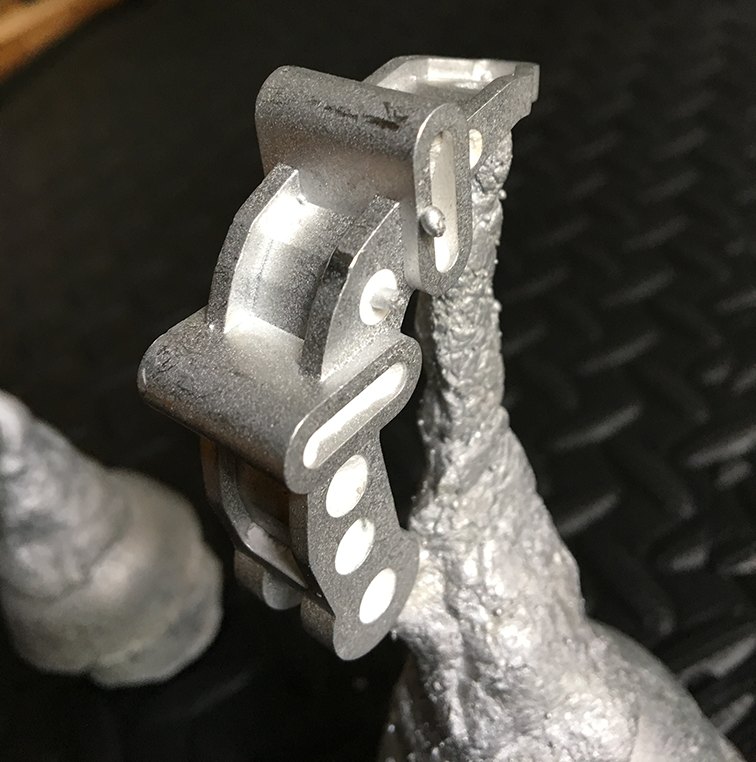
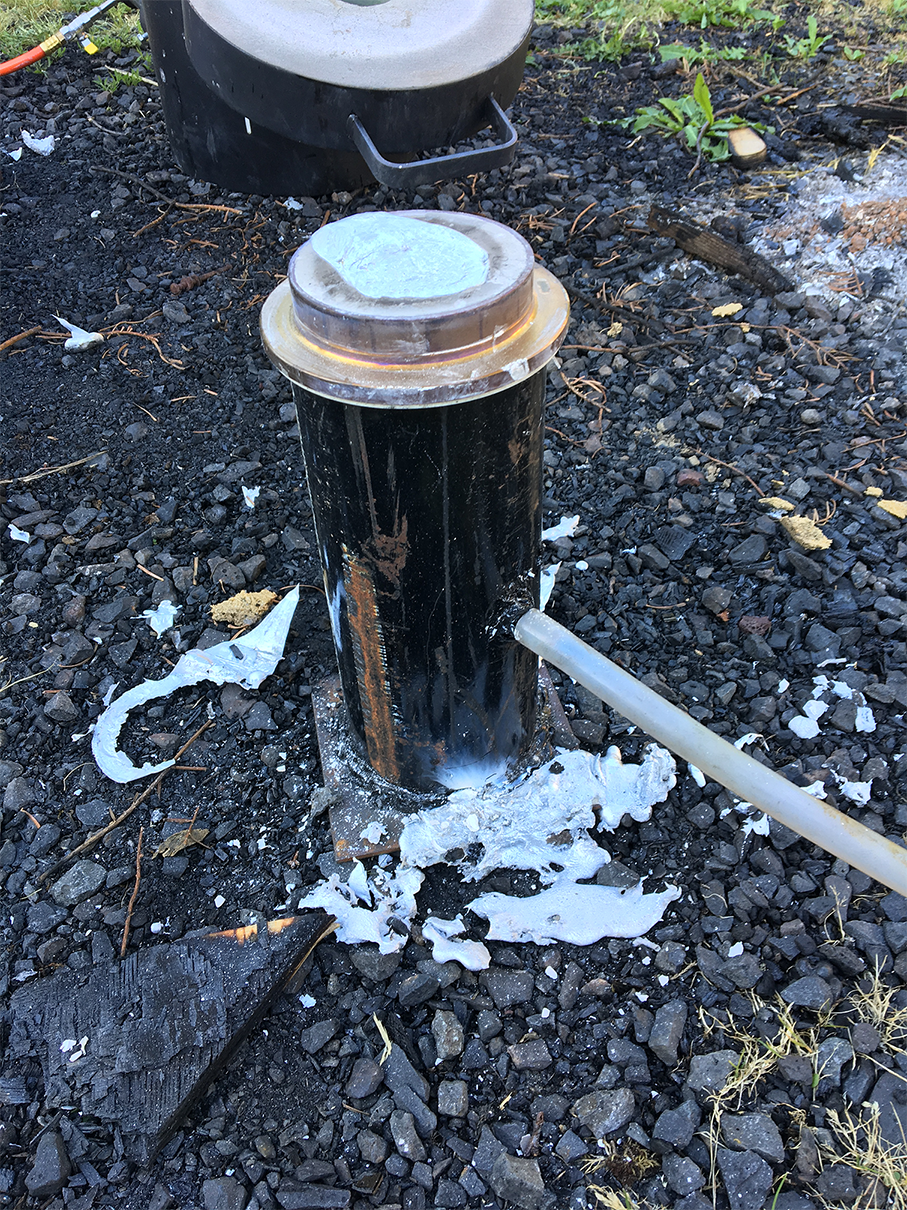
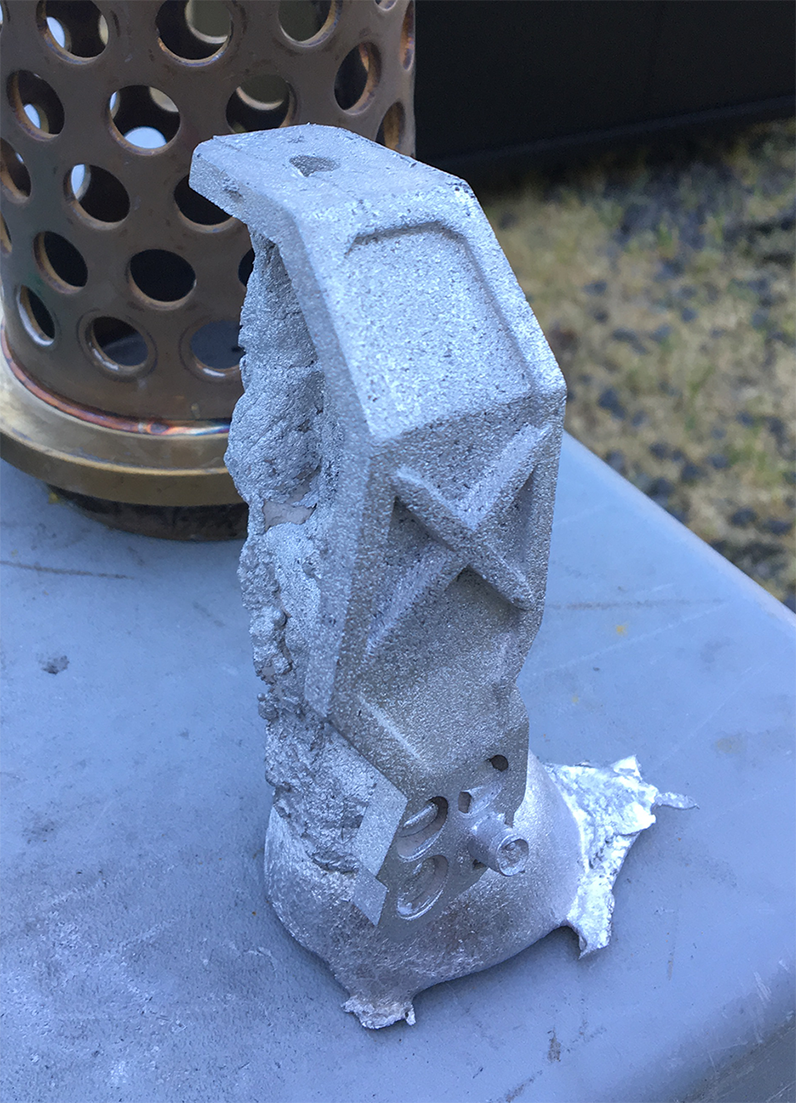
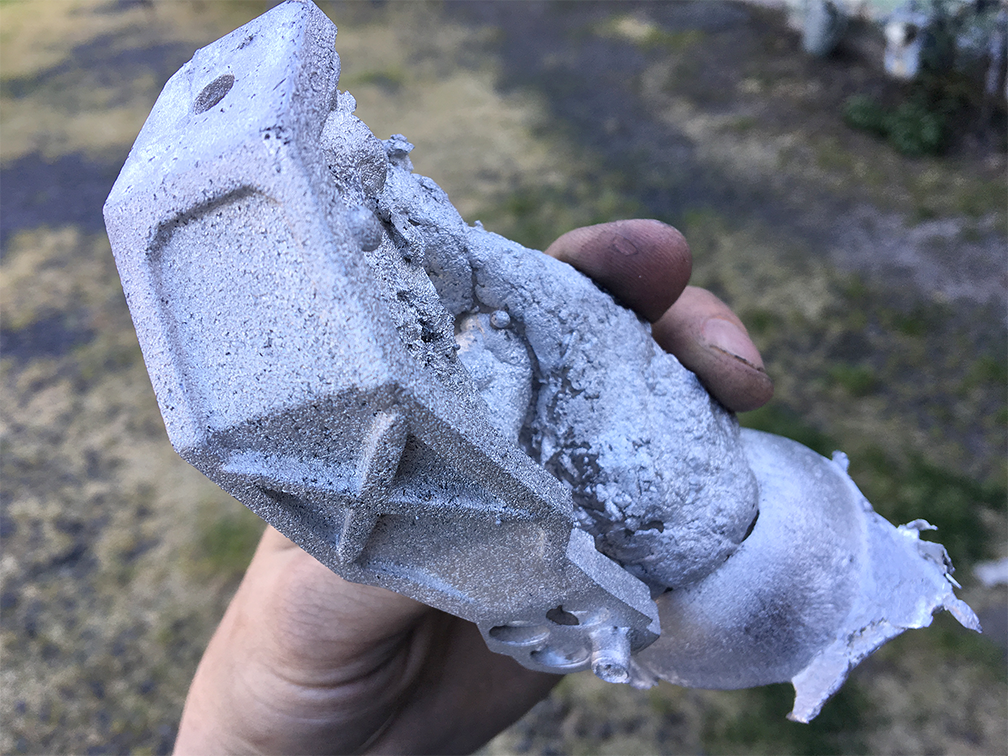
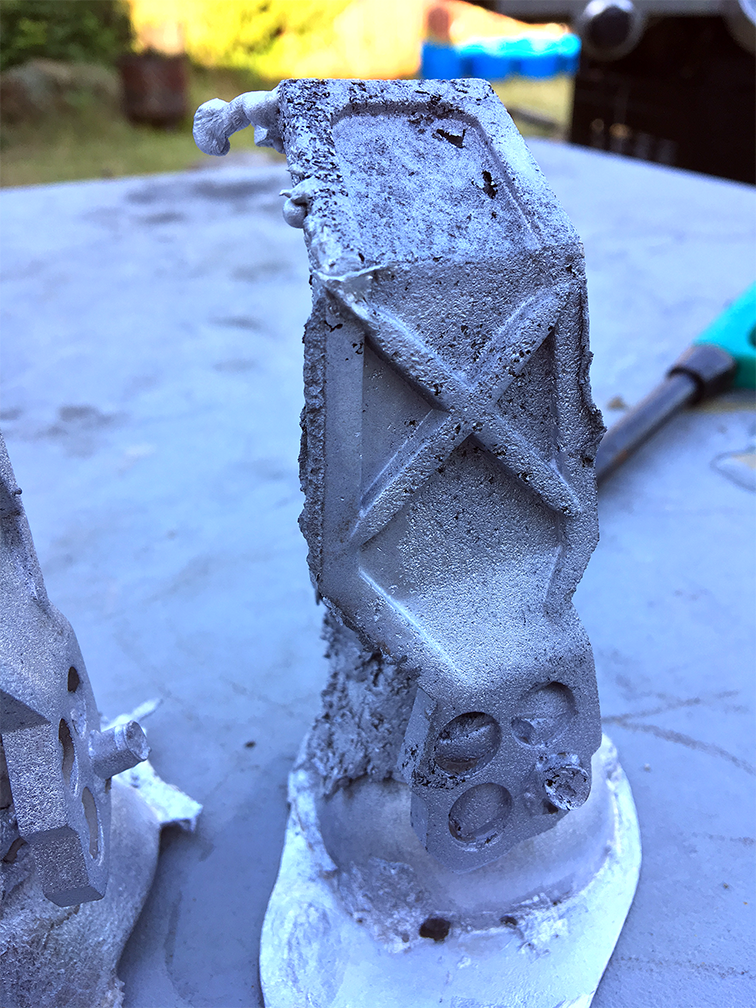
06/02/2017 at 05:22 • 0 commentsAfter a very long year of experimenting with metal casting techniques, I finally got perfect casts using the vacuum process. Now it's a matter of shotgunning all 300 parts of the exosuit using the same method, and then a few more months of finishing and painting.
The last problem turned out to be the lack of control over the mold burnout and baking process which is very crucial to obtaining quality. Ultravest instructions need to be followed to a T, especially the part where you hold it at 1350 F for two hours to ensure there is no water left in the mold, which otherwise turns into steam and destroys the metal surface.
![]()
![]()
![]()
![]()
-
Vacuum metal casting
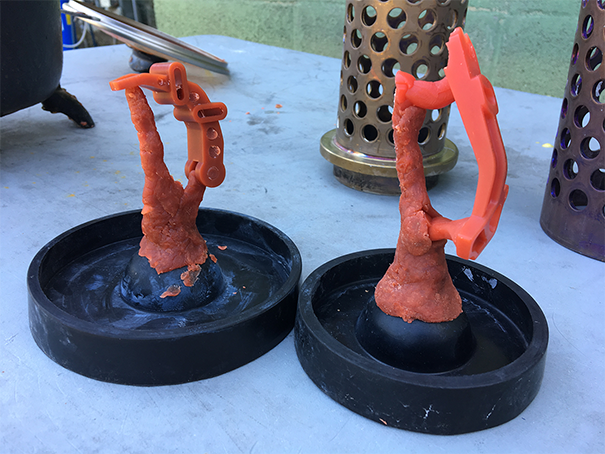
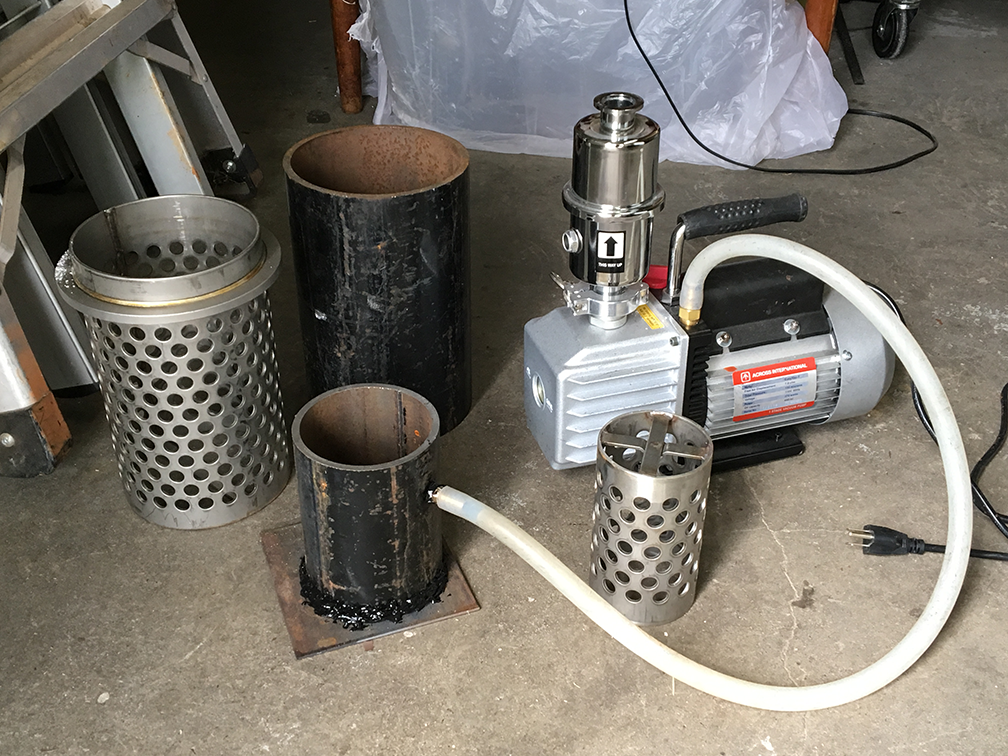
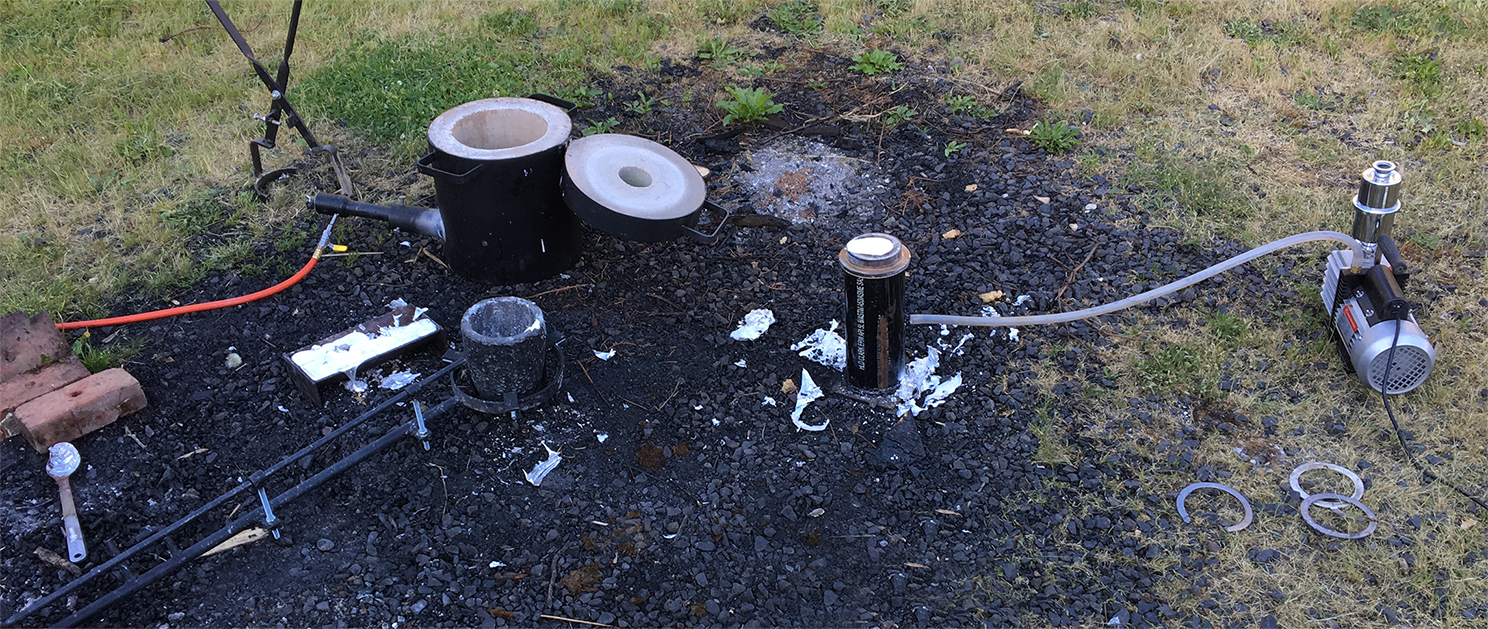
05/28/2017 at 17:27 • 0 commentsI thought vacuum metal casting would require a giant rig the size of my car, or that jewelry casting machine that can only do tiny parts like rings. Turns out it's both cheap and easy to build one for your application! DavidF from AlloyAvenue forums was nice enough to share the details.
All that's required is a trip to a steel yard to get a pipe and a base plate. I also got a barbed fitting (MPT) to connect to my vacuum pump. After drilling a hole in the large steel pipe I threaded it with an MPT tap, screwed the fitting in, then used RTV (high temp silicone sealant 300 F) to attach pipe to the base plate and put some RTV around the fitting as well. Flanged perforated flasks (ordered from jewelry supply or custom-built) go in the pipe. The flange lip hits the top of the pipe and a silicone gasket (also bought, or you could use RTV again) provides a vacuum seal. When investment mold is inside the vacuum flask with wax model already melted out, just start the vacuum before pouring metal. Hydrogen and other gases that cause porosity are sucked out through dried investment walls, and the metal fills all the details.
![]()
![]()
![]()
![]()
![]()
![]()
![]()
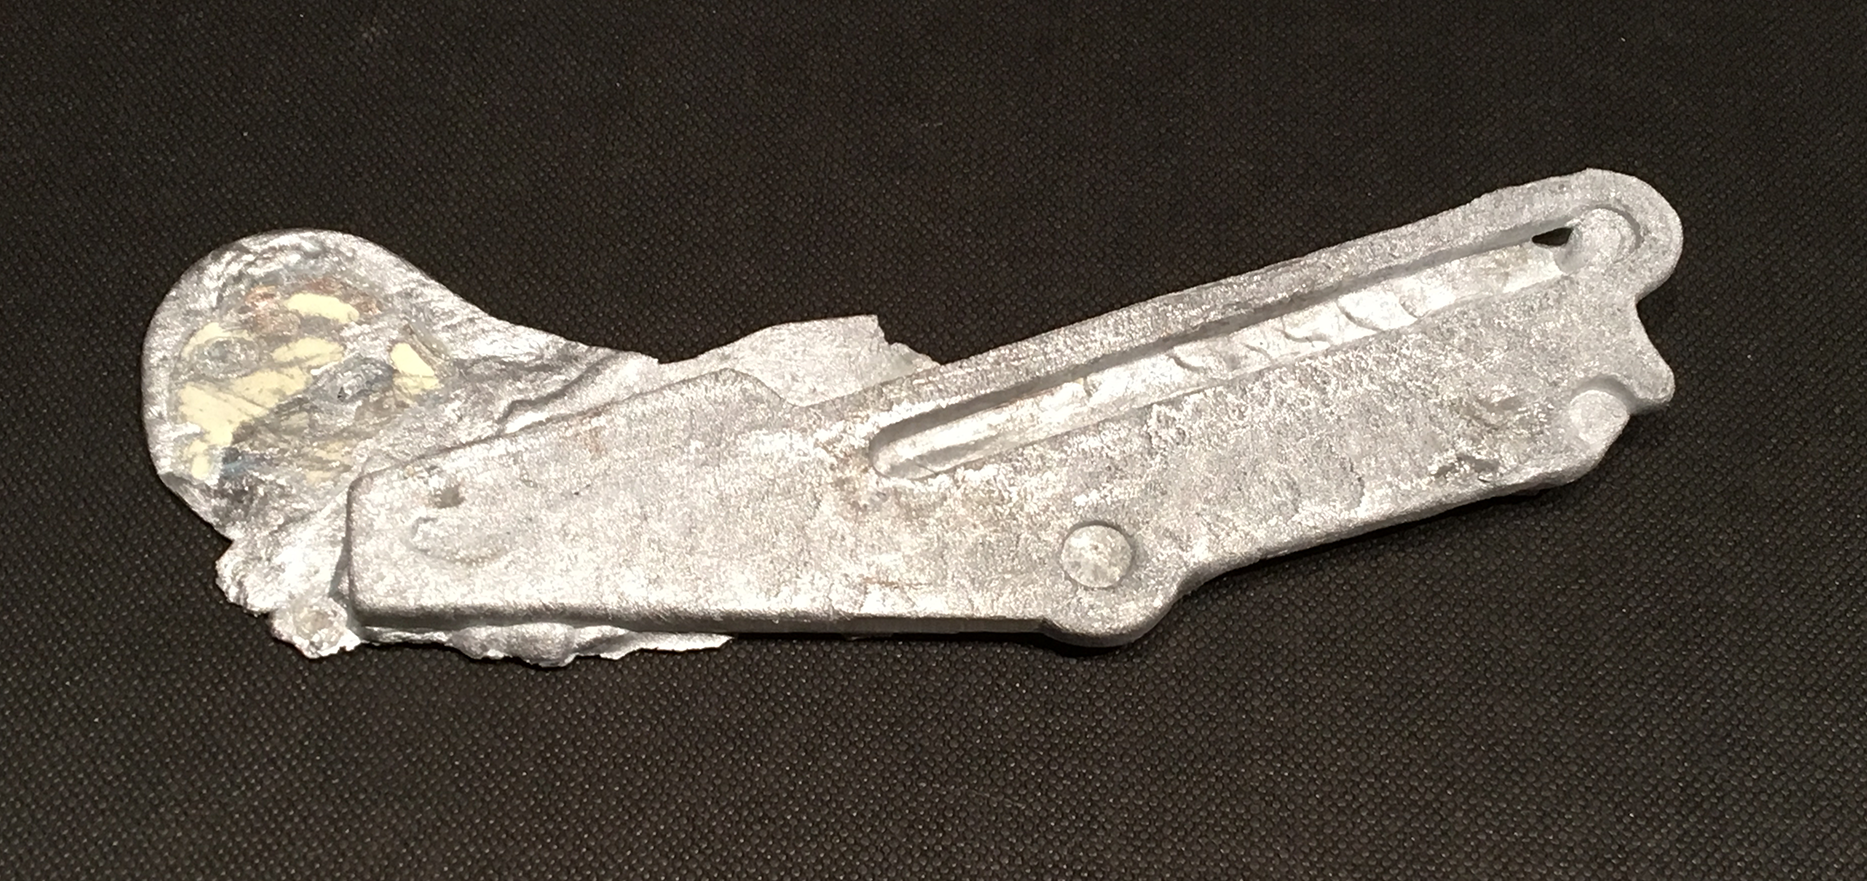
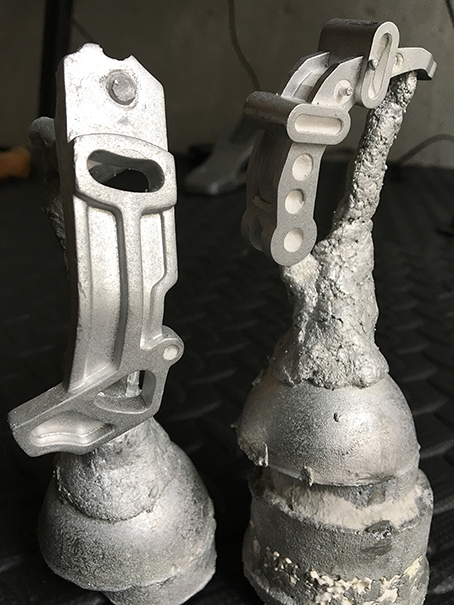
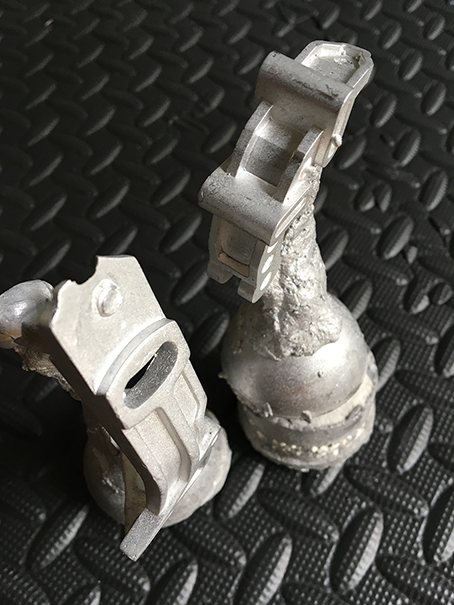
As you can see I still have issues with temperature control, and possibly the way I melt the metal and the alloy I use, but results are markedly better, especially the fill.
To summarize here:
- Go through the models you want to cast, and note bounding box dimensions
- Buy or build (if on budget) perforated vacuum casting flasks with flanges, that would fit those dimensions. Rio Grande offers a variety of pretty big (up to 8") diameters. Anything bigger, you would have to weld & drill a custom vacuum flask.
- Buy silicone gaskets along with vacuum casting flasks, or just use a layer of RTV sealant if on budget. I also recommend graphite gaskets on top of silicone (for the side that touches the very hot flask) and a rubber button base for wax models, because it creates a super nice funnel shape for pouring.
- You will need a fairly strong vacuum pump (~7 cfm), Rio Grande has those too, or you can restore a used one if on budget.
- A silicone tube to connect vacuum pump to the vacuum rig
- Build the vacuum rig as above. Use steel pipe & base plate dimensions to ensure flasks can slide into the rig with minimal clearance. I got three sizes to be safe: 3.5", 4" and 8" to fit 95% of all exosuit parts.
-
Better metal casting results
04/17/2017 at 00:58 • 2 commentsIt's still very early in the game, but after reading & following some advice I got the next jump in quality:
- Keep metal cooler. The hotter the metal is at the time of pouring, the more it will bind with air & water in the atmosphere to create hydrogen inclusions, which results in a horrible looking surface.
- Keep metal from getting too cool. Wrap the crucible and/or the ceramic mold into a ceramic blanket to curb heat loss on transfer.
- Pour slowly (just like with wax) to let gasses escape from the vents while metal is going into the sprues.
- Maintain a large thermal mass of metal just above the mold, to increase the force pushing the metal inside the mold. This is a low-tech alternative to vacuum casting or spinning centrifuge. The result is improved fills on thin and intricate mold cavities.
- Carefully degass with tablets just before the pour
- Fire ceramic molds as long as possible (but not higher than 500 F) to remove all water. Any remaining water will convert into hydrogen upon contact with molten metal and result in gas entrapment.
![]()
Parts being extracted and quenched:
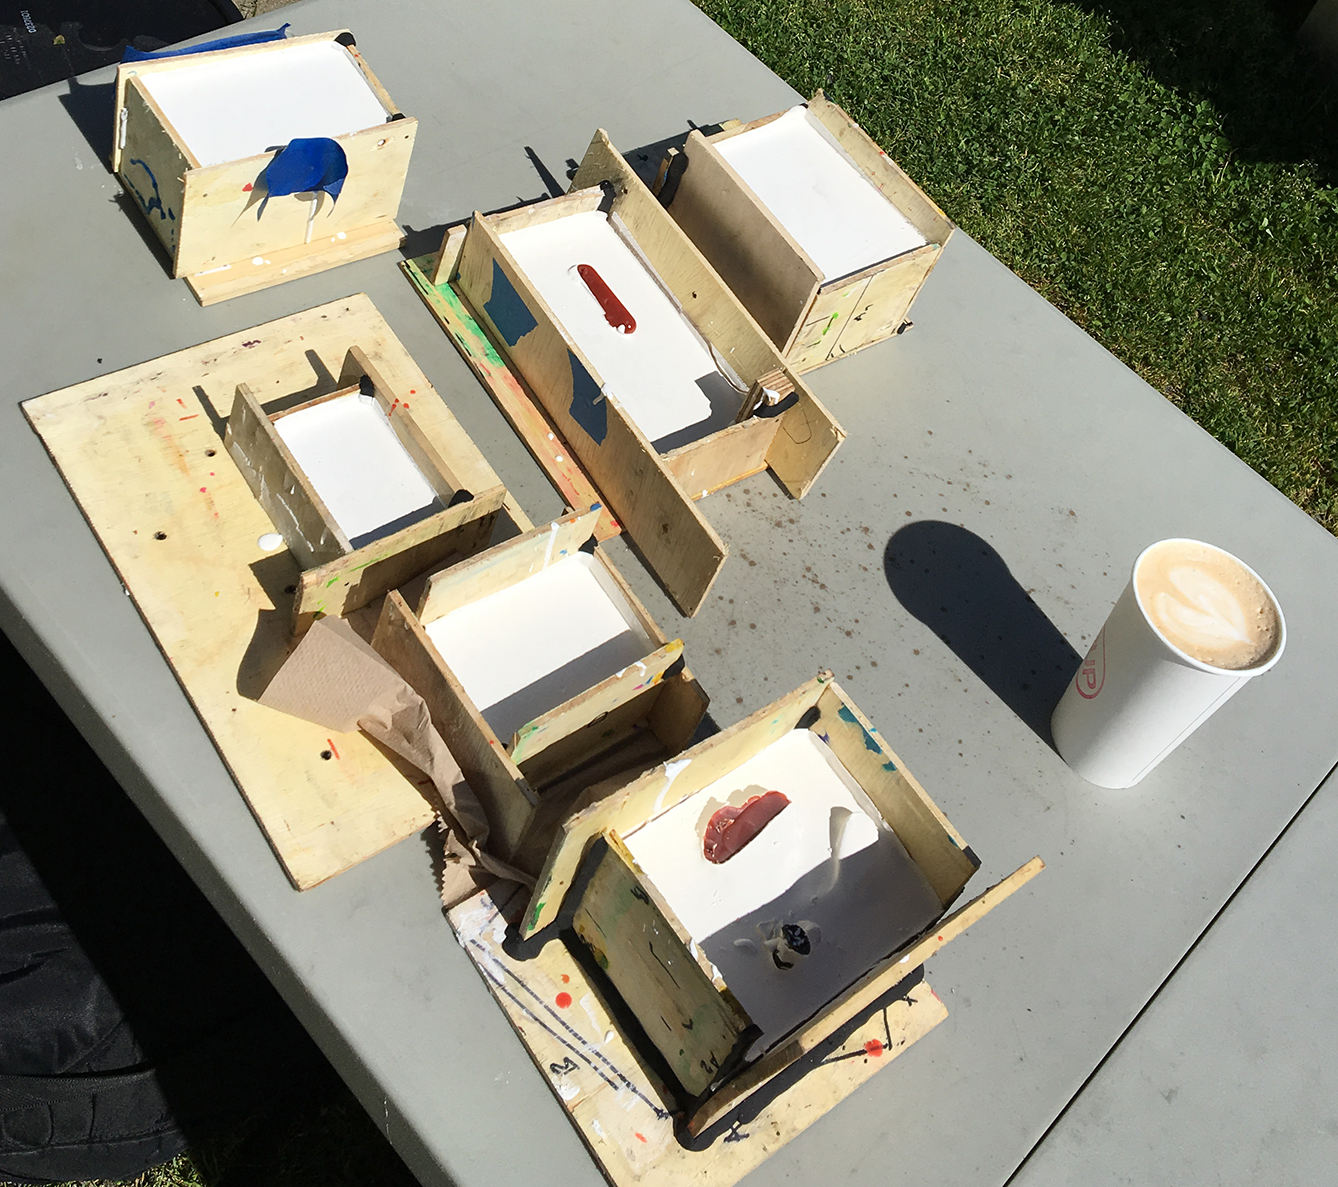
Wax casts prepared for box molding:
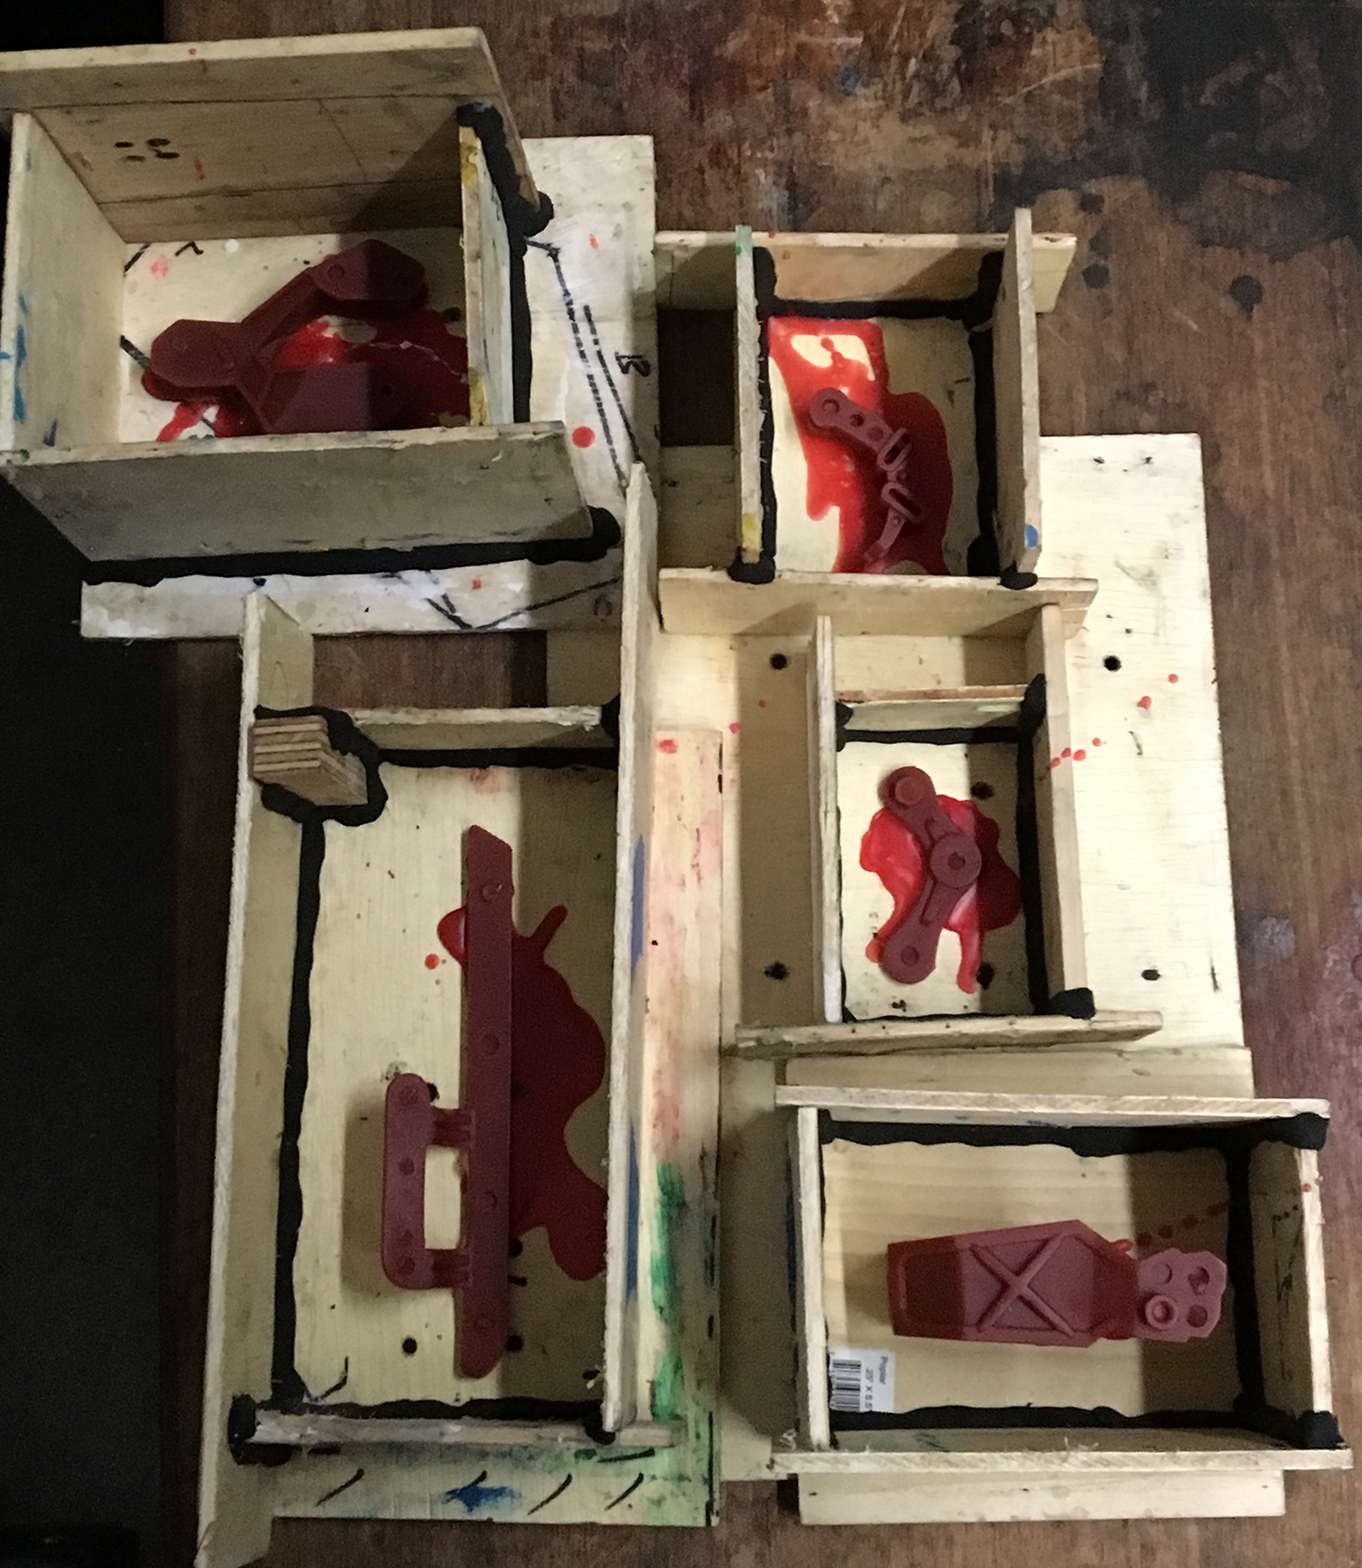
![]() Another batch: parts attached inside respective boxes for pouring UltraVest investment:
Another batch: parts attached inside respective boxes for pouring UltraVest investment:![]()
Removing from boxes after investment solidified overnight:
![]()
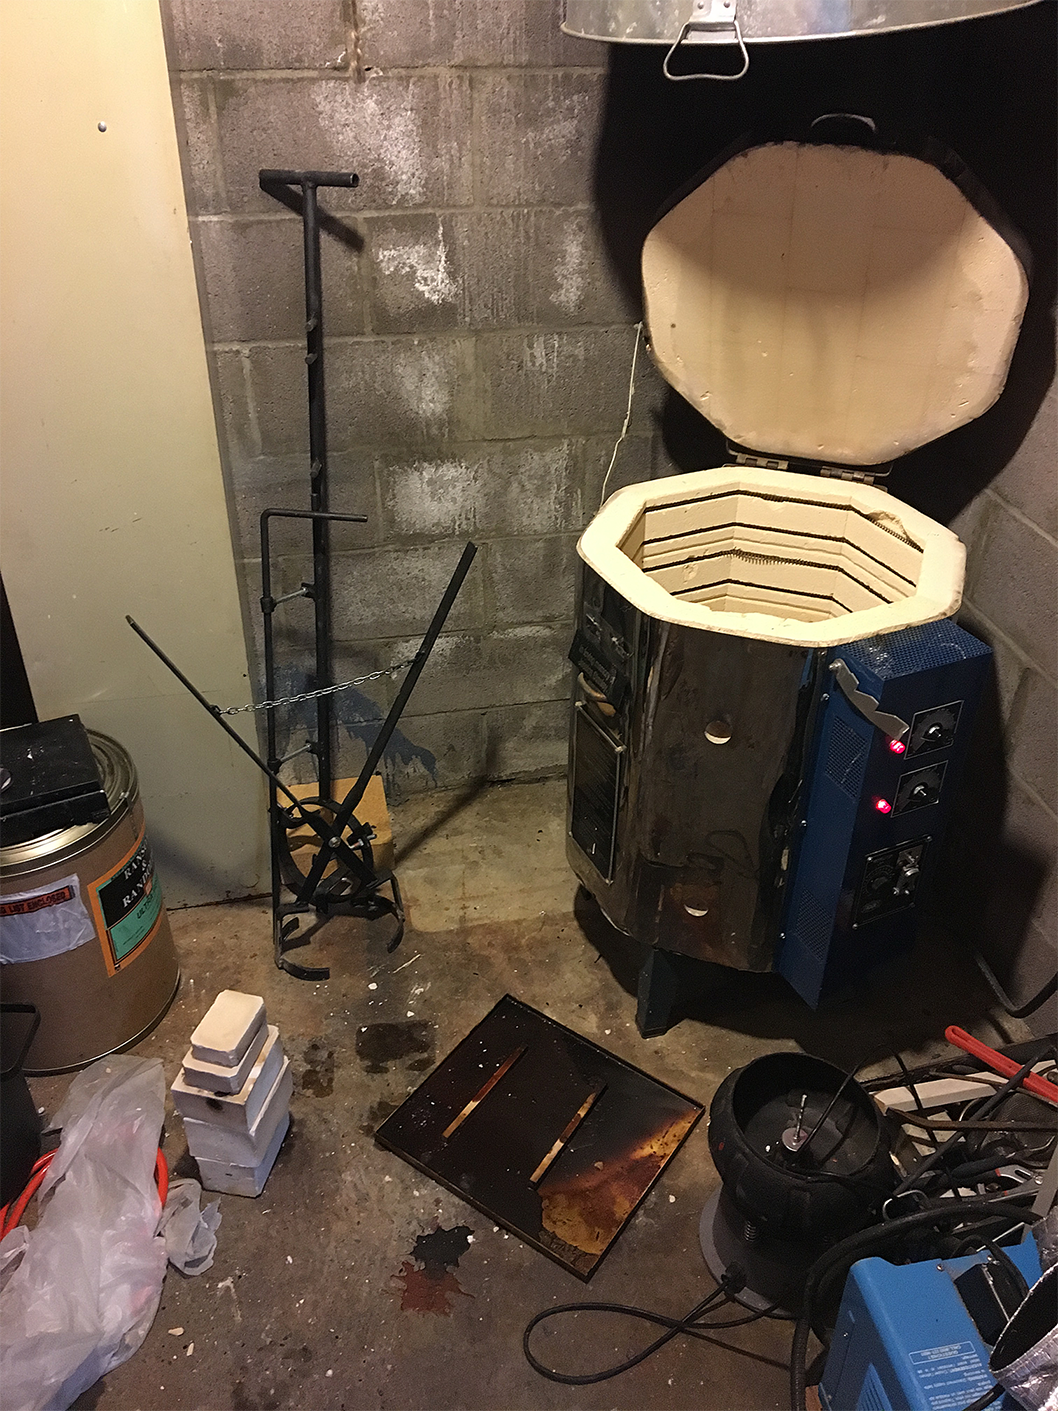
Wax burnt out and investment de-watered:
![]()
-
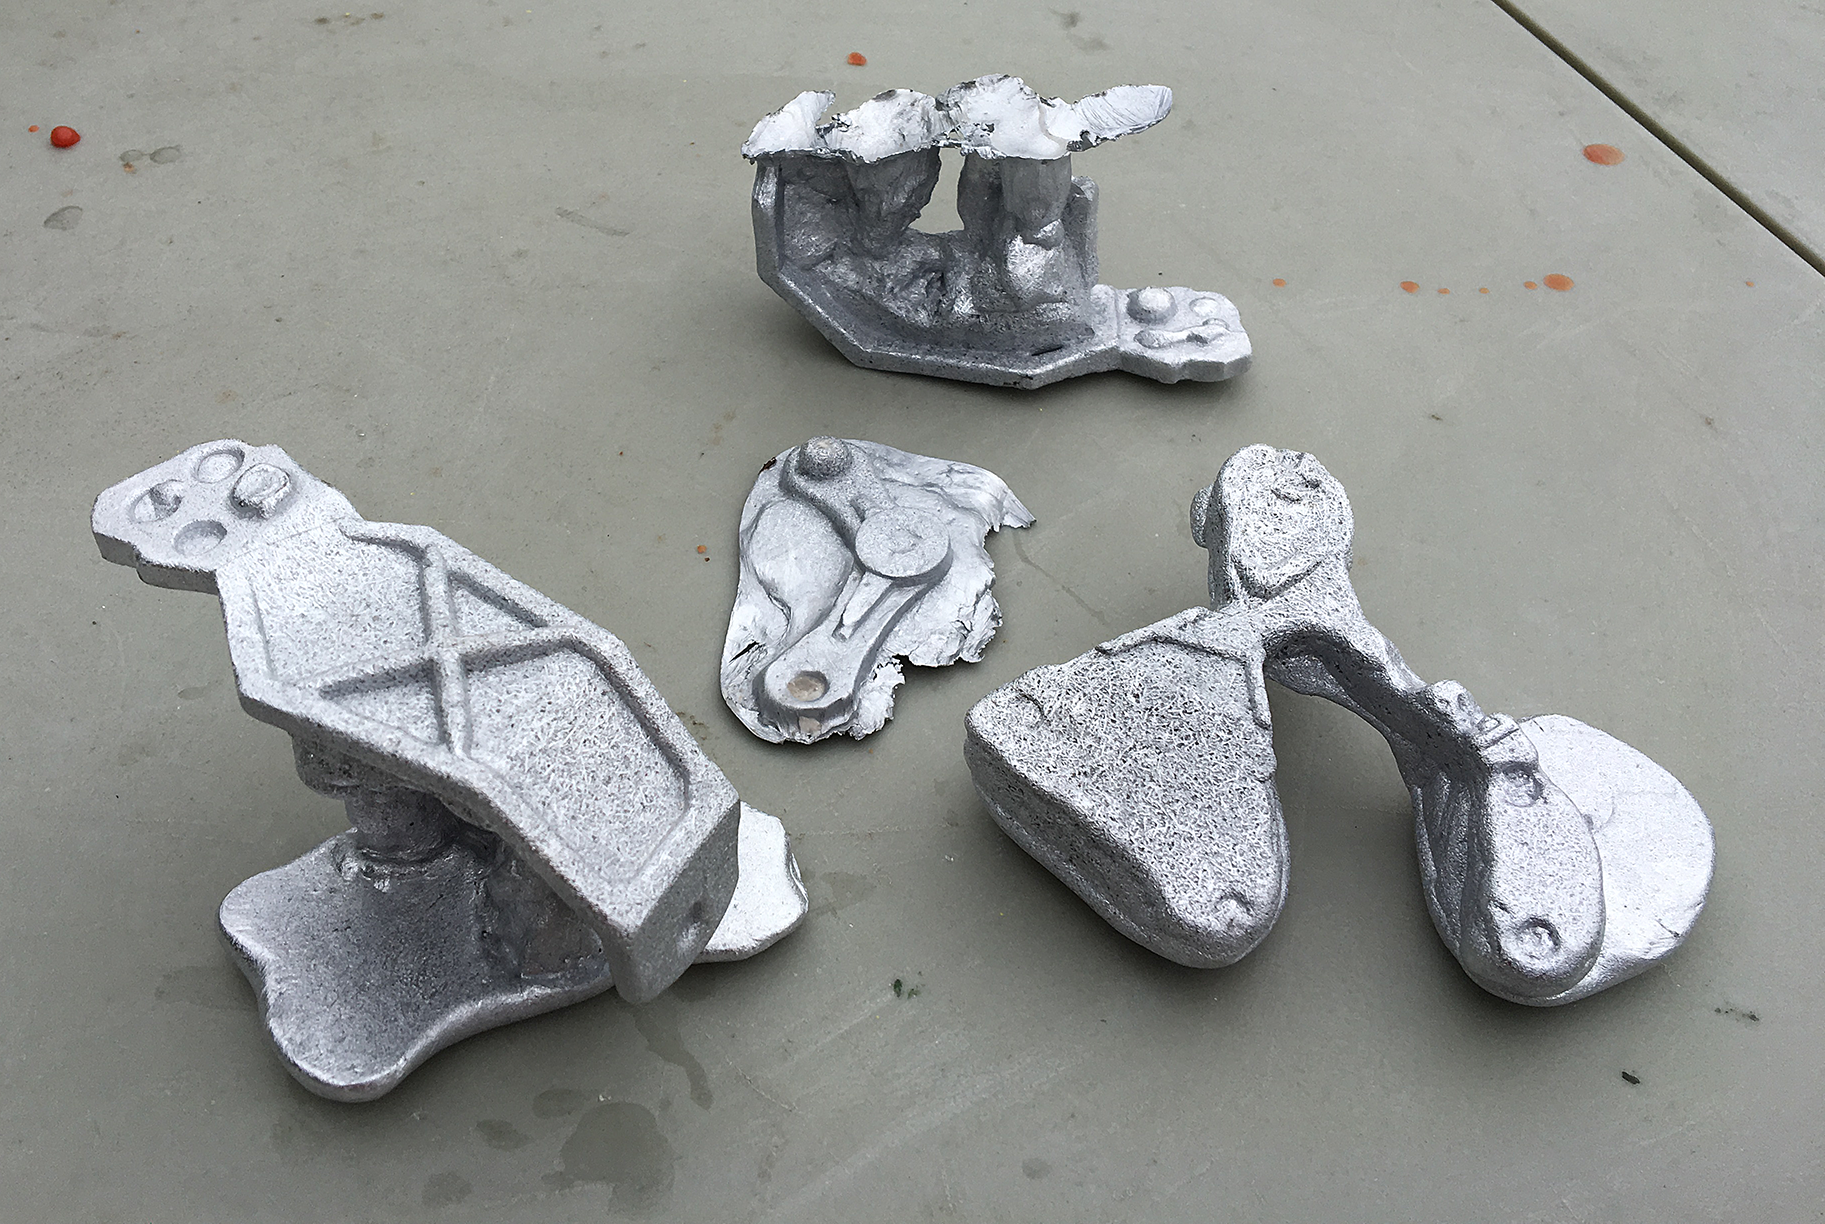
First Metal Casts
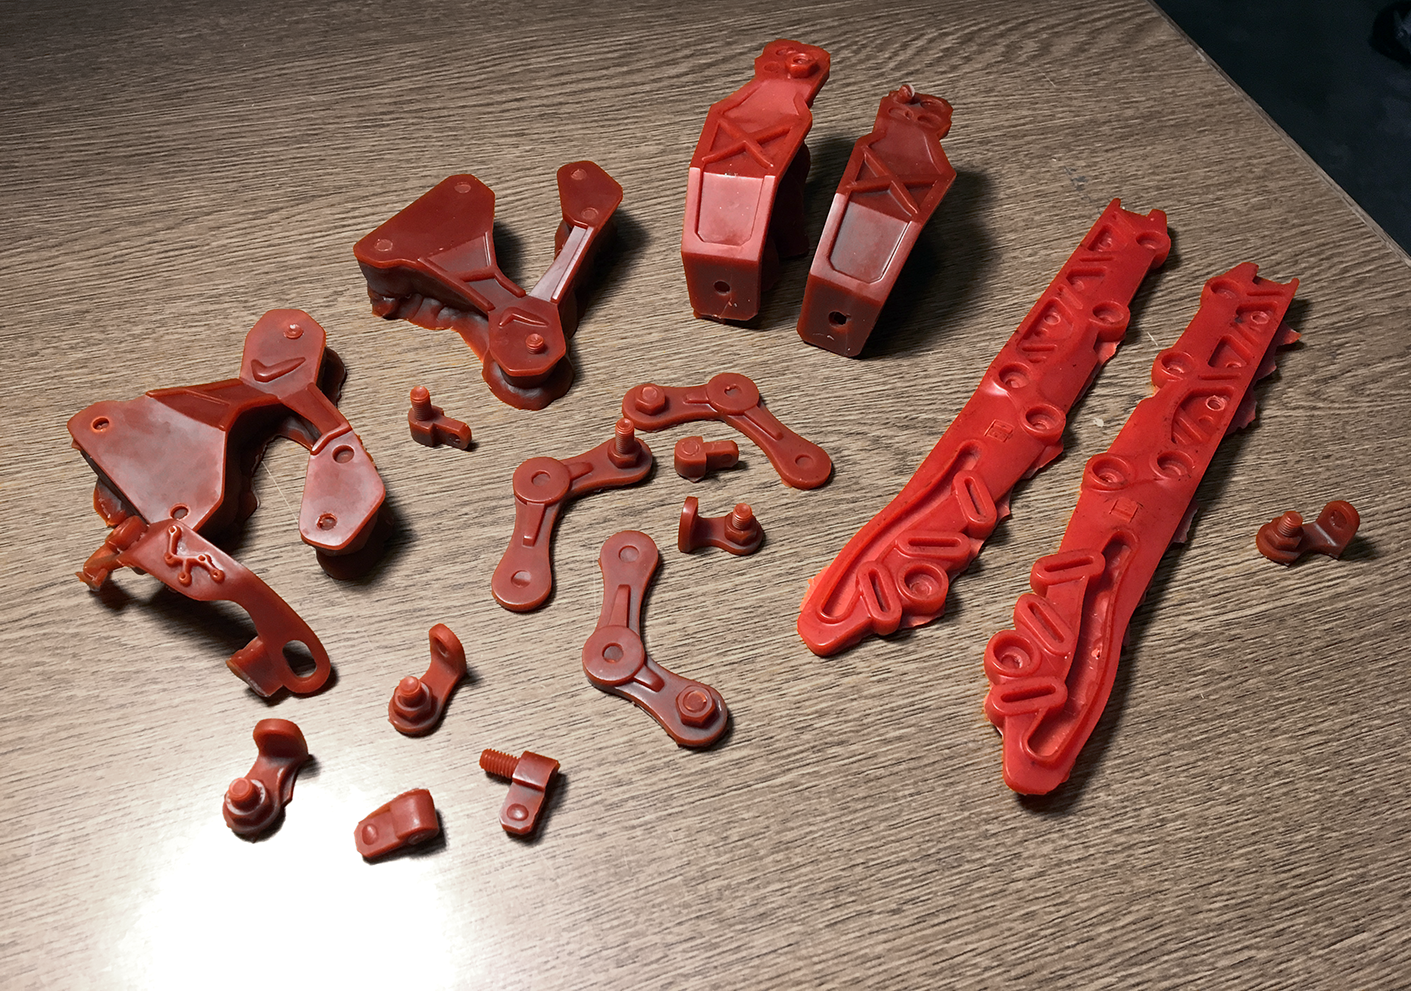
04/10/2017 at 04:28 • 0 commentsFirst casts are finally out. They look pretty horrible so the next few months will likely be spent tracking down best casting alloys, practicing sprue & gate configurations, and various degassing & conditioning agents.
![]()
![]()
![]()
![]()
![]()
-
Trying out Ultravest
04/09/2017 at 17:14 • 0 commentsWhen I first started metal casting experiments I tried plaster, but abandoned it in favor of shell casting because it was less standard in the industry and I had a lot of trouble melting wax out. Since now I have a lot more tools (de-ionizer, vacuum oven, and kiln) I decided to try box casting again using Ultravest (super-fine investment used for jewelry).
The advantage is that it takes all of 30 minutes to pour it and a day to cure, instead of 8 days for shell casting. First experiment was very unsuccessful as the metal filled 10% of the mold, but today I am trying again.
-
Casting vs Machining
04/03/2017 at 20:22 • 0 commentsThree years ago when I started this project, I thought I would upload all the parts to an online machine shop and hit submit. After > $20,000 quote I decided to go with additive manufacturing & investment casting instead -- and what a journey this has been. I ended up spending over $25,000 on 3D printing, finishing, and getting tools and supplies for investment casting, not to mention over 3000 hours spent in extremely painful trial and error.
I often wondered - did I make a mistake? Should I have outsourced all of the aspects of production, paid the same price or less, AND spent all that time hanging out with people, doing less painful kinds of art and having fun?
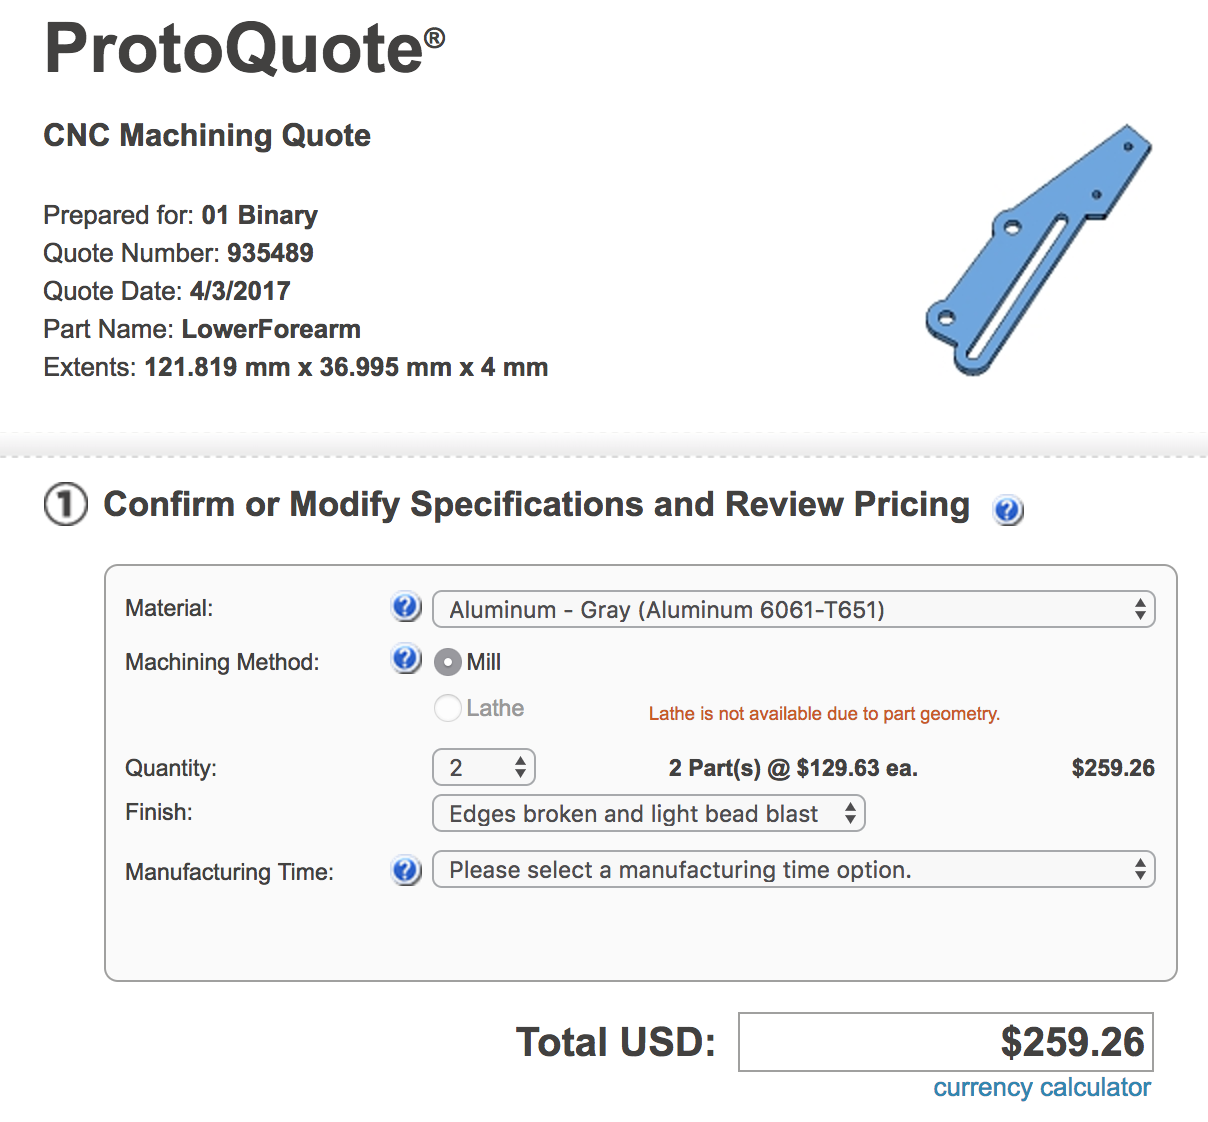
Turns out no. I quoted only the main parts of the whole suit and attempted to extrapolate the rest of the pricing myself (since the quote process was rather long and I didn't want to spend hours on the phone with engineers). The extrapolations were bogus - some parts that I assumed would be at most $100-150 are actually $200-$1000. And with a total of 300 parts, just a few parts being higher (and multiplied by qty) adds more like $10,000-$20,000 to the whole suit. Just take a look at this:
(ForearmBase - $58 ea to 3D-print, $234 ea to machine)
![]()
(LowerForearm - $44 ea to 3D-print, $130 to machine.
![]()
For reference investment casting tools and supplies were something like $5000, but amortized over 300 parts of the suit x number suits made (I plan to cast 3). Basically that adds $6 dollars per part in addition to 3D printing cost.
-
Not a process for the "Tyro"
03/26/2017 at 16:44 • 0 commentsLast week I got some books on investment casting and I've had a chance to read most of the chapters so I thought I would do a quick review.
![]()
Anyone who wants to get into investment casting should definitely have these two in their library:
- Precision Investment Casting by Edwin Laird Cady (Reinhold Publishing)
- Old school but very relevant, detailed treatise that answers questions instead of glossing over them or asking but leaving unanswered. The author makes sure you stop and consider what you're actually doing and what you want to achieve, giving you the right information to make informed decisions instead of getting stuck in trial & error. On top of all that, completely accessible to layperson audience.
Notably, Edwin wants you to know that this process is not for the "Tyro". True dat, if you try to treat it that way you are in for a whole lot of pain - this sets you up with the right mindset to succeed from the start, if you are doing it at all.
![]()
- Investment Casting edited by Peter R. Beeley and Robert F. Smart (the Institute of Materials)
- This book has been put together by a small army of industry veterans, and you can definitely tell. The text is so tight and efficient that it practically cuts like a razor blade. Just like the other book, extremely accessible. Unlike the other one, very modern. Tons of detail, the authors really try to take you on a journey and show you all the behind-the-scenes. If you are looking for tables, fear not, you will get tables (but this book is definitely not a boring collection of tables and charts).
As for the rest of the books on that table, total garbage. Do yourself a favor and don't buy them. There was hardly a sentence worth reading.
- Precision Investment Casting by Edwin Laird Cady (Reinhold Publishing)
-
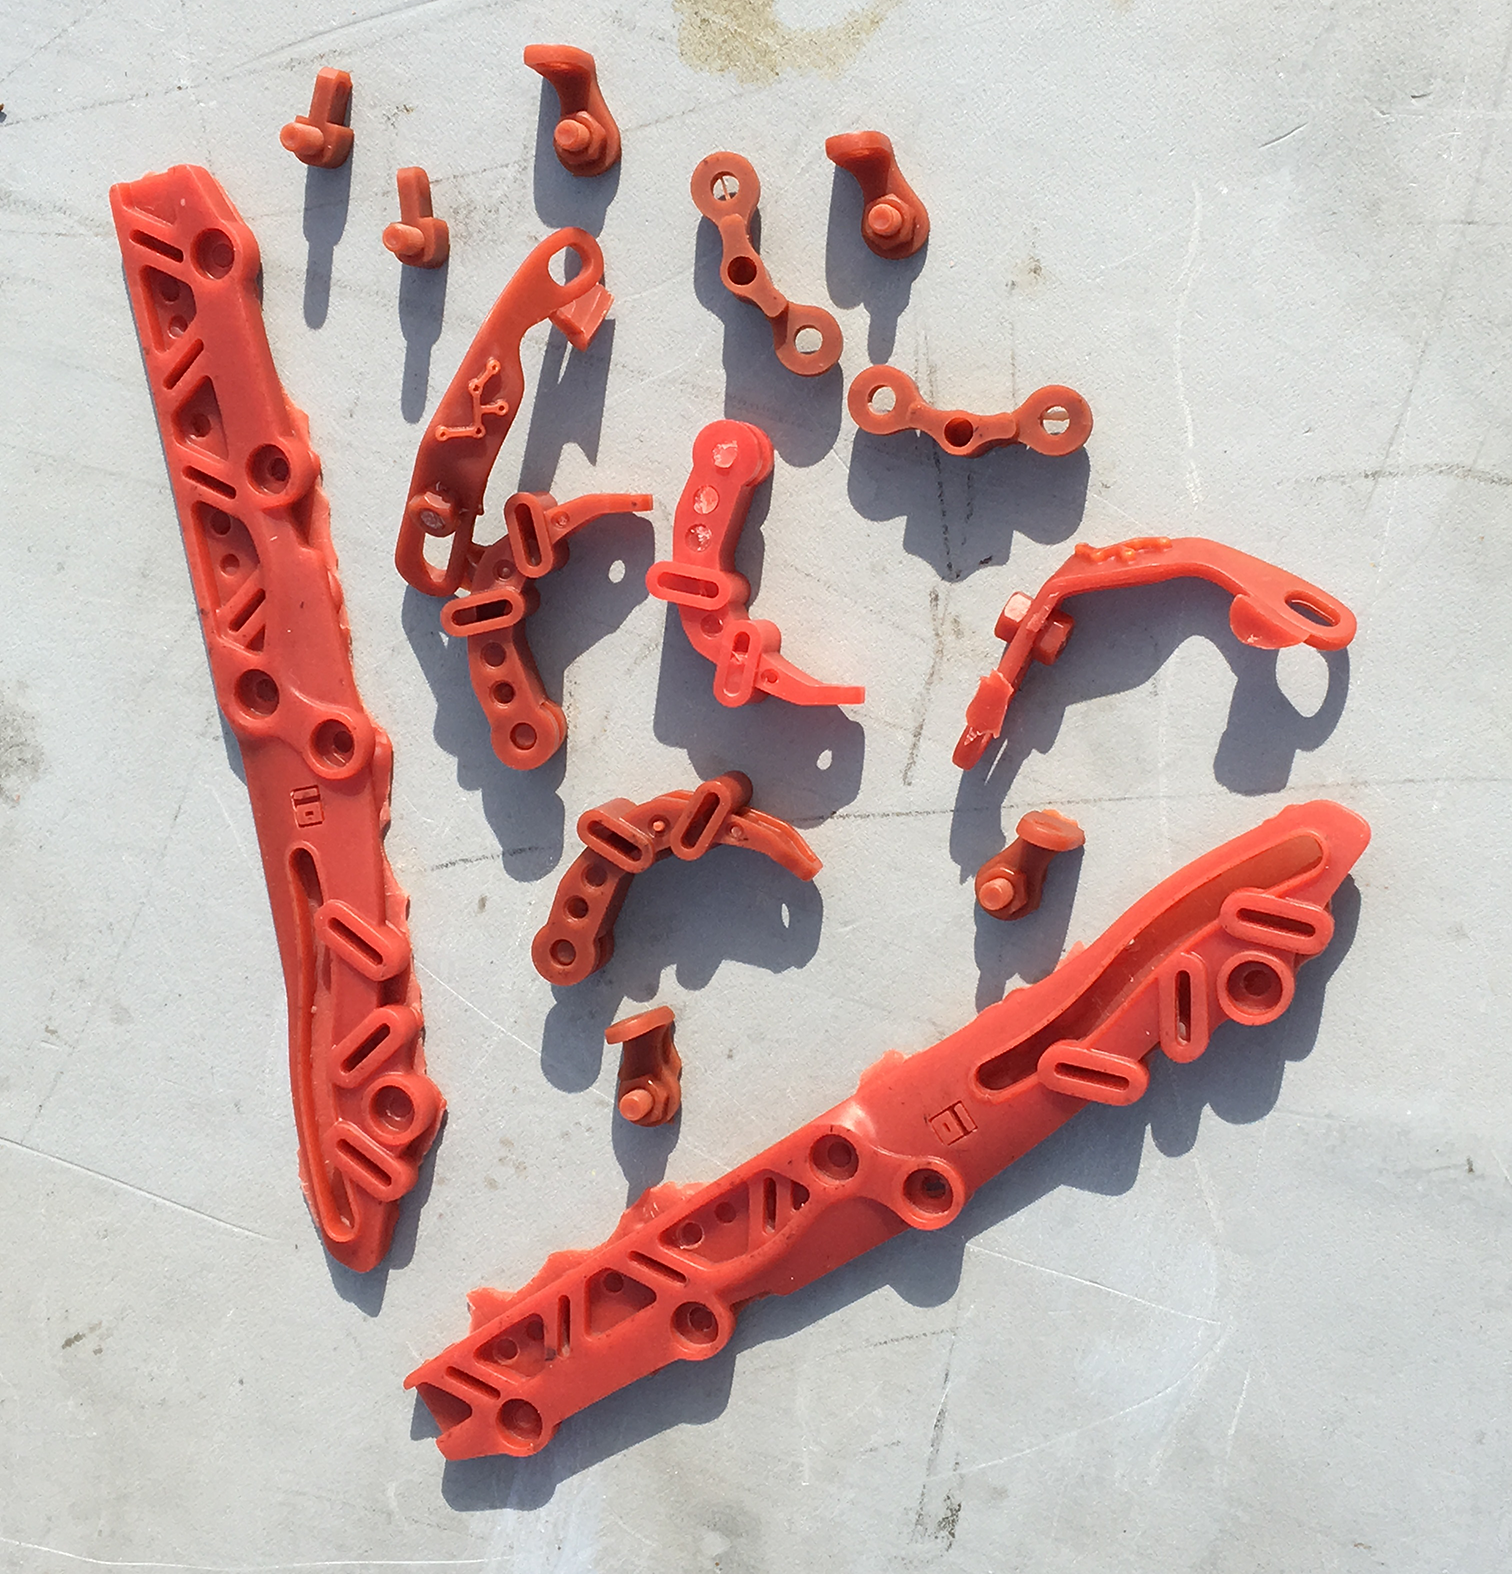
More successful wax casts
03/20/2017 at 15:41 • 0 commentsAfter what seemed like an insane amount of trial and error, I came up with a large list of details that must be followed precisely to achieve a successful cast. The temperature on de-mold is important since it takes about 2 hours for the inner core of the wax cast to cool. If taken out prematurely, the inside is still a thick soup. If taken out too late, the wax contracts too much and cracks. However, if the mold is not separated from the tray after 45 mins, separating later will crack the model. If there are screws plugging extra holes, they have to be taken out at this time as well. There are also specific considerations for designing the silicone molds to be able to release the model successfully.
![]()
This week I also completed a "Dark" version of the assembly instructions guide. It's mostly for screen media, but I would like to create a print version next. I aways liked those thick catalogs with black pages that art schools send out, and I think this might achieve that look, if I find the right print supplier.
Elysium Max Exoskeleton
Exoskeleton suit replica from the movie Elysium in Autodesk Inventor, 3D printed and investment cast out of Aluminum


 Another batch: parts attached inside respective boxes for pouring UltraVest investment: