Preface
I don't think I mentioned it in any previous project log, but this was my first go at sending a PCB to be manufactured at a fab house. Given that the order was $40 USD, I was a little nervous that some mistake in my schematic or layout would render the boards completely useless.
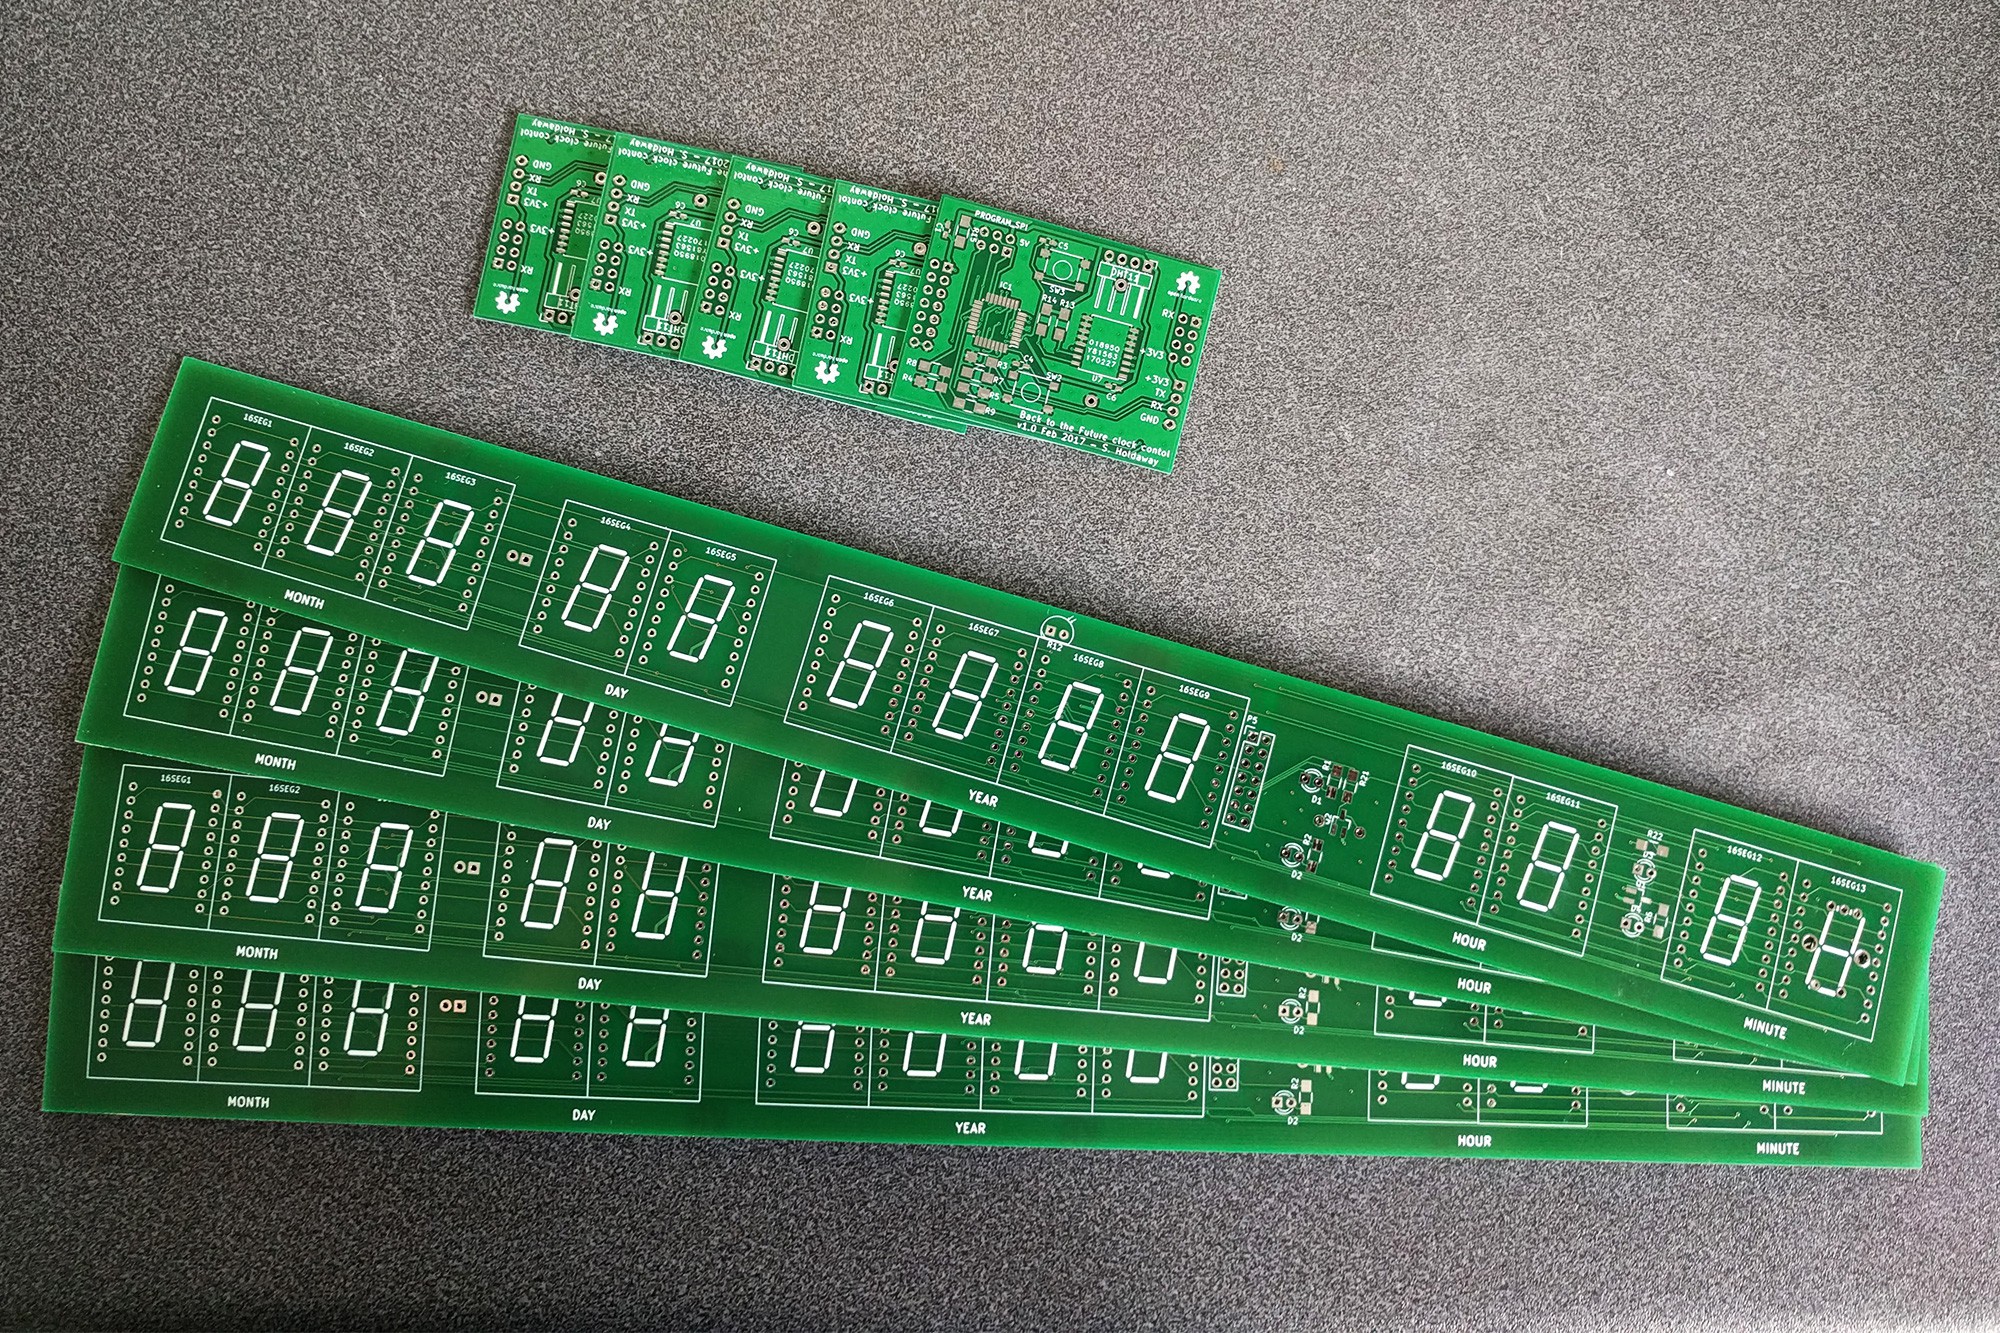
PCB arrival

The boards I ordered from Seeed Studio late February arrived on March 20 - two months ago now. I had been waiting a month for these to arrive from the time I ordered, so I was pretty excited to get a board up and going when they arrived!
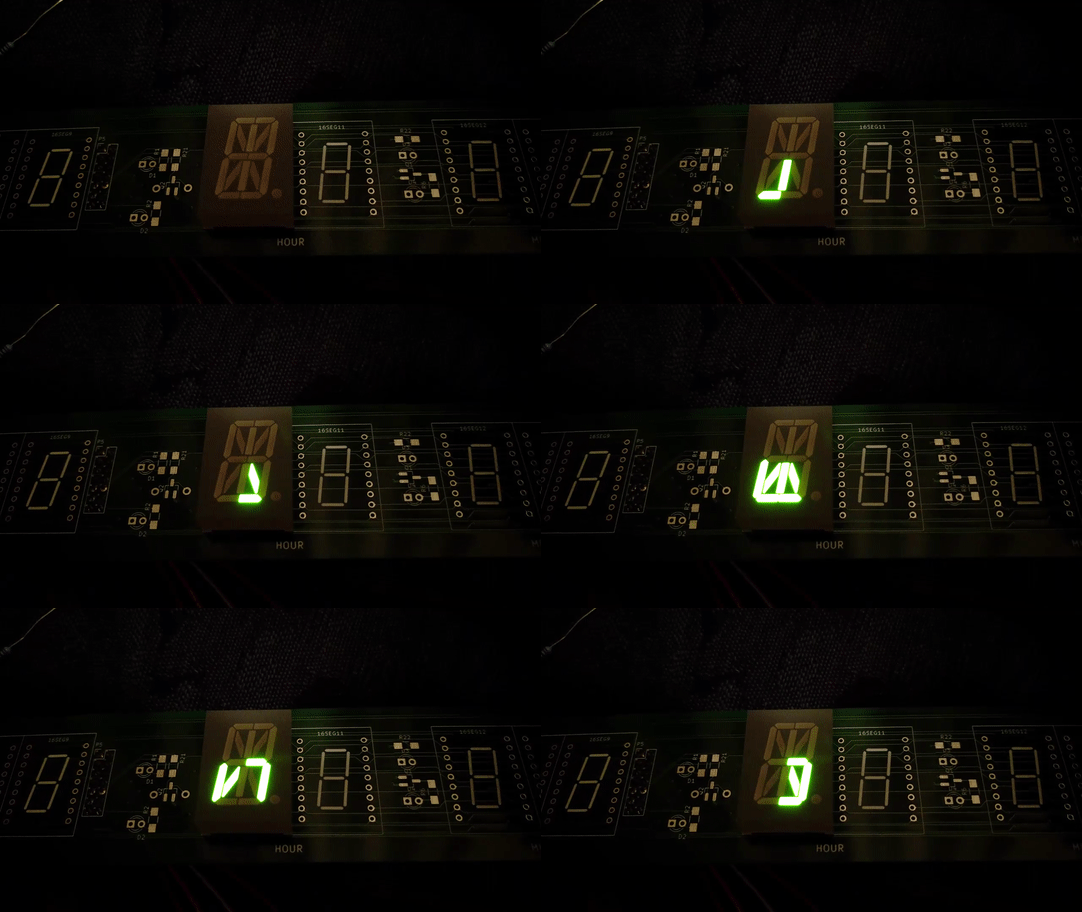
I soldered on one 16-segment digit, a MAX7219 driver, and a header to connect to a dev board. All the digits powered on in test mode, and the driver was accepting commands. This was looking promising! I wrote some test code to cycle through the 16 segments to confirm I was about to have a sweet working clock, but...

Turns out I hadn't made a mistake in my layout or schematic as I'd worried about - I had instead made a fundamentally incorrect design choice to use two digit sinks on a MAX7219 to drive each 16-segment display. It simply doesn't make sense electrically.
The datasheet for the MAX7219/MAX7221 mentions the behaviour of the DIGn lines on page 5:
Eight-Digit Drive Lines that sink current from the display common cathode. The MAX7219 pulls the digit outputs to V+ when turned off. The MAX7221’s digit drivers are high-impedance when turned off.
and nearby the behaviour of the SEGx lines:
Seven Segment Drives and Decimal Point Drive that source current to the display. On the MAX7219, when a segment driver is turned off it is pulled to GND. The MAX7221 segment drivers are high-impedance when turned off.
I read the datasheet a number of times, but I apparently skipped over (or at least didn't understand the implications of) these two statements. In practice, sharing "digits" like this means that when either DIGn line is connected to ground by the MAX72xx, power applied to any SEGn line will have a path to ground and cause both segments connected to that SEG line (the ones intended for separate digits) to light up.
Writing that down has really clarified this for me - it makes complete sense why this happens, and it's pretty frustrating I didn't catch it before sending off the design. Lesson learned.
Retrospective
When I was designing the display board, I had actually had the MAX7219 chips along with the 16-segment displays for this project sitting in a drawer beside me. Looking back, I really should have tested this out with a quick home-made breakout board to find out if it worked, since using 16 segment displays is not mentioned in the datasheet...of course this idea would never be mentioned a datasheet since it's basic electronics that this idea simply cannot work!
Second lesson: prototype cheaply if you're trying something not mentioned in the datasheet.
As it turned out, at least two people have tried this idea before and got the same result - searching around on the internet about this idea would've helped avoid a three month set-back and a bucket of disappointment / frustration.
Future
While this experience has been a little frustrating, I'm certainly not going to shelve this project. I want my retro clock (especially since it embodies experience/lessons/stories). Here's the plan:
- I'm not going to redesign and re-spin the display board as part of finishing this one-off build. The display PCBs were kind of expensive to have made, and are fit for purpose mechanically and electrically other than the design error which is specific to how the MAX72xx chips work, not the wiring.
- The only thing between me and a fancy clock is a suitable driver solution. LED driver chips for 14 or 16 segment displays all seem to be really expensive (mostly made by Maxim). 16-48 output LED drivers have pretty cheap list prices, but I'd either need to order from element14, digikey, mouser etc where shipping is $15-20 NZD for a few dollars of chips, or order from China where the shipping is free but there'll be another month to wait to continue this build.
Neither of these are great options as I'd like to avoid spending any additional money on this project, and I'd like to complete it soon as it's heading towards six months since I started it. - Using parts on hand, the one possibility is using one of the 15 or so ATMega128A's I have lying around. The I/O can comfortably sink/source the 20mA each segment draws (one lit at a time), and it has more than the 29 programmable I/O pins needed for the display (16 segments by 13 digits). Seems like a bit of a waste to use a MCU with 128KB of flash and 4KB of SRAM just to multiplex LEDs, but the stock I have was ~$1 NZD per chip...still not entirely happy with that wastefulness.
A better alternative might be using a smaller MCU (I have a whole lot of 20-pin STM8's) and a couple of shift registers. I'll have a think and prototype something (!!!) to see if its feasible with the SN74LS164N's I have on hand.
 Stephen Holdaway
Discussions
Become a Hackaday.io Member
Create an account to leave a comment. Already have an account? Log In.
did you ever get this working? I made a simliar mistake...couldn't get it working with max 7221s either. Have you check out the ht16k33? Seems to be the solution for my project and much much much much much cheaper than the MAX 6954
Are you sure? yes | no
Lessons learned are always helpful! Shift registers also seem like a great solution. The 7-seg drivers are cool, but... expensive!
Another thought: TI has a few LED driver chips that might be appropriate here. I've played around with their 16-ch constant current drivers, you could use one of those and multiplex using GPIOs and FETs. I suppose that doesn't really help solve the NZ shipping issue...
Are you sure? yes | no
Thank you for sharing this and good luck with it (from now on)!
Are you sure? yes | no