 Cora
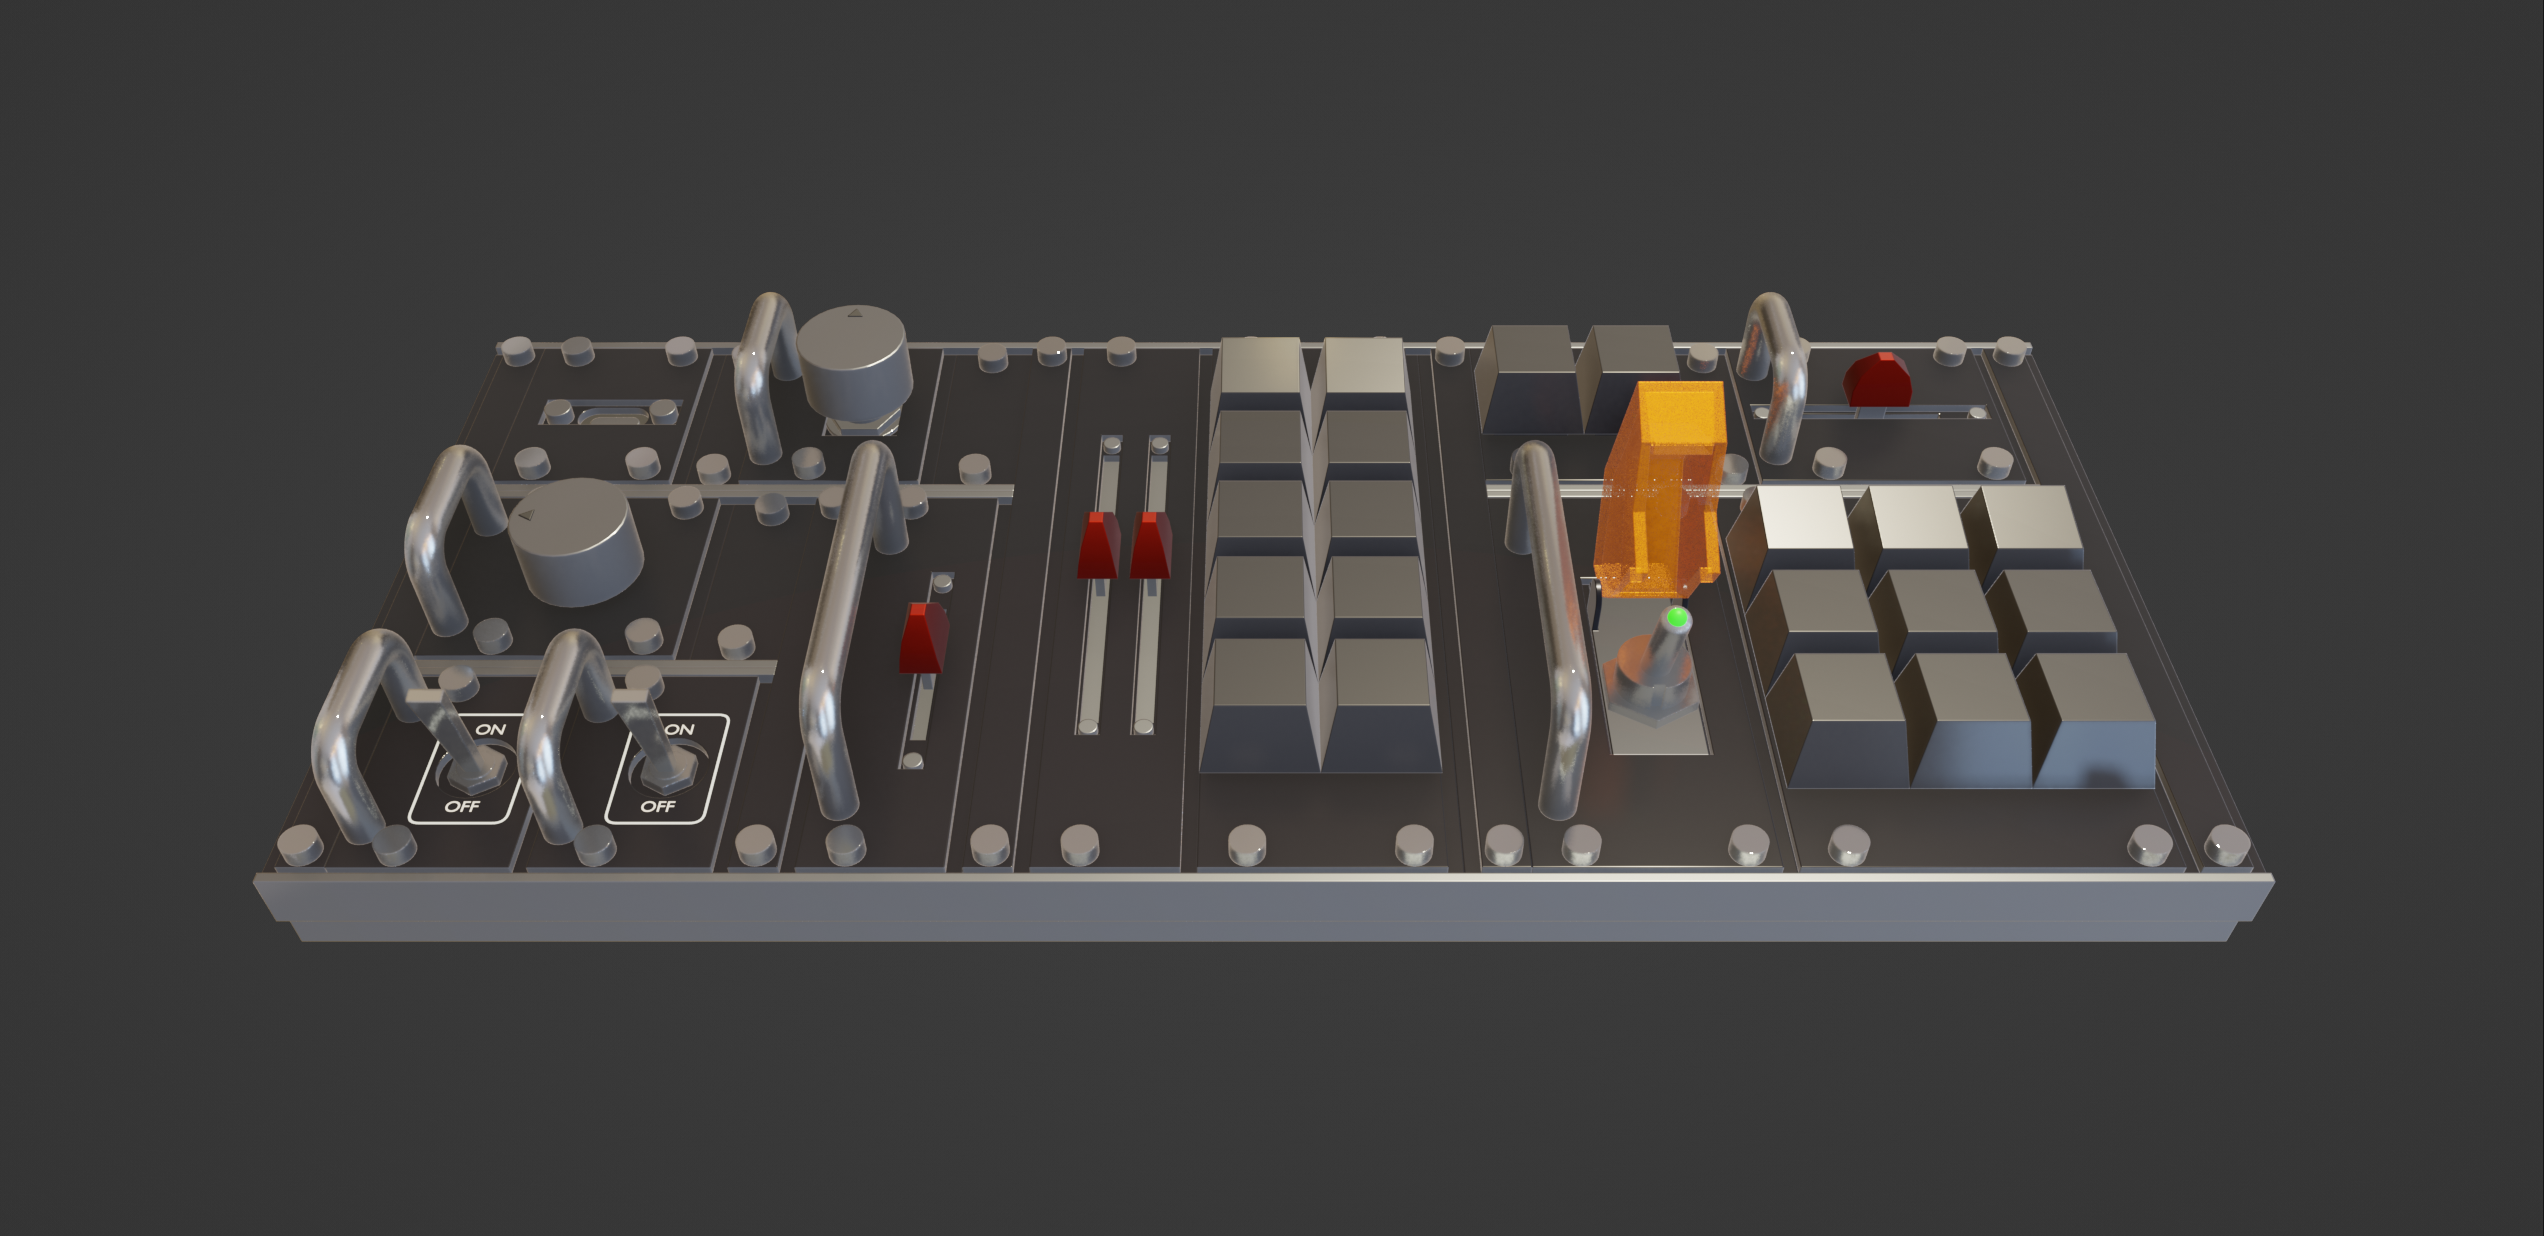
CoraWith version 1 done and dusted, I had some time to sit and use it. And what I found was a lot of the buttons and such were too close together!
This was actually a huge relief, because as I was designing the modules, I was trying to cram them in as close as I physically could to avoid potentially having too much wasted space. So knowing I have the opposite problem means I can start to be creative with how I lay things out.
One of the other things I noticed, trying to use the buttons and switches, is that the case is too light! What I mean by this is, with it just sitting in a case on my desk and not affixed to anything, trying to press some of the larger switches, or move the sliders, is a lot harder than it should be. I have to sort of wedge my hand against the case in order to get enough leverage to move the toggle switches.
Something else I noticed was that it doesn't quite have the same "look" to it that a lot of military/HOTAS systems have.
I can solve all of these problems at the same time.
I was browsing Etsy, of all things, and came across some small handles for hand-made tables and drawers. It was clearly just a drop-shipper, but it got the idea in my head: little handles for each part! That way, I can have the leverage I need to press the buttons easily, and it will look more like the military/HOTAS systems I've seen around.
So I went onto AliExpress, and started searching. I found lots of u-shaped rod handles that fit the bill, but only one or two sellers that were selling ones small enough to fit onto a 1U module, and even then only if I got creative with it (links in the Components section).
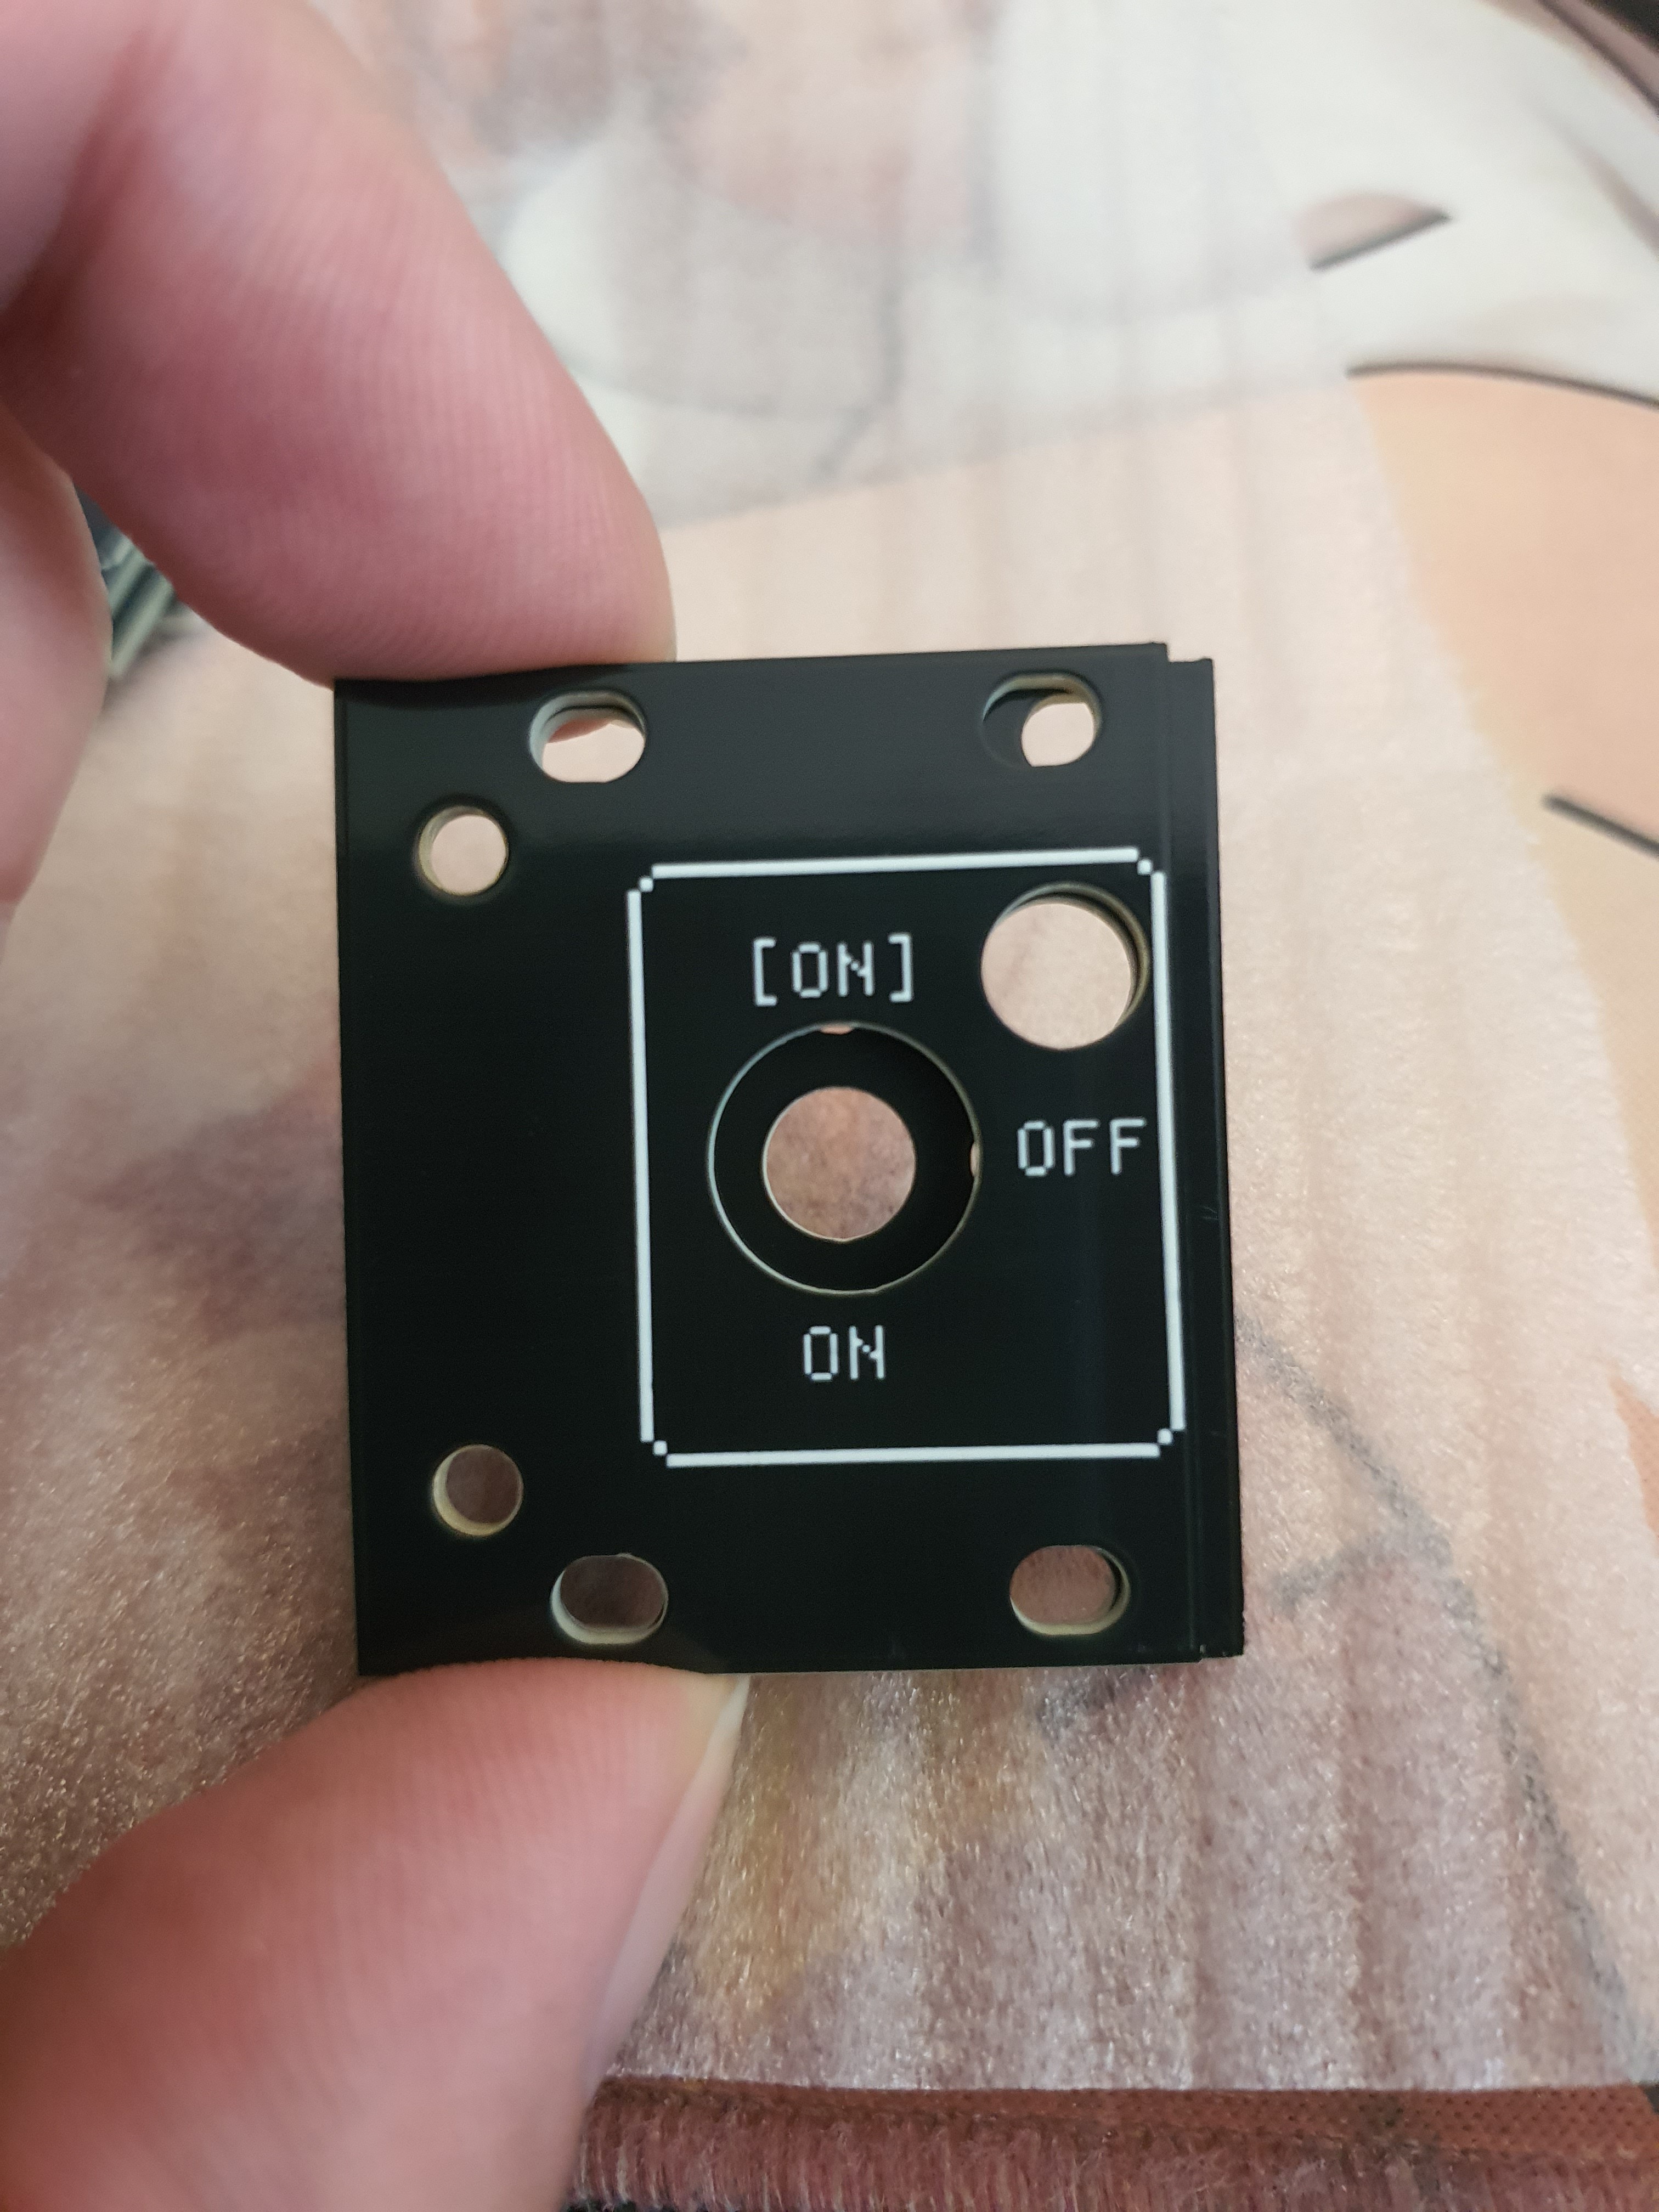
The problem is that the handles have a 25mm spacing between the M3 screw holes, and I only have 22.5mm to work with between the rails of a 1U module. So I started to brainstorm; what if I got 3D with it? Took some of the sandwich keyboard knowledge I have, combined it with a lil' bit of 3D printing know-how, and designed *two* PCBs that stacked together? One of the PCBs would attach to the handle, and the PCB beneath it would have a matching hole for the screw to fit in. The height of the bottom PCB would be enough to hide the screw, if I used the thin screws I used for attaching the Eurorack rails to my custom adapters, and it would let me play with a bit of depth as I could vary the PCB footprints such that their height differences could create some interesting vertical detail.
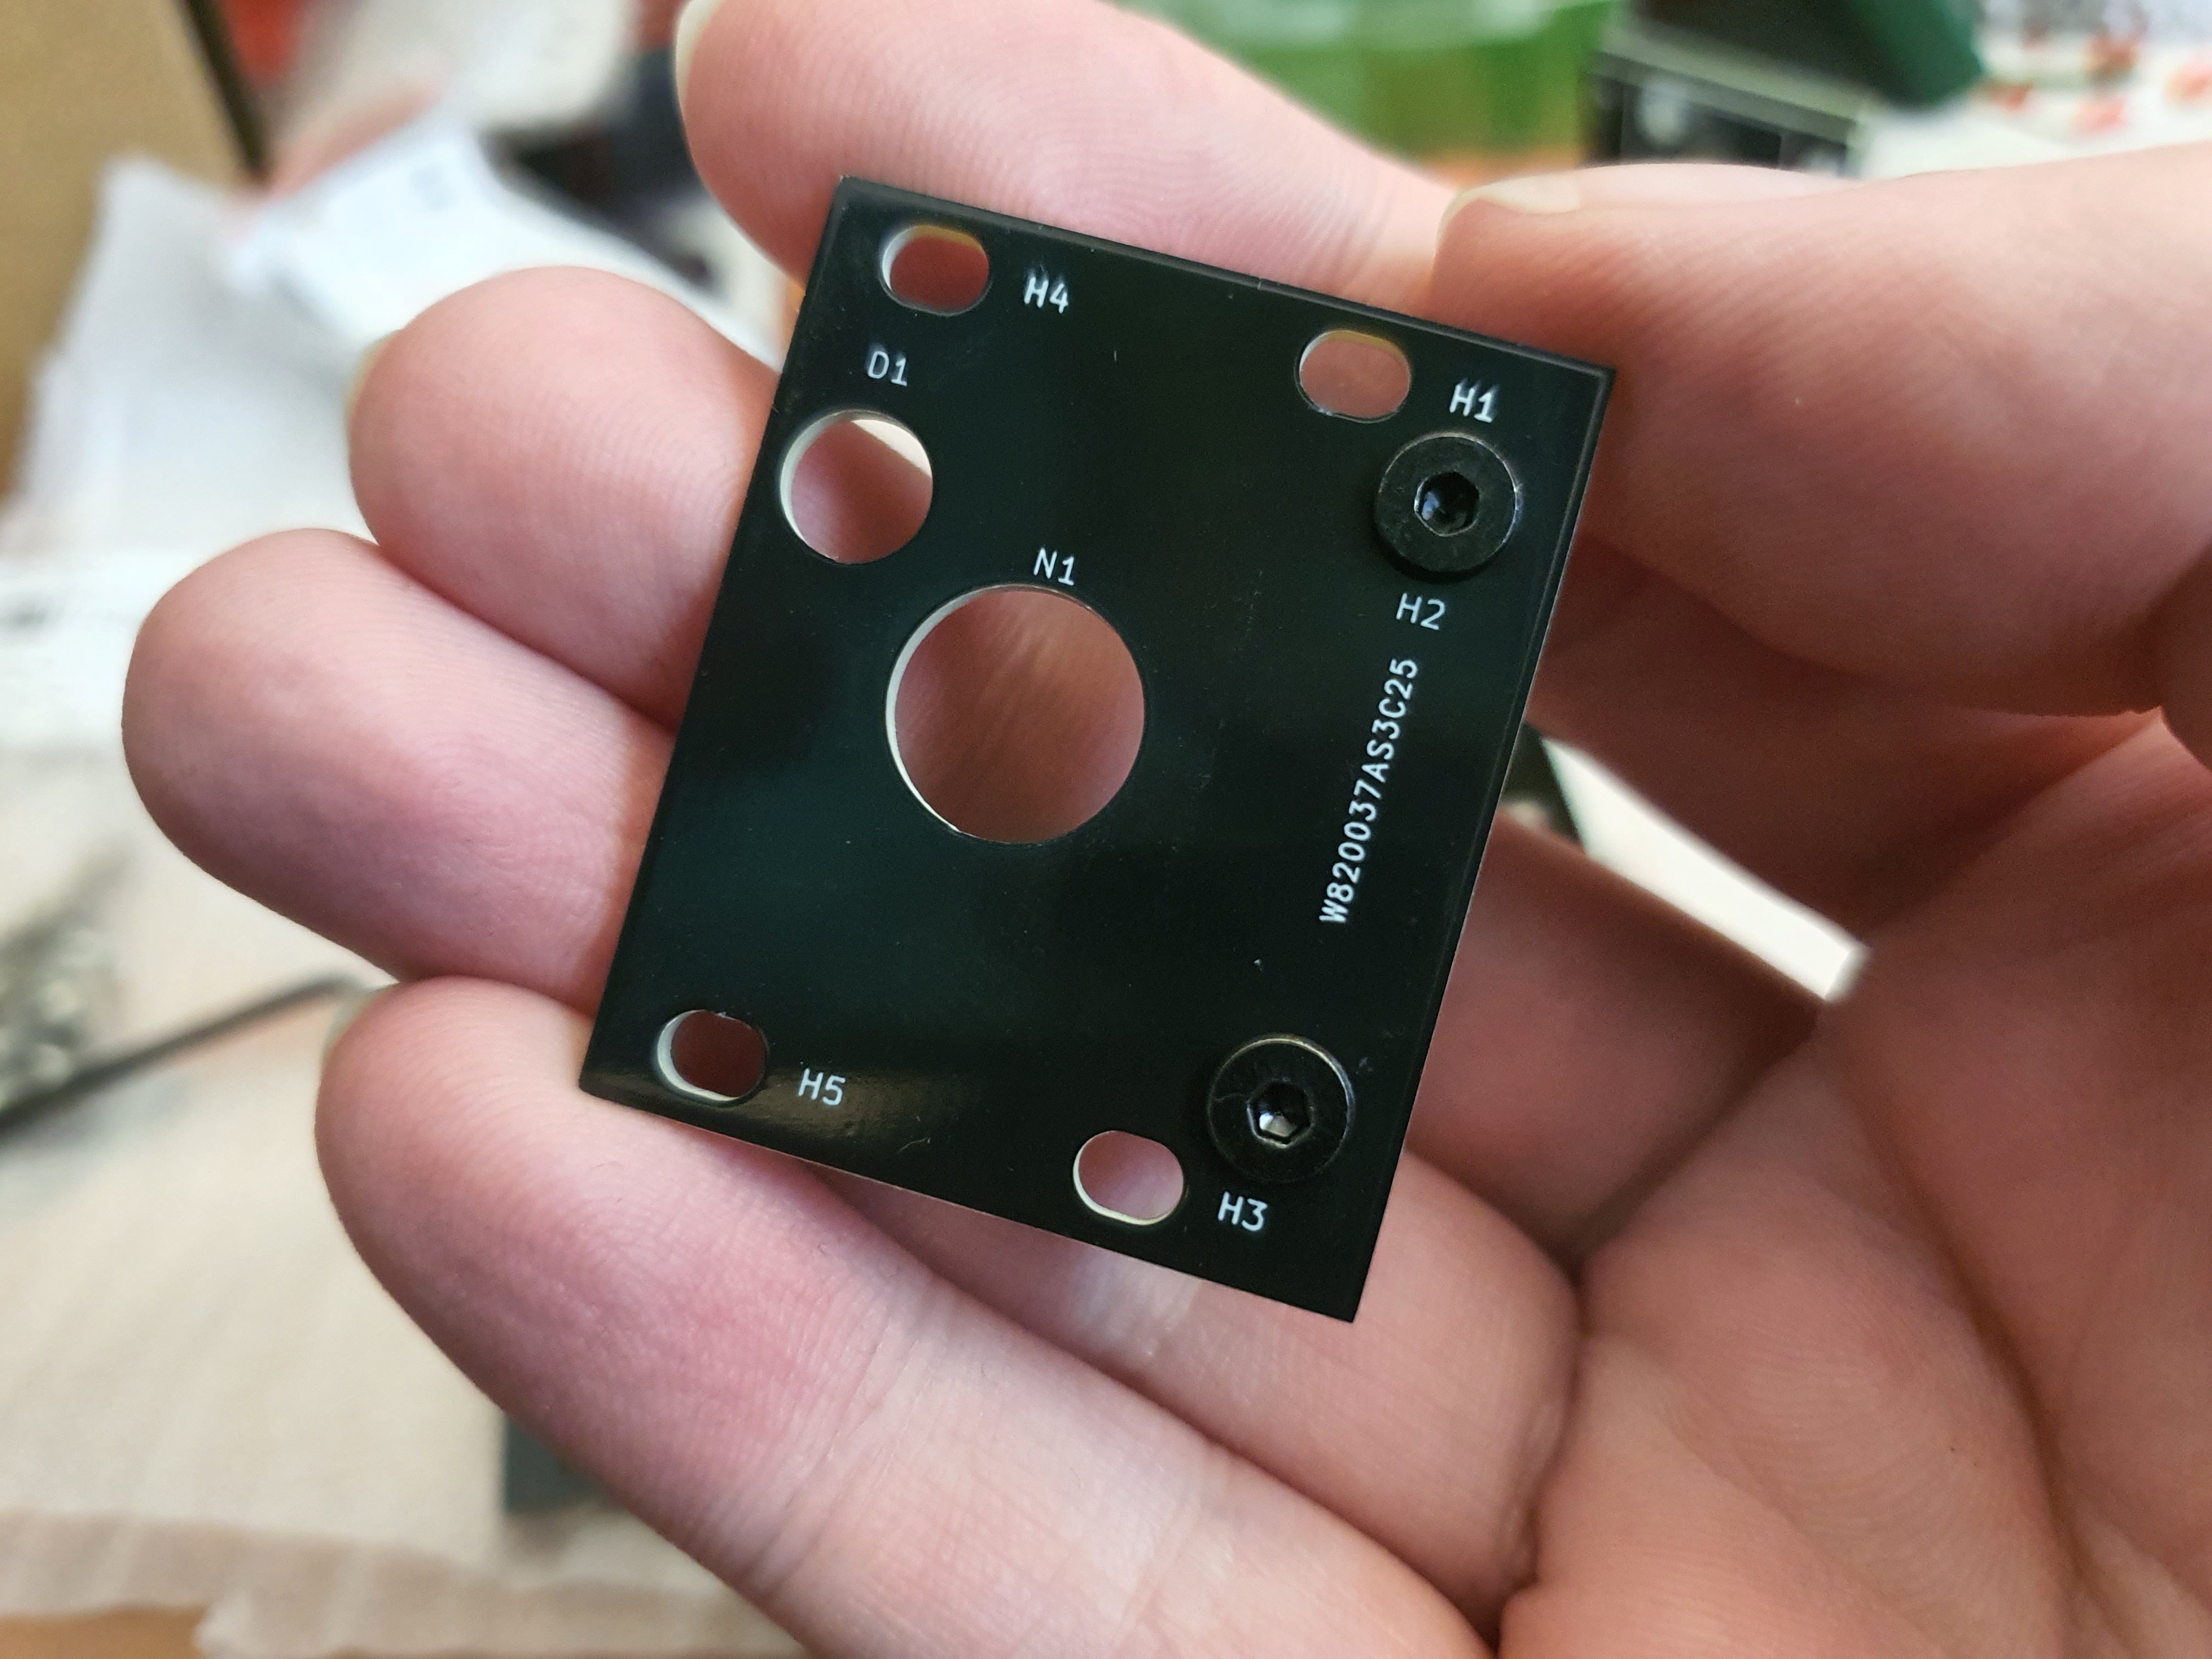
This is what I came up with:
Sponsored by PCB Way
It was at about this time that Liam, my lovely PCBWay representative, got back to me asking about future projects, since he seemed so happy with the previous logs I've made here, and I decided to ask about another sponsorship for this version 2. I threw the PCBs I designed into the fancy PCB Way button in KiCAD that I love so much (seriously, it's so handy), and sent them his way.
Less than the estimated time later (an unexpected, but not unwelcome surprise!), the PCBs were at my door, and look! aren't they beautiful!
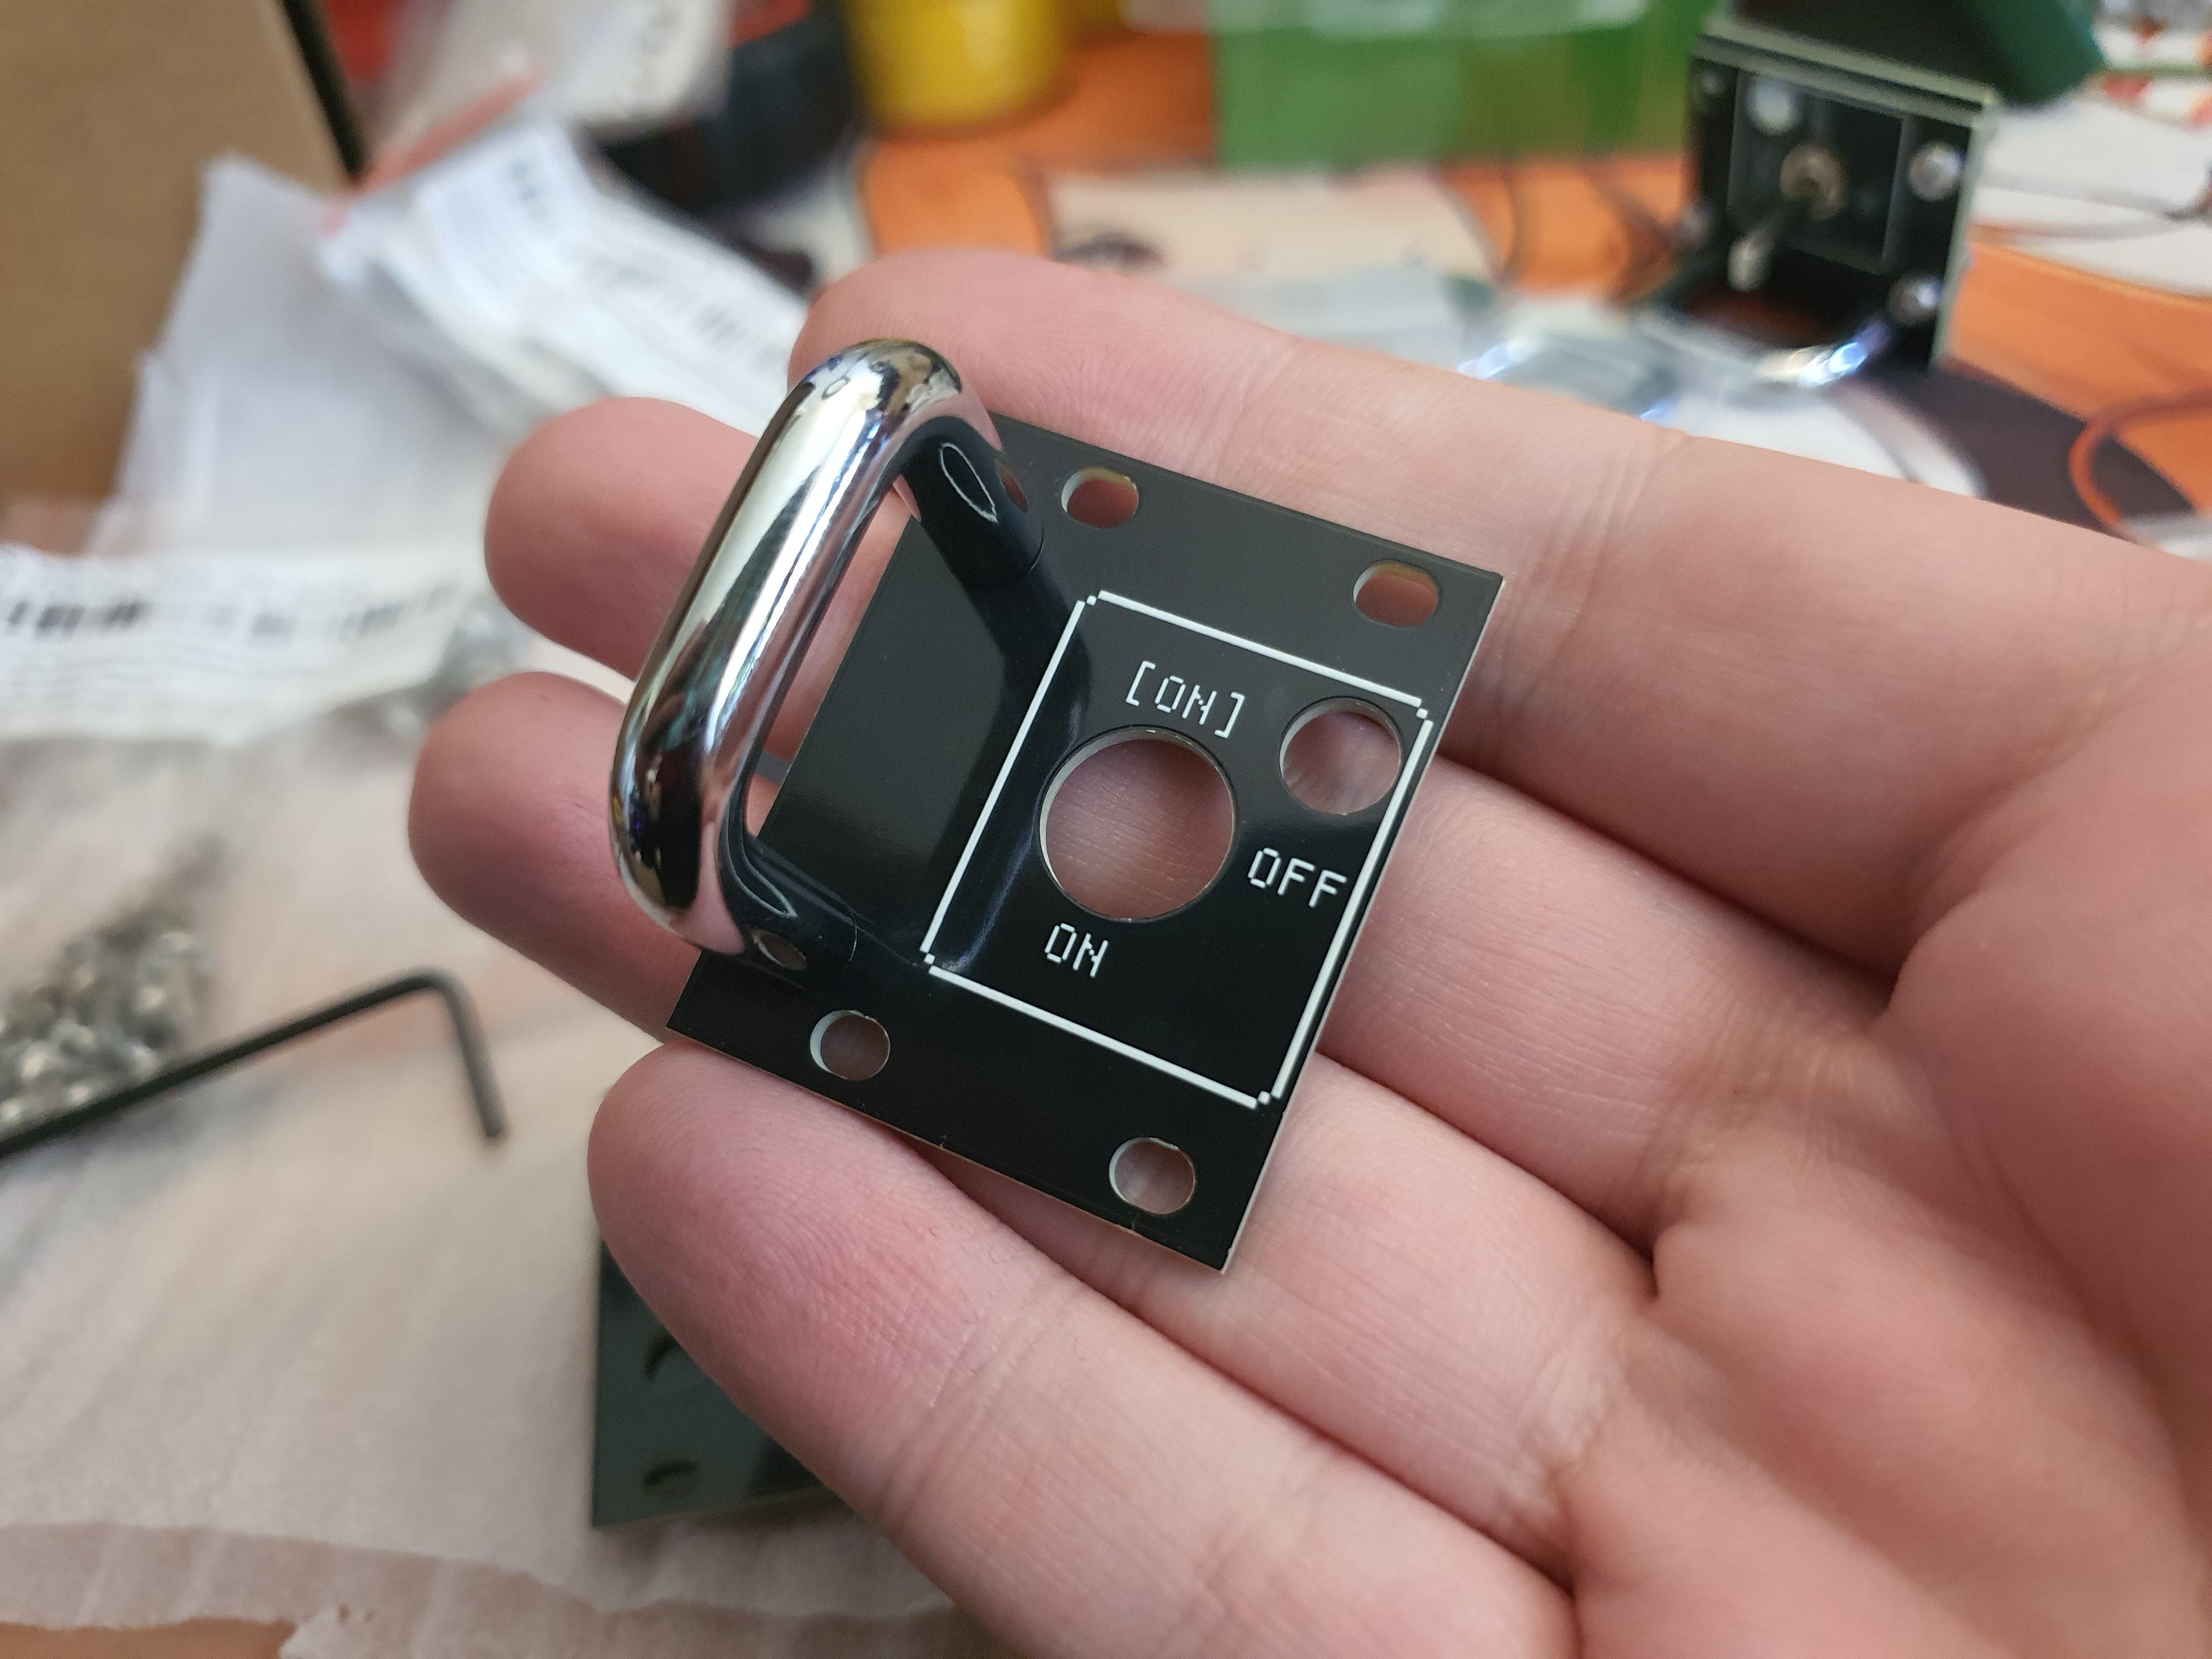
I did notice that top-right screw hole doesn't match, so I checked the PCB designs and indeed they were misaligned. Entirely my fault!
I will have to keep this in mind as I design more modules, as now I have two PCBs that I need to keep aligned together, or things will start to get really difficult and annoying very quickly.
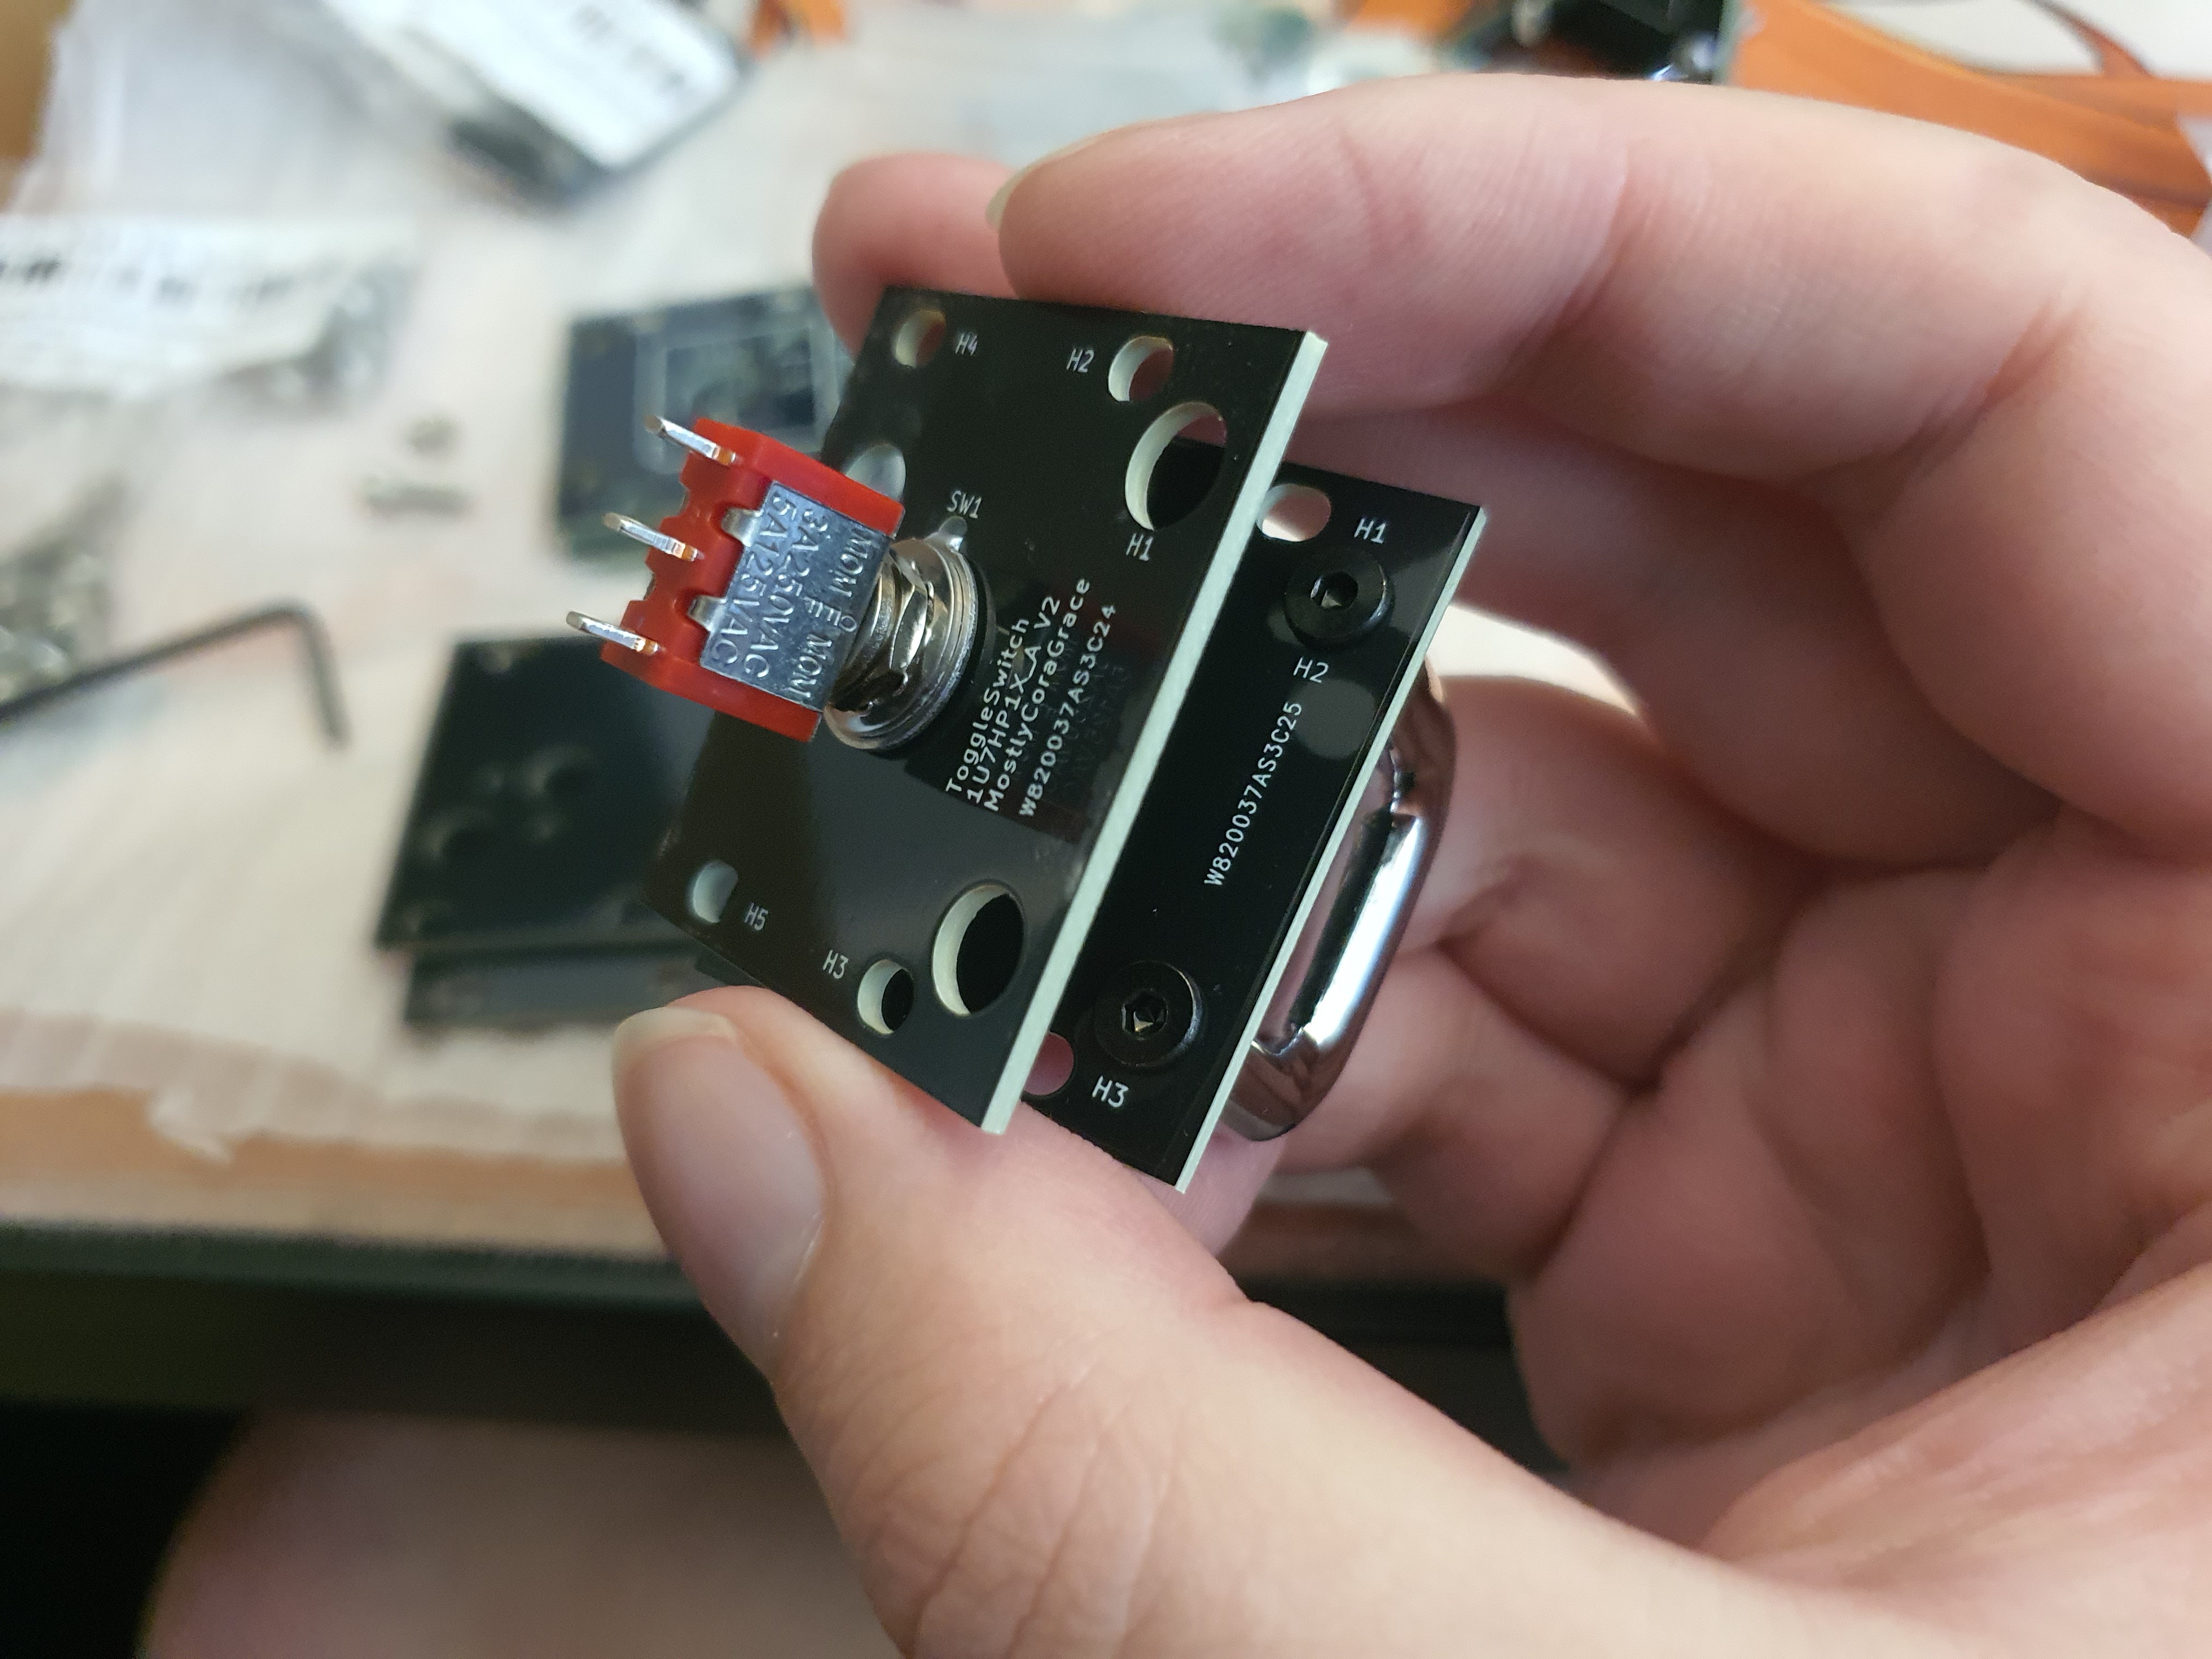
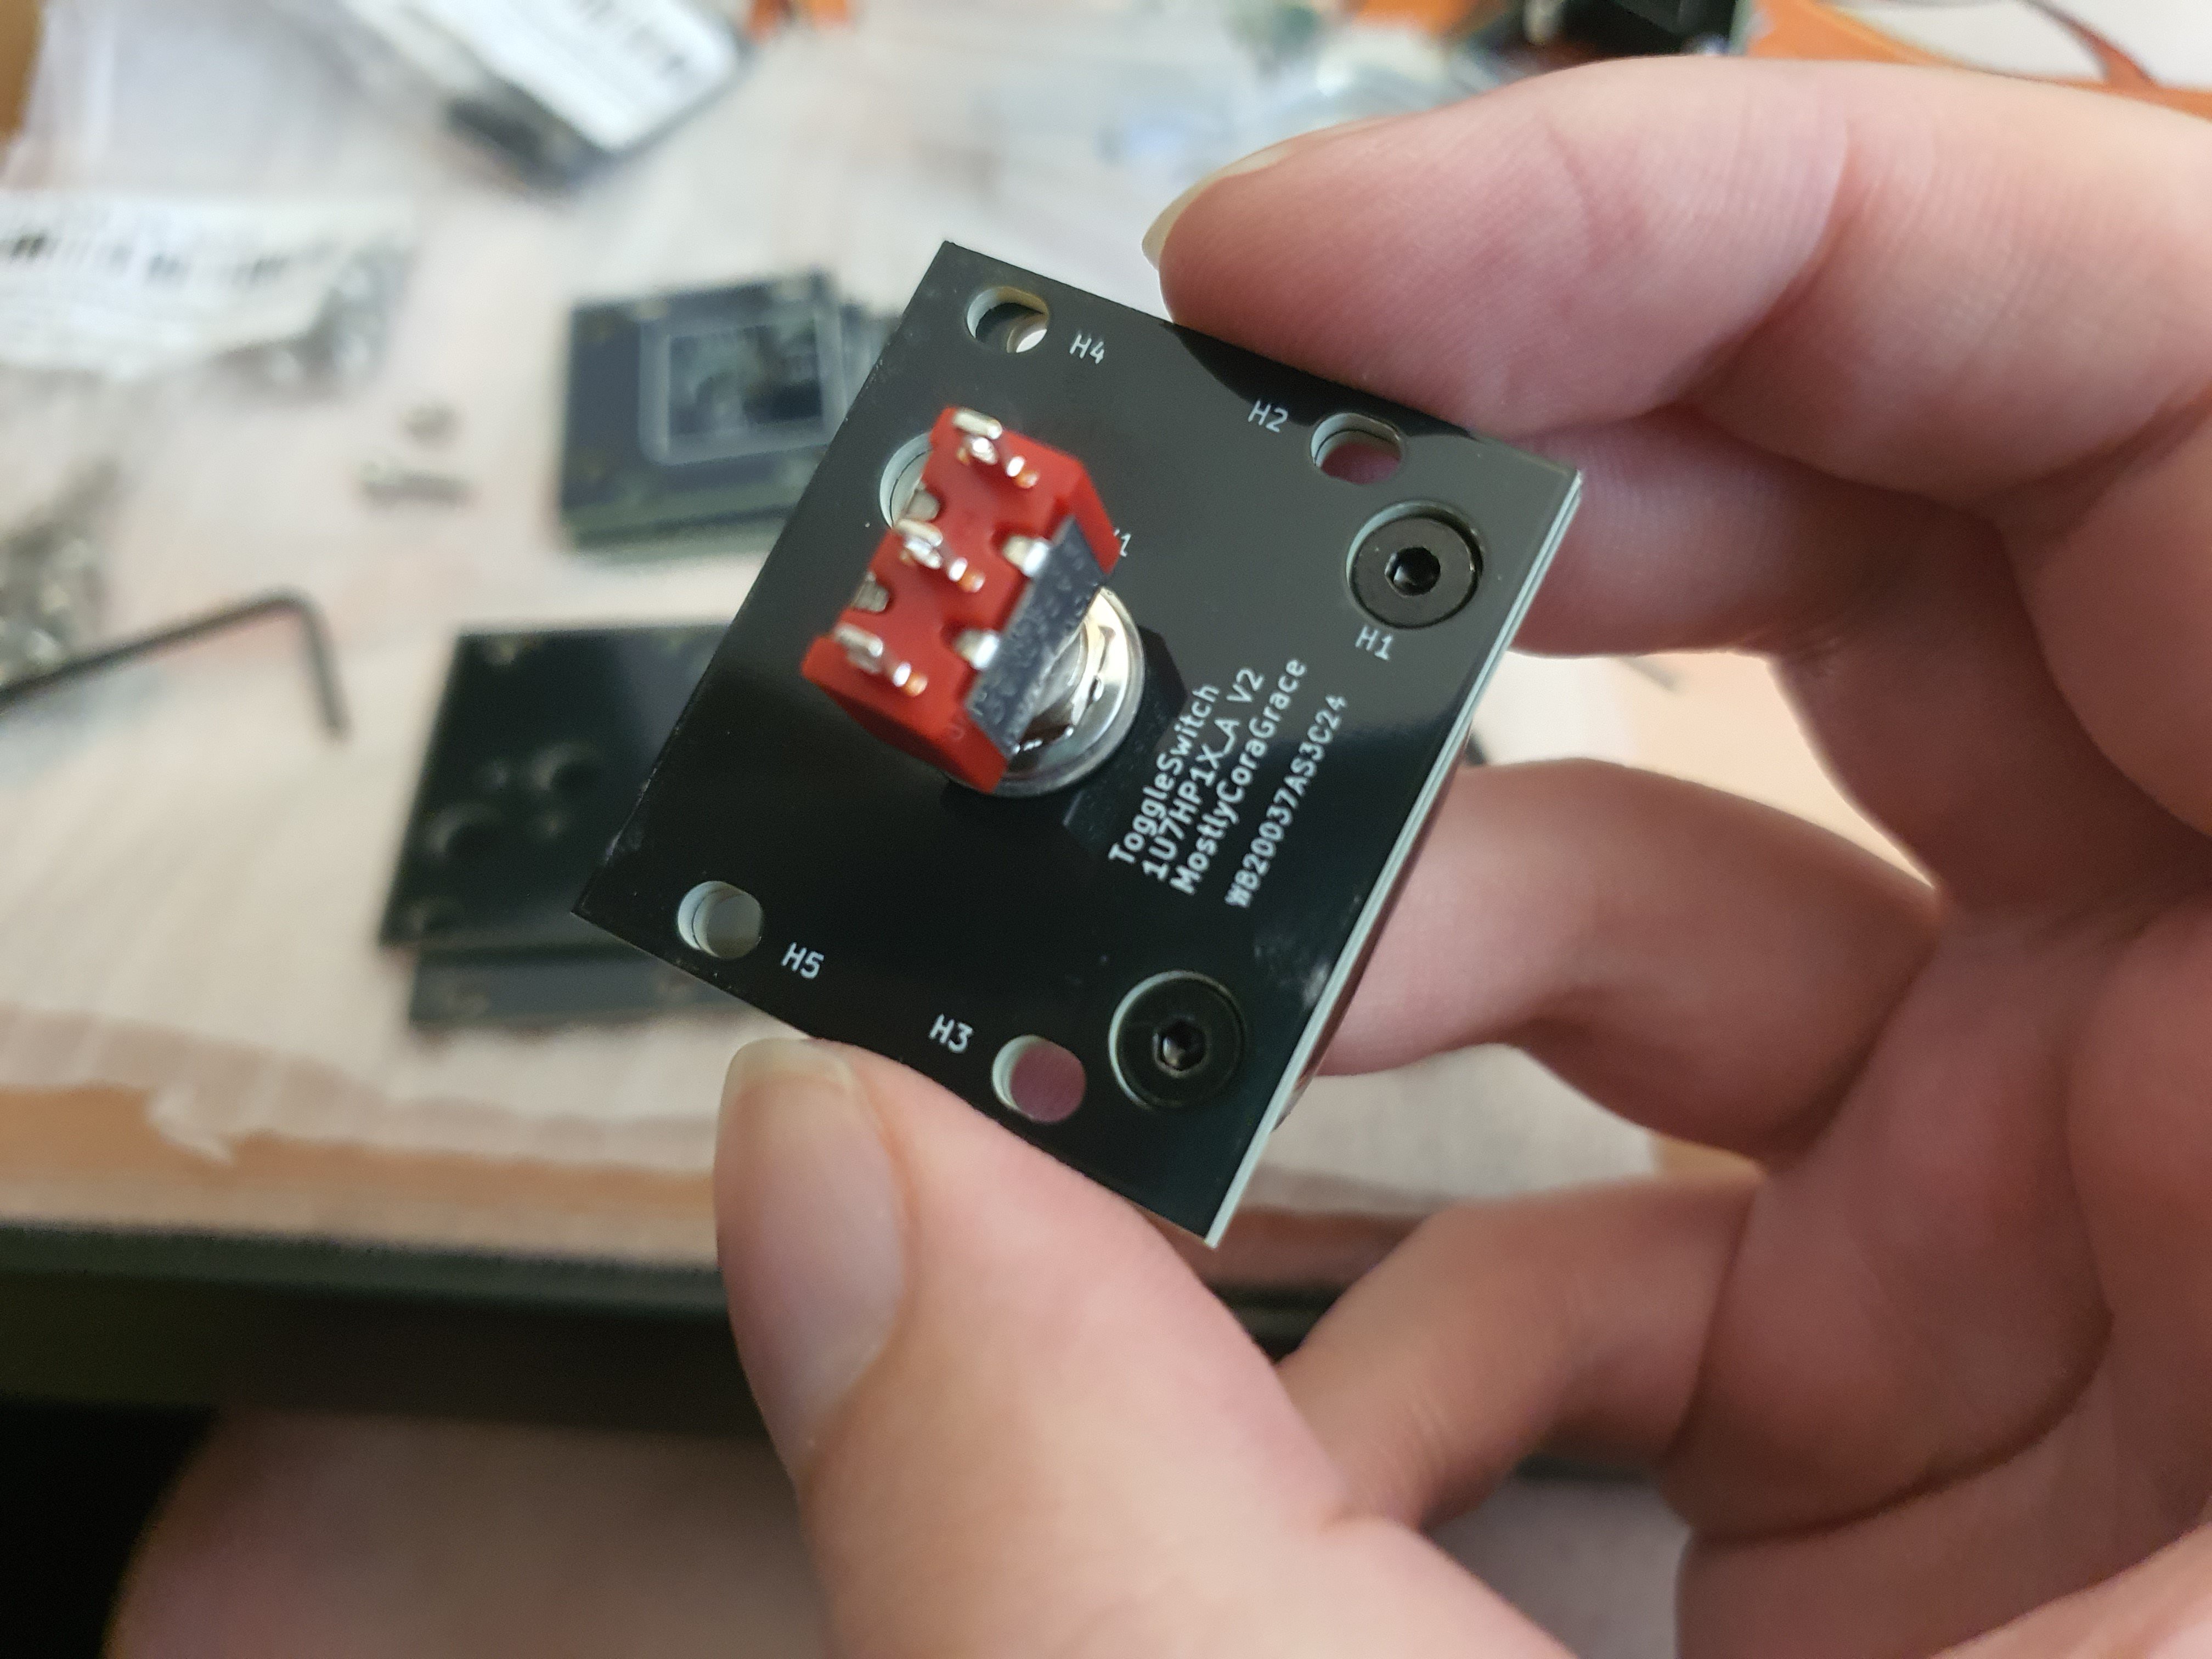
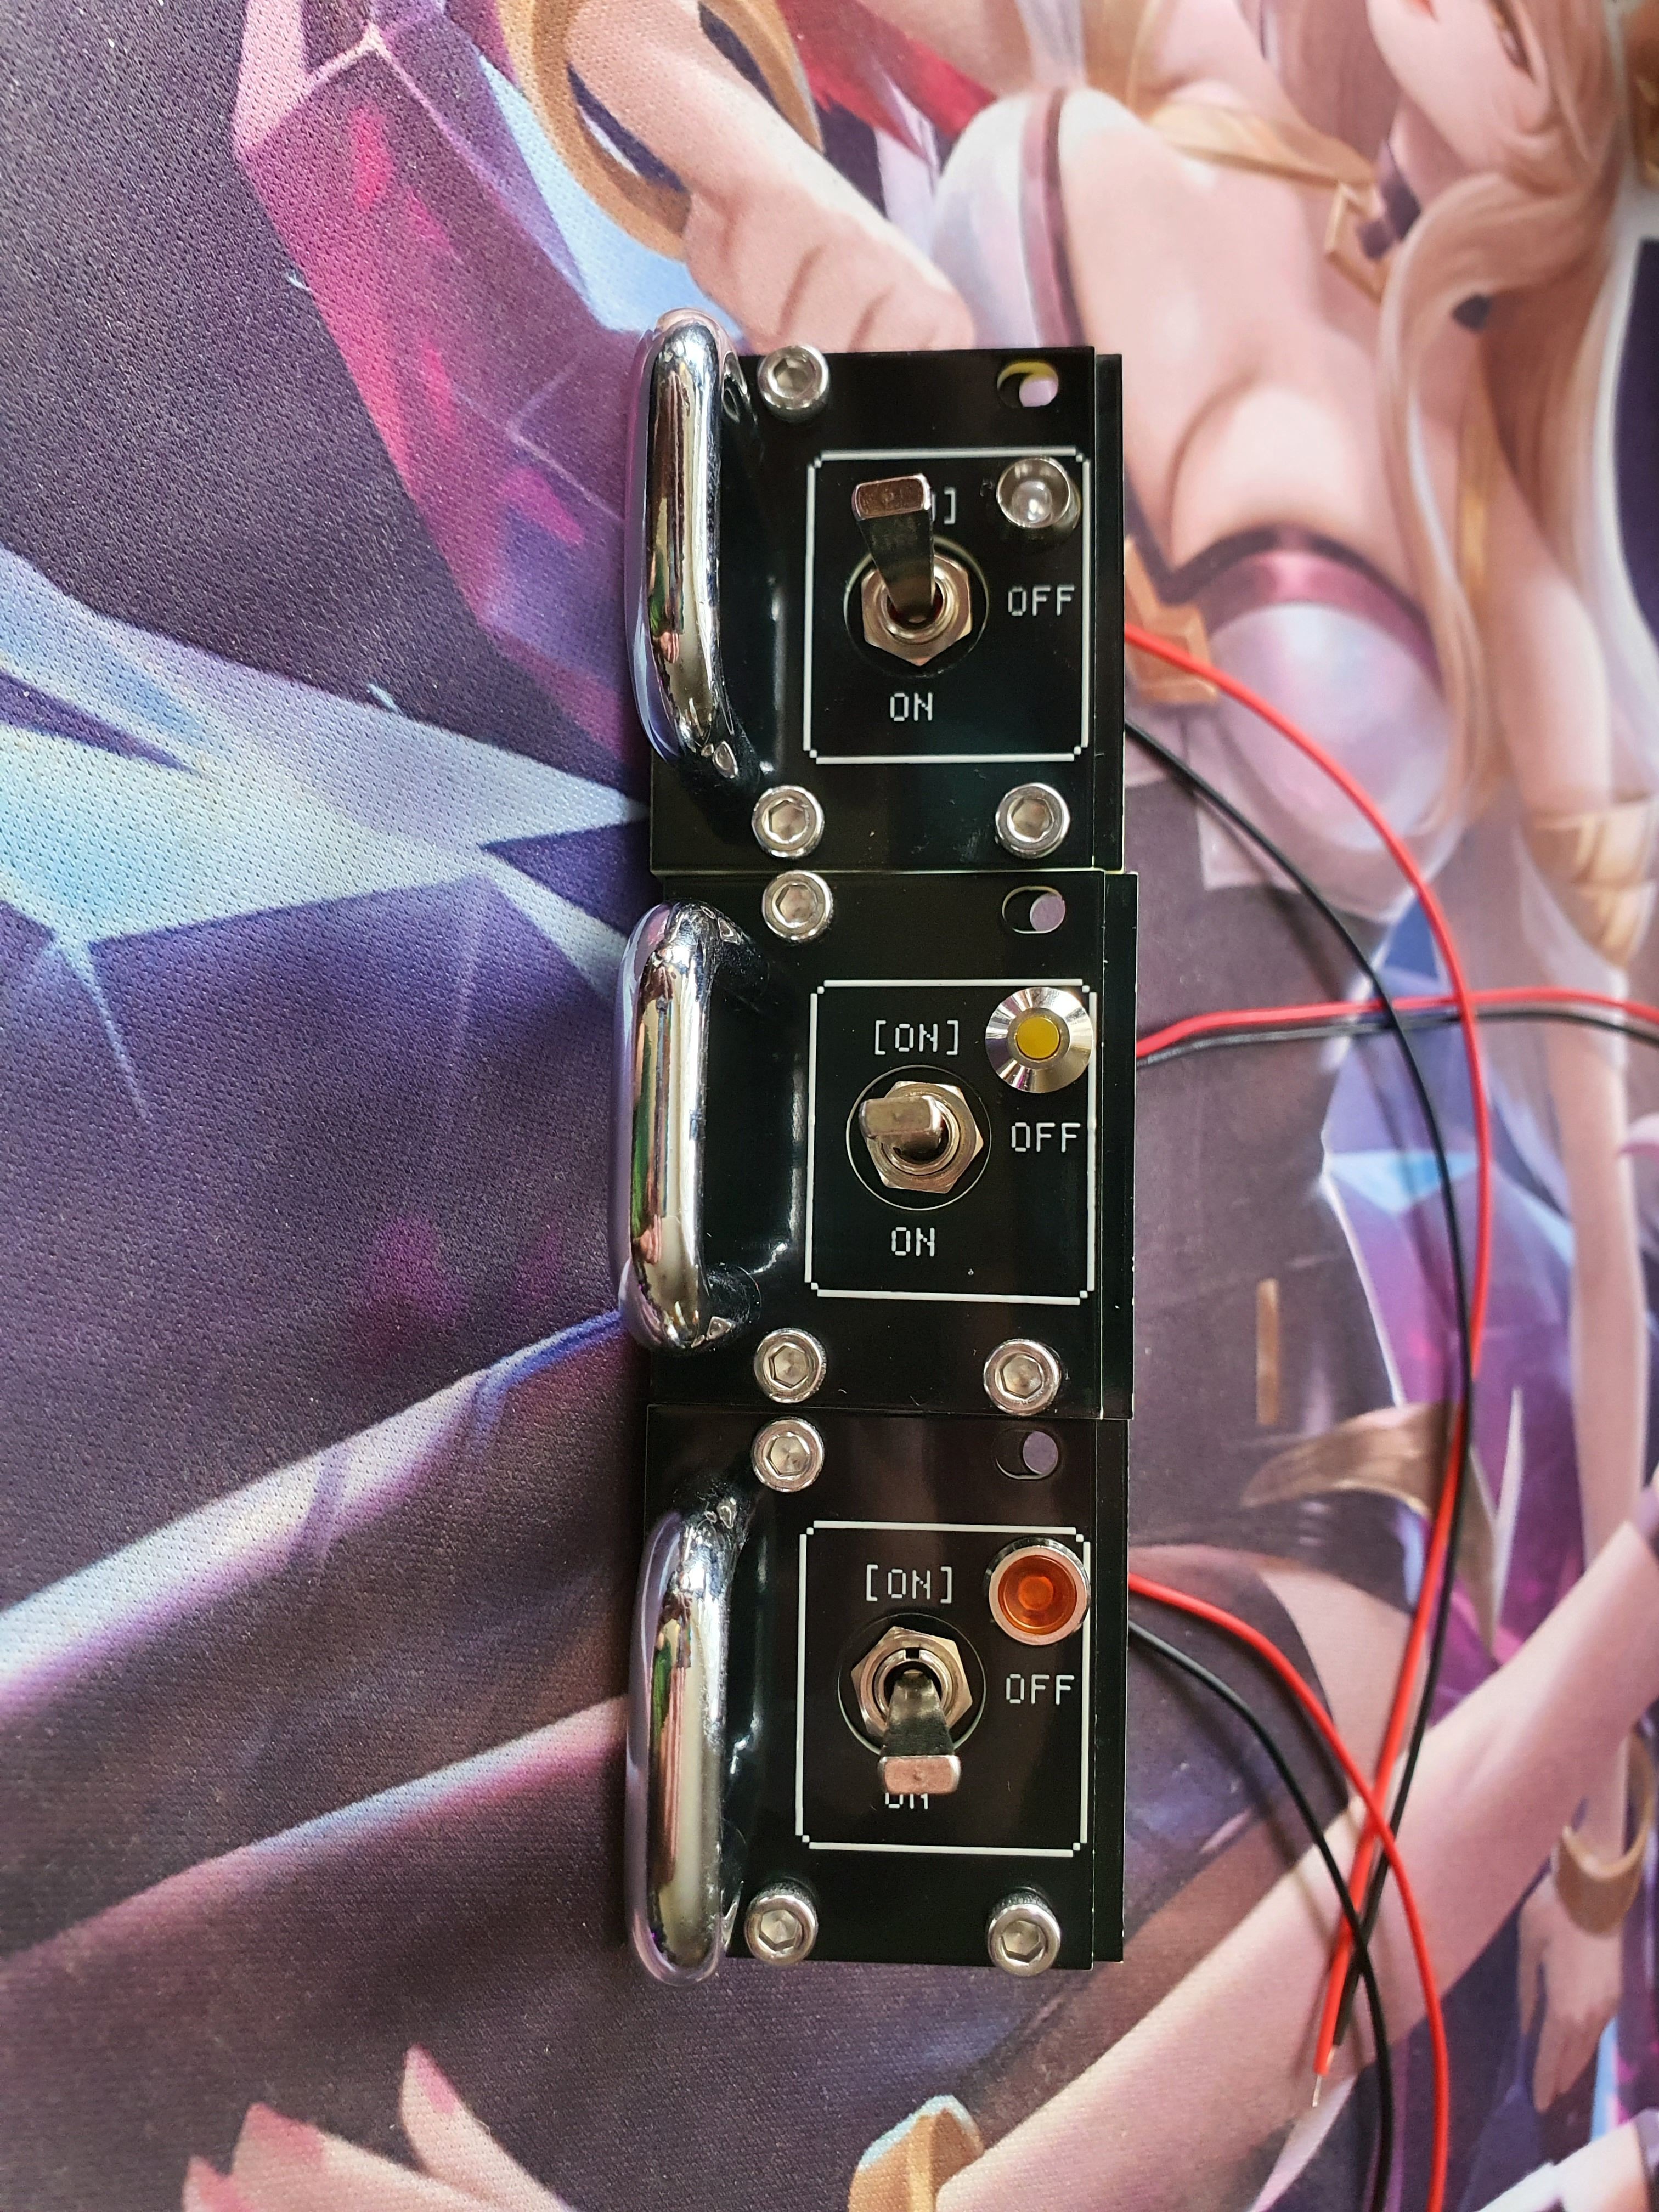
Since I was going for more of a military look, I also bought some more screws, this time going for flat hex M3 screws. Since I could only get three of them in there, you'll have to use your imagination a little bit, but here it is all assembled:
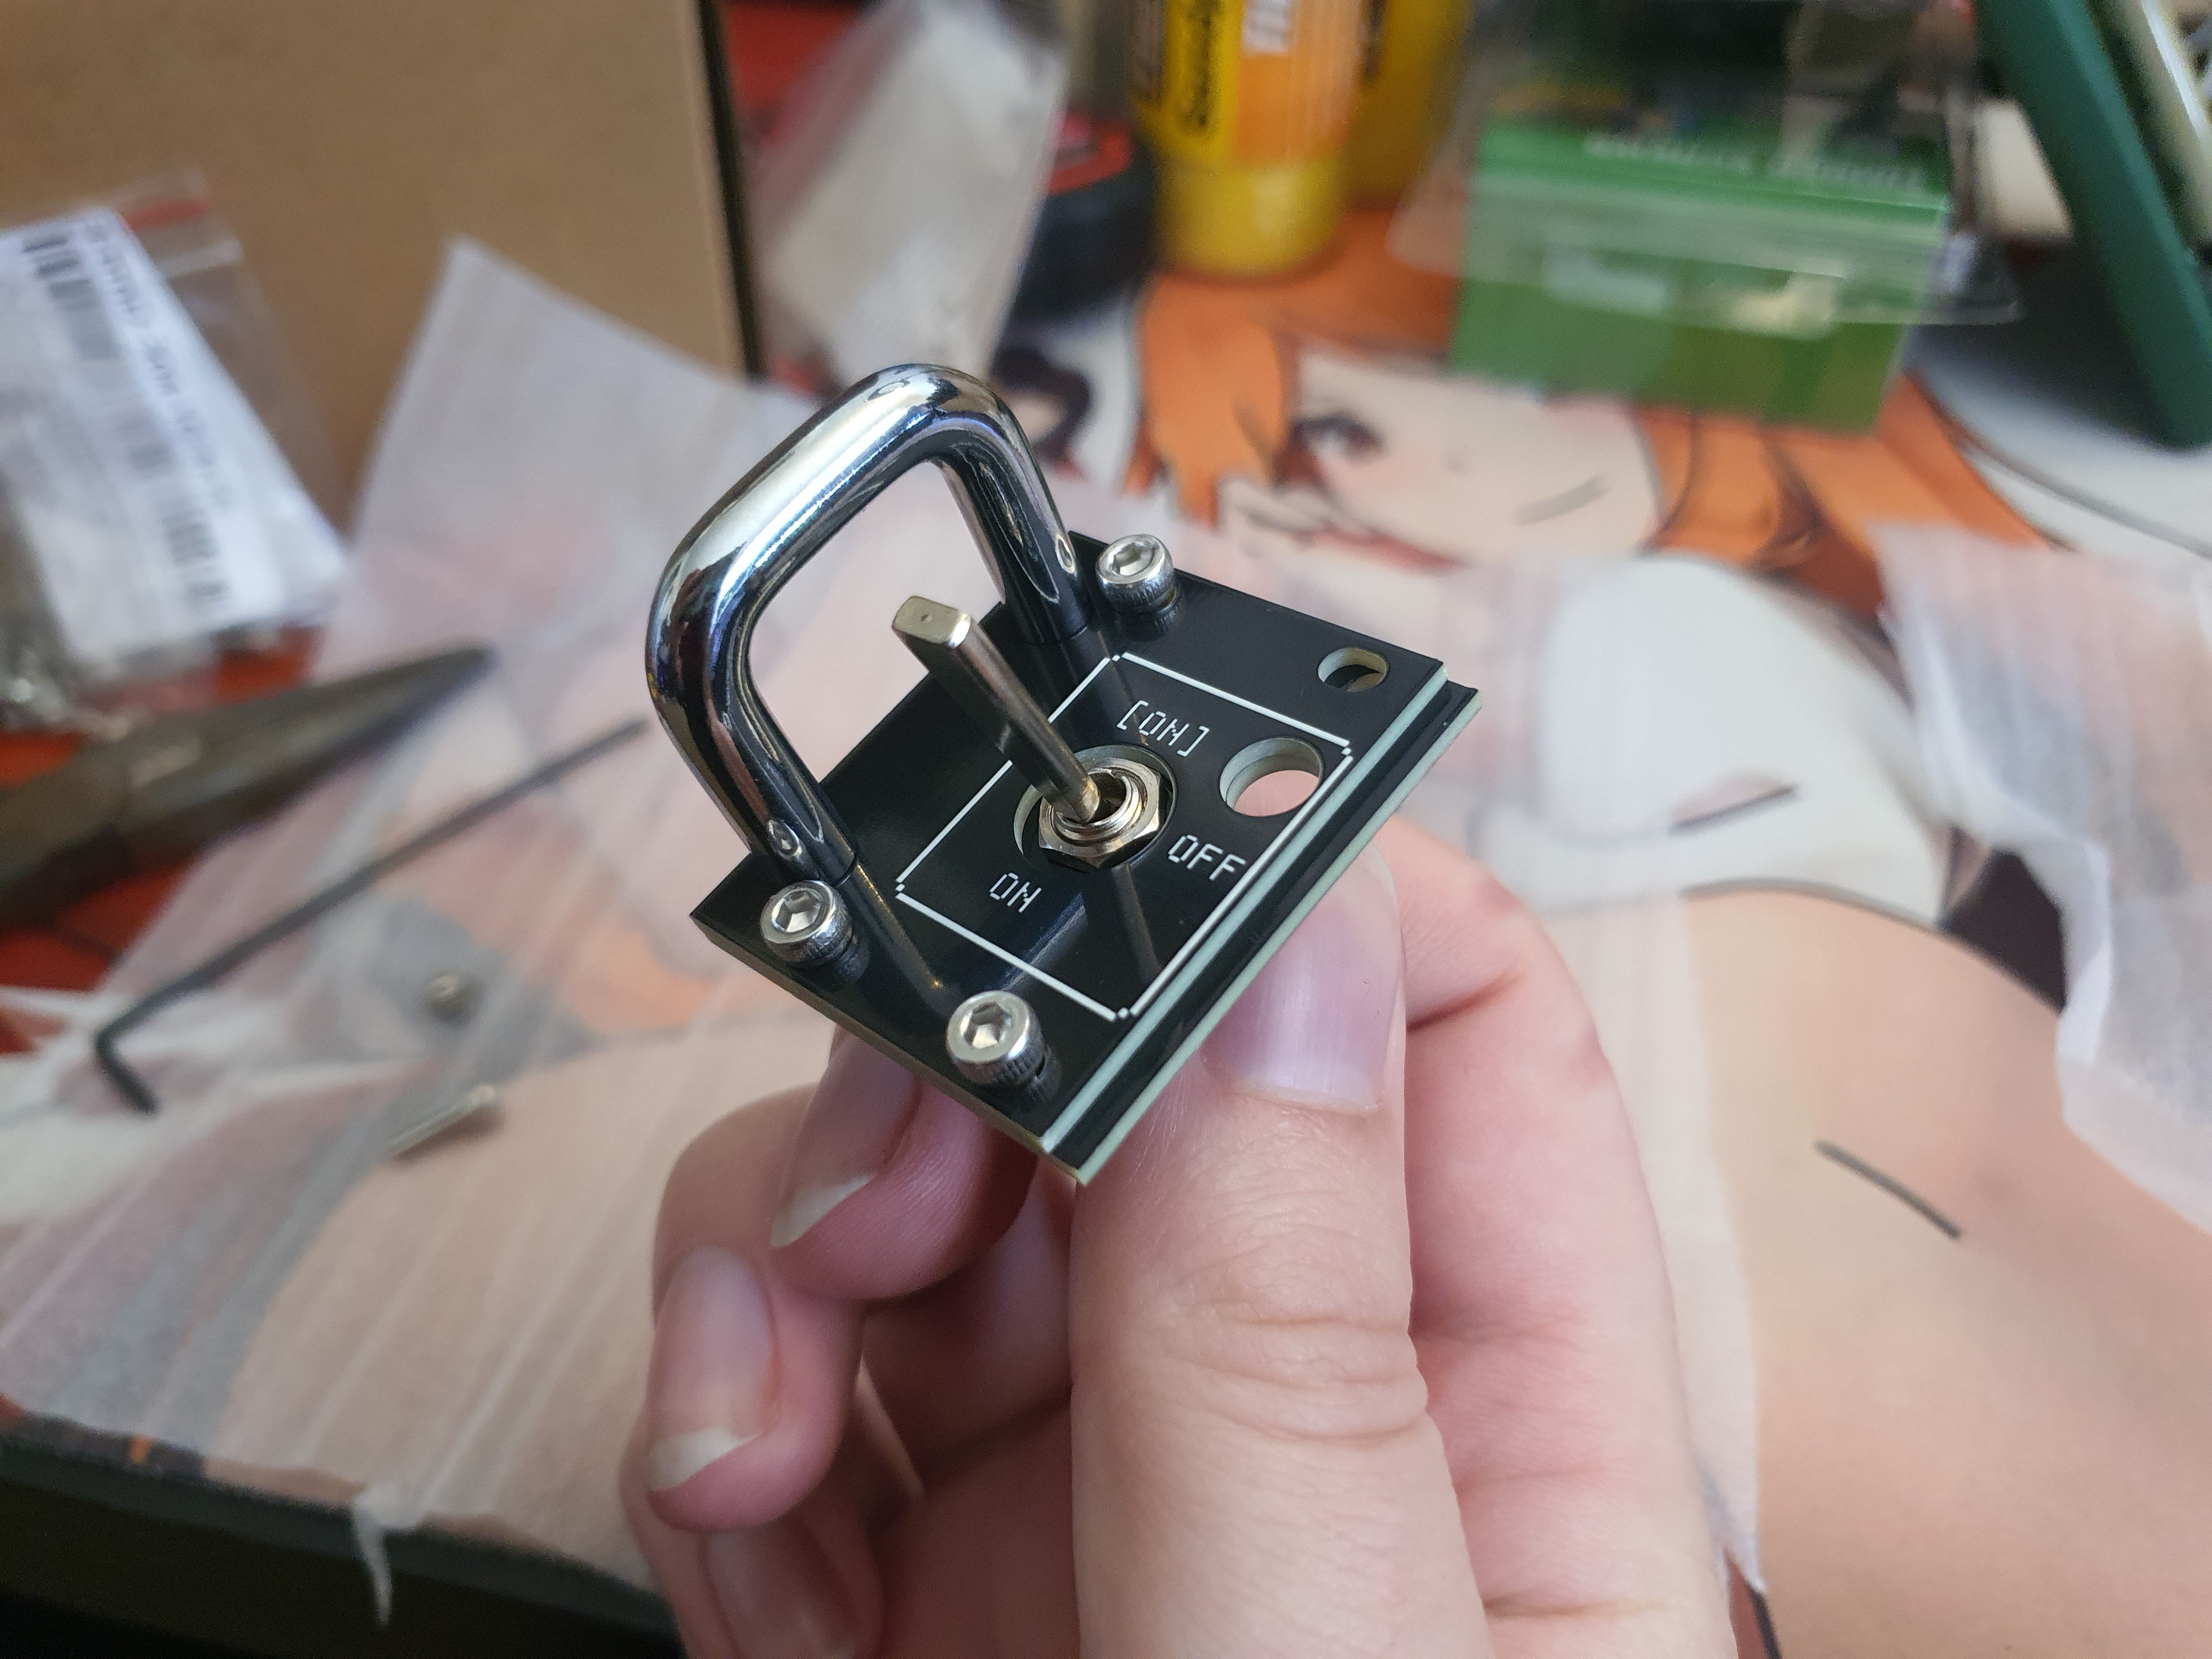
Attaching the handle was simple and just as effective as I thought it would be. Here is how it works:
And here are several of them lined up, looking all fancy and chunky and ooh don't you just want to flick them!
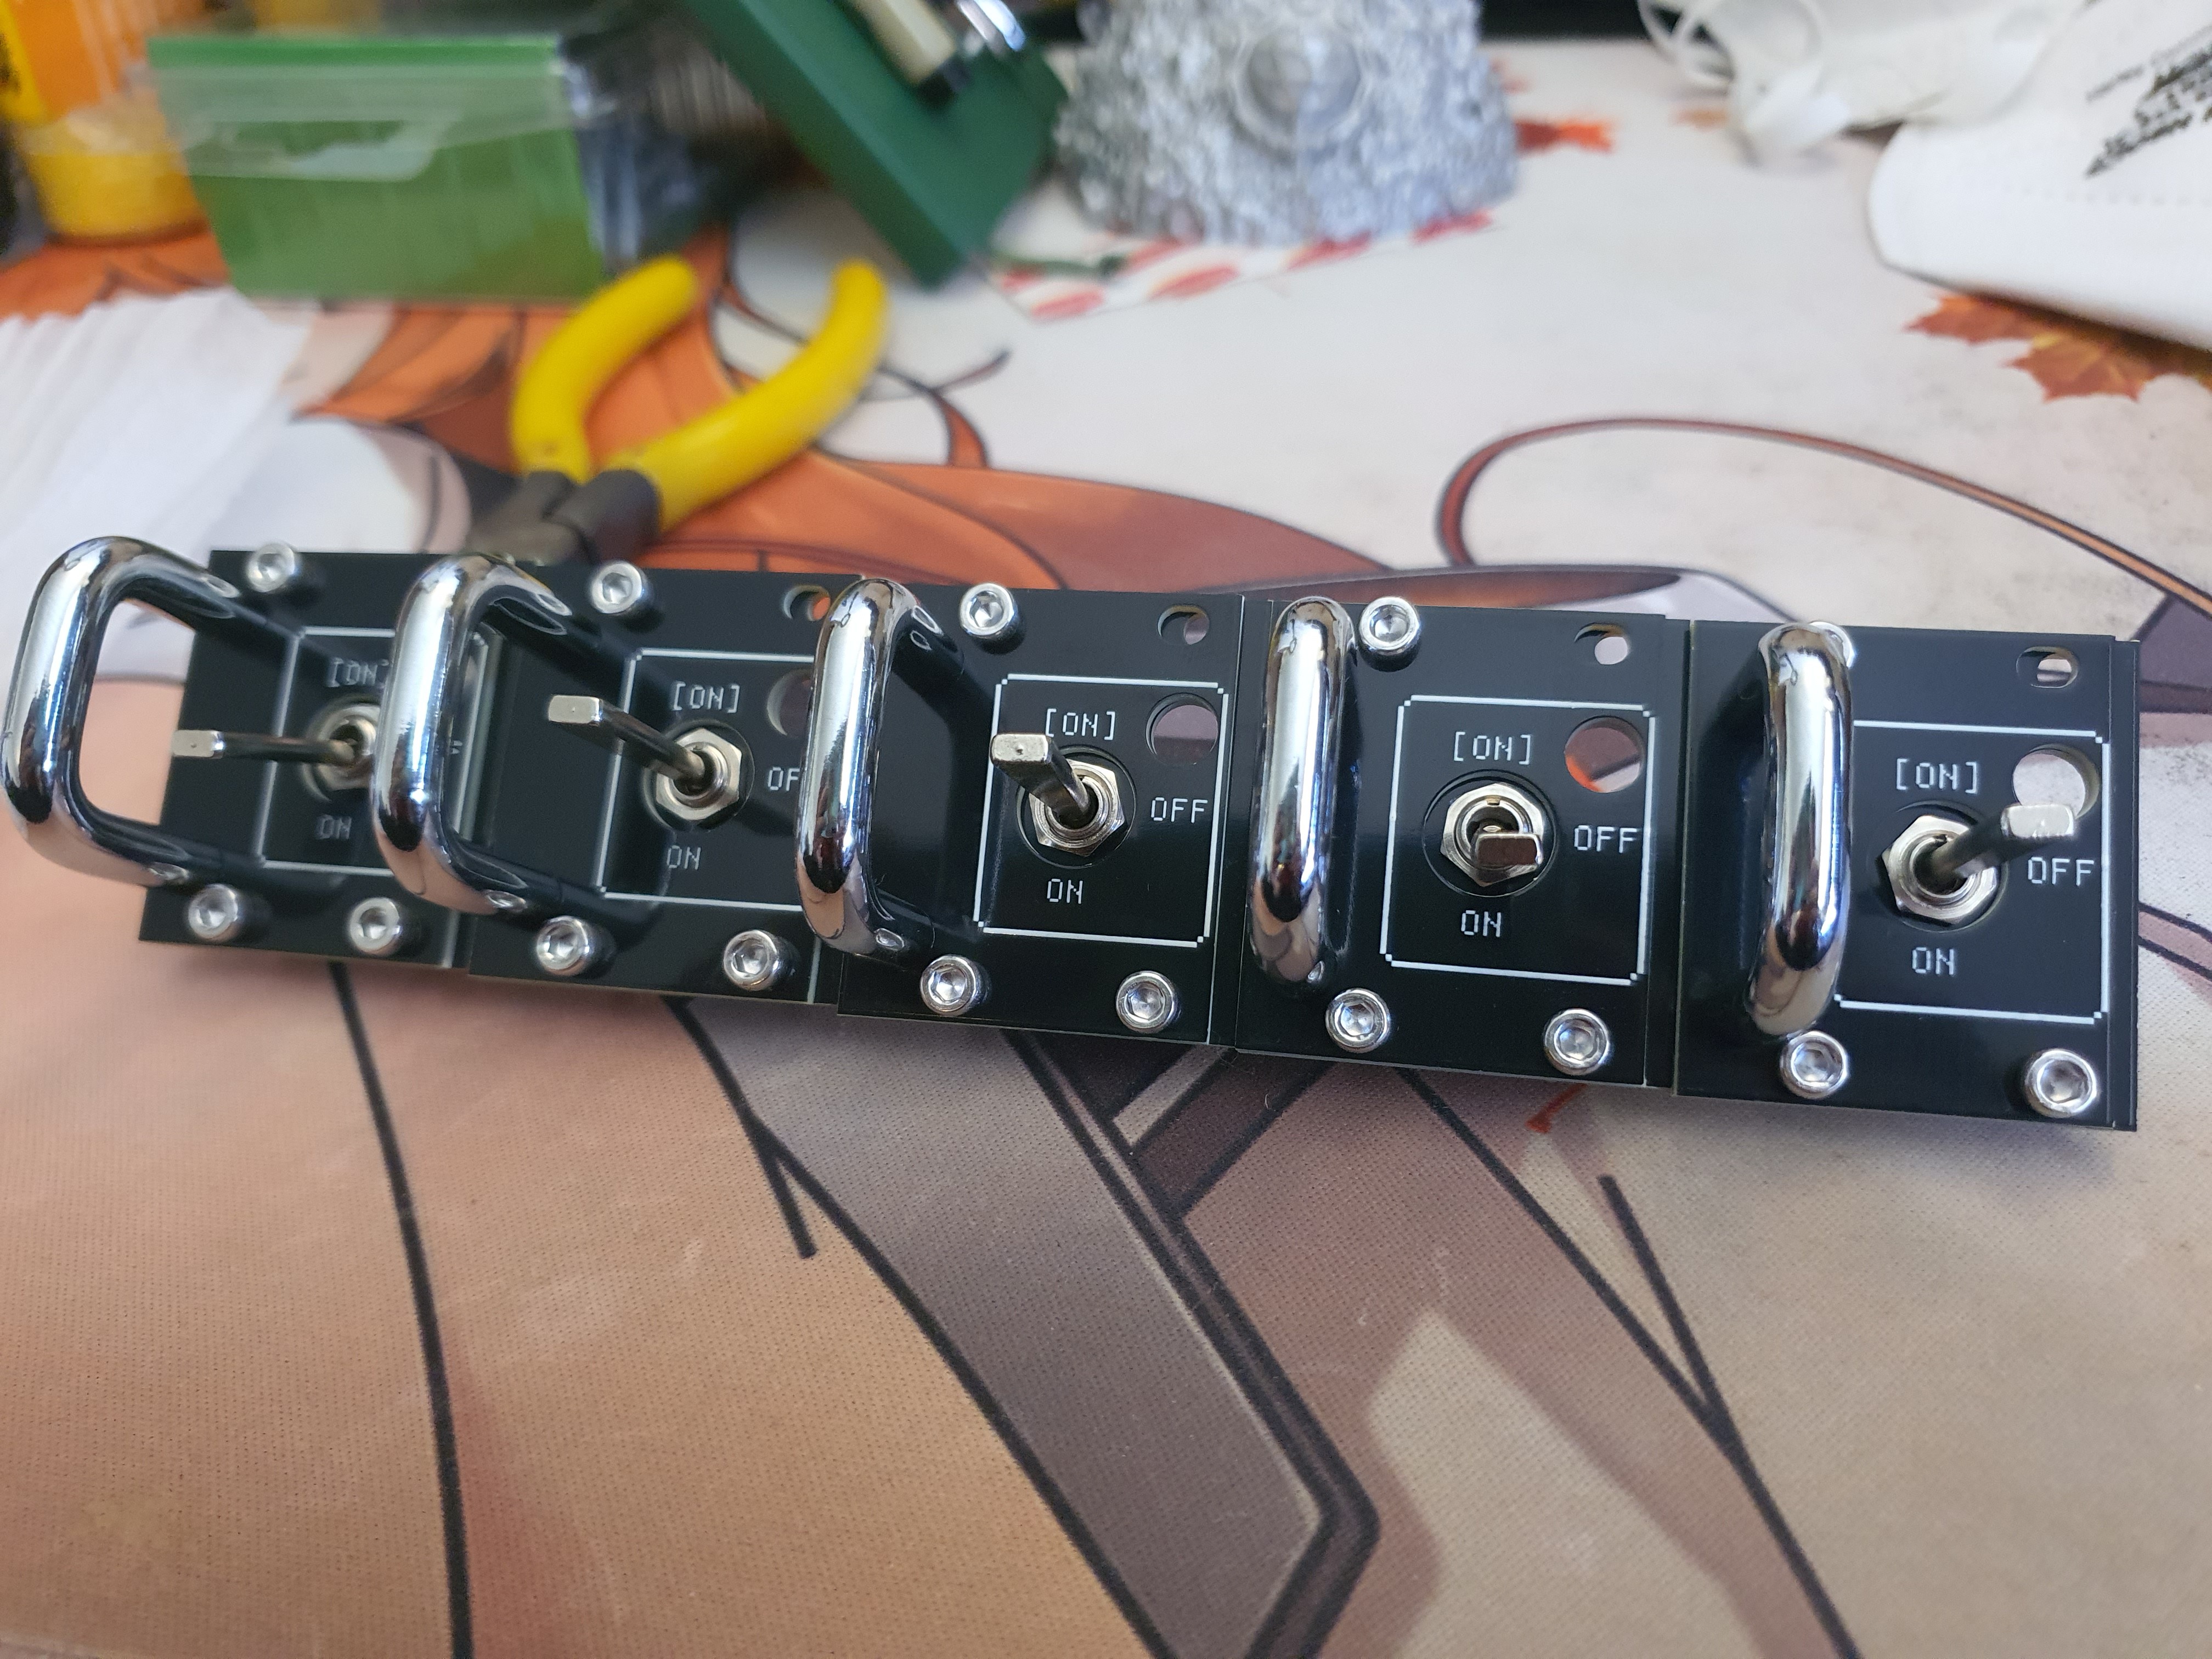
They feel very chunky, and surprisingly sturdy. Who would've thought two layers of fibreglass would be strong! (sarcasm)
One interesting thing to note here is the switches are all ever-so-slightly mis-aligned in their recesses, which I'm not quite sure where that comes from- it could be many things. The two PCBs could be slightly offset in their screws, the nut could be off-center, the shaft of the switch could be off-center, or heck even the holes in the PCBs could be slightly mis-aligned (though my vague understanding of the tolerances involved in PCB design has me thinking this is the least-likely.) At the end of the day, it isn't a problem, since I included some tolerance in the size of the hole in the upper PCB for just this purpose, so all's well that ends well :)
Lights, lights!
The keen reader may have noticed that along with the misaligned screw hole (I'll have to ask Liam kindly once again to get a replacement sent out after I fix the PCB files, and maybe I'll see if Aluminium PCBs look good!) for which I cannot attach a screw, there is another hole.
This hole is for panel-mounted LEDs to go in. It is a 6mm diameter hole, just like the panel-mounted switches, and I found several LEDs that fit this format on AliExpress (links in the Components section). I bought several of each, and here is what they look like:
I think I like the orange colour best (I am a certified Orange Enjoyer. It is second only to green, but green as a light can be too sharp), but I like the shape and size of the white LEDs' housing best. It's a pitty the seller I bought the white ones from don't sell that particular one in Orange, but I'm sure these LEDs can be replaced with similar-sized ones, if only I can find ones that are orange (or, gasp, even RGB!)
The holy grail of toggle switches
Before you get your hopes up, I have yet to find such a switch. But I have found the next-best-thing:
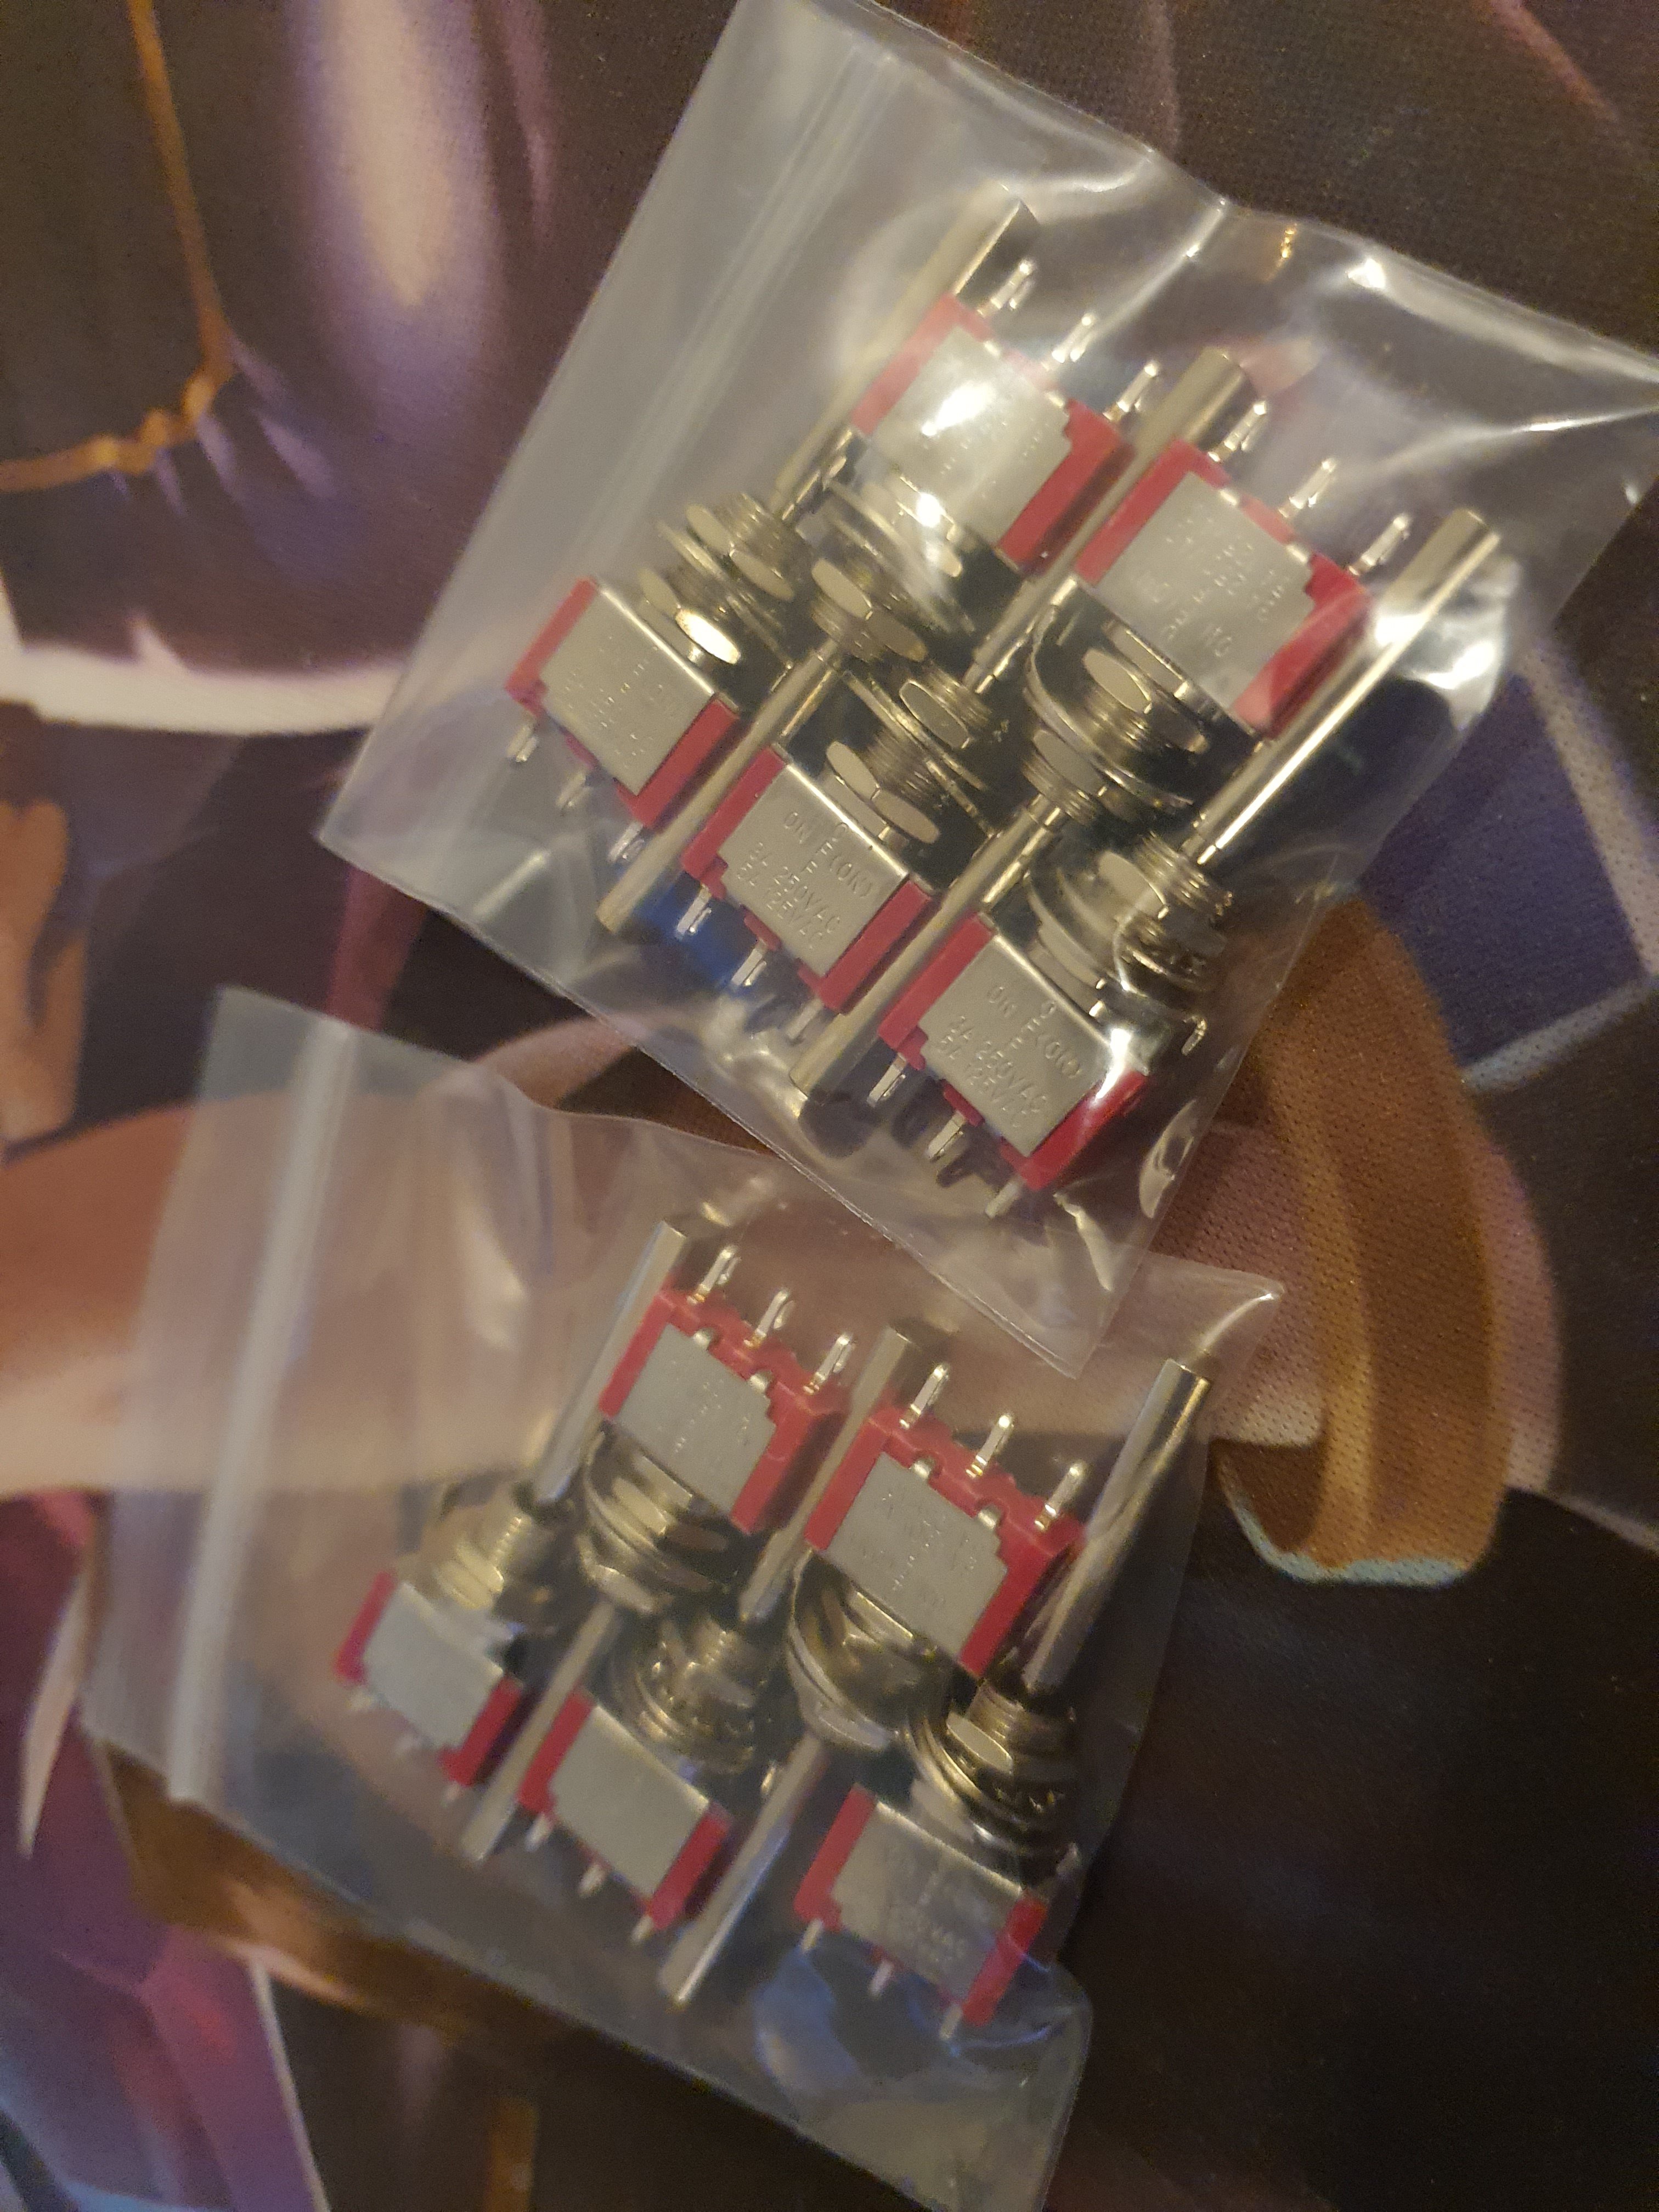
These are on-off-mom switches, or on-off-(on) switches, or switches that have three states: an 'on' state, an 'off' state, and an 'on' state that is momentary, ie: will return to the 'off' state when released. I have been searching for such a switch on AliExpress for quite some time, and finally found them. Unfortunately, they are slightly larger than 6mm! they are the infuriatingly-similar but not-exact 6.35mm switch. alas!
Oh well, I needed a new revision of this PCB anyway, so adding another change to them is no biggy :)
All in all, I call this a massive success! I am very excited for where this is going.
That will be all for now, I have a new tabletop to polish and a new PC to build, and then after that perhaps I will fix the problems with this PCB, adapt the hole for the larger toggle switch, and ask Liam very nicely again.
Discussions
Become a Hackaday.io Member
Create an account to leave a comment. Already have an account? Log In.