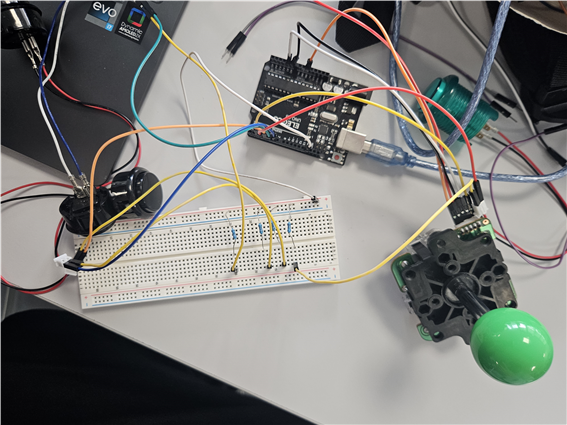
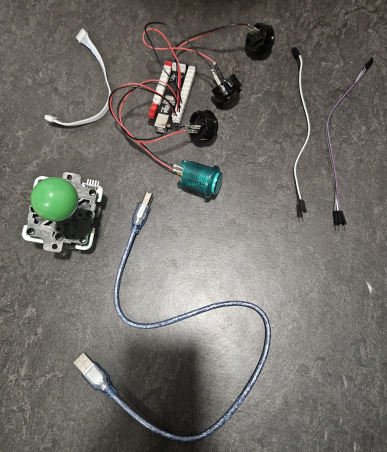
Close
0%
0%

AltCtl Project in 2024 with GW YJ

Alternative Controller Class in 2024 at ESME.
and projects by exchange students

Similar projects worth following
To revive the nostalgia of flash games and introduce Korean gaming culture, we created the Mini Crazy Arcade controller.

The controller consists of a joystick and buttons mounted on a 3D-printed base, enabling players to interact with the water-balloon battle game Crazy Arcade.
In the initial phase, the joystick and buttons were connected using a breadboard and Arduino board, but compatibility issues led us to switch to a direct connection using a joystick encoder.

Ultimately, players can move their character using the joystick, place water balloons, and activate items using the buttons. This project offers a simple and enjoyable gaming experience while showcasing one of Korea's iconic games to an international audience.


Materials Needed

Initial Build:

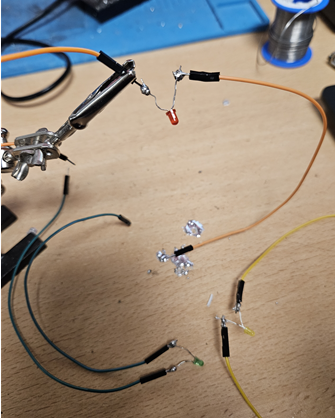
  • SN-05001N (Joystick module)
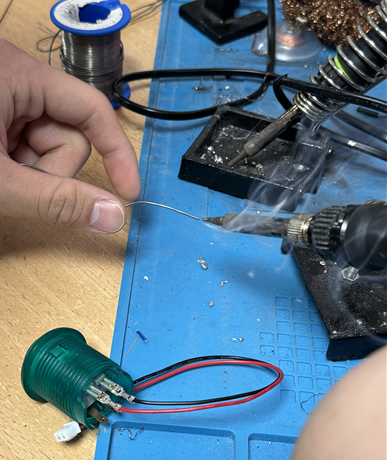
  • 4 Push Buttons
  • Joystick Encoder (direct connection to USB)
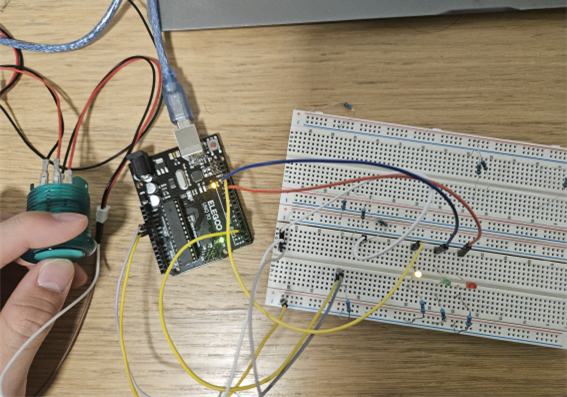
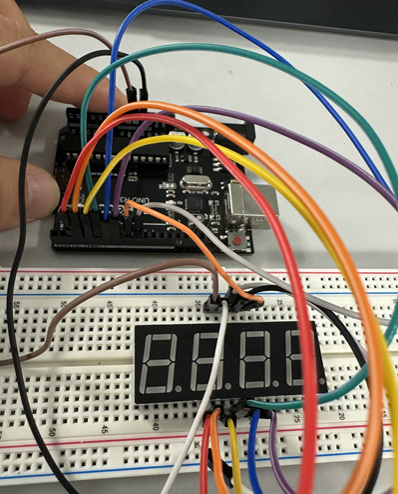
  • Breadboard (used during prototyping phase)
  • Resistors
  • Wiring (assorted lengths and colors)
  • Laptop for testing and playing the game
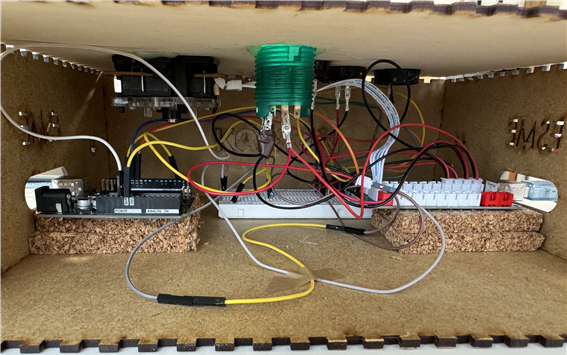
  • 3D-printed Controller Box (housing the joystick and buttons)
  • Joystick encode
  • 3 LEDs
  • wires

Version Progression

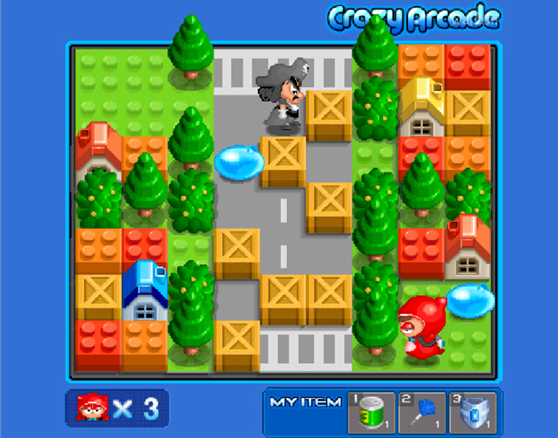
Mini Crazy Arcade V1

  • Core Features:
    • Joystick mapped to arrow keys (↑, ↓, ←, →).
    • One button assigned to balloon placement (SPACE), and the others mapped to in-game items.
    • Basic controller functionality to enable game play.

Mini Crazy Arcade V2

  • Design Enhancements:
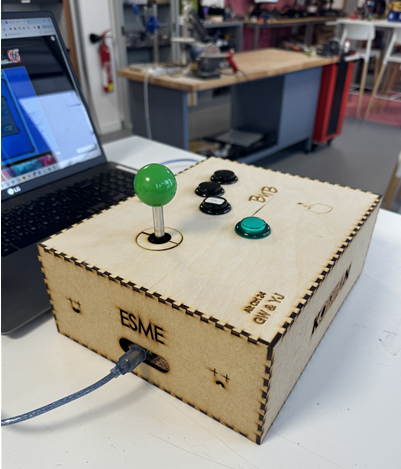
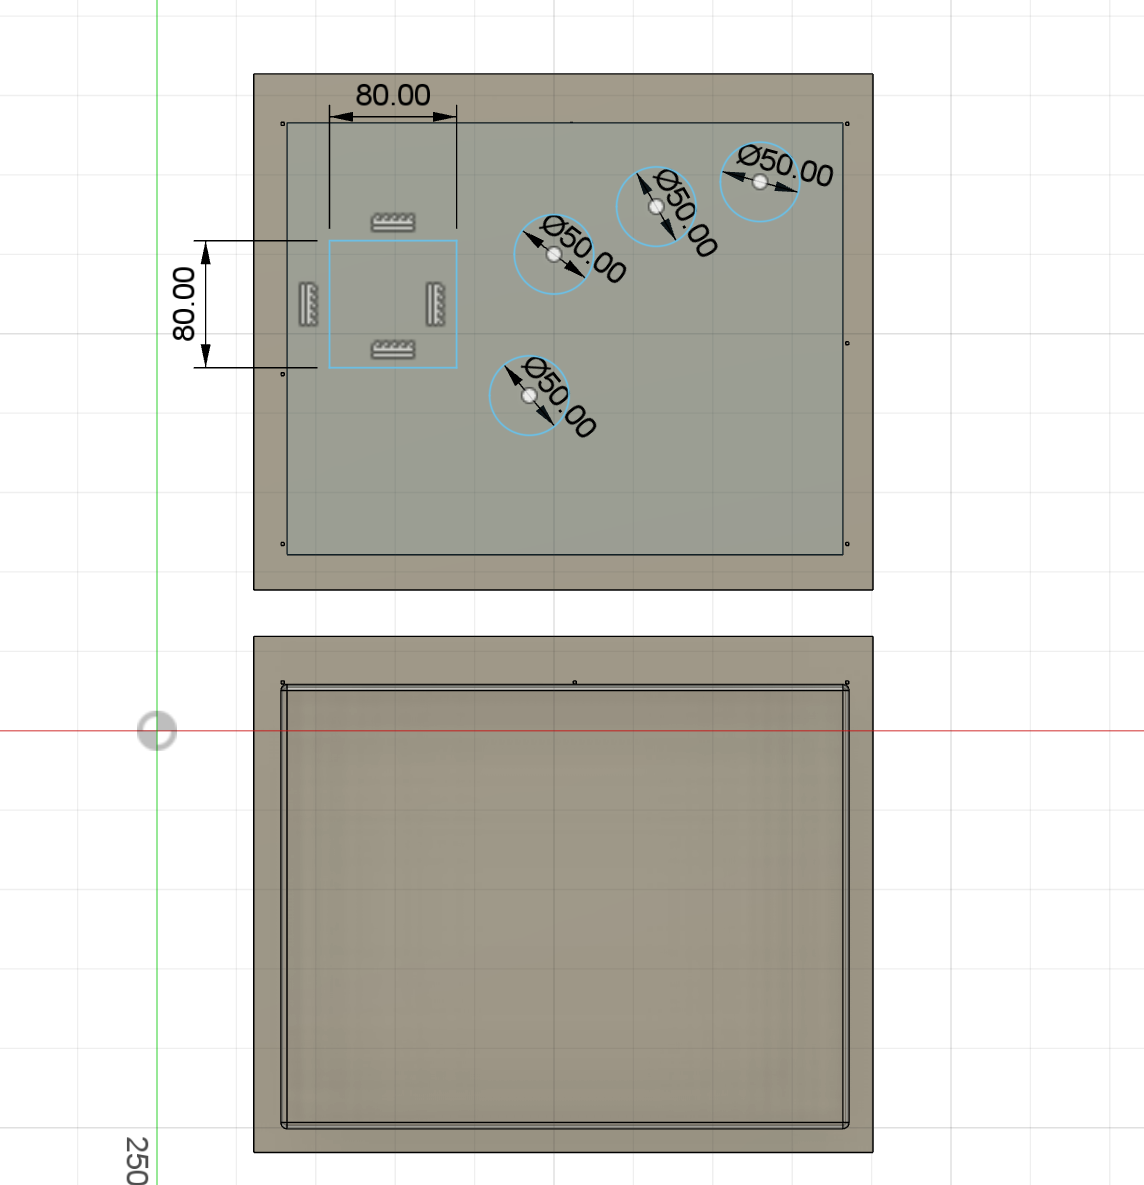
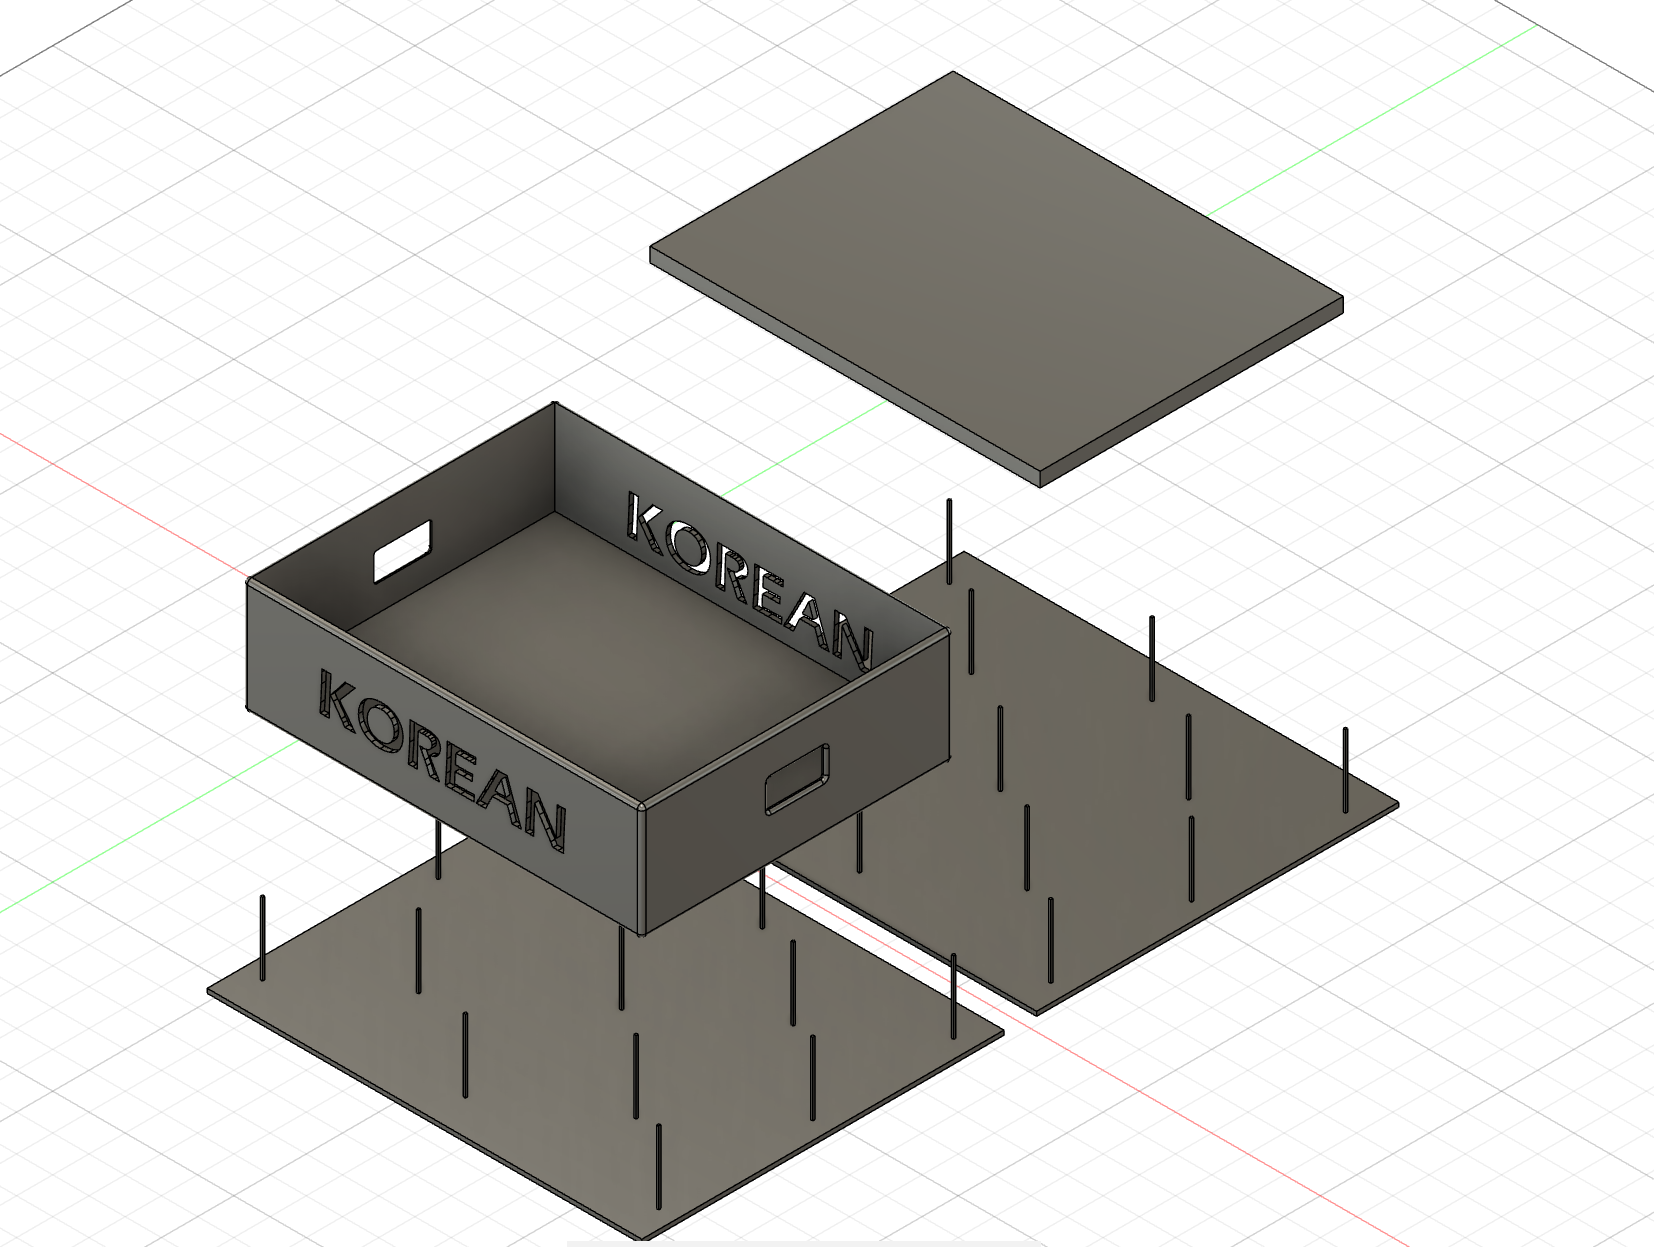
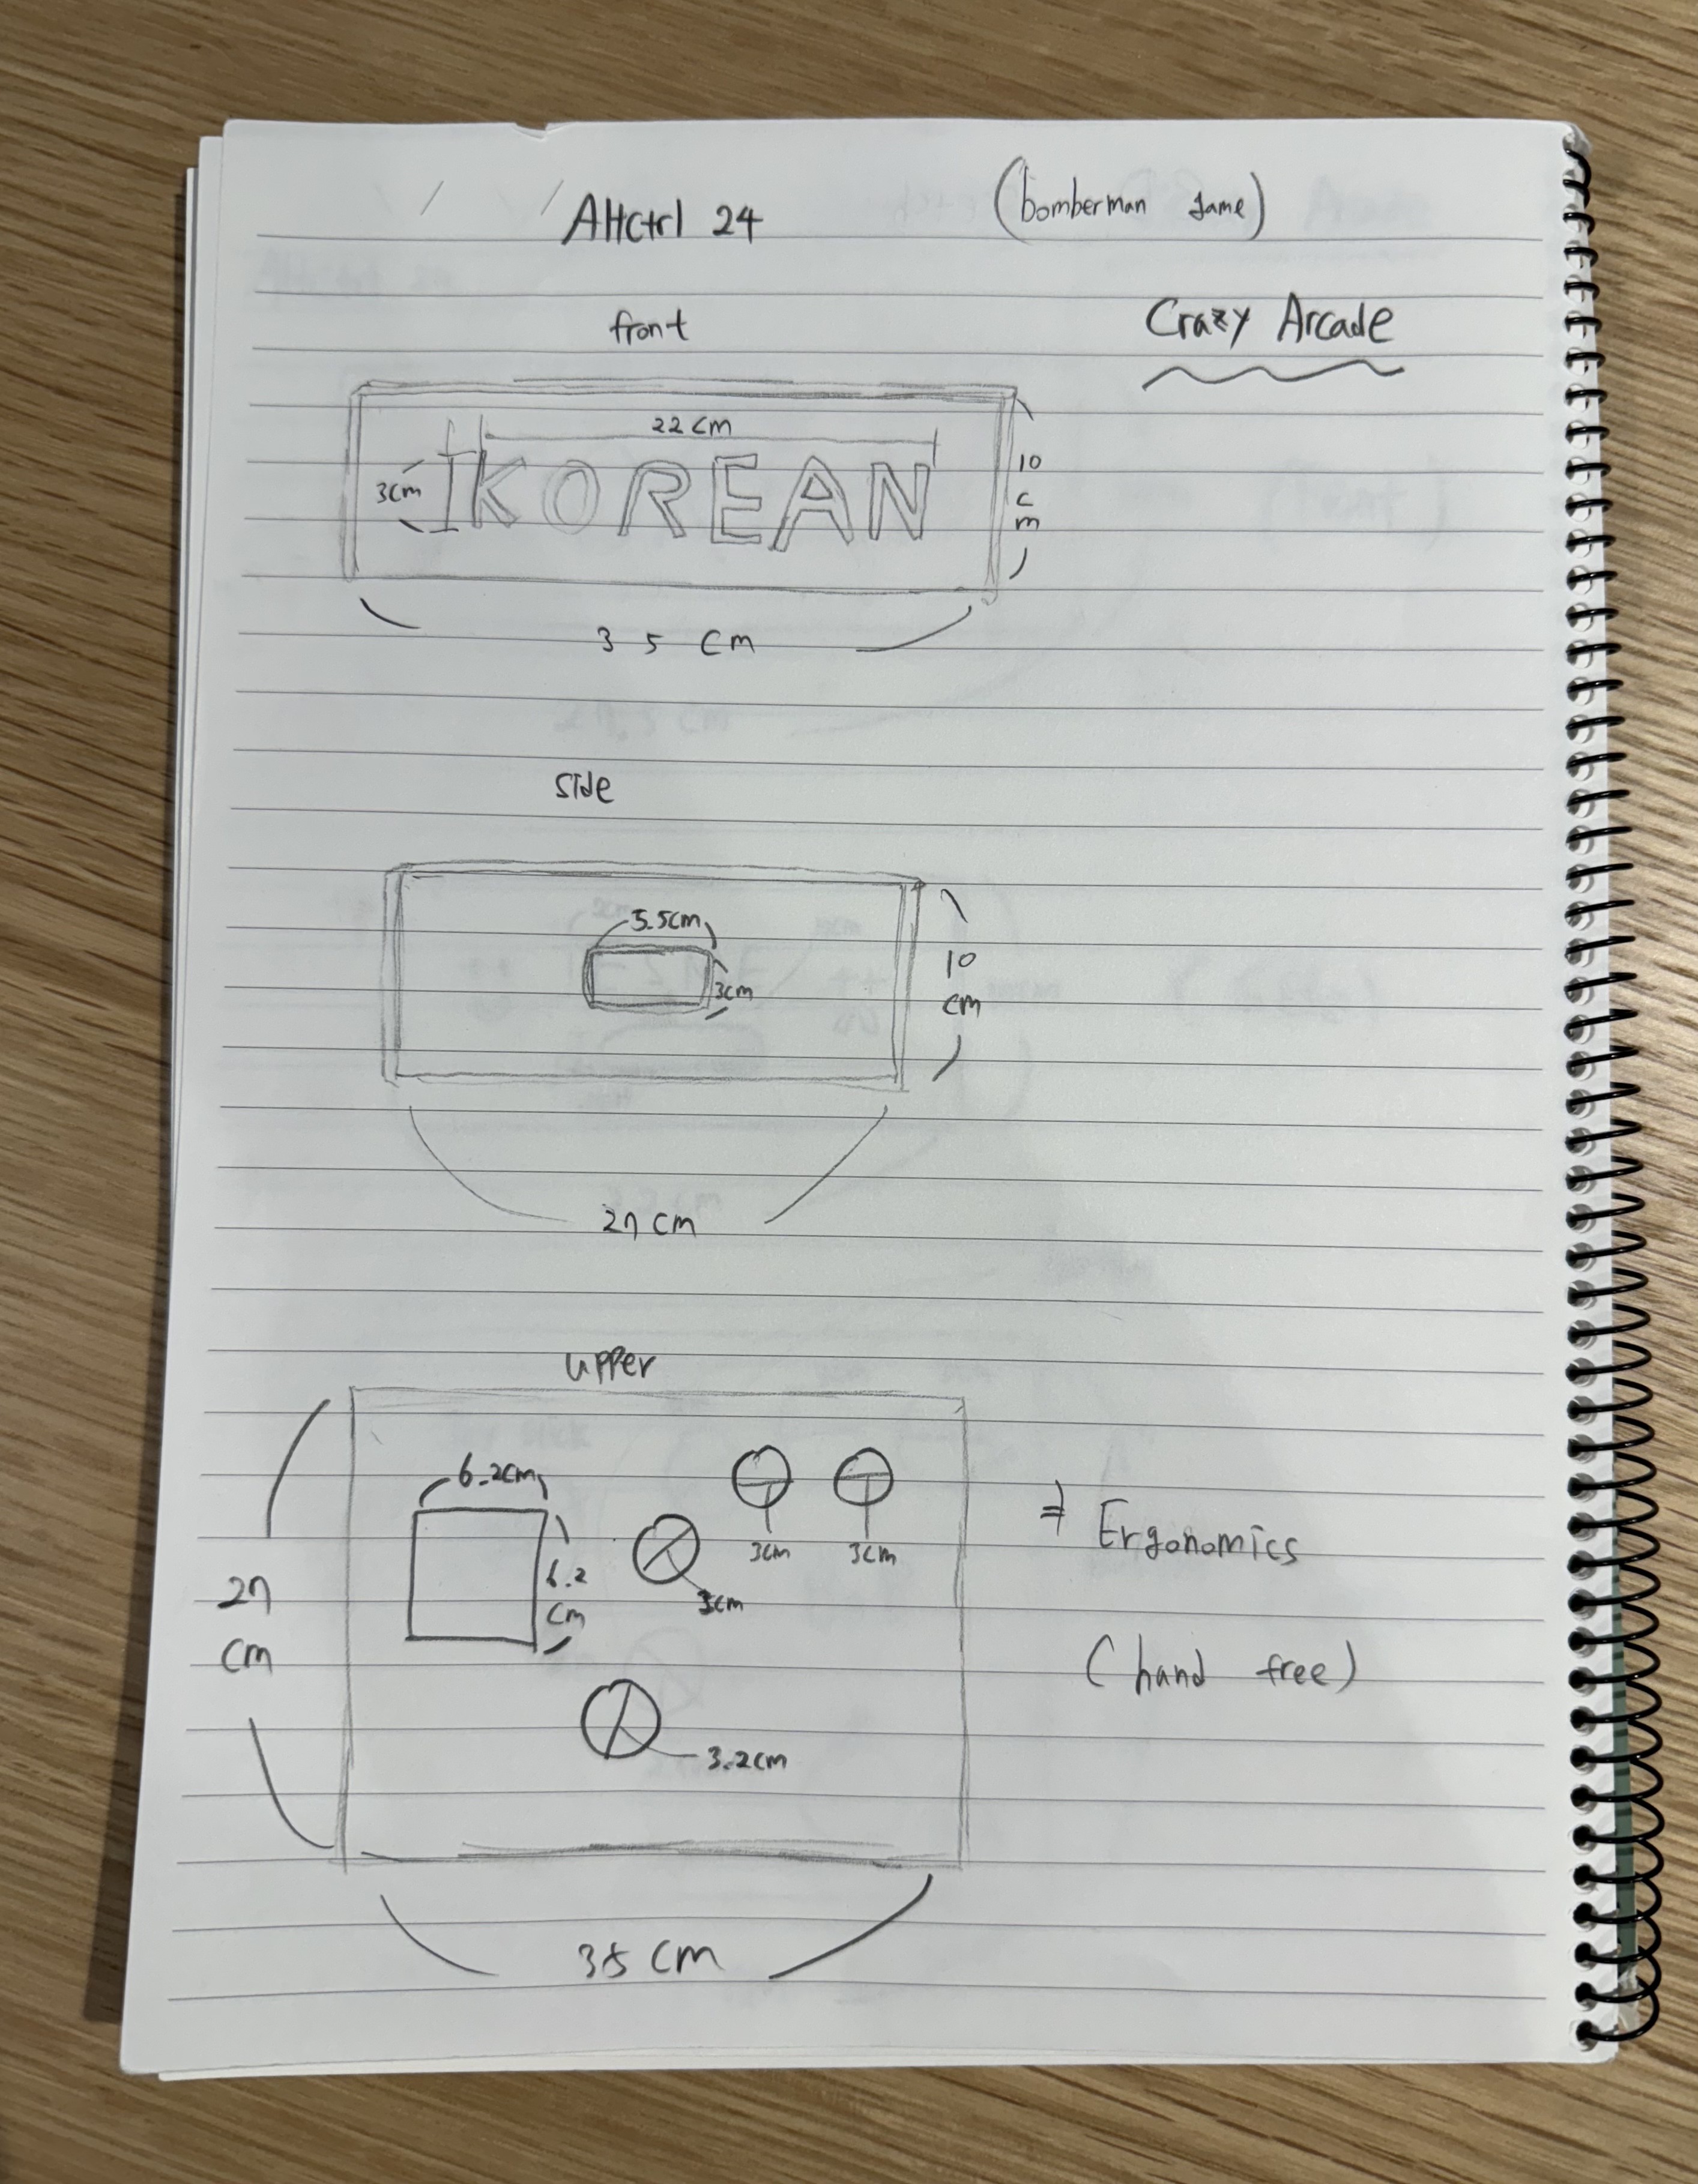
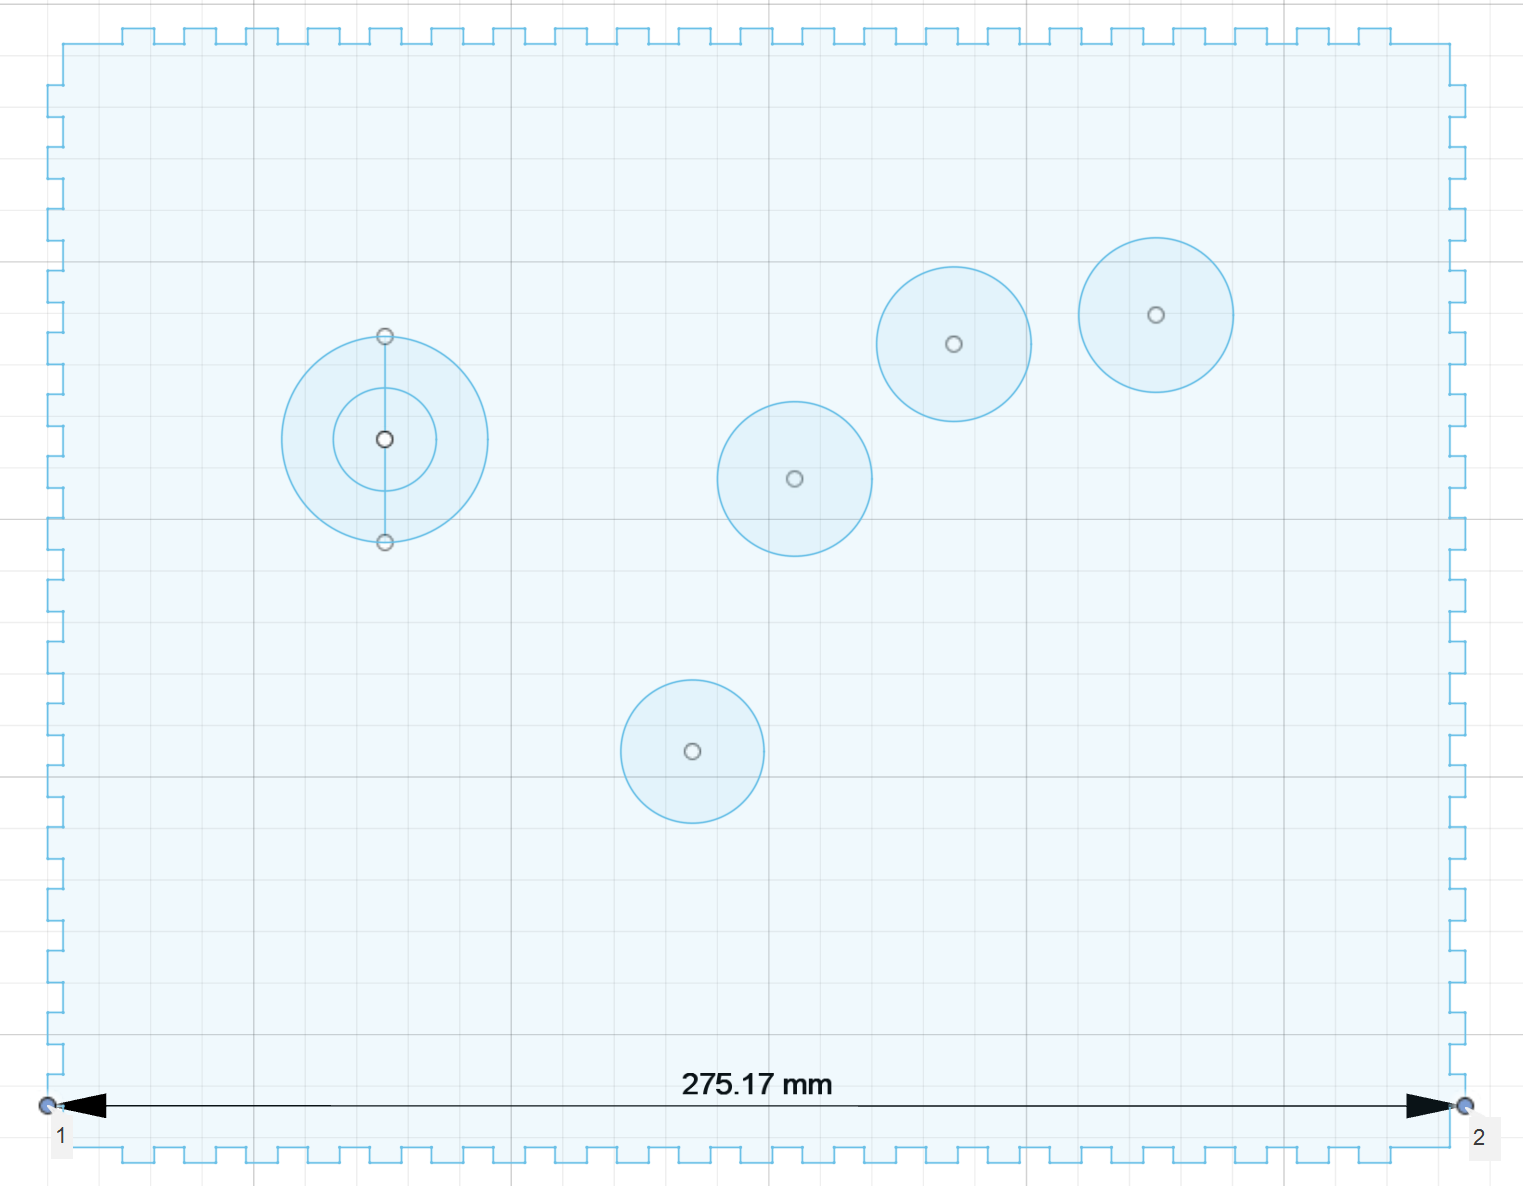
    • Adopted a 3D-printed controller box for a sturdier and more stable structure.
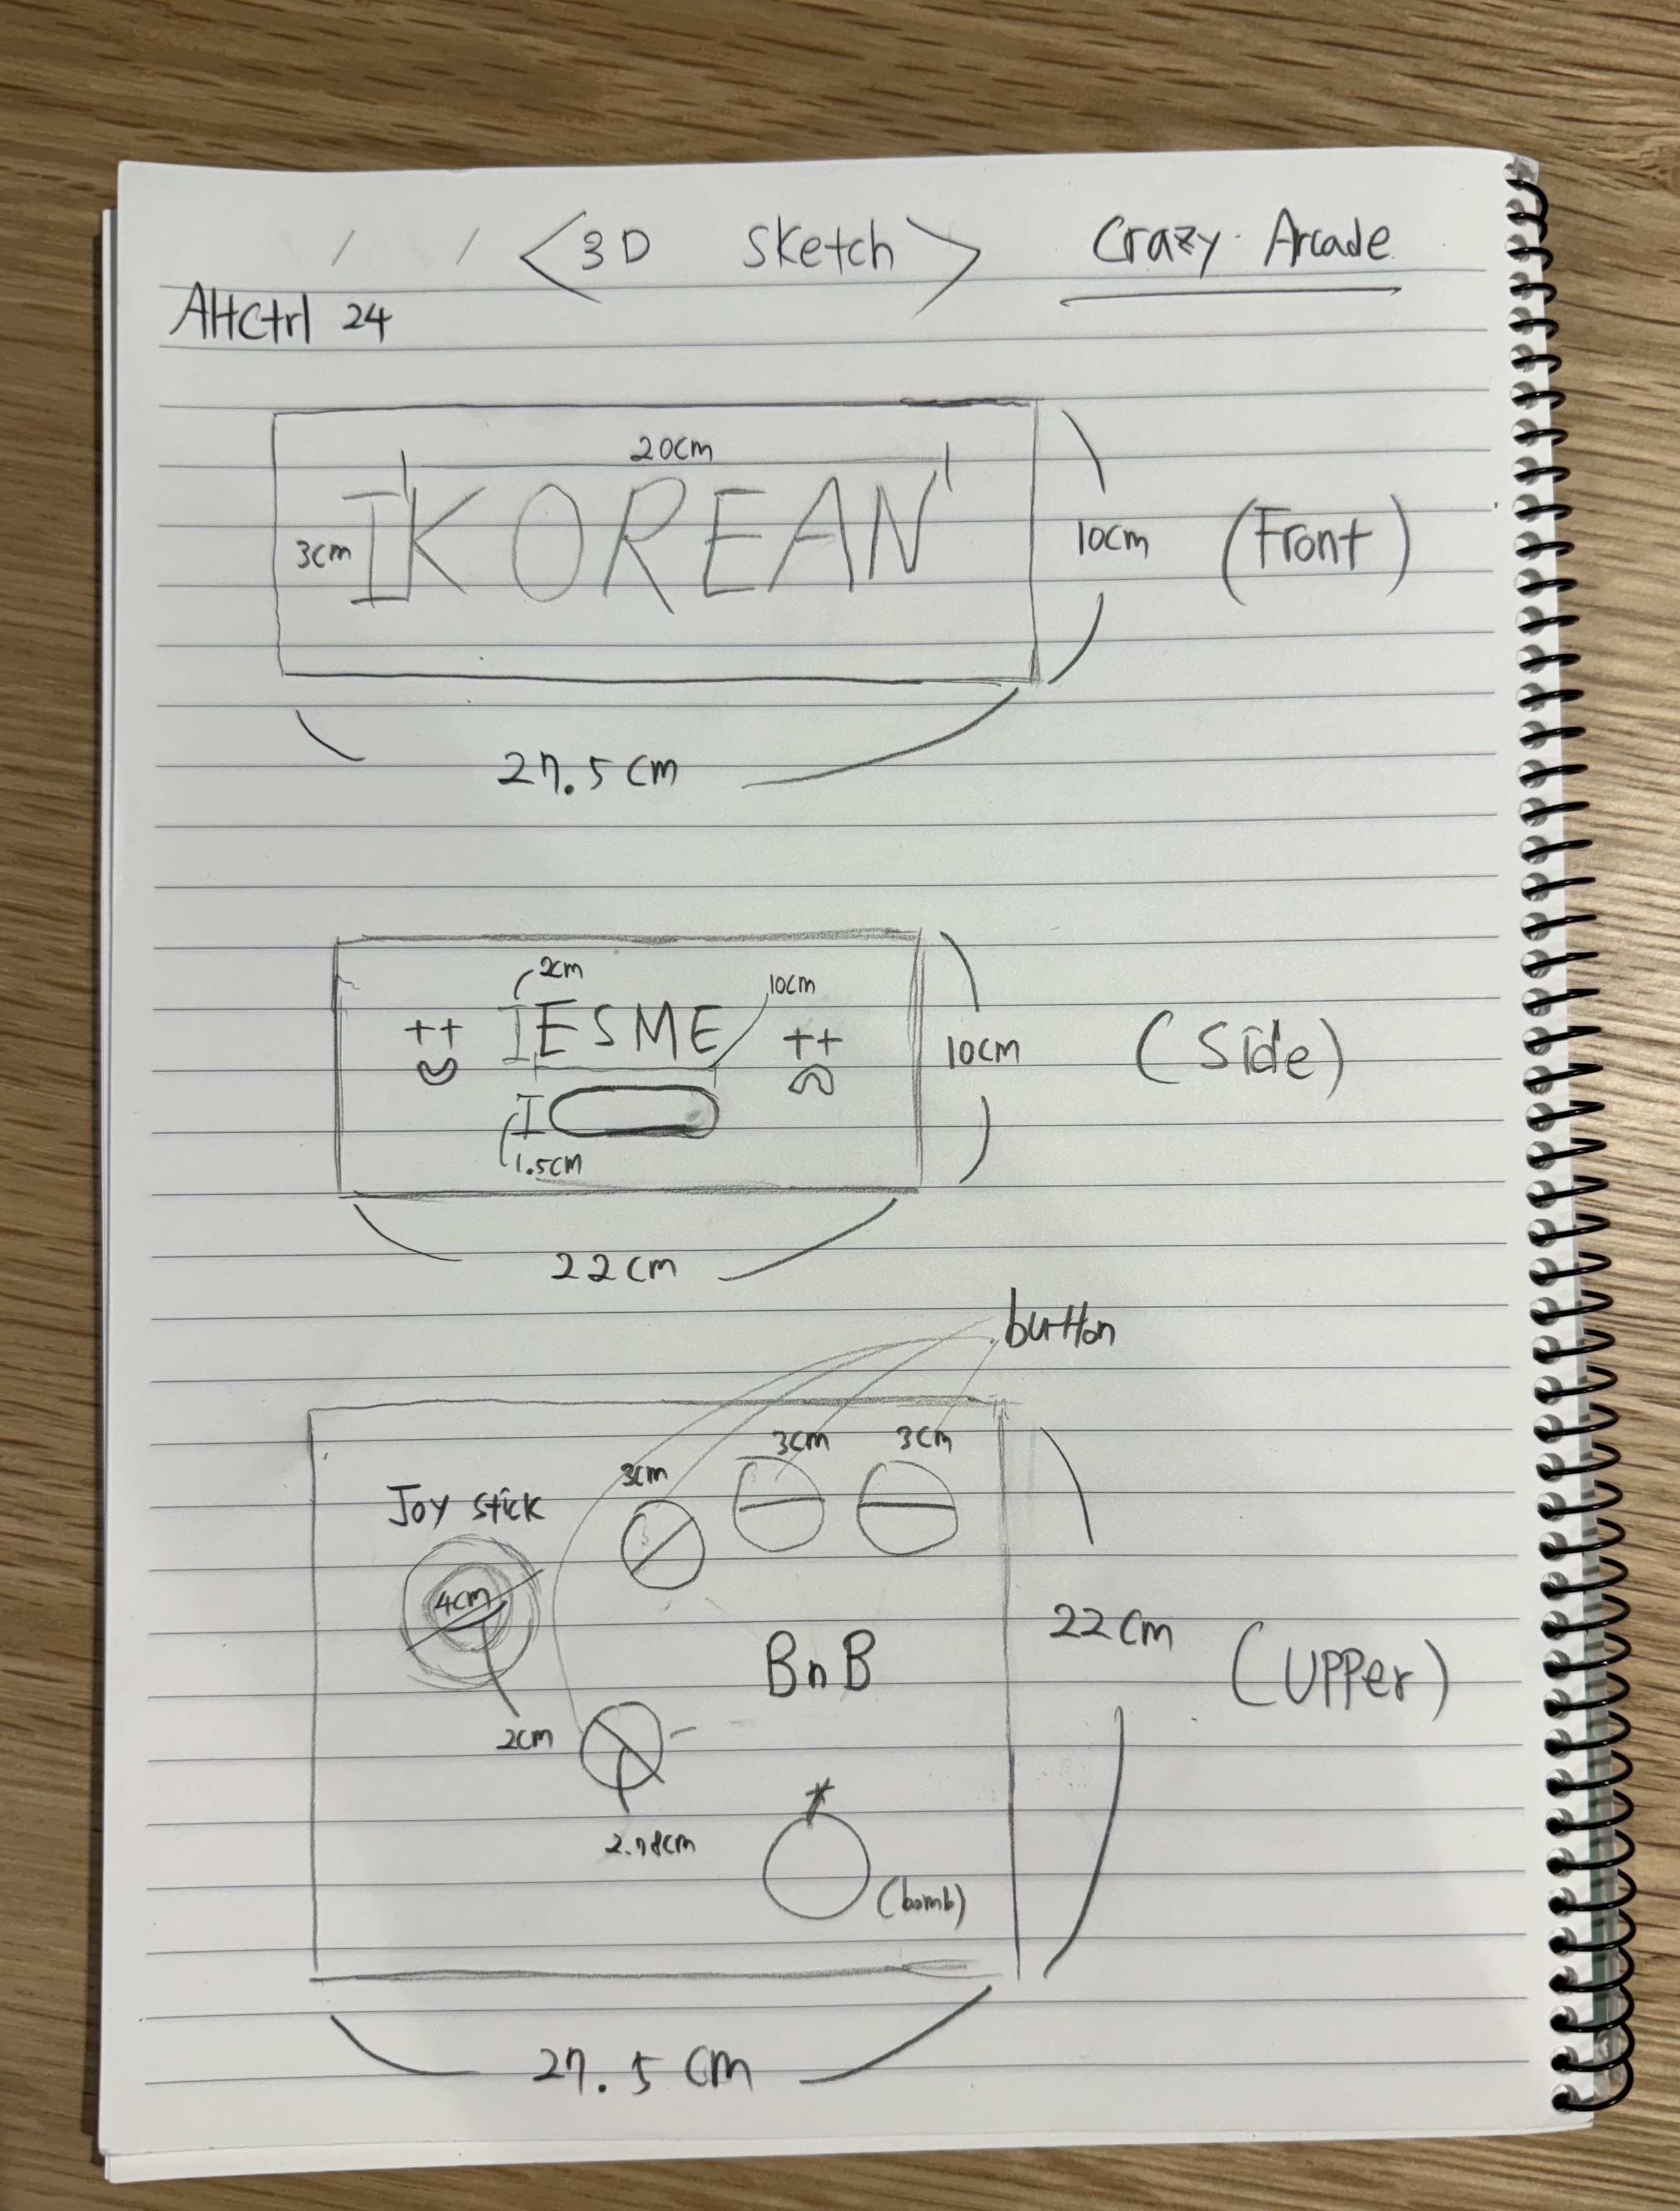
    • Applied an ergonomic design, repositioning the joystick and buttons to improve comfort and ease of use for fingers.
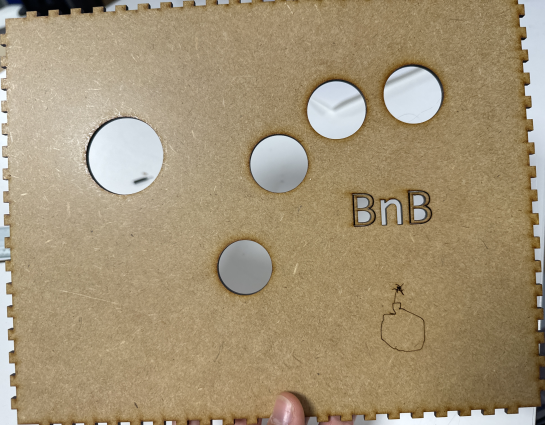
    • Engraved "KOREAN", "BnB", and other thematic text onto the controller box to represent Korean gaming culture.
    • Incorporated balloon-shaped engravings to highlight the game theme and enhance its visual appeal.

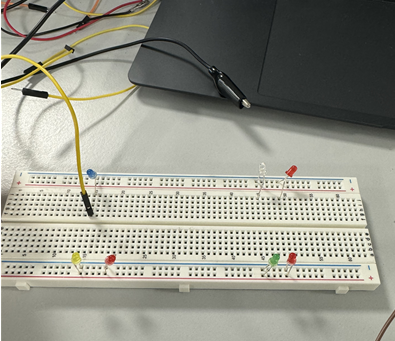
Mini Crazy Arcade V3

  • Game play Assistance Features:
    • Added 3 LEDs to visually display the balloon burst timer.
      • Example: When a balloon is placed, the LEDs light up sequentially, helping the player anticipate when it will burst.
    • This addition simplifies game play while adding a strategic element for players.


The Basic of the box.pdf

Adobe Portable Document Format - 26.17 kB - 12/16/2024 at 18:29

Preview

simulation2.mp4

final actual simulation2

MPEG-4 Video - 2.40 MB - 12/15/2024 at 16:12

Download

simulation1.mp4

final actual simulation1

MPEG-4 Video - 3.76 MB - 12/15/2024 at 16:12

Download

LED simulation.mp4

MPEG-4 Video - 2.20 MB - 12/16/2024 at 15:51

Download

crazyacade_final.ino

crazyacade LED arduino code

ino - 2.79 kB - 12/15/2024 at 16:12

Download

View all 11 files

  • 1 × SN-05001N Joystick module
  • 4 × Buttons
  • 1 × breadboard Electronic Components / Misc. Electronic Components
  • 1 × 10k ohm Resistor
  • 3 × 220 ohm Resistors

View all 12 components

  • Controller Completion

    Youngjun JEON12/15/2024 at 18:46 0 comments

    12/14 Controller Completion

    • We organized the internal wiring to improve stability.
    • To ensure the USB connectors of the Arduino board and joystick encoder fit properly through the box, we adjusted the internal height of the box.
    • Finally, we assembled all sides of the box, ran the simulation, and successfully confirmed that the game could be played as expected.

  • Timer Addition and Fixing

    Youngjun JEON12/15/2024 at 18:45 0 comments

    12/13 Timer Addition and Fixing

    We added three LEDs to visually display the timer for when the water balloon explodes. The LEDs light up sequentially, helping the player anticipate when the balloon will pop.

    And we fixed the LEDs and wires in place by soldering them and then securing the components with hot glue.

  • Design Enhancement

    Youngjun JEON12/15/2024 at 18:45 0 comments

    12/10 Design Enhancement
    We applied ergonomic design principles to adjust the placement of the joystick and buttons, improving both comfort and usability. We engraved the words "KOREAN" and "BnB" on the controller box to represent Korean gaming culture.


    Additionally, we engraved a water balloon shape to enhance the game theme.
    Before finalizing the box, we repeatedly tested the system to ensure its functionality. We confirmed that if any wiring was disconnected, the system would not function properly.

  • Controller Box Creation

    Youngjun JEON12/15/2024 at 18:44 0 comments

    12/9 Controller Box Creation

    • Initially, none of us were familiar with 3D printing, so we struggled to find materials for the controller box. We searched at stores but couldn’t find any suitable materials, so we decided to use 3D printing instead.
    • We designed a sturdy controller box using Fusion 360 and created it through 3D printing to ensure precise joystick and button input.

  • Controller Creation

    Youngjun JEON12/15/2024 at 18:44 0 comments

    12/3 Controller Creation
    We attempted to create the controller using Arduino alone, but the first model failed due to compatibility issues with JoyToKey. 

    After trying several alternatives, we found that using a joystick encoder provided an easy solution, since we could not find an upgraded Arduino version in the lab.

  • Decision to Choose Mini Crazy Arcade

    Youngjun JEON12/15/2024 at 18:43 0 comments

    11/26 Decision to Choose Mini Crazy Arcade 

    Next, we considered some popular flash games from Korea, such as ‘Dad and Me’, ‘Aggressive Racing’, and ‘Pikachu Volleyball’

    However, we found:

    1. The key inputs were too simple, which made the creation of a custom controller unnecessary.
    2. The feeling of the games was quite different from the experience we had 15 years ago.

    So, we decided to look for a new game.

    Ultimately, we chose ‘Crazy Arcade’, developed by NEXON, a leading Korean game company.

    • Reasons:
      • Simple controls with a variety of key inputs.
      • Non-violent and suitable for all ages.
      • Promotes Korean culture by introducing a popular Korean game.

    reference:

    https://en.wikipedia.org/wiki/Crazy_Arcade

  • Project Change

    Youngjun JEON12/15/2024 at 18:43 0 comments

    11/19 Project Change 

    We concluded that creating the ‘Cheonggi Baekgi’ game was not in line with the objectives of the course. Furthermore, due to the complexity of the game and the likelihood of frequent errors, we realized that making our own game would be too challenging.

    • Solution: Instead of creating a game from scratch, we decided to shift our focus to building a controller to operate an existing game.

    for example,

  • Cheonggi Baekgi Game Development

    Youngjun JEON12/15/2024 at 18:42 0 comments

    11/5 Cheonggi Baekgi Game Development
    We created the 7-segment display, LED lights, and circuit to be used in the ‘Cheonggi Baekgi’ game. We also wrote the necessary Arduino code for the game.

  • Project Concept

    Youngjun JEON12/15/2024 at 18:42 0 comments

    10/22 Project Concept 

    The project began with the goal of introducing a popular flash game from Korea to my French friends for a unique experience. Initially, we planned to select a representative Korean game or activity and create something new based on it.

    At first, we tried creating a reaction game inspired by *Cheonggi Baekgi (Blue Flag White Flag) Game by coding it ourselves. We adjusted the rules to match the original game and designed it with LEDs and buttons to make it more user-friendly.

    청기백기 - 나무위키

    *Cheonggi Baekgi (Blue Flag White Flag) Game is a traditional Korean game that tests quick thinking and concentration. A leader gives commands like “Raise the blue flag” or “Lower the white flag,” and players must follow the instructions by raising or lowering their blue and white flags accordingly.

    If a player makes a mistake or responds too slowly, they are either out of the game or face a penalty. Despite its simple rules, the game is exciting and engaging, making it popular in group settings or as a fun activity for children.

    This game is a great way to experience a piece of Korean culture while having fun and sharpening your reflexes!

View all 9 project logs

  • 1
    Wood Laser Cutting Machine

    Using a laser cutting machine, we created a wooden puzzle box that would hold and secure our controller. We designed each of the six sides of the box with the required schematics, and added the required designs to each side except the bottom. ex) Korean lettering, wire connection holes, etc.. 

  • 2
    First Box dimension

    We started with a pencil design, which we then used to design using the Fusion 360 program.

    We initially set the dimensions at 35X27X10.

    Because we felt that, from an ergonomic standpoint, something relatively large would allow us to comfortably position our hands on a stationary object.

    And we measured the diameter of the buttons directly on the floor plan and found that they were 3cm and 3.2cm in diameter, and the joystick would require a 6.2cm square hole.

  • 3
    Final Box dimension

    We tried to proceed with the previous schematic, but the maximum range of the laser cutting machine was 30 cm, so we scaled it down a bit. 

    The dimensions of the box are as follows 27.5X22X10. (Allowing for a small error due to laser cutting)

    We put a lot of effort into the top view. The buttons were shortened to 2.78 cm when we decided to use different buttons, and the distance between the buttons, the position of the hands, etc. were modified several times after cutting to make the controller ergonomically comfortable. (We found that a spacing of about 1 cm between buttons felt comfortable)

View all 5 instructions

Enjoy this project?

Share

Discussions

Similar Projects

Does this project spark your interest?

Become a member to follow this project and never miss any updates