Close
0%
0%

FluidNC 4 axis foam cutter controller

A very cheap foam cutter controller, driven by an ESP32 and 4 Polulu DRV8825. Compatible with Gcode foam cutter softwares

Similar projects worth following

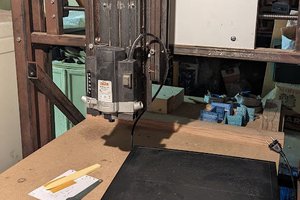
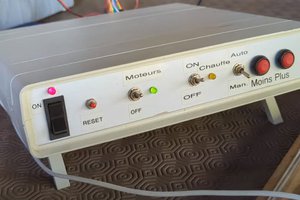
A few months ago I retrofitted an old foam cutter based on a MM2001 hardware.
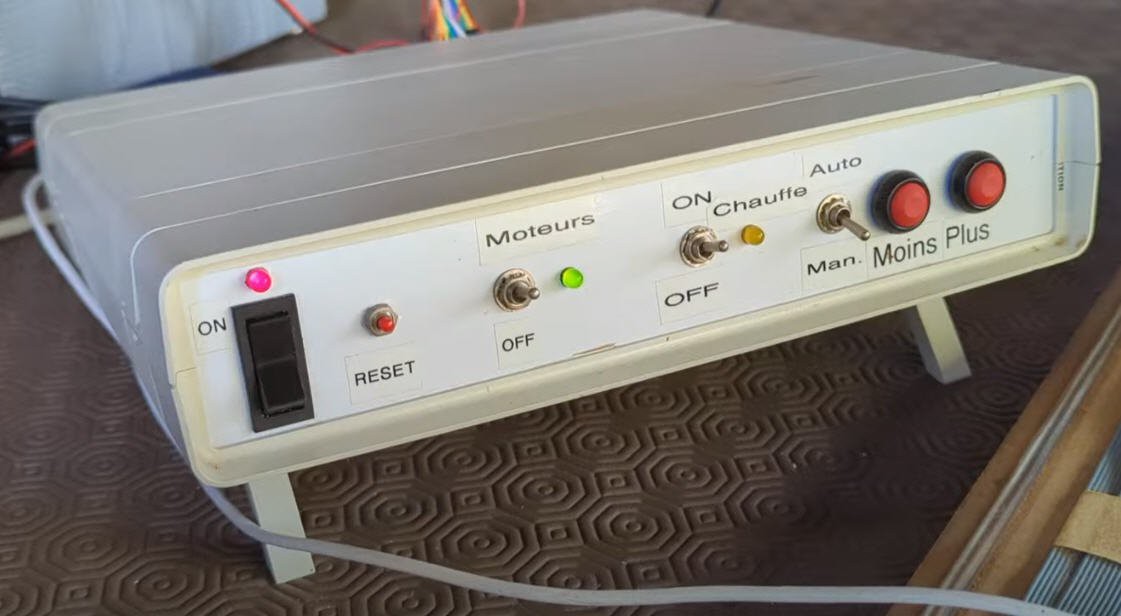
This system works quite well, but the unipolar stepper motors are very weak and prevent any fast motion... which is "annoying" when the hot wire is at one end of the machine and you want to go to the opposite side...
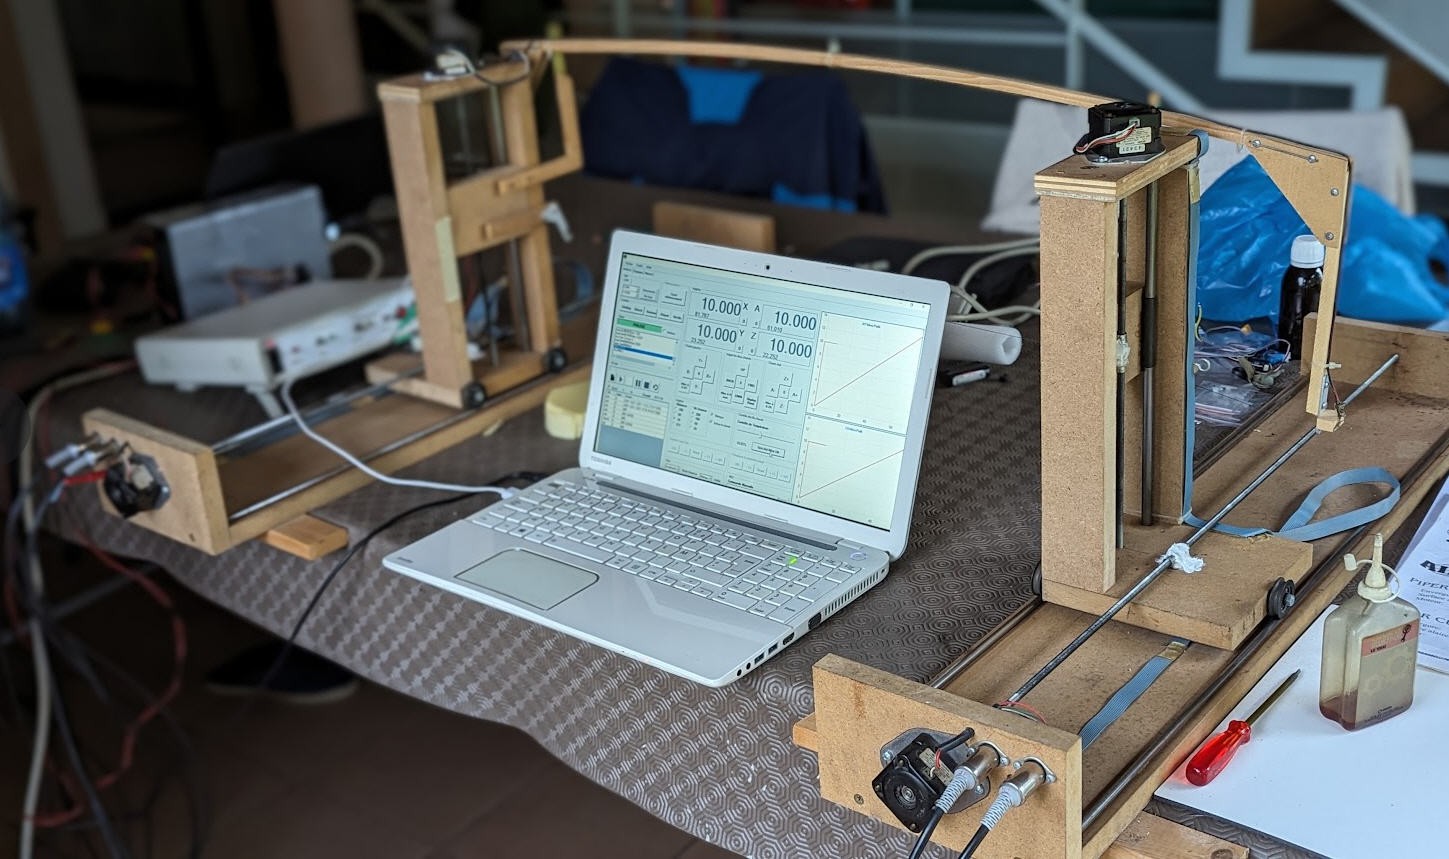
So why not building a brand new controller with the following requirements :

  • able to drive a hot wire
  • equiped with 4 bipolar steppers
  • driven by standard polulu shields
  • and with an ESP32 MCU
  • FluidNC driven
  • able to "eat" gcode produced by any "foam cutter" software

Let's go it's an easy project which shouldn't cost more than 20$ (without motors) !


Electronics

Schematics
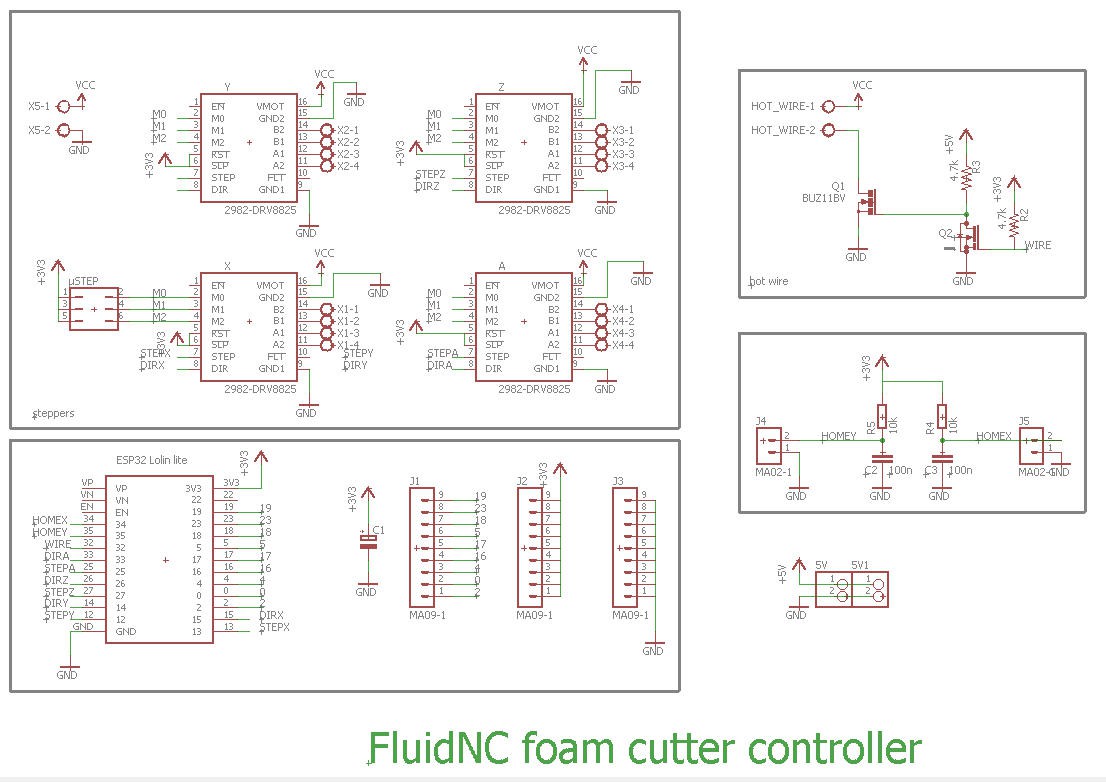
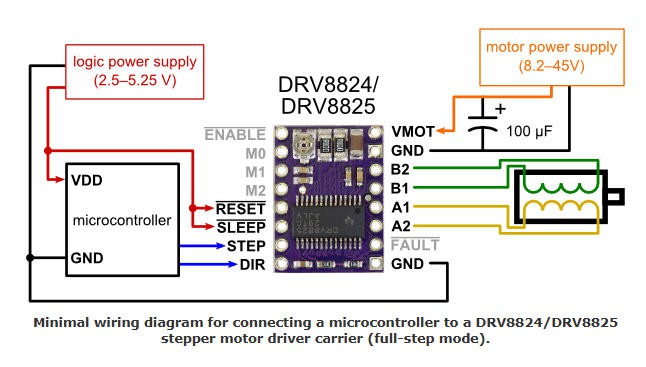
This schematics is extremly simple as it implements 4 times the basic way to use a polulu driver
Apart from the steppers, the only useful part is the hotwire. It's a 1m long 0.3mm nichrome wire which is fine tuned powered by a PWM under 40V (same PSU for the steppers).

  • PWM is produced by a two stages mosfets setup
  • the big BUZ11 takes care of the power line
  • the small 2N7000 is powered at 5V and its gate is triggered by GPIO32 of the ESP32
  • 5V supply is delivered by the USB cord plugged into the ESP32 and by an external supply for polulus and hotwire

Finally I have added  two home switches inputs (homeX and homeY) although they are useless for a foam cutter!

And exposed a few more pins of the ESP32 to be used (or not) for future projects!


PCB

I have designed a nice and compact PCB allowing to "shield" the drivers and the ESP32 modules.

The PCB was kindly sponsored by PCBWay and is as usual of excellent quality.

You can order it here: PCBWay shared project. It's cheap, delivered very fast and so professional looking!

and if you are new to PCBWay please use this affiliated link : https://pcbway.com/g/o35z4O
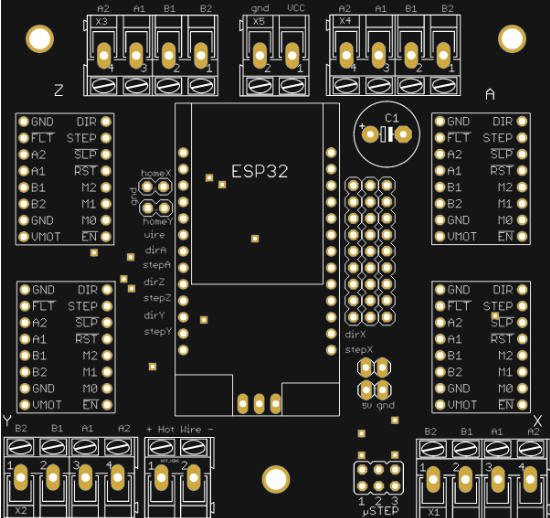

Soldering this board is fairly simple. 

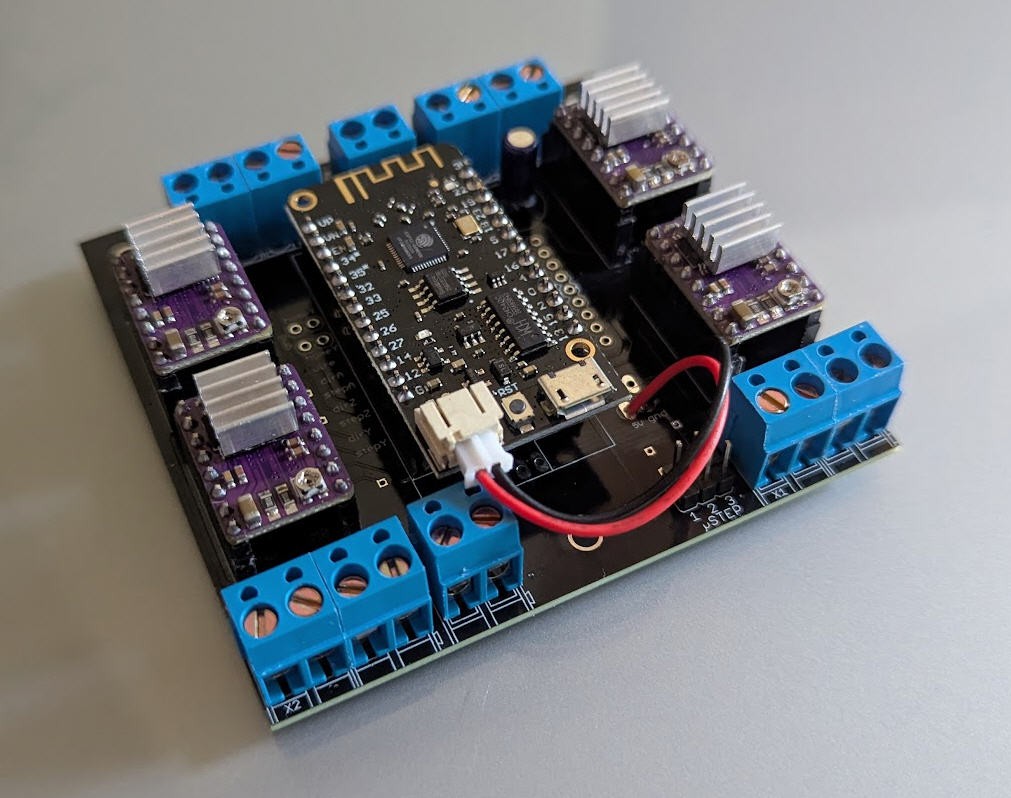
Here is the result:

Software

This board is directly compatible with FluidNC firmware. So we will only focus on FluidNC configuration.

If you don't know how to install FluidNC, please refer to this log : https://hackaday.io/project/193659-lets-convert-a-dc-motor-into-a-stepper-one/log/225300-installing-fluidnc

Configuring FluidNC is not totally simple but if you follow the documentation it is feasible without too much difficulties.

Here is the config.yaml file for my machine.

name: 4 axis hot wire cutter
start:
  must_home: false
axes:
  x:
    steps_per_mm: 3200
    max_rate_mm_per_min: 500
    acceleration_mm_per_sec2: 50
    max_travel_mm: 1000
    motor0:
      limit_all_pin: NO_PIN
      limit_neg_pin: NO_PIN
      limit_pos_pin: NO_PIN
      hard_limits: false
      pulloff_mm: 1
      standard_stepper:
        step_pin: gpio.13
        direction_pin: gpio.15:low
        disable_pin: NO_PIN
  y:
    steps_per_mm: 3200
    max_rate_mm_per_min: 500
    acceleration_mm_per_sec2: 50
    max_travel_mm: 1000
    motor0:
      limit_all_pin: NO_PIN
      limit_neg_pin: NO_PIN
      limit_pos_pin: NO_PIN
      hard_limits: false
      pulloff_mm: 1
      standard_stepper:
        step_pin: gpio.12
        direction_pin: gpio.14:low
        disable_pin: NO_PIN
  z:
    steps_per_mm: 3200
    max_rate_mm_per_min: 500
    acceleration_mm_per_sec2: 50
    max_travel_mm: 1000
    motor0:
      limit_all_pin: NO_PIN
      limit_neg_pin: NO_PIN
      limit_pos_pin: NO_PIN
      hard_limits: false
      pulloff_mm: 1
      standard_stepper:
        step_pin: gpio.27
        direction_pin: gpio.26:low
        disable_pin: NO_PIN
  a:
    steps_per_mm: 3200
    max_rate_mm_per_min: 500
    acceleration_mm_per_sec2: 50
    max_travel_mm: 1000
    motor0:
      limit_all_pin: NO_PIN
      limit_neg_pin: NO_PIN
      limit_pos_pin: NO_PIN
      hard_limits: false
      pulloff_mm: 1
      standard_stepper:
        step_pin: gpio.25
        direction_pin: gpio.33:low
        disable_pin: NO_PIN
stepping:
  engine: RMT
  idle_ms: 250
  pulse_us: 5
  dir_delay_us: 1
  disable_delay_us: 0
user_outputs:
  digital0_pin: NO_PIN
  digital1_pin: NO_PIN
  digital2_pin: NO_PIN
  digital3_pin: NO_PIN
PWM:
  output_pin: gpio.32:low
  enable_pin: NO_PIN
  direction_pin: NO_PIN
  disable_with_s0: false
 s0_with_disable:...
Read more »
config.yaml

FluidNC configuration file for the foam cutter board

yaml - 1.84 kB - 12/18/2024 at 17:05

Download

box_flat_3mm.dxf

box template. dxf file to be laser cut or 3D printed

AutoCAD DXF - 217.31 kB - 12/18/2024 at 16:05

Download

AG26_flip.dxf

wing tip dxf profile of the example wing

AutoCAD DXF - 47.87 kB - 12/13/2024 at 13:56

Download

AG25_flip.dxf

wing root dxf profile of the example wing

AutoCAD DXF - 47.91 kB - 12/13/2024 at 13:55

Download

GCode_by_Jedicut_481248722.txt

Gcode example. (produced by Jedicut)

plain - 13.78 kB - 12/13/2024 at 13:41

Download

  • Building Zenity glider

    JP Gleyzes • 06/05/2026 at 15:18 • 0 comments

    Finishing Zenity glider

    And if you are here it means that you are possibly interested by this project and would like a see the result !

    So here are a few pictures showing the realization after foam cutting !

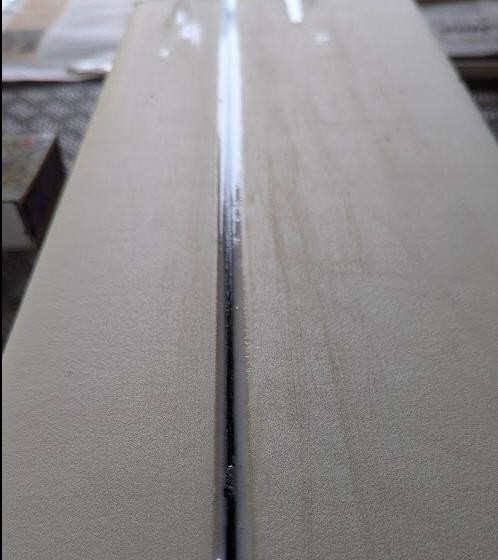
    filling the grooves with micro balloon and epoxy

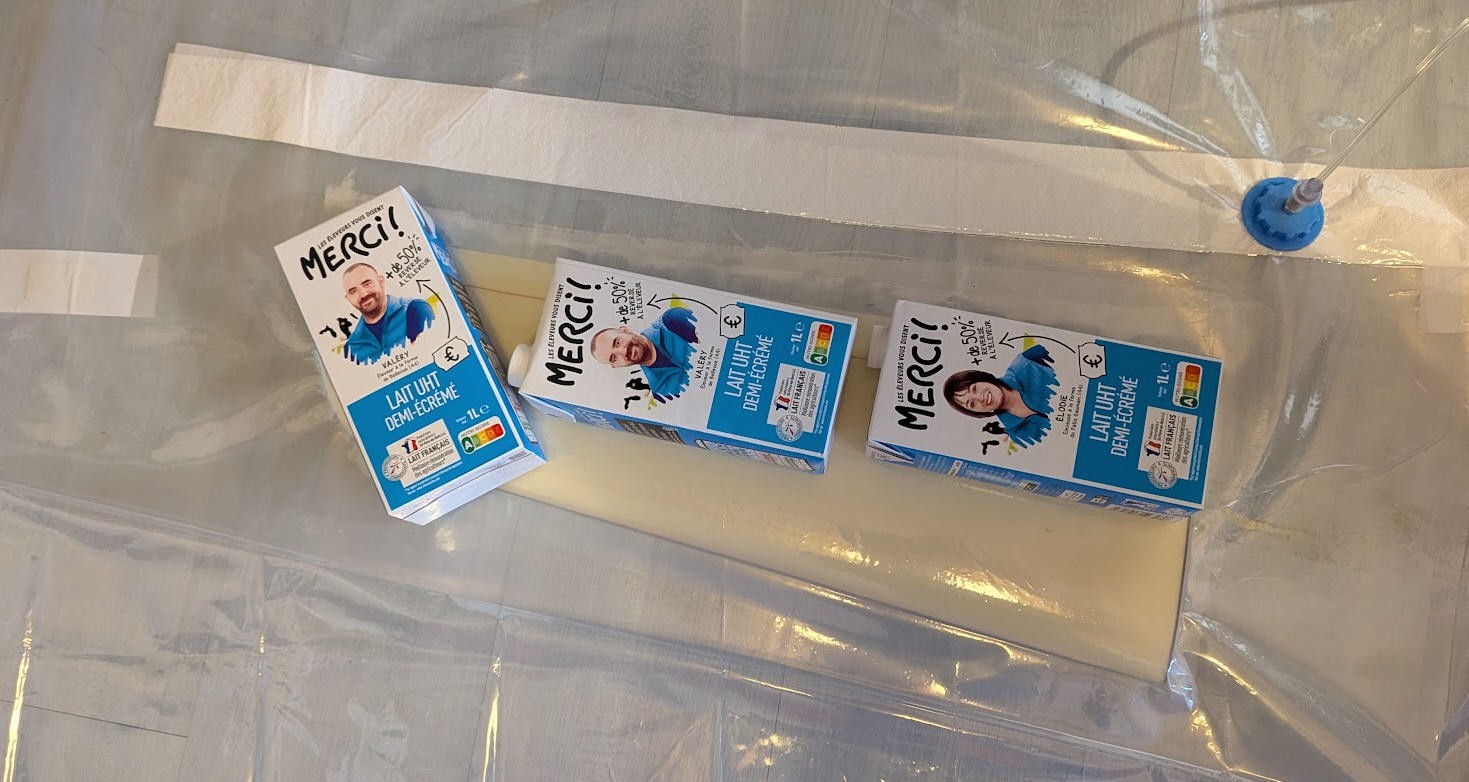
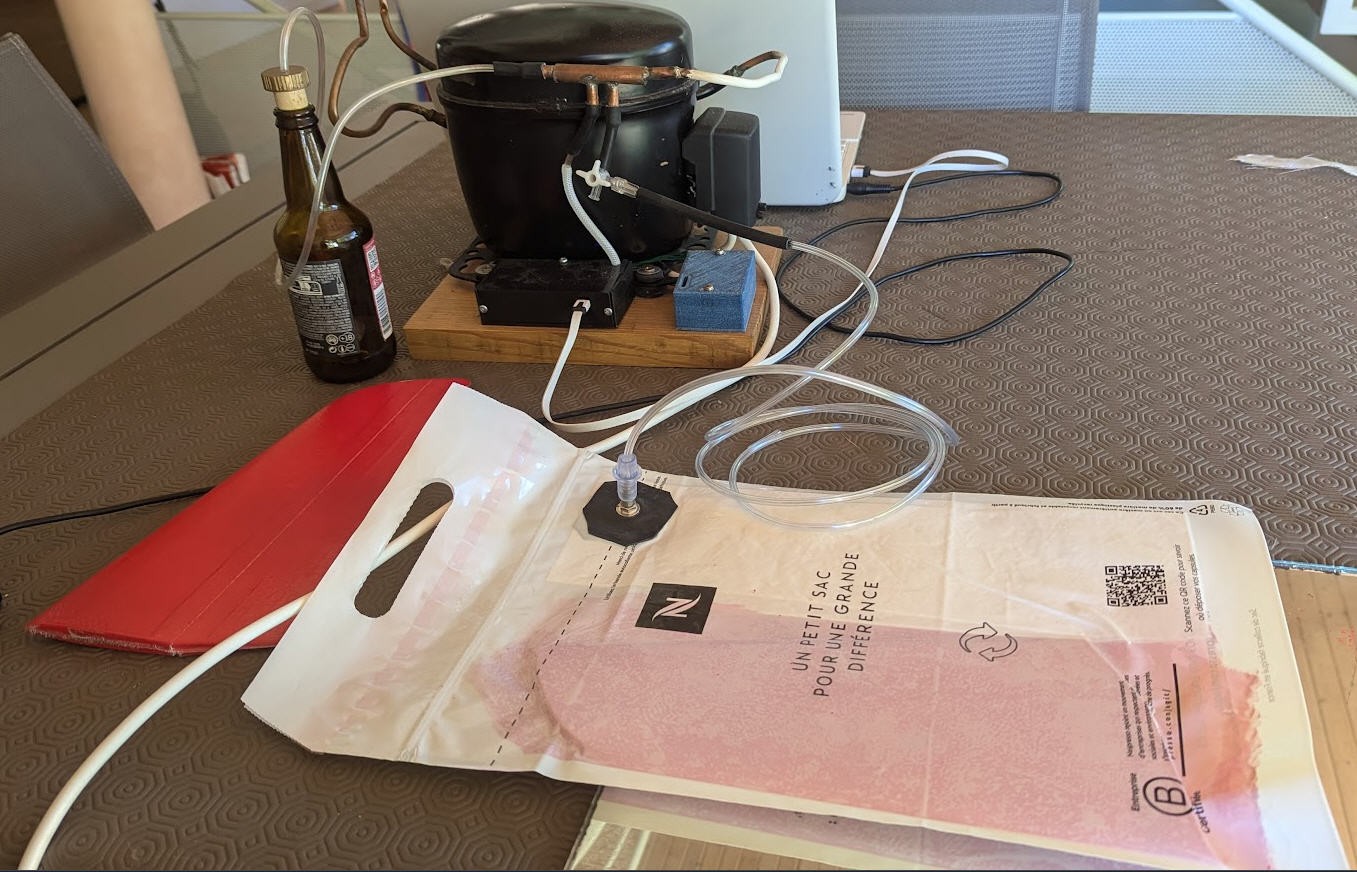
    vacuum bagging the wings (see this project: https://hackaday.io/project/196665-a-vacuum-pump-with-an-old-fridge-motor

    keep the wing flat while vacuum bagging...

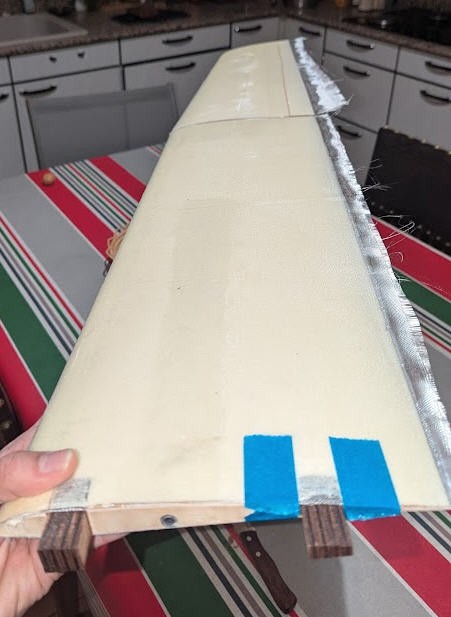
    Prepare wing joiners and trim the edge

    cut the plywood hinge for ailerons and flaps : https://www.thingiverse.com/thing:6898947

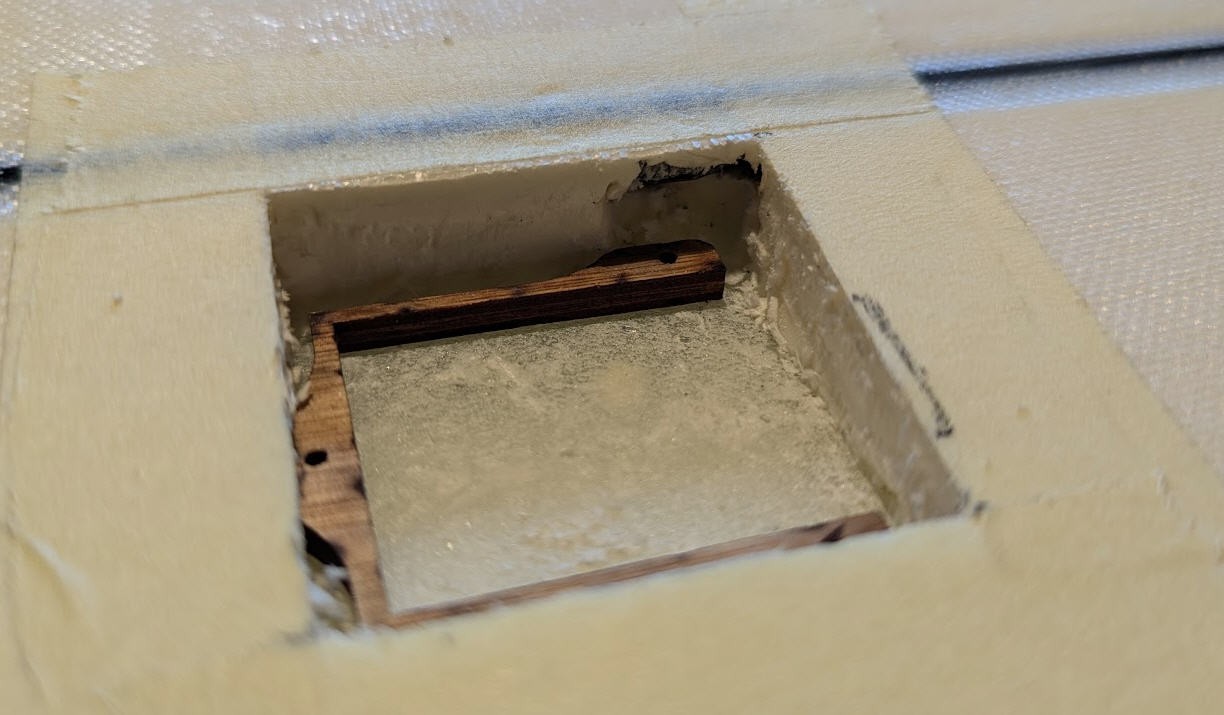
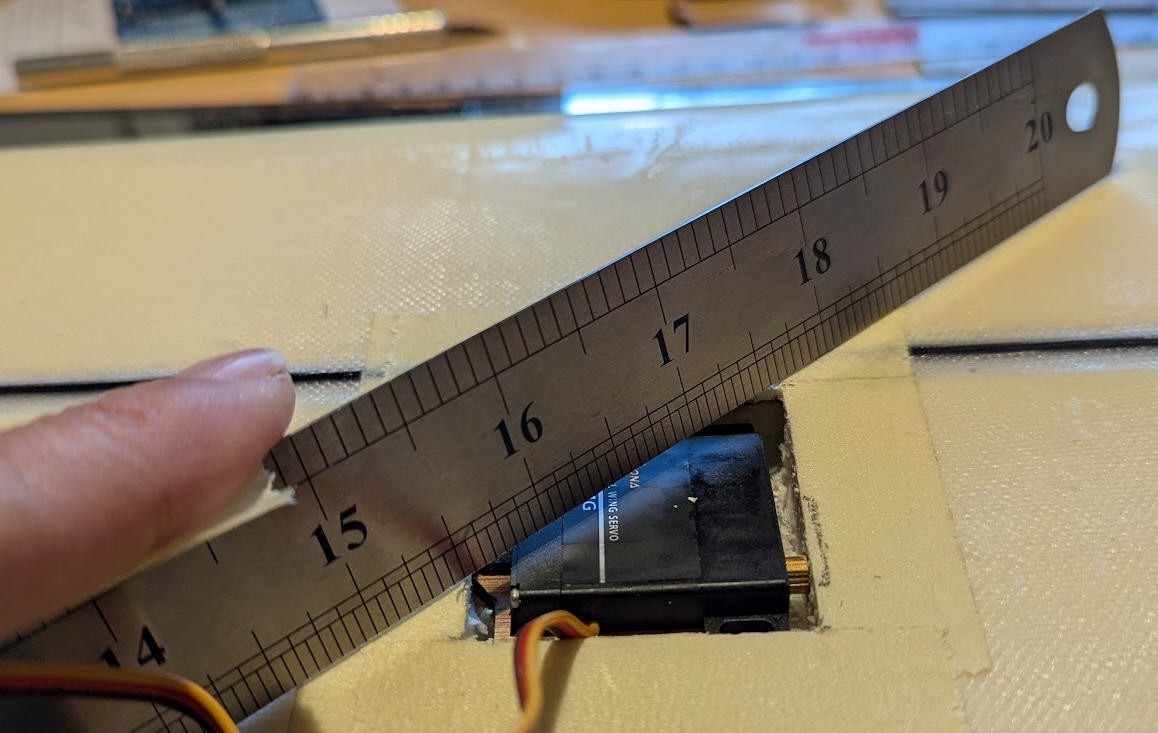
    cut the servo bays

    and install the servos

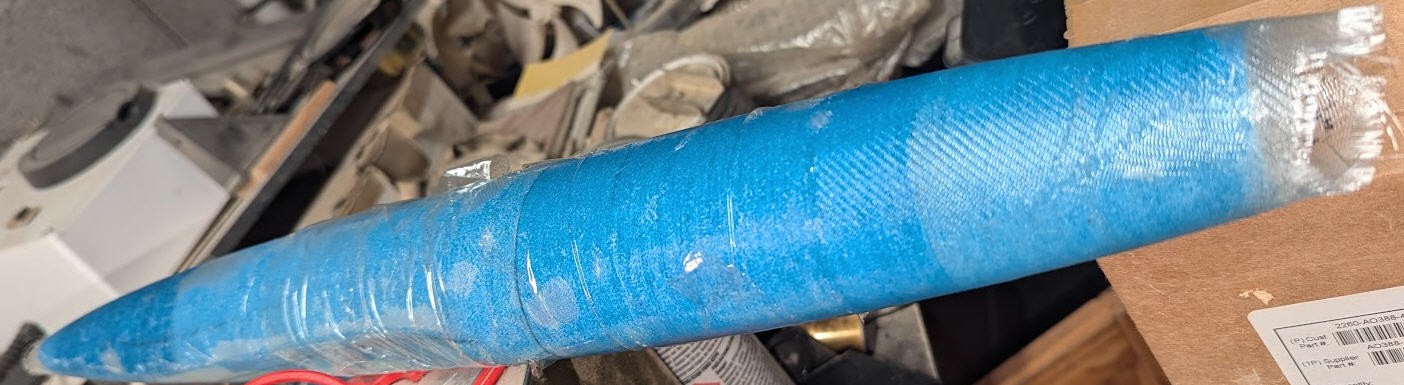
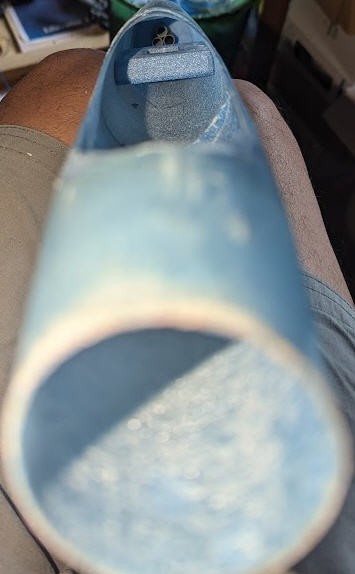
    3D print the fuselage and fiberglass it

    cut the cockpit install servo tray

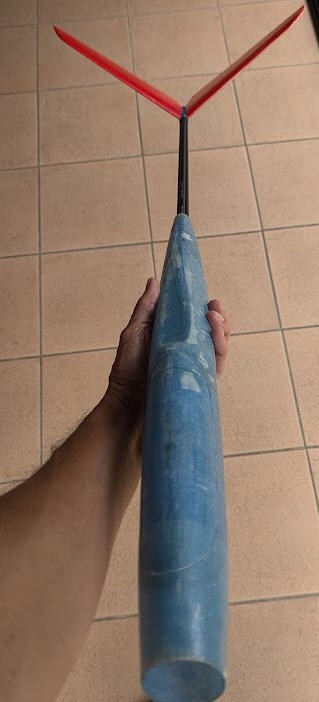
    cut the V tail, fiberglass it

    fix the V tail on the tail boom (3 arrows carbon spars)

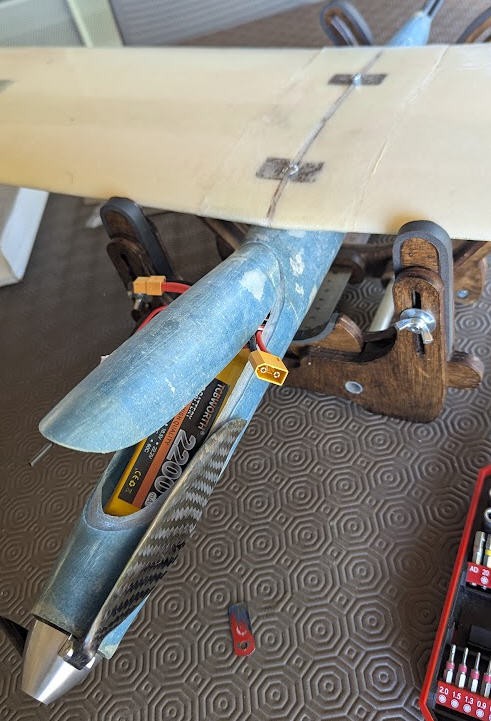
    integrate all the electronics and check Genter of Gravity

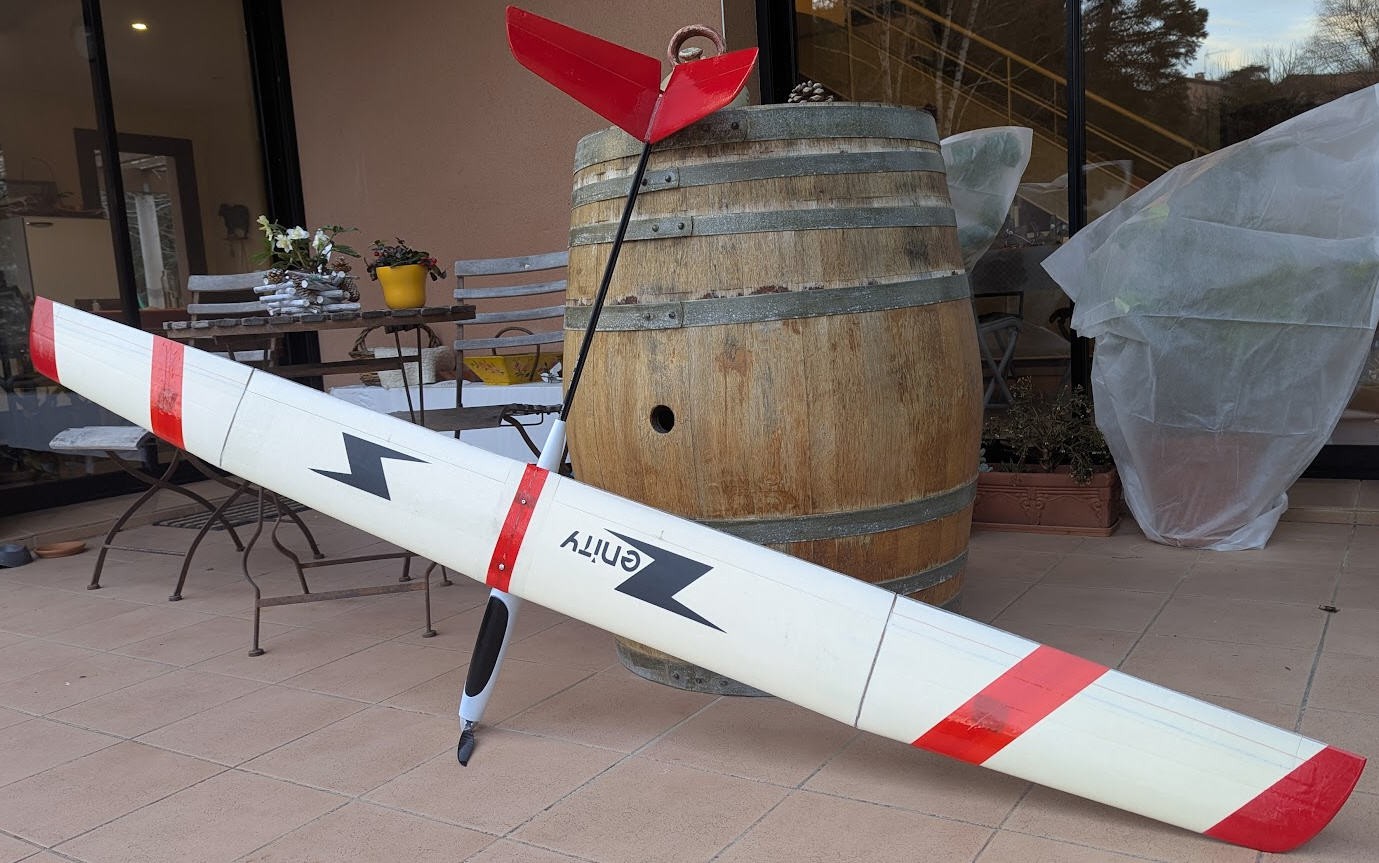
    now paint the fuselage, add decals and trim all this: Ready To Fly!

  • using Jedicut

    JP Gleyzes • 06/04/2026 at 15:01 • 0 comments

    A lot has to be said as this software is rather tricky to use but a simple tutorial will help to overcome difficulties !

    You can download jedicut from this link : jedicut download

    Then install it and launch it. First thing to do is  to configure your machine. 

    Configuring your machine

    Go to the option menu

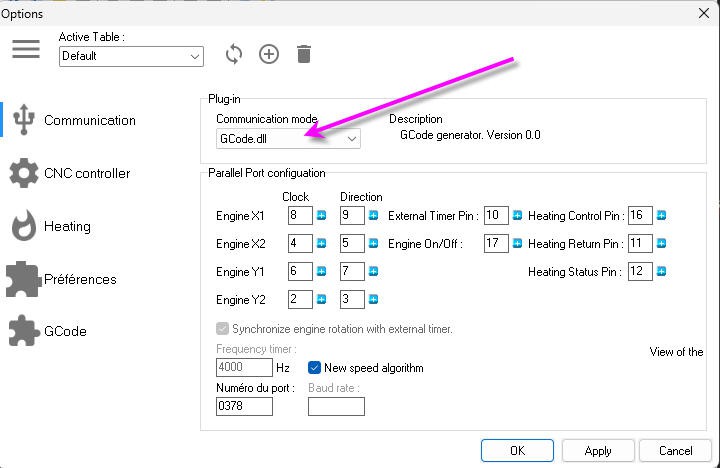
    then in the communication tab select Gcode and leave all the other values unchanged.

    (Jedicut was working with old PC and sending motion to the parallel port of the PC... We will not use Jedicut to control our machne as it will be done by FluidNC.)

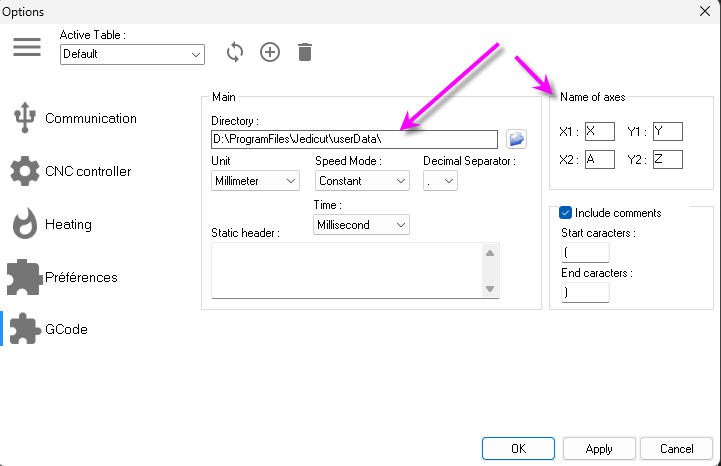
    Now check in the "GCode" tab that it looks like this screen

    You will find the location where the Gcode files will be saved and the conventions for axis naming (do not change these namings they work fine)

    The two planes for the profiles will be

    • X1Y1 = XY
    • X2Y2= AZ

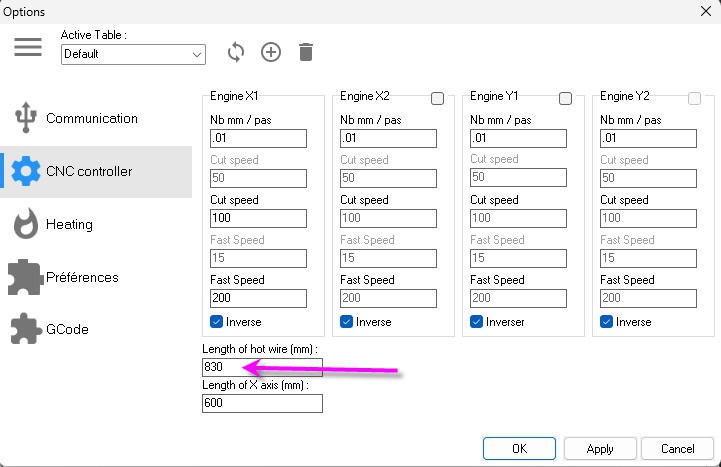
    Now click on the "CNC Controller" tab and enter the length of your hotwire

    don't change other values, they were used by the parallel port controller. If you want to be clean you can however enter the Length of the X axis!

    That's it you machine is now fully configured.

    You can create your first wing

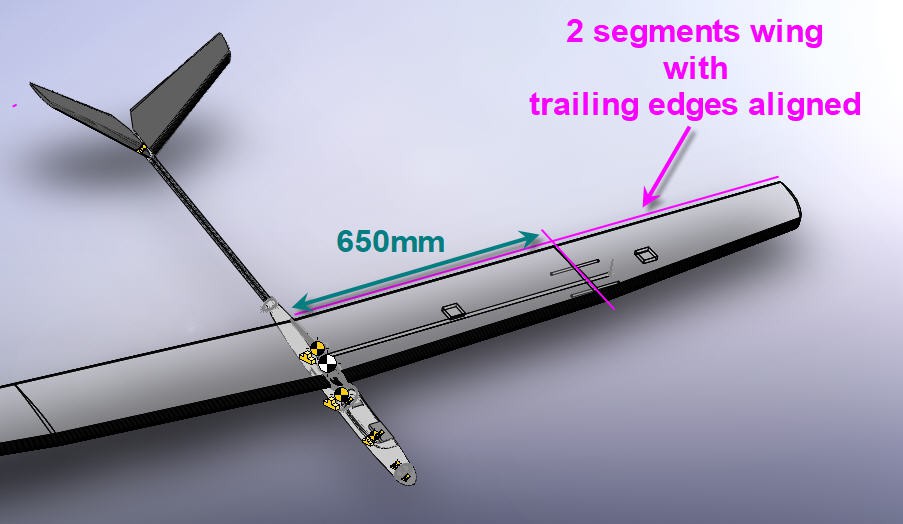
    Suppose that we want to cut this wing: (first 650 segment as an example)

    profiles for wing root and wing tip are into the files section of this project.

    Importing dxf profiles

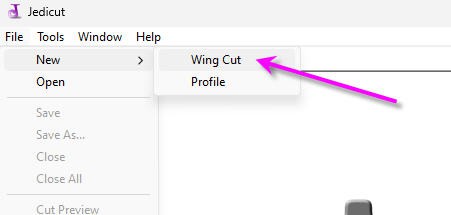
    Start by creating a new "wingCut"

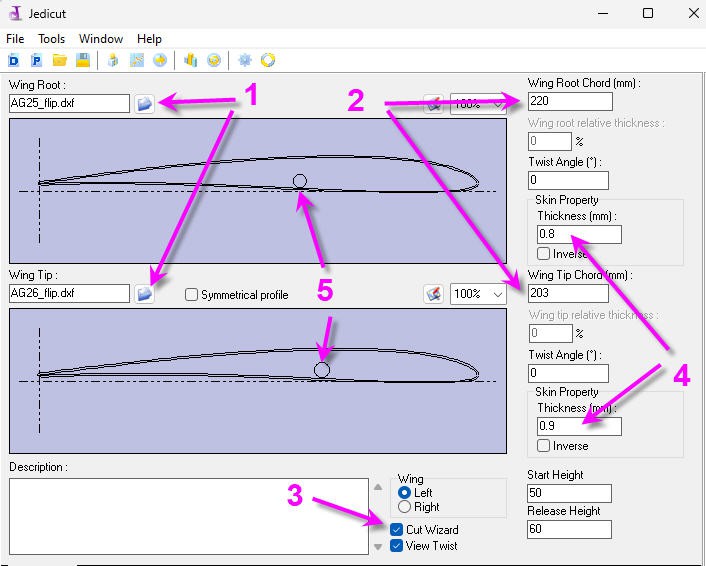
    Then you will have to fill this screen:

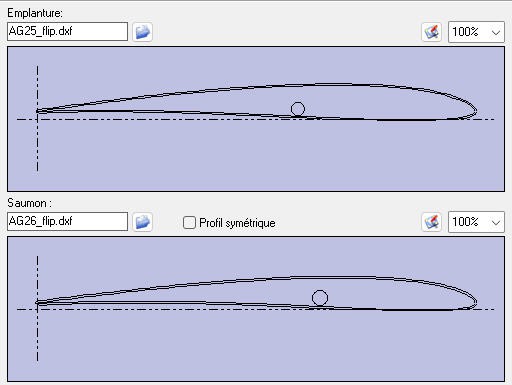
    1. import dxf files one for the root the other for wing tip 
    2. adjust the chord lengths
    3. don't forget to leave the "Cut Wizard" box ticked. It's mandatory to have jedicut running well
    4. adjust the kerf values (named thickness) for root and wing tip.
    5. and if you want to insert a carbon rod as on the wing drawing follow next paragraph...

    As you can see on this screen, you can import "flipped" profiles (that is with trailing edge on the left instead of leading edge). I did it because 

    • cut will start by the trailing edge and won't stop at the leading edge
    • hotwire will "pull" foam when finishing the cut at the trailing edge/bottom skin. This will insure a very clean and thin trailing edge
    • my wings are aligned at le trailing edge. It's thus easier to align the hotwire on the foam block

    Of course jedicut doesn't know that I have flipped the profiles and will call "leading edge" what is for me "trailing edge"...

    Cut outs

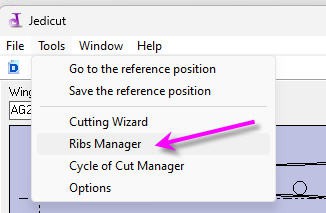
    open the "Ribs Manager" menu

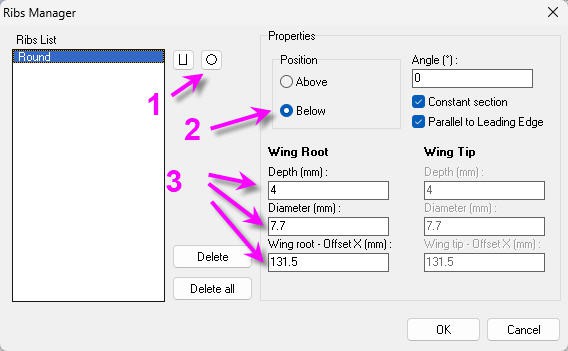
    And don't be impressed by this screen. Let's take an example of a carbon rod with a 7.5mm diameter that you want to insert on the bottom skin of the wing (exactly as displayed above)

    1. select the round cutout
    2. place it "below"
    3. enter the "depth" (half the diameter + margin), enter the diameter, and position the cut out on the X axis (origin at the left of the profile, usually at the leading edge)

    you can select different poisitions and diameters for root and wing tip (upper right tick boxes -note that "parallel to leading edge" means for my flipped profile "// to trailing edge"-)

    Configure the foam block and wing length

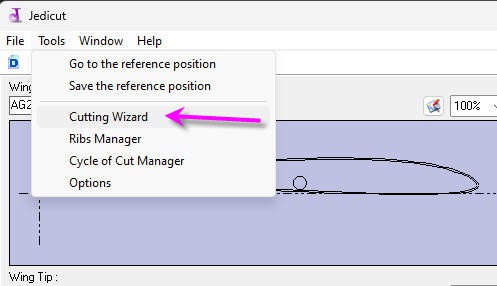
    Open the "Cutting Wizard" menu

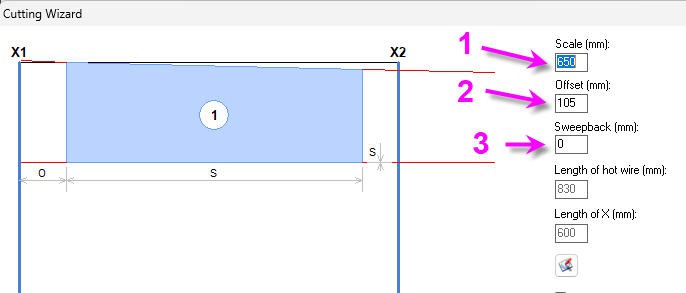
    and enter  mainly 

    1. your wing length
    2. position of your foam block in your bed
    3. enter sweep back value (here 0 as I am aligned on the trailing edge)

    cutting path

    You are almost ok for cutting your wing, but you must first tell jedicut how you want to do it

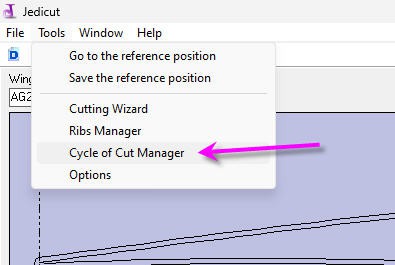
    Open the "Cycle of cut Manager" menu

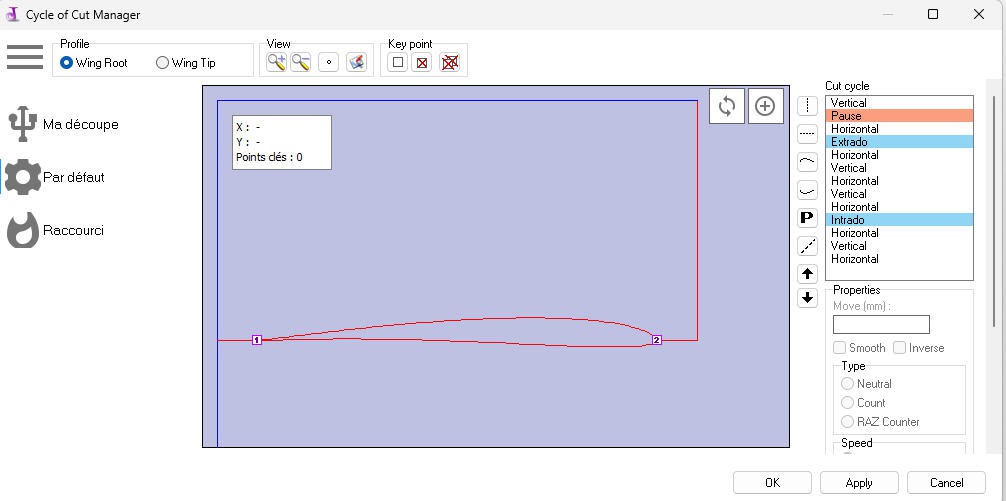
    And you will get this default screen

    Cut will start by a vertical blue line then enter the foam horizontally, then cut the upper skin from 1 to 2, then go vertically, then go back to origin and cut the bottom skin with the same path

    It can be useful for wing laminating but it's long...

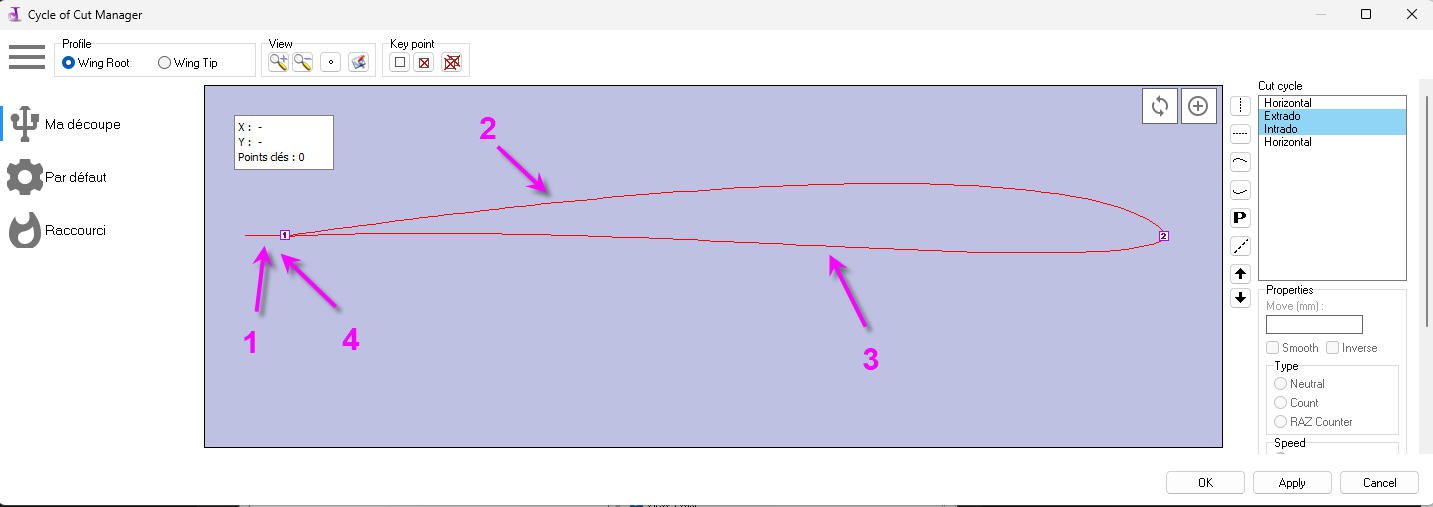
    So I prefer to cut my wing in a single path starting from the trailng edge, cutting the top skin then going back to the trailing edge.

    Hopefully you can delete most of the path (delete button at the bottom right corner) and reverse cutting direction for horizontal or vertical lines (change the sign), and even reverse the path for upper or lower skin

    1. 10 mm entry...
    Read more »
  • Using GRBLhotWire

    JP Gleyzes • 06/04/2026 at 14:41 • 0 comments

    GRBLhotwire

    RCKeith is maintaining a Gcode sender totally specialized for foam cutters.

    Consequently the drawbacks of UGS are no longer present with GRBLhotwire.

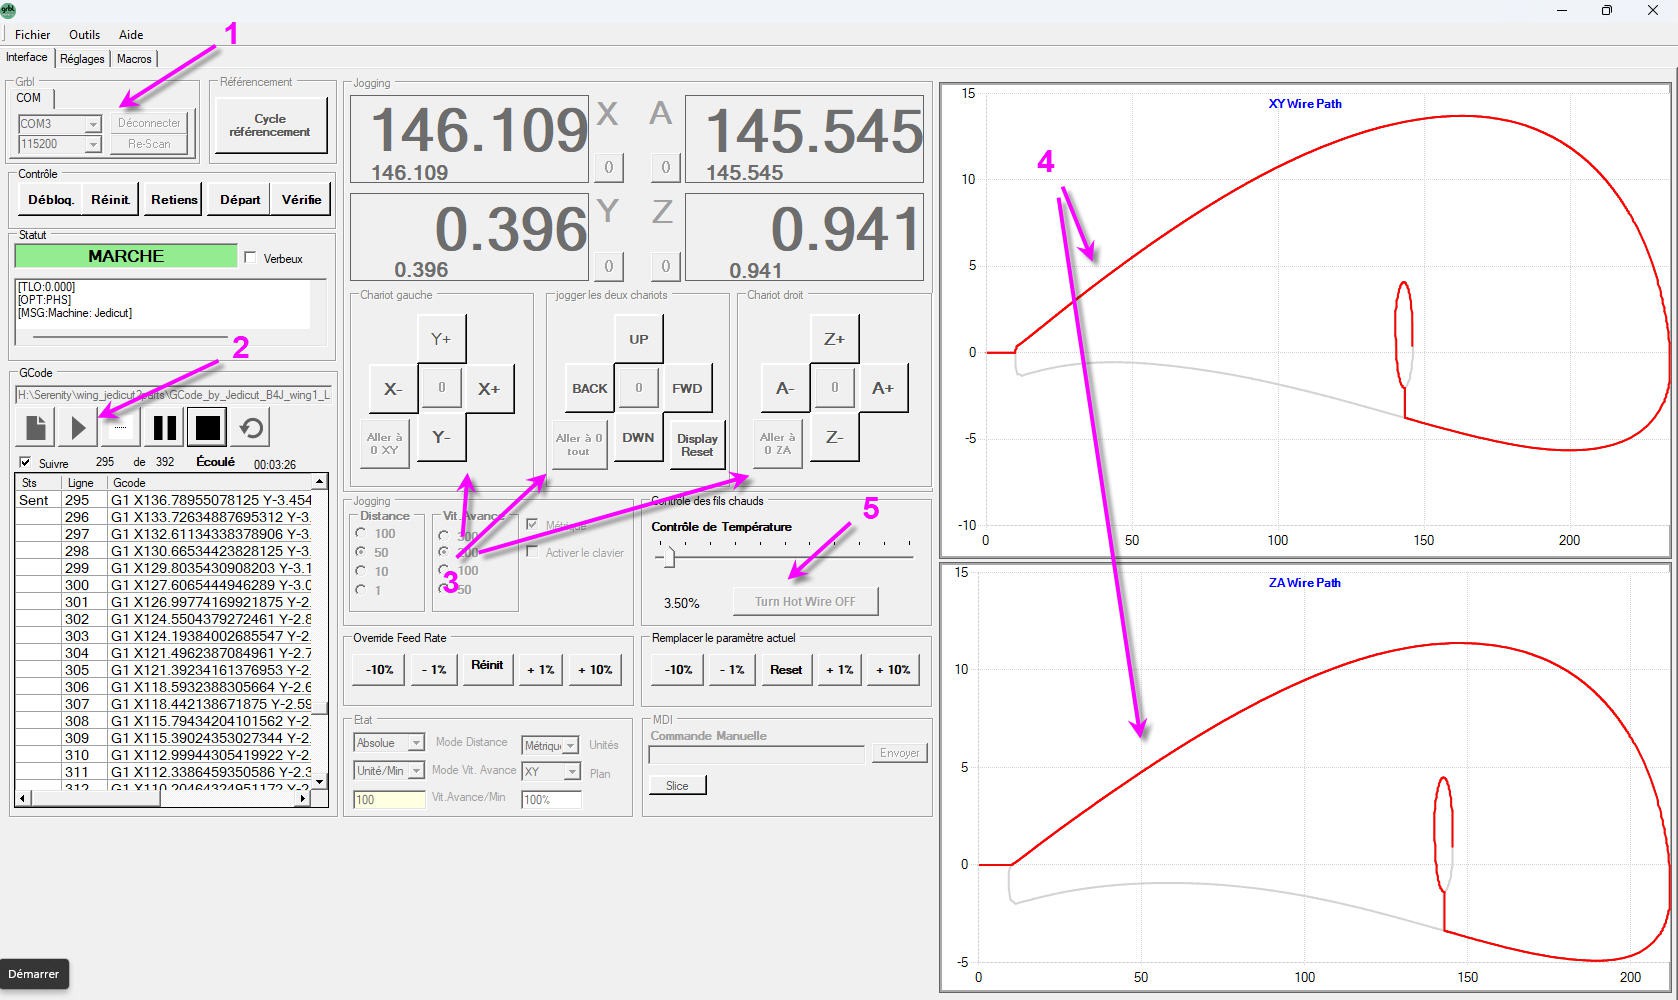
    Everything is more or less on a single screen:

    1. you can connect after selecting the com port
    2. you can load and run the Gcode file
    3. you can jog the two axis independently or simultaneously
    4. the two profiles are displayed (still a little deformed but looking like originals)
    5. the hotwire can be controlled and the temperature can be tuned

    Drawbacks are minimal:

    • the profiles are not perfectly scaled and look still a little weird (but cutting is perfect !)
    • jogging is not "continuous" as with UGS. 

    However this software is a little "old looking" and suffers from a recent bug induced by Windows 10 and W11 december 2024 update of USB serial drivers. This bug was difficult to find and is not yet fixed (as due to the driver itself and not to the application...). The software simply does no longer work with current driver version...

    RCKeith has documented this issue : usb-ch340-driver-problems

    The only solution today is to uninstall the official Windows driver and to roll back to a previous version. For Windows 11 a working version is 3.5. It can be found here : CH340-Driver v3.5

    RCKeith also told me that a new version fully compatible with FluidNC will soon be released. Current version works already very well with FluidNC V3.9.2 PR2 or above.

    Currently GRBlhotwire is still my prefered Gcode sender for foam cutter machine (user friendly display of profiles, dual axis jog).

  • Using UGS

    JP Gleyzes • 06/04/2026 at 14:38 • 0 comments

    UGS

    UGS is by far my favorite Gcode sender for CNC mill and laser cutter, and it works very well out of the box even for foam cutter.

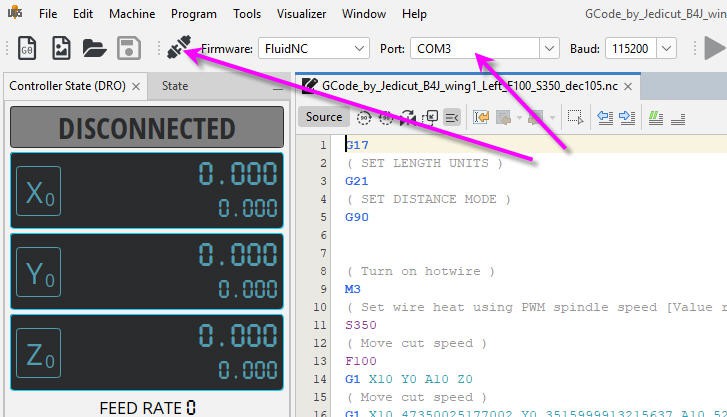
    FIrst select the com port of your board and click connect :

    Before connection only 3 axis appear in the interface, but as soon as connection is established, the fourth one will pop up :

    You can open your Gcode file and you can send it to your board when clicking on the play button.

    It works very well, it's clean and safe but there are two minor drawbacks:

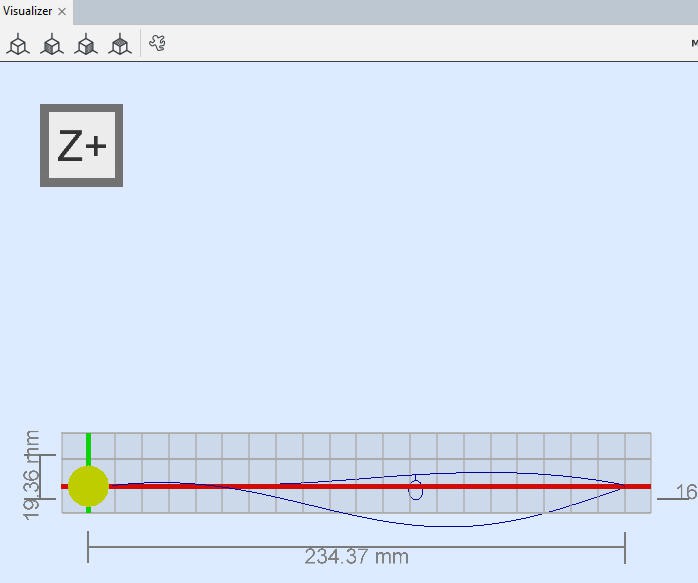
    • 1) the display of your profile is unique and cannot be changed. So that, if you display "Z top" view you will get the less awful profile of your wing... but it is not the profile you have designed in you CAD software...

    It's normal... UGS uses  a regular CNC mill display XYZ in 3D ... and a foam cutter needs a two planes XY + AZ plot.

    Here is what we expected... But we can't get it with UGS. Nevertheless it is only a matter of display, UGS will send the Gcode perfectly and you will have a nice and smooth motion without issues.

    • 2) jogging the two planes simultaneously.

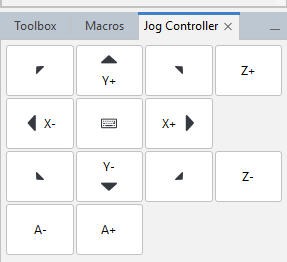
    With UGS you can natively jog each axis X, Y, Z and A and select X+Y to jog X and Y together. But with a foam cutter we would mainly like to jog also X + A and Y + Z axis together. 

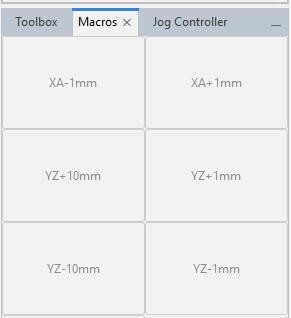
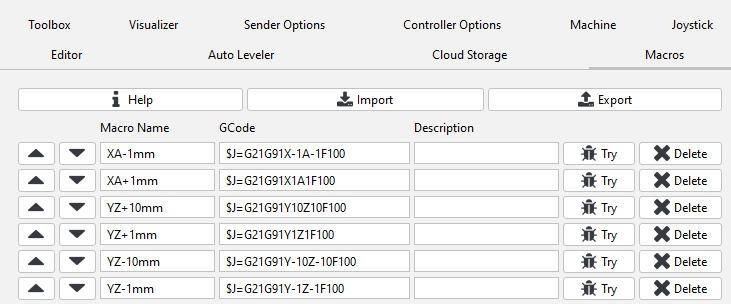
    There is a work around to achieve this. It's to use "macros". I have thus created special macro to jog two planes together:

    It's not totally perfect but it does the job.

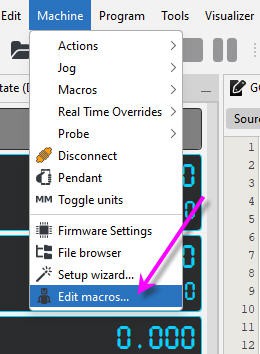
    Creating a macro is fairly easy. select Machine/Edit Macros menu:

    And enter the magic Gcode jog commands :

    Now your UGS sender is fully configured and you can jog and cut wings!

View all 4 project logs

Enjoy this project?

Share

Discussions

Similar Projects

Does this project spark your interest?

Become a member to follow this project and never miss any updates