Close
0%
0%

Altair 8800 front panel Ardiuno shield

A very small fully-functional interface for an Arduino Due emulating an Altair 8800

Similar projects worth following
This project is another Altair 8800 clone, but minimized down into the size of an Arduino shield. This project is built on the work done by David Hansel from the below link.

https://www.hackster.io/david-hansel/arduino-altair-8800-simulator-3594a6

That project replicated a full-size front panel of the Altair. I wanted to make a much smaller, but fully-functional shield instead. This would reduce the cost significantly. But since David did all the legwork for getting the software up-and-running, I'm going to use his software and adapt my board to fit his established pin-out.

Since there are two different pinouts for the Arduino MEGA and the Due, I could only create a PCB for one or the other. Since the Due can simulate the Altair 8800 with better performance, I decided to target that system for my project.

Components

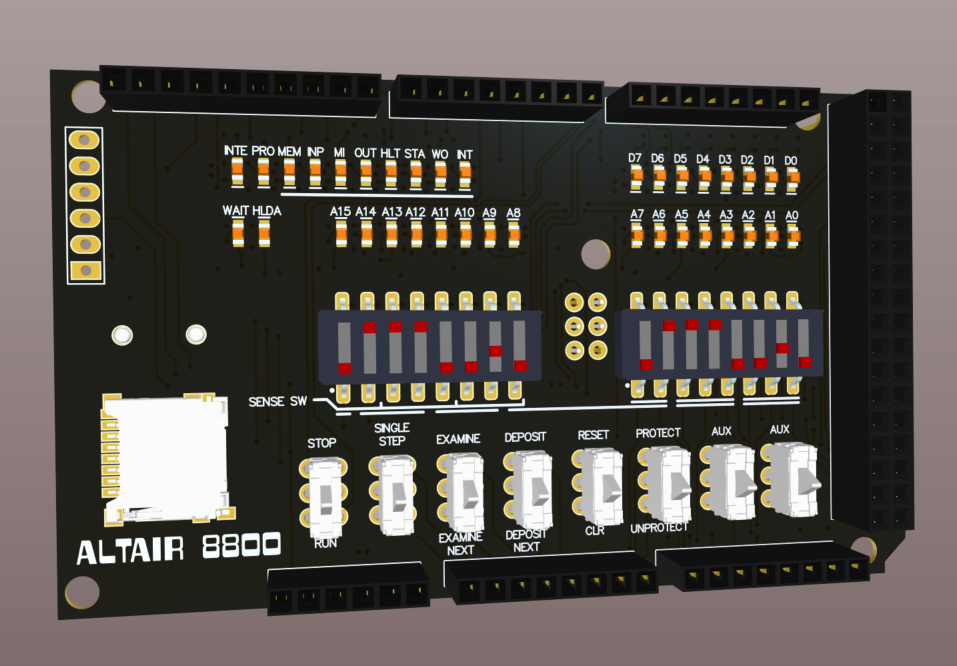
I needed to find components which would fit within the footprint of the shield. I knew I could fit the original sized switches on the board, so I needed very small switches. The toggle switches could be replaced with DIP switch arrays; although, they may be difficult to use. The momentary switches were more difficult to replace since they have an embedded spring to return them to the home position. Fortunately I found some limit switches just the right size. I considered using an LED array to make assembly easier, but couldn't find one that was the right size. So I settled on surface mounted individual LEDs. I also decided to put a microSD card reader on the top to support the disk drive. And then as recommended, I added a connector for a SparkFun Bluetooth Mate Silver for wireless serial communication.
  • 1 × Arduino Due
  • 36 × KP-1608SECK LEDs and Accessories / Light Emitting Diodes (LEDs)
  • 2 × 219-8LPST Switches and Relays / Switches
  • 8 × ESE-24SV3 Switches and Relays / Switches
  • 18 × 2N7002BKV,115 Discrete Semiconductors / Diode-Transistor Modules

View all 8 components

  • Rev B

    Justin Davis12/20/2019 at 14:17 0 comments

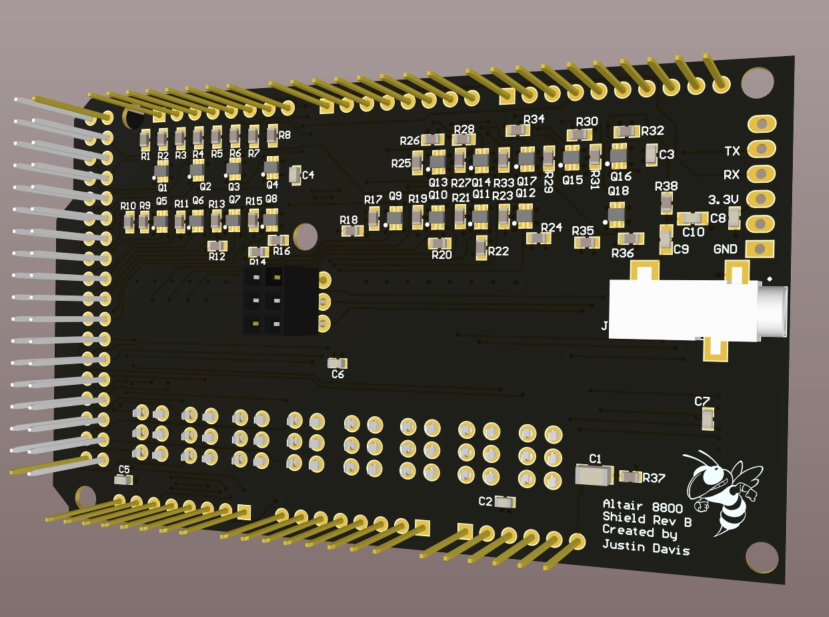
    This project has been sitting on the back burner for a loong time now.  Now that I have small window of free time, I figure I'd come back around to it and do the rev B board.  I had a couple errors in the layout for the first version.  I changed the SD card interface so it's a pass-through - I don't see a way around it so there will be a few pins visible on the top side.  

    I also decided to make a few other changes.  I wanted the top of the board to look a little cleaner, so I moved all the passives to the bottom of the board.  I also figured I'd implement the music output too. It's just two caps, a resistor, and a 3.5mm barrel receptacle.  There's room for it on the bottom of the board where it will be hidden.  

  • PCB prototyping

    Justin Davis03/16/2017 at 13:23 1 comment

    I've gotten some comments about rapid-prototyping PCB fabricators. I know there's a lot out there, but one site I use to get quick quotes from a lot of places is http://pcbshopper.com/

    You put your board requirement in such as size, mask color, etc. and it spits out many of the rapid prototype places like PCBWay, OSHPark, Dirty PCBs, EasyEDA, Bay Area Circuits, etc with a price which includes total boards cost, per board cost, and includes shipping costs. So you can see how much you will pay at each place with shipping.  However, I often end up using PCBWay since their prices are often the best and give lots of free options such as board color.  Since I wanted a black soldermask, they usually don't charge more for black soldermask.

    Each place has different bonuses like low shipping costs, or special mask colors, etc. so it's good to check each line. Some places have price cutoffs for board size like 5x5cm, 10x10cm in their pricing, and others have a rate for the exact board size. However, they all have a minimum board number of 3 or 5, so if you only plan on making one board, your board cost is really much higher.

    But it's great how low the prices are for making PCBs these days. I remember the story of Steve Jobs selling his VW van to pay for the first run of Apple 1 boards. These days it's so much cheaper.

    Once I create the rev B boards, I will upload them to wherever people would like. Some site do a good job of letting others order your boards, so you don't have to worry about getting them boards. But you still have to order 3 of them at minimum. It would be nicer if you could order 1 board, and then when 2 other people order that same board, it triggers the board getting made. Or if more people order in a certain window, then it might bring the board cost down.

  • Blogged

    Justin Davis03/15/2017 at 15:27 0 comments

    First, got my project on the front page of Hackaday which I thought was very cool. Thanks to everyone for the encouragement!

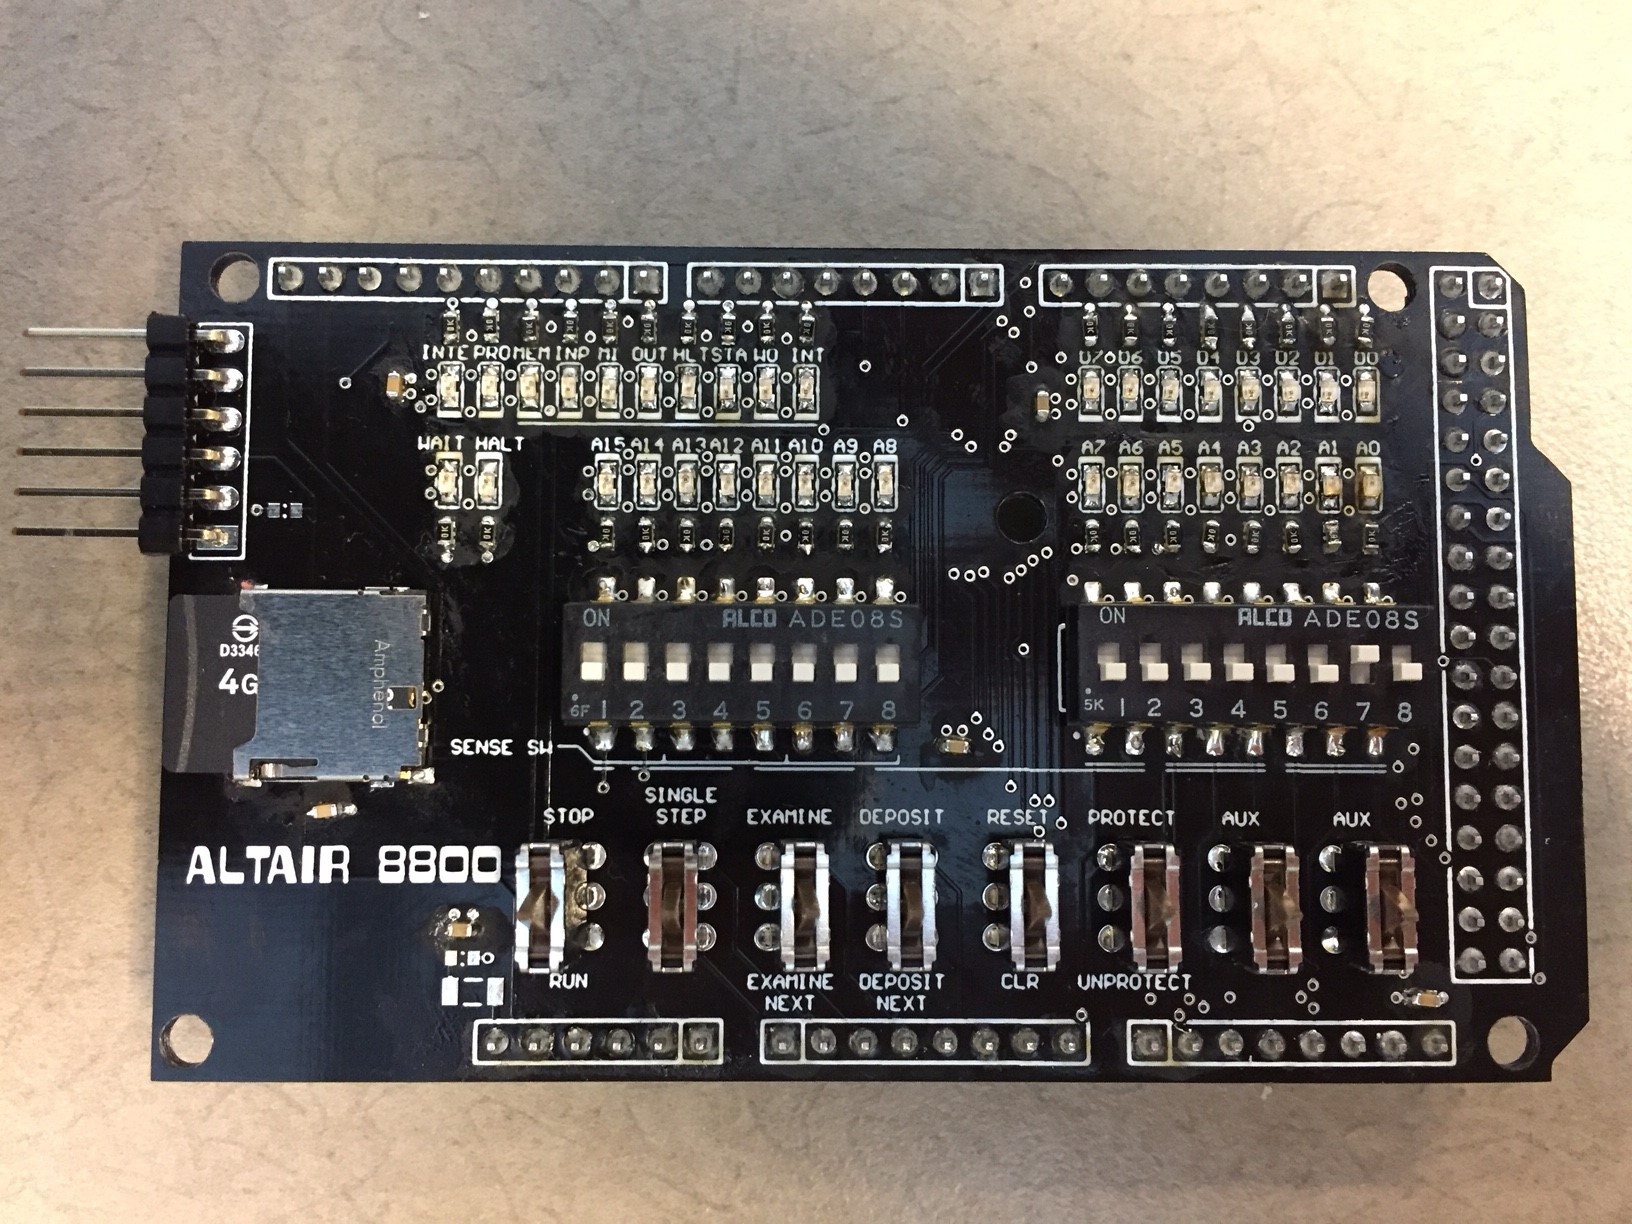
    Second, I figured I'd better check out the rest of my board. I soldered on the microSD card receptacle and the Bluetooth comm headers. So I have a photo of the finished version of the top-side with the microSD card installed.

    Then I flipped the board over to solder on the SPI connector. And that's when I realized I made another mistake. The pitch on the connector is only 50mils. I'm not sure how I made that mistake, but I think the only fix for this is messy. I only need to connect 3 pins on that header, so I may try to hack on three individual posts. I knew I took a risk by going with a surface mount header. I also chose one which did not have alignment posts, so I knew alignment could have been a problem. I think I may go back to a through-hole header for rev B. I went away from it mostly for aesthetics (there would be a 6-pin connector between my switches). I'm not sure if I will ever make a second run of boards just because of the cost, but if enough people are interested, then I will. I should order a bluetooth module to check out that header too before I make a rev B.

  • Primary objectives complete

    Justin Davis03/08/2017 at 17:43 1 comment

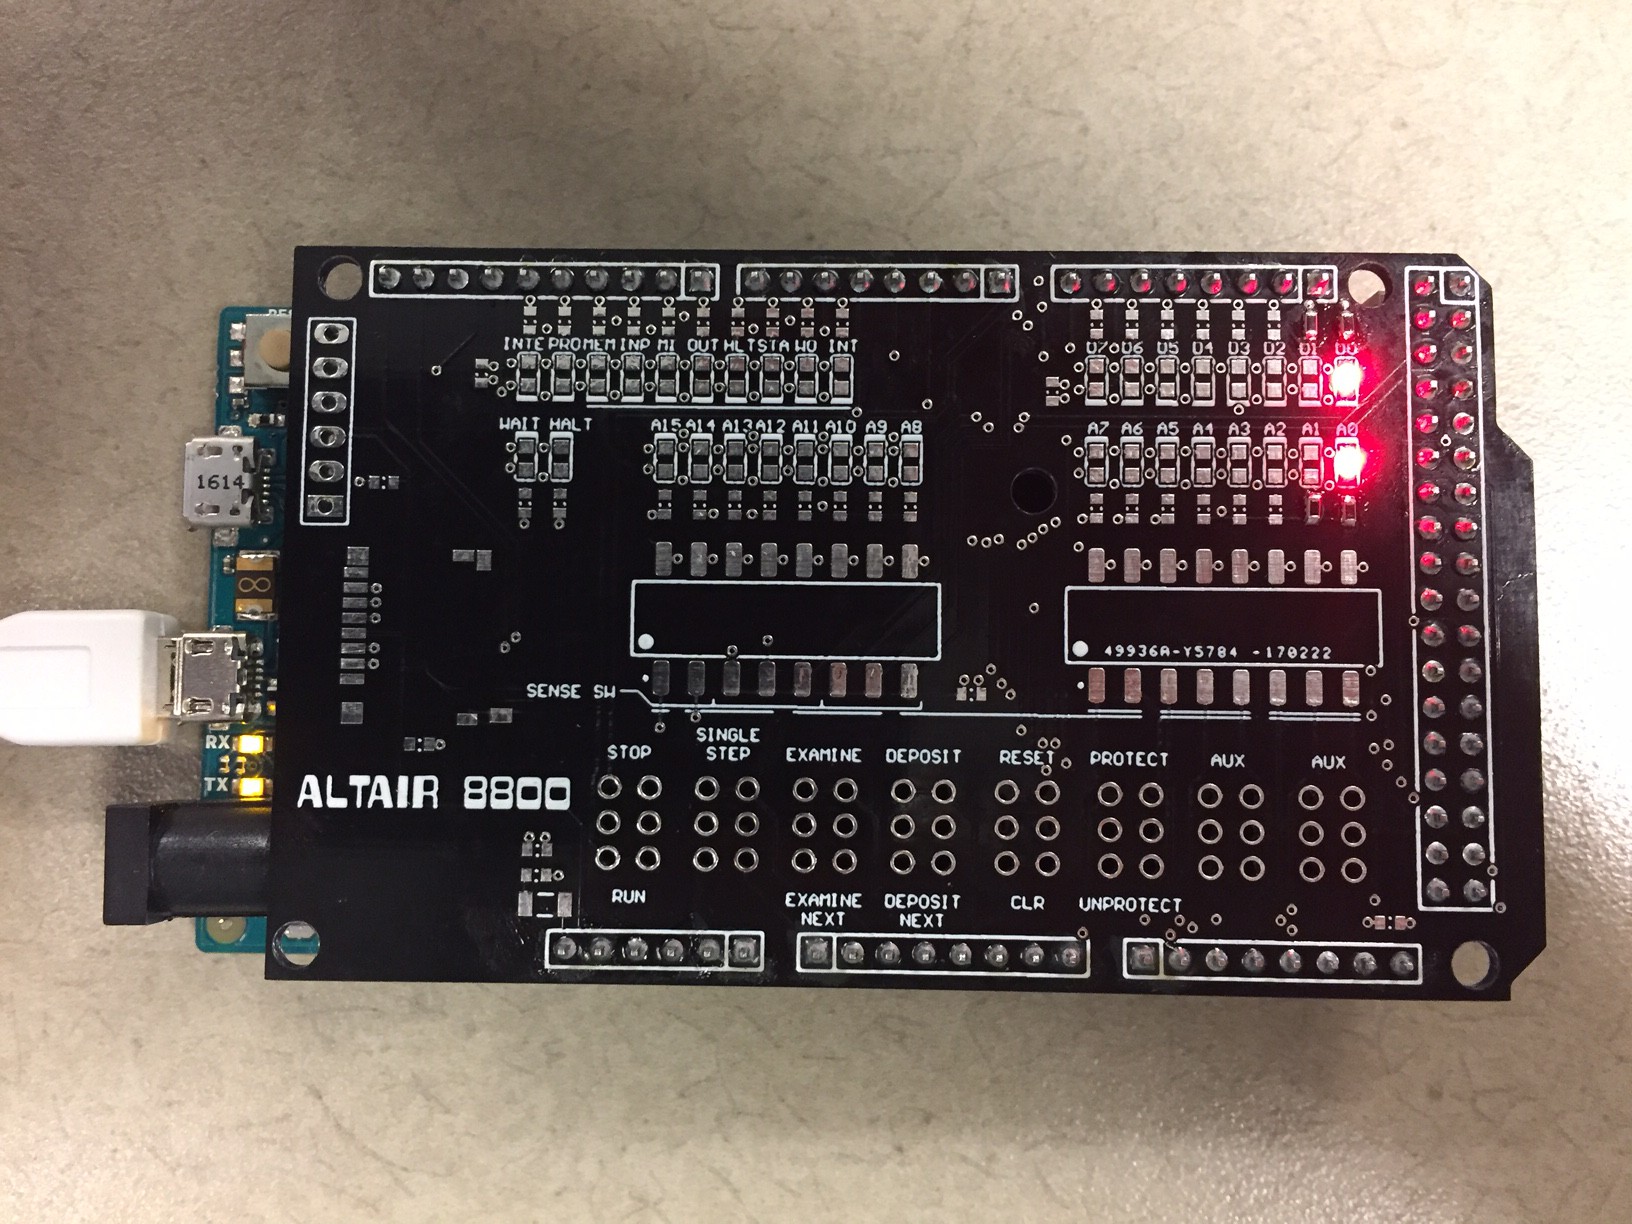
    I have my primary objectives of switches and lights done. And it works!

    There are two errors which I discovered. One pairs of pins going to A4 and A5 are swapped in the footprint artwork for the dual row connector. So those LEDs are swapped. Not a big deal - I can hack the software to get them to display correctly. The second is I have my STOP/RUN switch backwards. Again, I can swap it in software. If I do another board spin, I will fix those errors and the via solder mask problem.

    I have kill-the-bit up and running and it looks like it's working ok. I haven't finished checking every LED and switch, so there may be more hidden errors. Next is get the microSD card reader up and running so I can have disks!

  • Halfway

    Justin Davis03/07/2017 at 20:51 1 comment

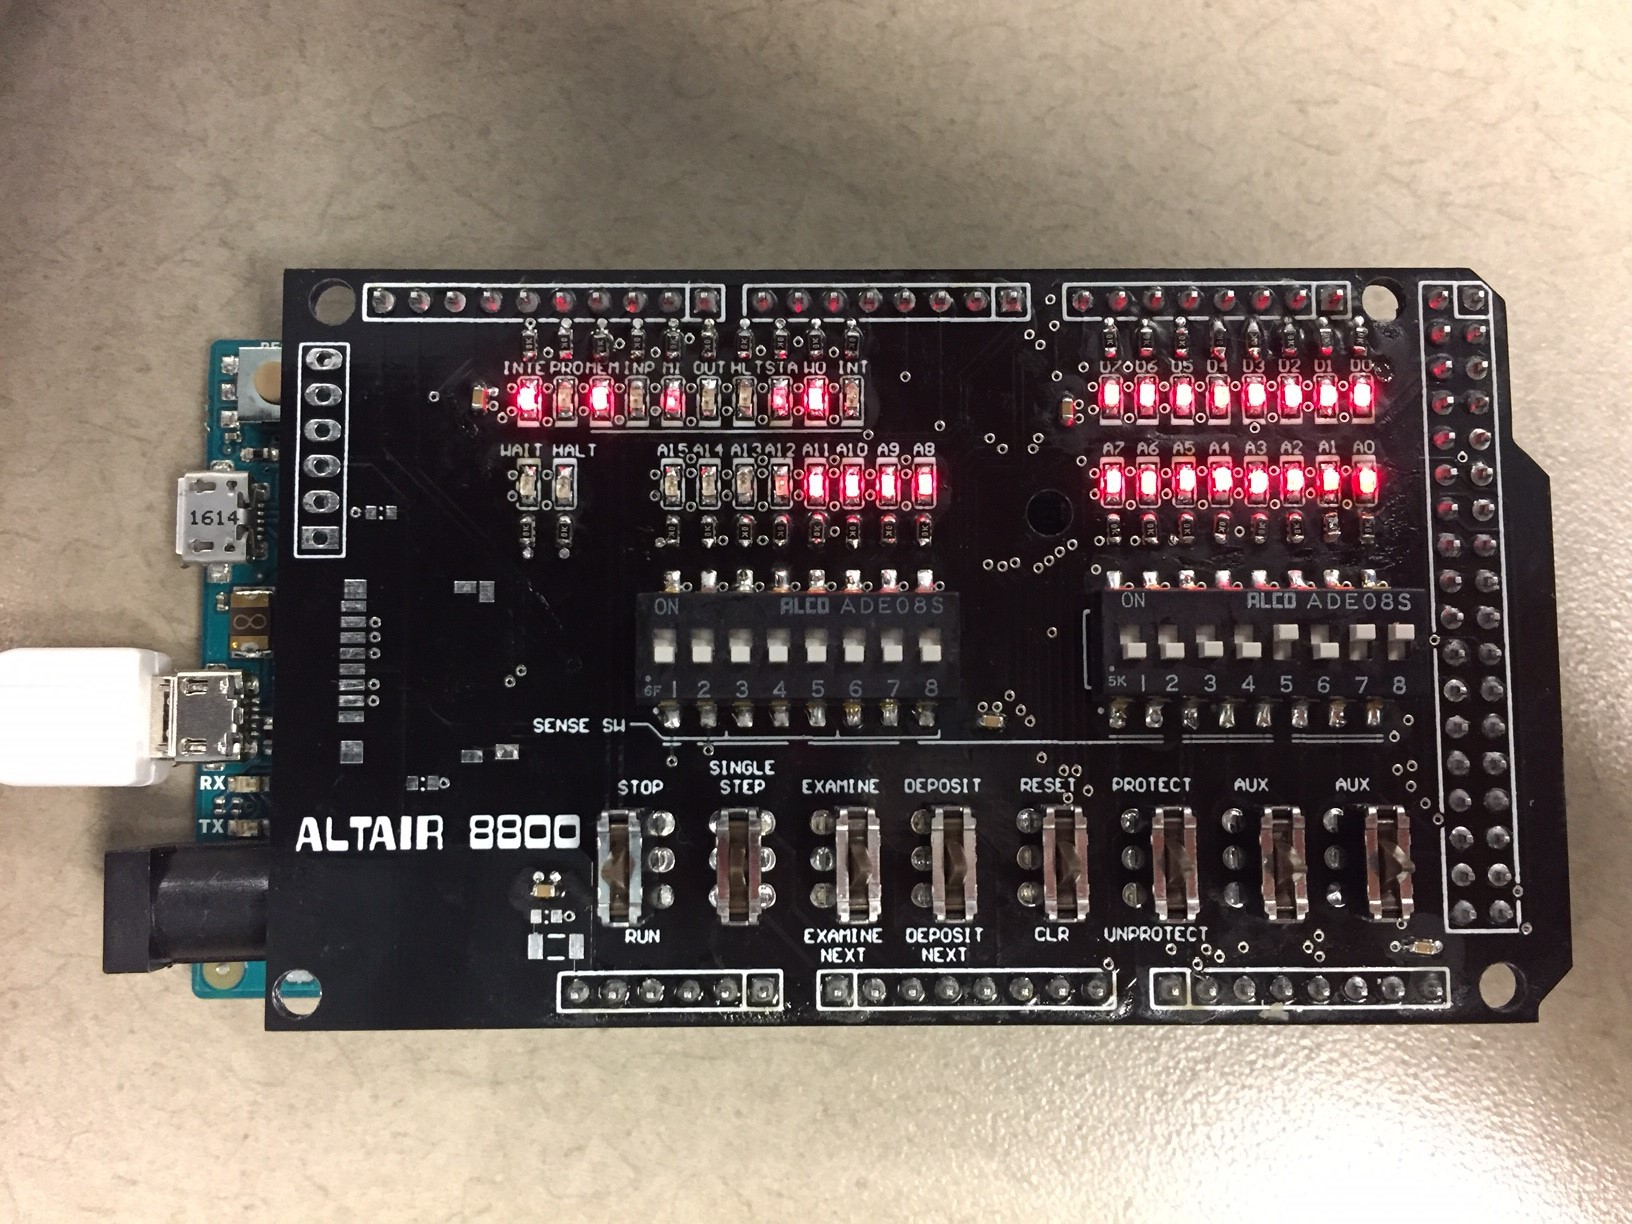
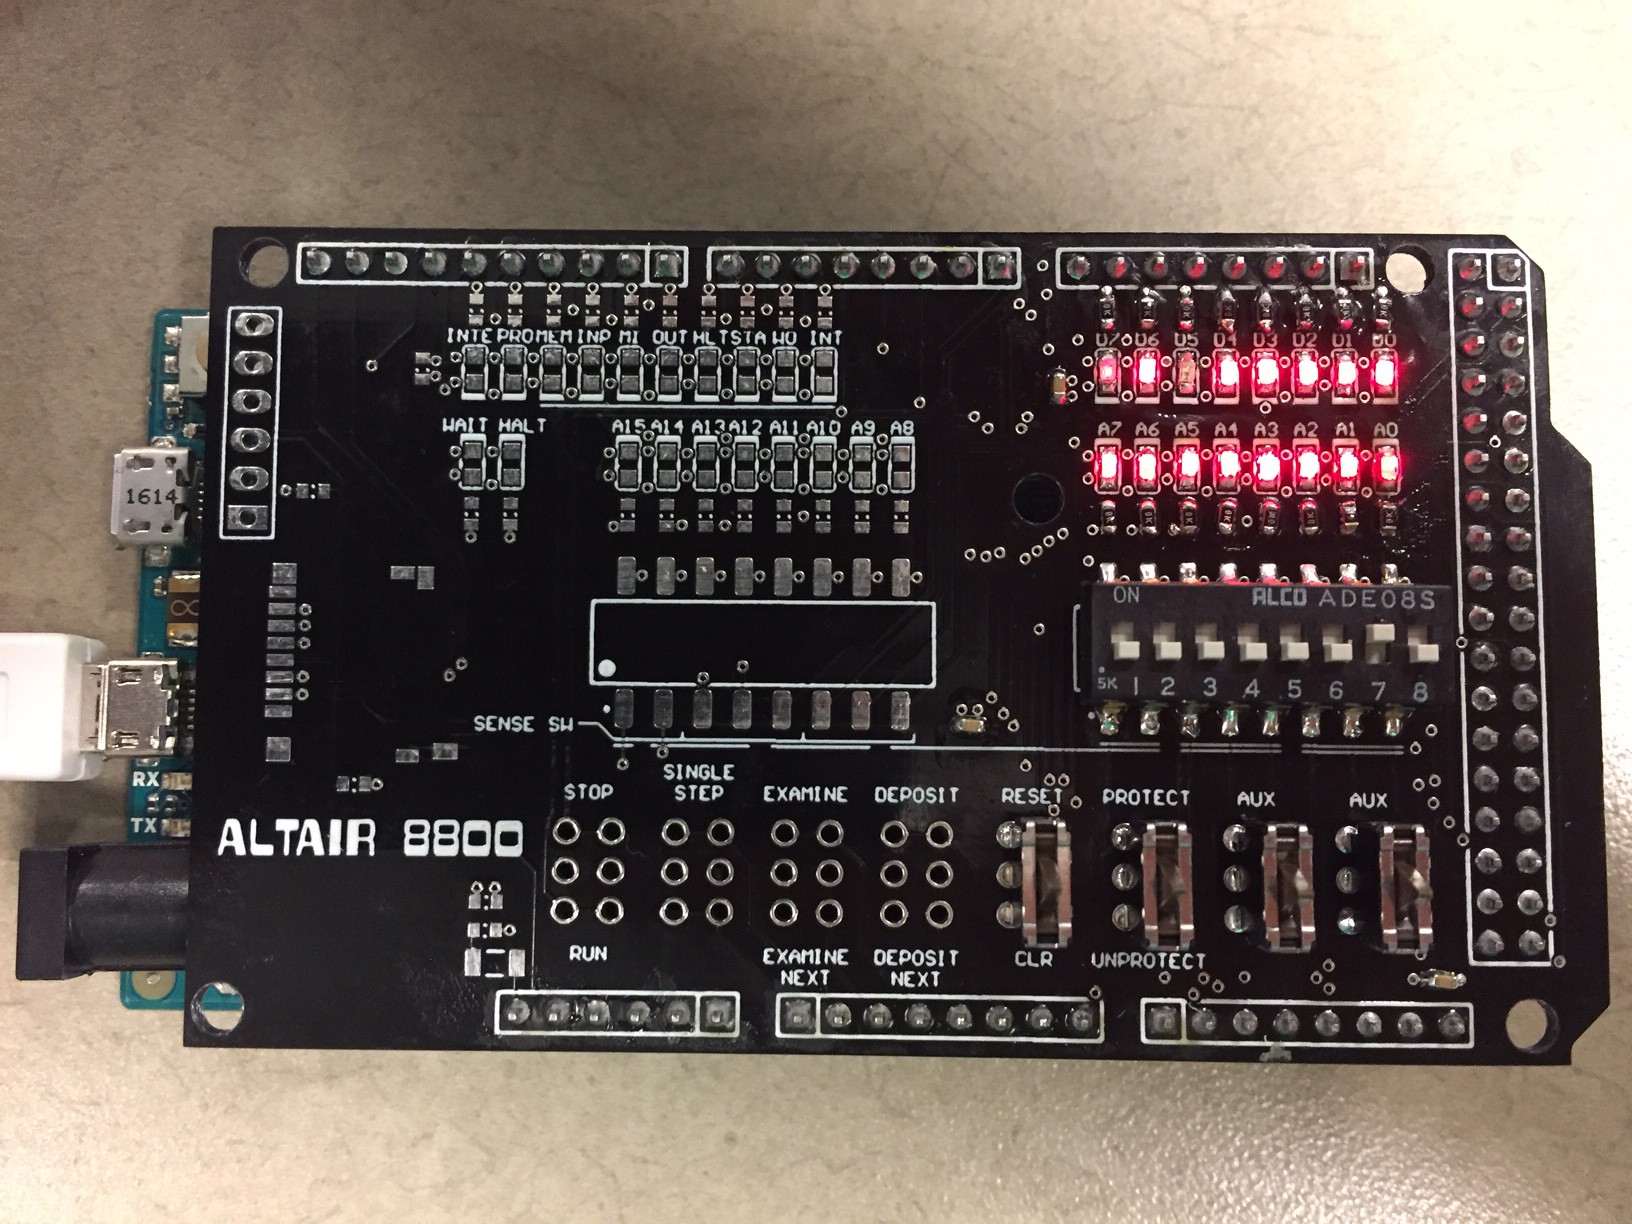
    I finished the right side of the board. I checked the DIP switches for polarity, and then soldered the remaining right-side LEDs, resistors, DIP switches, and the four right momentary switches. Since the software has pre-loaded programs, I used those to check everything. For example, setting my DIP switches to 0000 0010 and hitting the AUX1 toggle loads the kill-the-bit program (shown running below). Once I get everything working, I'll put up some videos showing it running.

    Next up is left side LEDs,resistors, DIP switches, and the remaining momentary switches. If I get that working, then all my primary goals are achieved. The secondary goals are to get the microSD card reader working, and then maybe the bluetooth module.

  • LED brightness toned down

    Justin Davis03/07/2017 at 18:40 0 comments

    I replaced the 1k current limiting resistors with 10k resistors and it's much more bearable to look at now. It may not come across in the photos.

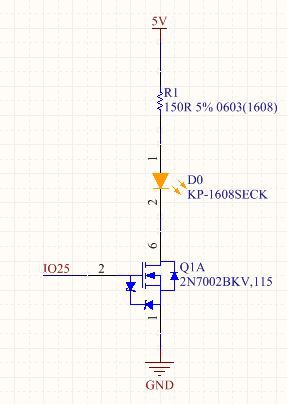
    I haven't uploaded a schematic just yet since I'm still making some small changes with components. But here's the LED driver. R1 is now 10k.

    Next I need to check the polarity of my DIP switches. I want "up" to be "on" like in the Altair. Which means a short on the switch. I think that means I need to install the switches upside down, but that's ok.

  • My eyes!

    Justin Davis03/06/2017 at 21:10 6 comments

    I got the standoffs soldered and two of the LEDs. I wanted to check the brightness on the LEDs before soldering all of the resistors. I decided 250 Ohms was still too much current, so I started with a 1kOhm resistors. I put two on the board and tried them out. And they were still very bright.

    There's no big diffuser on smalll LEDs like this, so all the brightness is very concentrated. I ended up writing a custom program with analogWrite and jumpered with a wire over to the LEDs to see what would be an acceptable brightness. I think if I had about 1/10th of the current it would be fine. So that means 10kOhm resistors. I'll remove the 1k and replace with 10k.

    I also found that with this many headers it's very tough to get the shield on and off easily. Perhaps with more repeated on/off cycles it will get easier.

  • Vias

    Justin Davis03/04/2017 at 21:58 0 comments

    I realized that I forgot to change my via settings. This was my first try at making a board in Altium. By default it doesn't place the solder mask over the vias. I prefer having the solder mask over the vias. It makes soldering by hand a little easier. In this case, the small amount of solder I place on the resistor and LED pads gets sucked down into the via. Not a big deal, but makes assembly just a little more difficult.

  • PCBs!

    Justin Davis03/03/2017 at 13:04 0 comments

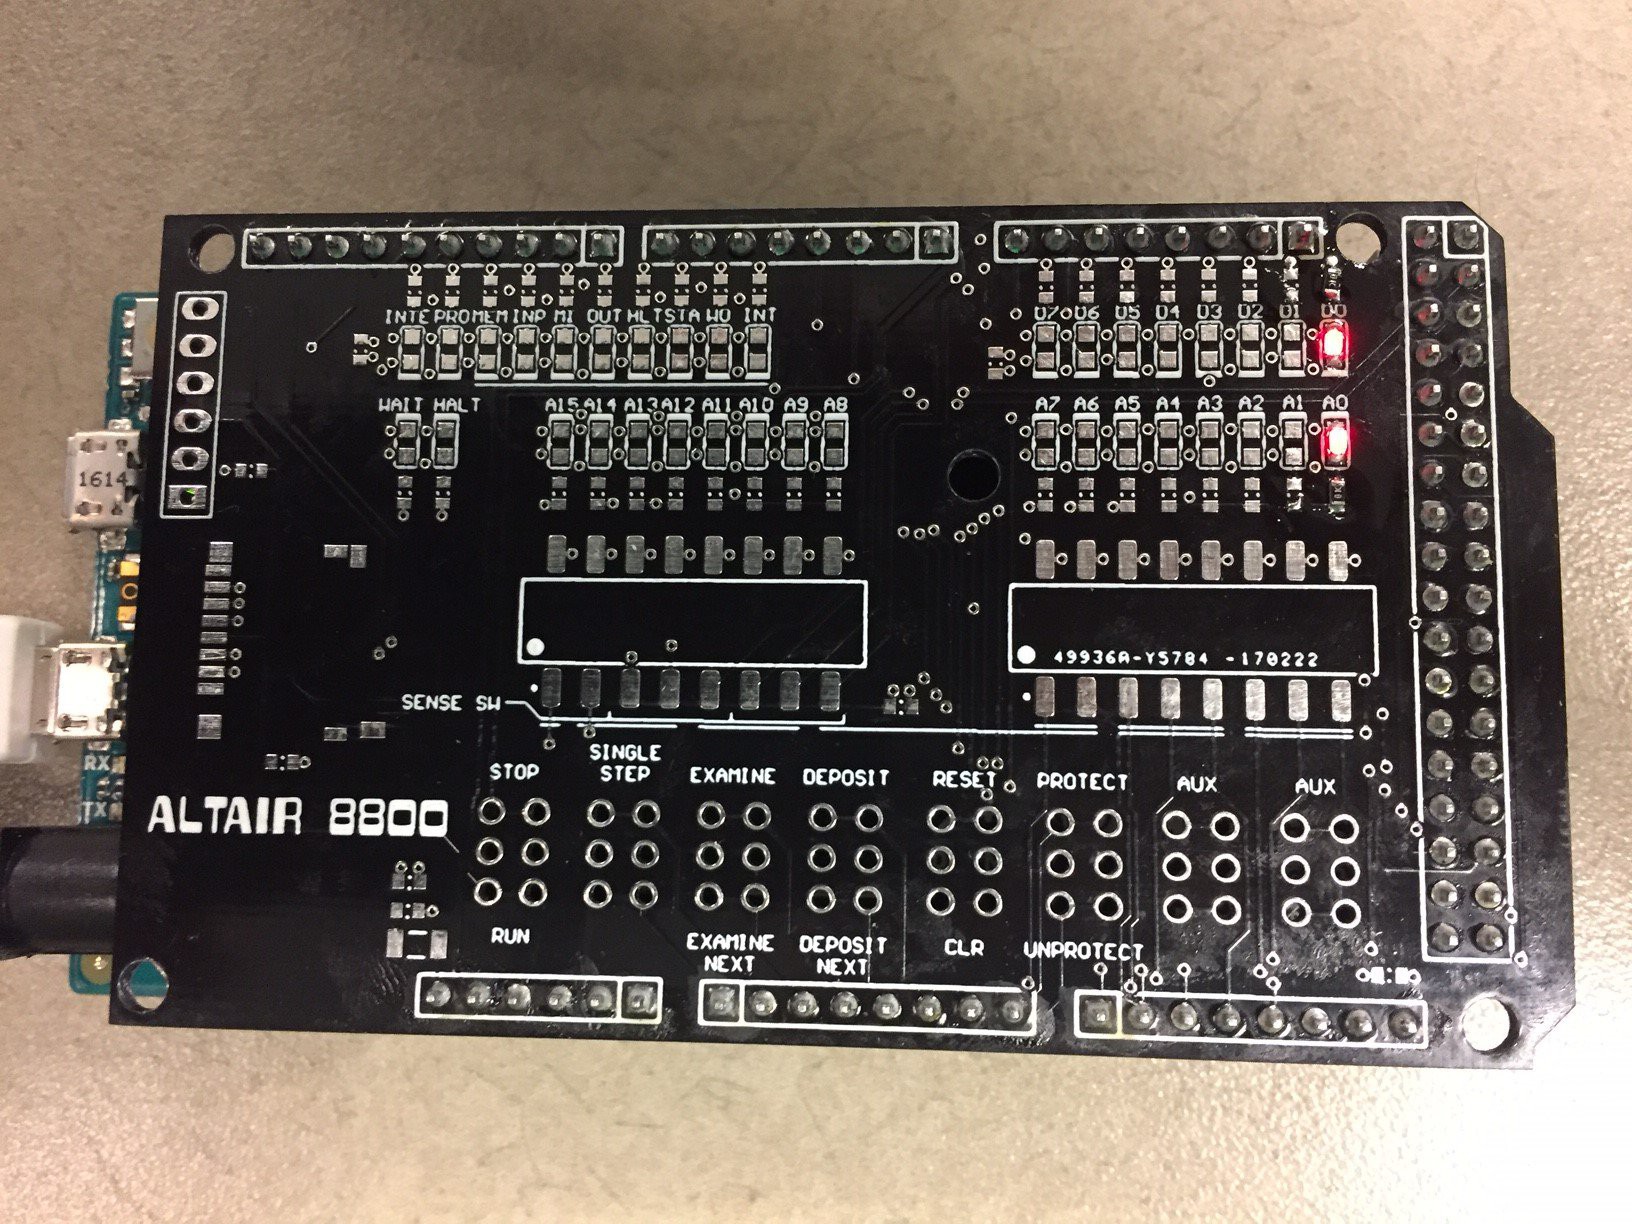
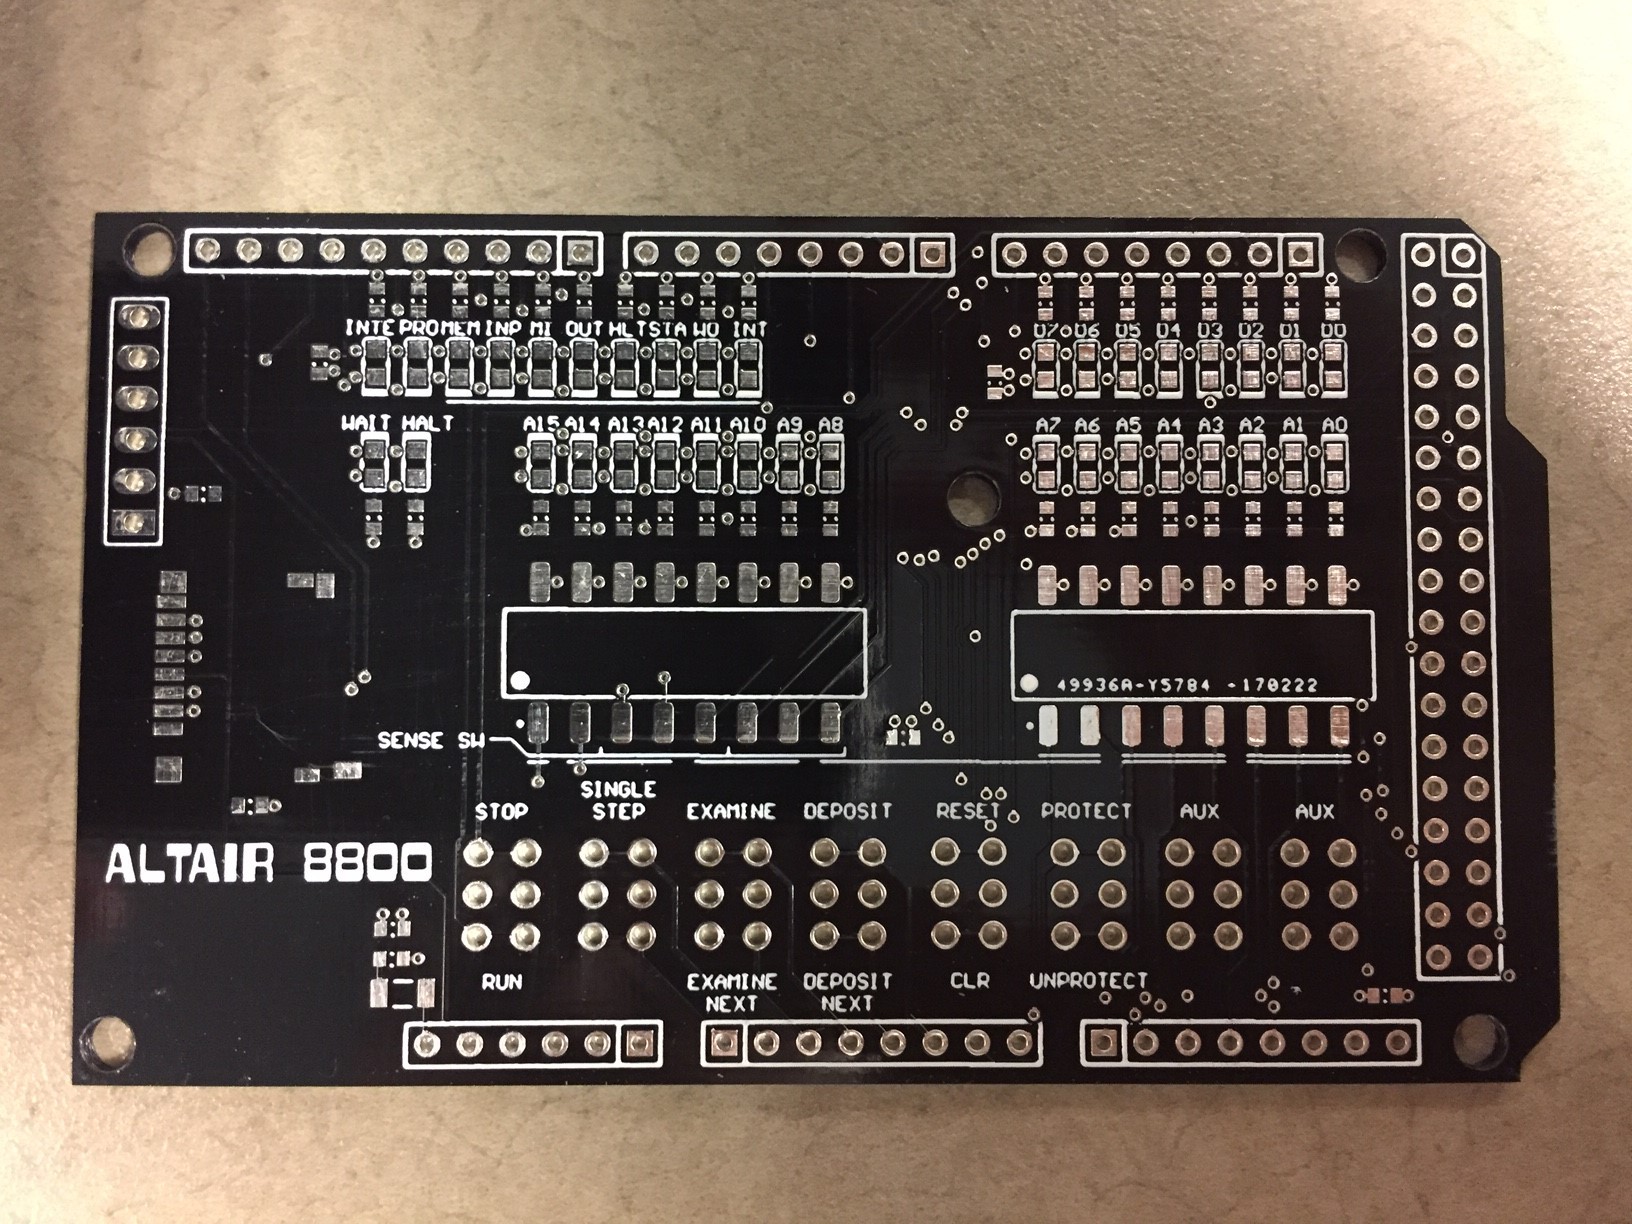
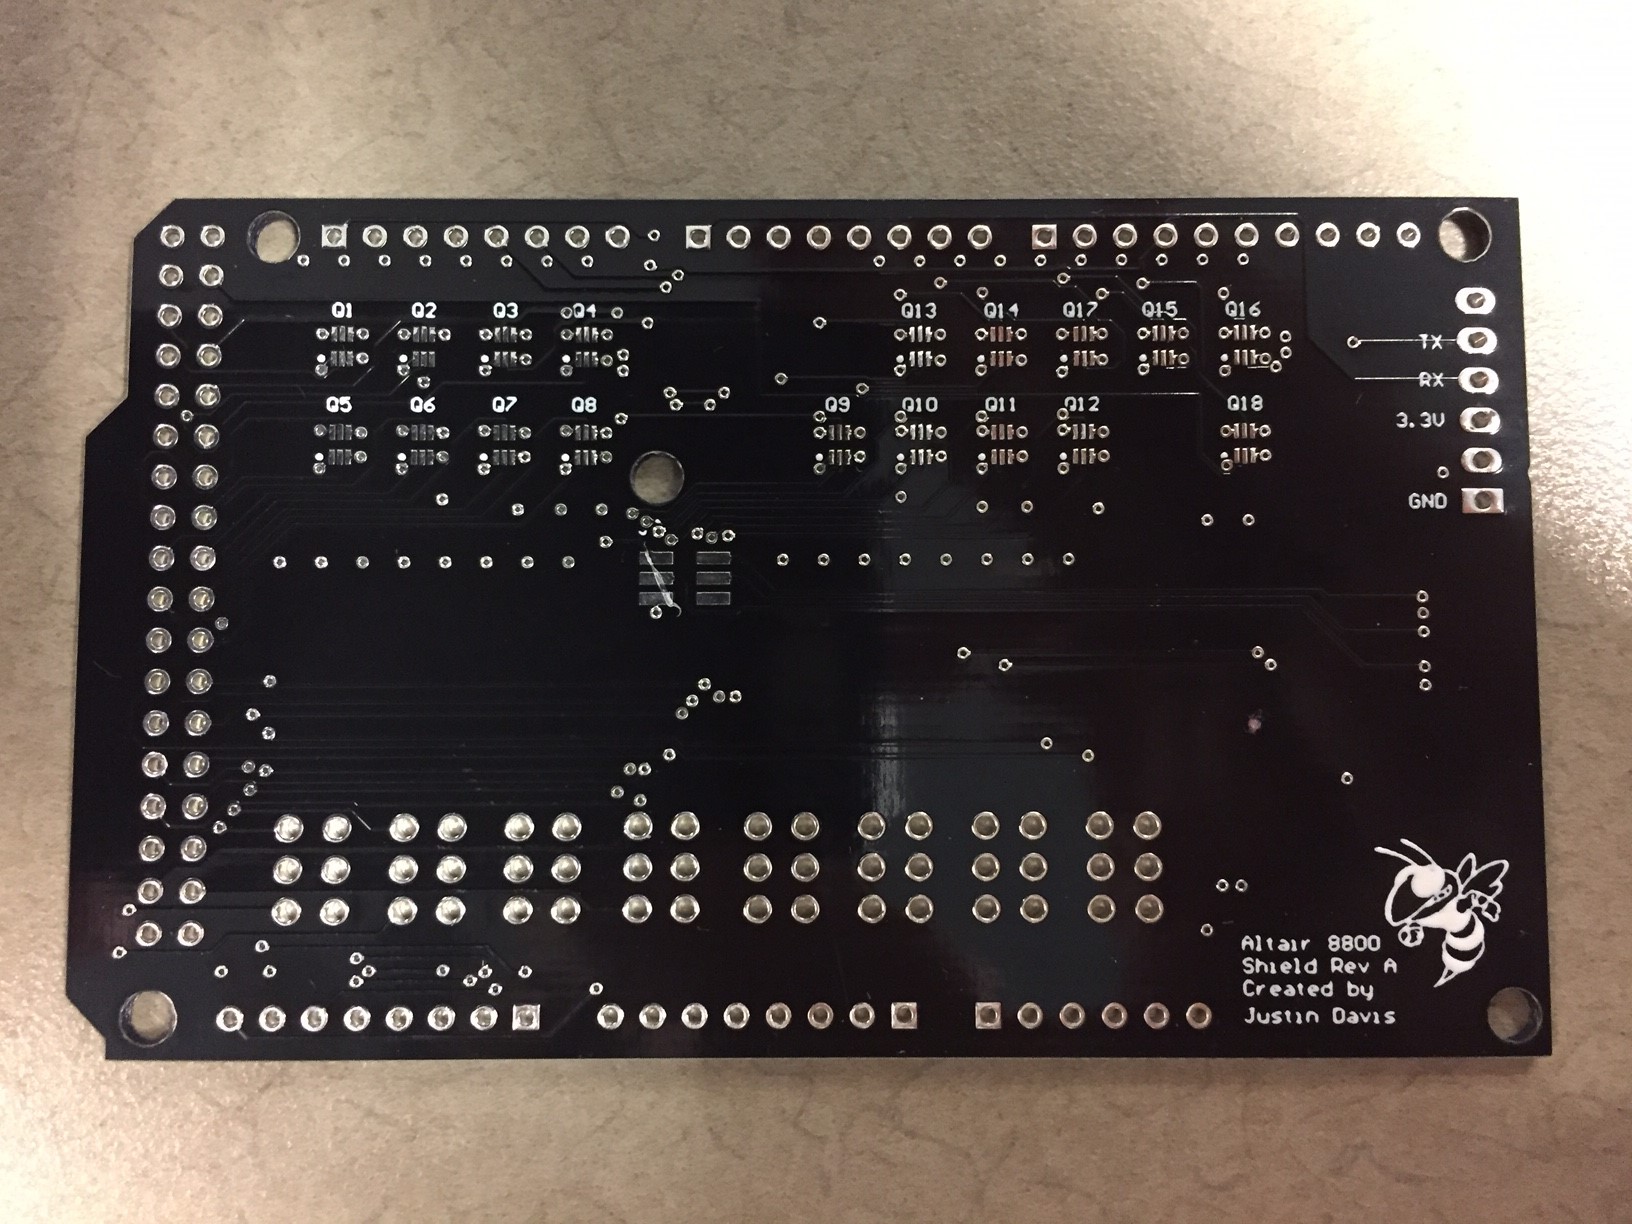
    Lookin good! The black mask really makes the silkscreen pop. If I were to do this again, I might move the LED resistors to the bottom side. They kinda look crammed in there. I also added a Buzz on the backside since I've never put artwork on silkscreen before. And the Altair 8800 logo looks good too. Now to begin the long process of soldering and check out.

  • PCB shipped

    Justin Davis02/28/2017 at 21:01 0 comments

    PCBs shipped today! Supposed to arrive tomorrow. I'll put photos up when I get them.

View all 15 project logs

Enjoy this project?

Share

Discussions

jondaddio wrote 06/15/2020 at 18:48 point

Any updates on the Rev B PCB??

  Are you sure? yes | no

jondaddio wrote 04/16/2020 at 21:14 point

I am interested in your Rev B board once you get ready to release it.

  Are you sure? yes | no

joseluis.collado wrote 04/04/2019 at 22:49 point

Hi ! Do you still have a PCB left, or planning on a new batch ? 

  Are you sure? yes | no

Zeb McClure wrote 02/20/2018 at 20:04 point

Wondering if anything is happening with this project.   Still itching for an assembled one!

  Are you sure? yes | no

Justin Davis wrote 02/27/2018 at 01:23 point

I probably won't do an assembled version unless there's a significant demand.  I haven't heard a significant demand, so probably not at this point.

  Are you sure? yes | no

kpmyers wrote 06/21/2017 at 22:34 point

Are thease boards avail anyplace for those of us without  

PayPal? Love the project and always craved the Altair as a young man.

Ken

  Are you sure? yes | no

Zeb McClure wrote 06/13/2017 at 15:20 point

I'd love to buy a rev.2 board, preferably assembled.  Any plans to sell them?

  Are you sure? yes | no

Jean-Charles wrote 05/25/2017 at 05:41 point

I'd want one ! Have you ever one ? Is that possible to send it to France ?

  Are you sure? yes | no

Justin Davis wrote 05/25/2017 at 14:21 point

I can send you a bare PCB.  I have not yet sent anything internationally, but I can get you a quote for shipping to France.  I think it will be around $40 for shipping and the board to get to France.

  Are you sure? yes | no

Justin Davis wrote 03/28/2017 at 11:34 point

For anyone wanting a bare PCB as-is, my paypal account is gpburdell1@yahoo.com.  Include the address you want me to ship it to, and I'll get it sent off through USPS.  Just keep in mind there's a couple errors on the current version, but no show-stoppers.  I'll let everyone know if/when my stock (of 8) runs out.  The price to send to anyone in the US is $13.  Anyone outside US will have to pay for international shipping which I will have to get a quote for, but it looks like it will be about $42 total.  If you are outside US, let me know you want one and I will get you a quote.

  Are you sure? yes | no

Neal wrote 03/22/2017 at 03:04 point

how do you want me to pay you for the PCB. I have a paypal account

  Are you sure? yes | no

retrotech95 wrote 03/20/2017 at 14:33 point

I'd want one too. I think it would be cool if this would be a soldering kit!

  Are you sure? yes | no

Orion Campos wrote 03/15/2017 at 08:23 point

Please, add me also to any list of a new batch of PCB's or any other related product. Cheers!

  Are you sure? yes | no

Tachyon wrote 03/15/2017 at 05:13 point

You could also put the board designs on Dirty PCB's for the budget conscious.

Cool project BTW. 

  Are you sure? yes | no

Mark Jungwirth wrote 03/15/2017 at 01:29 point

Justin, awesome.  Please add me to the list for a PCB, please.  Now to find some stronger reading glasses...

  Are you sure? yes | no

kevin.is.out.there wrote 03/15/2017 at 00:44 point

Beautiful project Justin. Please add my name to the list of spare/bare board customers.

  Are you sure? yes | no

Justin Davis wrote 03/14/2017 at 20:37 point

I have 9 bare boards as of today.  I'd be willing to part with 8 of them.  I'll have to figure out a way to do a secure transaction for them.  I can also put the design on OSHPark, but that'll be a lot more expensive (and they won't be black).  I'm thinking in the $12-13 range each.  Keep in mind this is not an easy board to solder since it's a lot of 0603 components.

  Are you sure? yes | no

Neal wrote 03/14/2017 at 23:53 point

Justin I'll be like to purchase one. Also what is the header on the right side of the board for?

  Are you sure? yes | no

Chrismck wrote 03/15/2017 at 12:34 point

Thar's the side connector on the Arduino Due.

  Are you sure? yes | no

Chrismck wrote 03/15/2017 at 12:36 point

I'll DM you, you let me know the way you're most comfortable (secure) for purchase and toss the PCB in a padded envelope - no problem on my end for the 0603 components.

  Are you sure? yes | no

Koaps wrote 03/27/2017 at 17:49 point

if you still have some, I would love to buy one, amazing work

  Are you sure? yes | no

Thomas Jager wrote 03/14/2017 at 18:32 point

Like many others, I'd also love to buy a PCB if they were made available.

  Are you sure? yes | no

moosesport.electronics wrote 03/14/2017 at 18:14 point

I would like to buy a PCB as well.

  Are you sure? yes | no

Neal wrote 03/14/2017 at 17:22 point

yes I'd love to purchase a PCB also

  Are you sure? yes | no

Chrismck wrote 03/14/2017 at 16:14 point

Absolutely fabulous idea Justin, you by chance have the interest in selling a bare PCB?  I'd love to put one together, I considered doing just this after I saw a tweet regarding Mr. Hansen's project.  Or if this was an OSHPark order (I suspect not cause you indicated 10 boards) a link to the boards.  Again, awesome project - Kudos!

  Are you sure? yes | no

Similar Projects

Does this project spark your interest?

Become a member to follow this project and never miss any updates