Metalnat
-
To Build a Controller for Ants...
05/04/2017 at 08:43 • 0 commentsand possibly penguins.
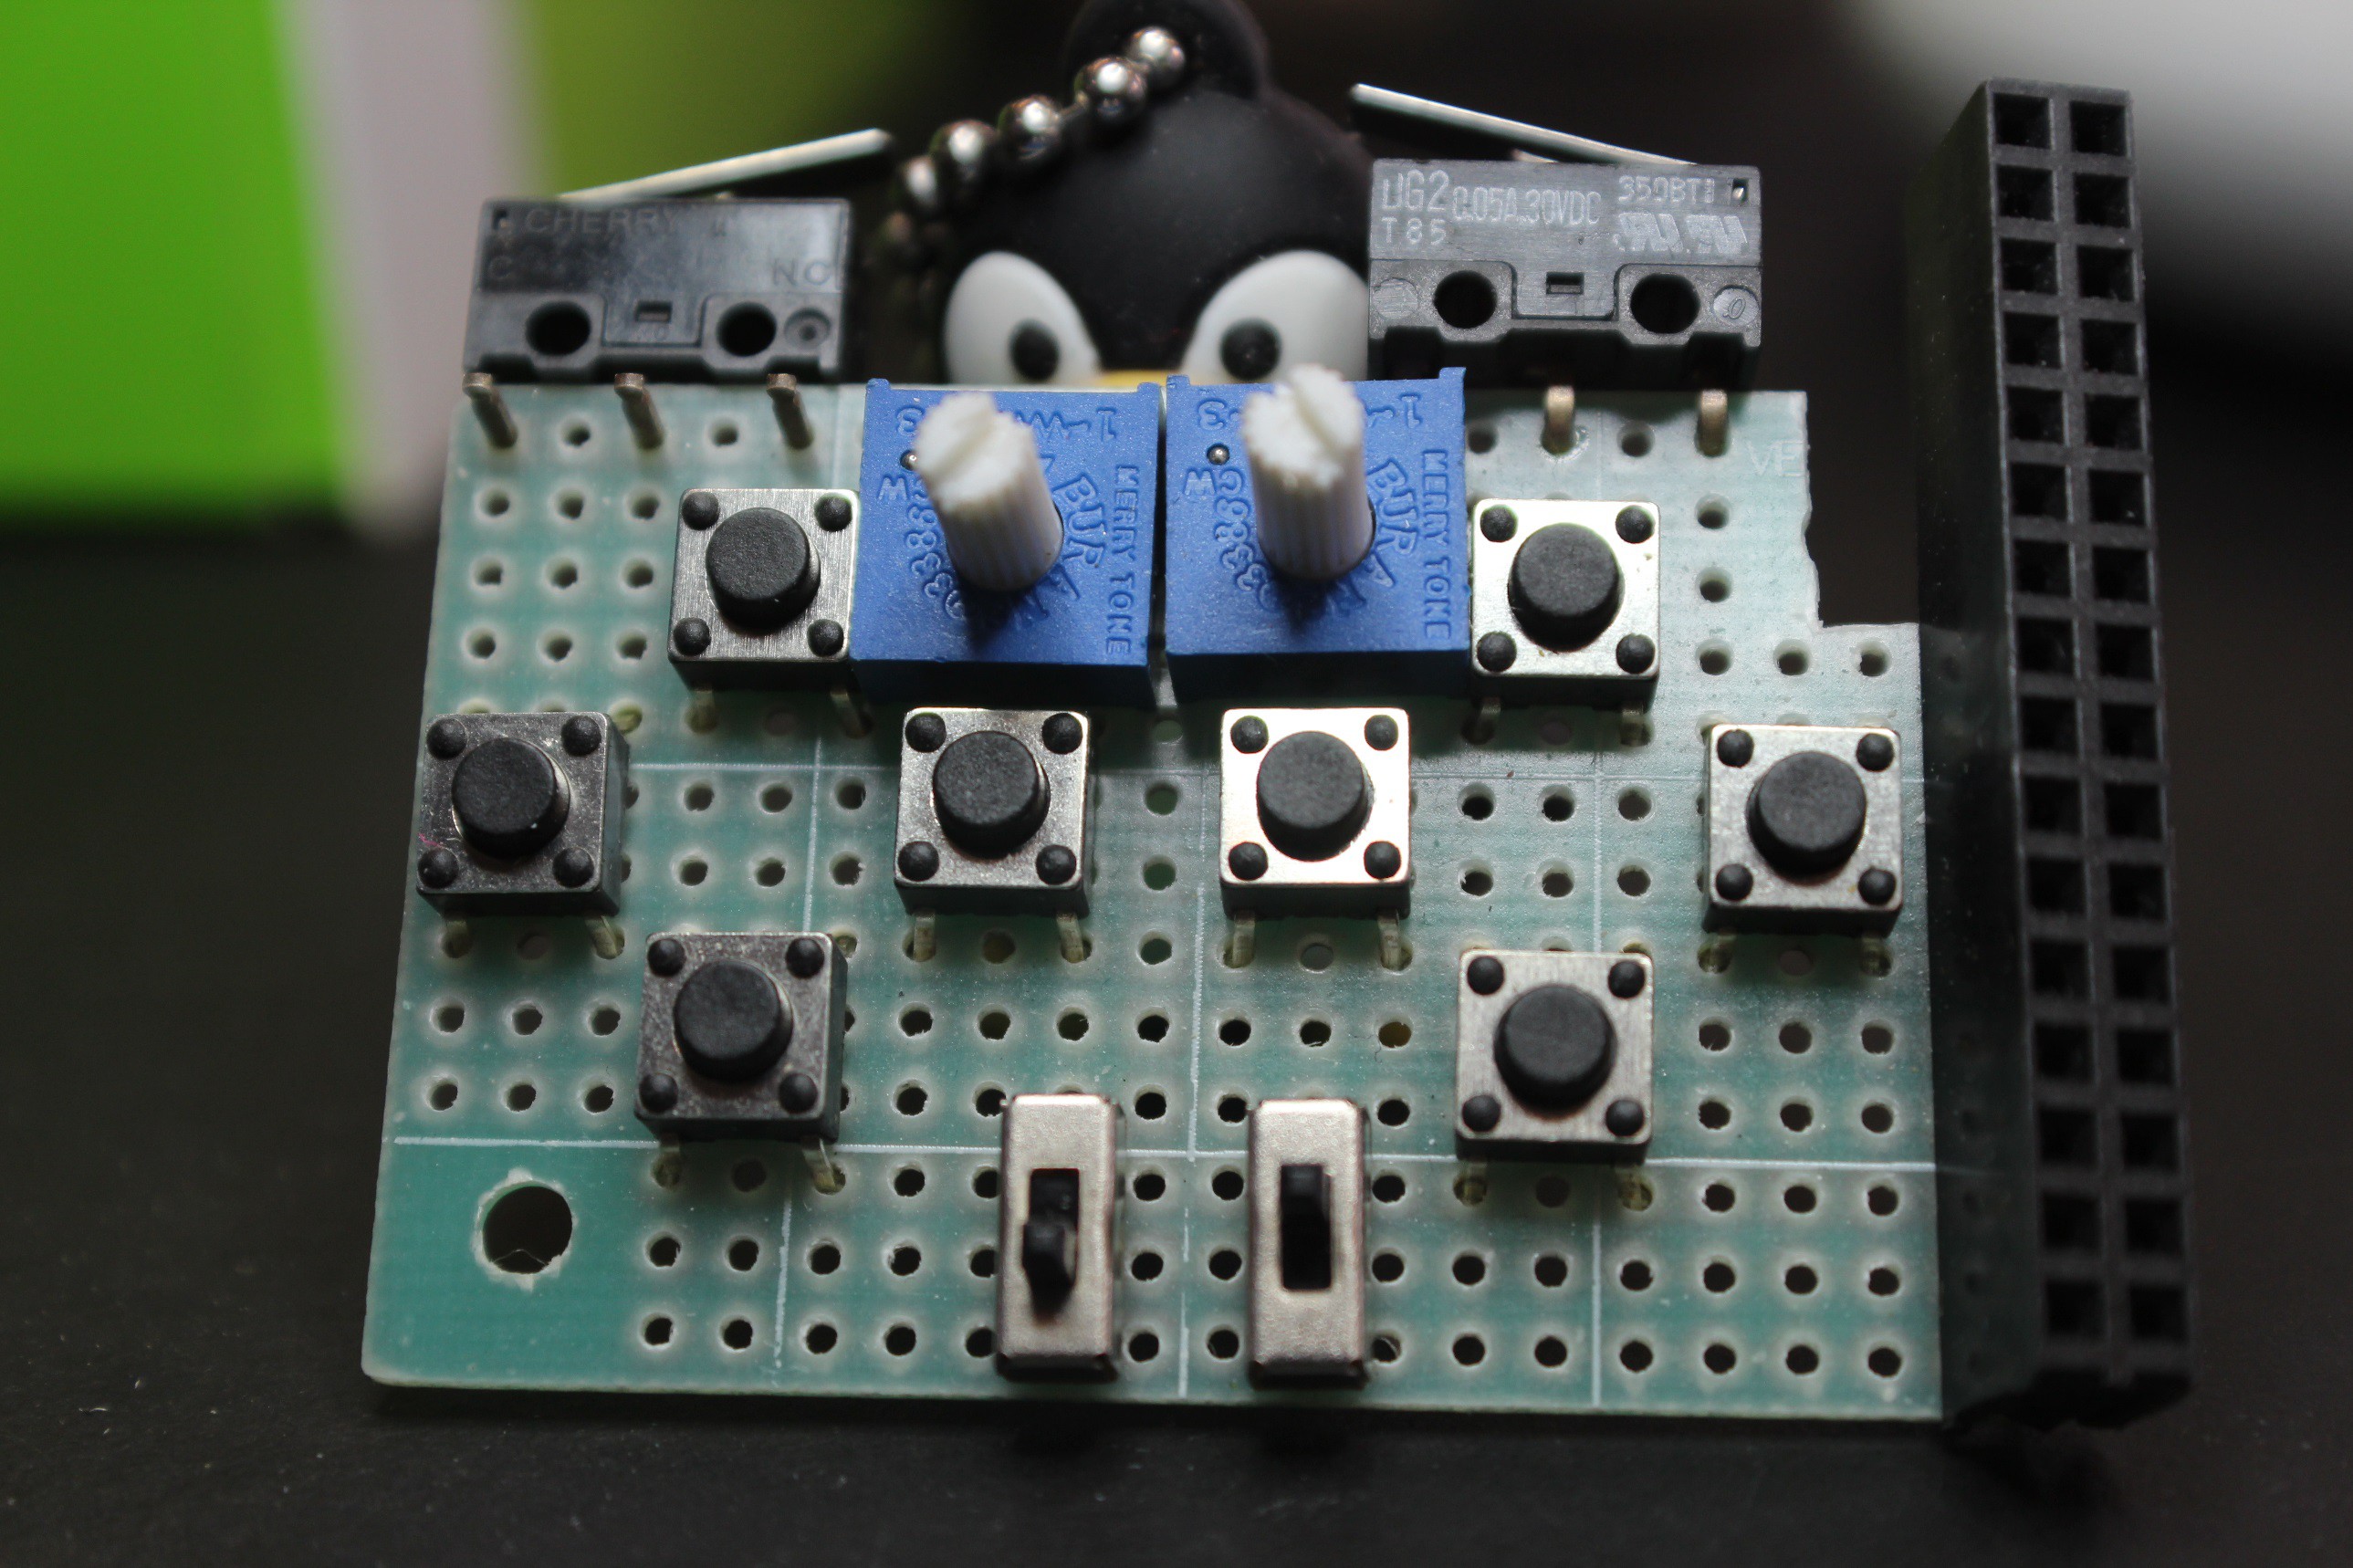
![]() Say hello to tiny make-my-hand-hurt controller. Admittedly I did not think this one through. Well not at least in the usability department. Mostly it was just to have buttons i can connect later and use for a pocket sized test rig roughly based off of the SNES controller from days with some minor changes for extended testing. Like having switches that act like latching buttons in execution. And potentiometers for.... well something I have not come up with yet. That's a puzzle for Future Metal.
Say hello to tiny make-my-hand-hurt controller. Admittedly I did not think this one through. Well not at least in the usability department. Mostly it was just to have buttons i can connect later and use for a pocket sized test rig roughly based off of the SNES controller from days with some minor changes for extended testing. Like having switches that act like latching buttons in execution. And potentiometers for.... well something I have not come up with yet. That's a puzzle for Future Metal.I've also made a more robust Teensy dev build with GND and VCC/5V/3V rails for quick testing of sensors. Admittedly all of the header female sockets bunched up like this has on occasion made for a blunder or two. But that's reason #17 why i like the Teensy so much. I've done many a dumb thing to them and yet they still keep kicking.
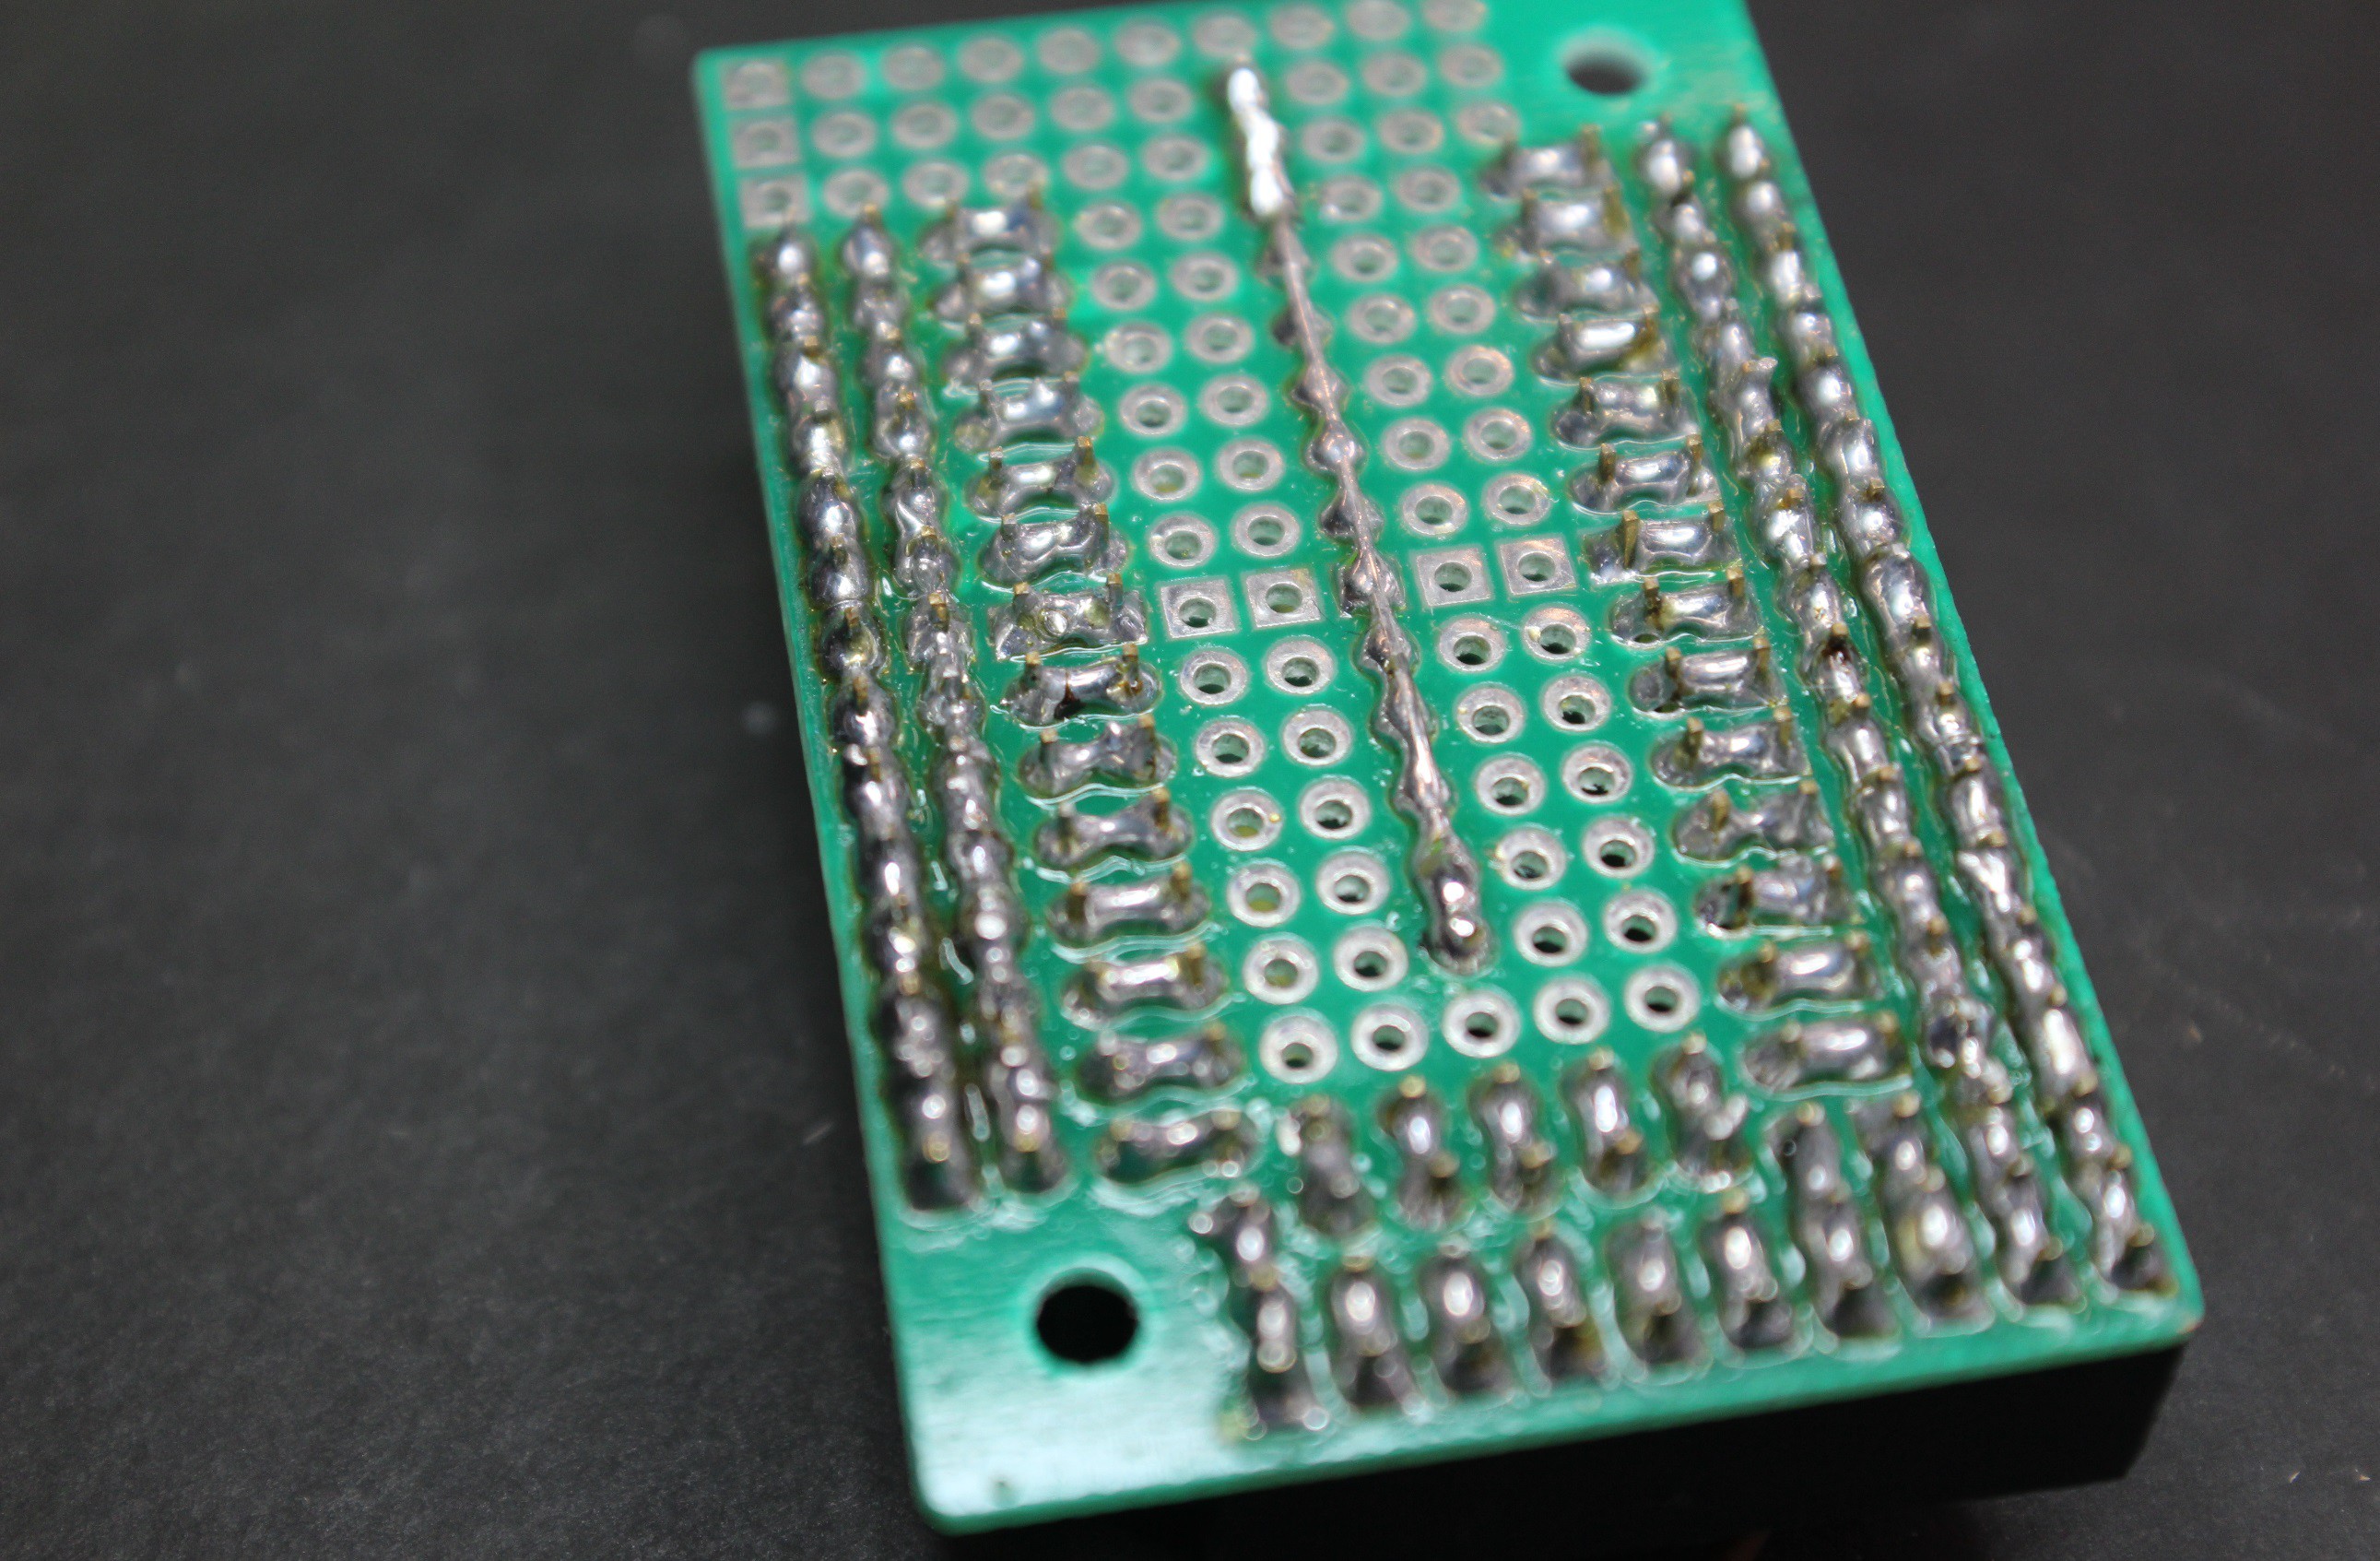
![]()
And a bottom view to better show what i mean by the GND and power rails.
![]()
I really like soldering and putting things like this together but we are already viewing a threshold stopping many from diving into this kind of build. I've taught many classes for something as simple as soldering to students that have never soldered, or have but felt super self conscience of their work. And after every class, every single student has left feeling confident that they can tackle most projects like this and after our discussion on how to use the multi-meter, feel like they can at least observe issues and have a chance at fixing issues. Sadly though I am not able to sit with everyone I meet, or friends from different stated to provide the same reassurance enabling them to continue forward. So how do we make these kinds of projects accessible? What are all the pitfalls that hinder people just starting, or getting past their first issues. That in part is a goal to be addressed through this project.
~Metal
-
The Great Thing About Standards....
05/04/2017 at 07:29 • 0 commentsThere are so many to choose from.
This is something reiterated time and time again by most of my mentors and friends. So let me walk you through an example of what I mean and the oh so common feeling of starting a project and stopping short due to fear of not doing it the "right way".Given that I would like to set up a no code jump into game controllers I decided it would be smart to buy several controllers and see if there is a standard button layout to build off of. The two main reasons this is important to me would be allowing for a 1 to 1 comparison example build allowing people to make slight adjustments to different dimensions to make a nearly perfect controller be exactly what they want, and to minimize code changes in the software of many preexisting games.
I picked up some controllers from "Hack Me" boxes at local hackerspace like Crashspace or Burbank Makerspace and made some purchases from Amazon. Then i took all of the controllers I had and through windows device management i could check controller settings. This brings up a screen for seeing what number or axis is sent to the computer when a button is pressed or a joystick is moved.
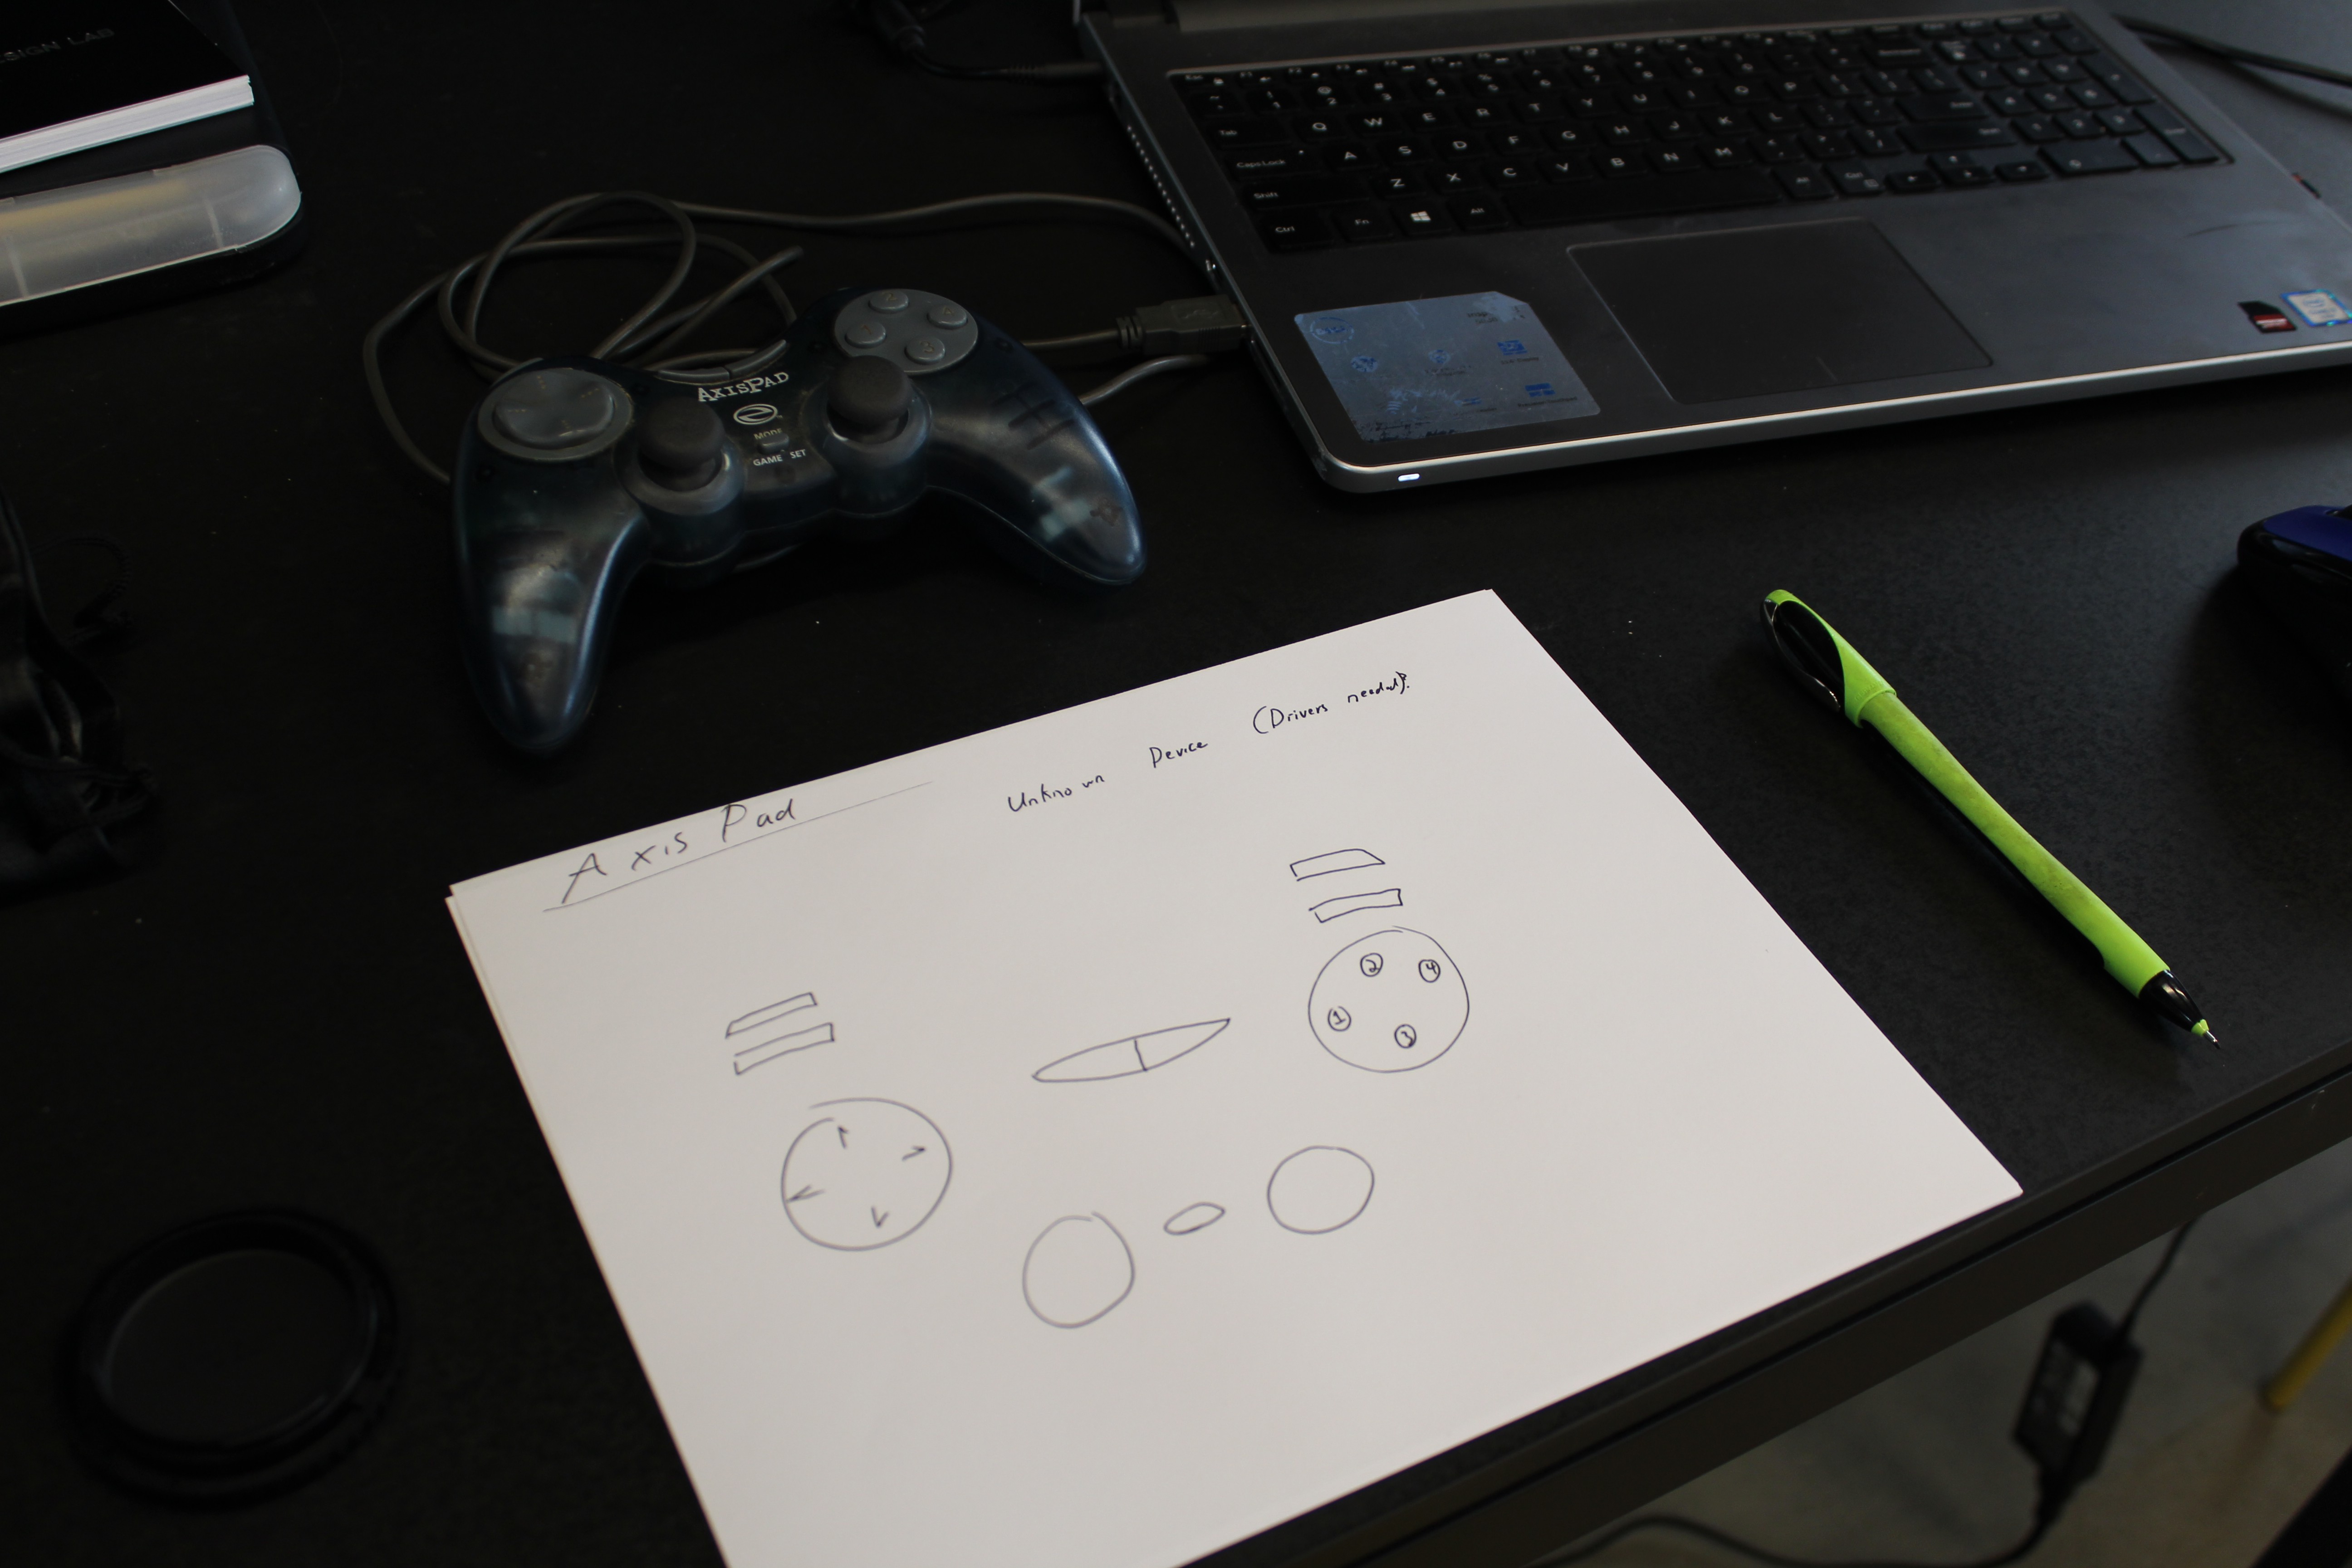
The first one was an old Axis Pad. My computer did not recognize the device. Most likely i would have to install drivers. Since this is already the opposite experience i want for anyone else I decided to move on. The reason i chose the Teensy to build off of was it's ability to be understood as a joystick when plugged in. Nothing else need be installed.
![]() This gem was found in the Hack Me box at Crash. so all bets are off to say the least. Also not recognized by my computer... well not entirely. The name Playstation (R)3 Controller showed up in device name. even though SplitFish was want was on the side.
This gem was found in the Hack Me box at Crash. so all bets are off to say the least. Also not recognized by my computer... well not entirely. The name Playstation (R)3 Controller showed up in device name. even though SplitFish was want was on the side. ![]()
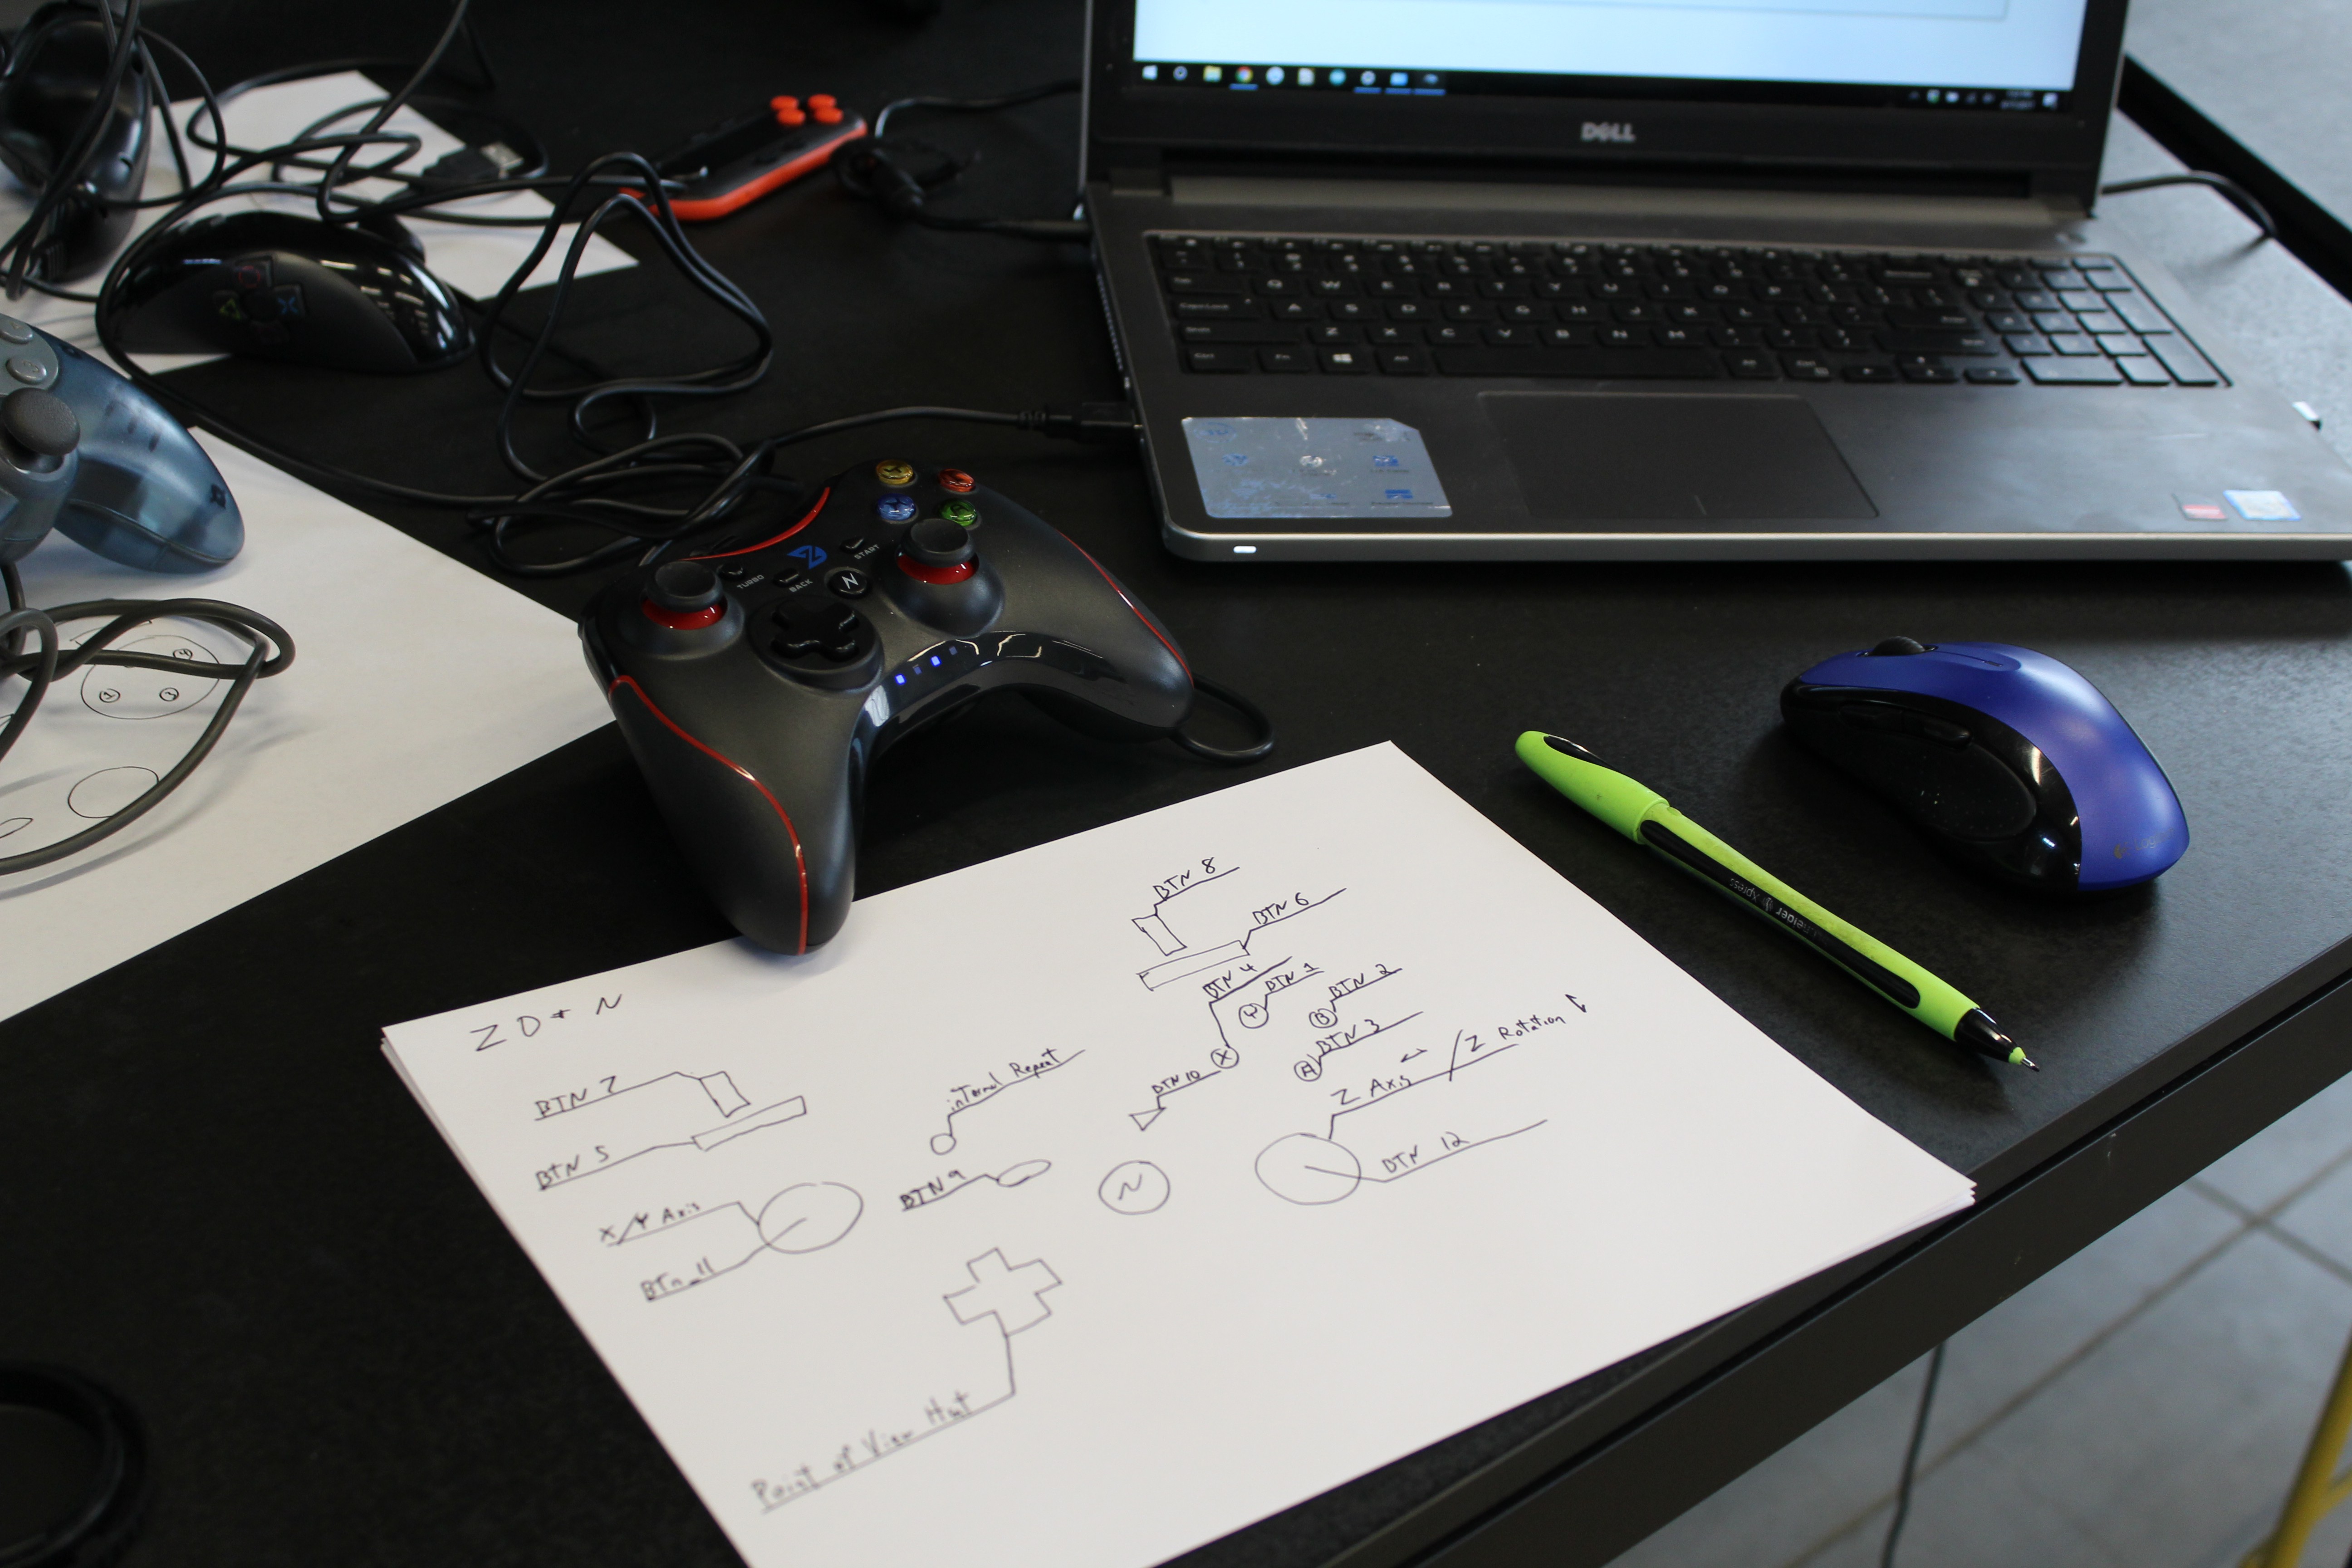
This one i purchased on Amazon. It's the ZD+N controller labeled for computers and mobile devices. It immediately worked out of the box. just plugged in and it knew it was a joystick AND it observed all button changes without any issue. This is a lot more like the experience i want for my clients. This being the first controller to pop up in this list of experience I did notice a few things on the joystick settings that was new to me. The number of buttons updated to match number of buttons on the controller. All button signals and joystick values are solid and without detectable noise. In tandem to buttons and joystick axis values I could now see something called "Hat" referring to the D-Pad in the bottom left. All things to test and look up more later.
![]()
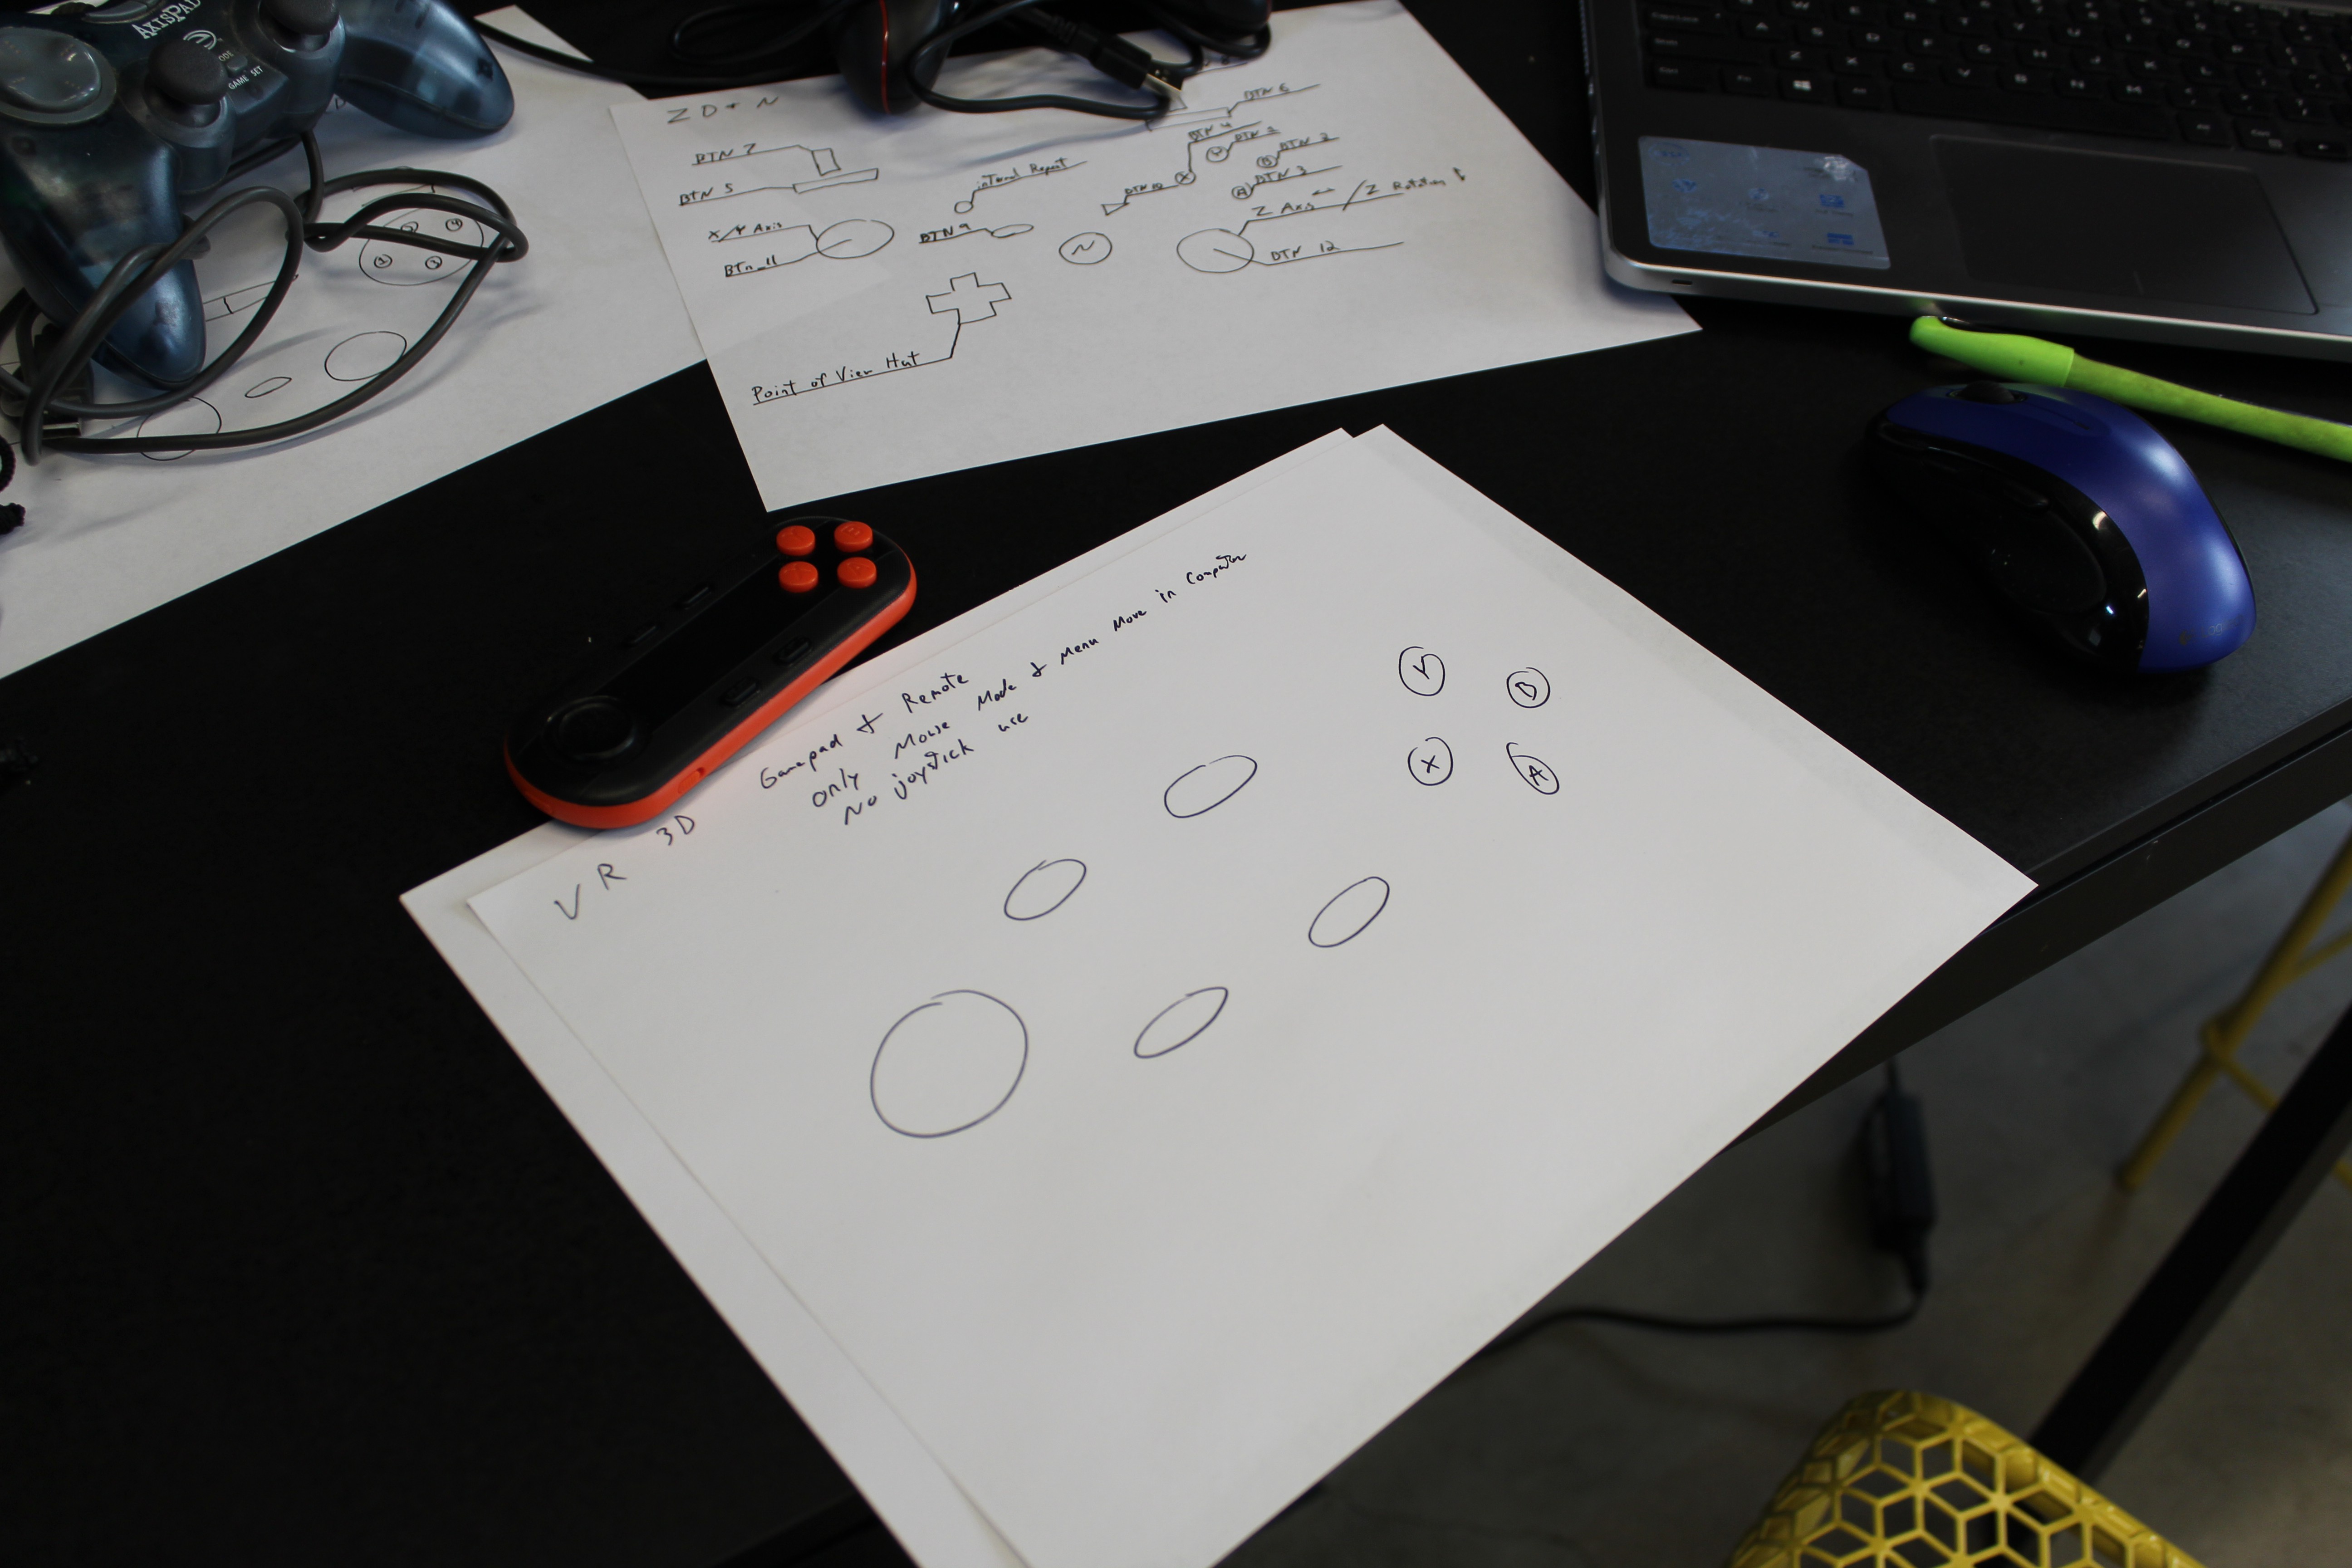
This little guy simply labeled VR 3D was from Burbank Makerspace for testing. Only acted and a mouse on the computer regardless of what mode i placed it into. I think more for presentations than games, But i do remember playing with this some on my android for a unity test build many months ago. The no joystick mode for computer quickly ended my time testing this one out as well.
![]()
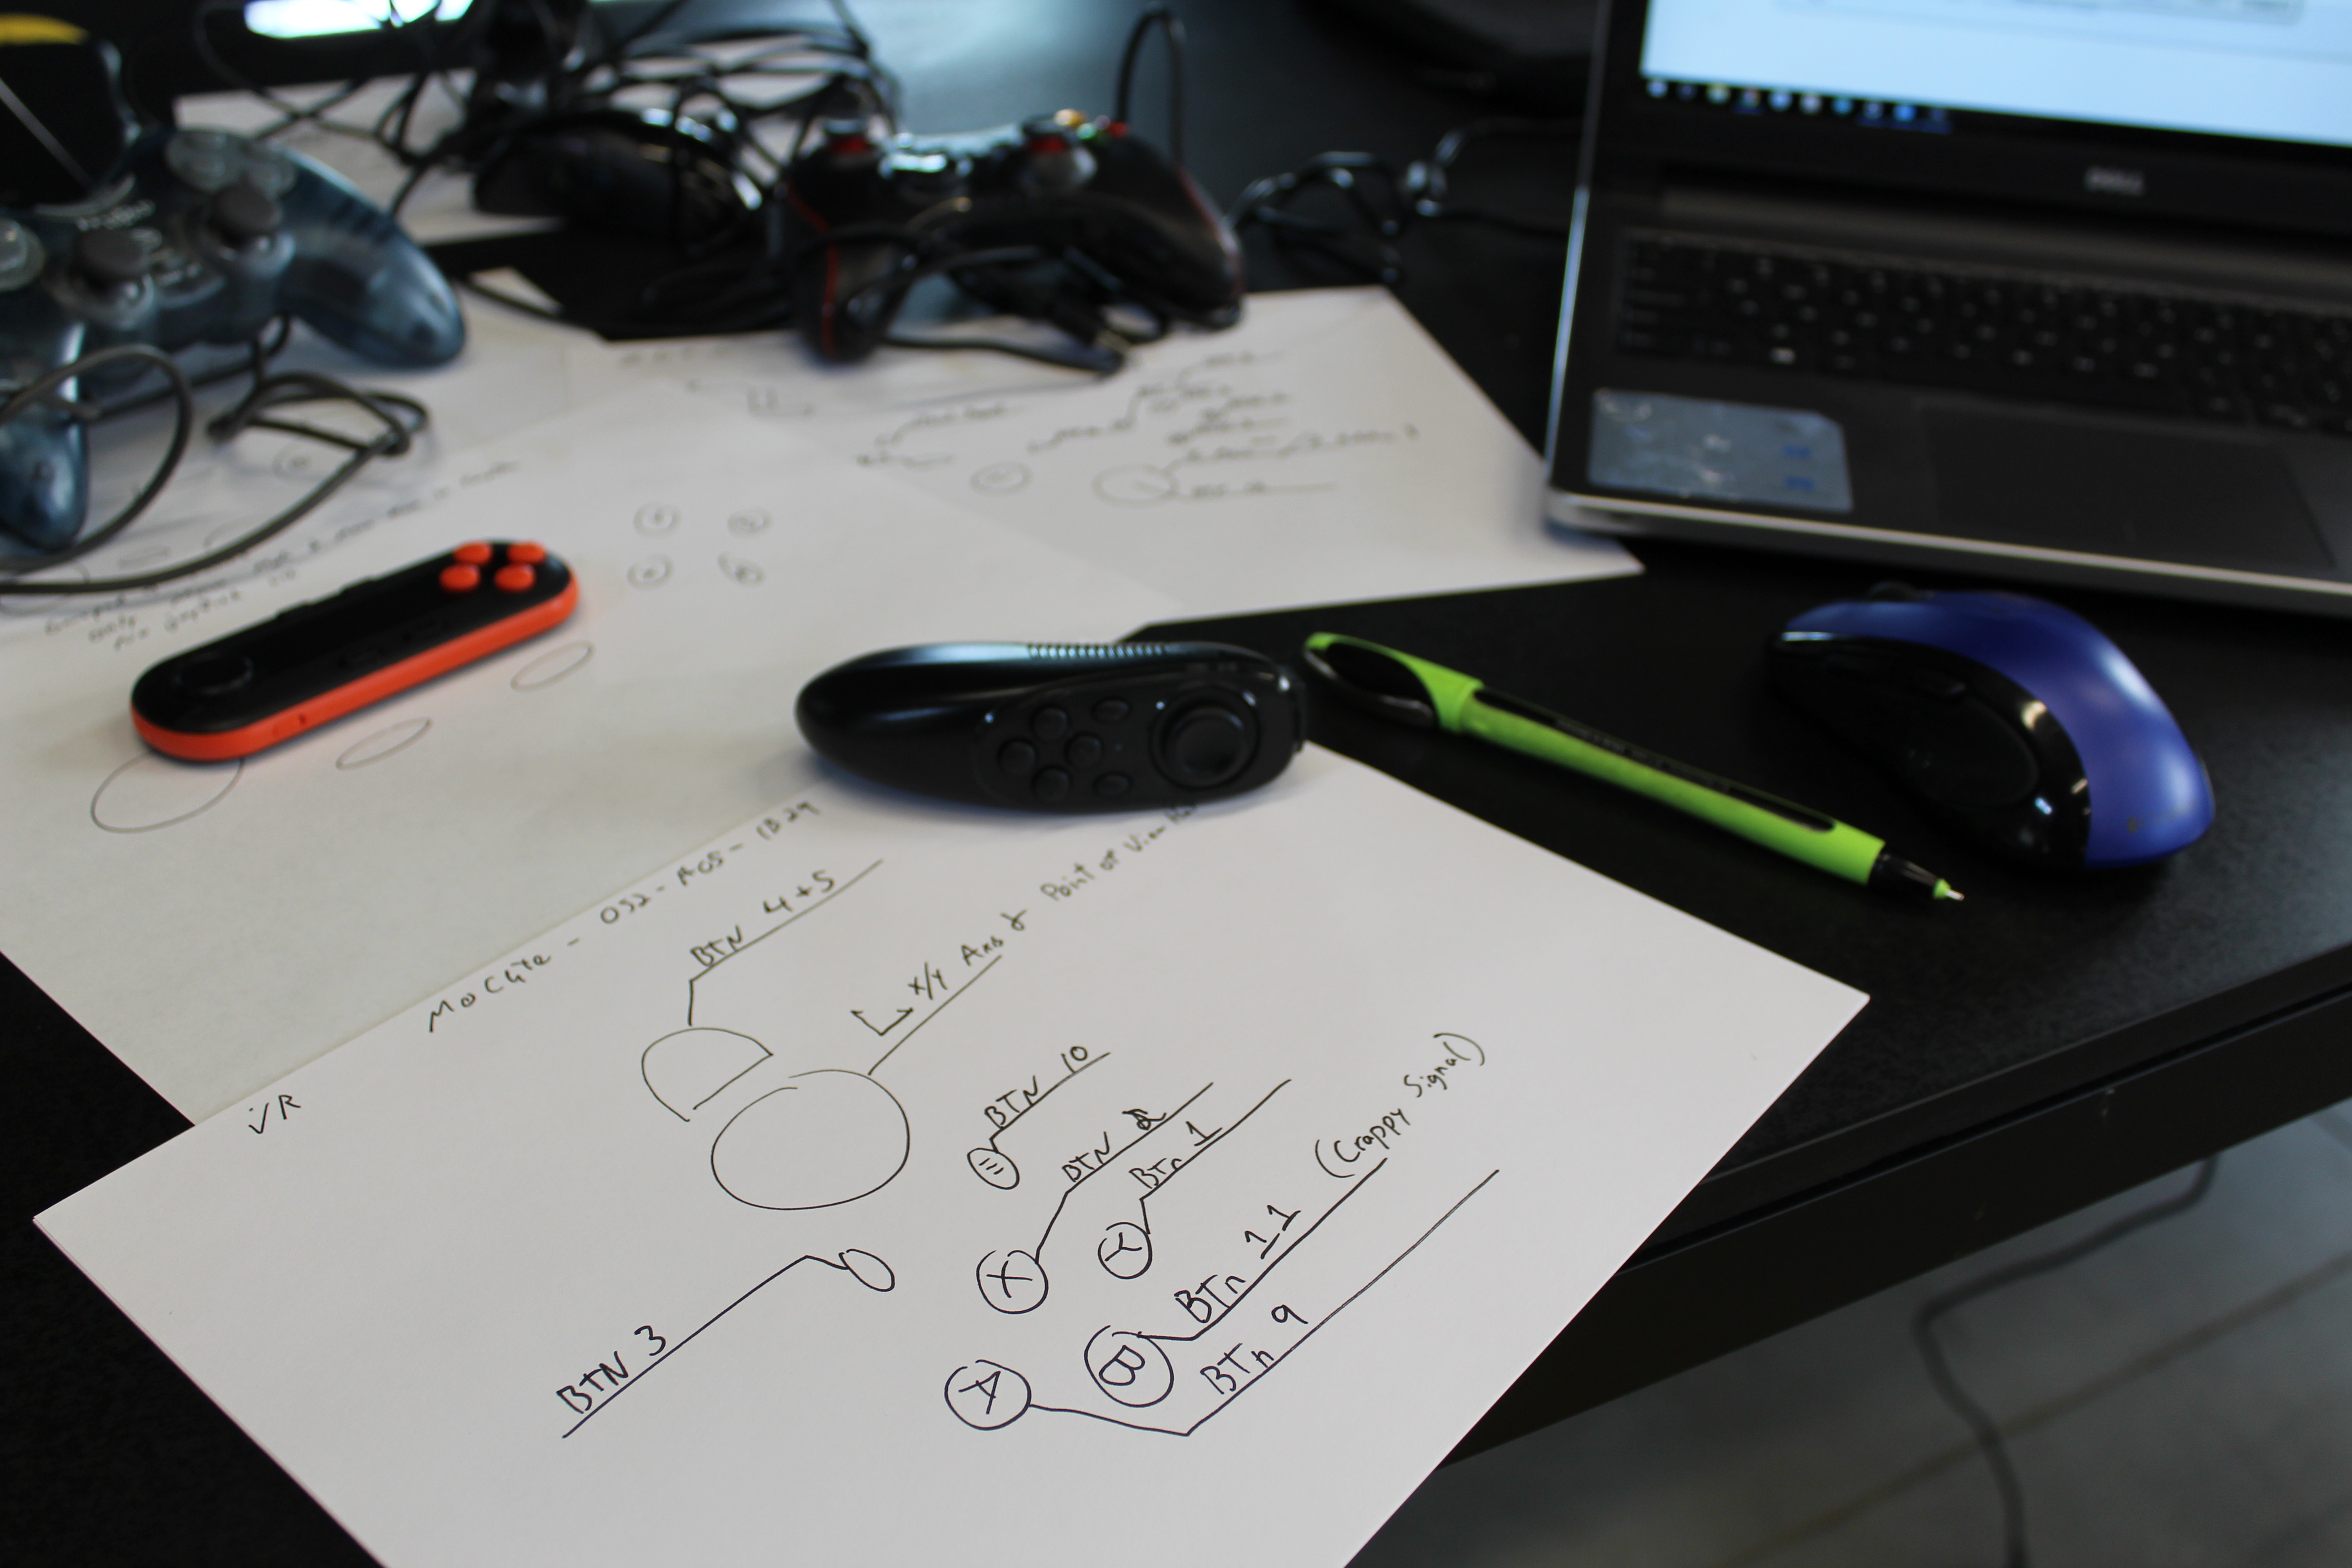
This one was yet another Amazon purchase after simply searching "VR Controller" and buying the cheapest one at the time. This one had mostly responsive buttons and joystick. One button was very iffy. The most interesting thing about this little guy was the button layout. Four buttons set next to each other have a joystick address of 2, 1, 11, 9. Where as the other controller I liked above went 1, 2, 3, 4.
![]()
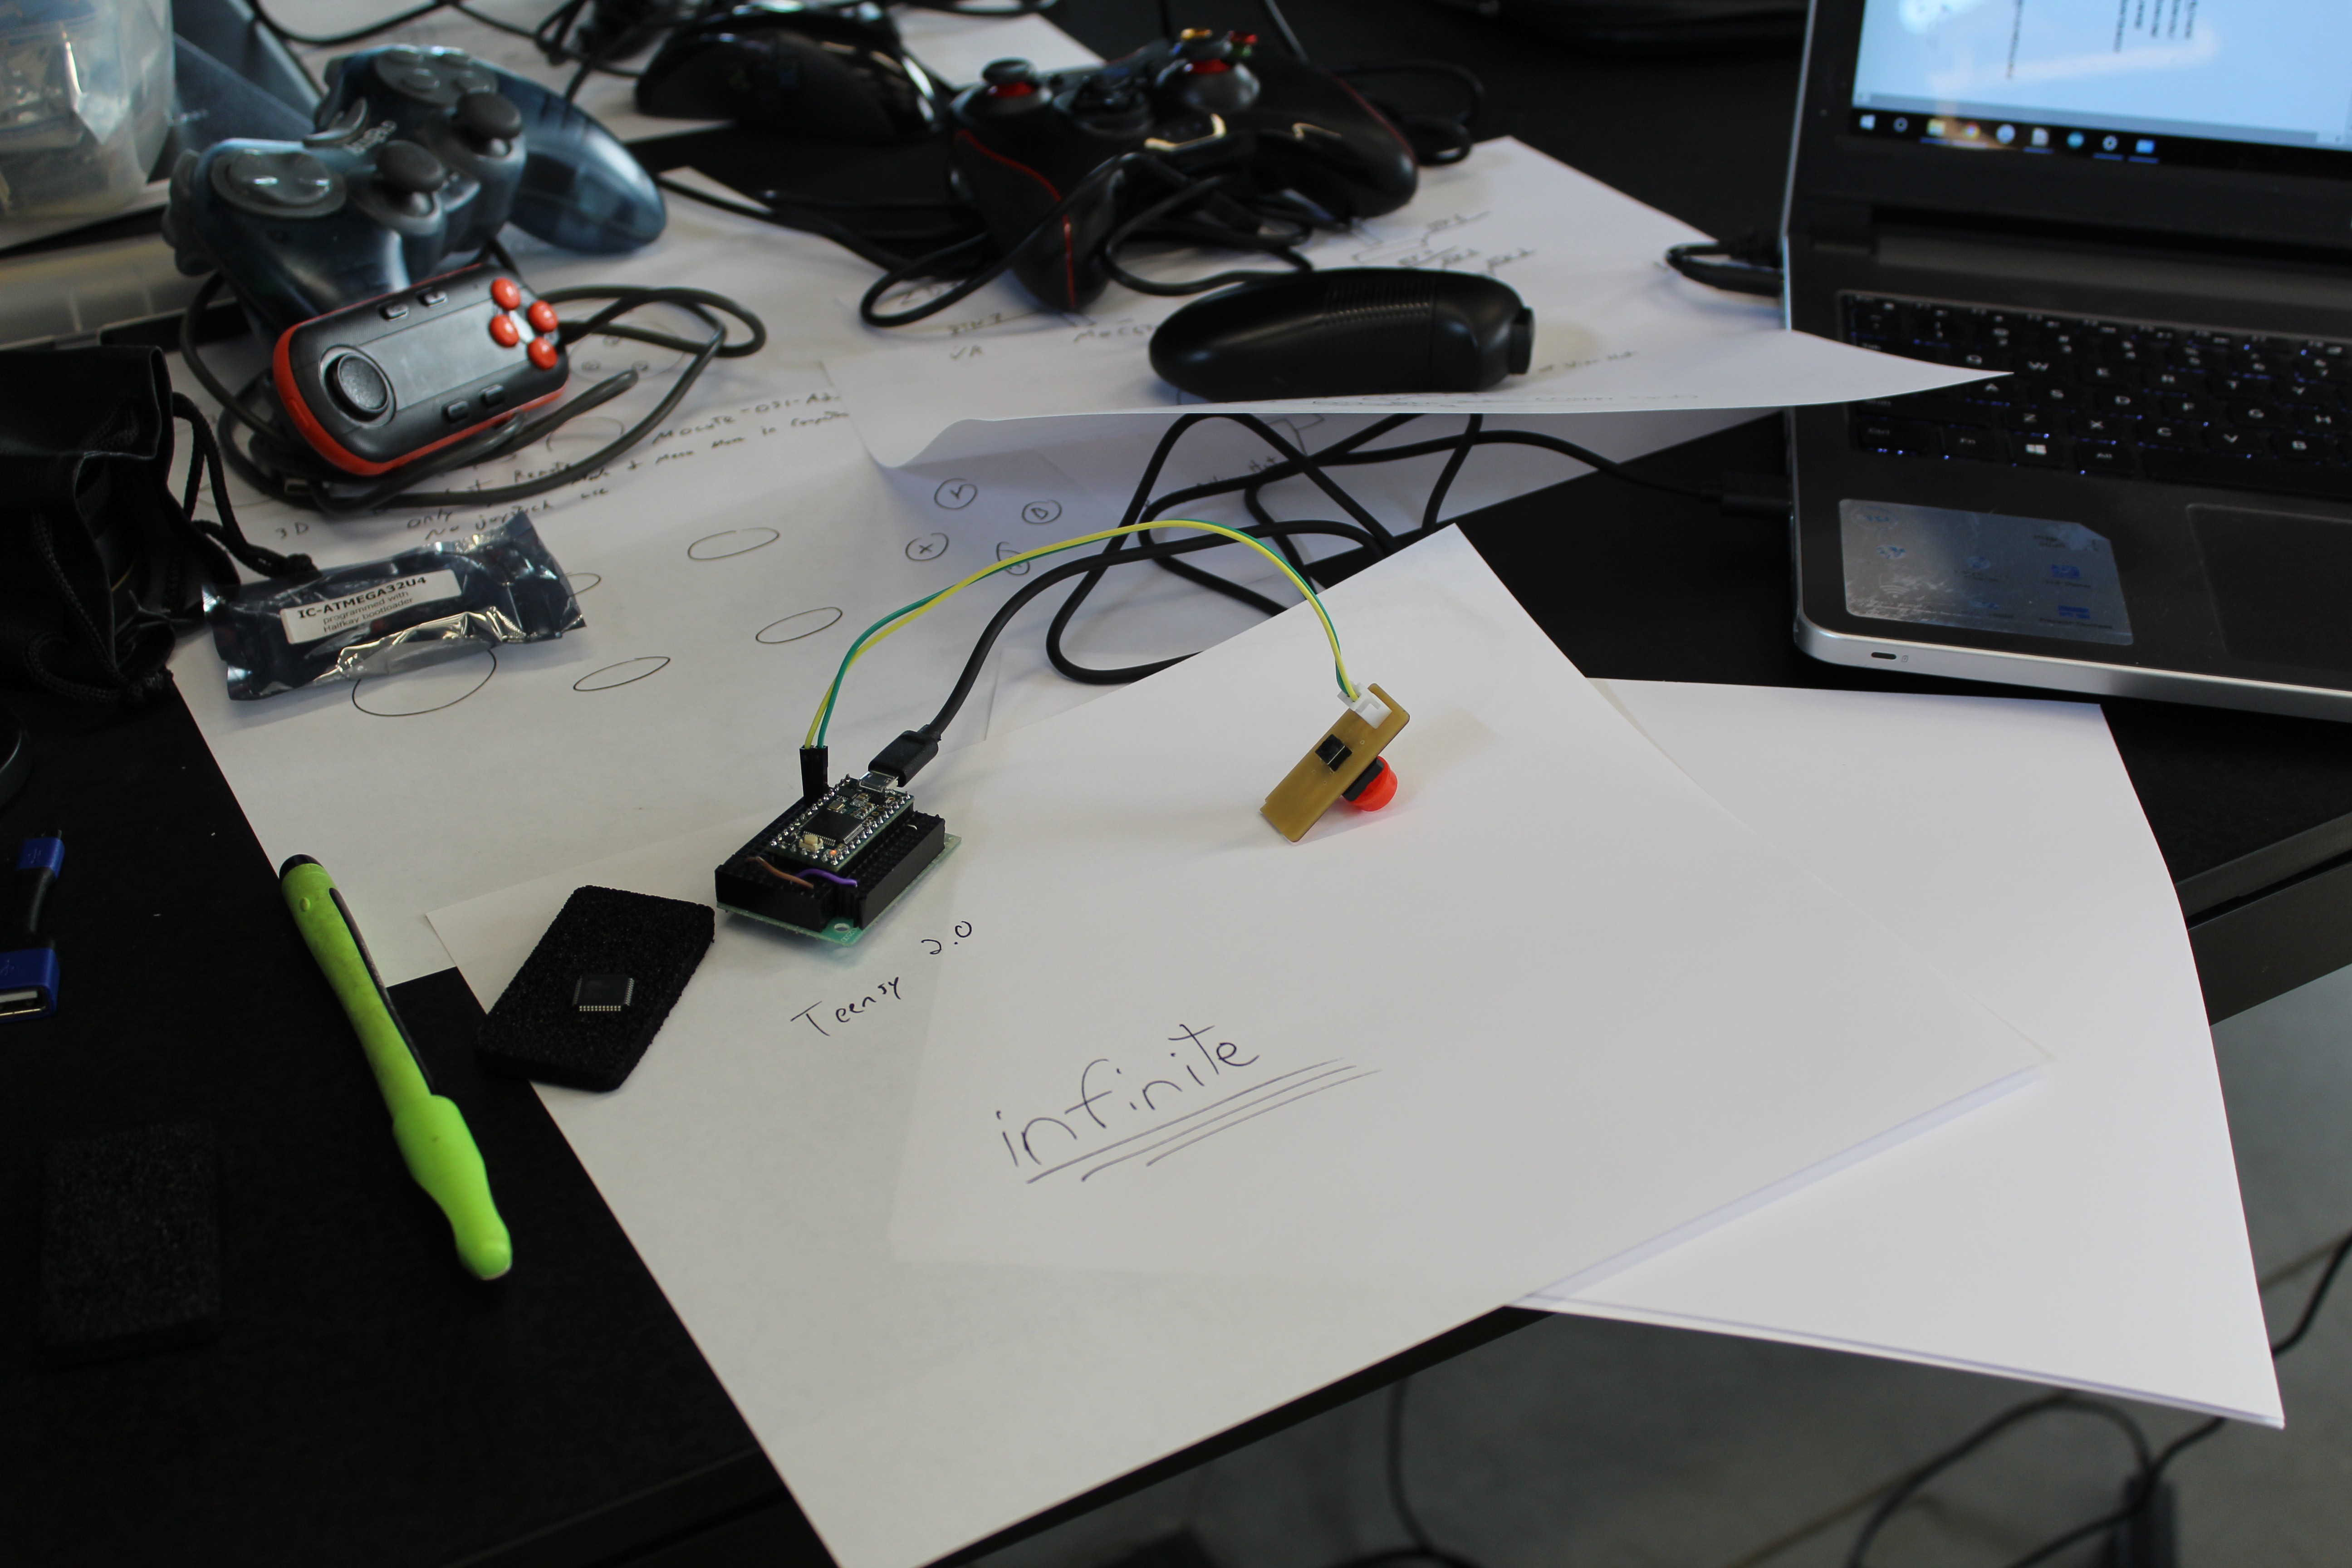
Then there is the possibility of the Teensy. Just connects, and any pin i switch to i can map to any button value/address. Same goes for axis data and once I flashed it with the demo joystick code by Paul, it just connected and worked. Both for computer and phone. Although without anything tying my axis analog pins to any value, it did showcase all the noise so leaving no option for a disable or static pulled down position, this could show up and have undesired effect in games. So optional jumpers to pull pins to GND will be entertained as a solution.
![]()
All in all I have observed more of what i don't like about how things are currently than things i do like. I've seen that in regards to layout, all bets are off in most cases. One interesting thing to note, button layout observed from computer and mobile devices can be seen differently even if it's the same controller. And all of that anxiety most of us have when learning a new thing, and the apprehension sharing and showing our builds to others needs to just go away. We have spent so much time in systems that train us that if we don't have a certificate, many years experience, or someone telling what "the right way" is, that we are not allowed the option to start. Or worse yet, that our opinion of observations are somehow invalid. That way of thinking is complete garbage in my opinion. As Hutch always tells me, "One test often beats a thousand expert opinions" And with the onslaught of opinions out there, how many of those could even be considered "experts"?
Test everything, and for the sake of everything that makes life amazing and impossible, please stay curious.
~Metal
-
Where has the Metal gone?
04/22/2017 at 01:19 • 0 commentsThis although not entirely encompassed by scope of this project specifically, has undoubtedly been affected by it. And by it i mean life. I've made lots of progress in KiCad mastery, and ran into several new concepts that i'm still processing. Like getting a negative voltage on a system could be as easy as redefining my GND reference as a positive value, making my original GND my Vs-. I've also gotten some help making cables from a fellow maker from a completely different state. I can't wait to write up that post about how amazing this community is.
Now without going into all the details of where nearly all of my energy and time has gone, I'll just state that I've come to the decision to let go of any and all ownership of Burbank Makerspace and will continue to host the Sunday Funday open houses as a member only.
The good side of this decision means that i will have more time for contract work, Control-Or-Sense development, and documentation. Letting go was one of the toughest things I've had to do as of late, but necessary for progress on all things relating to personal life goals.
So thanks for sticking with me this far, and I hope these next few months are as fun to share as they are going to be to experience!~Metal
P.S.
I'll be catching up on posts shortly. Just need to process all the media and text. The max file size of 5 mb does not agree with the photos i take from the DSLR... so there's now a process step. Which is funny that's it's an inconvenience because when i started making websites in 95, (i was 10) putting an image online was a serious task for managing content vs page load times. crazy, right?
-
Quick crimp guide found
03/27/2017 at 19:39 • 0 commentsSomething I know only from having my mentor and friend have me redo many crimp connections way early on. They also articulate better than i can all the things to be observed and considered:
![]()
This was found at JST.com
-
Breaking bits in the pursuit of progress.
03/24/2017 at 05:27 • 0 commentsLet me tell you of my journey of getting to this point:
![]()
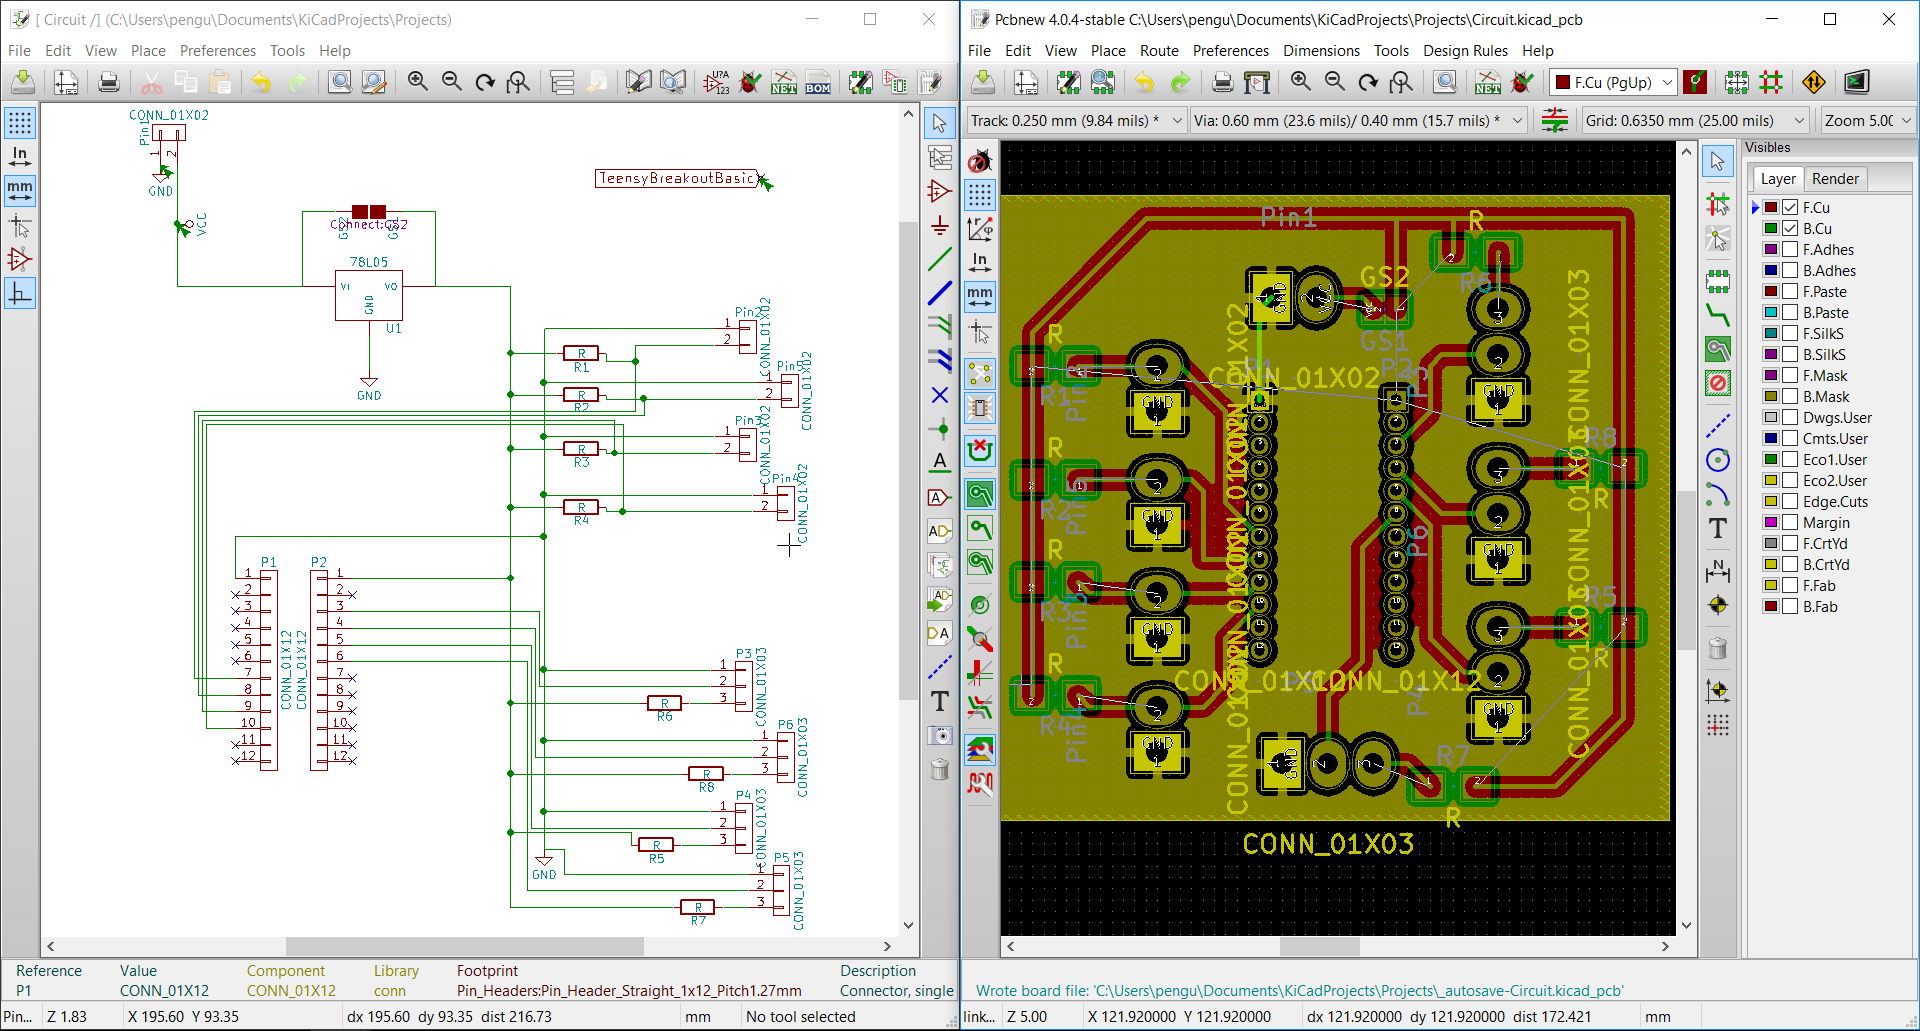
It started off well enough with studies and following the path of Getting to Blinky with @Chris Gammell. Then after that going through KiCad Quickstart Guide. With those two sets of videos followed I was able to fumble through some board design.
I started with a simple goal. Take a teensy 2.0 footprint and break out 4 IO pins to buttons with pullup resistors and ending on the board with a wire-to-board JST connector. Then add 4 analog (3 pin) jst connector to 4 other IO. This time adding the resistor on the vcc line, in case end used shorts the vcc and gnd wire together. This led me to this first attempt:
![]()
In the top left you will see where power supply feeds system. Then a 5v voltage regulator but if I happen to feed a regulated 5v source I have to option to jump the two pads and bypass the regulator. Then it's my button setup. followed by my analog in setup. One thing many of you may have noticed is that my traces on the right do not connect to my SMD (Surface Mount) resistors. There is a simple reason for this..... I did not know yet how to "flip" the component to backside. Nor did i know that pressing the "B" key with the fill area tool selected would refill my ground plane.
Being anable to fix this I deleted the file completely and started over. The second attempt went by a lit faster and I made these:
![]()
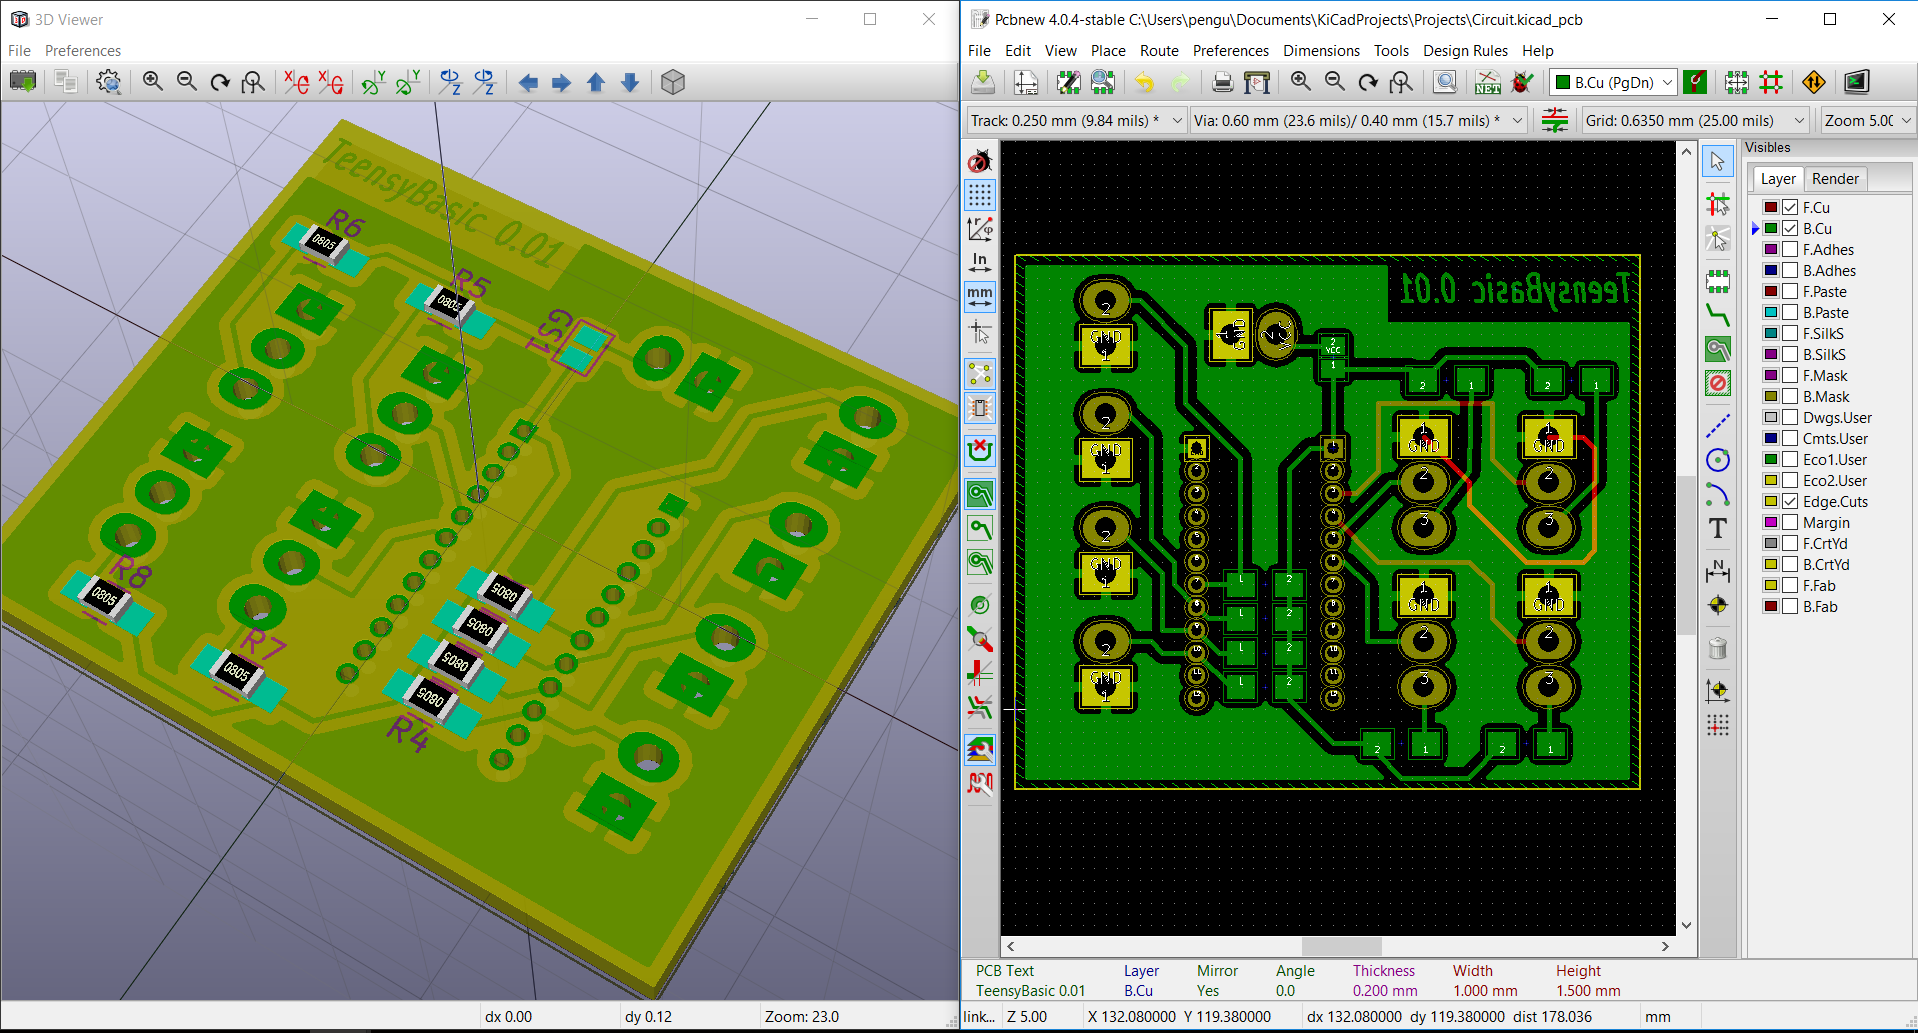
Holy crapcakes! I found that KiCad has a 3d view tool built in. so cool right?.
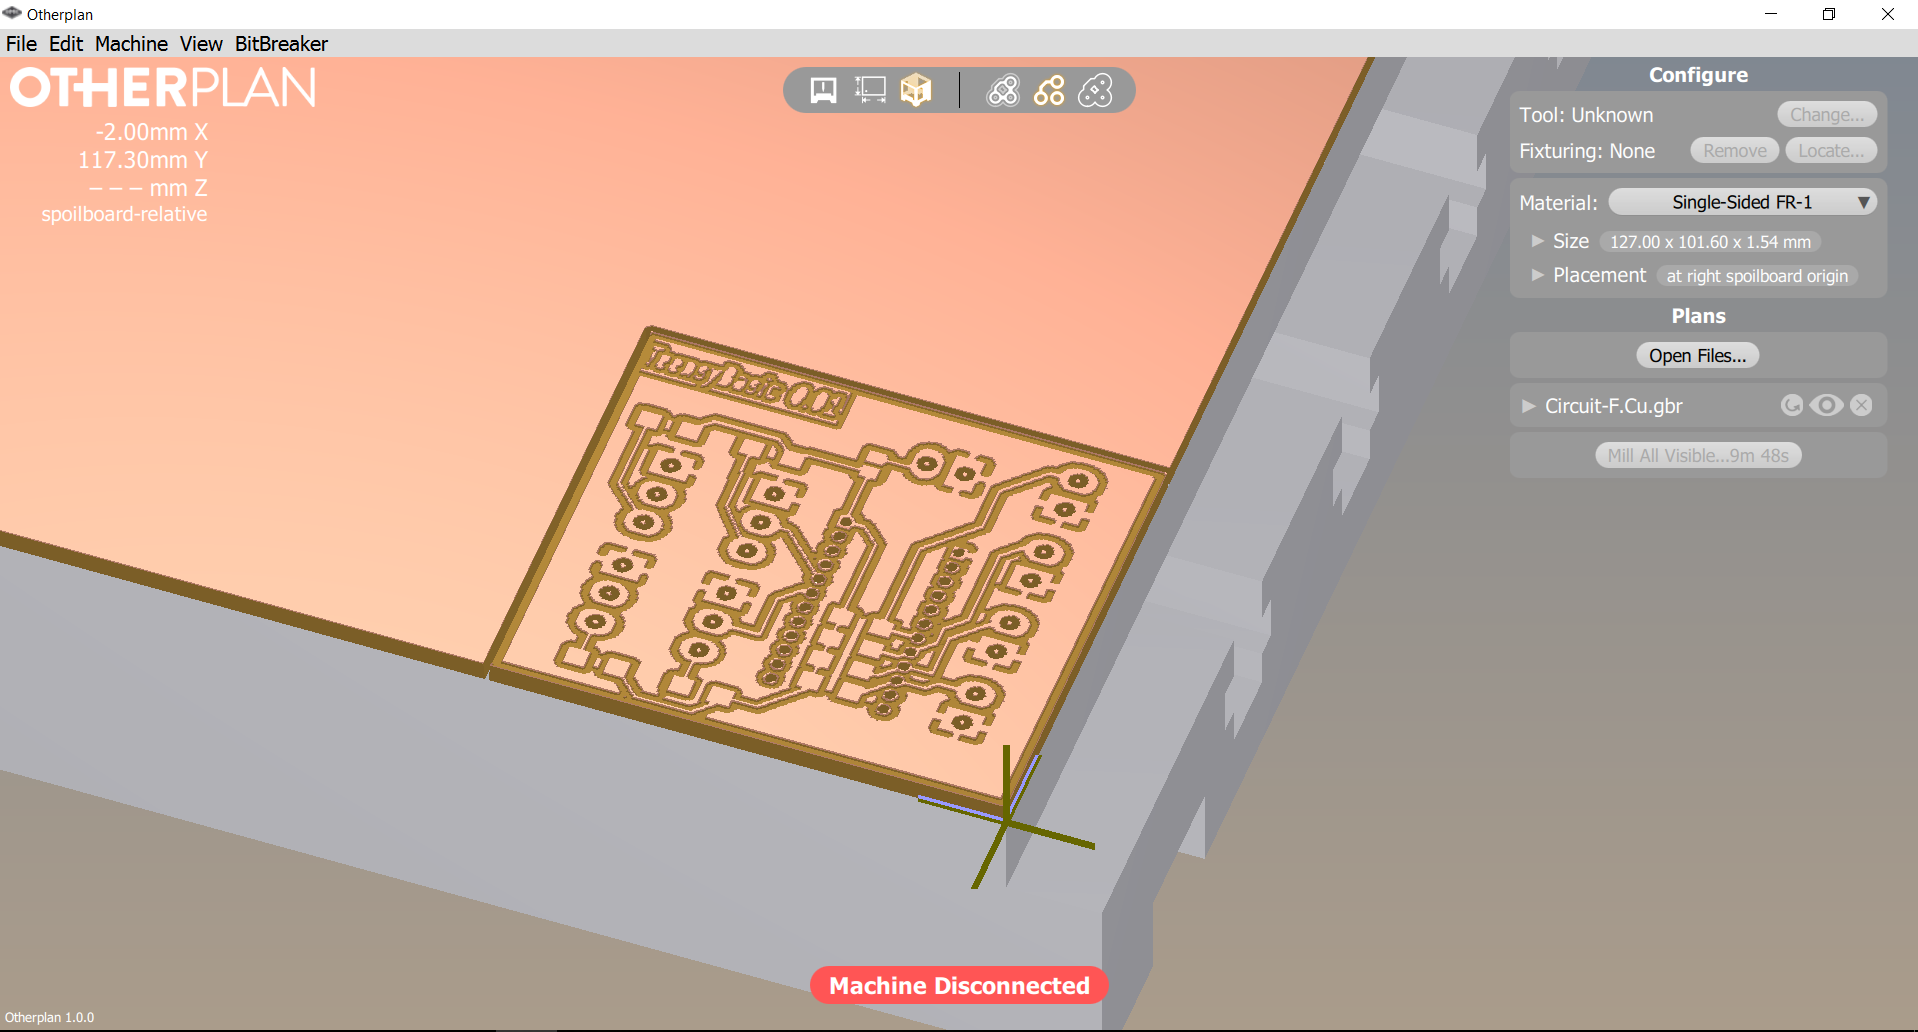
![]() And after some playing around with the OtherPlan software I was able to generate a setup for cutting. And this began my journey into the physical world... I mean other 3d printing and that birth thing.
And after some playing around with the OtherPlan software I was able to generate a setup for cutting. And this began my journey into the physical world... I mean other 3d printing and that birth thing. ![]()
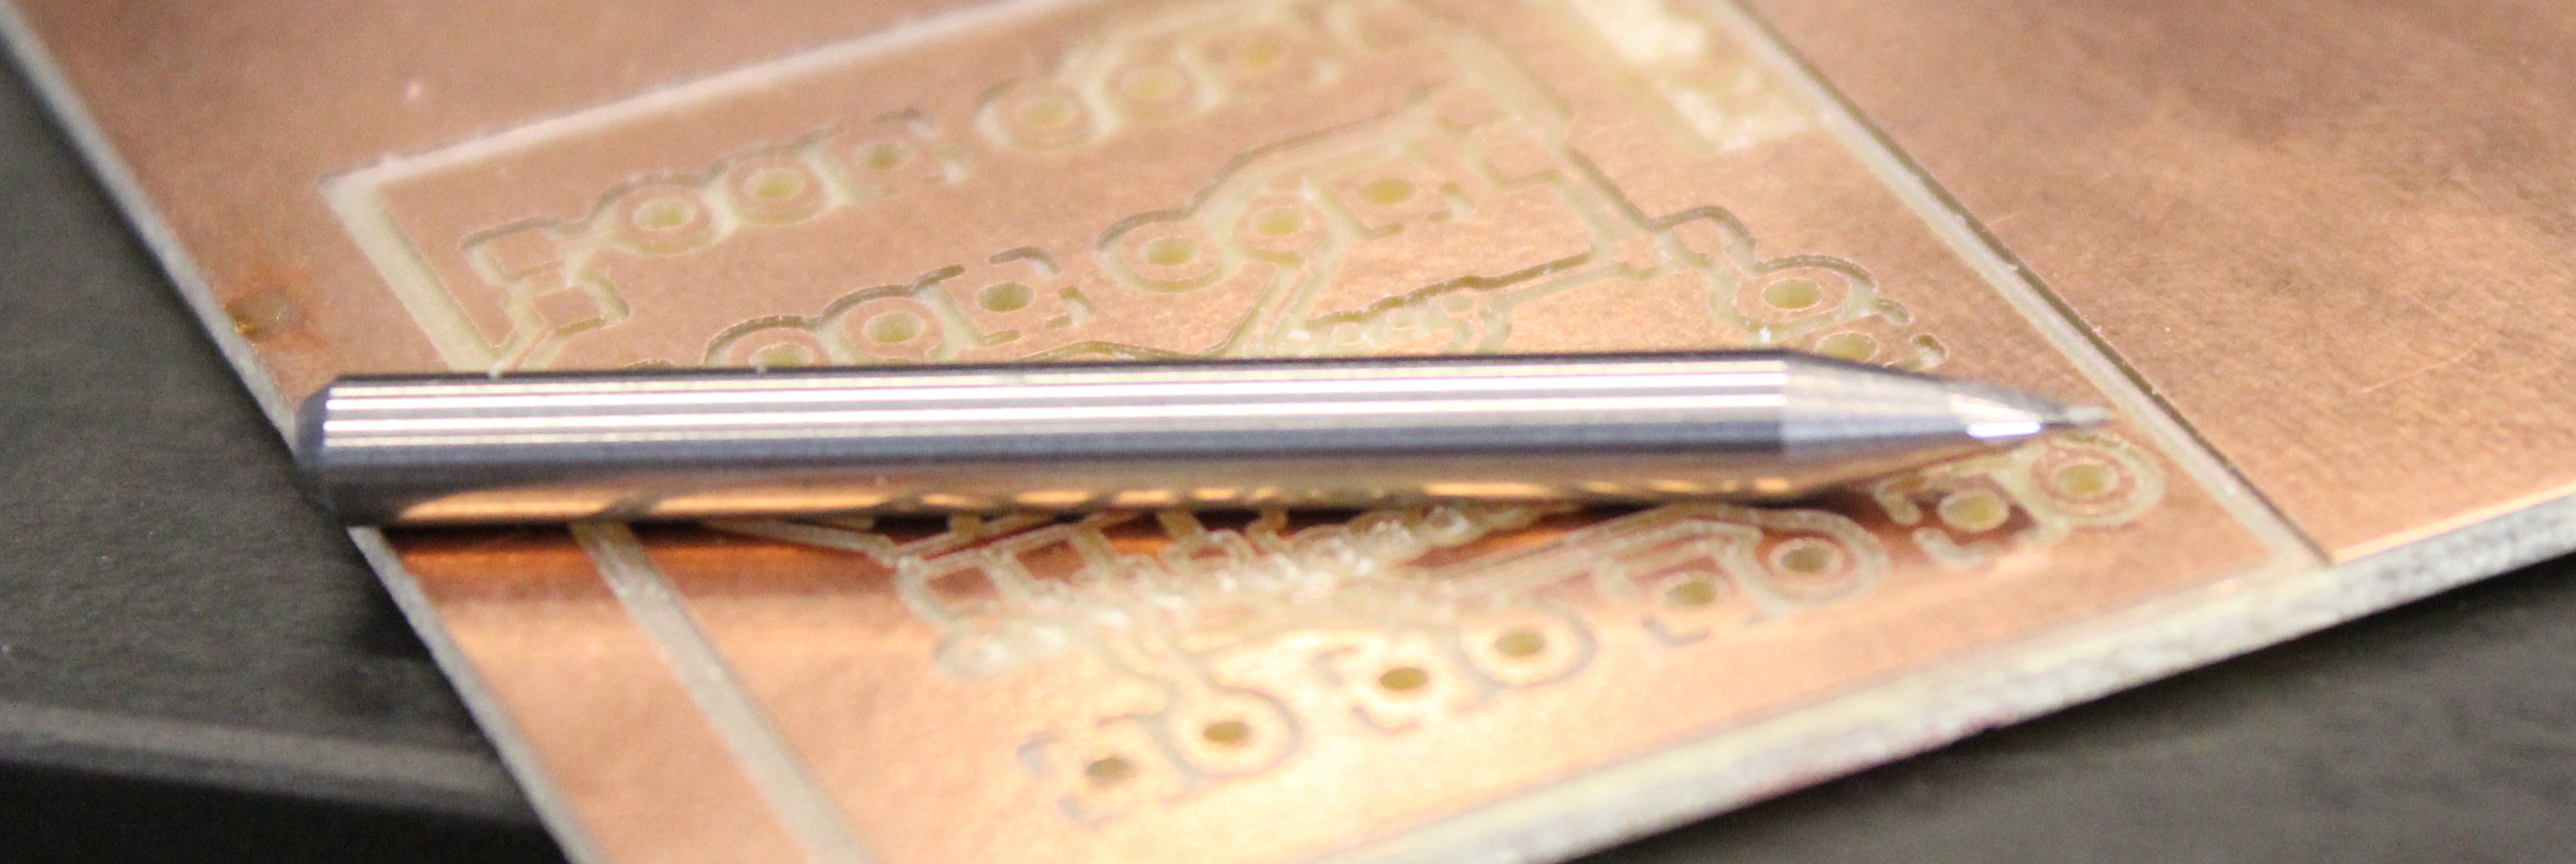
My first casualty from ignorance. I had thought that since the machine knew it's width of tool, and the jig placement could only be set by the two holes at the front of the other mill, that the tool path would know an offset for placing board layout inside of the safe area for these tolerances. This is not the case.... Also since I was about to learn the first valuable lesson i was hoping for..... real world measurements and interference:
![]()
Even though the JST connectors fit right into their places.... they don't fit right next to each other. Turns out, the footprint i used doesn't have the right spacing for the outline of the plastic parts. Also I had made a mistake with choosing my header spacing... by double. It's easy to select spacing that isn't the 2.54 spacing that I now know that i needed. On a good note, the 0805 components line up perfectly. so woot for that. At this time I had enough info to work on this board at home so I could be ready for my next day at the design lab. So to best use time at space I hop on to a more simple board concept.
The general Button V1 board:
- Two pin by way of JST connector
- Allow for 6mm button
- Allow for 12mm Button
- Allow for SMD button
- Not break any more bits.
The next little board i make schematic for, draw out circuit, and have on the mill within 30 minutes. Wow I feel really good and accomplished at this moment for sneezing out a simple design. This feeling was short lived however as my next step.... break a bit. Seriously!
My previous experience on this machine was that first thing it would do was bring bit to middle front and ask for confirmation on bit type/change opportunity. Then it would go to the right and home just off of the side of the the material. Thinking this was a beginning gcode type of thing I go ahead and change the bit and press the start milling button. What i didn't know is that i had the order different than the machine thought and since i did not specifically initialize the "change bit" opperation by top right button press, and it thinking it was still the previous bit and what it wanted, it just went in and did a plunge right into the copper board. This is when I asked what i missed and was informed of the button on the top right. So bit two down and another lesson learned.
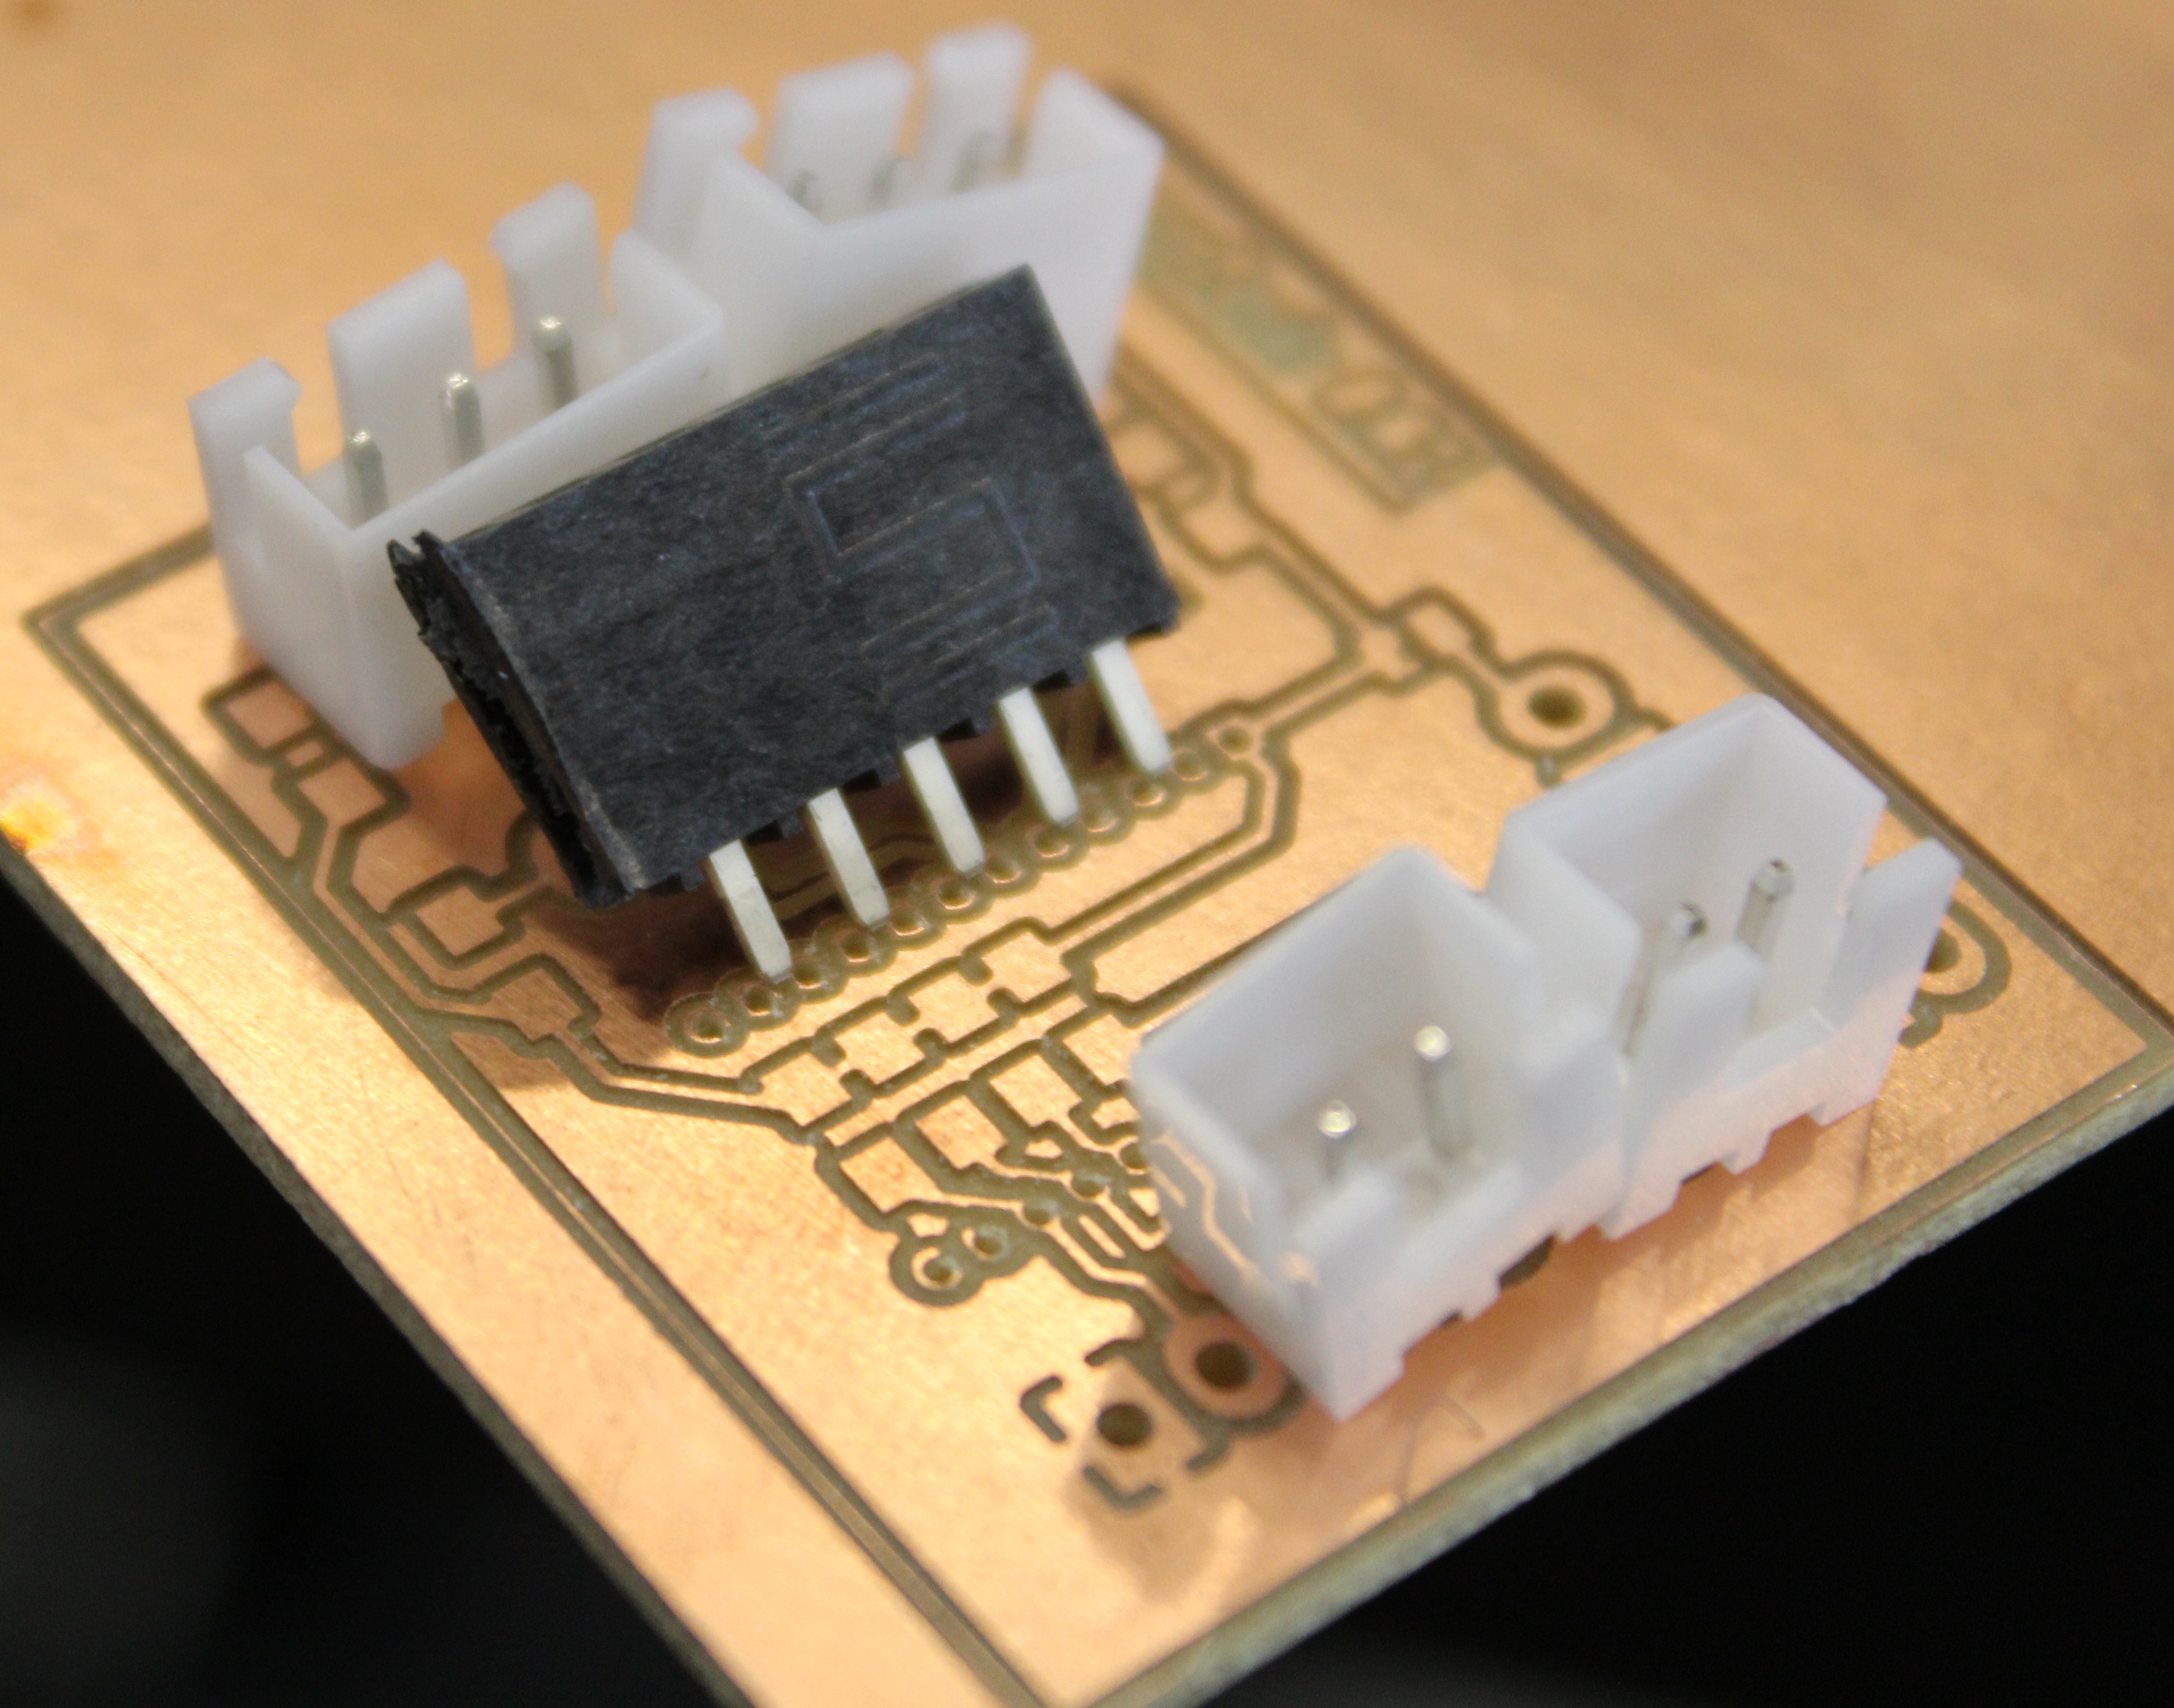
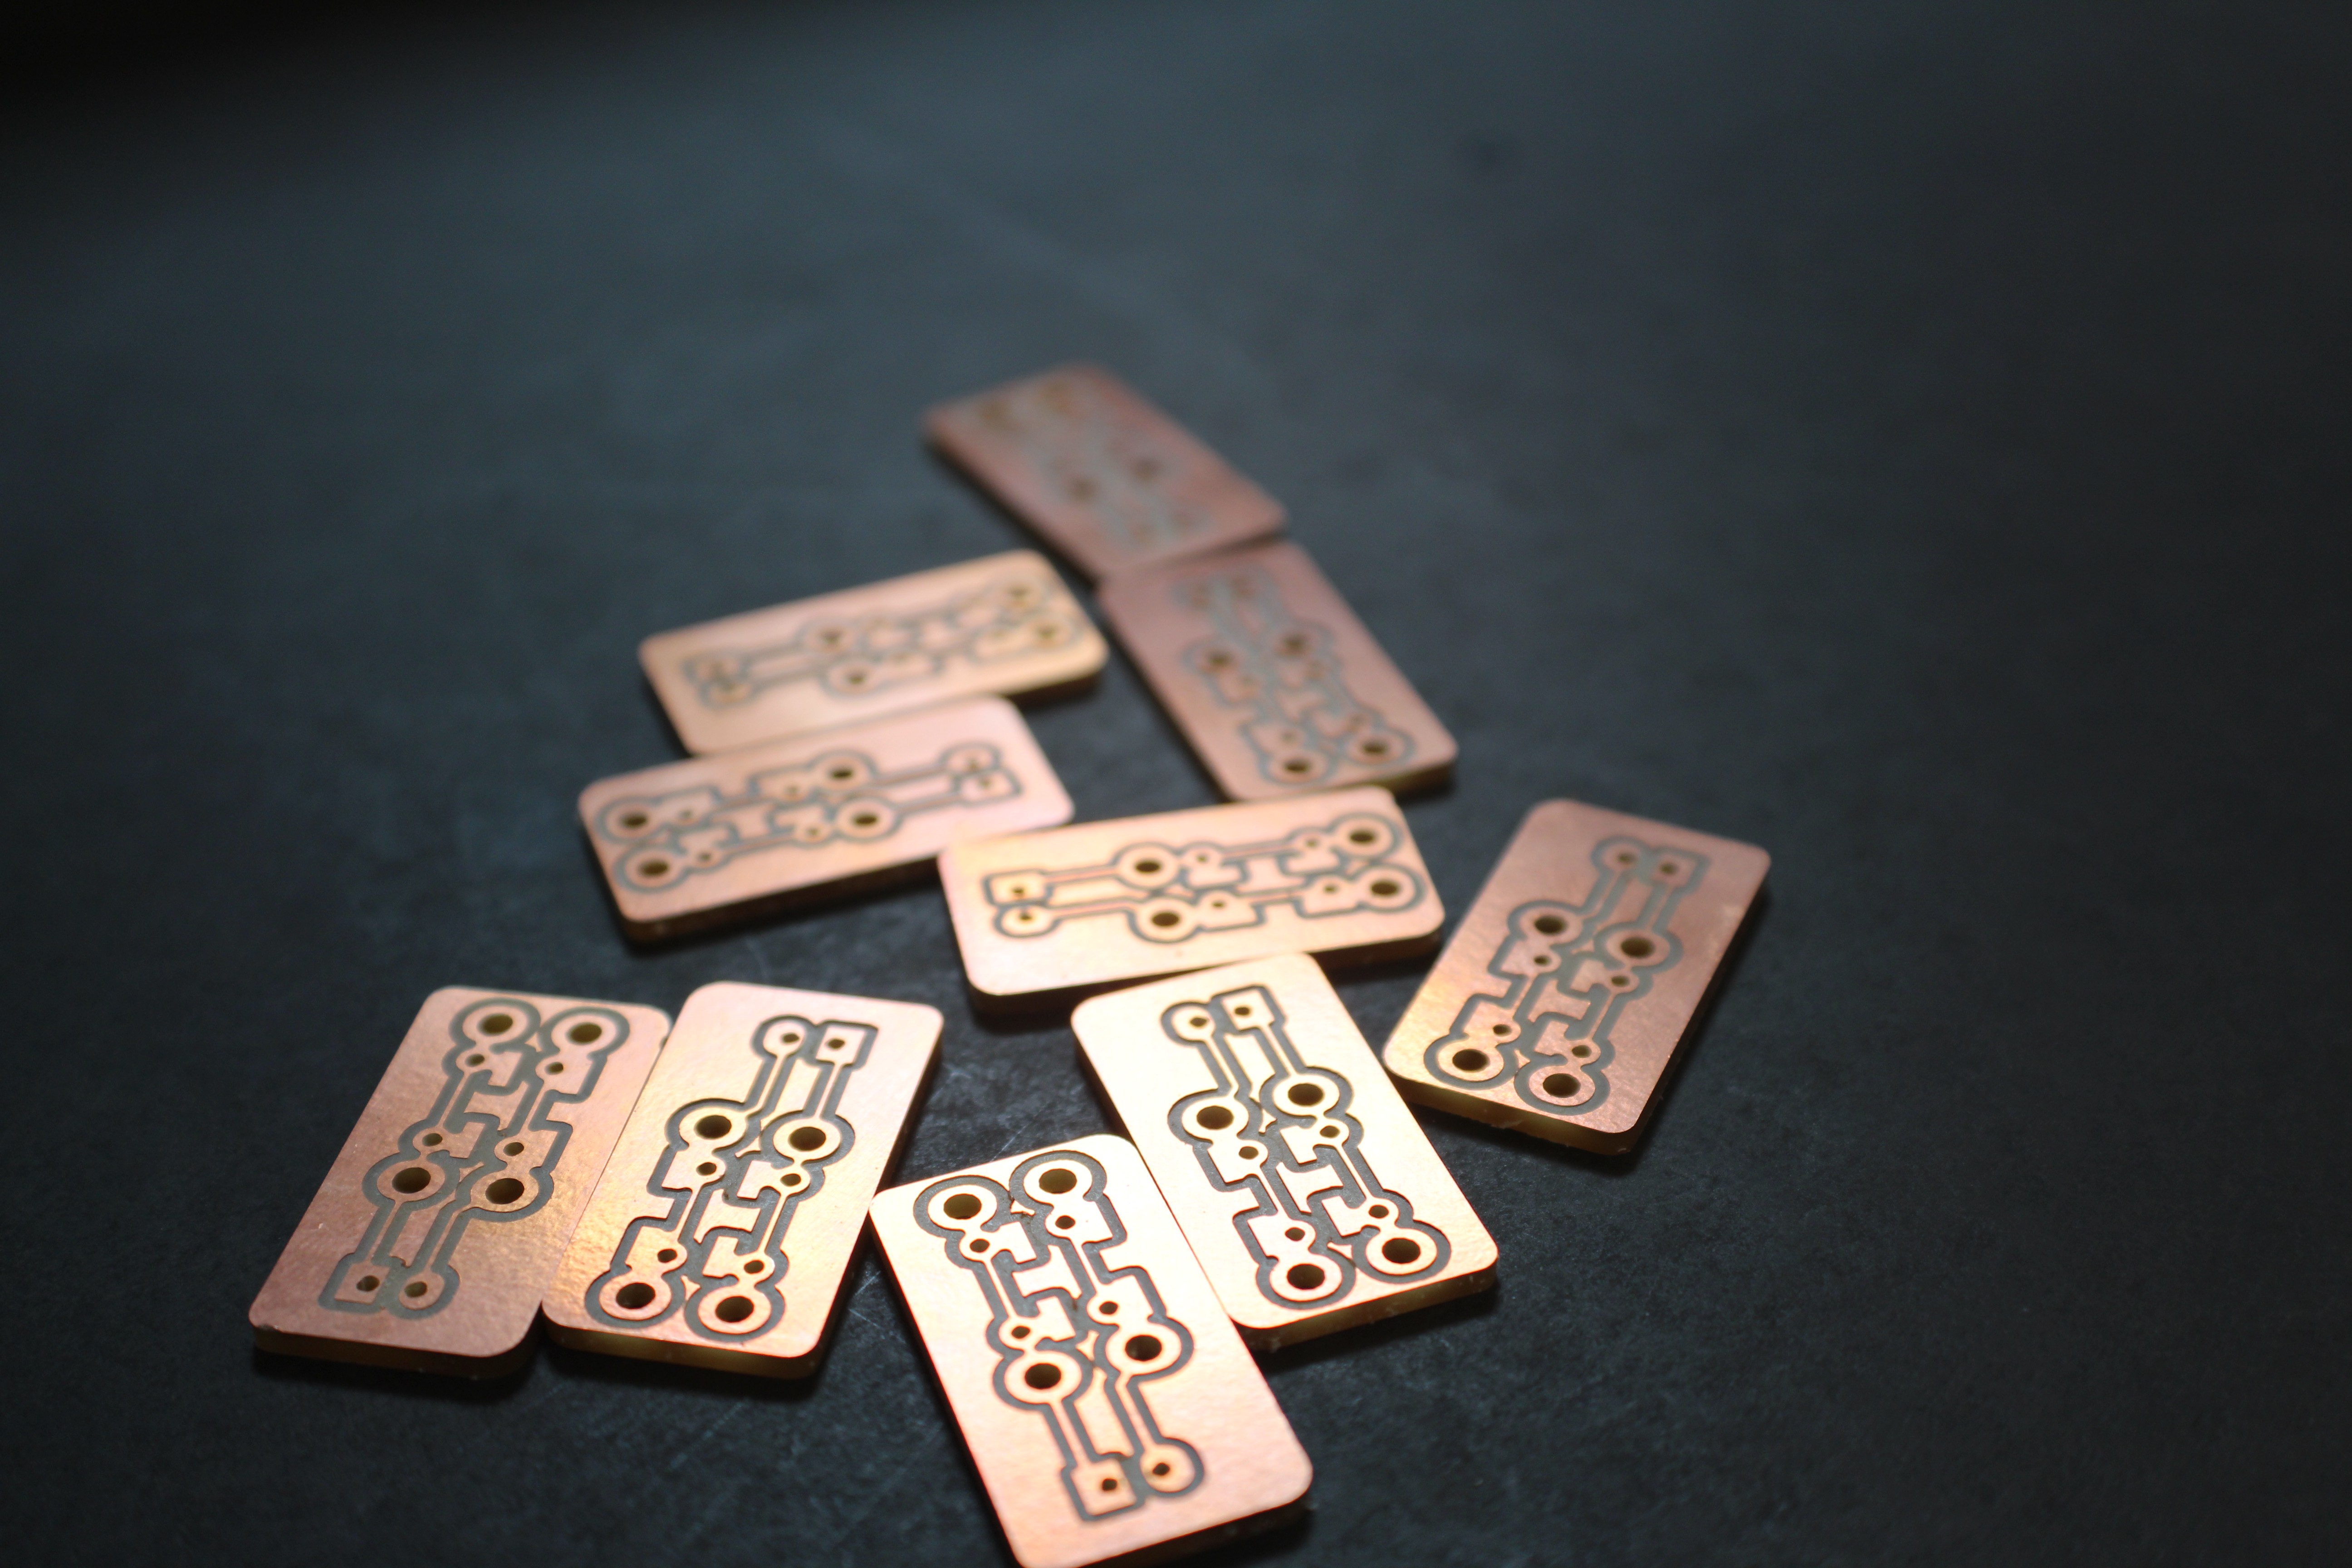
Then i was able to start cutting my first button board.
![]()
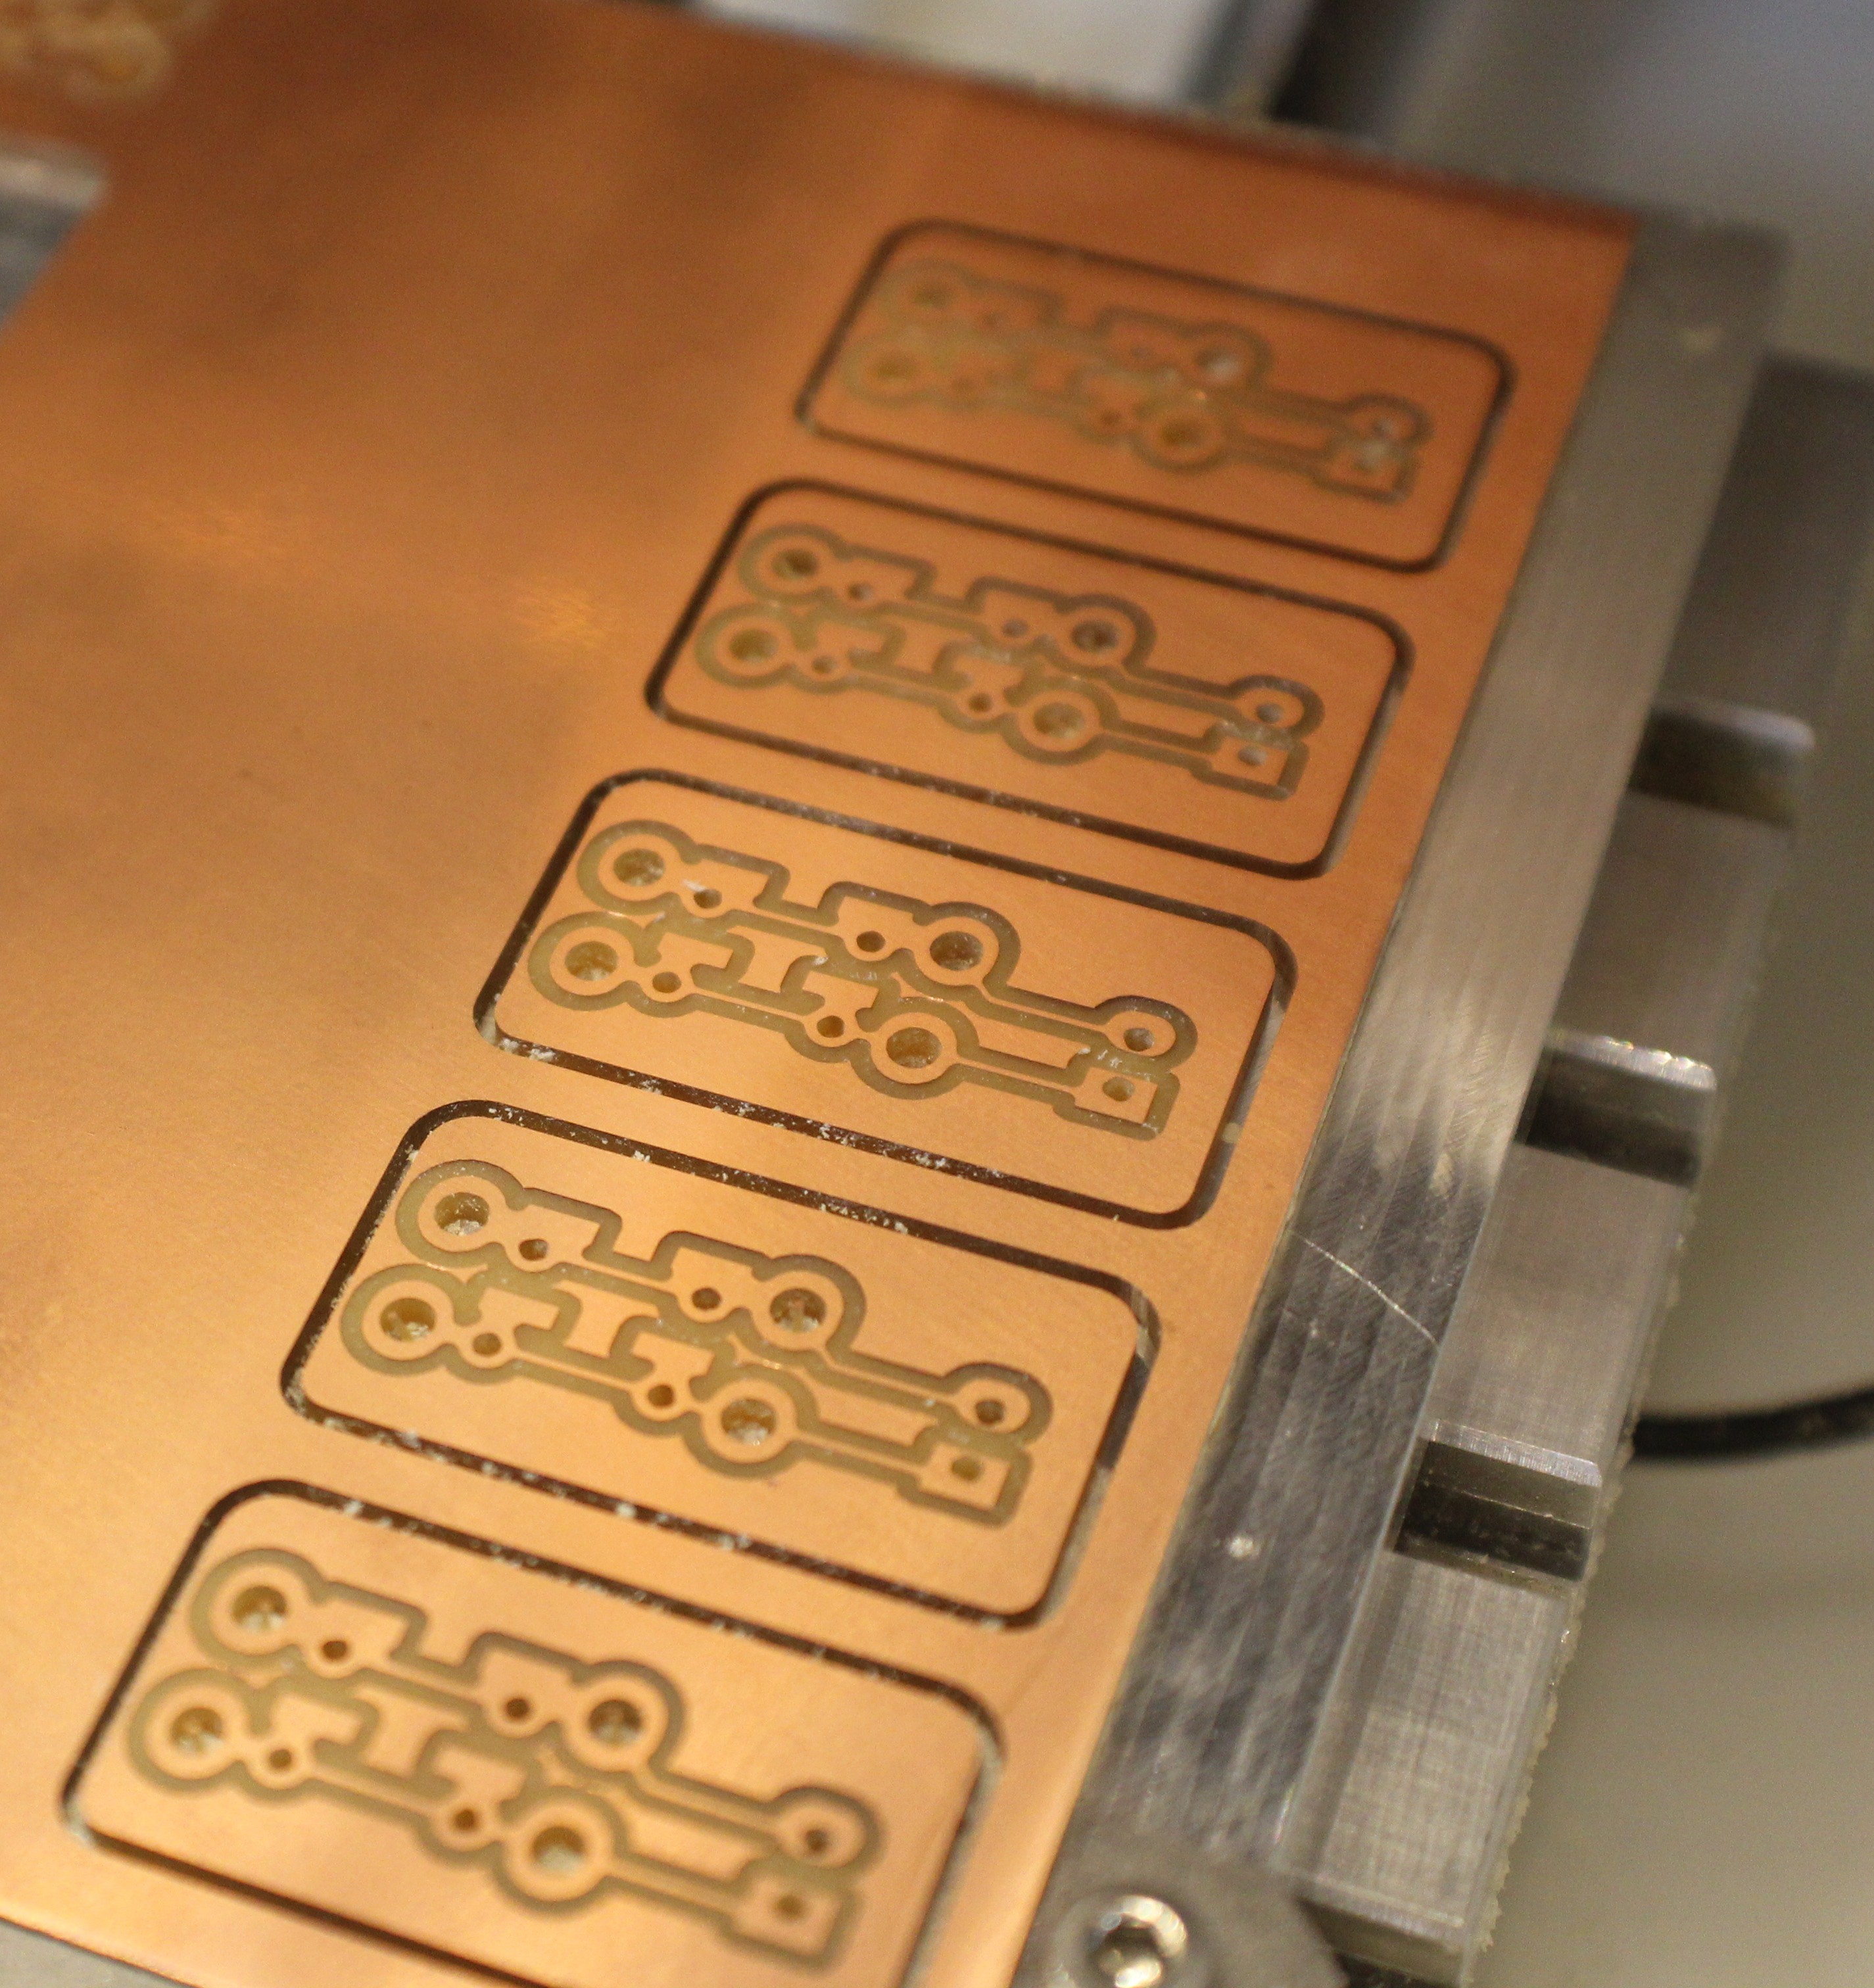
Simple button board that allows fro three type of buttons, and all attached in parallel. But this too is bitter sweet. You see that little divot in the bottom of the board. That's where the board jumped once cut out and broke my third bit for the day. I spoke with Dan on this and explained the measures i went to make sure the surface was cleaned with IPA before covering the entire bottom of the board with double sided stick tape. After the talk we decided to try the other Other Mill. And this is what happened:
![]()
Just beautiful. And no issues. Finally things are coming together and I was able to better overlap the buttons for this cut, making the assembly have a smaller footprint still. It's at this point I feel i can finally proceed with some level of understanding and confidence.
All growth outside of comfort will be riddled with failures. but upon these failures we learn the lessons to succeed. On towards the next steps!
~Metal
-
Let's Write a Novel!
03/17/2017 at 22:05 • 0 commentsWell, if a picture is worth a thousand words, then we are about to write a novel.
Those that know me know that my main form of sharing is through instagram. And as such i made a point to get better tools for documentation for this project and any tutorial here after.
The camera kit I got was the Rebel t6: Link to item here
Keep in mind that my only experience with this kind of camera is limited to holding one for b-roll during my stay at gamezombie.tv.
So lets look at my progress so far and compare my phone image to a camera image.
Phone (Galaxy Note 3):![]()
Camera (Canon Rebel T6):
![]()
I'm still using the auto setting on the camera. This was my first go at tripod and manual focus.
Now i can get pictures that are very usable with both my phone and new camera. but the real reason i went for the camera was to create usable video for the tutorials. This will be the most accessible build I've done to date, but also the most "non-digital" topic to cover. We are talking about assemblies, wiring, testing, ect... Expect to see those videos soon enough.
~Metal
-
Learning About Tools and Personal Limit Habits
03/06/2017 at 06:22 • 0 commentsSo begins my journey into this project and first chance I signed up for training on some machines so access during my limited time on site I can have active progress onsite, and research offsite. This is an ideal use of time. Being on site itself yields a nice environment with others eagerly awaiting training and actively diving into their own project pursuits and that is amazing. Plus we are all hopping in and out of our projects to help the other residents. It's what being a maker should always have been. In my opinion at least.
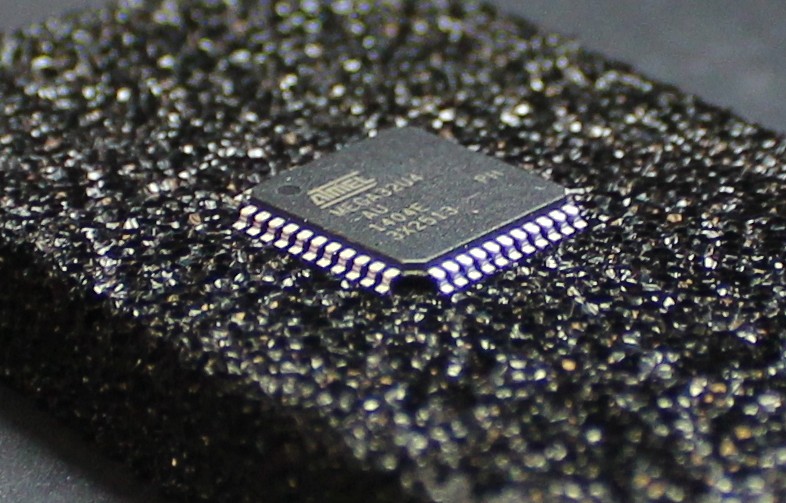
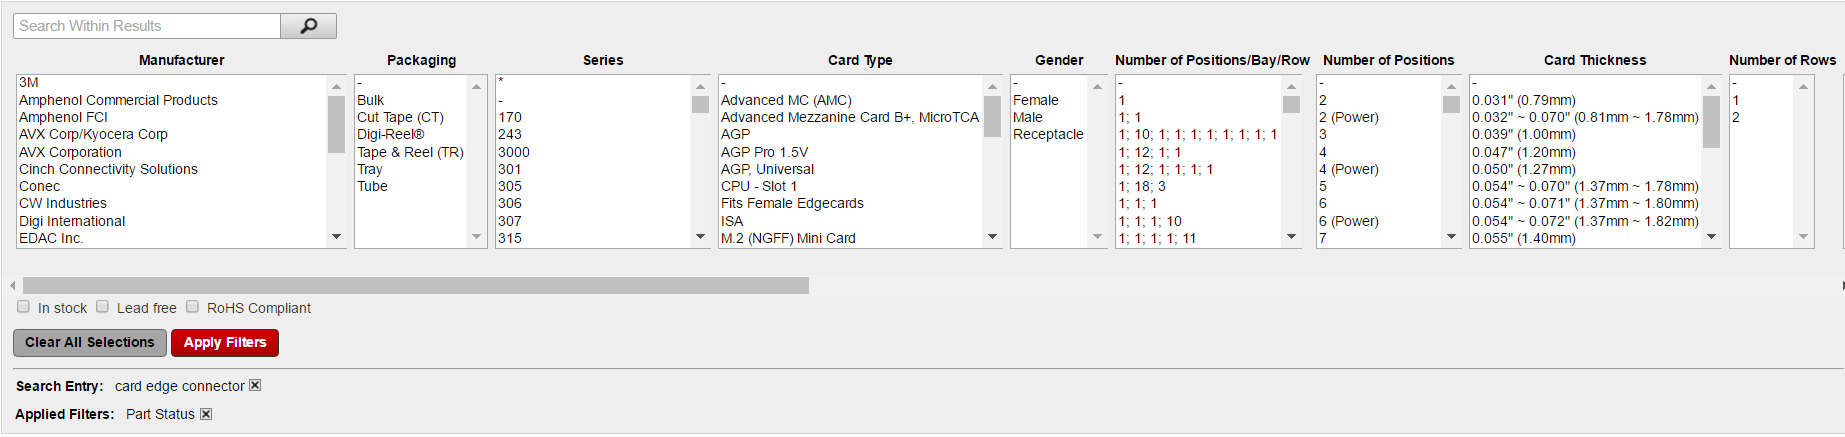
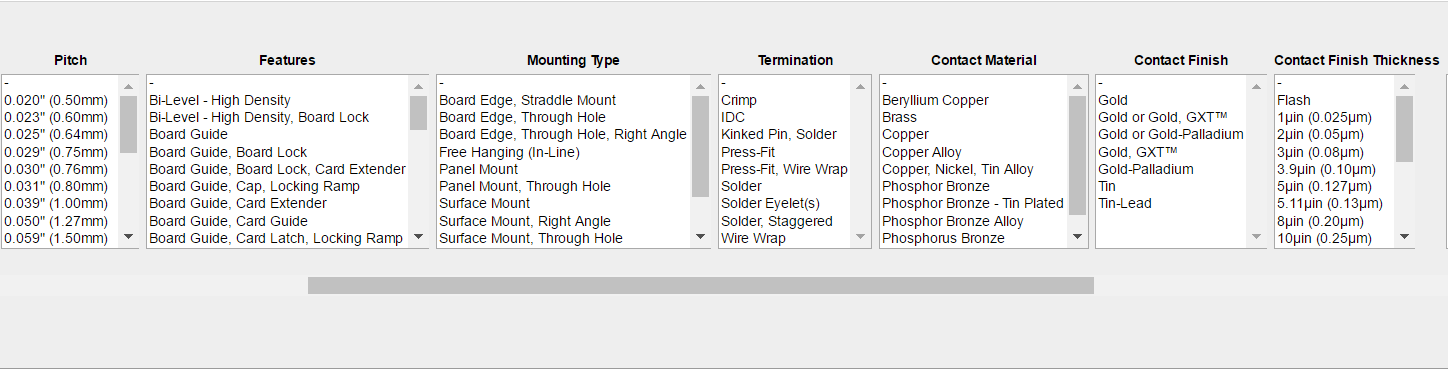
Now that I've been trained on the othermill, I'm diving back into KiCad as well as looking up components and calling up friends that already work on their own boards. This is the bulk of what I've been squeezing time in for while still working on the VR suspension rig, and running a Makerspace. These little moments are harsh reminders of all that i don't know. Like one key component to my build is using a slotted "cartridge like" system for the main boards and the breakout docks. While talking with my friend Paul I was educated on the ways to properly dive into Digikey and given the keywords "card edge connector." This alone was a giant leap into the right direction because my searches were more along the lines of "SMD female cartridge connector" or "female nintendo slot" so on and so forth. There is a significant language barrier in the physical world for components. But not impossible at all. Hell I've only started actively diving into the electronics part of things 3 years ago, and only 1.5 years ago did i finally get ohms law. The equation by itself processes as one thing, but the active execution of the equation is a completely different part of processing. It's why i tell my students, active pursuits filled with failures yield far more than a lifetime of observation with none.
As someone new to ordering components, this is damn intimidating. And due to my personal limiting habits, twice as hard. (will get into that later)
![]()
![]()
![]()
A fun link for "Card Edge Connectors"
Now that I've got a point on connectors I'm looking into spec sheets when i can find them. And still trying to narrow down form/function needs. But those are much later.
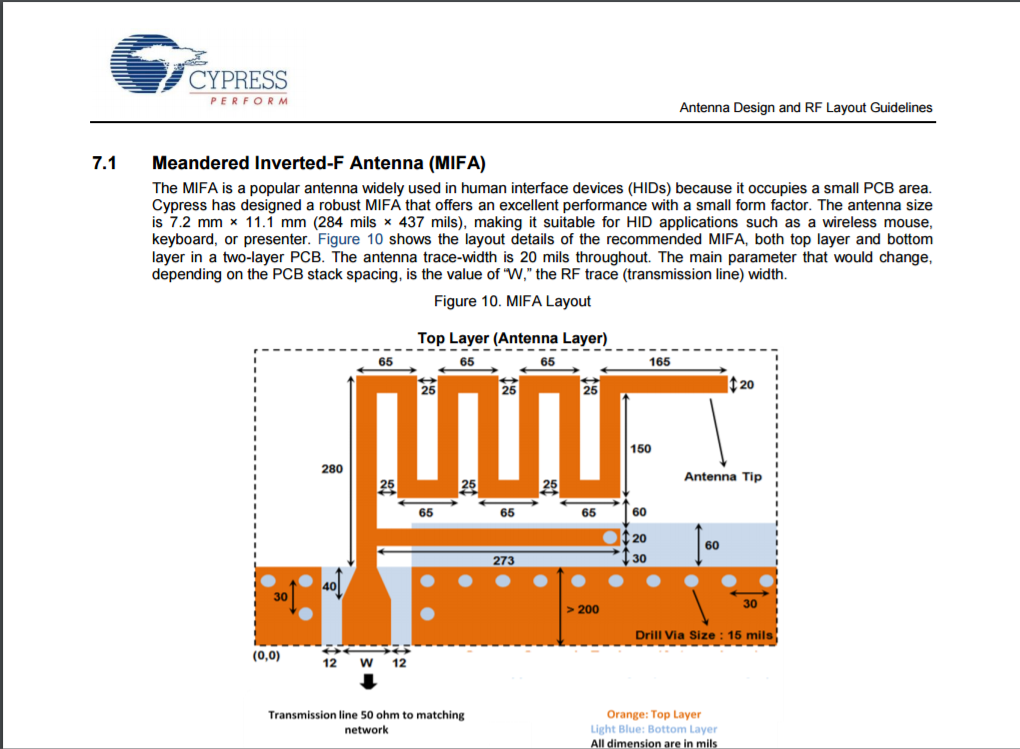
Now to Bluetooth initial studies. I've learned that the human body is great at getting in the way of frequencies used by bluetooth and should be taken into consideration when designing any interface as well as the antenna shape matters greatly in coverage area. Plus a lot of other great other bits of info regarding circuit embedded antennas.
![]()
Now all of the bluetooth research is a bit early but I feel it's important to let my brain process while i continue studies on other fronts. It's just how I work.
And now for the confronting of personal limiters. Most of which are due to budget constraints and this is something I have always known, and have seen many of my friends and students deal with on their adventures. So this is not anything new. My solutions for RnD is to buy in pairs because at somepoint, something will fail. Just accept that. But on this project, with a fixed budget, flying solo I find myself looking over every component with more energy then i can physically budget but mostly because of how I don't know what i don't know. As demonstrated earlier I am so thankful for the friends i have through these maker communities for continued mentor-ship and family for their support. Without either I would surely have burned out already. Nobody can do all of this alone and I am no different.
Hope all of this made sense. I'm a bit on the tired side and the night is still young for supporting makerspace members, and personal studies.
~Metal
Control Or Sense
Supply Frame Residency project to make a no-code custom controller infrastructure for mobile devices and other game systems.
 Say hello to tiny make-my-hand-hurt controller. Admittedly I did not think this one through. Well not at least in the usability department. Mostly it was just to have buttons i can connect later and use for a pocket sized test rig roughly based off of the SNES controller from days with some minor changes for extended testing. Like having switches that act like latching buttons in execution. And potentiometers for.... well something I have not come up with yet. That's a puzzle for Future Metal.
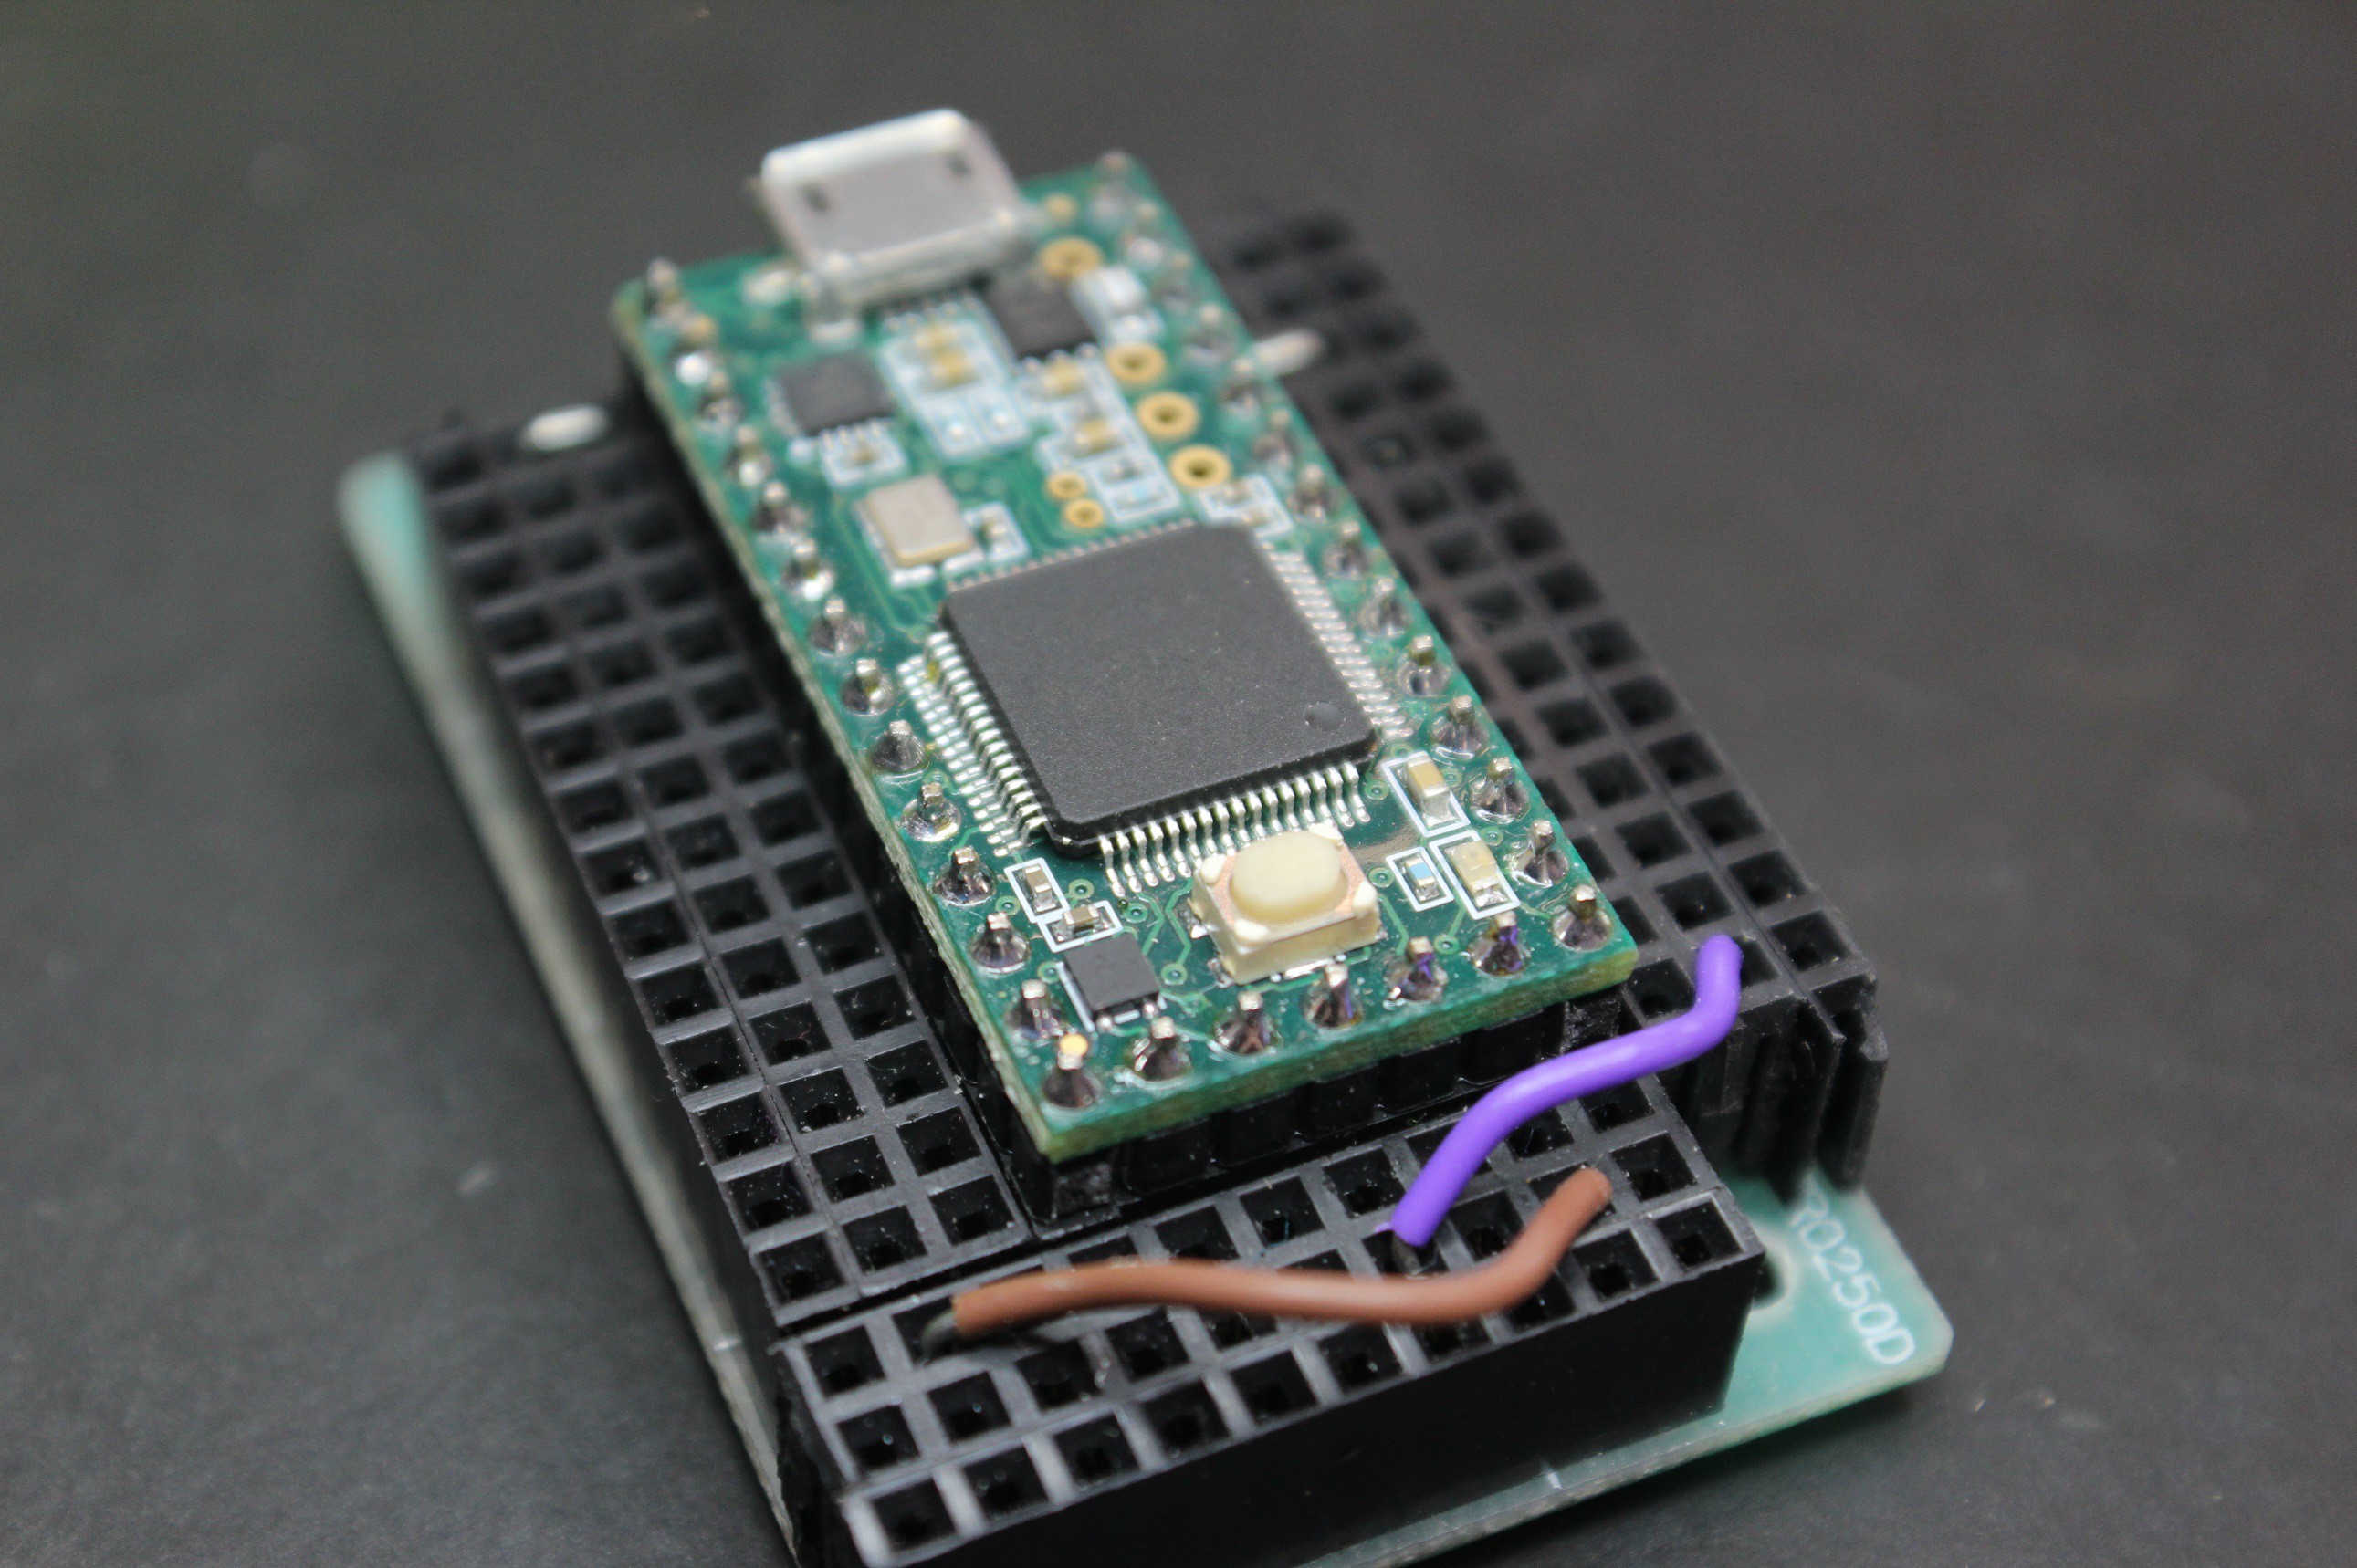
 This gem was found in the Hack Me box at Crash. so all bets are off to say the least. Also not recognized by my computer... well not entirely. The name Playstation (R)3 Controller showed up in device name. even though SplitFish was want was on the side.
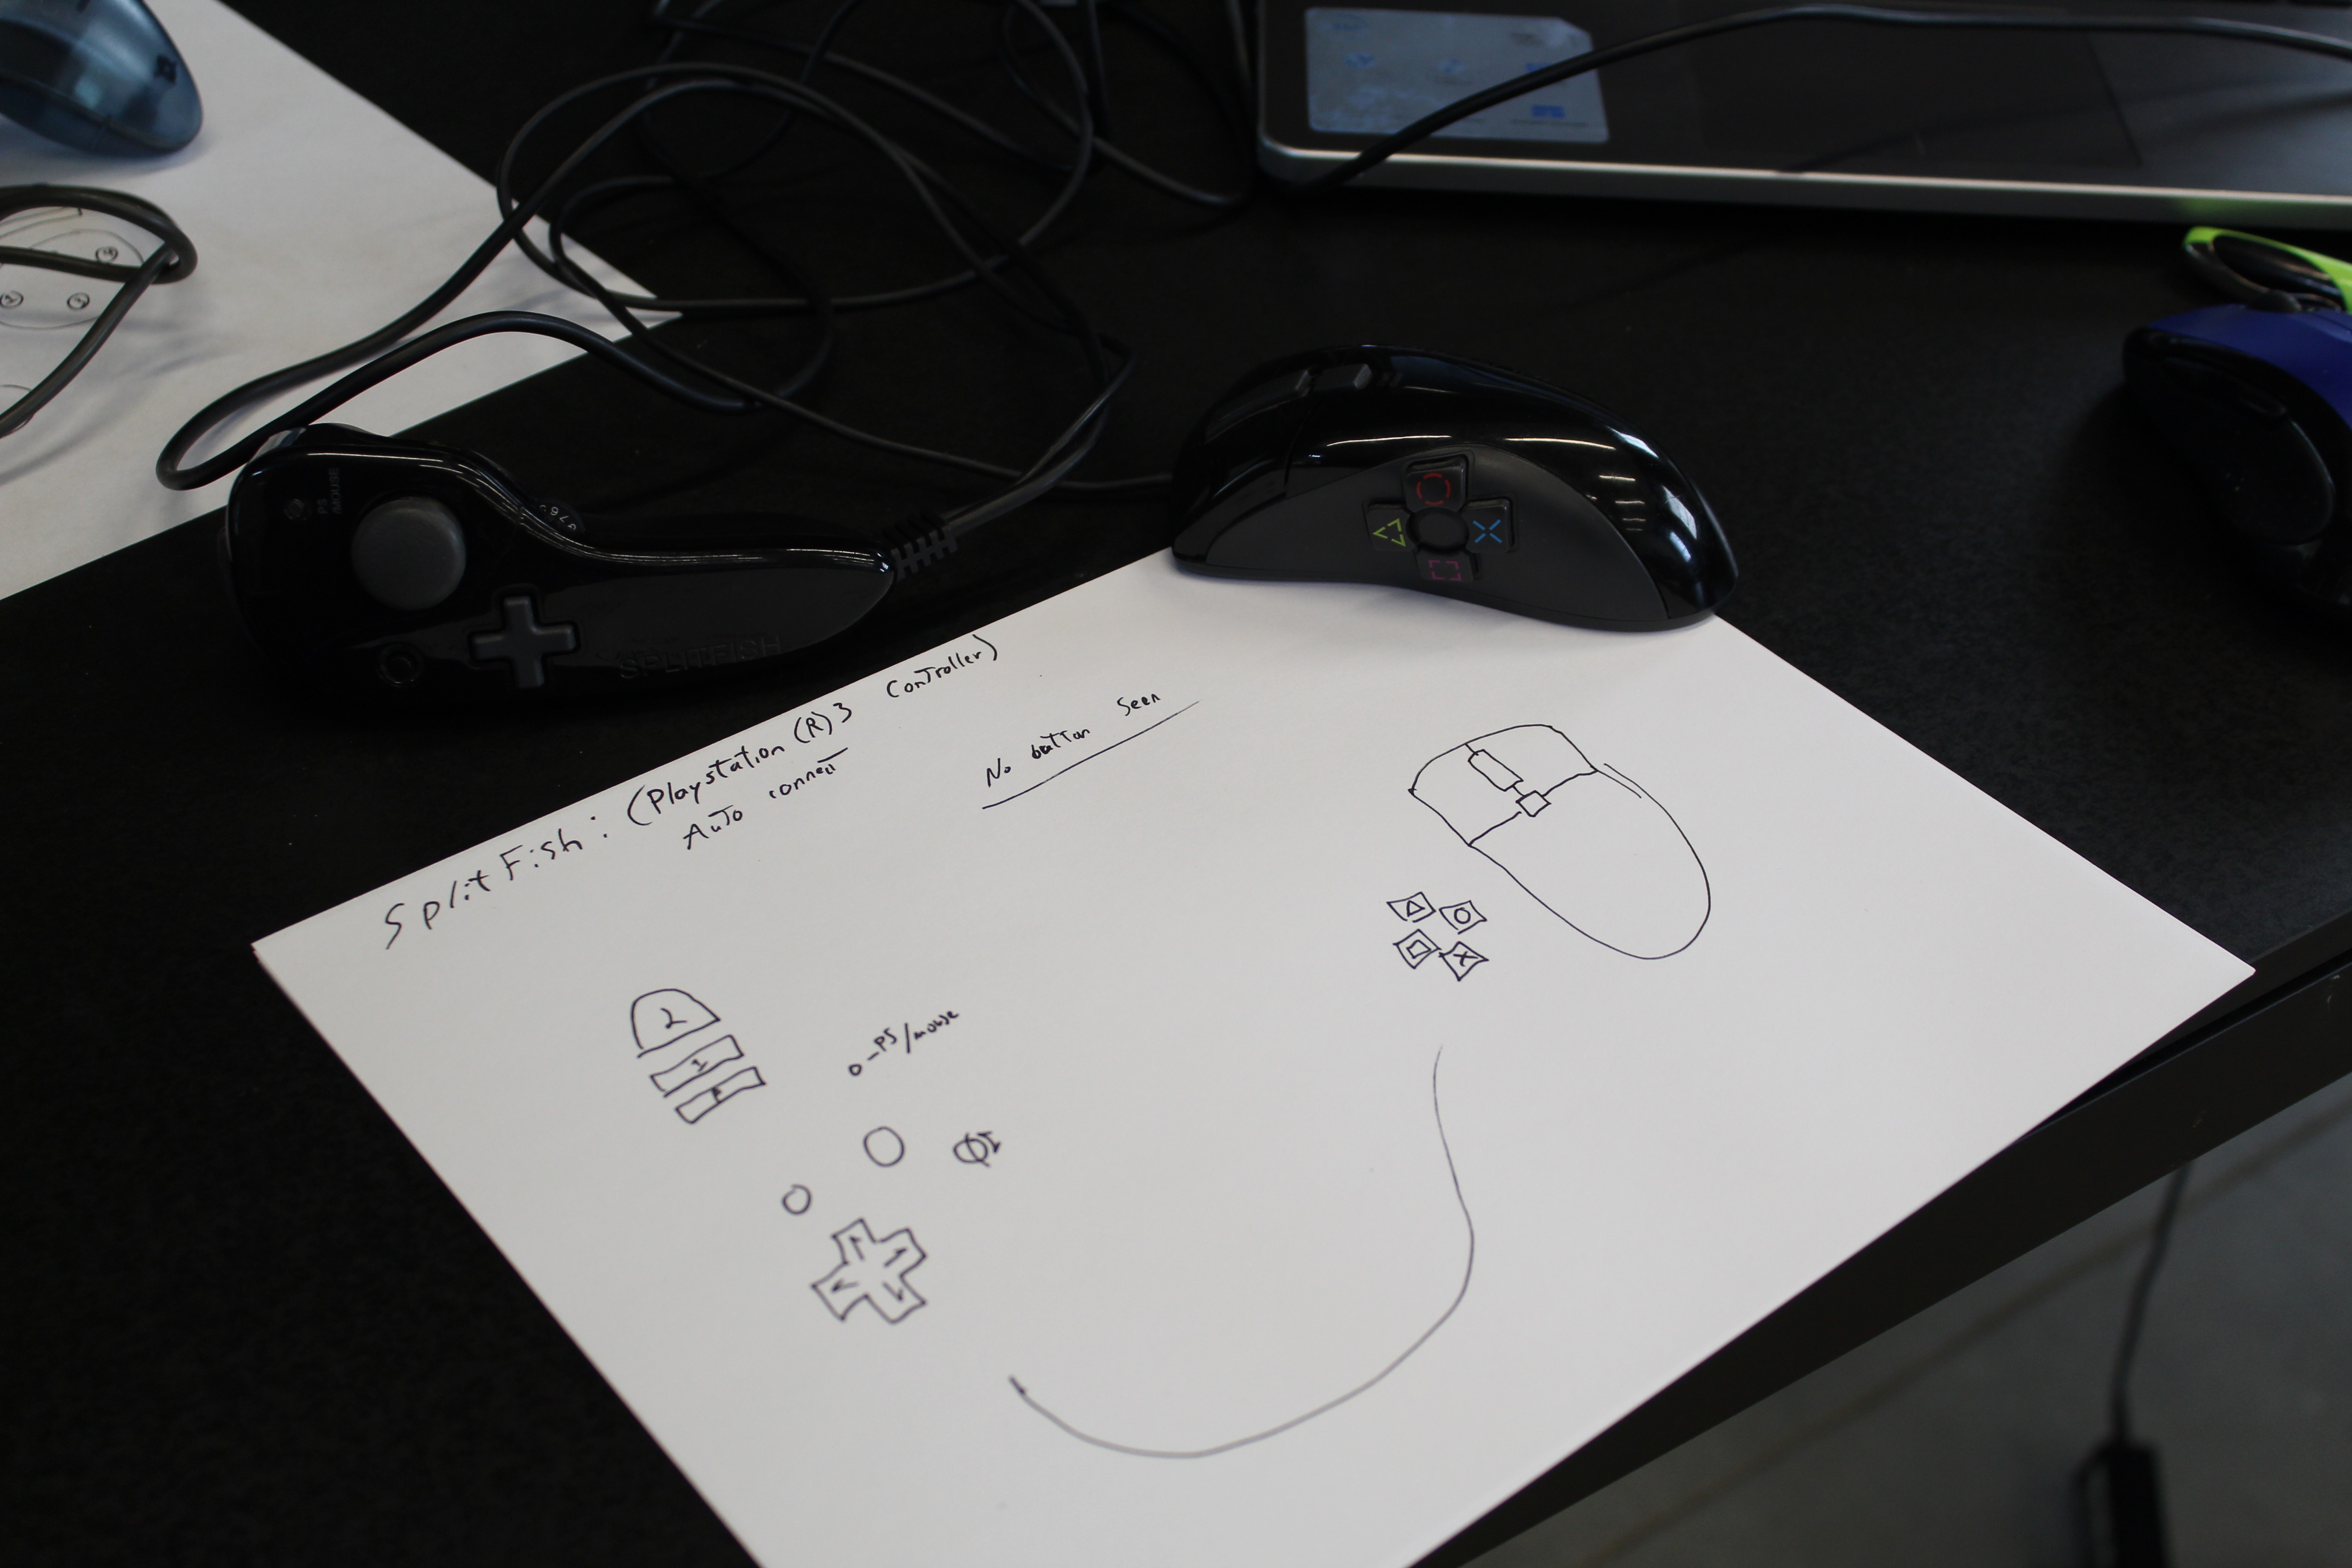

 And after some playing around with the OtherPlan software I was able to generate a setup for cutting. And this began my journey into the physical world... I mean other 3d printing and that birth thing.