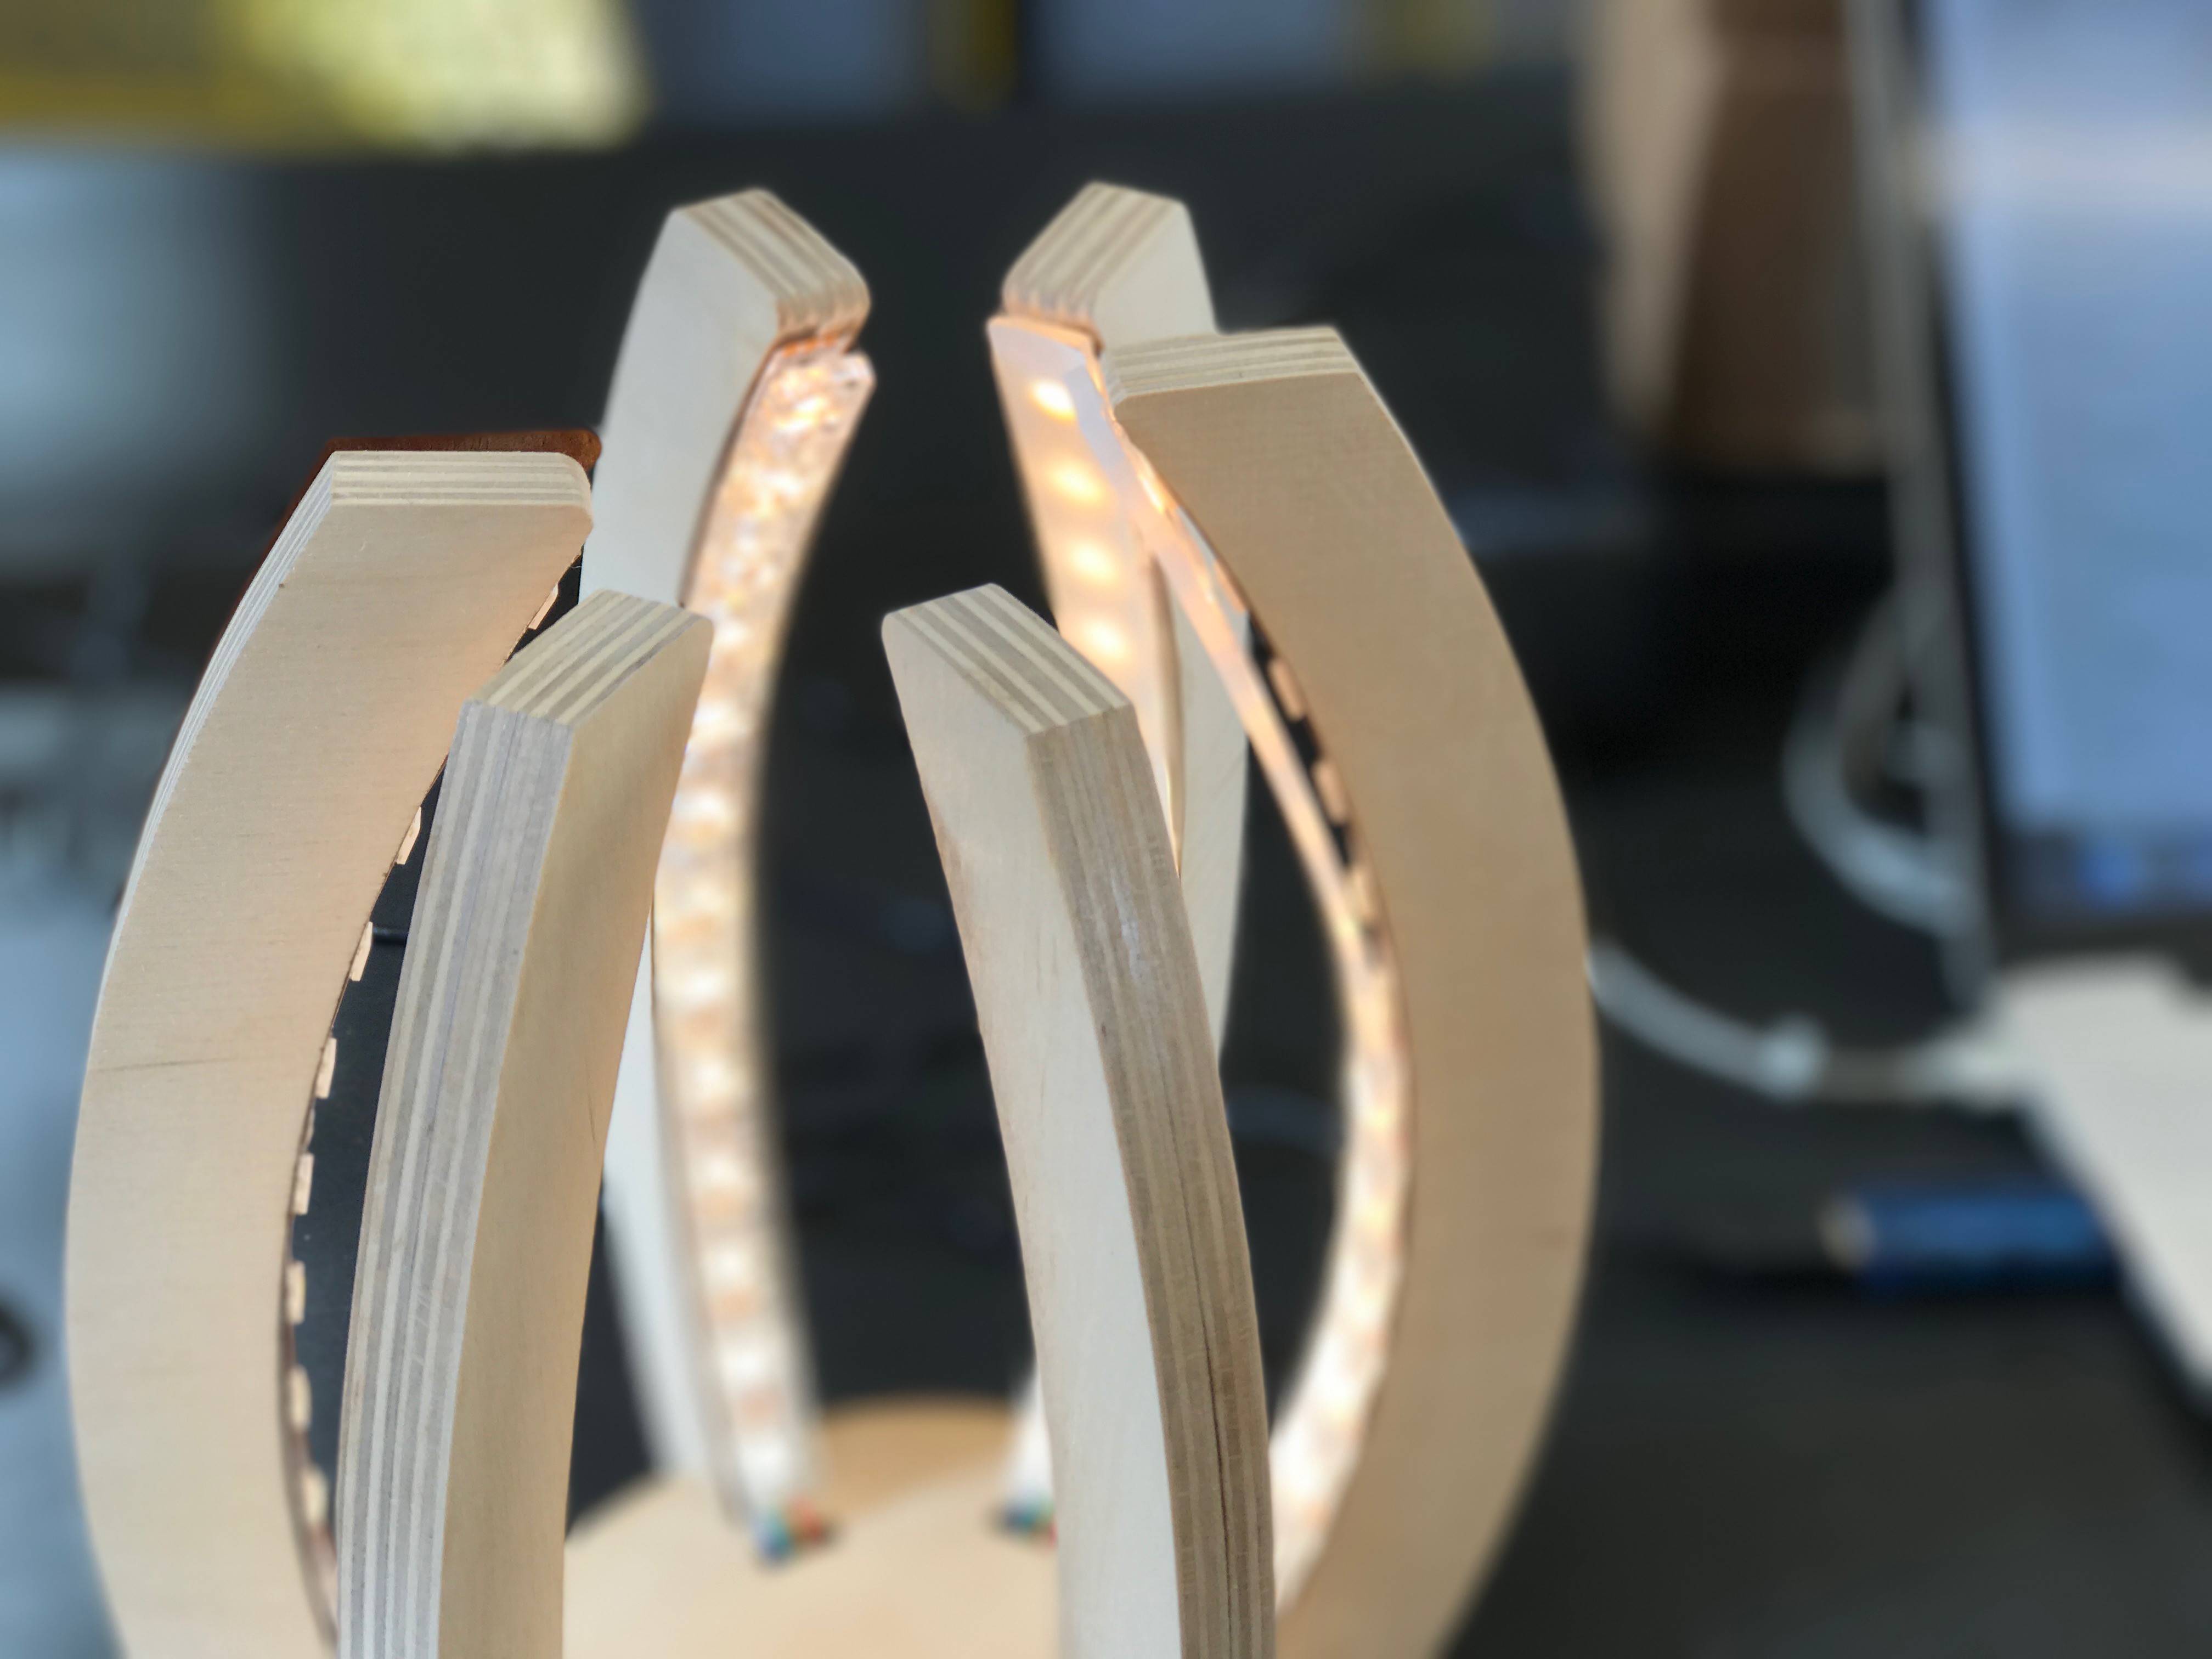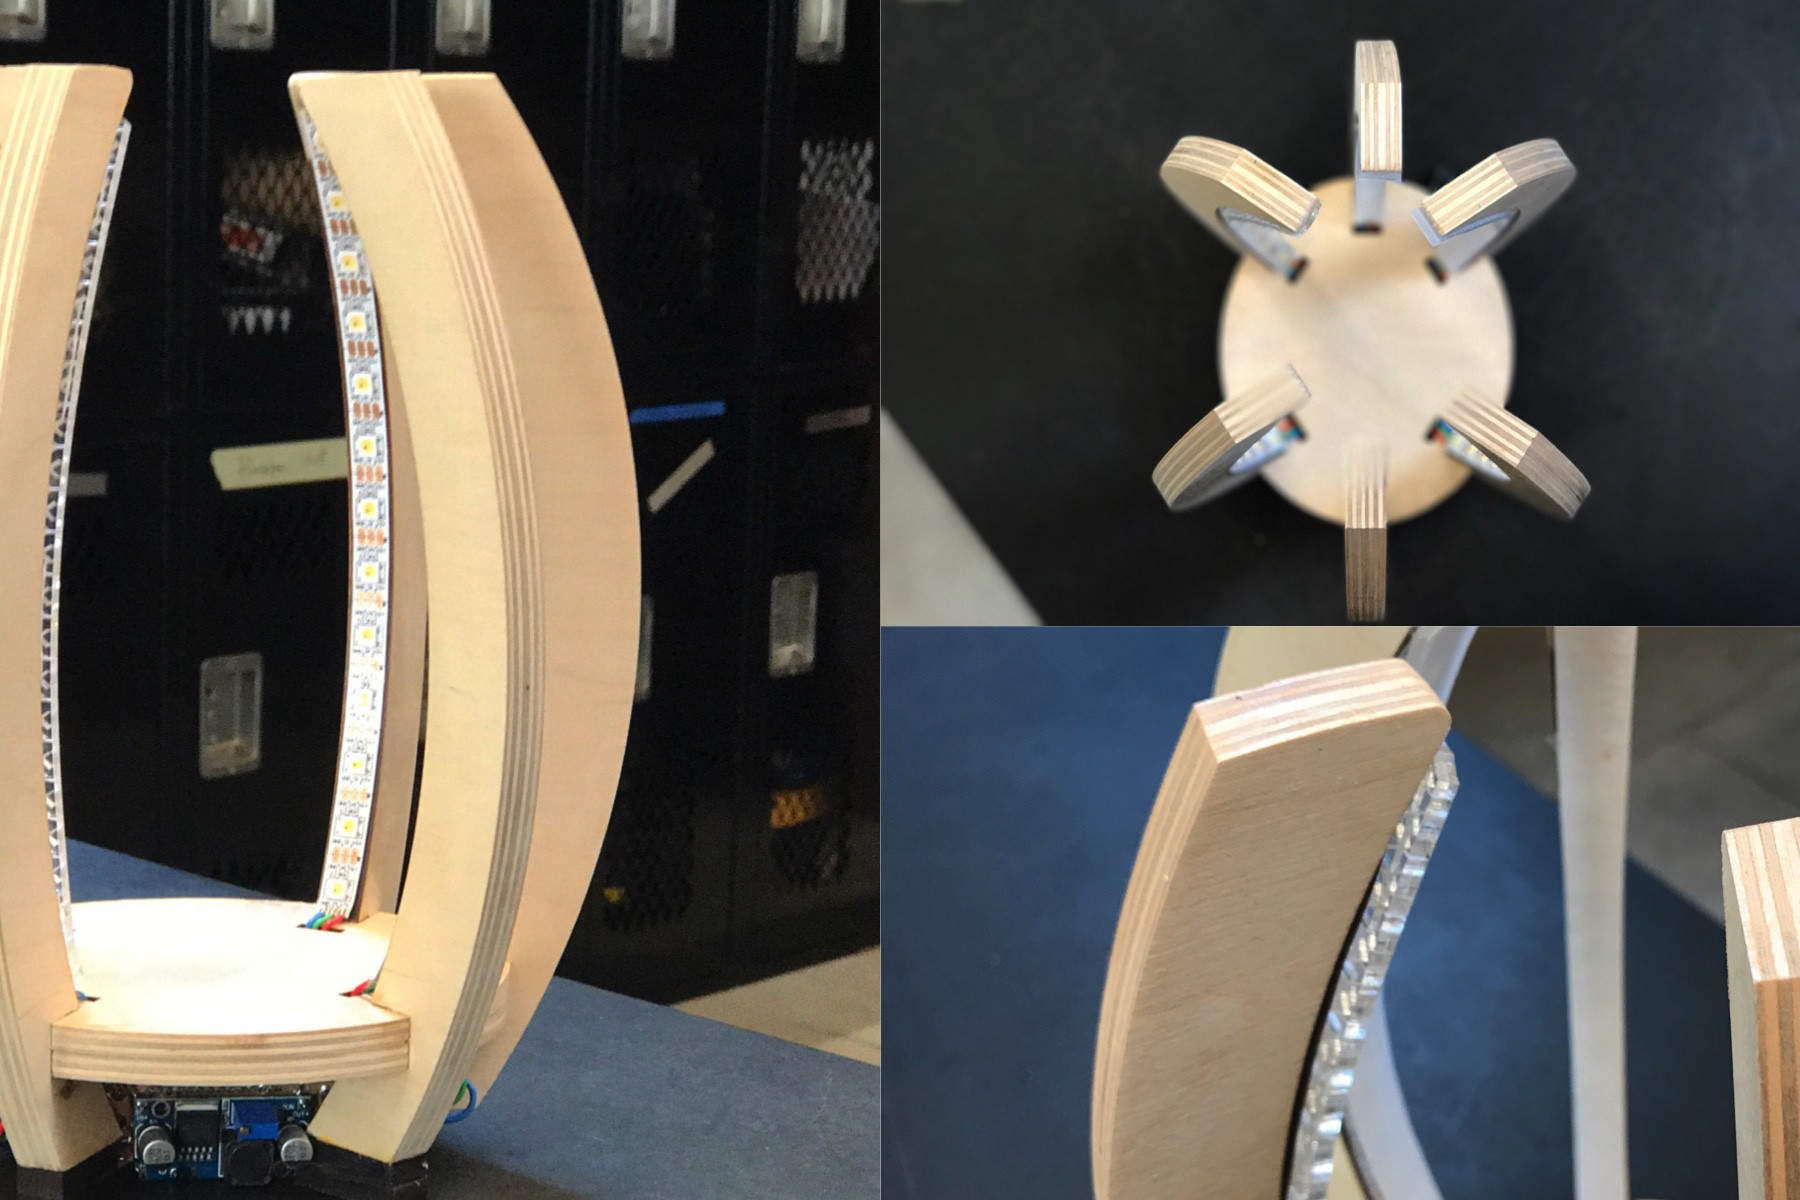
This lamp I'm unimaginatively calling "ellipseArc1" because it is formed via truncations of ellipses.
It is composed of 1/2" baltic birch plywood "spires" reaching upward on a 1/2" plywood base, with single strands of SK6812WWA strips running up the inner sides the spires. These spires also form the feet of the lamp.

This lamp is derived from an early experiment with 12V "dumb" strips using 1/4" lasercut plywood (in the background of the below photo). Those strips were just barely too thick for the wood thickness so I knew I needed to go thicker, especially with the 10mm width of the WS2812-style strips.

The design goal was to have the LED strips disappear into the base plate, so the light sinks into the wood. Unfortunately, due to how lasercutters work, you cannot cut at an angle other than 90º, so having the LEDs seamlessly disappear into the wood isn't possible with the spires being curved into the base. Instead, each strip terminates early and wires are visibly running from the strips into the base. I don't like that effect much.

Another issue is that due to the spires curvature, there is very little room under the base for the driver board. To account for the driver, I had to glue on spacer feet to rise the lamp up enough. And the driver board is where I was experimenting with including a 5V switching power supply. Adding it takes up way too much space, even when mounted cleverly to the back of the driver PCB.

The goal was to have each spire independently controllable, but because of the space issues, they are instead put into three groups: front, middle, and back. It's a real mess.
To construct the wood form of the lamp (since the ShopBot was out of commission), I used the laser cutter. I designed the lamp to use 1/2" plywood but our laser cutter can only do 1/4". To create "fake" 1/2" plywood, I lasercut double of each of the shapes from 1/4". I then sanded the lasercut edges to hide their lasercut origin and reveal the nice edge detail of the baltic birch.
The final effect looks pretty convincing and solid. The spires slot into the base in a standard lasercut fashion, but I offset them so it didn't read like a lasercut object.
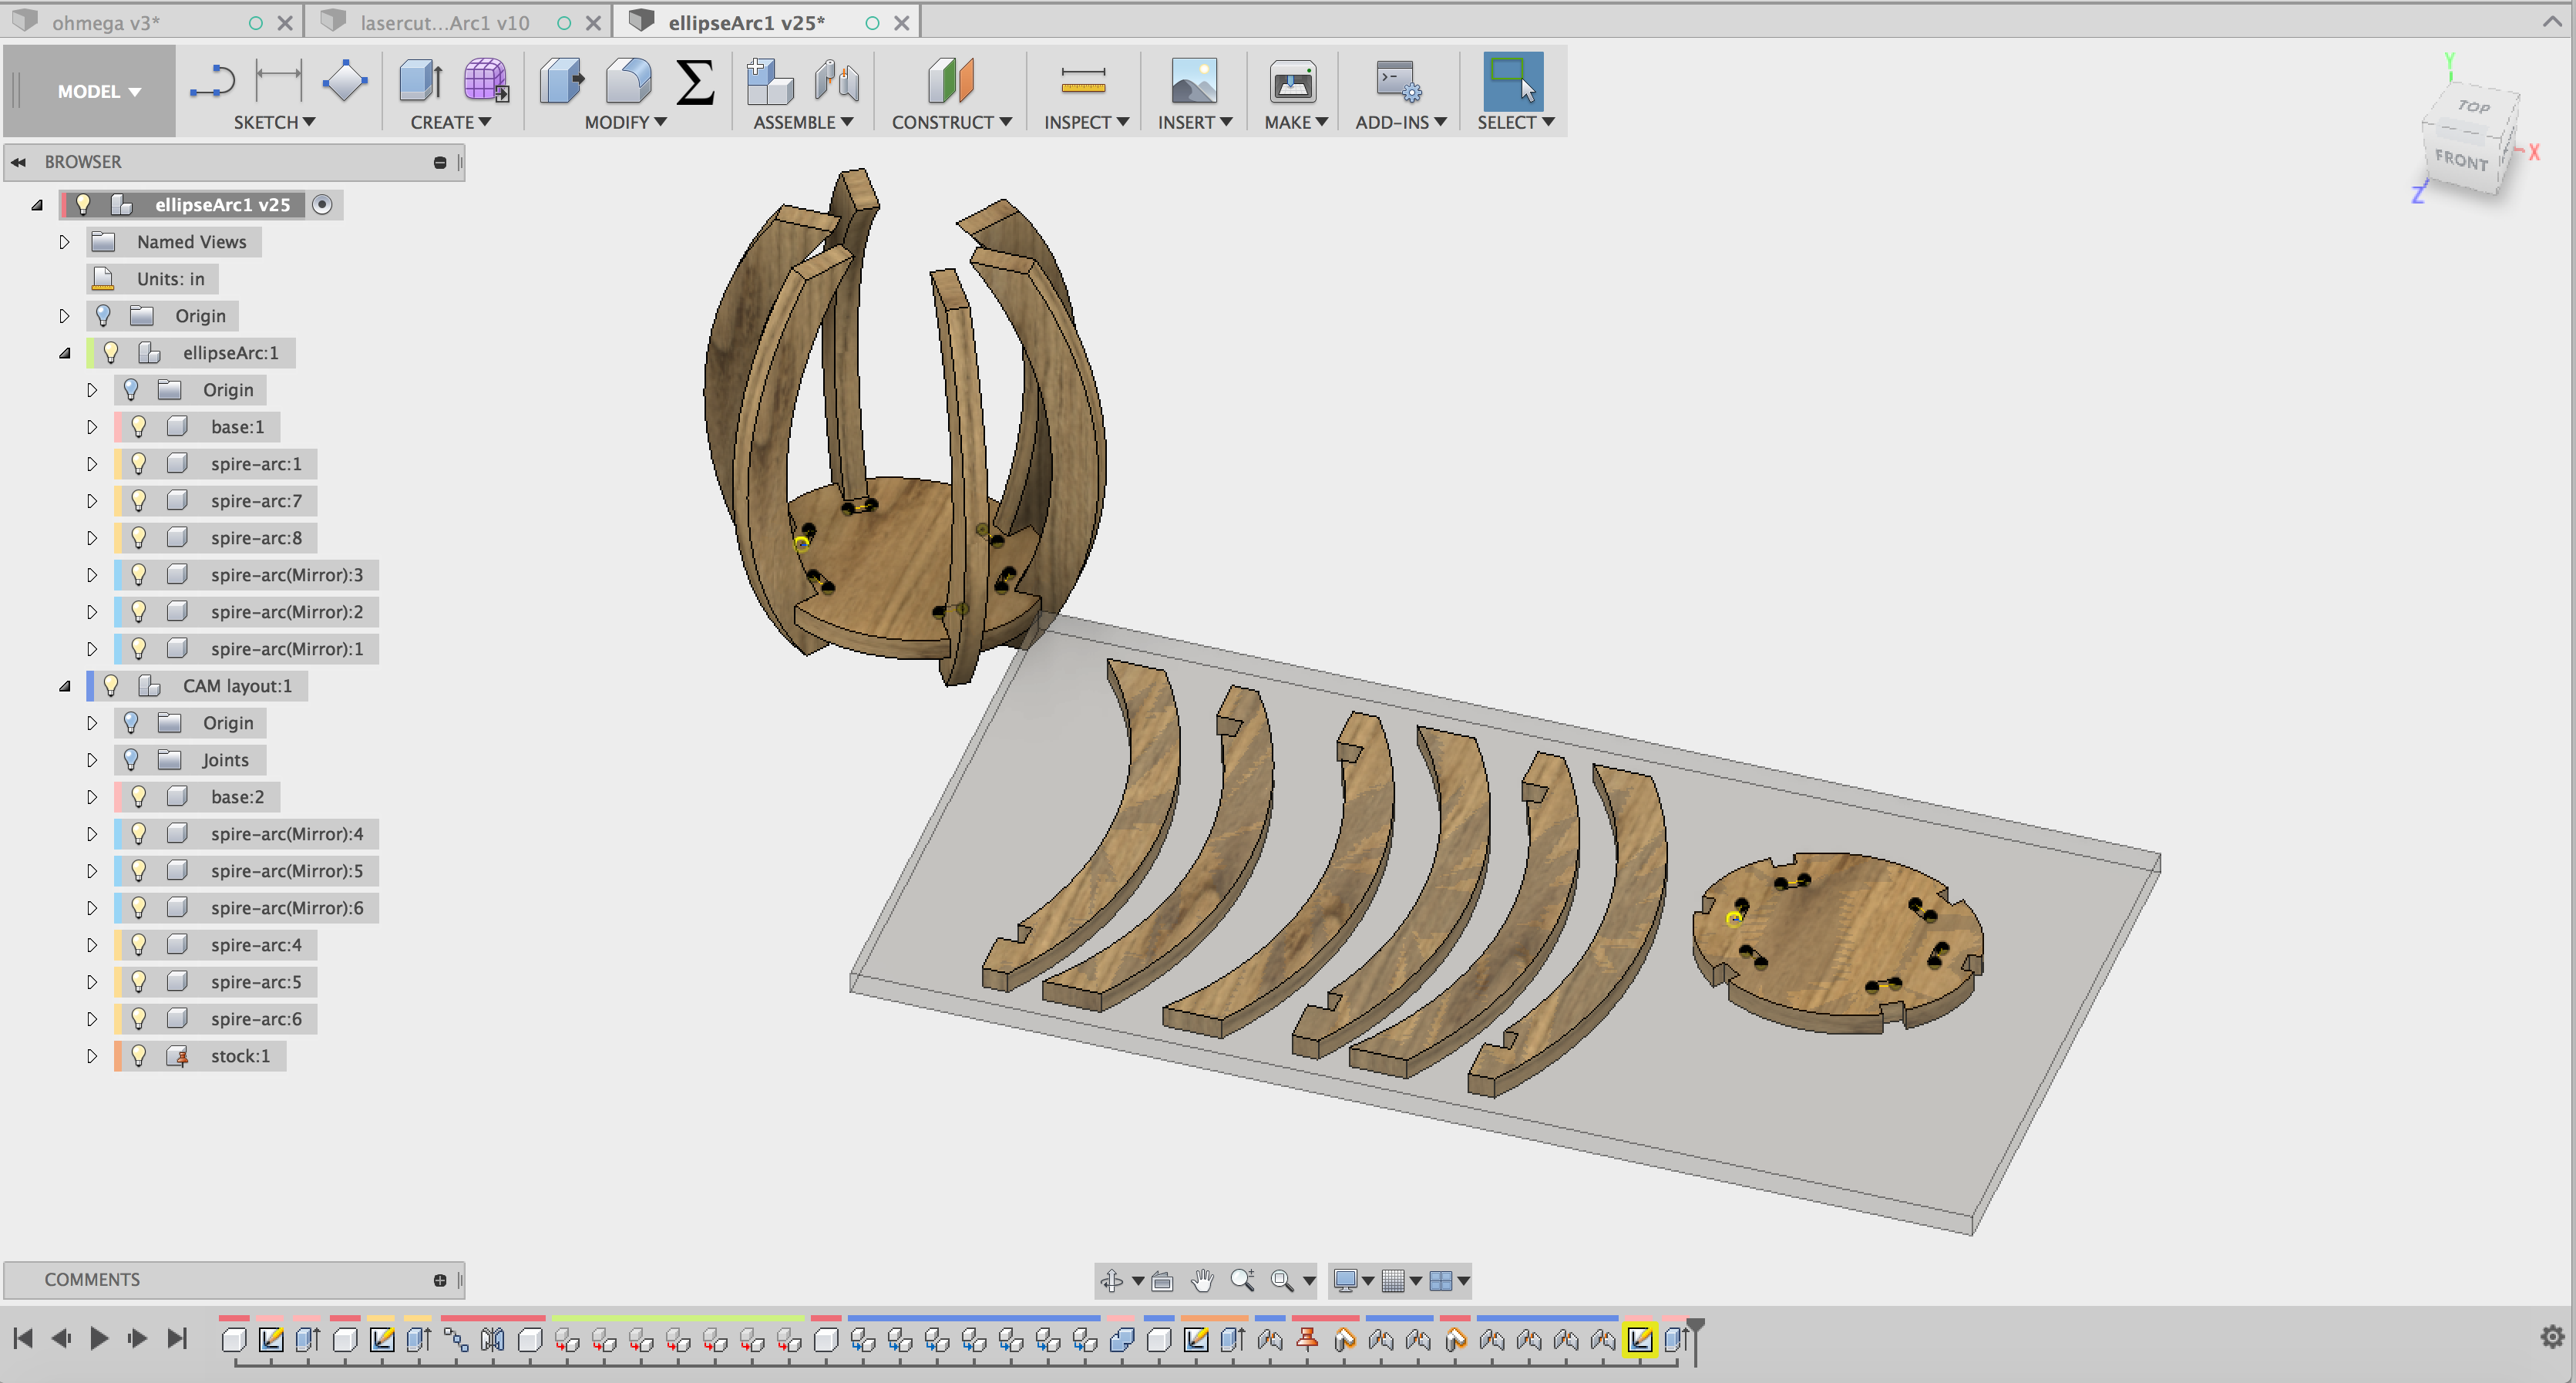
This was also my first real venture into properly designing multi-component CAM layouts in Fusion360. This is done by making a copy of the components and positioning them onto a "stock material" object (perhaps via joints). It works pretty well.

Overall, this lamp experiment was a failure in terms of functionality and construction. But it did teach me a few things.
Lessons learned from this lamp prototype:
- How to take a design in Fusion360 and lay it out for laser cutting or CNC milling
- The beginnings of how to make lasercut wood look like CNC'd or hand-built
- Getting more comfortable using the DesignLab shop tools for doing hand-building and finishing of wood
- Further experimentations with living hinge pattern acrylic cutting for diffuser effects (see below)
- Initia lasercut wood veneer experiments for varying surface treatment of the lamp body. It can look pretty good! (see below)

It also started me down the path to start thinking about how to incorporate the electronics into the body of the lamps. Until now, I have purposefully been ignoring that. I wanted to explore raw shapes and didn't want the distraction of electronics dimensions & UI considerations.
For future lamps, I will be striving to both incorporate the electronics into the lamp bodies as well as begin integrating a more thoughtful user interface for the lamps.
 todbot
Discussions
Become a Hackaday.io Member
Create an account to leave a comment. Already have an account? Log In.