-
PCB assembled
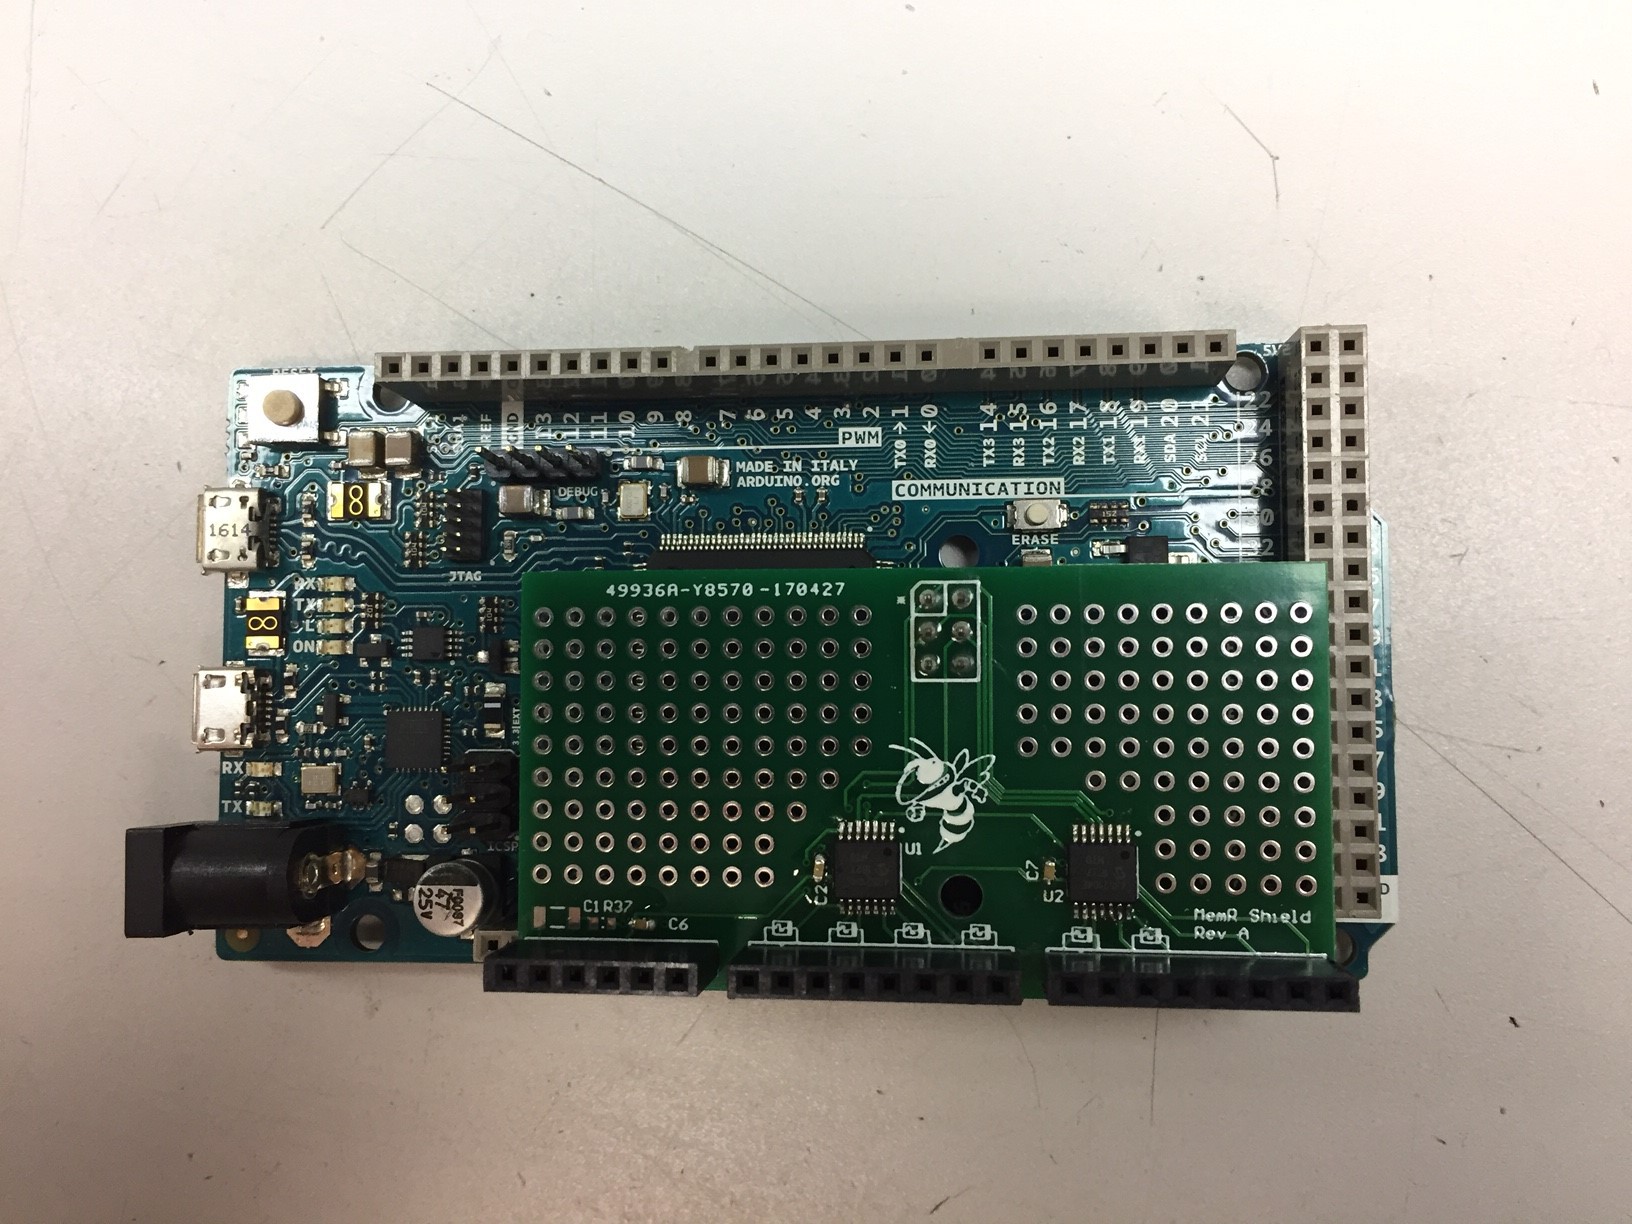
05/30/2017 at 12:14 • 0 commentsI have the first PCB assembled. Now on to testing! This is the board installed on the Arduino Due.
-
PCB arrived!
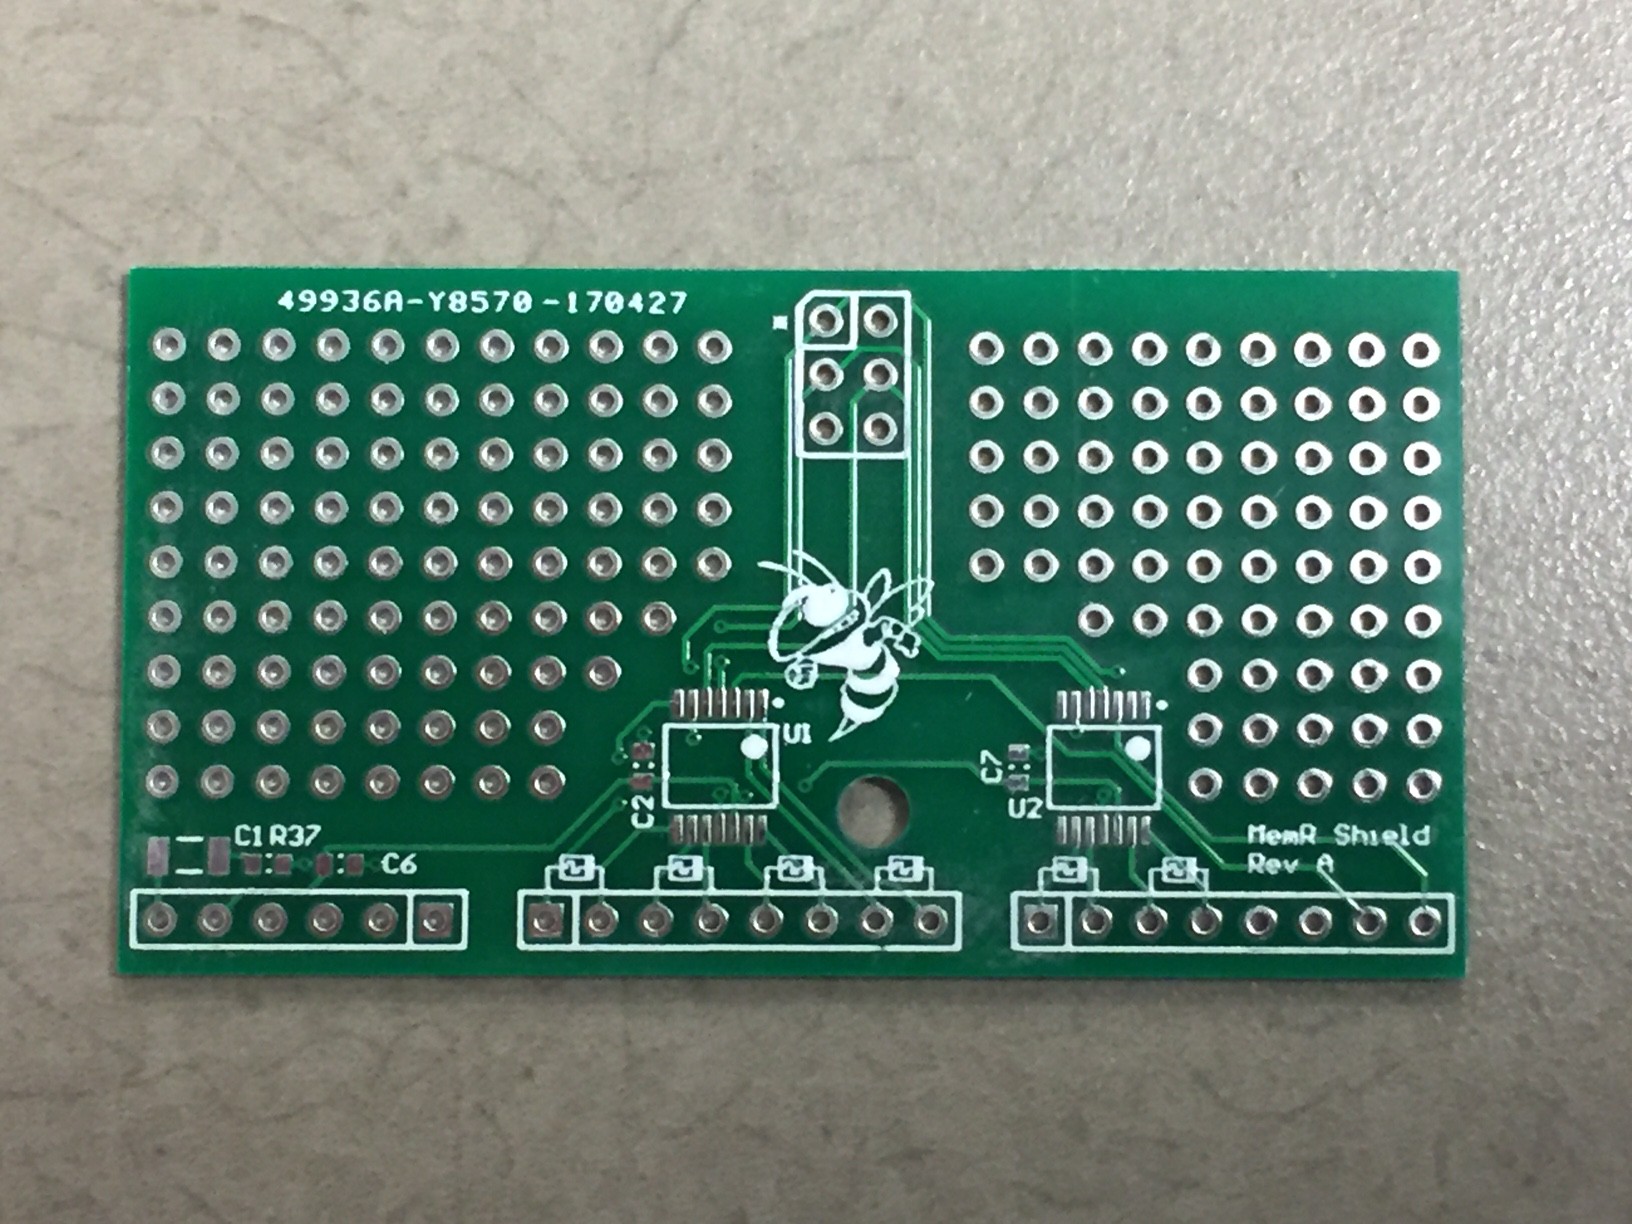
05/23/2017 at 01:24 • 0 commentsWell, EasyEDA let me down a little bit. They were running late on shipping the boards, so I emailed them. They said they would ship that day. TEN DAYS LATER they still had not shipped. I didn't notice because I was on vacation. So I finally got them today. Took a month to get my boards when it was supposed to be two weeks. But they look good! Gotta start building them up next.
-
PCBs shipped (?)
05/11/2017 at 19:35 • 0 commentsGot an email from EasyEDA saying the boards are shipping today. However, it is not updated on their website. Feels like it's been a LOONG time waiting for these boards to get back to me.
-
PCB ordered
04/27/2017 at 17:51 • 0 commentsI ordered my 6-memristor PCB. $8 for 10. Plus about $25 shipping. No changes from the last post. 2 weeks to arrival.
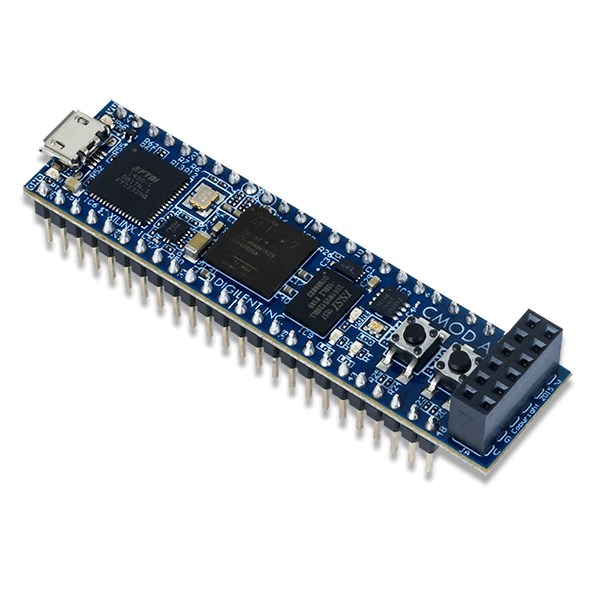
I have been looking into the scaled version with an FPGA board. I figured if I had an 8-input ADC with each quad digital pot, I'll need 8 sets of these to get 32 memristors. Assuming the ADCs are SPI, then I'd need 5 I/O for each ADC/POT set. Each set would have a dedicated SPI interface. I want this for speed. Then I will need 40 I/O for all my chips. I ordered a Digilent Artix-7 module which has 44 I/O in anticipation of scaling the project up. And I still need to read up on the crossbar support circuitry. I may do 2 pairs per SPI bus if I need more I/O.
http://store.digilentinc.com/cmod-a7-breadboardable-artix-7-fpga-module/
![]()
-
Neural net example
04/24/2017 at 14:49 • 0 commentsI have an example of a crossbar array which is targeted as a neural net. I will have to read more about it to understand the interface. It has 2 4x4 arrays of memristors or 32 memristors. That may give me an attainable target for this project.
![]()
-
Scaling
04/24/2017 at 02:09 • 0 commentsI know 6 memristors is not really a whole lot. I've been considering how to scale it up. I could easily add more digital pots since they are all SPI based, but the analog measuring would get complicated. I suppose I could do some analog multiplexing. I have 4 memristors per digital pot, and 12 ADC inputs, but I need 2 for each pot. So 1.5 chips with no muxes.
6 chips: 24 pots: 48 analog channel needed. So there would be 4 signals for every channel available. So I'd need 6 4:1 muxes. I can get 2 4:1 muxes in a chip, so I'd need 3 chips more. So 9 chips total would give me 24 memristors.
The only problem would be sampling time. I can only grab one sample at a time, and I have to get 48 samples and have to include time to change the muxes.
I may consider changing my approach. It may make more sense to use a separate 8-channel ADC for each digital pot. And then use an FPGA for a separate SPI bus to each ADC/pot pair. Perhaps I should figure out how many memristors I really want for a decent neural net architecture which would drive the final implementation.
-
Final PCB
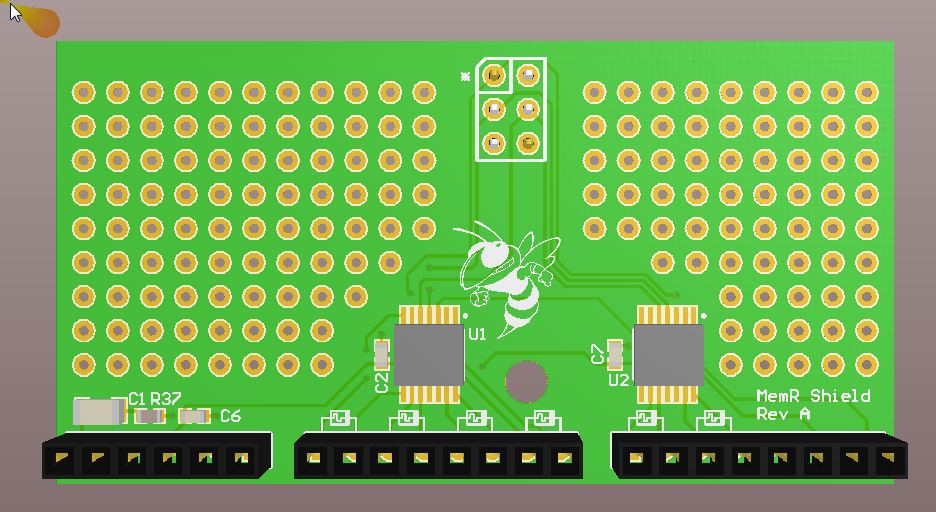
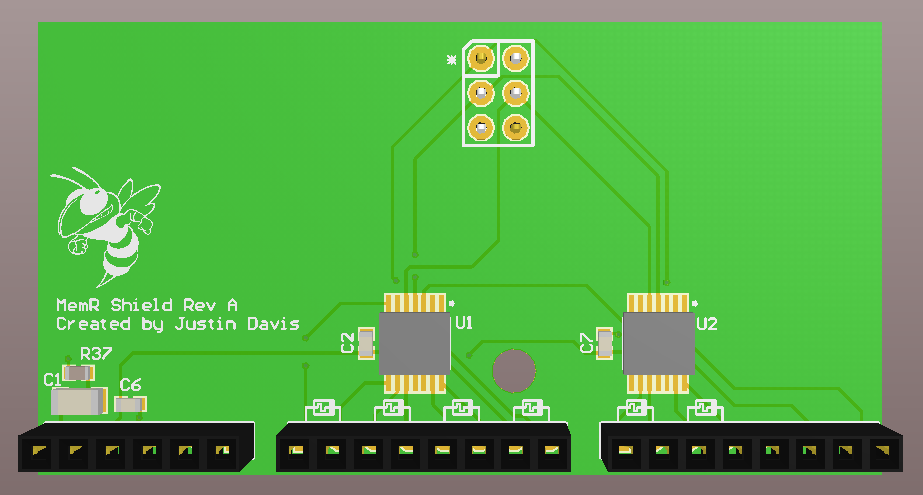
04/20/2017 at 12:15 • 0 commentsI finished up the PCB and added some prototyping area since it will be used for multiple projects. Uploaded to OSH Park, but not yet ordered. It's so few parts, but it will make it so much easier. I still need to update the software, but it doesn't have to be done before the boards arrive.
![]()
-
PCB fab
04/18/2017 at 13:55 • 0 commentsI'm working on a small PCB for the memristor simulator. I didn't really want a full-sized shield for the cost since there's barely anything to the project right now. Perhaps next version will include more parts. So it's more of a half-size shield. It only needs to connect to the one side of the Arduino Due and its SPI pins. I figure I would hack the Select pins for the SPI interface to the bottom size of the board. And then I plan to use the headers on the top side to plug in wires for the different interfaces. There's 6 memristors available, so that should be enough to do some simple experiments. The only problem is all the blank space on the board. I wonder if I can fill it up with other things. Maybe I should put a through-hole array for prototyping. It would be more useful than blank space at least.
I can order these from OSH Park for $16. I'll share the files as soon as I get them uploaded. I think they gave me a coupon once since I have a some projects on here, so maybe they'll even be free.
![]()
-
Pinched!
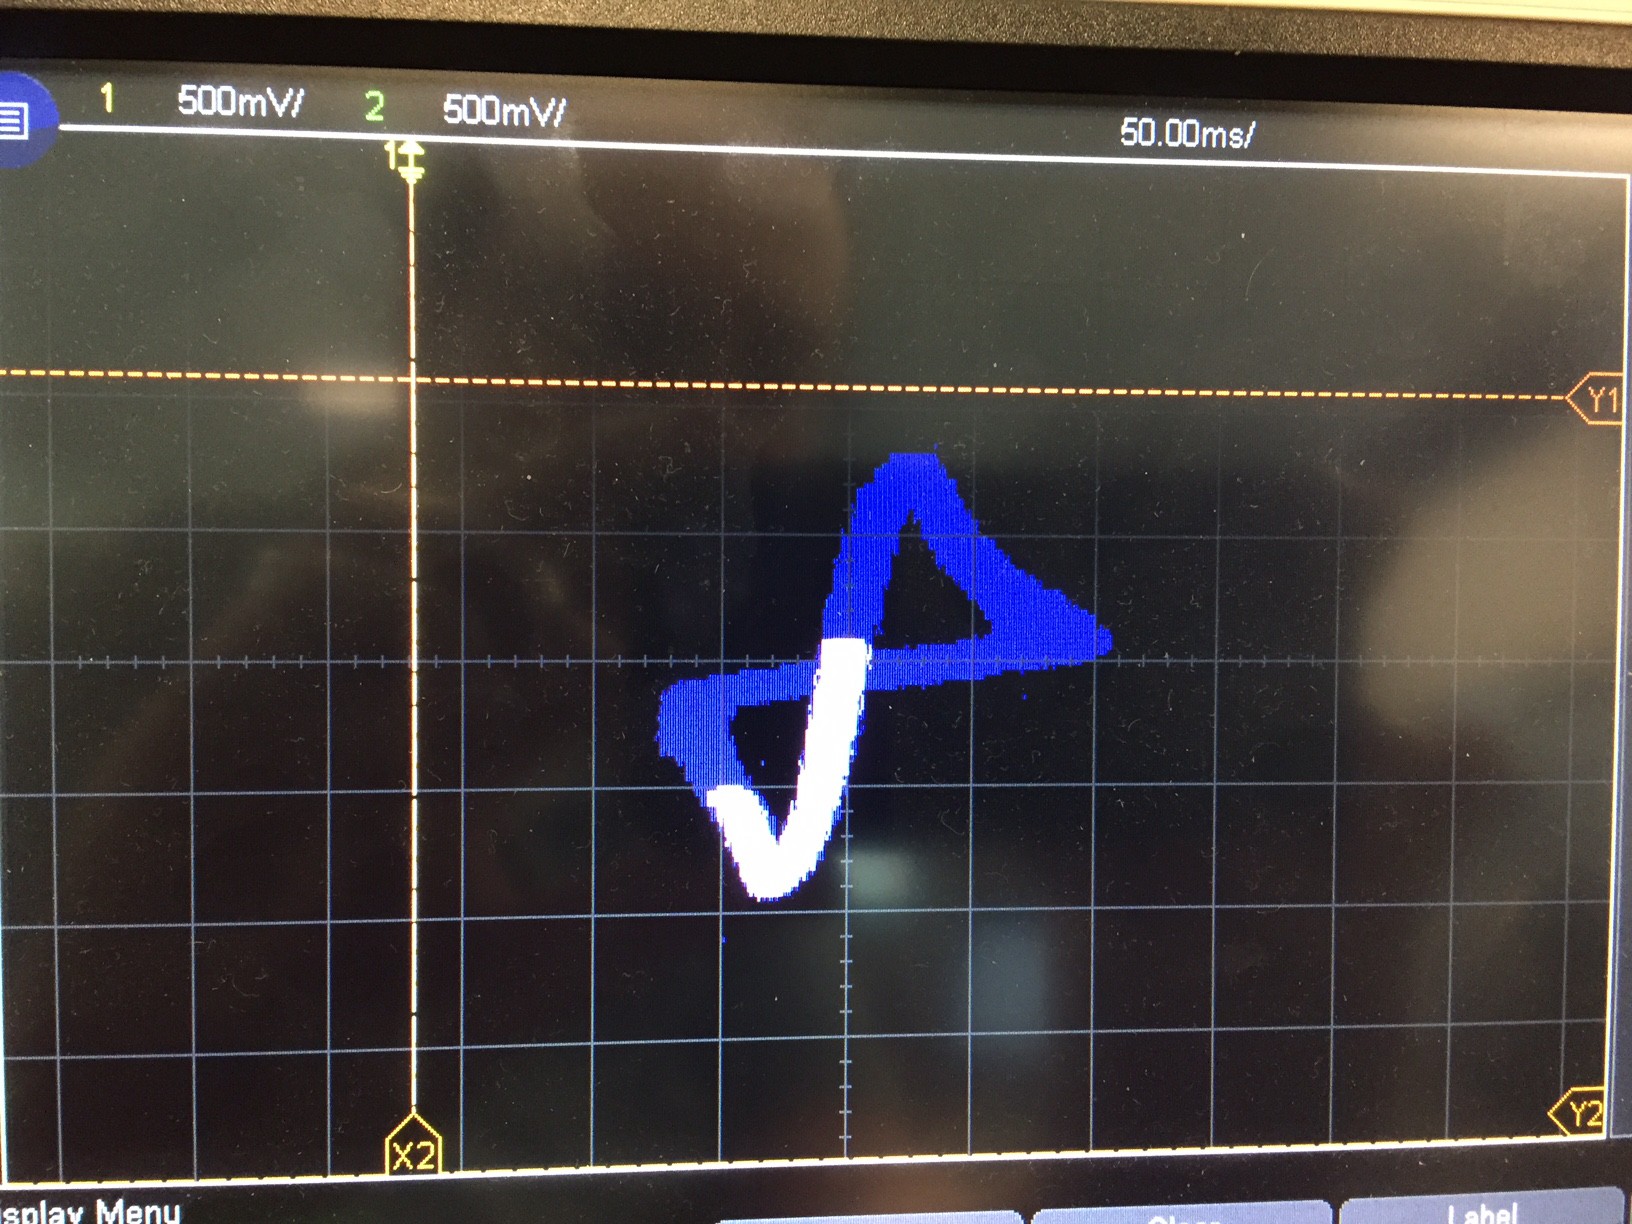
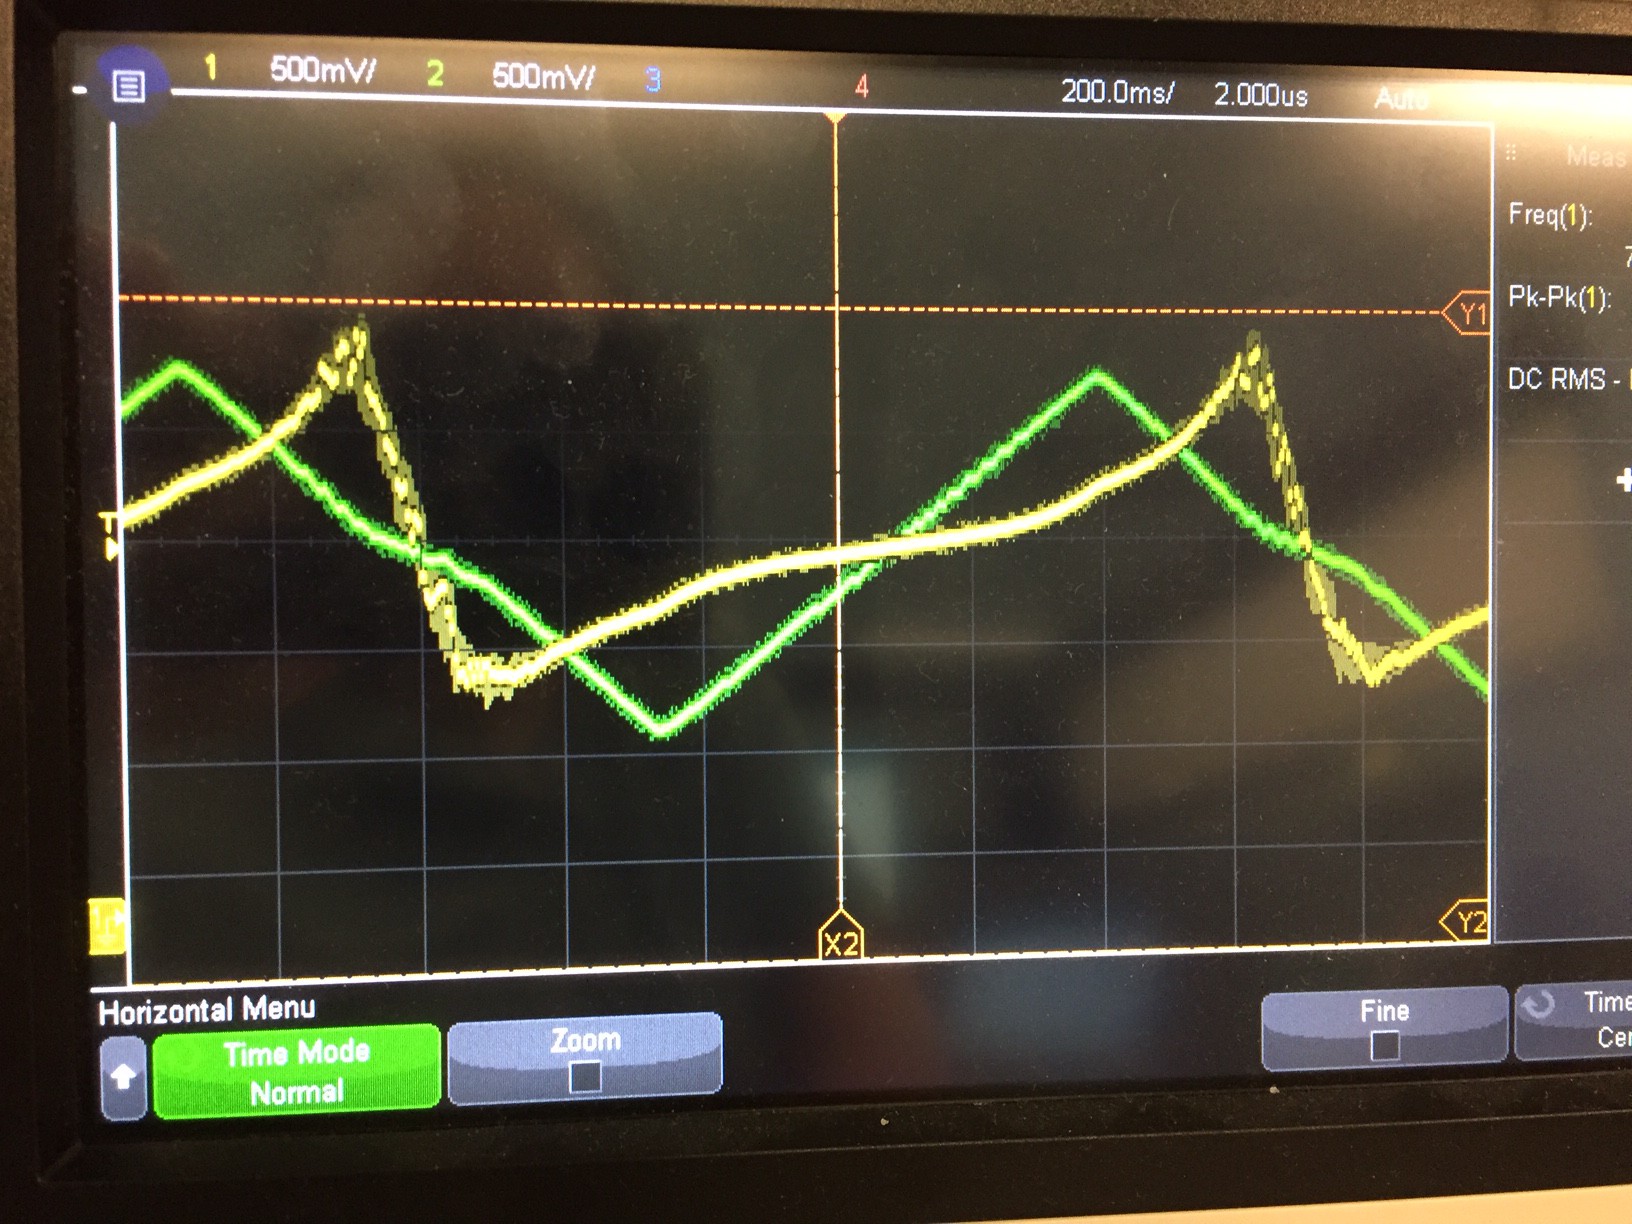
03/21/2017 at 17:42 • 0 commentsI finally got the voltage difference and current outputs working on the Due. Took a little tweaking, but I finally got the characteristic pinched curved which is associated with memristors. I also found the XY persistent display isn't great for showing this, but acceptable. The system is also fairly noisy so the sweep is pretty wide. But it's good enough for solderless breadboarding.
I'm using a simple voltage ramp up and down instead of a sine wave output since it's much simpler to write an up-down counter than a sine wave generator. It's roughly 1.3Hz. In the time-domain display below the green is the voltage difference and the yellow is the current. These are both DC shifted up in voltage since the Due can't output dual-voltage on its DAC. The trigger is pointing to roughly the zero line.
I'm not sure which direction I will go next. I'd like to clean up the XY output and perhaps do a good sine wave. And then use level-shift op-amp circuit to get a dual-voltage output. Of course, that's not a fun as actually trying to use the circuit as a memristor to build things, so maybe I'll looking into building a simple wired-AND or wired-OR style logic gate.
-
Due SPI problems
03/16/2017 at 19:50 • 0 commentsI spent way too much time working on the SPI interface on the Due today. Ultimately I found I was writing to the wrong address in the pot. However, I also found out that I can't seem to change the SPI clock frequency or mode using the Arduino library function SPI.beginTransaction. I poured over the documentation and it's definitely not obvious why. But I got that up and working again, so I guess I will live with the 4MHz SPI clock. It works.
And I'm still working on converting the voltage and current to the DAC outputs for my XY display. But this SPI problem was a big delay. It's even more frustrating because it was working before, and at some point I must have changed that address. So it's like doing the same work twice.
Memristor Simulator for a Neural Network
Simulating the functionality of memristors using off-the-shelf parts to form a neural network crossbar array
