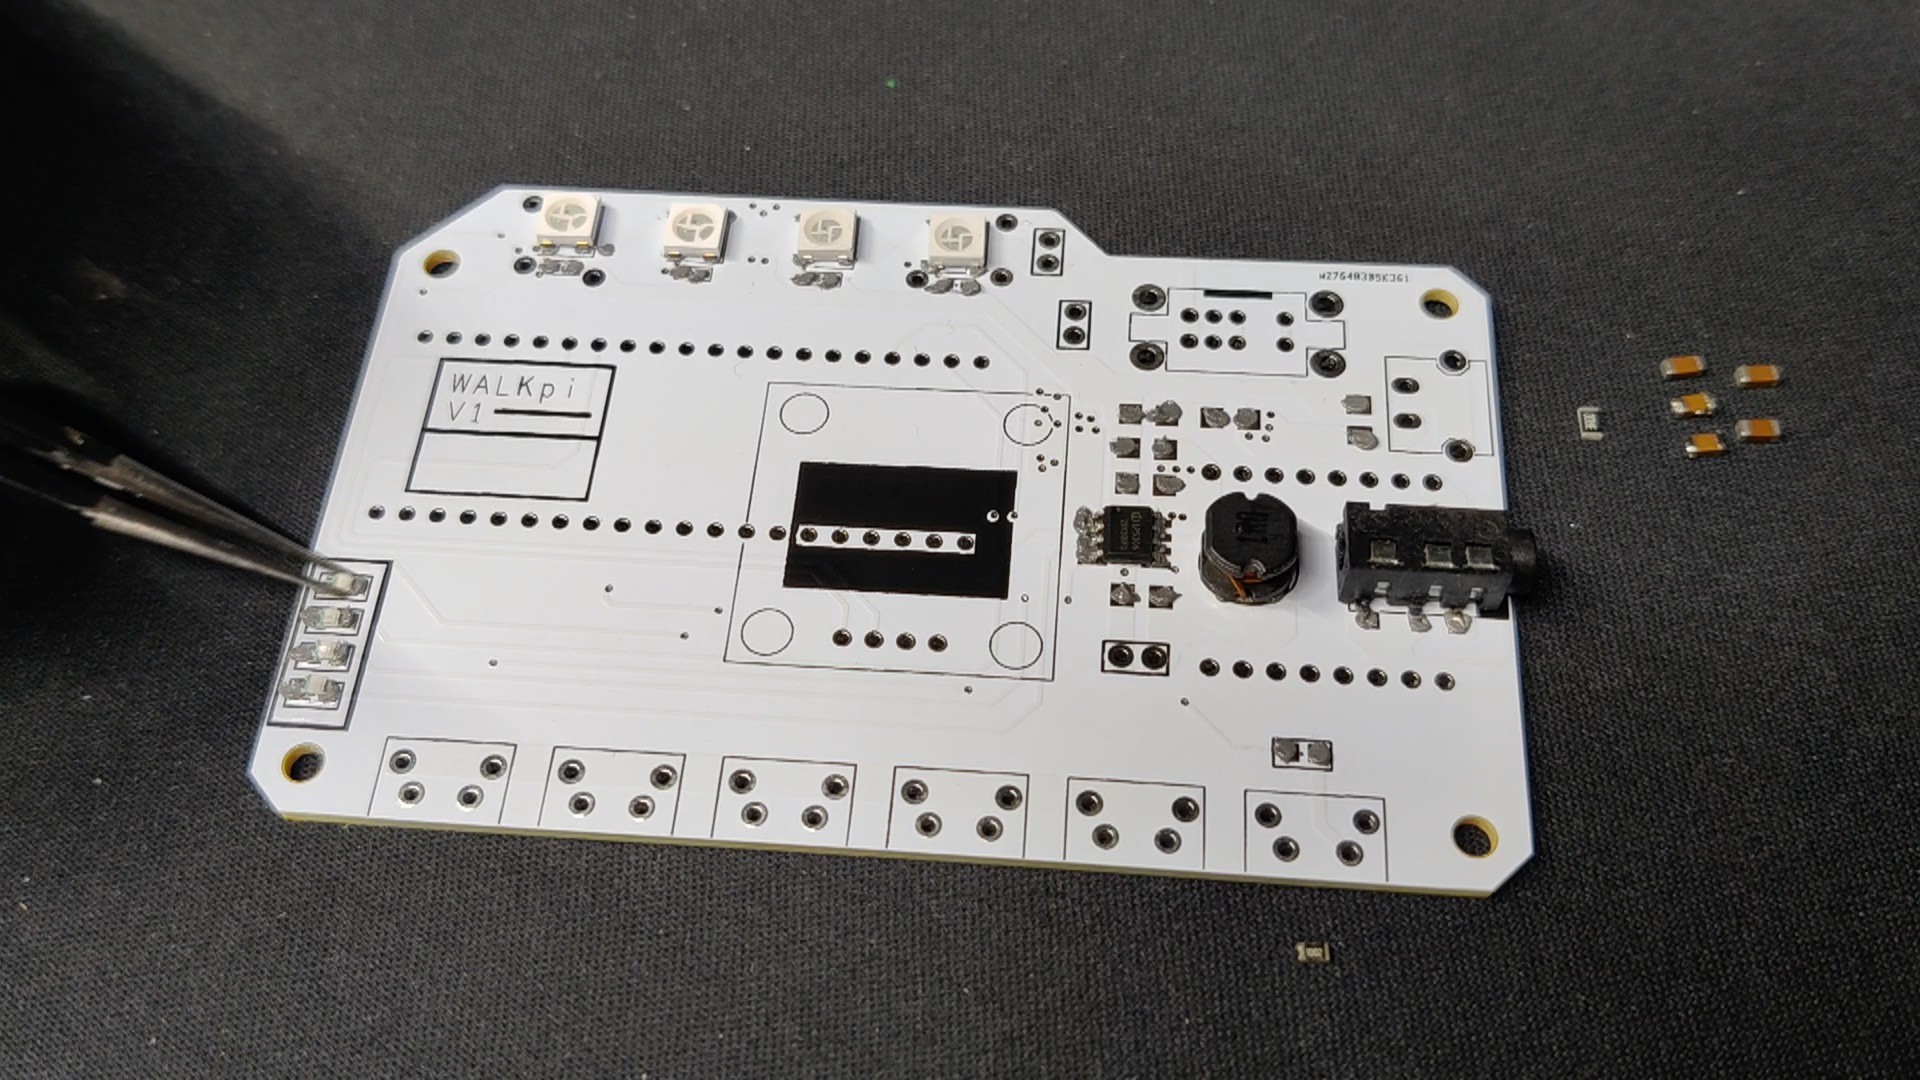
Applying solder paste to each component pad is the initial step in the circuit-building procedure. In this case, a solder paste dispenser synringe with 63/37 Sn/Pb solder paste is used.
Next, we pick and place each component in its proper place.
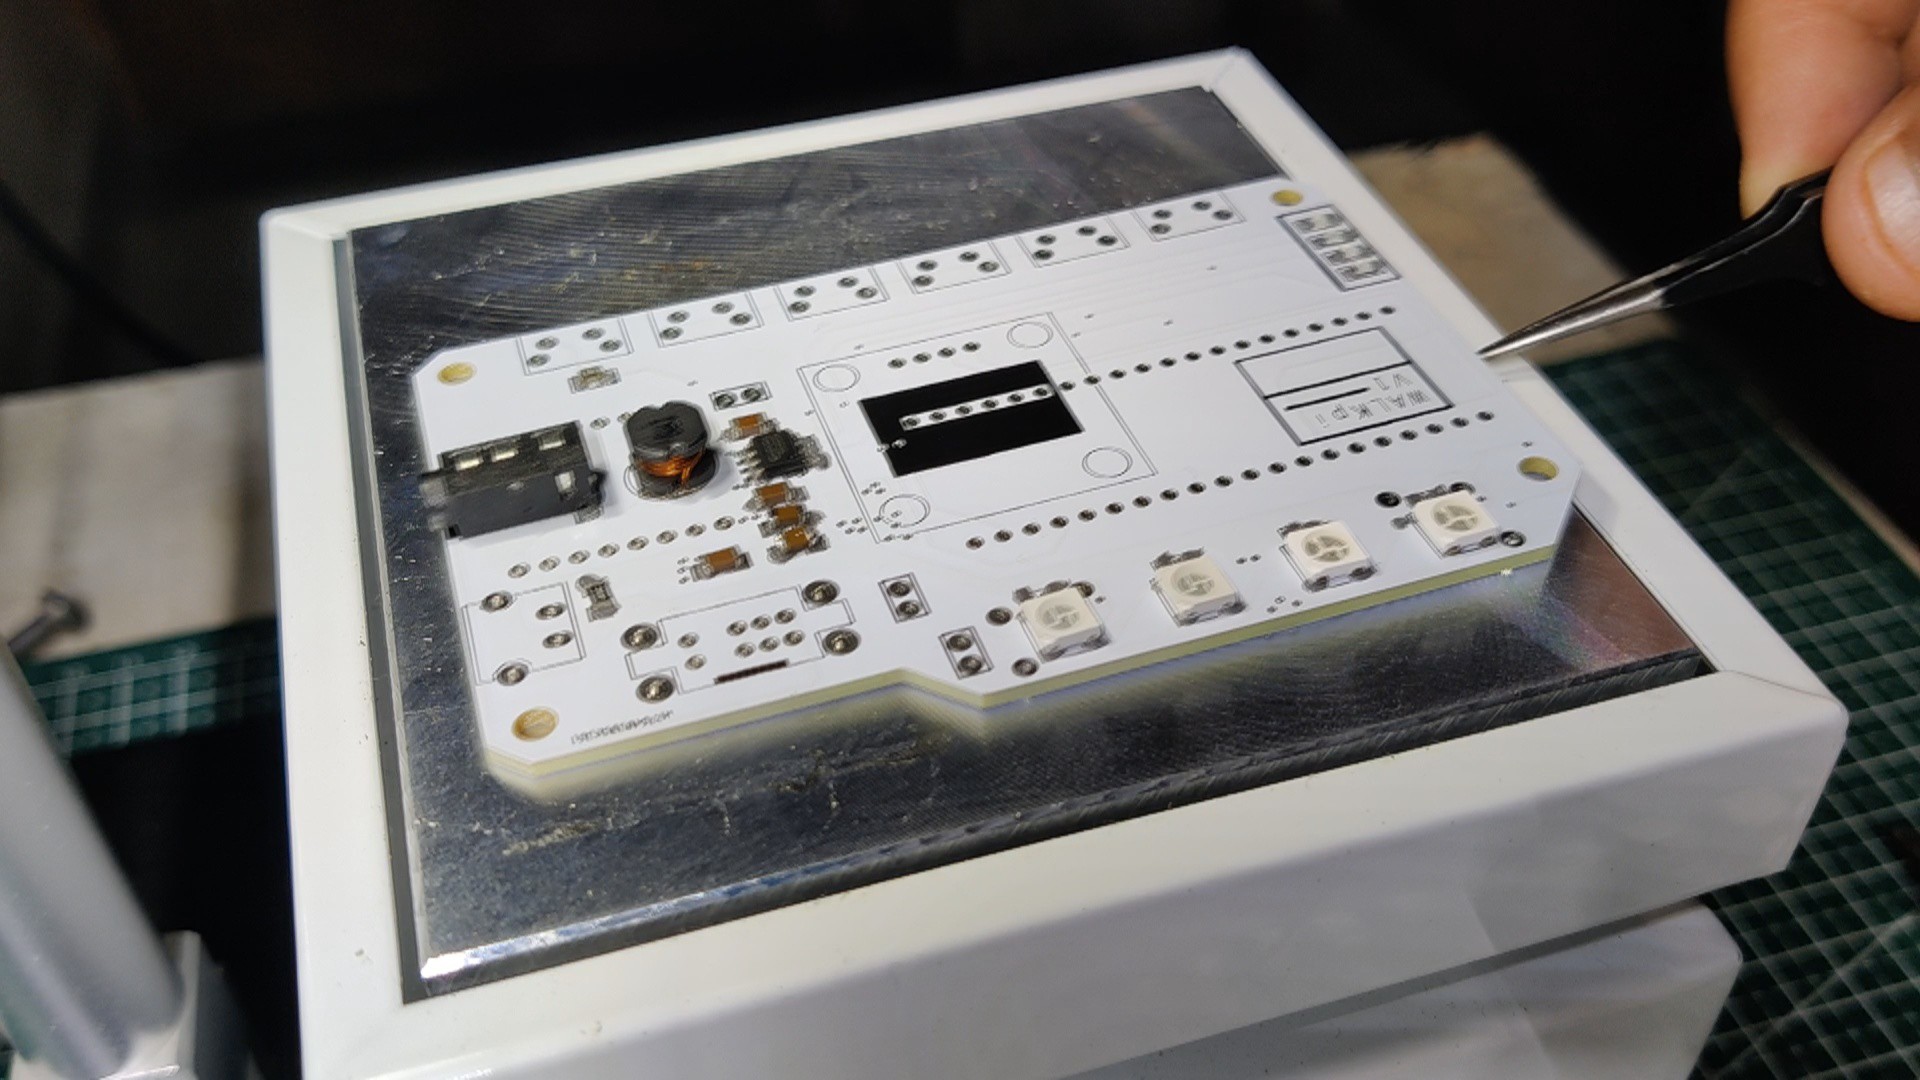
After that, we lift the circuit and place it on the reflow hotplate, which increases the PCB's temperature to the point where solder paste melts and all SMD components attach to their pads.
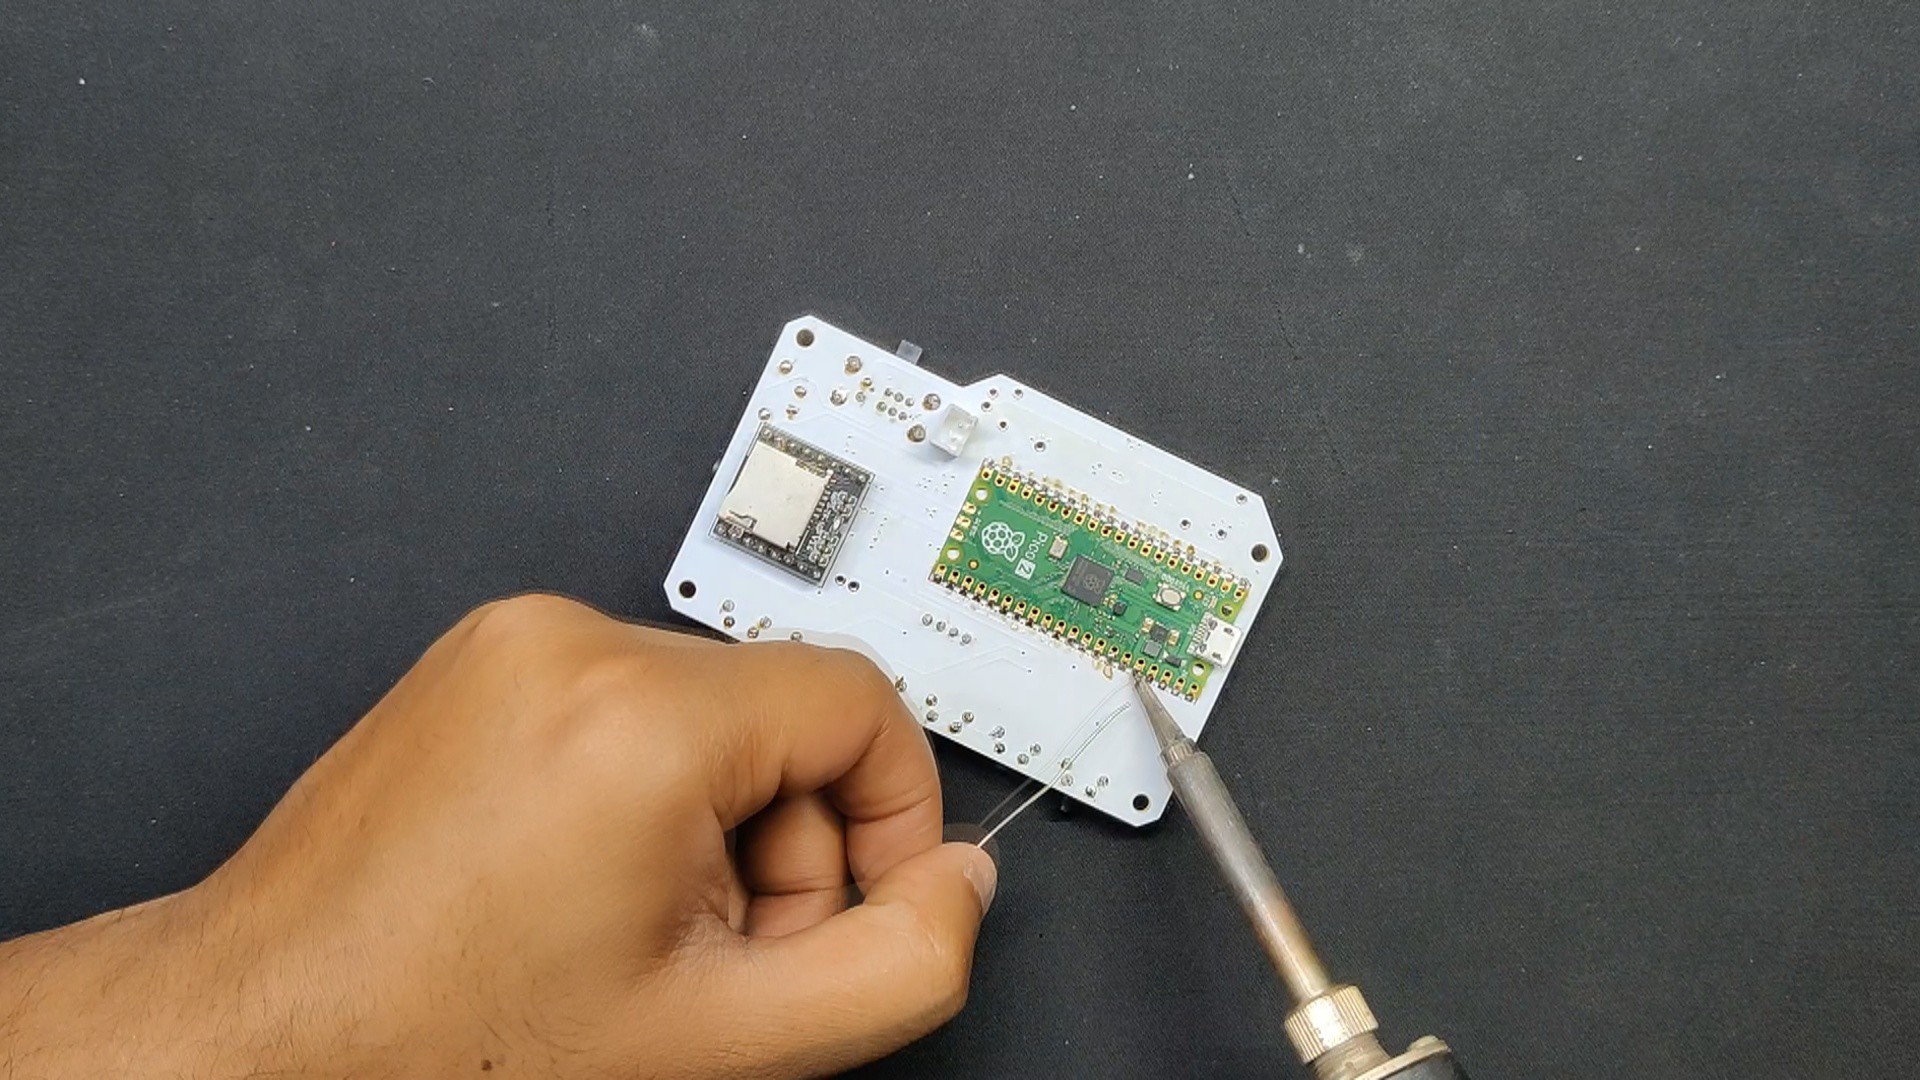
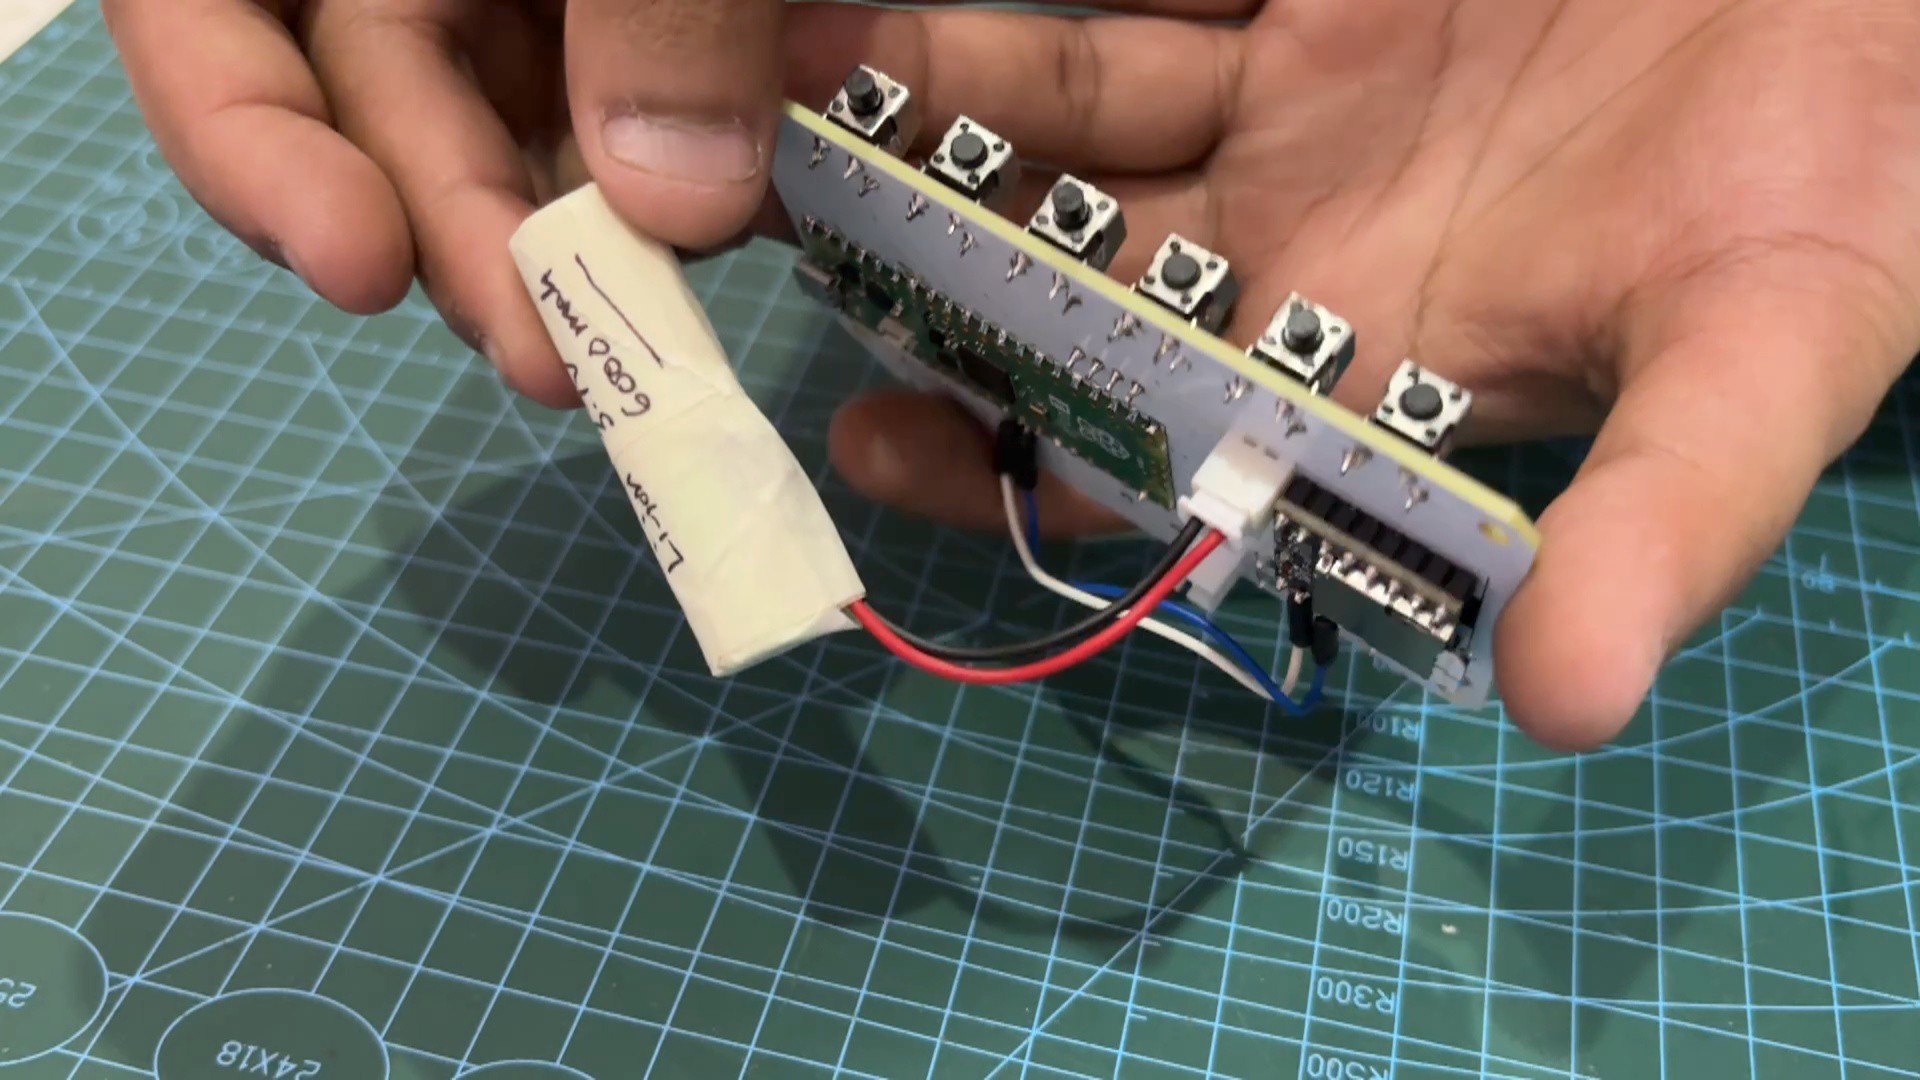
Then, using a soldering iron, we solder all of the component leads in their proper locations after placing all of the through-hole components, such as the horizontal push buttons, Type C port, and CON2 JST connectors.
2
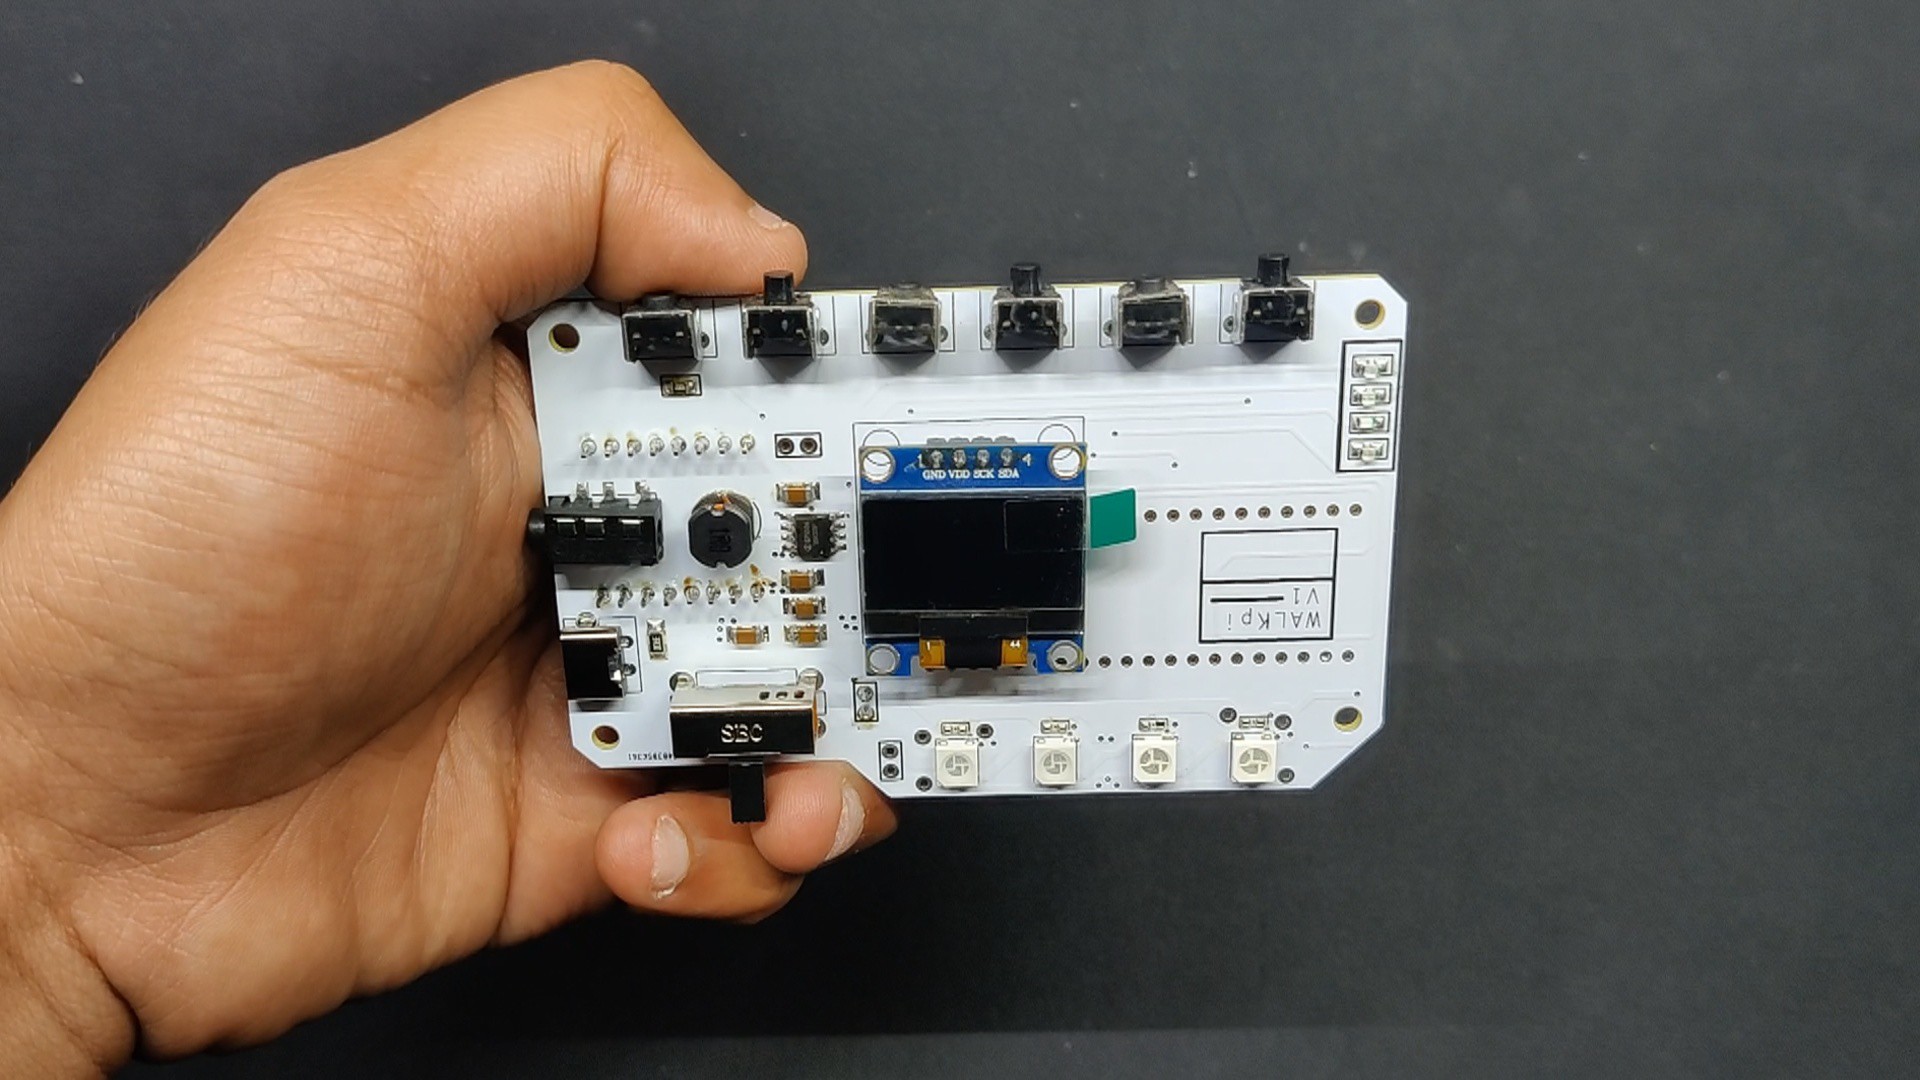
Adding Modules onto the Circuit (OLED, PICO, DF Player)
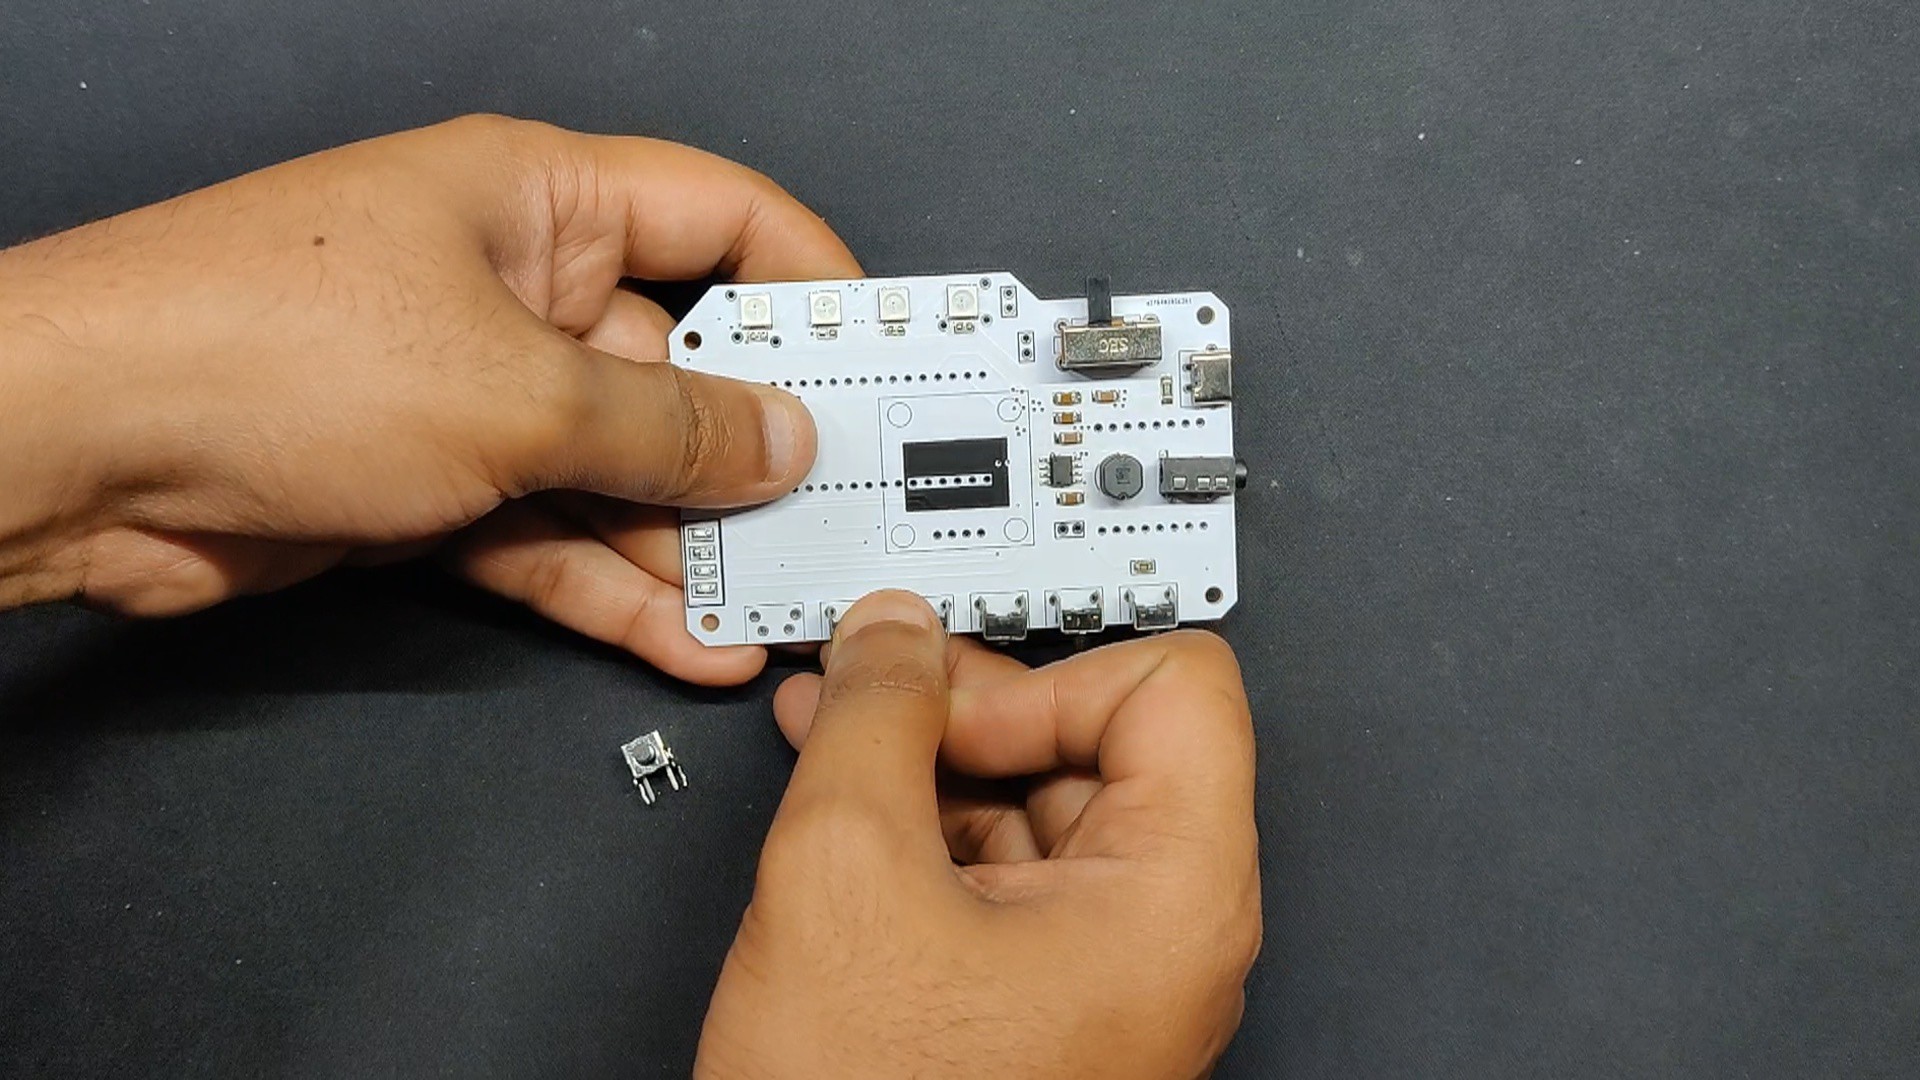
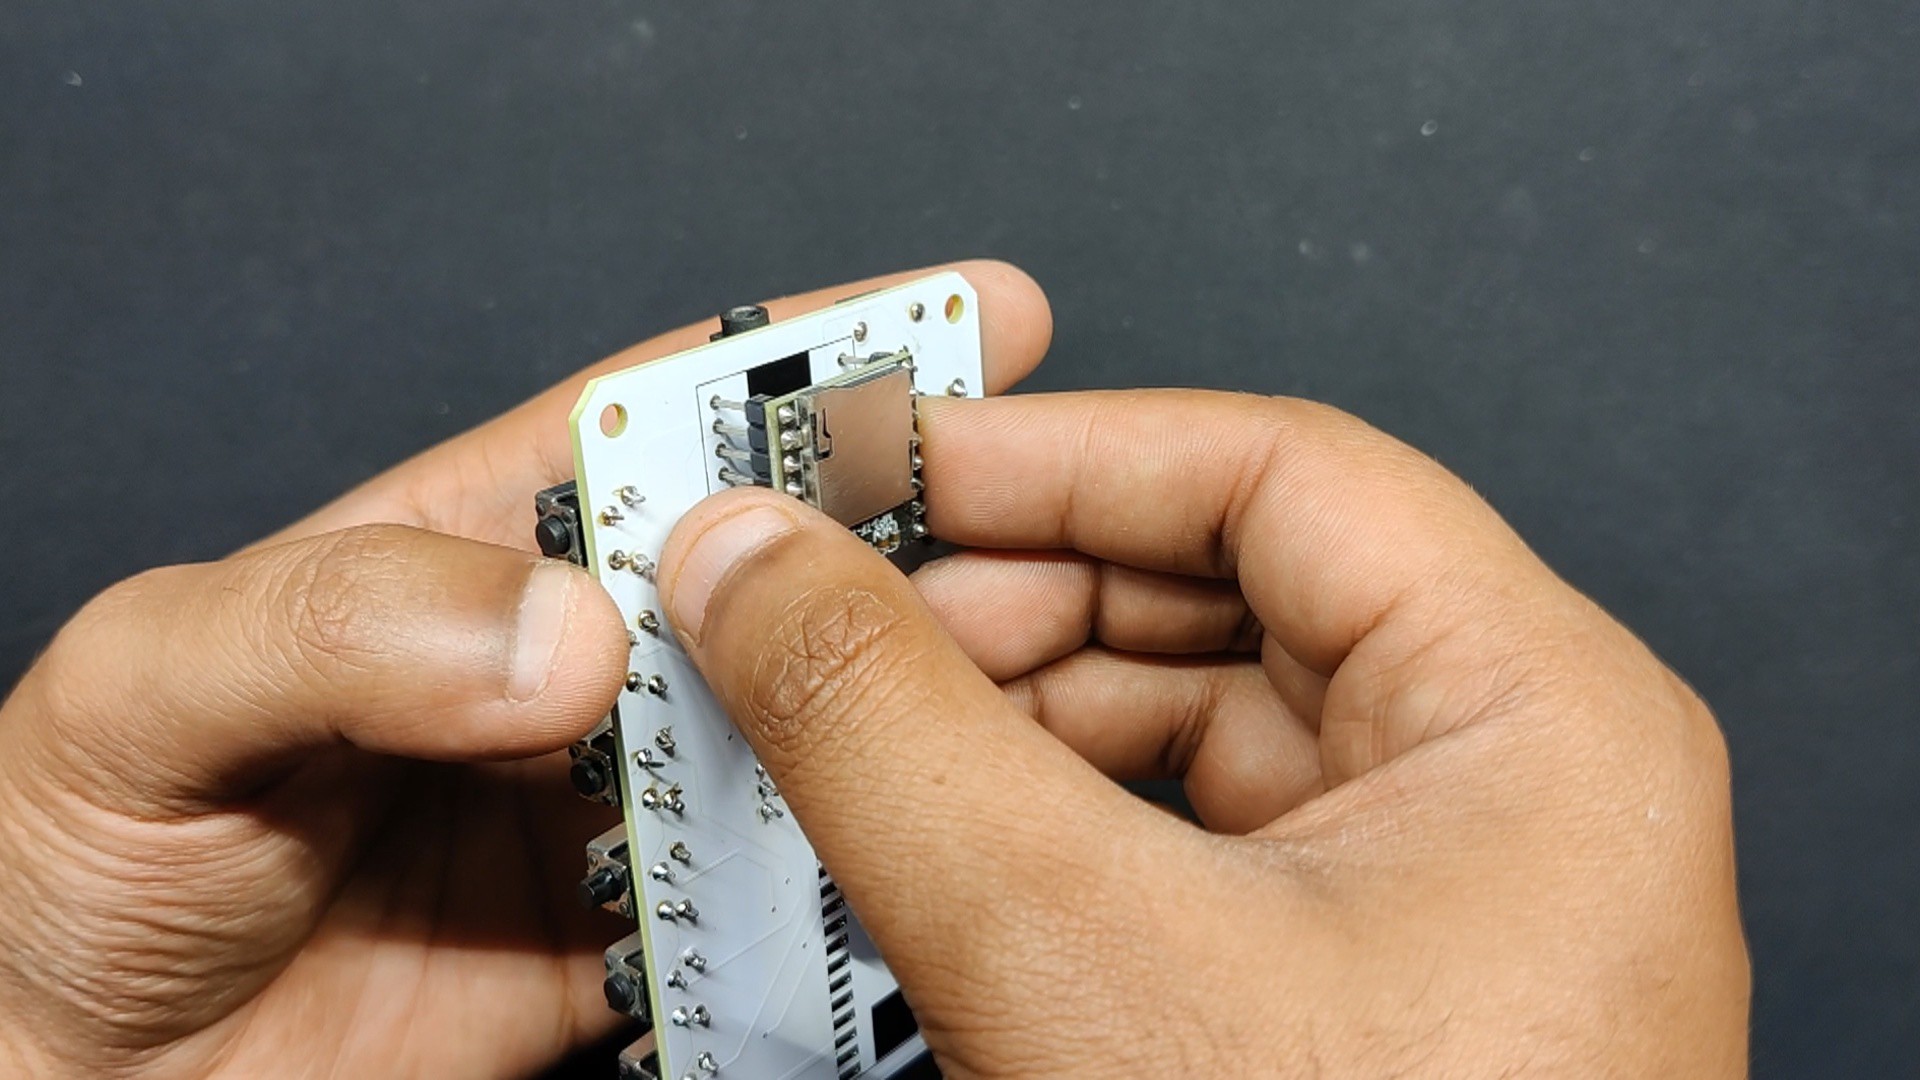
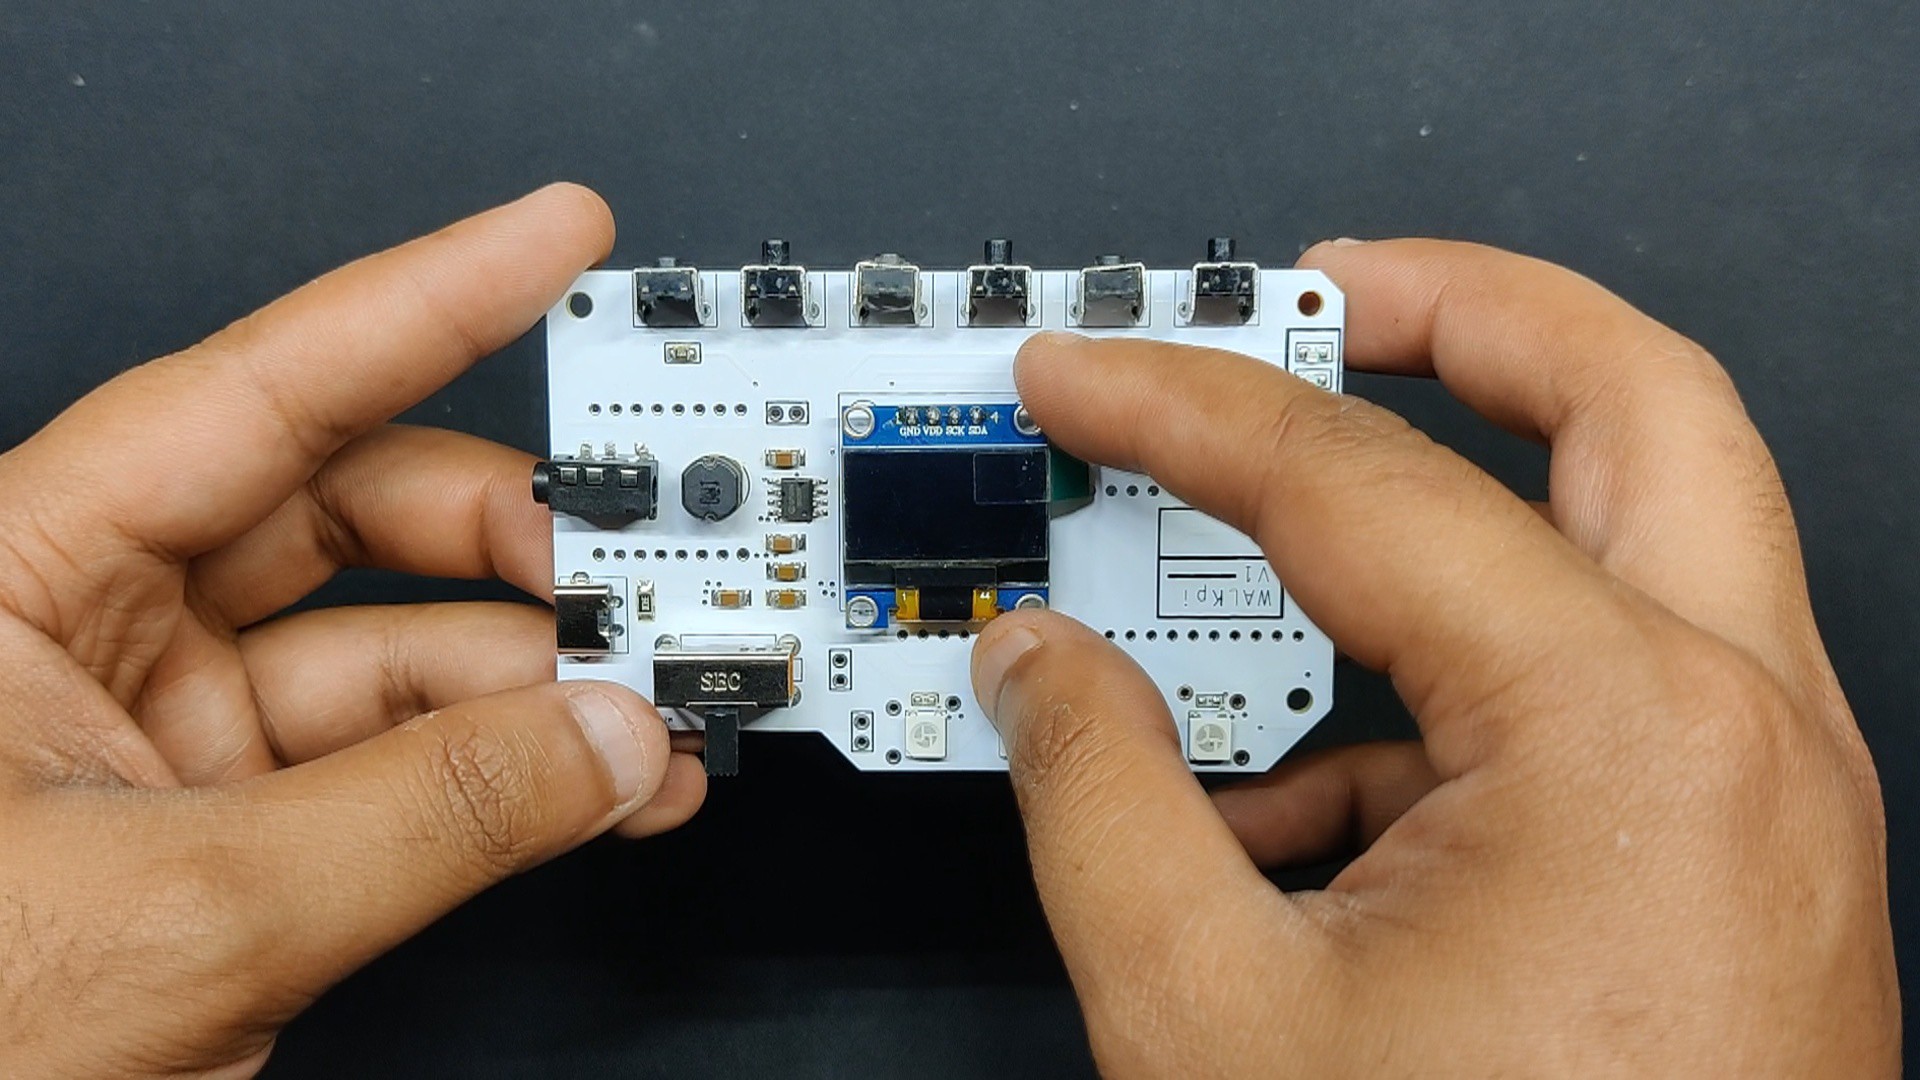
We now set up every module, including the DF Mini Player, Pico 2, and SSD1306 Display, in its proper location. The SSD1306 Display is first added to the circuit from the top side, and its pad is subsequently soldered from the bottom side.
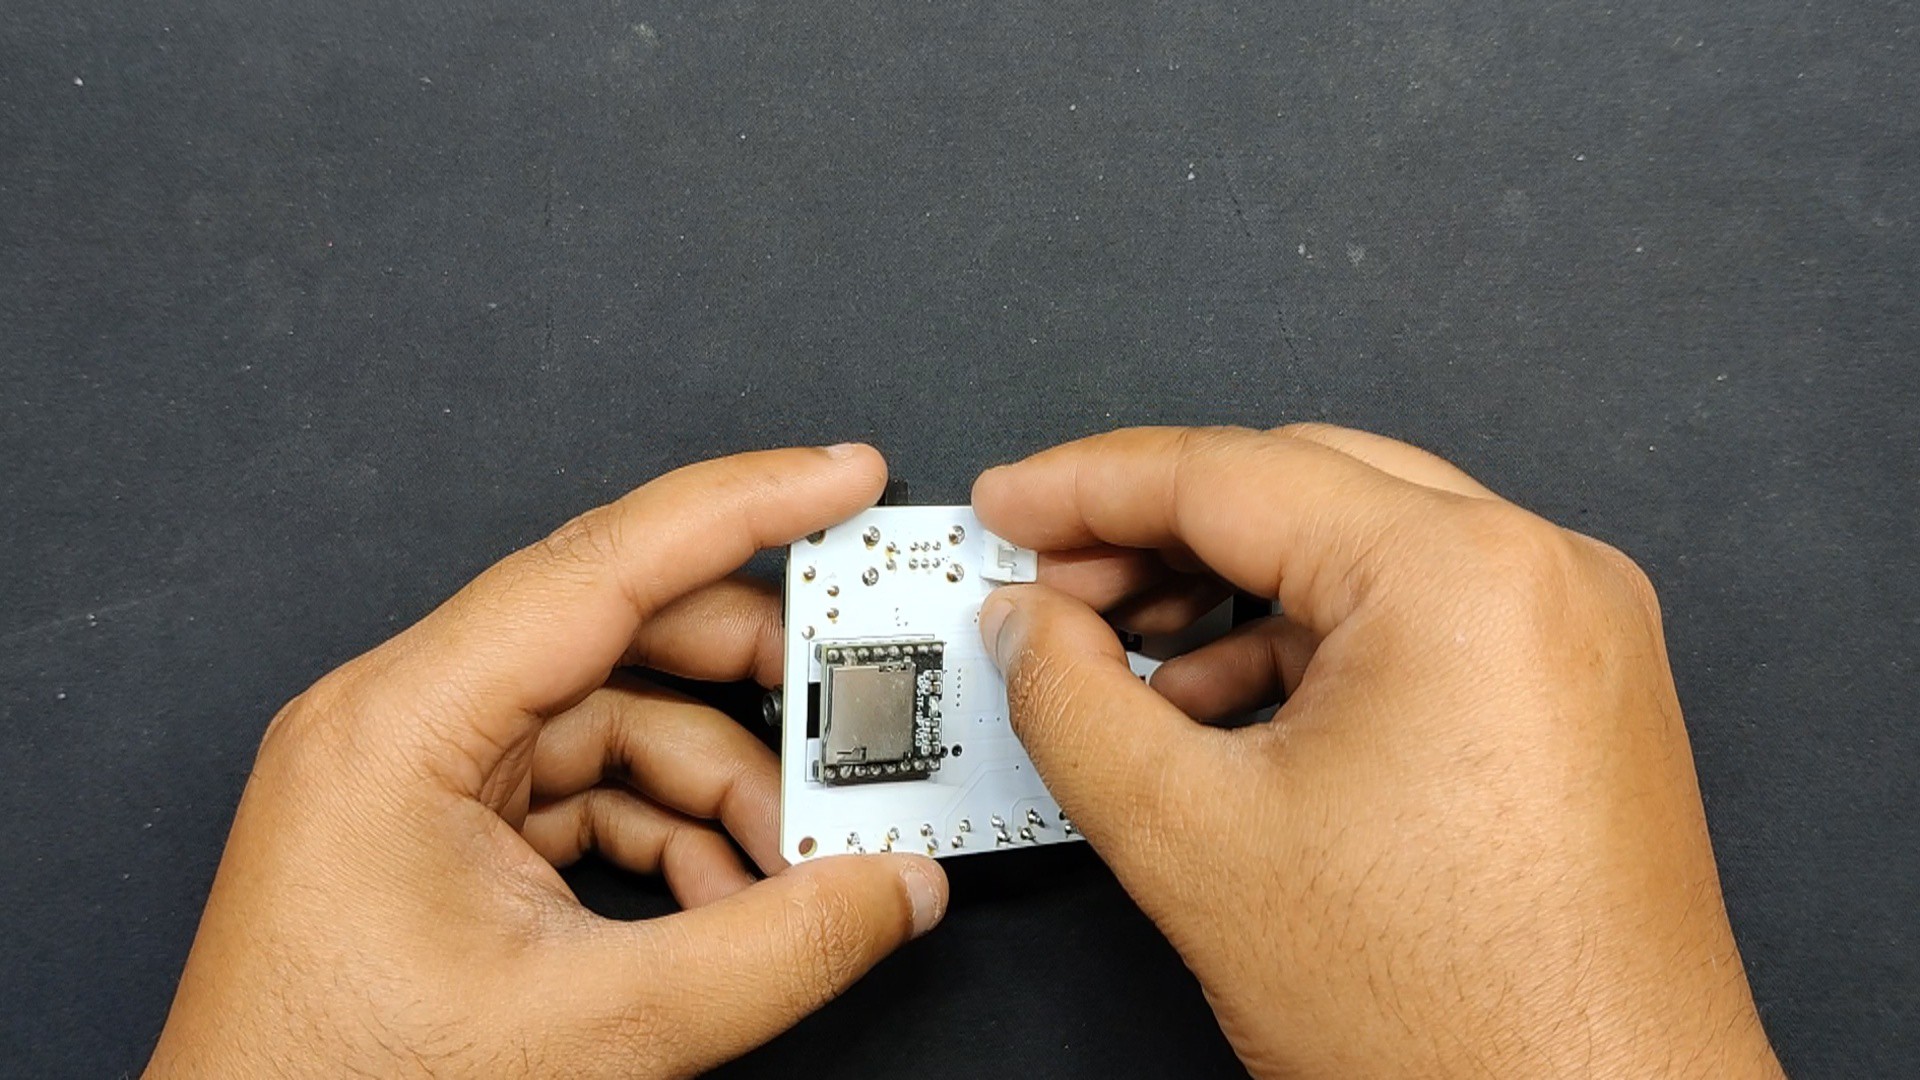
Using a soldering iron, the terminals of the DF Mini Player are soldered from the top side of the board to the bottom side of the circuit.
We also included two JST connectors, which will be used to connect the battery and speaker.
In its place, we finally installed the Raspbery Pi Pico 2. We soldered the Pico directly onto the circuit using its castellated pads.
The circuit assembly is now complete.
3
CODE
Next is the project's code, which is large but takes a very straightforward approach.
#include<Wire.h>#include<Adafruit_GFX.h>#include<Adafruit_SSD1306.h>#include<SoftwareSerial.h>#include<DFRobotDFPlayerMini.h>#include<Adafruit_NeoPixel.h>#define SCREEN_WIDTH 128#define SCREEN_HEIGHT 64#define SSD1306_I2C_ADDRESS 0x3C#define LED_PIN 0#define NUM_LEDS 4Adafruit_SSD1306 display(SCREEN_WIDTH, SCREEN_HEIGHT);
Adafruit_NeoPixel strip = Adafruit_NeoPixel(NUM_LEDS, LED_PIN, NEO_GRB + NEO_KHZ800);
// DFPlayer connectionsSoftwareSerial mySerial(9, 8); // RX (Pico) to TX (DFPlayer), TX (Pico) to RX (DFPlayer)
DFRobotDFPlayerMini myDFPlayer;
// Button pinsconstint buttonPinNext = 27; // Next song buttonconstint buttonPinPrev = 26; // Previous song buttonconstint buttonPinSelect = 12; // Select song buttonconstint buttonPinVolumeUp = 13; // Volume up buttonconstint buttonPinVolumeDown = 14; // Volume down button
String songNames[50]; // Placeholder for song names from the SD cardint totalSongs = 0;
int currentSongIndex = 0; // Start with the first songint volume = 10; // Initial volume level (0-30)unsignedlong lastDebounceTime = 0; // For navigation button debounceunsignedlong debounceDelay = 250; // Debounce delay in milliseconds for navigation buttonsbool isPlaying = false;
// Function declarationsvoidlistSongsFromSD();
voiddisplayVolume();
voidplayVisualizer();
voiddisplaySongInfo();
voidsetLEDsRed();
voidsetLEDsPurpleAndBlue();
voidsetup(){
// Initialize Serial and the display
Serial.begin(9600);
mySerial.begin(9600);
display.begin(SSD1306_SWITCHCAPVCC, SSD1306_I2C_ADDRESS);
display.clearDisplay();
// Initialize DFPlayer
display.setTextSize(1);
display.setTextColor(SSD1306_WHITE);
display.setCursor(0, 0);
display.println("Init DFPlayer...");
display.display();
delay(1000); // Pause for observationif (!myDFPlayer.begin(mySerial)) {
display.setCursor(0, 10);
display.println("DFPlayer Init Failed!");
display.display();
while (true); // Halt further execution
}
myDFPlayer.volume(10); // Set initial volume
display.setCursor(0, 20);
display.println("DFPlayer Initialized");
display.display();
delay(1000); // Pause for observation// Set up button pins
pinMode(buttonPinNext, INPUT_PULLUP);
pinMode(buttonPinPrev, INPUT_PULLUP);
pinMode(buttonPinSelect, INPUT_PULLUP);
pinMode(buttonPinVolumeUp, INPUT_PULLUP);
pinMode(buttonPinVolumeDown, INPUT_PULLUP);
// Initialize the LED strip
strip.begin();
strip.show(); // Initialize all pixels to 'off'
setLEDsRed(); // Set initial state to red// Display welcome message
display.clearDisplay();
display.setTextSize(2);
display.setTextColor(SSD1306_WHITE);
display.setCursor(0, 0);
display.drawRect(0, 0, 128, 64, SSD1306_WHITE); // Frame box
display.setCursor(18, 25);
display.println("Welcome!");
display.display();
delay(2000);
display.clearDisplay();
display.display();
// Read and display song names from SD card
listSongsFromSD();
}
voidloop(){
unsignedlong currentMillis = millis();
// Display song menu
display.clearDisplay();
display.setTextSize(1);
display.setTextColor(SSD1306_WHITE);
display.setCursor(0, 0);
display.drawRect(0, 0, 128, 64, SSD1306_WHITE); // Frame box
display.drawLine(0, 10, 128, 10, SSD1306_WHITE); // Line under the title
display.setCursor(5, 0);
display.print("Select Song:");
// Display the list of songs with an arrow
display.setTextColor(SSD1306_WHITE);
display.setCursor(5, 13 + currentSongIndex * 10);
display.print(">");
for (int i = 0; i < totalSongs; i++) {
display.setCursor(15, 13 + i * 10);
display.print(songNames[i]);
}
// Display current volume
display.setTextColor(SSD1306_WHITE);
display.setCursor(5, 55);
display.print("Volume: ");
display.print(volume);
display.display();
// Check for button presses with debounce for navigation buttonsif ((currentMillis - lastDebounceTime) > debounceDelay) {
if (digitalRead(buttonPinNext) == LOW) {
currentSongIndex = (currentSongIndex + 1) % totalSongs; // Loop back to start
lastDebounceTime = currentMillis;
}
if (digitalRead(buttonPinPrev) == LOW) {
currentSongIndex = (currentSongIndex - 1 + totalSongs) % totalSongs; // Loop to end
lastDebounceTime = currentMillis;
}
if (digitalRead(buttonPinSelect) == LOW) {
myDFPlayer.play(currentSongIndex + 1); // Play selected song
isPlaying = true;
lastDebounceTime = currentMillis;
playVisualizer();
}
}
// Check for volume button presses separately with a shorter debounce delayif (digitalRead(buttonPinVolumeUp) == LOW) {
if ((currentMillis - lastDebounceTime) > 50) { // Shorter debounce delay for volume buttonsif (volume < 30) { // Max volume is 30
volume++;
myDFPlayer.volume(volume); // Update volume on DFPlayer
displayVolume();
}
lastDebounceTime = currentMillis;
}
}
if (digitalRead(buttonPinVolumeDown) == LOW) {
if ((currentMillis - lastDebounceTime) > 50) { // Shorter debounce delay for volume buttonsif (volume > 0) { // Min volume is 0
volume--;
myDFPlayer.volume(volume); // Update volume on DFPlayer
displayVolume();
}
lastDebounceTime = currentMillis;
}
}
// Automatically play the next song if the current one endsif (myDFPlayer.available()) {
if (myDFPlayer.readType() == DFPlayerPlayFinished) {
currentSongIndex = (currentSongIndex + 1) % totalSongs;
myDFPlayer.play(currentSongIndex + 1);
displaySongInfo();
}
}
// Handle LED colors based on whether a song is playingif (isPlaying) {
setLEDsPurpleAndBlue();
} else {
setLEDsRed();
}
}
// Function to list songs from SD card (Mock implementation)voidlistSongsFromSD(){
// Placeholder implementation to list songs
songNames[0] = "Song 1";
songNames[1] = "Song 2";
songNames[2] = "Song 3";
totalSongs = 3;
}
// Function to display volume changevoiddisplayVolume(){
display.clearDisplay();
display.setTextSize(2);
display.setTextColor(SSD1306_WHITE);
display.setCursor(0, 0);
display.drawRect(0, 0, 128, 64, SSD1306_WHITE); // Frame box
display.setCursor(35, 10); // Adjusted position
display.print("Volume");
display.setCursor(55, 35); // Position below the word
display.print(volume);
display.display();
delay(1000); // Show volume for 1 second
}
// Simple visualizer functionvoidplayVisualizer(){
// Basic visualization while playing
display.clearDisplay();
display.setTextSize(2);
display.setTextColor(SSD1306_WHITE);
display.setCursor(0, 0);
display.drawRect(0, 0, 128, 64, SSD1306_WHITE); // Frame box
display.setCursor(10, 20);
display.print("Now Playing:");
display.setTextSize(1);
display.setCursor(10, 40);
display.print(songNames[currentSongIndex]);
display.display();
// Visualizer loopfor (int i = 0; i < 20; i++) {
display.fillRect(i * 6, 50, 5, random(10, 30), SSD1306_WHITE);
display.display();
delay(50);
display.fillRect(i * 6, 50, 5, random(10, 30), SSD1306_BLACK);
}
}
// Function to display current song infovoiddisplaySongInfo(){
display.clearDisplay();
display.setTextSize(2);
display.setTextColor(SSD1306_WHITE);
display.setCursor(0, 0);
display.drawRect(0, 0, 128, 64, SSD1306_WHITE); // Frame box
display.setCursor(10, 20);
display.print("Playing:");
display.setTextSize(1);
display.setCursor(10, 40);
display.print(songNames[currentSongIndex]);
display.display();
}
// Functions to control the LED stripvoidsetLEDsRed(){
for (int i = 0; i < NUM_LEDS; i++) {
strip.setPixelColor(i, strip.Color(255, 0, 0)); // Red color
}
strip.show();
}
voidsetLEDsPurpleAndBlue(){
for (int i = 0; i < NUM_LEDS; i++) {
strip.setPixelColor(i, strip.Color(128, 0, 128)); // Purple color
}
strip.show();
delay(500);
for (int i = 0; i < NUM_LEDS; i++) {
strip.setPixelColor(i, strip.Color(0, 0, 255)); // Blue color
}
strip.show();
delay(500);
}
The constants that specify the display's dimensions and I2C address, as well as the LED pin and number of LEDs, are all included in the first section of this code, which also includes all the libraries you must right away install. Additionally, it includes objects such as the NeoPixel strip and the OLED display, respectively.
The first section also assigns button pins, stores song names in an array called songNames, and uses certain variables to monitor the number of songs, the song index that is currently selected, and the volume level.
The OLED display and the DF Mini player are initiated by the Section's Setup Function, which also includes a tiny part that checks to see if the DF player's initialization failed or was functioning well.
Along with the WS2812B LED, which is configured to glow red, this function also includes buttons that configure each button as an input. We also added a welcome message that will appear each time the device starts on.
The third section, or the Loop Function, is made up of seven parts, including the Current Time, which keeps track of time in microseconds and manages button debounding, Song Menu Structure, Song List, and volume display. The navigation button functions by detecting if buttons are being pressed and updating the song index accordingly. The volume buttons perform the same function as the song index but also control the LED and play the next song segment.
Before using this sketch, make sure you install the libraries listed below.
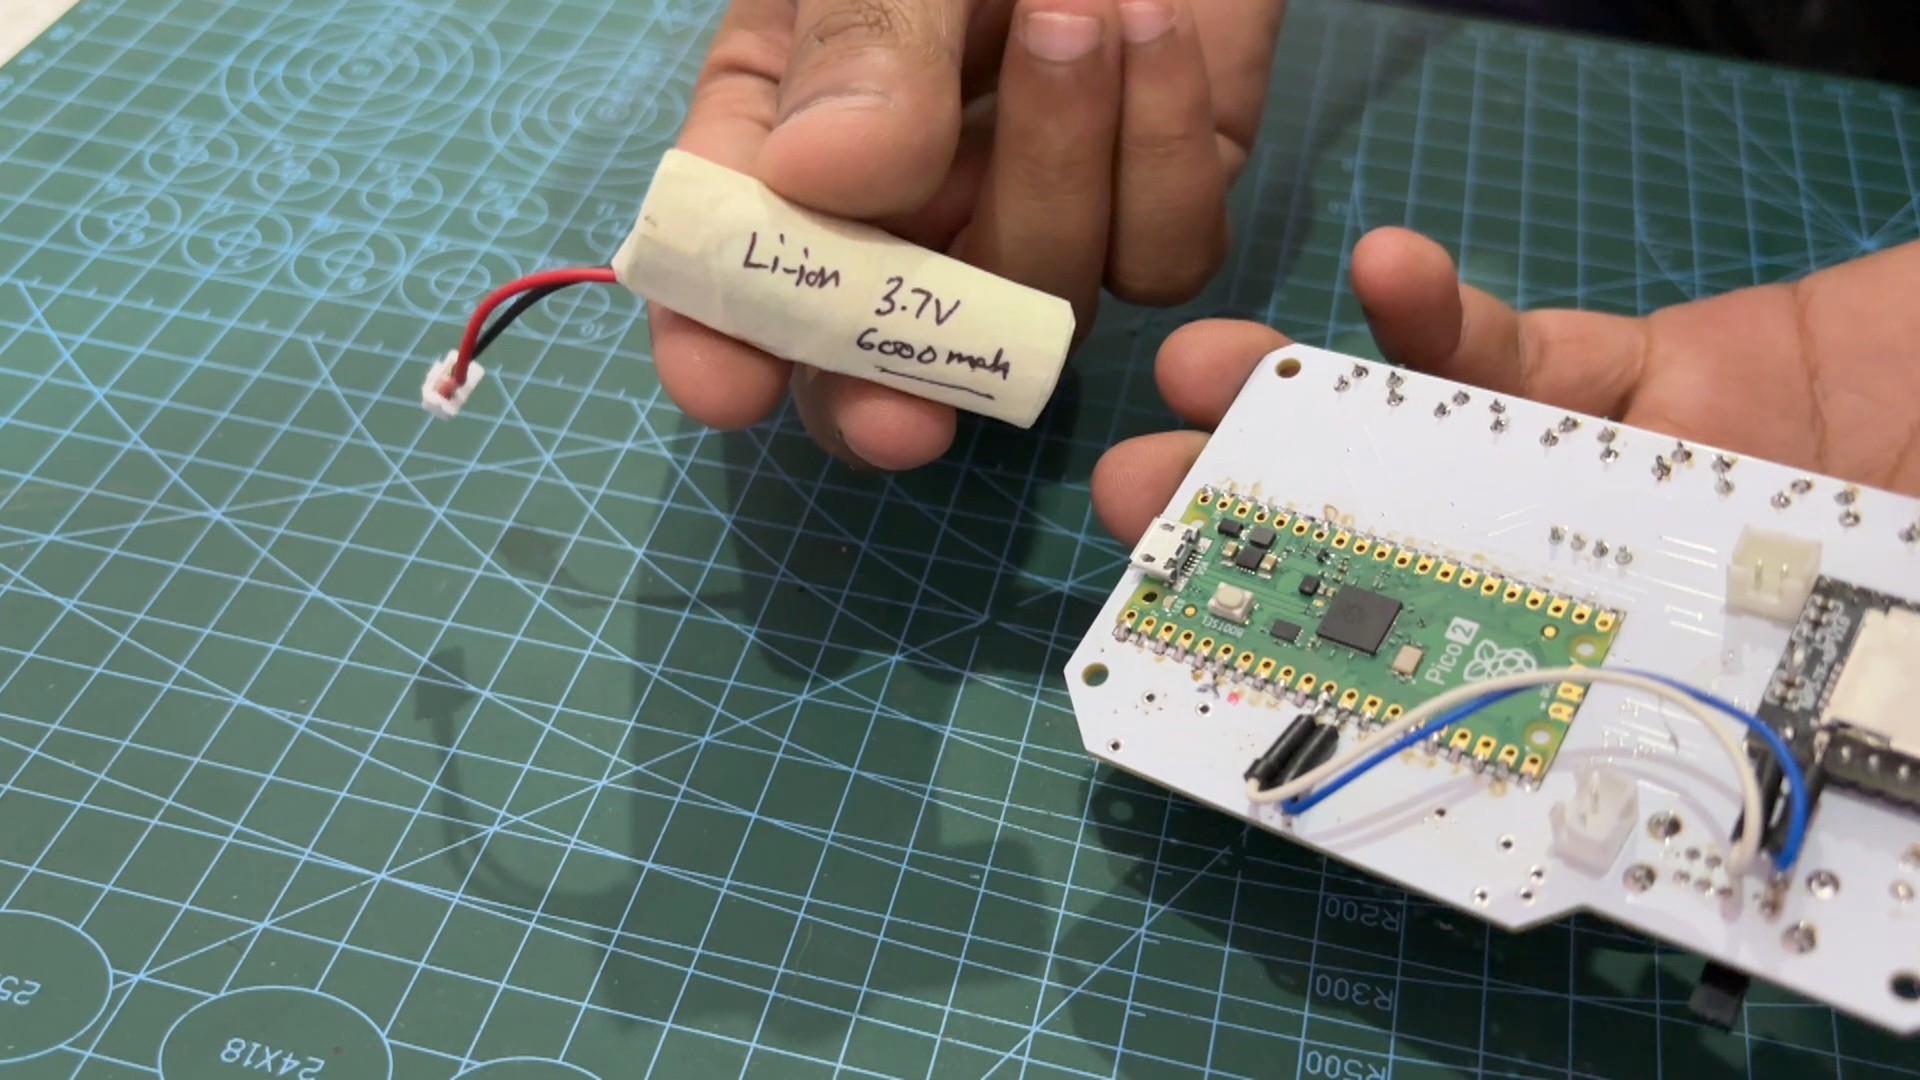
We are using a 14500 3.7V 600mAH Li-ion battery as the power supply, which is a smaller formfactored cell than the 18650 cells that are often utilized. In order to give the lithium battery both low and high-cut functionality, we added a wire harness and a PCM.
The JST connector on the wireharness links to the battery connector on the circuit.
The device turns on when the Power button is pressed, and the four side LEDs that indicate the battery's current fuel level glow.
The device can be turned off by double-pressing the Power Button.
Because of its small capacity, the lithium cell can be charged using the Type C connector in a maximum of two hours using a 5V/2A charger.
5
Result
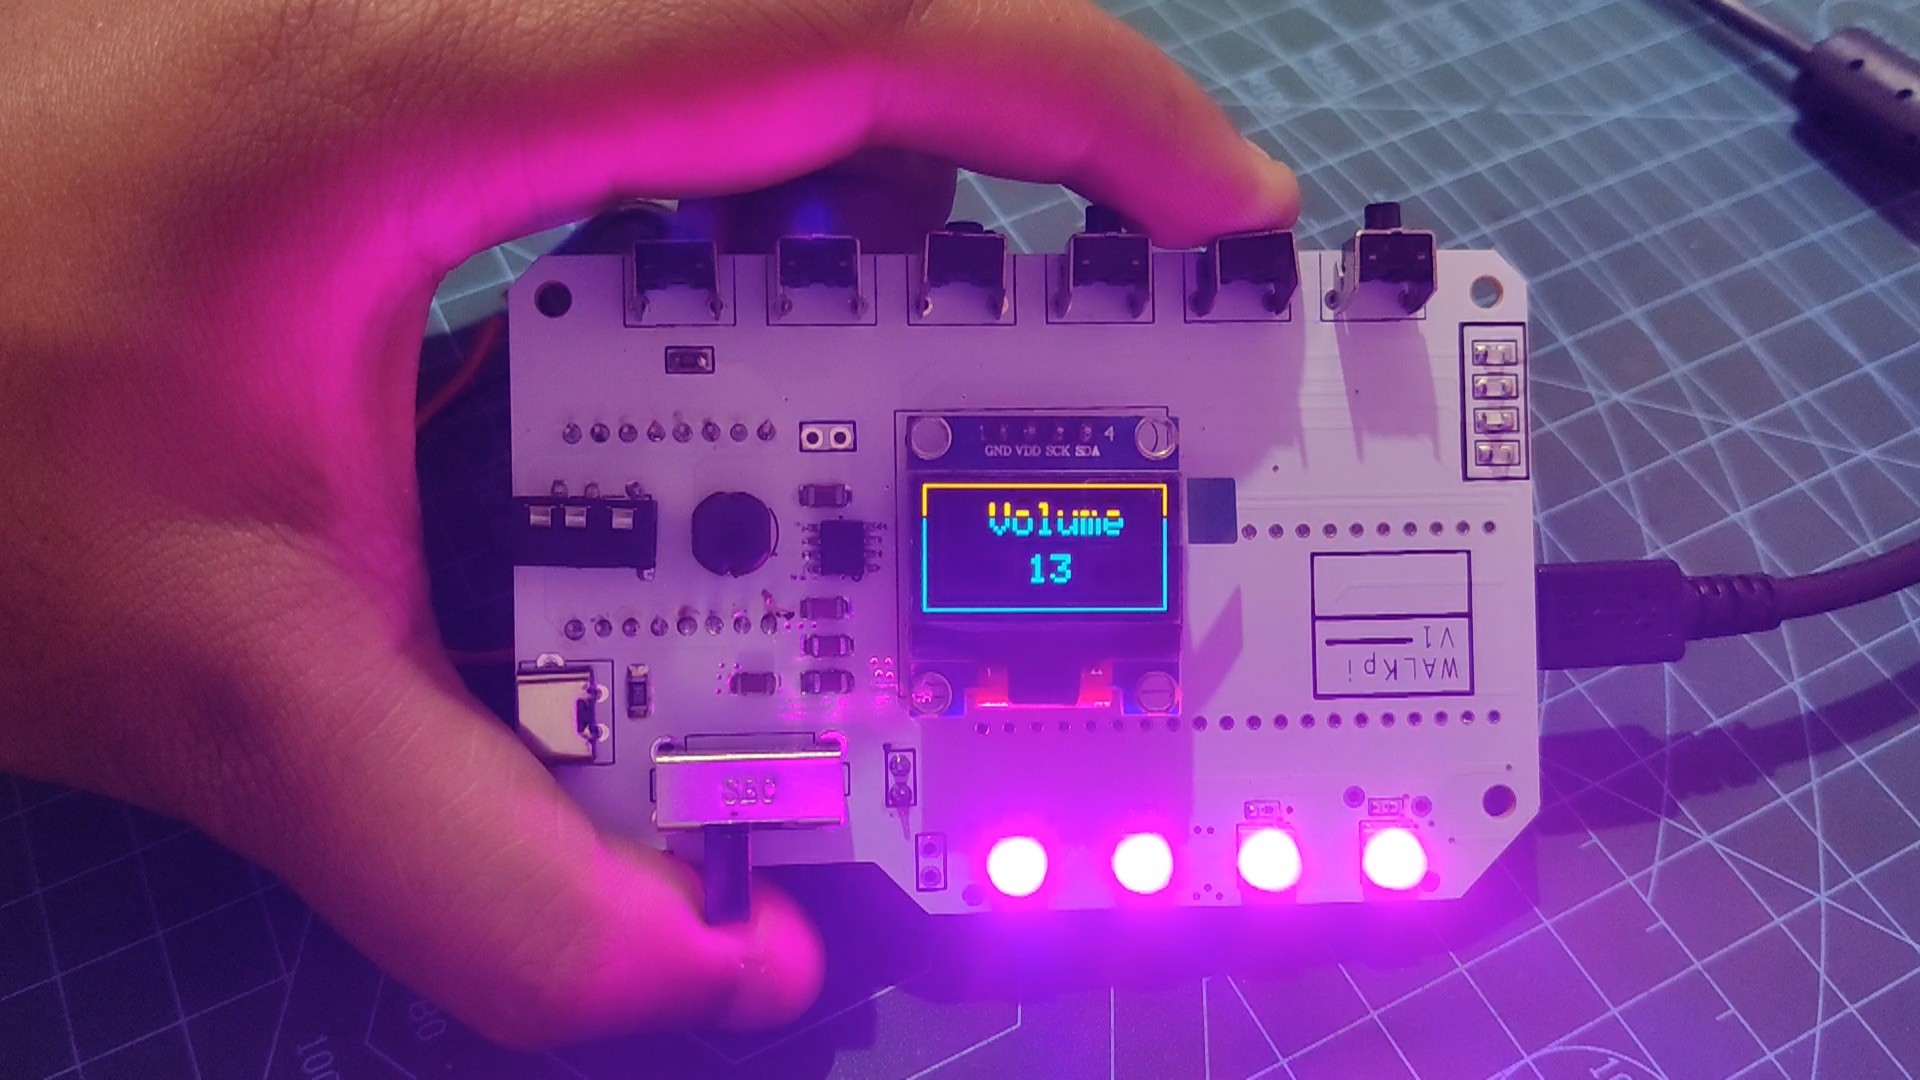
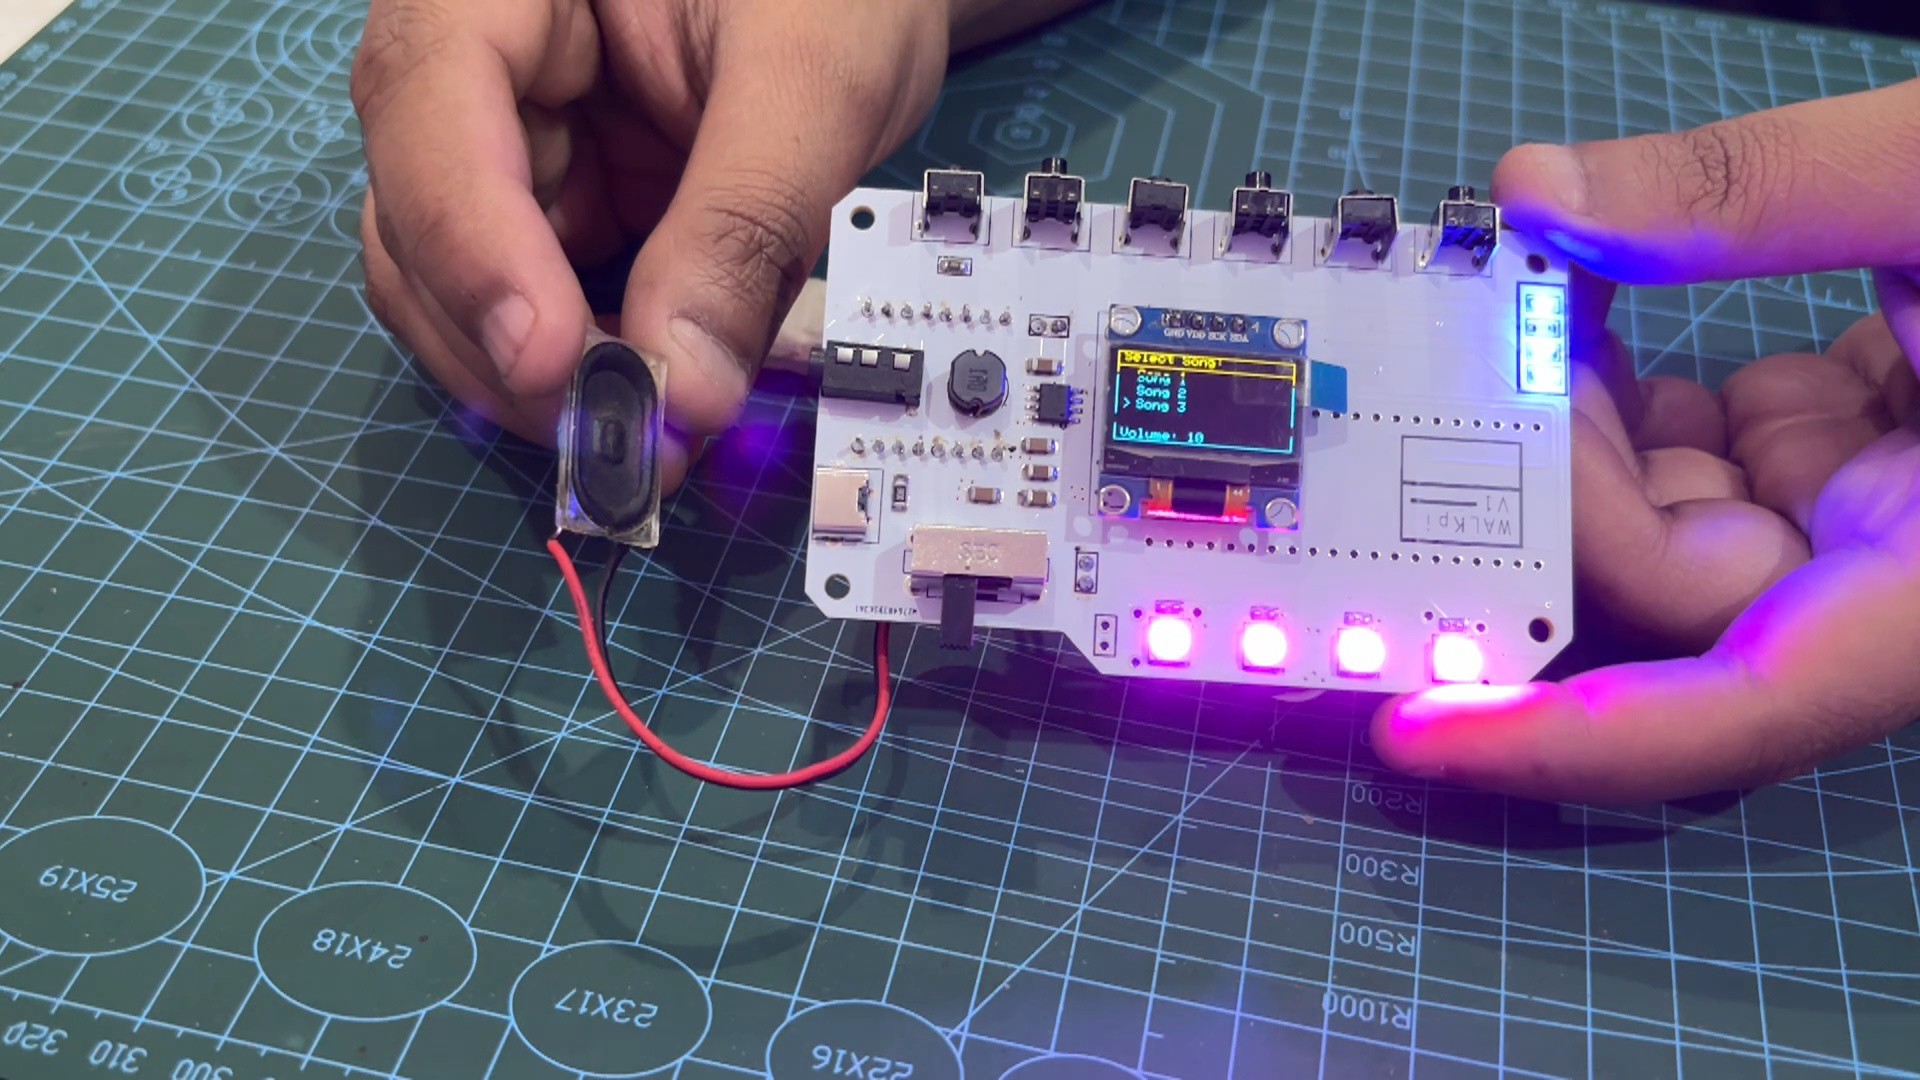
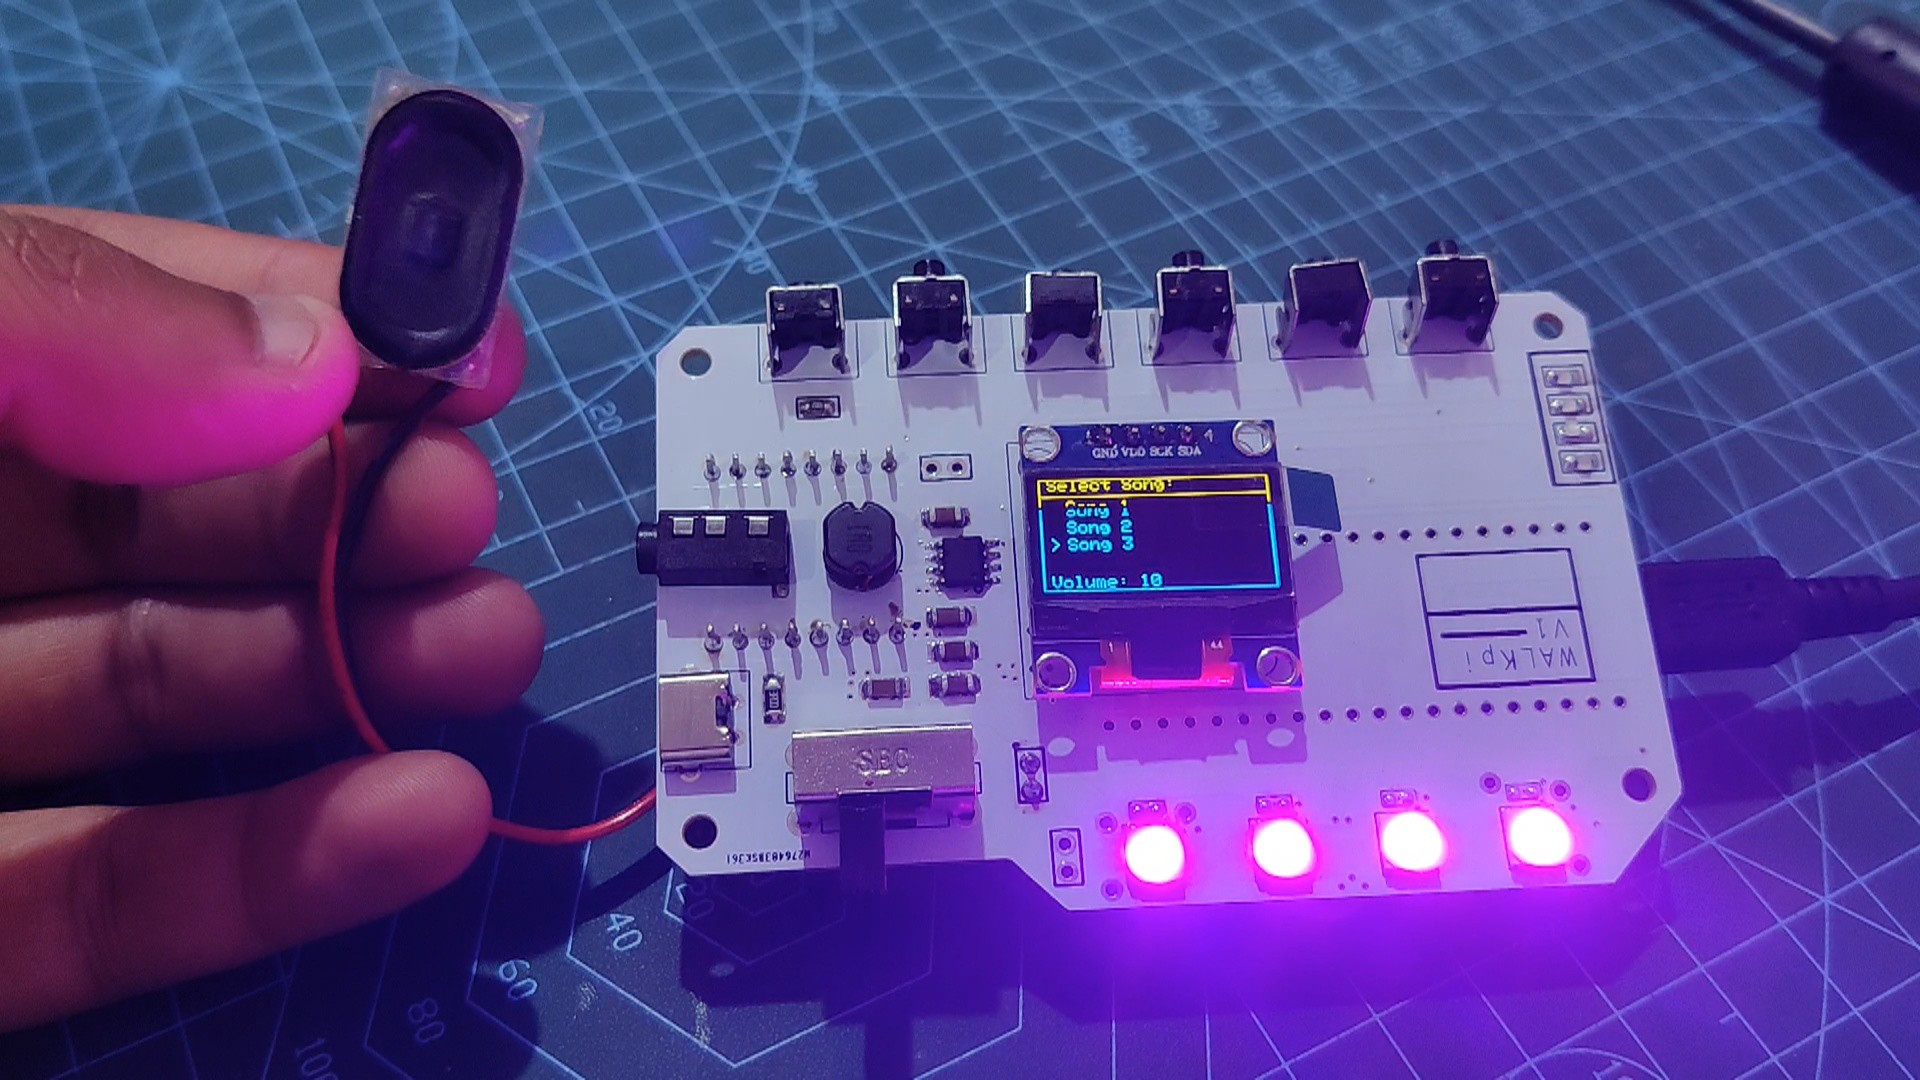
After the gadget has been set up and updated with the code and power, it turns on when we push the power button. The RGB LEDs illuminate red when the device first powers on, and a welcome message shows on the screen.
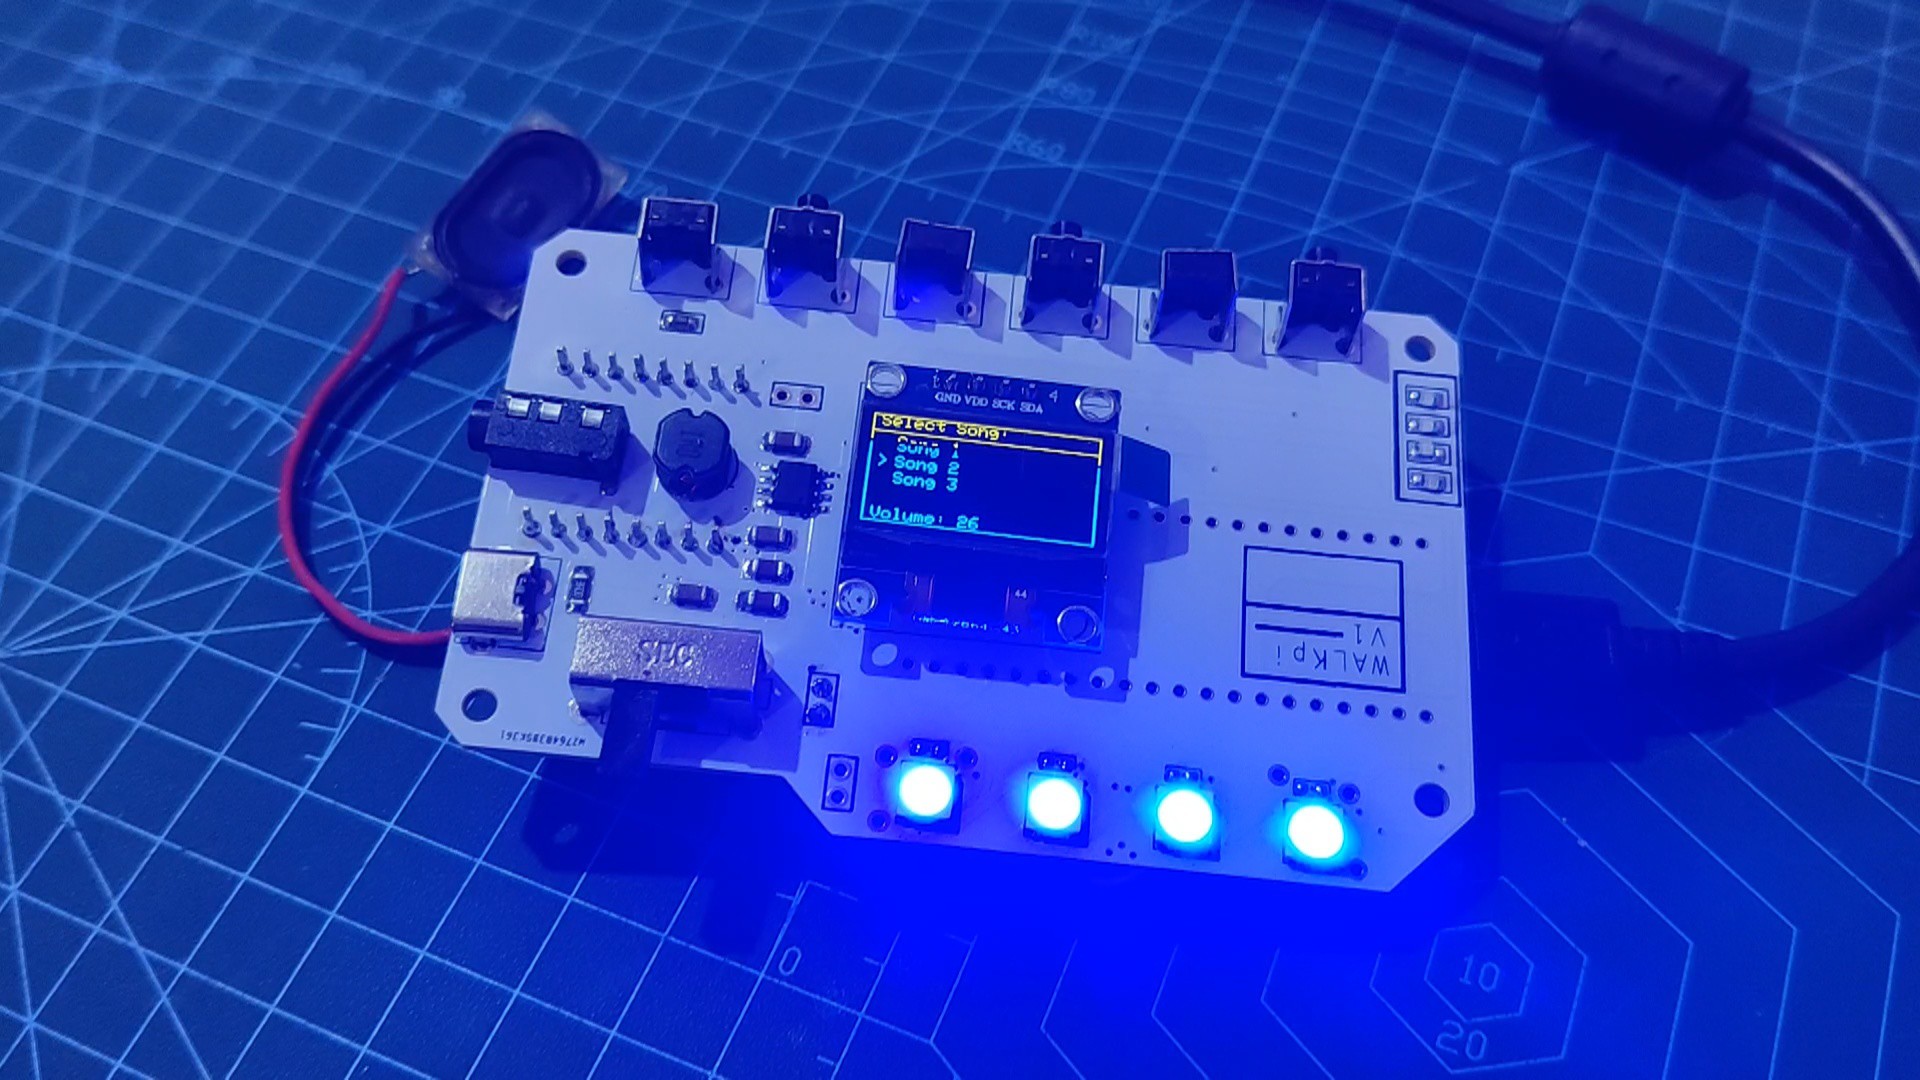
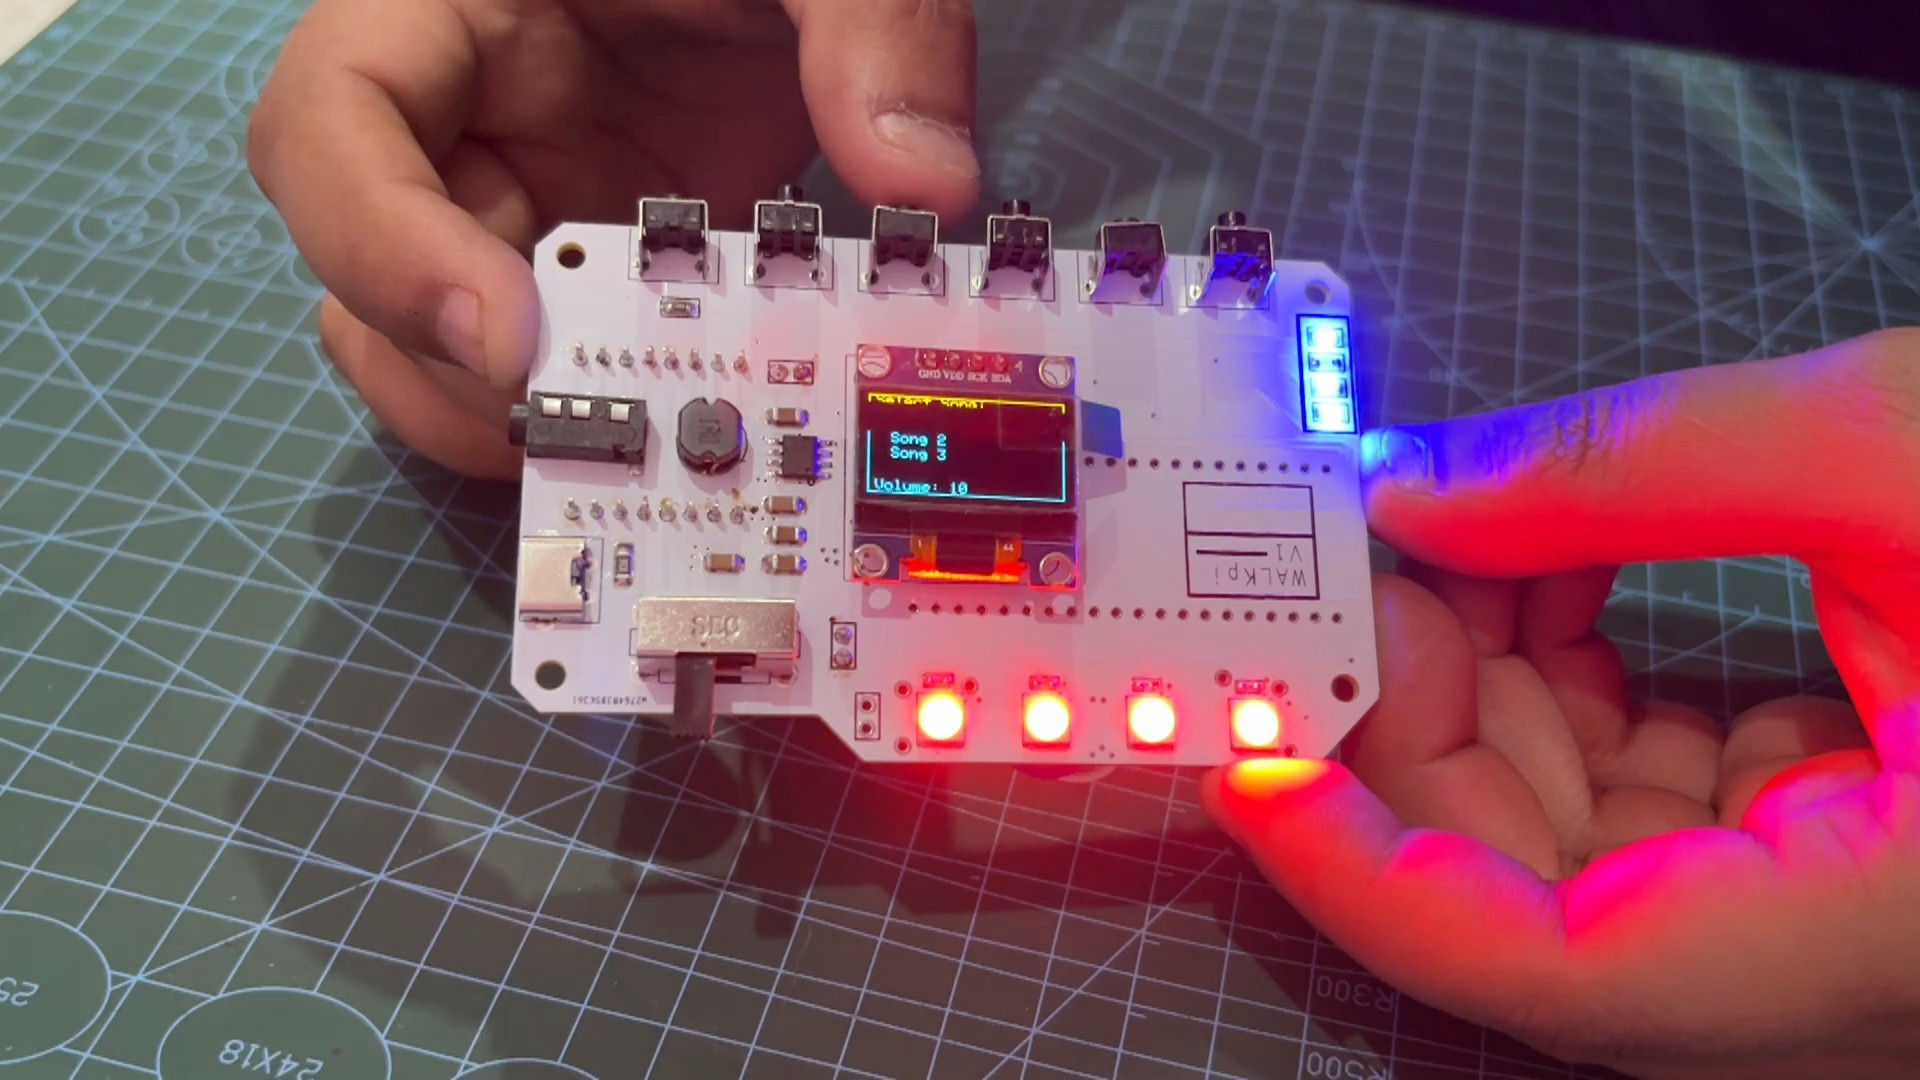
The song we wish to play is selected using the navigation buttons, and the song is picked using the select button. When the song has been selected and begins to play, we are presented with a Playing Now splash screen.
The slide switch allows the user to choose whether to connect earphones or play music on the built-in speaker.
RED RGB LEDs turn purple while the song is playing, then change color to blue and back to purple again. This pattern repeats itself.
As of right now, we have only finished the main board for this project. We will be adding a battery layer to the back side of the device's along with a frontside enclosure and making a few small code changes because, as of right now, the device only lists the song names SONG 1, 2, and 3 as specified in the code. However, it will be changed so that it will display the names of the songs that have been added to the SD card and appear directly on the OLED screen.
 Arnov Sharma


Discussions
Become a Hackaday.io Member
Create an account to leave a comment. Already have an account? Log In.