IMAGE PREP
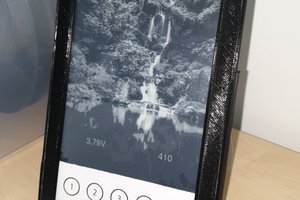
First, open image2cpp in your browser and select an image to display on the OLED
screen. image2cpp is an online tool that helps you display images on microcontrollers with limited memory, like those used with OLED displays.
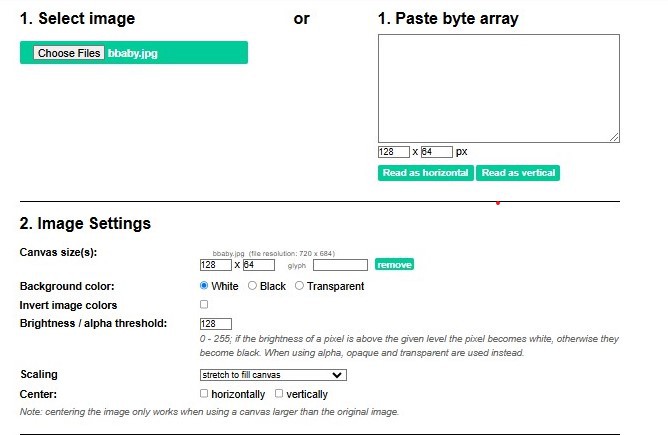
Size Check: First things first, check the "Canvas size" under "Image Settings." If your masterpiece is bigger than our OLED's 128x64 pixel canvas (remember, Boss Baby likes things neat), no worries! Just select a scaling option to make it fit perfectly. You'll see a preview to ensure it looks just right.
Color Playtime: Feeling adventurous? Explore the color options! Change the background or even entirely invert the colors. Let's see what kind of mischief Boss Baby can get into with the colors!
The Brightness Battle: Now, for the crucial step: the "Brightness threshold." This controls the black-and-white balance. A higher threshold means more white. Experiment until the image pops with the perfect level of detail, just like Boss Baby's personality. In our case, 128 seems to strike the right balance.
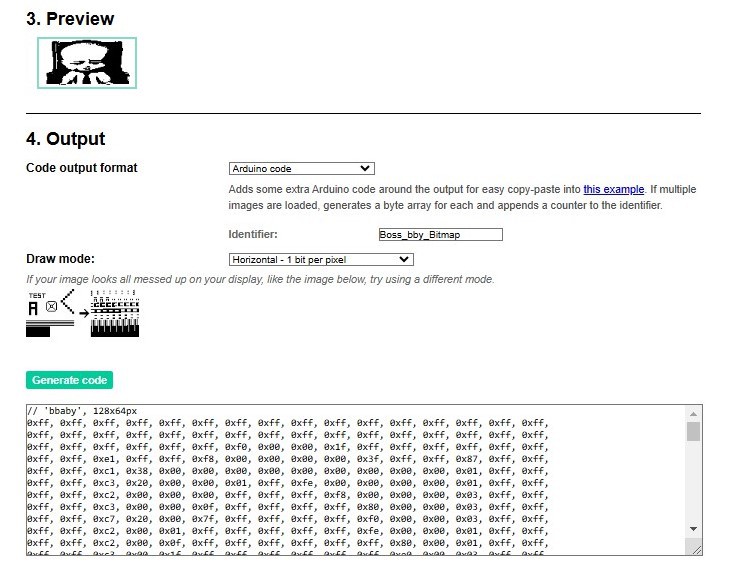
Preview Perfection: Keep an eye on the preview window as you adjust settings. This is your guide to achieving the perfect OLED-bound image, worthy of a true Boss Baby.
Once you're happy with the preview, generate the data array by selecting "Arduino Code" as the output format and clicking "Generate code".
DIGITAL SIMULATION
- Go to Wokwi (an online Electronics simulator. You can use it to simulate Arduino, ESP32, STM32, and many other popular boards, parts, and sensors) and create a new project.
- Add Components:
- Drag an ESP32 onto the workspace.
- Add a SSD1306 OLED display.
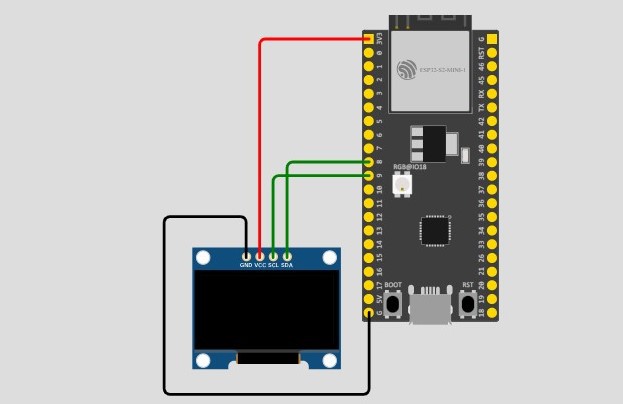
- Connect Components:
- OLED VCC to ESP32 3.3V
- OLED GND to ESP32 GND
- OLED SCL to ESP32 GPIO 9
- OLED SDA to ESP32 GPIO 8
![]()
Write the Code:
You can find my saved Wokwi project here:)
Your code is to have all the following sections:
- Include Libraries:
 Mike Szczys
 mircemk
 alleycat