Close
0%
0%

HexTech Fishbones

3ft 3D-printed replica of Fishbones, a shark-themed device featured in the series Arcane, that has an articulating mouth and LED lighting.

Public Chat
Similar projects worth following
This project is a replica of Fishbones, Jinx’s shark-themed weapon from the show Arcane. The 3-foot-long 3D printed model will be designed to open its mouth, light up with LED patterns and respond to the detection of a “Hexcore” (represented by a ball). It will also have a button-triggered mechanism that will activate the jaw opening and lighting effects. (See example below of build and lights flickering/breathing)

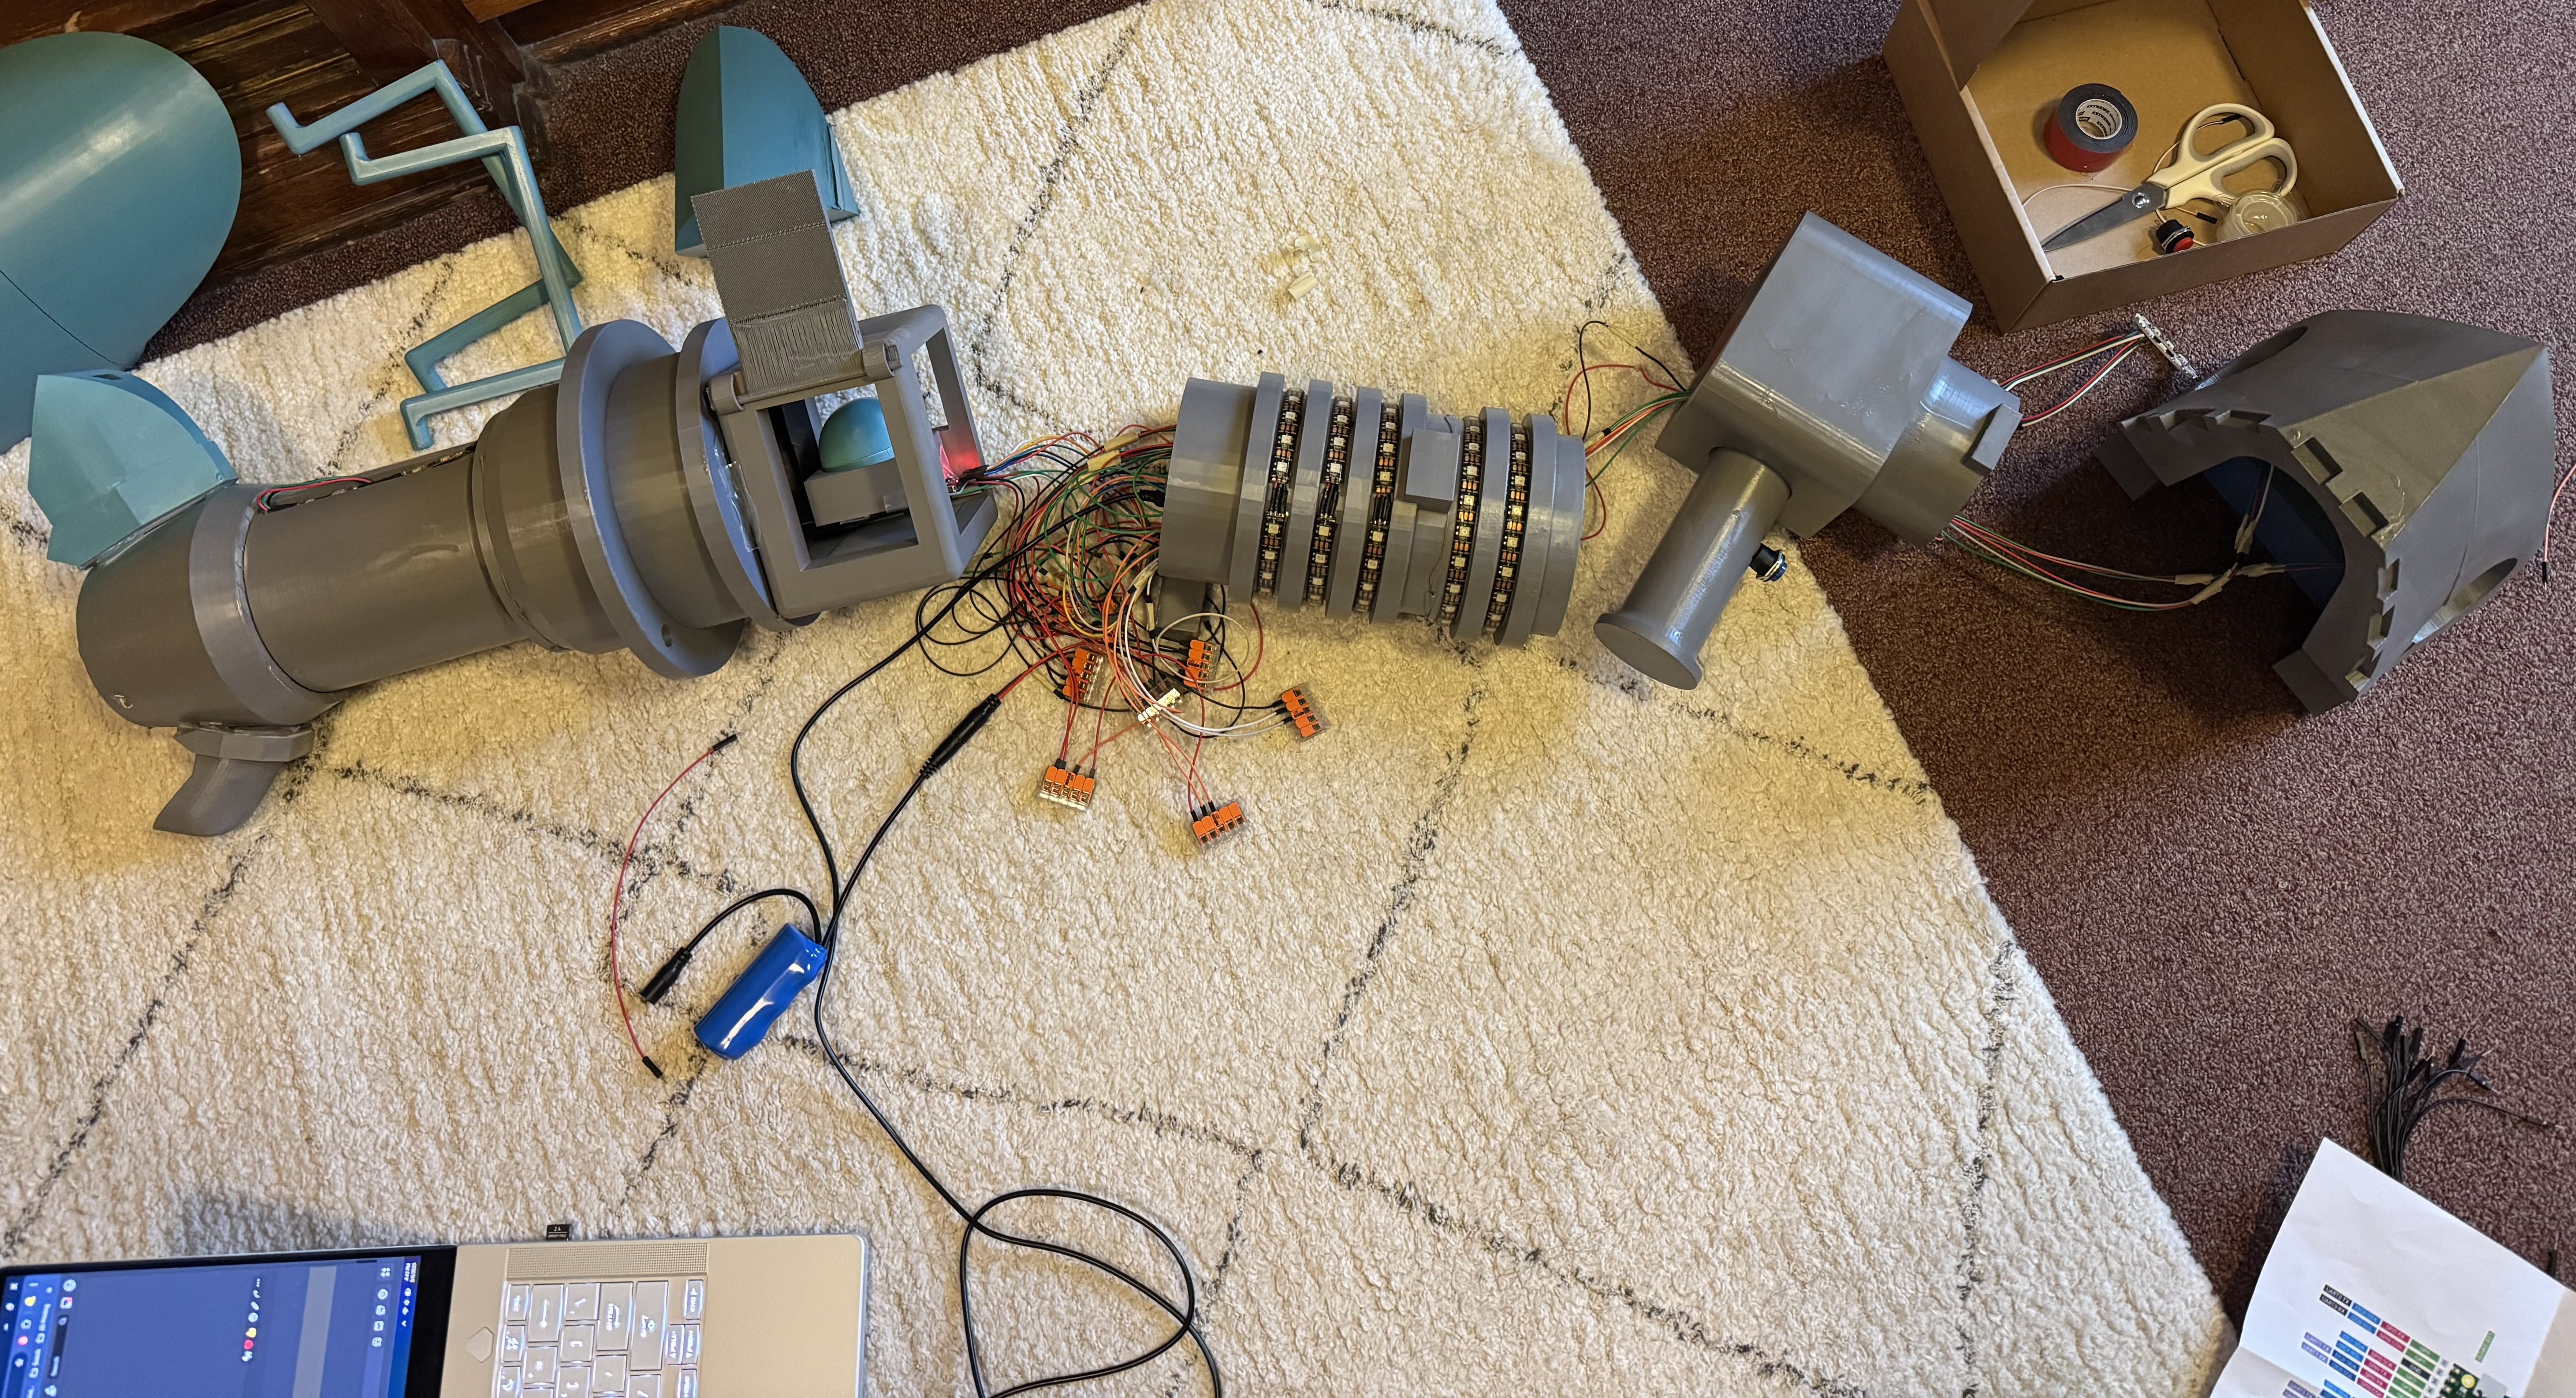
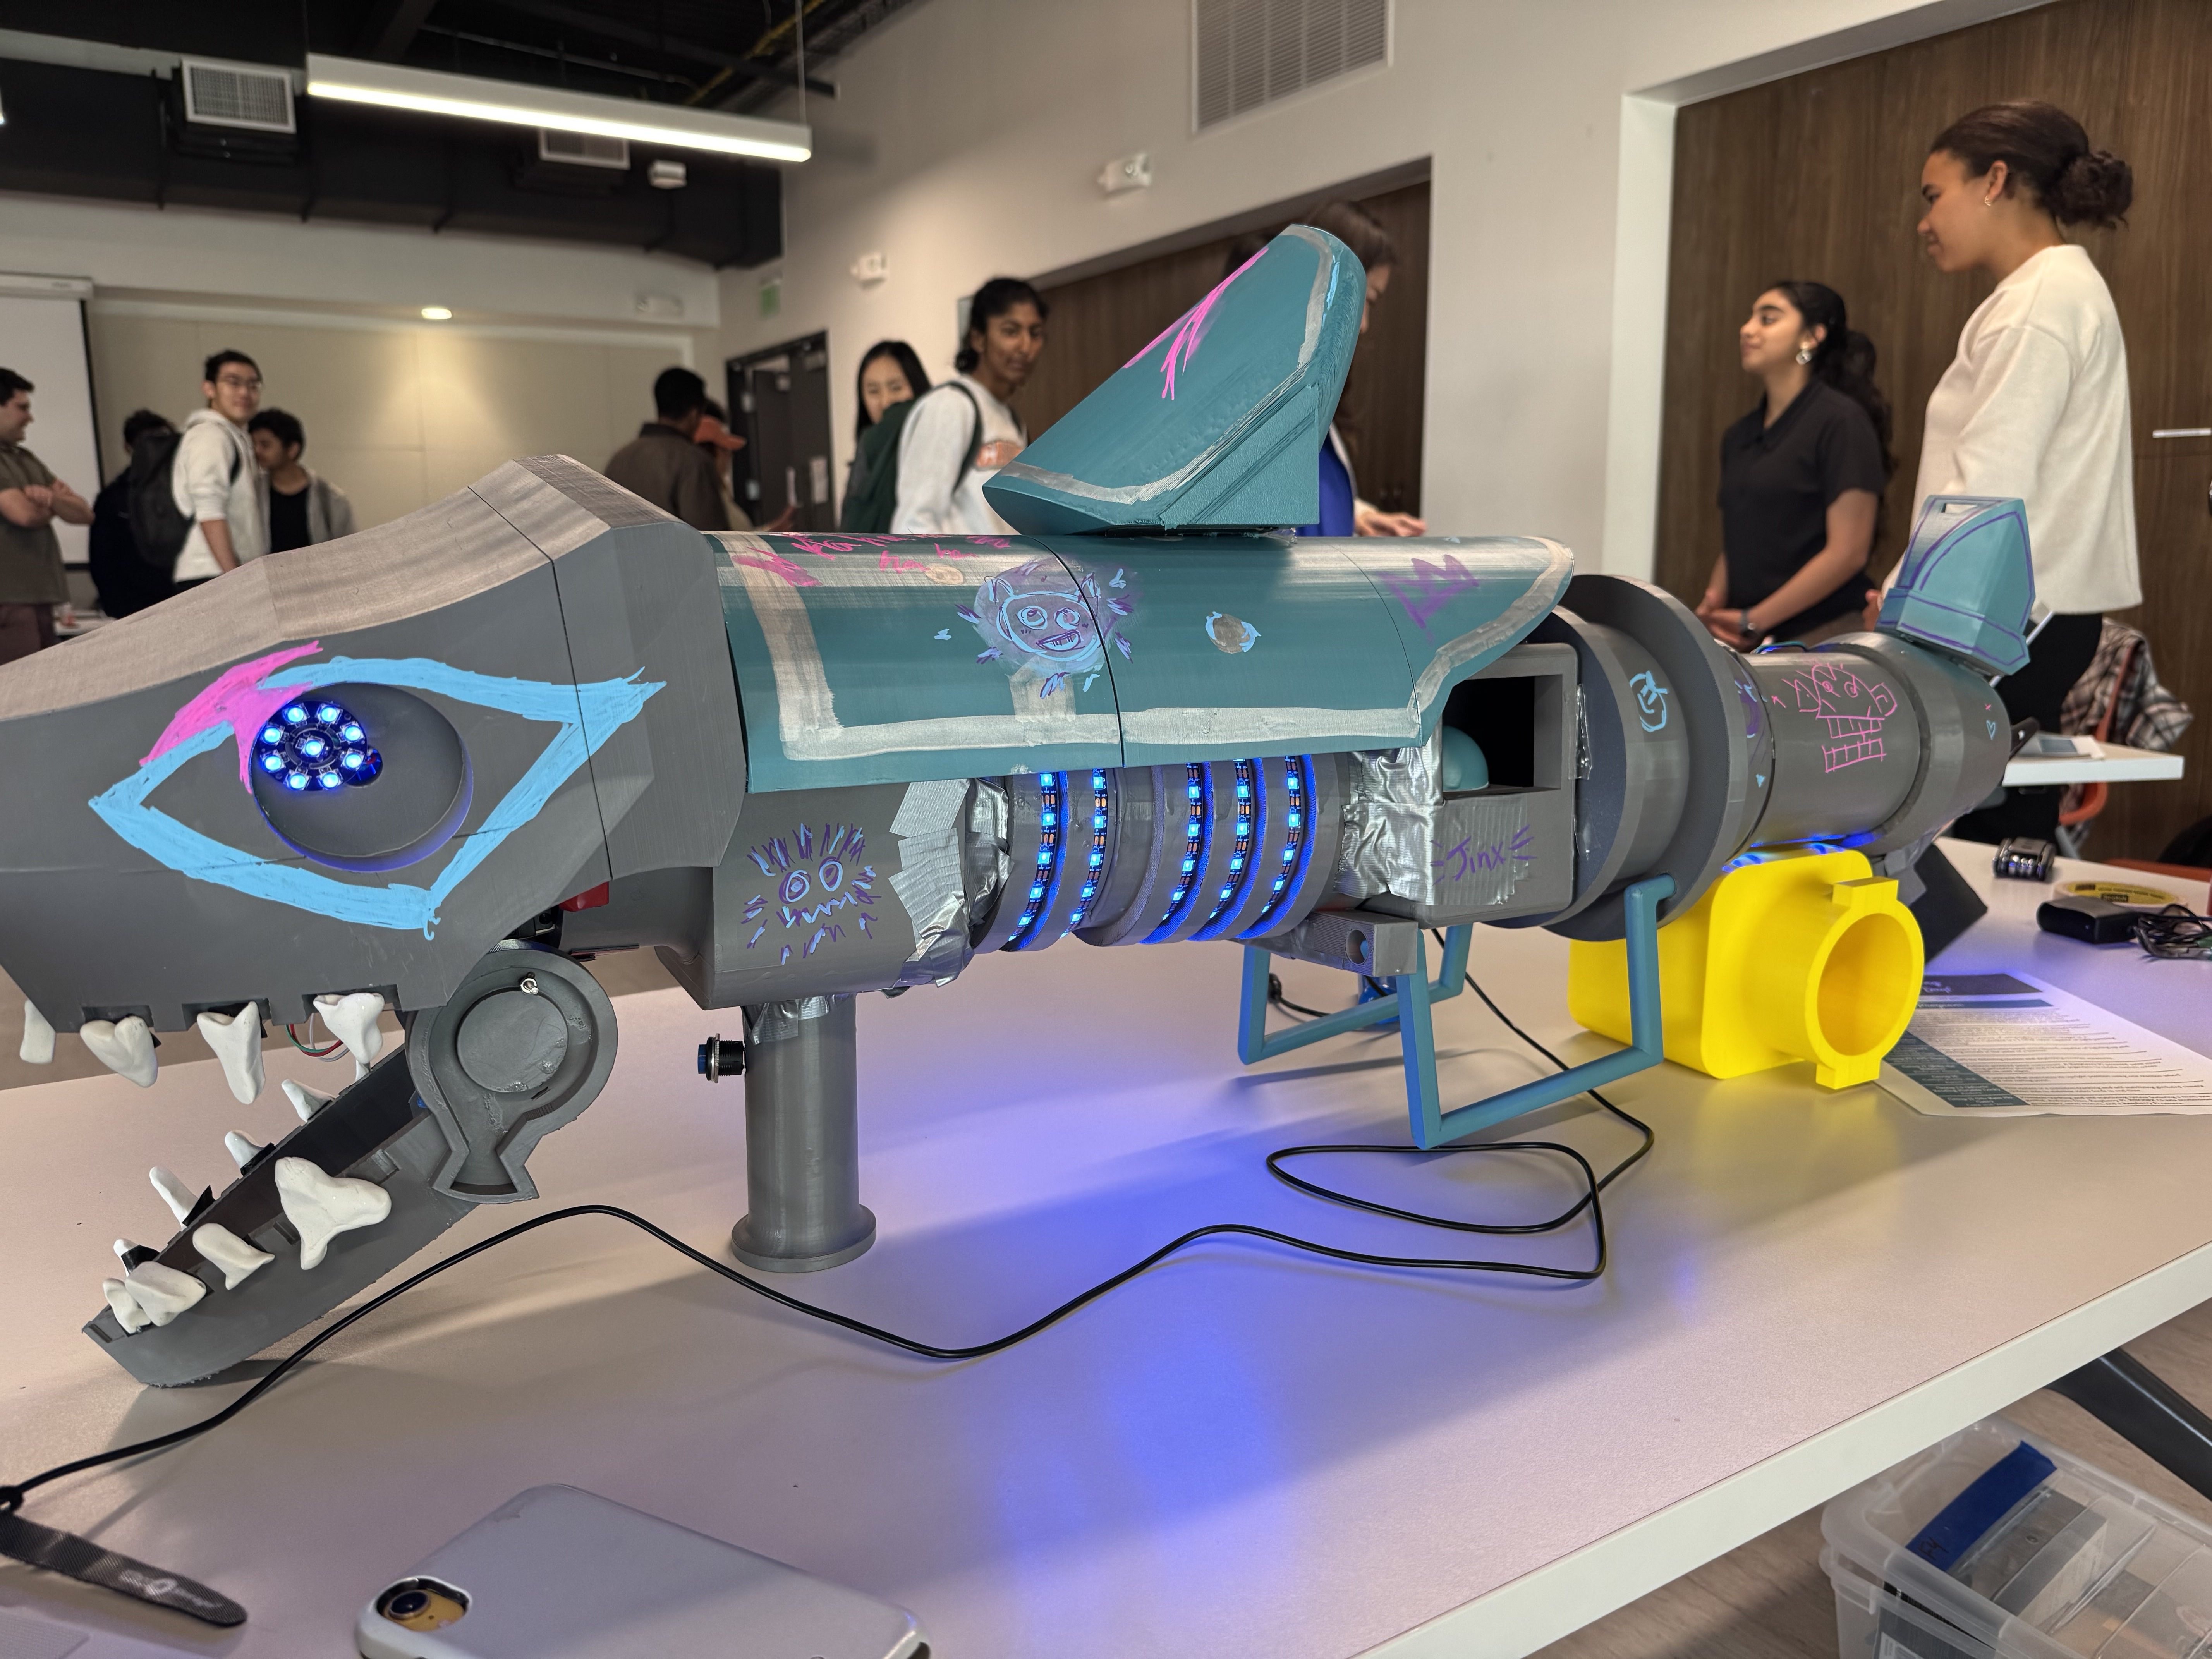
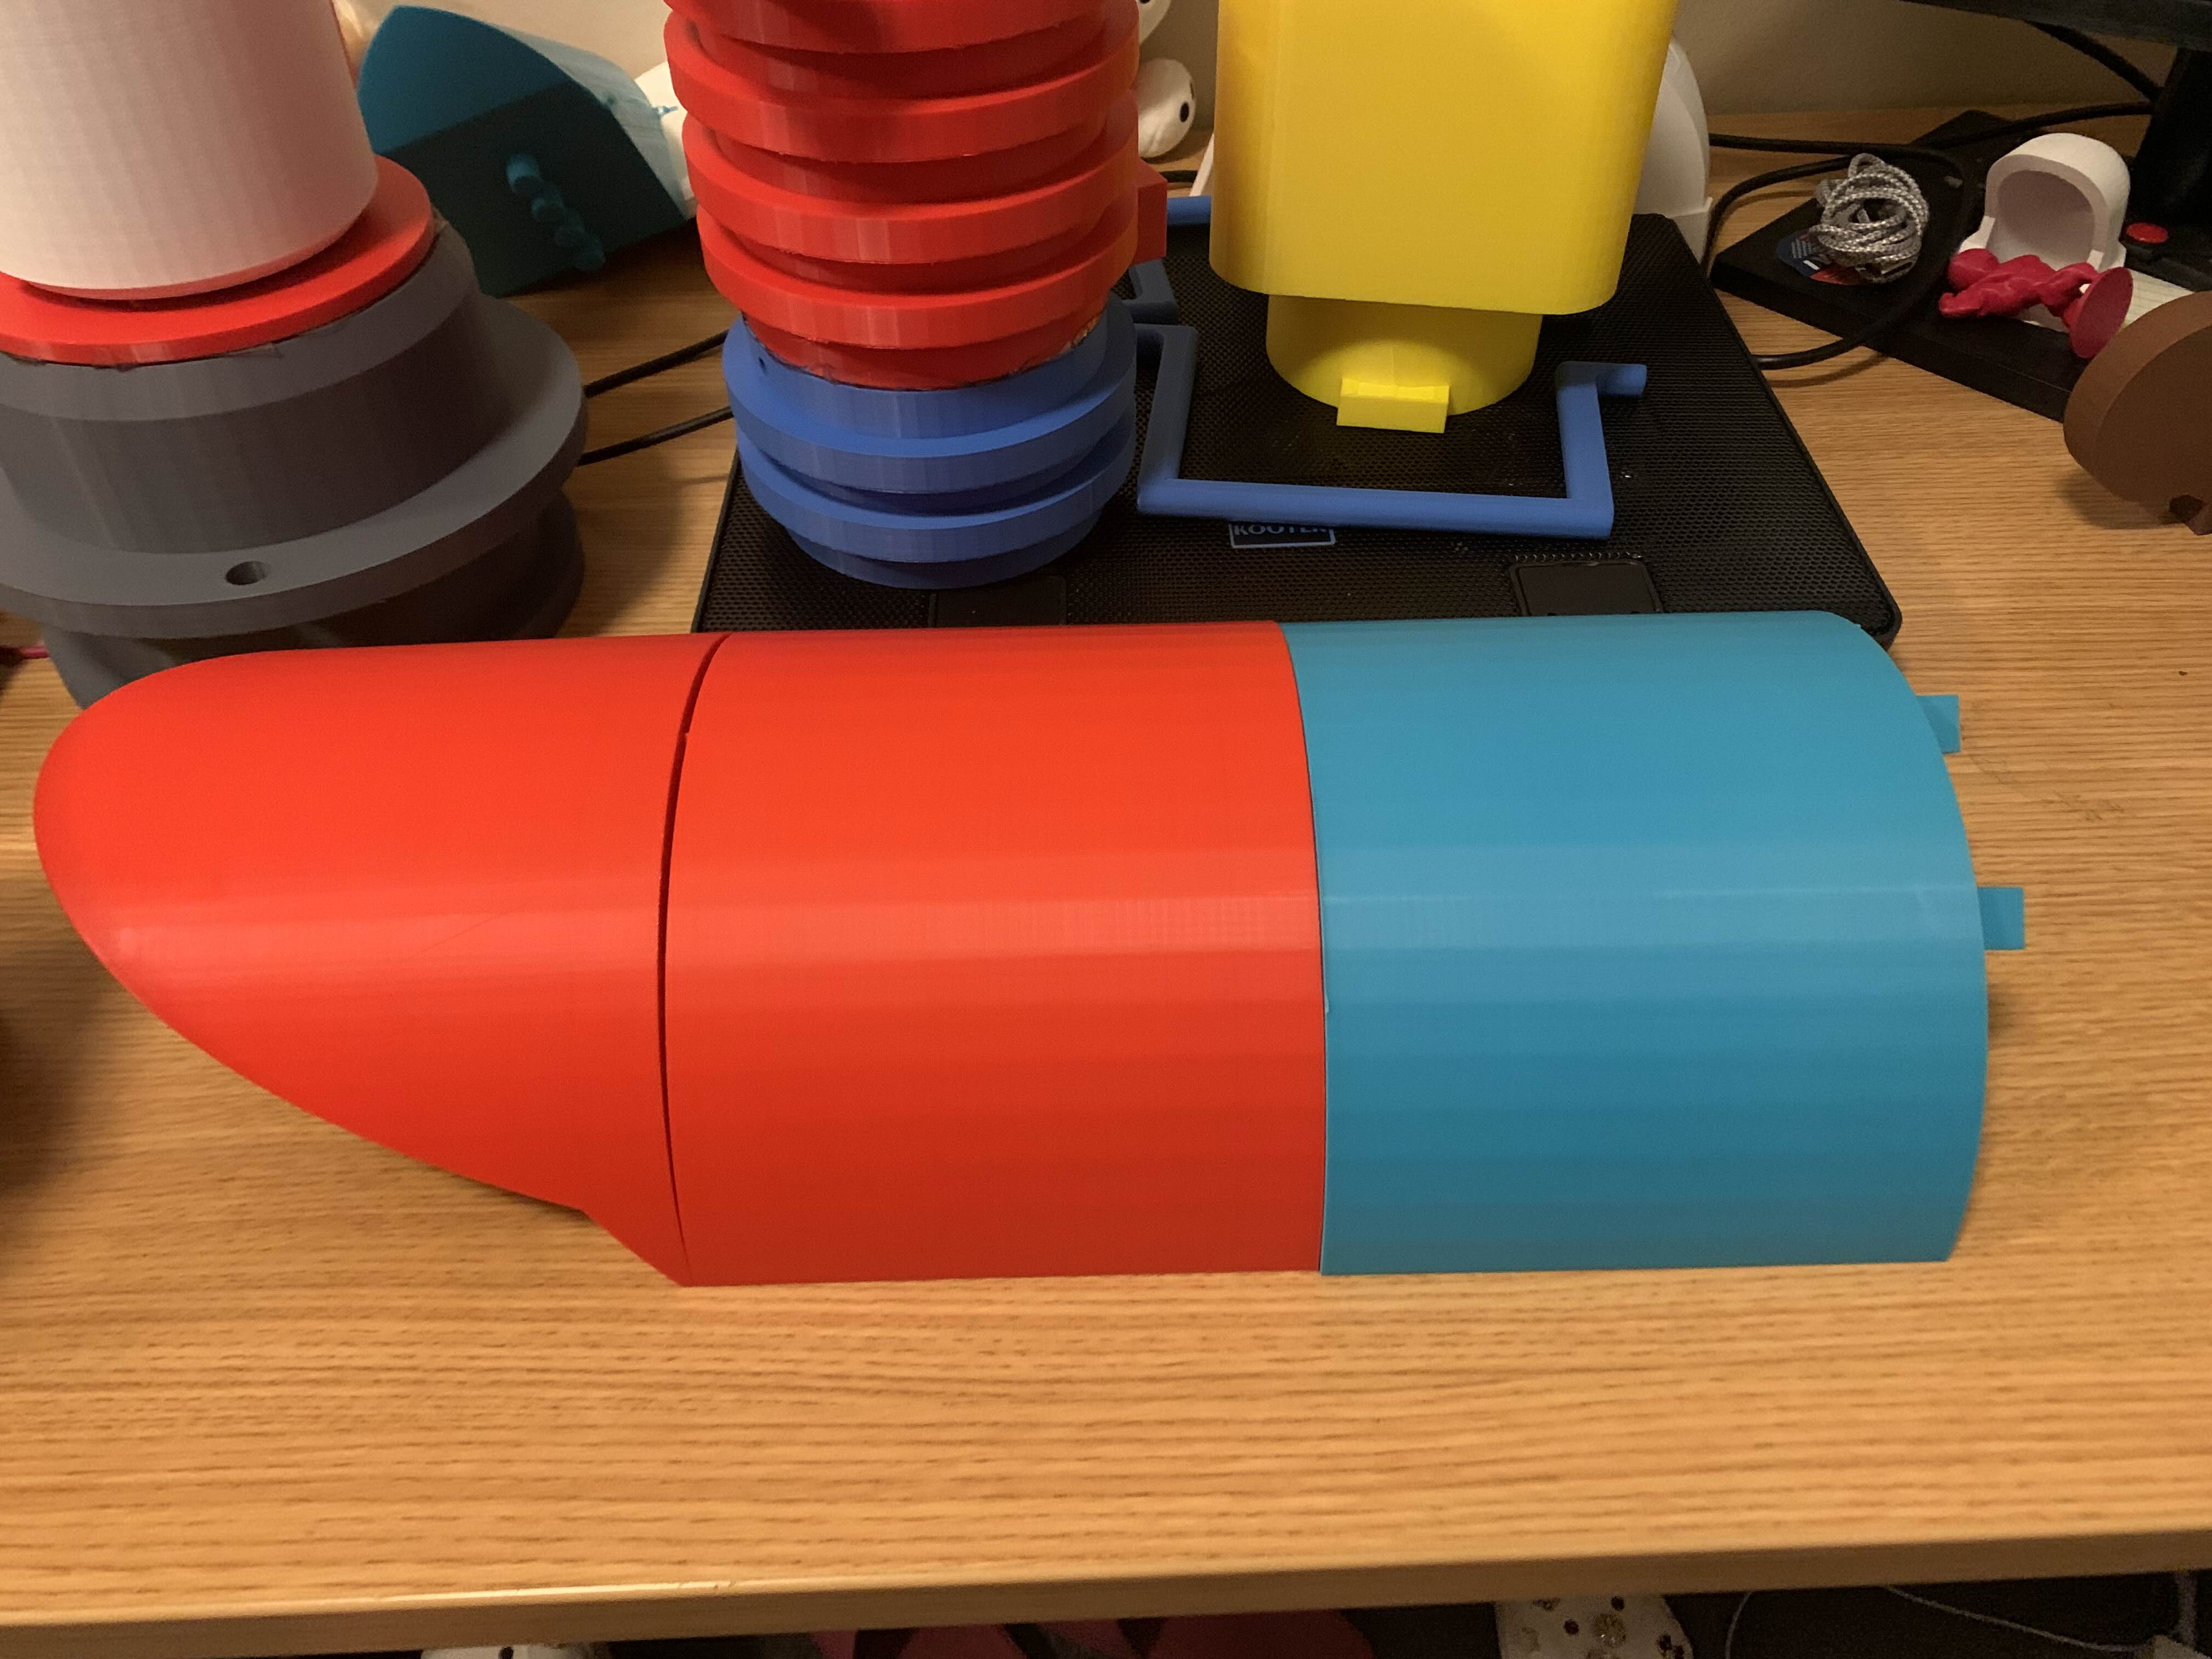
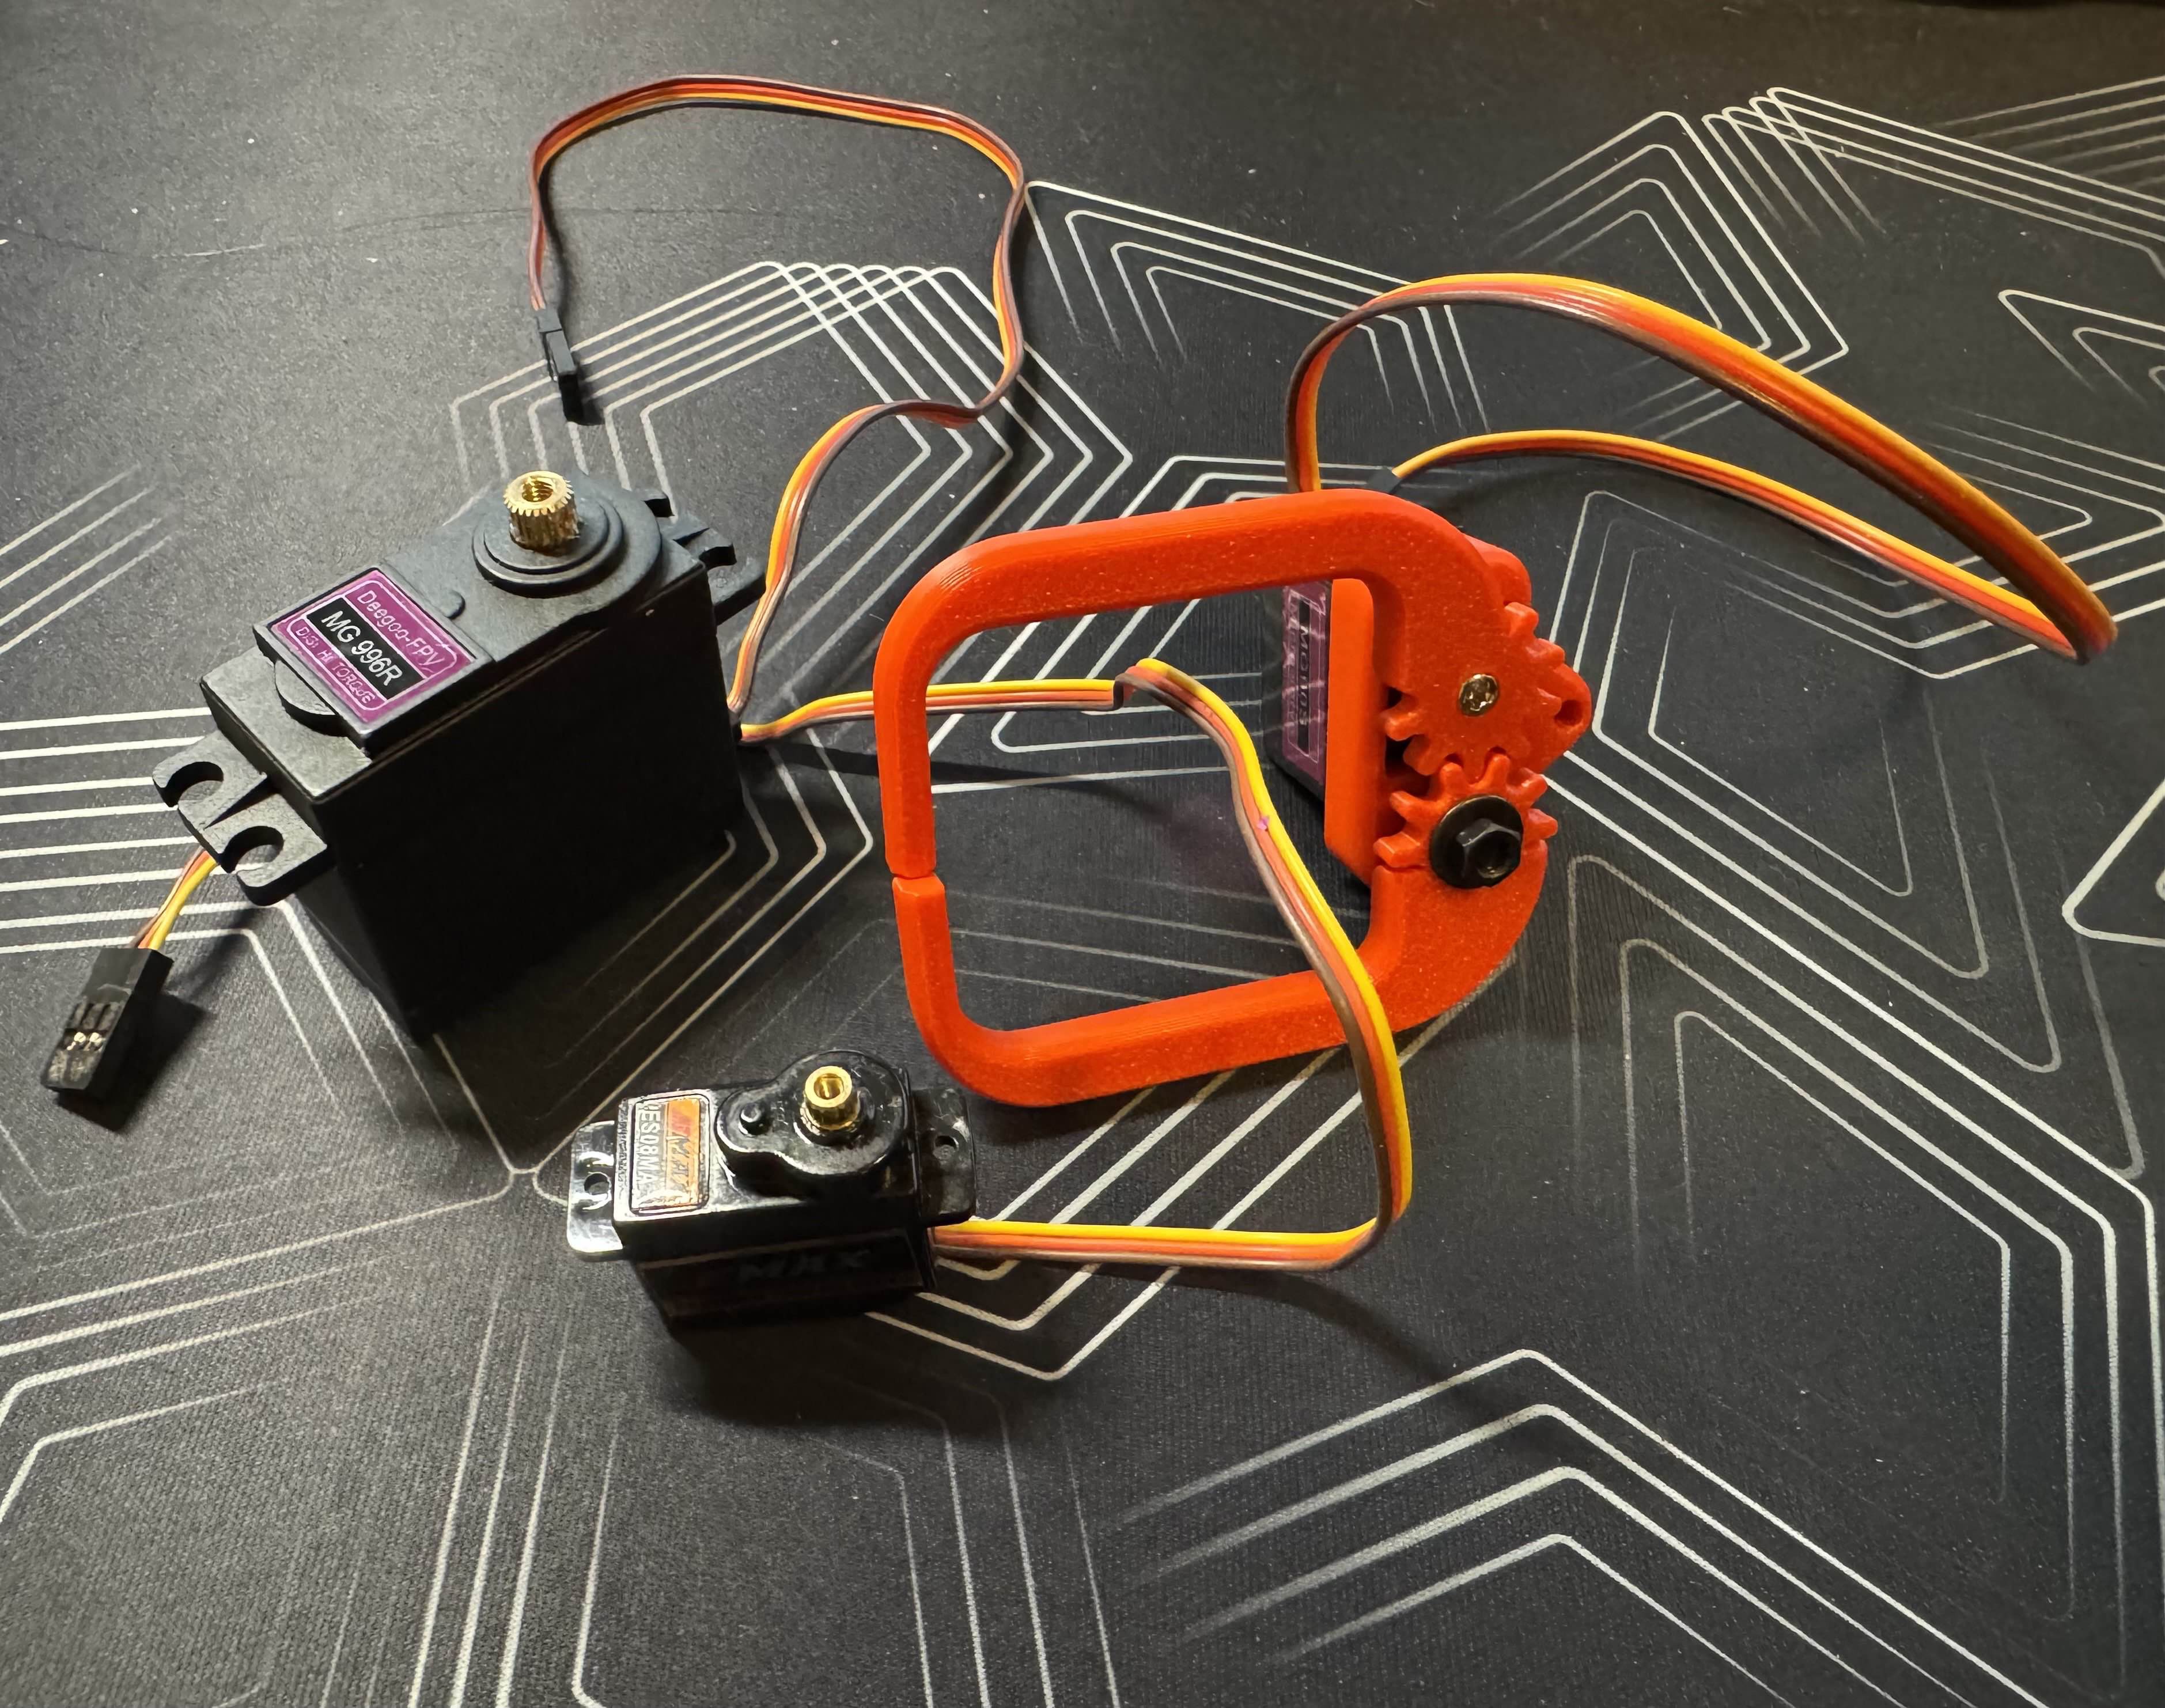
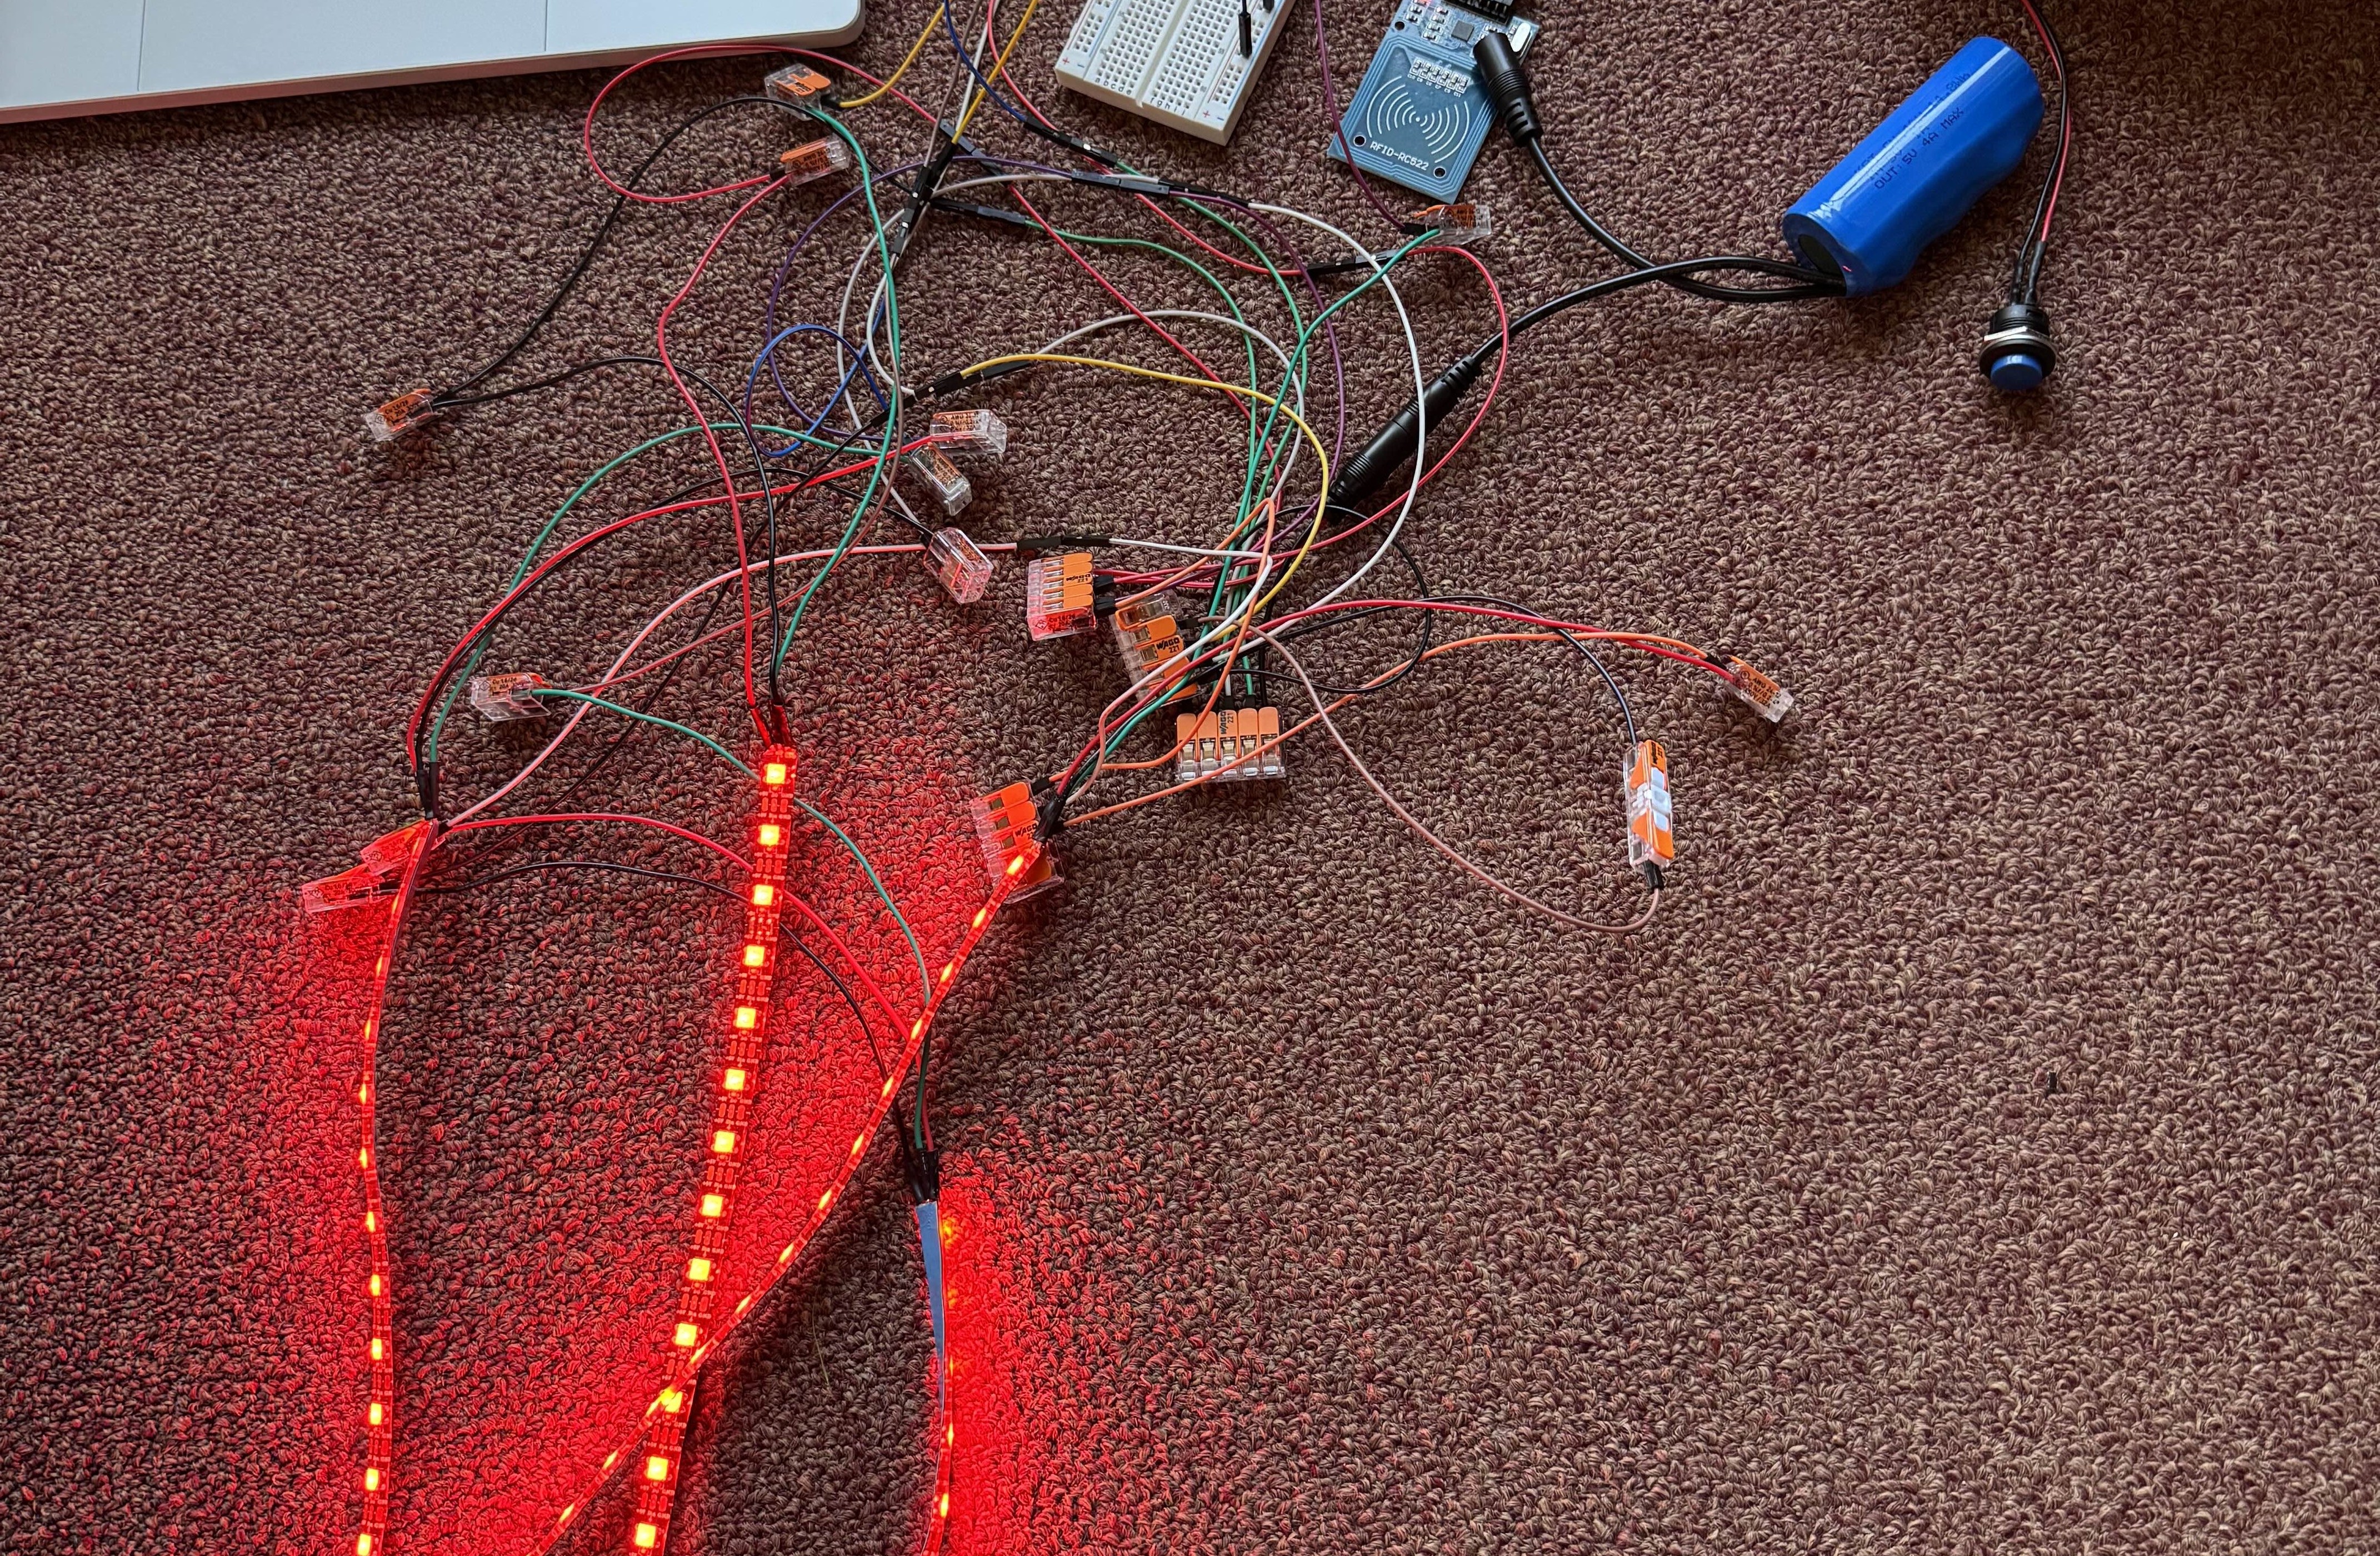
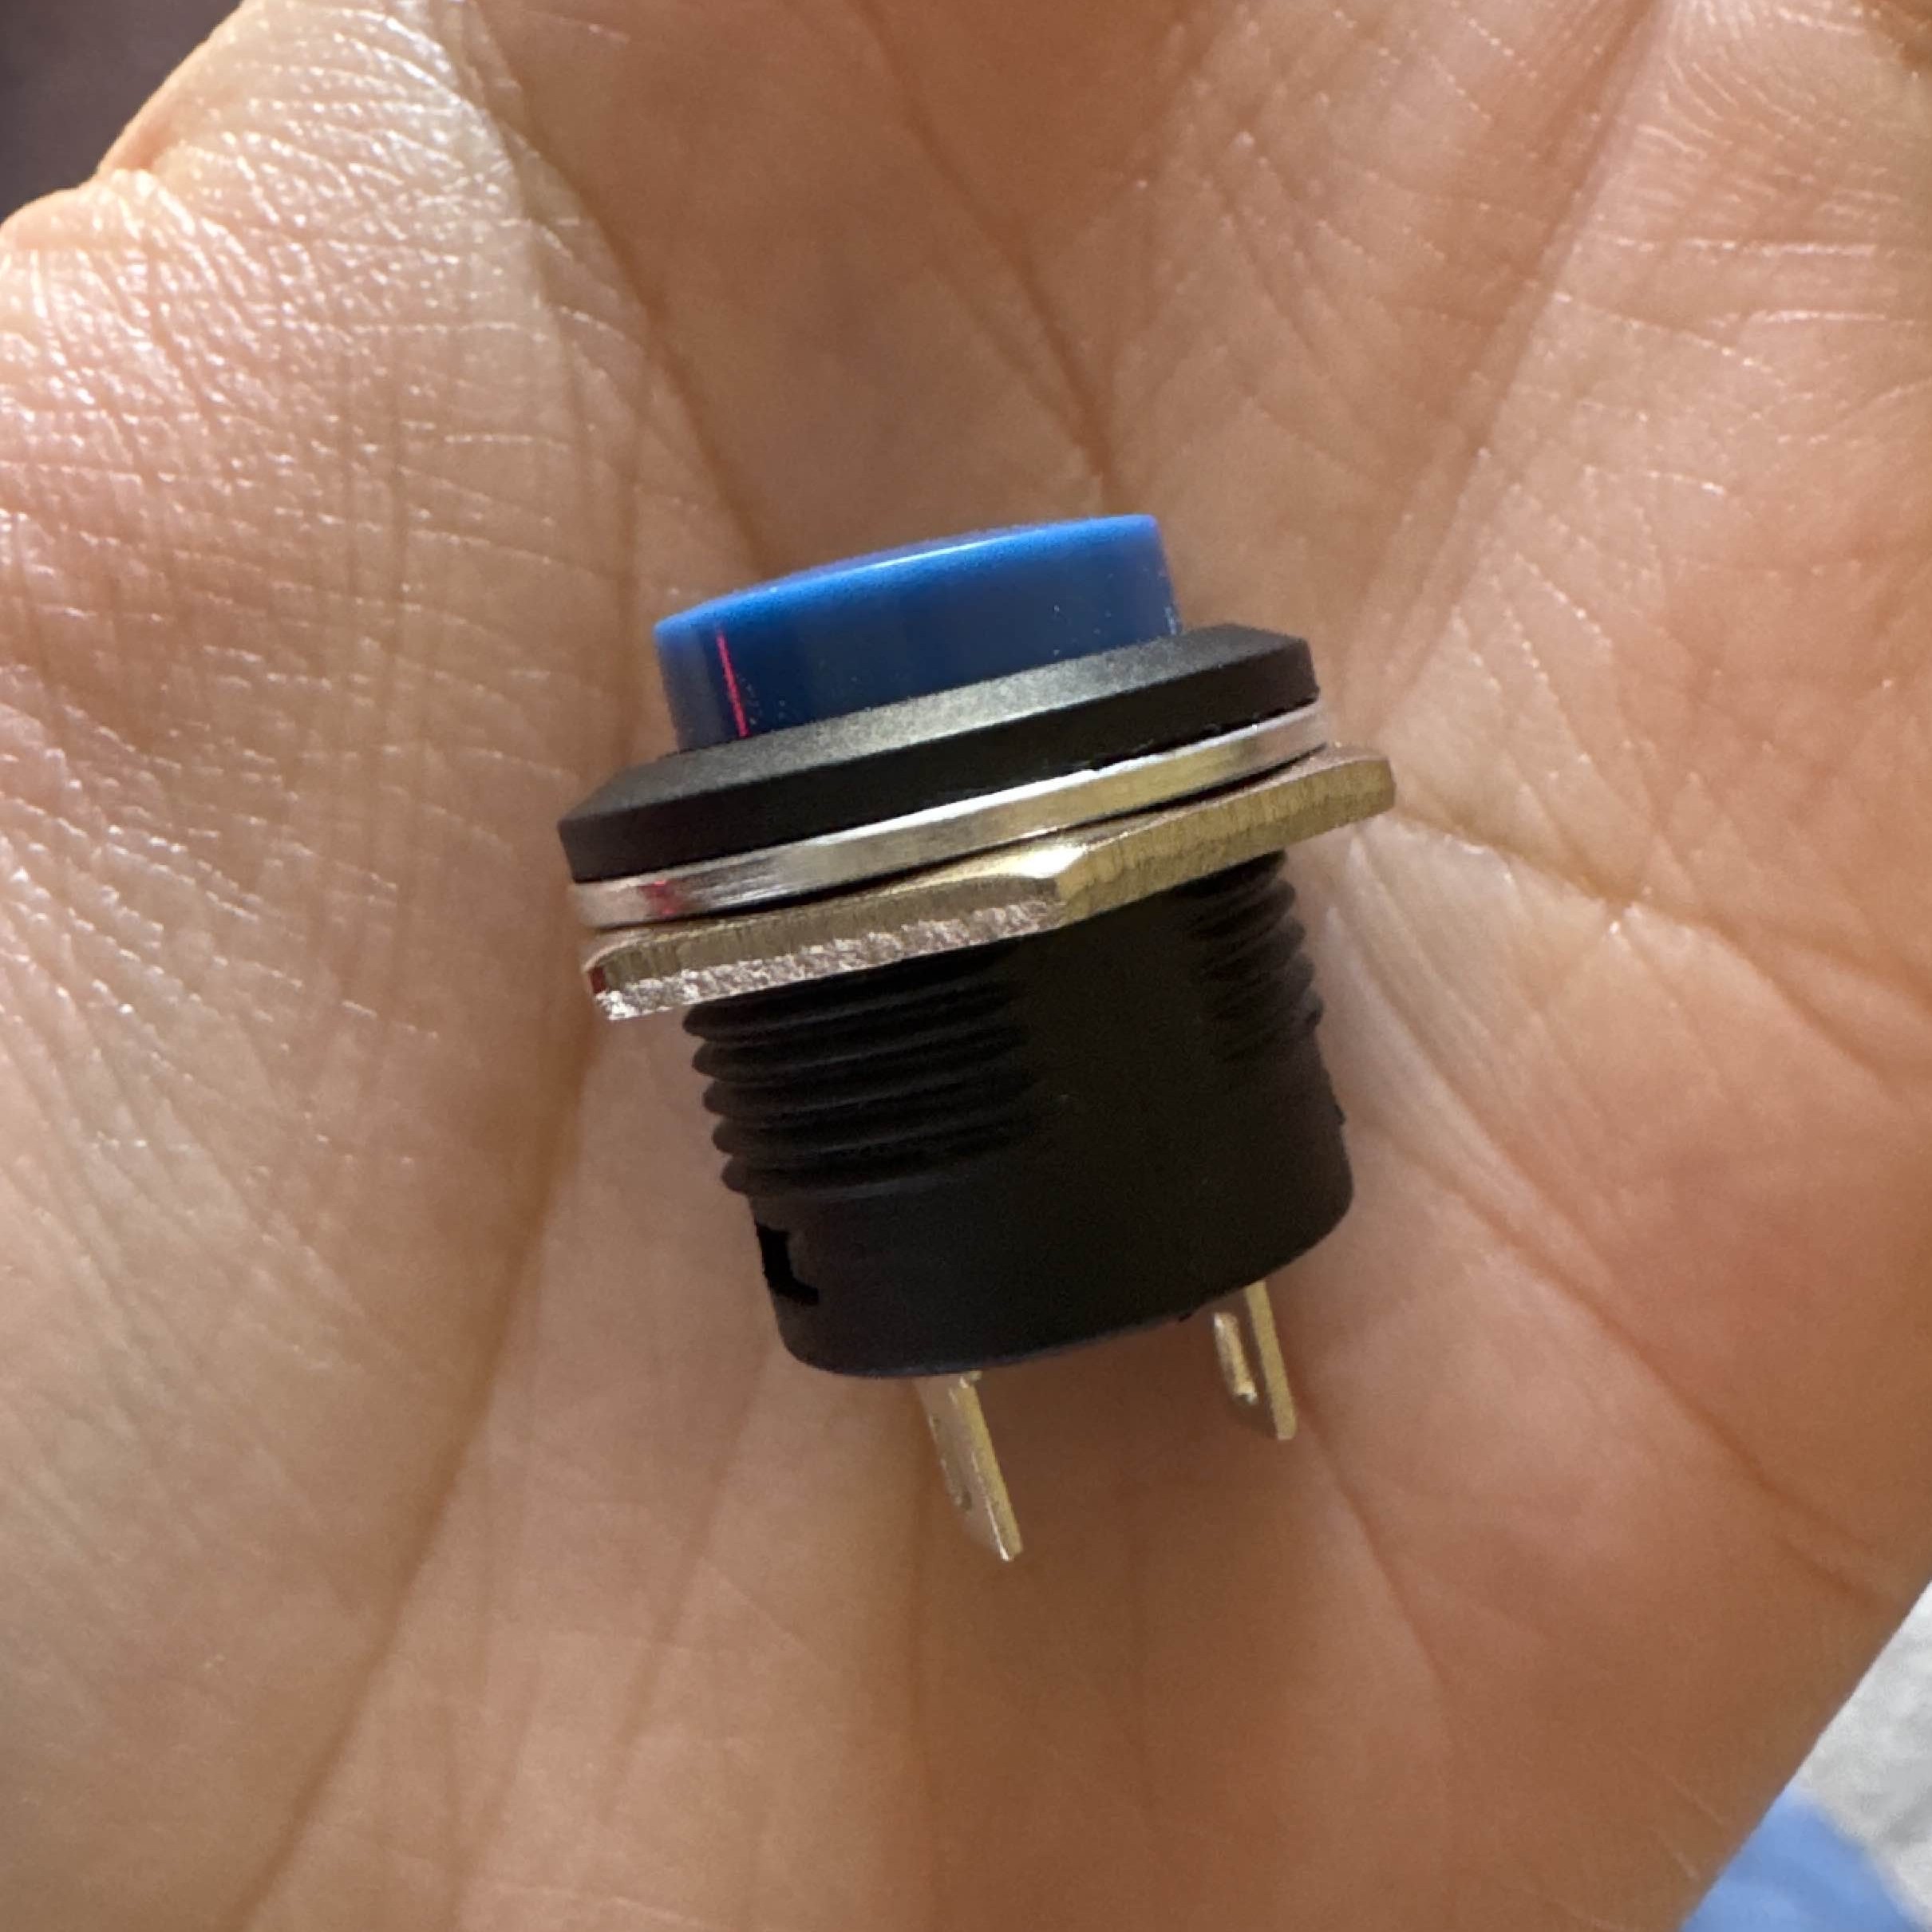
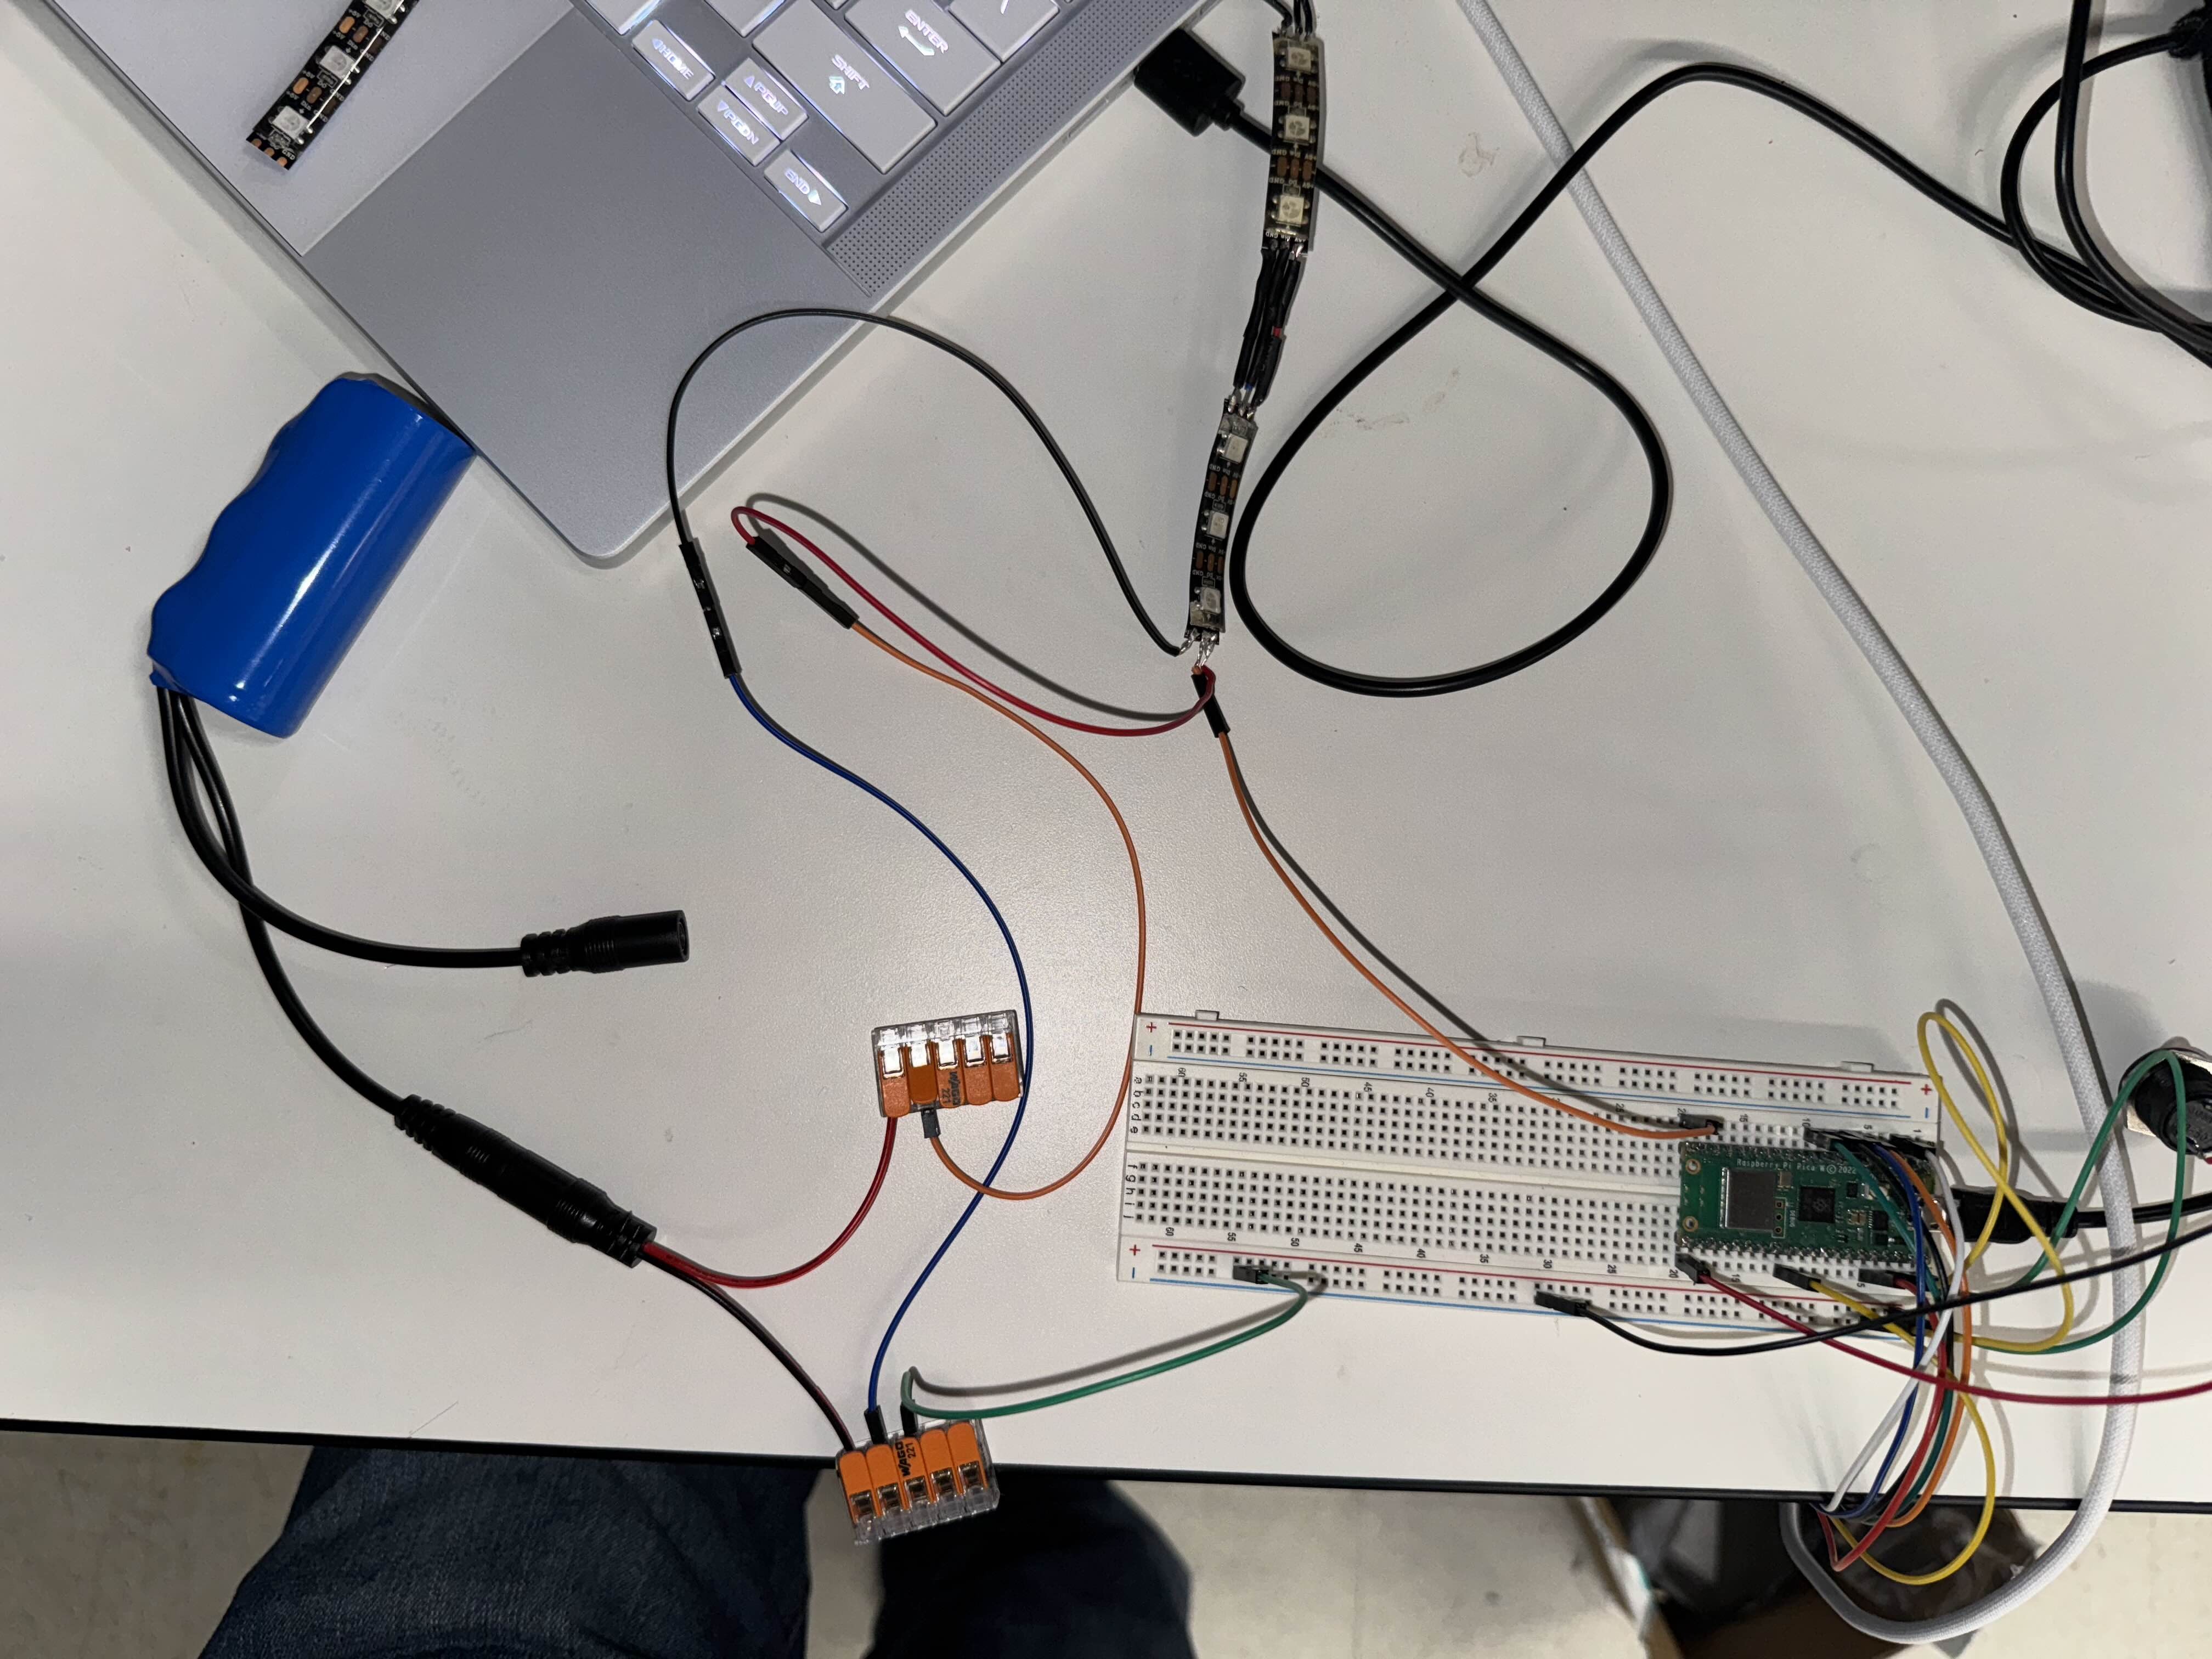
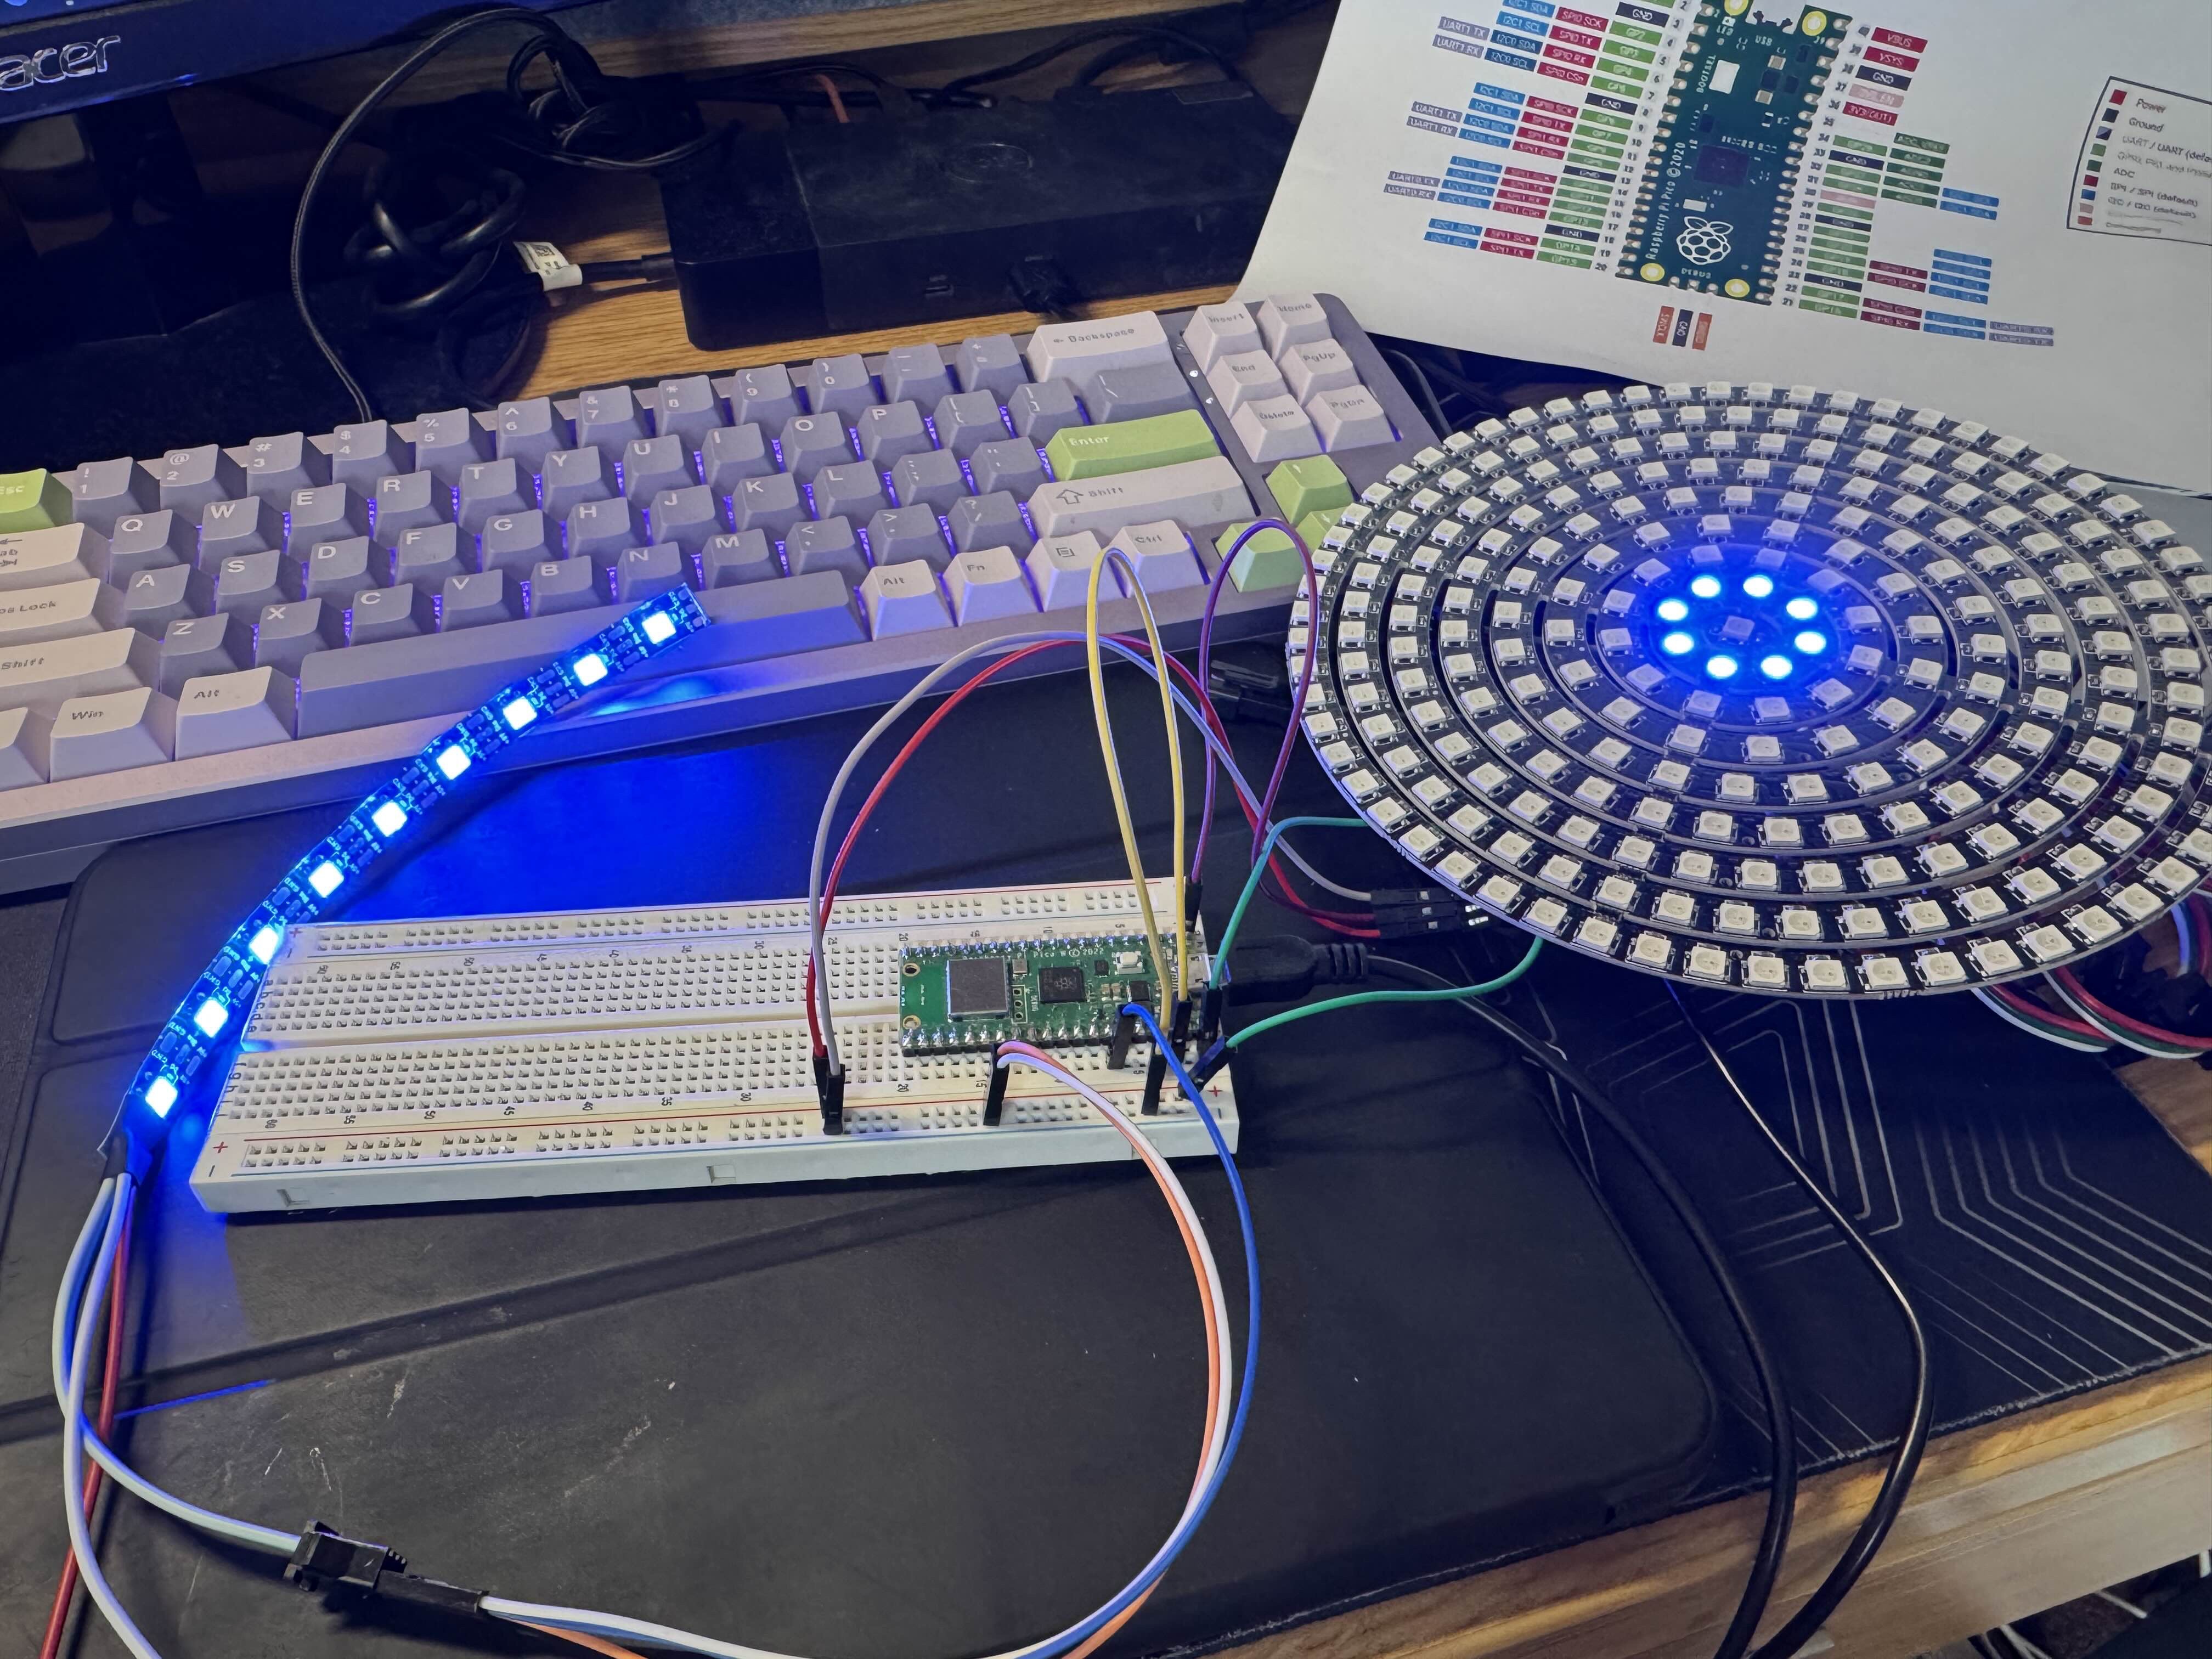
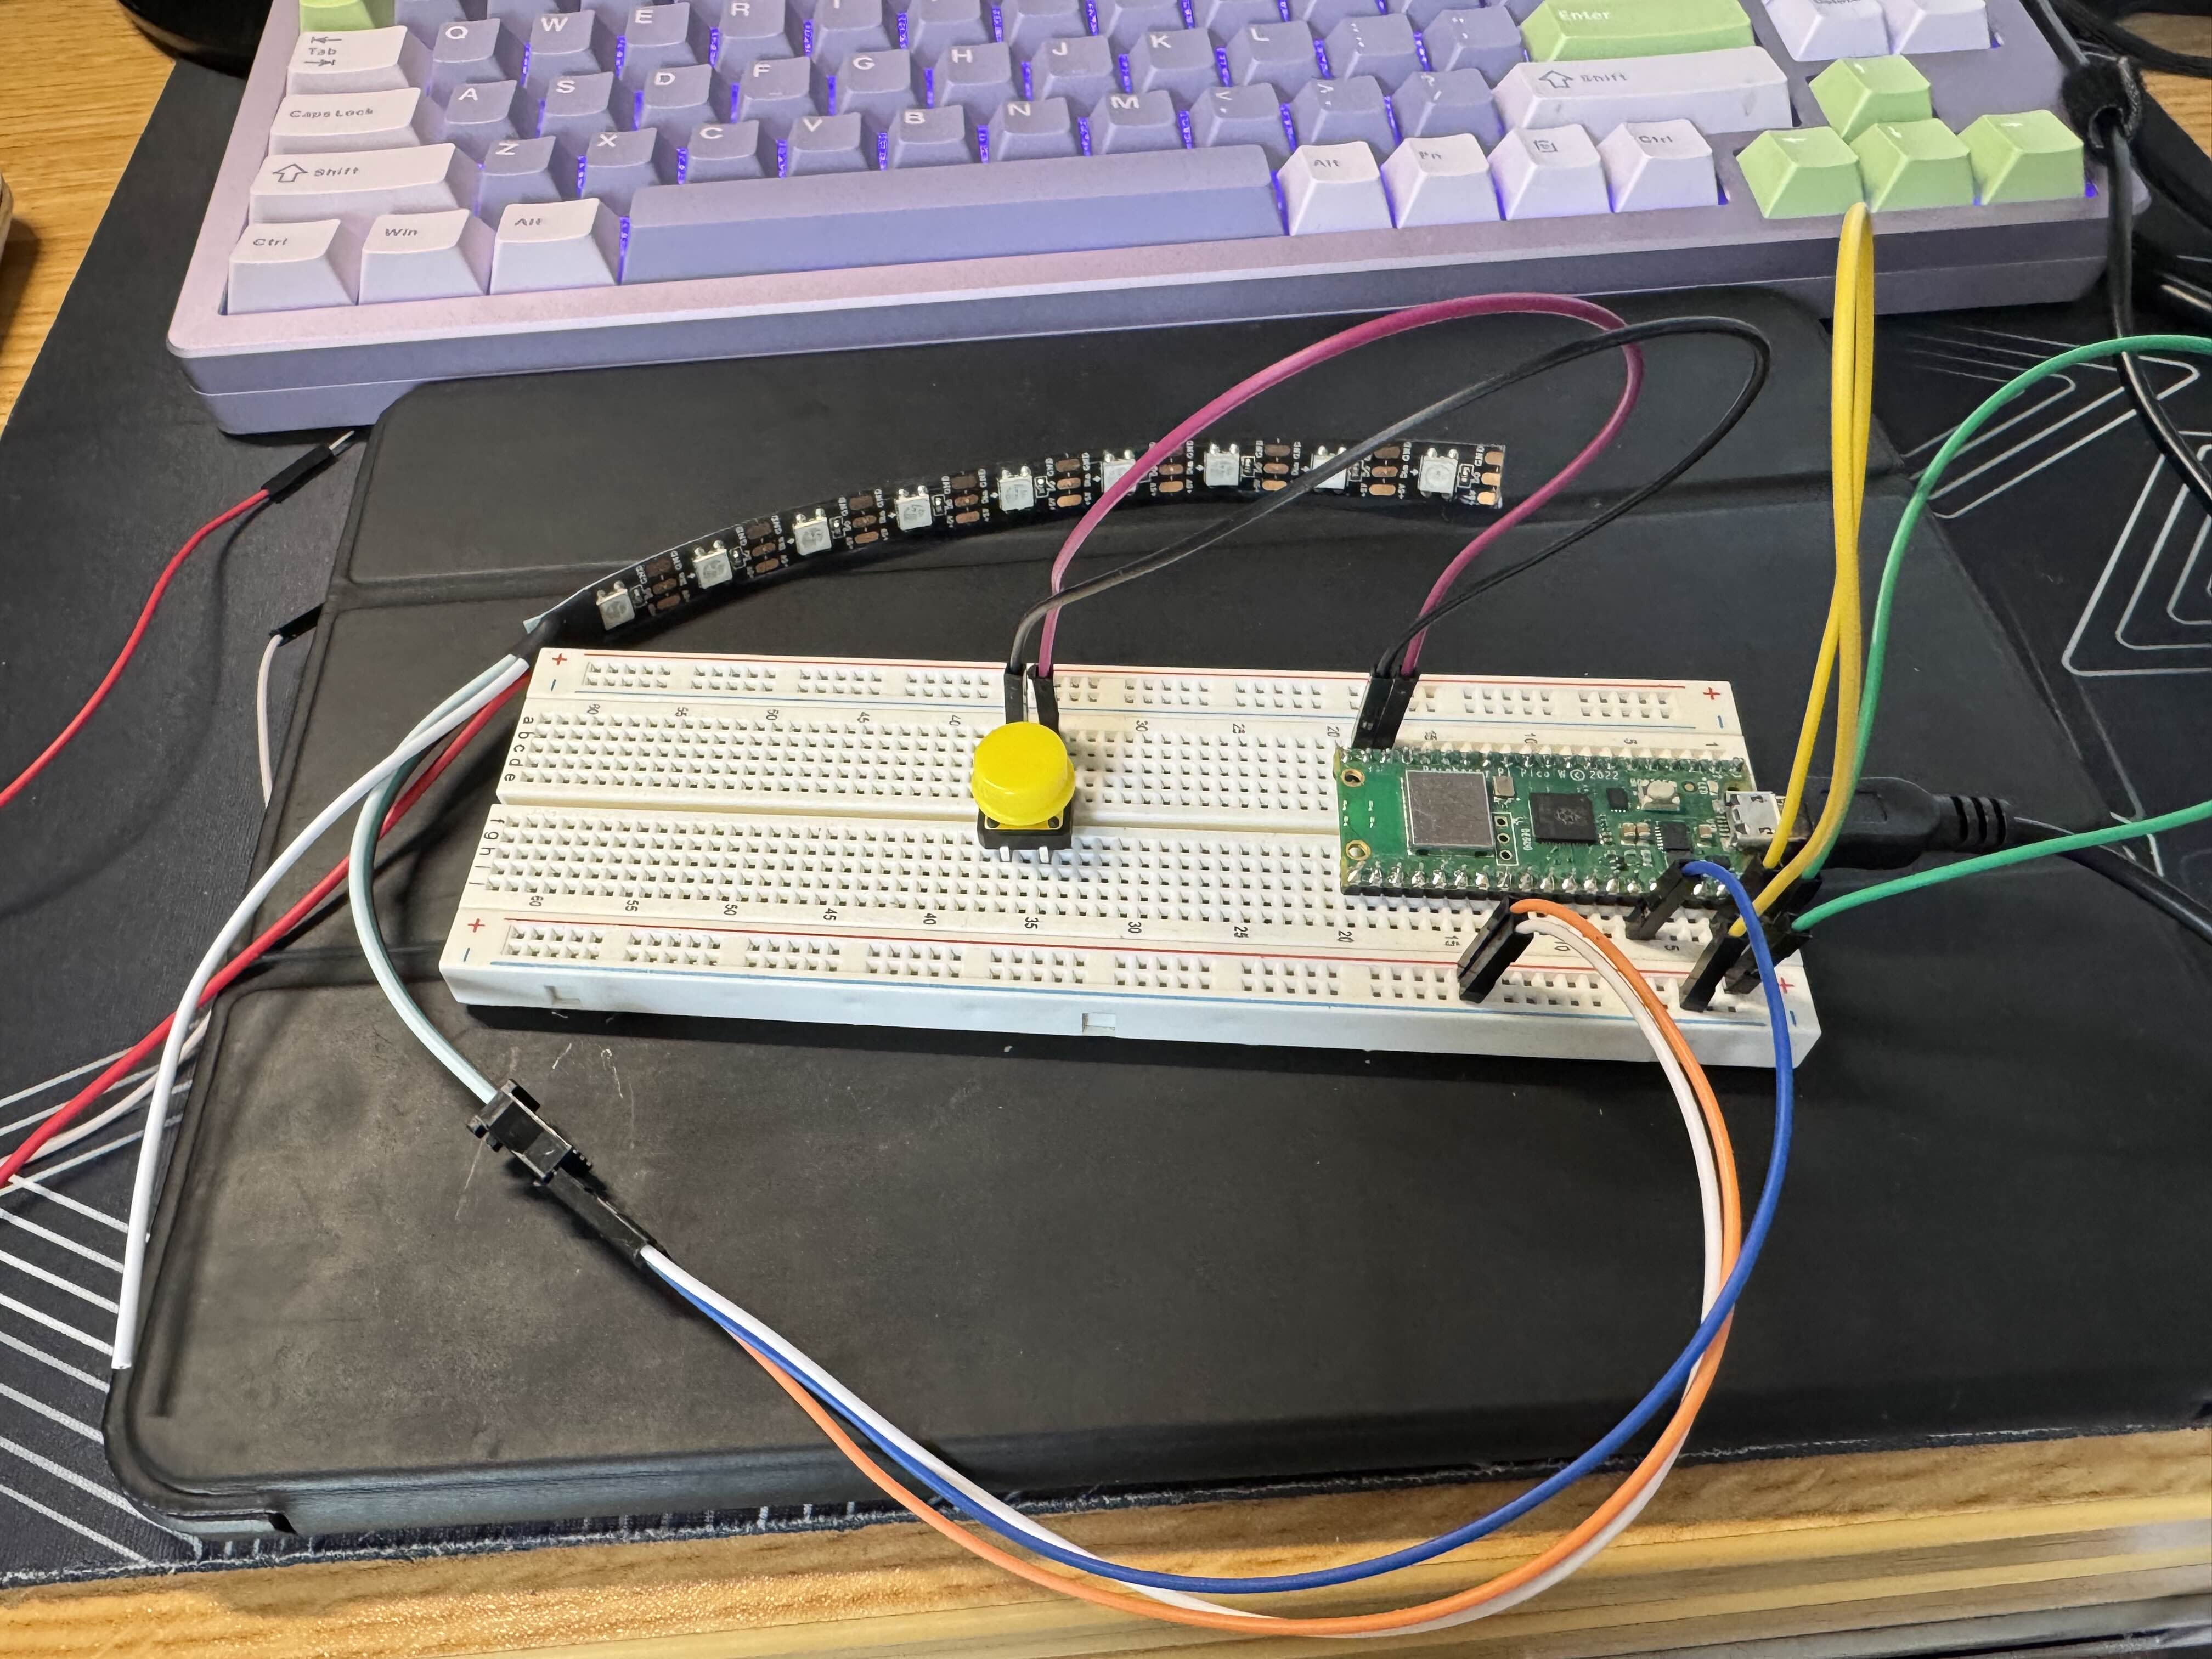
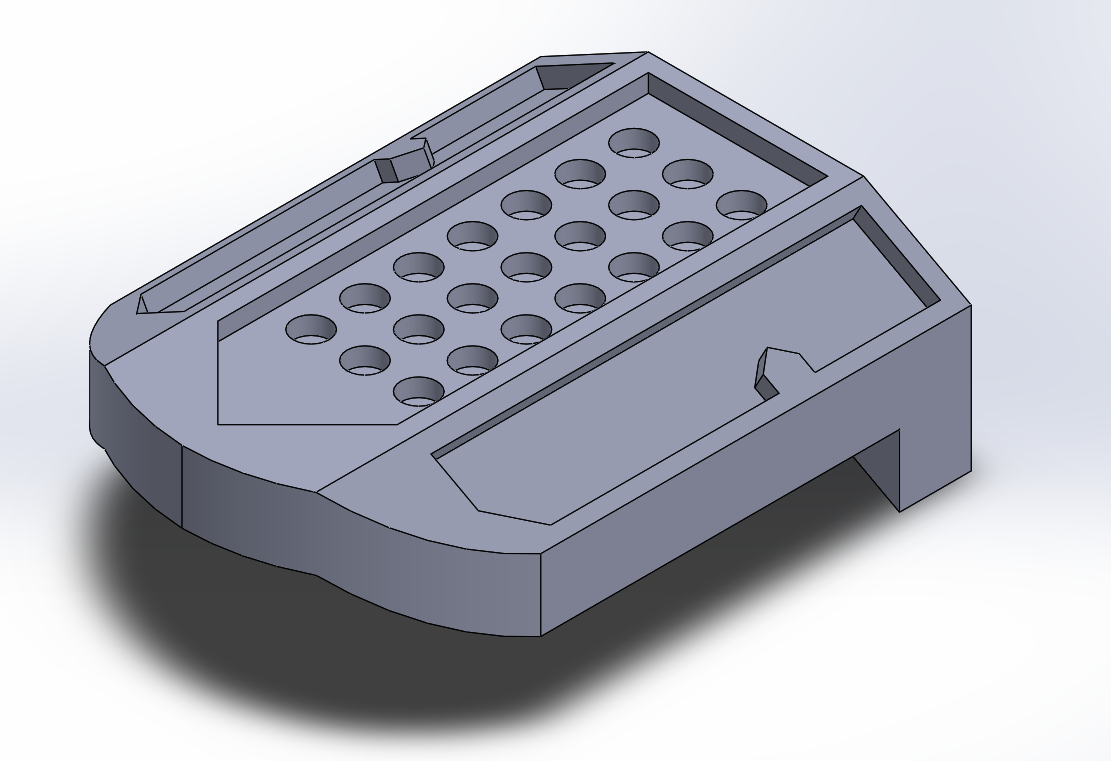
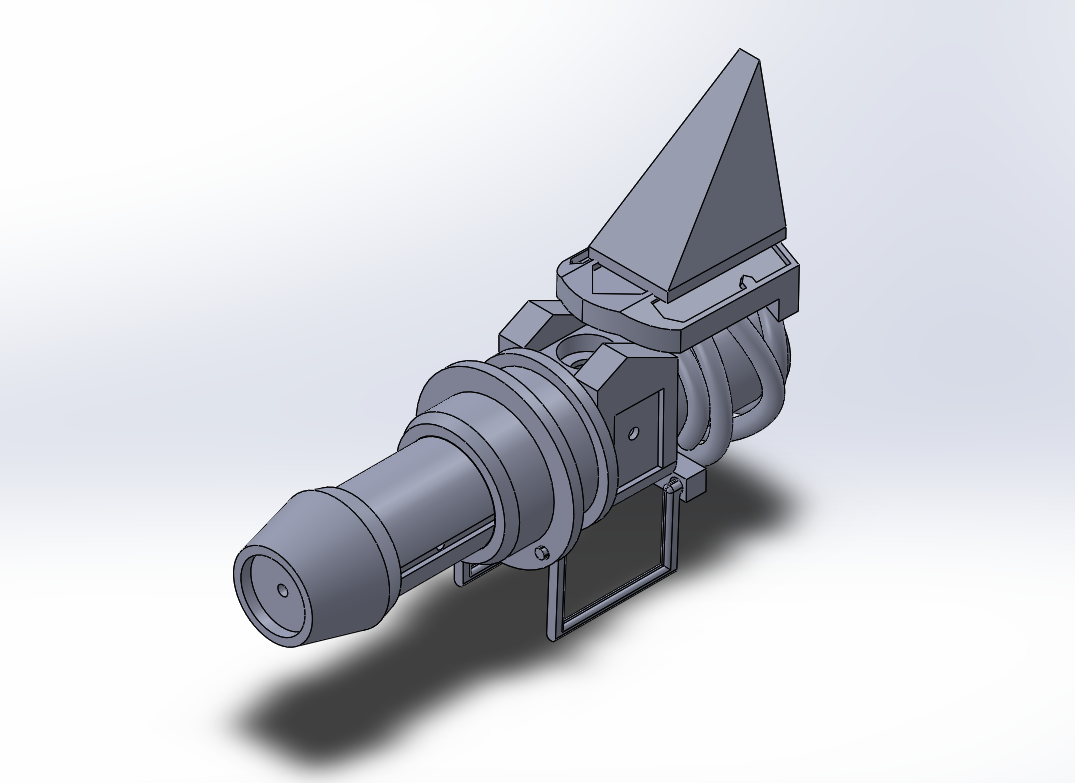
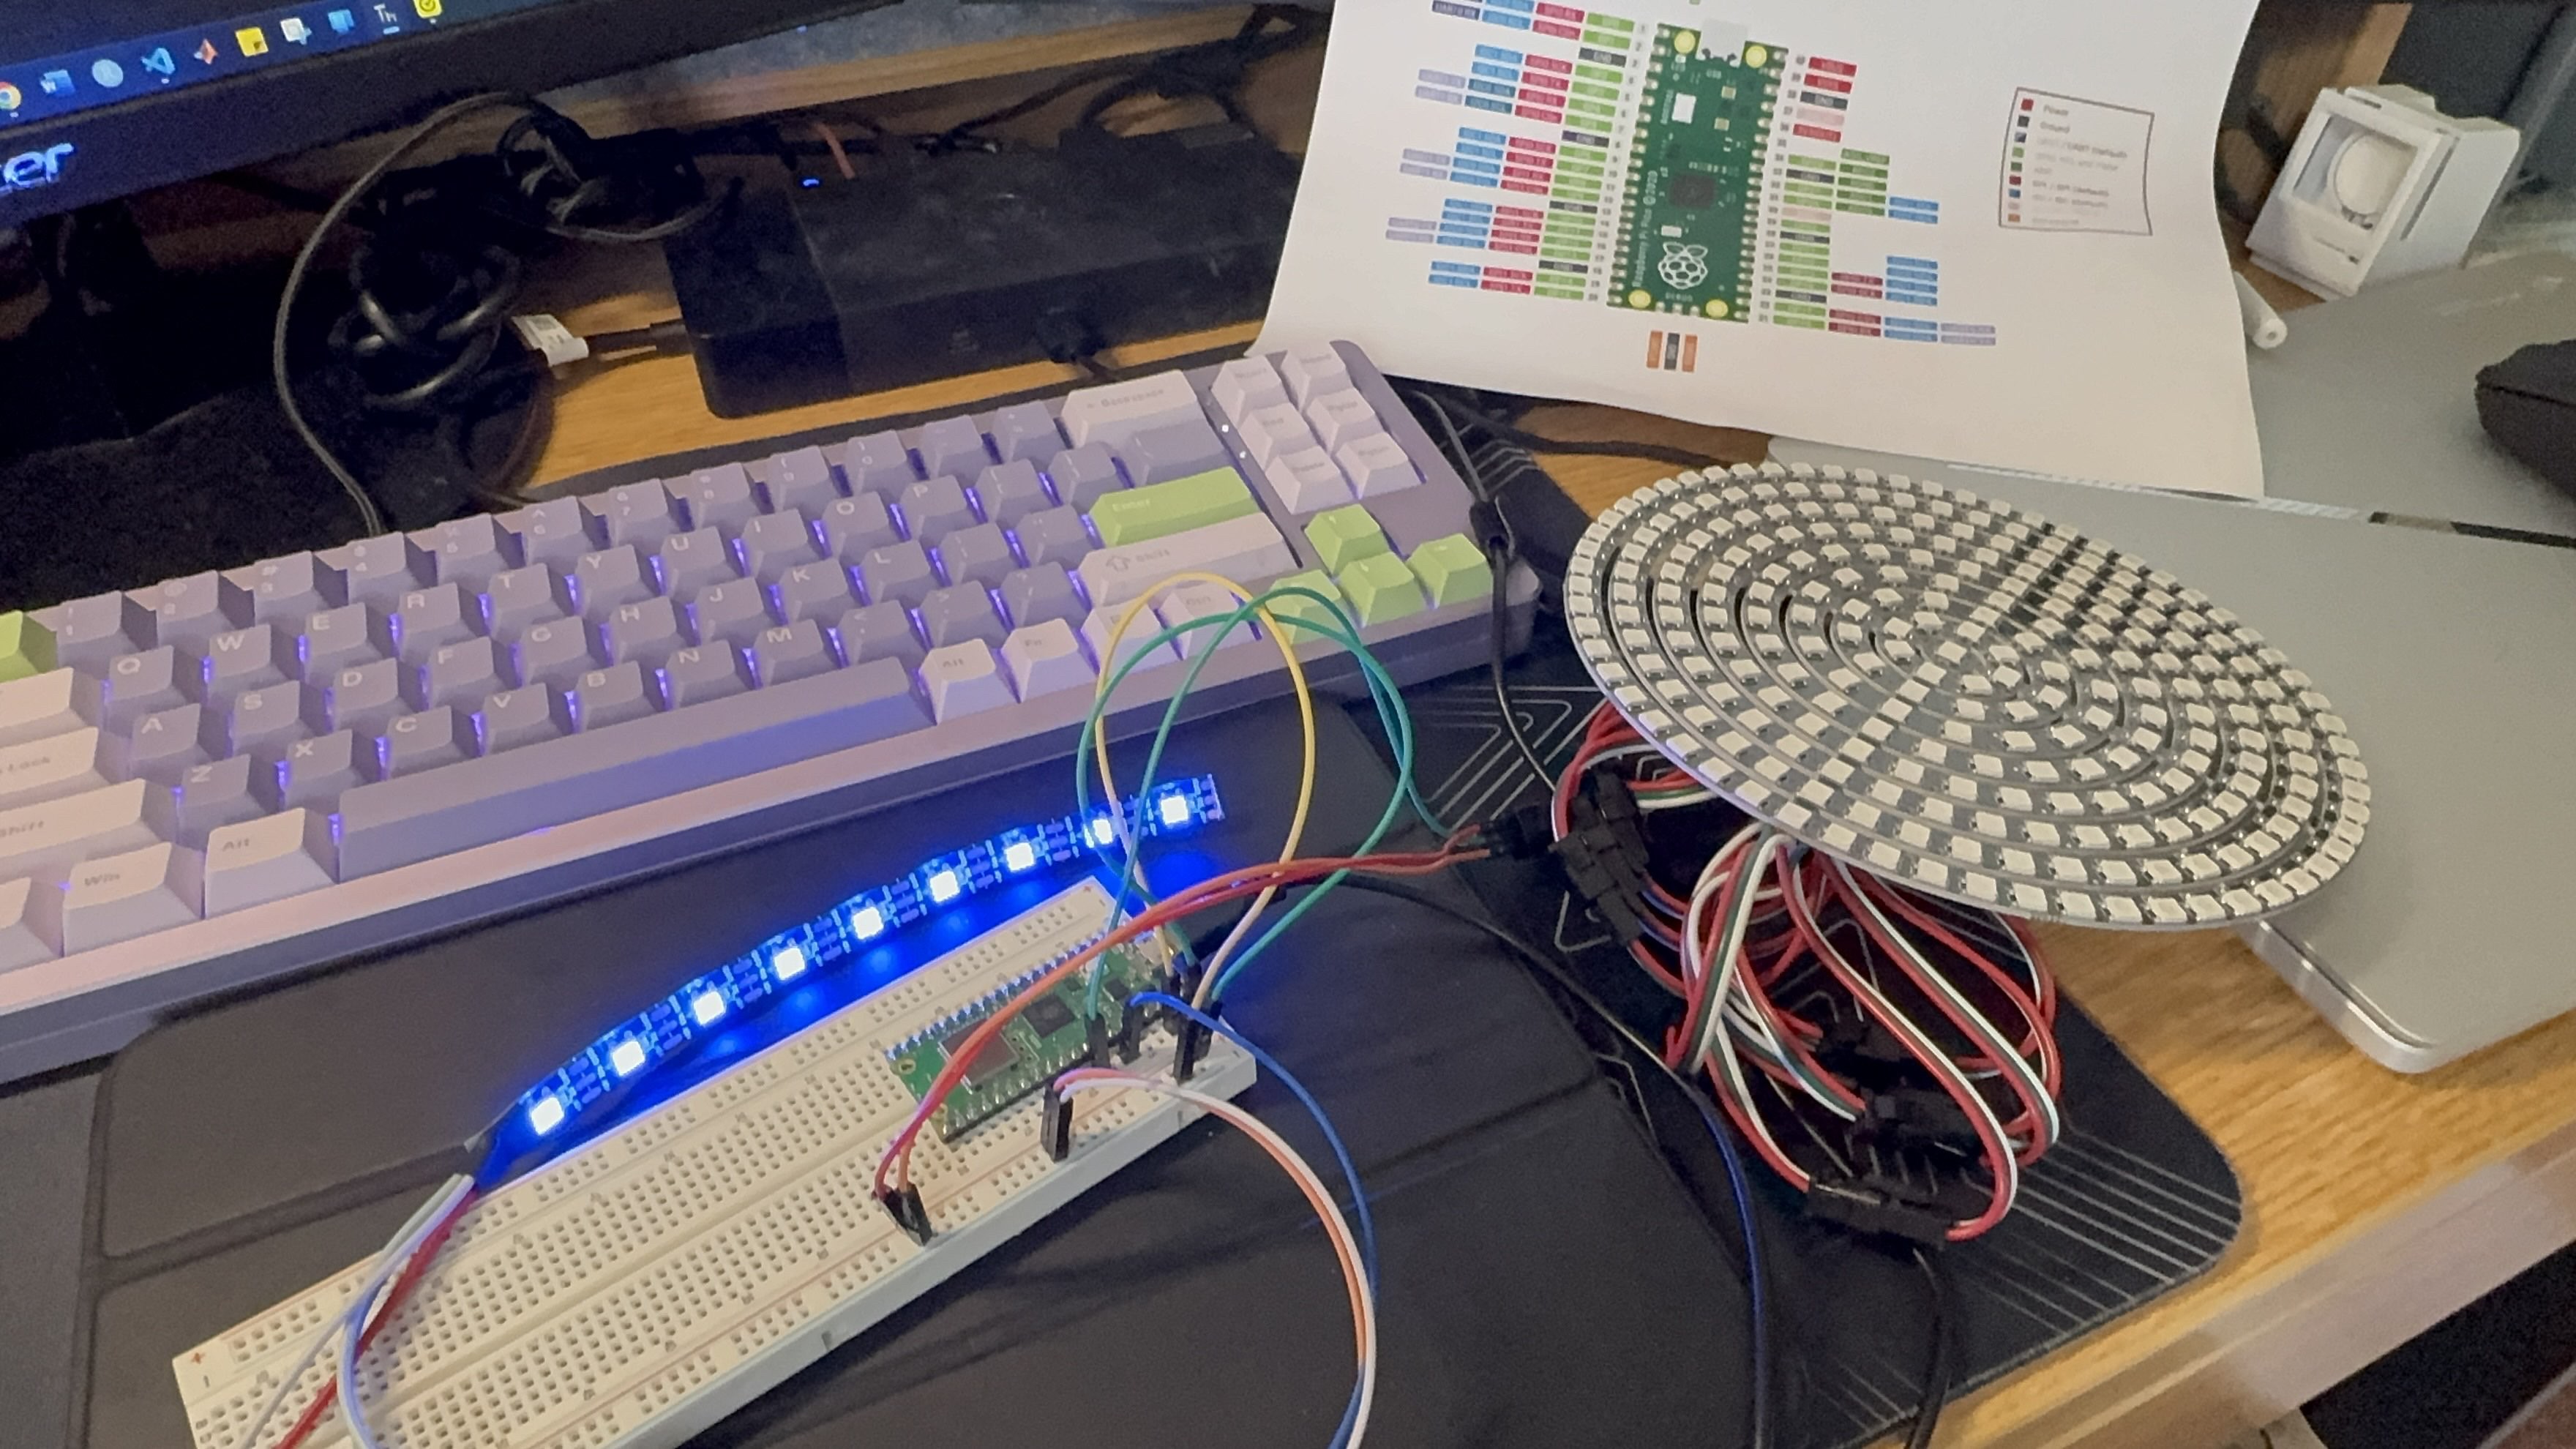
Inspired from Arcane, we decided to make a 3D-printed recreation of the Fish Bones device from the show. A sphere with RFID tags inside symbolized the Hexcore, which is a power source similar to a battery but more powerful. When the device is running all the LED strips and rings (approximately 100 individual LEDs), exhibit a red LED breathing pattern. When the RFID tags reader reads the presence of the tags, the device is being "powered," so the LEDs change to blue. Moreover, the articulate mouth can be moved upon pressing a button on the handle, which moves the jaw down with servo motors and also changes the LED pattern to cycle through as if loading. Note that all the motors and LEDs are separately powered with a lithium-ion polymer battery.

Power StateHexcore Detected?Button Pressed?LightingJaw Movement
Off--No lightingNo movement
OnNoNoRedNo movement
OnNoYesRedNo movement
OnYesNoBlueNo movement
OnYesYesBlueJaw goes down

Fishbones.zip

CAD files

x-zip-compressed - 3.78 MB - 03/14/2025 at 18:00

Download

data_read.py

Test file to read RFID tag number

x-python - 470.00 bytes - 03/10/2025 at 03:24

Download

LED_strip.py

Test file to test functionality of LED strips/rings

x-python - 1.70 kB - 03/10/2025 at 03:24

Download

servo_test_new.py

Test file to test functionality of servo motors (MG995)

x-python - 992.00 bytes - 03/10/2025 at 03:24

Download

ALL_parallel.py

Final micropython file to run all functionalities in parallel

x-python - 5.22 kB - 03/10/2025 at 03:23

Download

  • 6 × LED Strips Five 21 (individual) LED strips and one specialized 9 LED strip
  • 7 × LED Rings One 12 LED ring, two 1 LED connected to 8 LED rings, and one 16 LED connected to 24 LED rings
  • 1 × MFRC522 RFID Tag Reader
  • 2 × RFID Sticker Tags
  • 2 × MG996R Servos

View all 10 components

  • Final Week and Demo Day!!

    Pat Mutia03/10/2025 at 03:43 0 comments

    First we were testing out some of the LED rings and saw some of their connections had ripped, so they were fixed and resoldered. We taped connections together when routing all the wires throughout the device. Most of the wires were held in the tail and rib sections. The battery was routed outside along with the micro-USB to a laptop with the code.

    After all the LEDs were tested and connected to the battery, we started working on the servo motor for the jaw and realized one motor was not strong enough to carry the jaw without kickback, so we got another motor from Kevin. We realized that the mounting tape we had been using was not strong enough to hold the motors up, so we ended up creating bolt holes through the 3D-printed jaw to help. Although in the end, the jaw did not move in the correct manner, it had the initial workings to getting towards the motion we wanted. Moreover, the jaw was misaligned overall, so the movement would have not been what we 100% wanted in the first place.

    Then we mounted all the pieces together with double sided mounting tape. This was strong enough for most sections except the tail and ribs, where most of the weight of the electronics were, so we opted for duct tape. We kept the shield with the fin separate from the entire device to show off the electronics.

    We made teeth from modeling clay and painted on little designs on the device with Posca markers.

    Big thanks to Kevin and Fernando for helping throughout the term!

  • Coming Together!

    Pat Mutia03/01/2025 at 16:48 0 comments

    We laid out the entire body, which measured about 40 inches, so a little bigger than out initial 3 ft estimate. Once lined up, we realized certain parts would attach better to other parts if they had a bigger contact surface, so two parts were reprinted (yellow and blue).

    We also thought about how we would be attaching the back on top and realized our initial design was flawed (which had worked in the CAD) we have decided to use just one long piece instead of two

    We are currently designing a gear mechanism as the once we have found online don’t seem to be compatible with our design. We plan to begin attaching and spray painting some parts this weekend.

    For electronics, we started connecting everything together because Kevin figured out our problem with the battery was that it was severely undercharged. Then Pat resoldered connections together because they were tearing, so we switched over to the single solid core wires. Pat talked to Kevin and realized that we could just strip the solid core wire and put it into the female crimped connections of the other wires with connectors, so we will return many of the WAGO connectors. Pat also got another RFID tag for the sphere because the readings were not consistent.

  • Electronics Heavy Week!

    Pat Mutia02/20/2025 at 14:00 0 comments

    Pat has been soldering connectors to the LED strips and connections between the LED rings. She has also been testing them by connecting each individual component to the breadboard. She also soldered connections onto a new button with a different tactile feel because the pins do not fit the normal PWM crimped connectors.

    Currently, we have an issue with battery or the WAGO wire connectors. Pat has been testing a simple case of using the battery to power a single LED strip of 21 individual LEDS, but it has not worked although working on the breadboard. Pat talked to Kevin, and he suggested that the connections within the WAGO gates are not connecting properly, so we have switched from raw wire connections to the crimped connections and exposed approximately 10mm of the battery barrel jack wires. We also charged the battery to ensure it wasn't the issue either. However, the LEDs are still not lighting, so we are awaiting an answer for now..

    We eventually want to not have to connect the Pi Pico to Pat's laptop, so should we be powering the Pi Pico with a battery? Will it not run code without power?

    After this simple case is resolved, we can connect the rest of the LEDs! Pat and Kevin did the math, and our battery can approximately power 70 LEDs at full brightness. Currently, we approximately have 100 or more LEDs. So, we need to scale down the brightness with a scalar somewhere in the code to have about 2/3 of full brightness. The LEDs are extremely bright and look very cool B).

    Ale has been printing more of the ribs, the top fin, and started designing the head with the jaw and trigger handle. She also redesigned the hex core holder. 

    We are debating what servo motor to use to open the jaw because each piece has been around a pound or half a pound, so we are not sure if two micro-servo motors can carry that load or whether we should use a single bigger servo.

    NOW WE MUST PRACTICE CDR SLIDES!

  • Slow Midterms Week

    Pat Mutia02/15/2025 at 11:36 0 comments

    Ale starting assembling and taping the parts together and CADed a ring for mounting some of the parts together. She also printed an example gear mechanism to connect to the servo for the jaw of the shark for Pat to experiment with. Pat implemented a circling pattern for the ring alternatively to the breathing pattern but needs to experiment with syncing up chained LED rings.

    We went to the lab to start soldering the components together and got connectors for the battery. Pat needs to work on soldering the entire circuit with the battery together. Ale must work on CADing the shark head with the jaw and trigger handle.

    Things are coming together! We will update with more photos to come. 

  • Late Night with the Lights

    Pat Mutia02/08/2025 at 09:46 1 comment

    Got many new items! RFC tags! Knowledge on powering many components with the battery! More LED rings! Micro servo motor!

    After a busy day at the Techhub... Ale was able to obtain an open printer!! So, more parts are coming along.

    Pat worked on whether the RFID detects the RFC tag in parallel to the LEDs "breathing." This site was very helpful: RFID Reader Module. Problems to notice here are that the RED/no Hexcore mode is choppy in fading in and out because it takes longer to get the request from RFID when no RFC tag is present. We also want the transition to be smooth from RED to BLUE (i.e. when all the LEDs are off, switch the colors).

    VIDEO 1

    We realized that we were requesting the RFID to detect the presence of a RFC tag too often, therefore causing the choppy transitions. We only need to check the presence of the RFID within the period of fading in/fading out, which is approximately a 2-second period. Therefore, that allowed less interruptions to the LED brightness changes, leading to smoother transitions. Also, Pat added the changes to the LEDs' colors to occur in a stack (LIFO), so the changes would occur when the conditions of all the LEDs being off and the length of the list of colors being greater than 2 (indicating a need to switch) were fulfilled. Therefore, we get this:

    VIDEO 2

    Next things to work on: more 3D-printing, servo-gear jaw mechanism, and soldering power connections to the battery. Time to sleep...

  • LED Ring and Button

    Pat Mutia02/07/2025 at 19:43 0 comments

    LED Ring works! Now both LED strip and ring are passively breathing.

    Thank you to this website: https://electrocredible.com/neopixel-micropython-raspberry-pi-pico-ws2812b/

    Can easily add a button now.

  • More CAD and... LEDS!!

    Pat Mutia02/07/2025 at 19:07 0 comments

    Ale worked on creating CAD models for the top of the shark aka the Fin and Fin Holder. These parts are supposed to look similar to the 3D model. They are currently being 3D printed. We will continue working towards the head. Today, we will be printing an open close gear mechanism that will work with a servo to begin the jaw motion.

    CAD Images:

    Pat started working on LEDs and got help from Kevin on the Neopixel class. They tested out different methods for getting a "breathing" pattern on the LEDs, where it was more direct versus using a sine function. Then we set up a conditional to set up the structure for detecting the Hexcore. Pat is now playing with the LED ring and seeing if they can run both LEDS at the same time and separately. We also got our Li-Ion battery, so we need to see how to use that. 


    During our meeting today, we must ask about the NFC tags and how we can get longer wires. Also, we want to ask for a different colored button.

  • PRINTED 65% OF FISH BONES

    Pat Mutia01/31/2025 at 23:26 0 comments

    PDR completed! We also made our hackaday.io page!

    Ale completed more CAD of device (approximately 65% of the entire design). The next few parts are more complex because it involves the head, articulating mouth, and trigger handle. We've been printing every single day for this week. Pat got their 3D-printing certification on Monday at the Techhub but can't get into the Techhub or Caltech Hall.

    Current CAD of Fish Bones

    Printing in Progress
                                                                    We must remember to select tree-supports!
    All 3D-Printed Parts So Far...

    We purchased the double-sided mounting tape for connecting our pieces. We need to test out whether we have enough clearance to place the tape or if it strong enough to hold the pieces. We may need to print out additional L brackets or rings to fix into the design. This will let us mount each individual piece to each other because the inside of each part is hollow.

    Pat needs to complete the circuitry for the LED strips/rings and inquire about the NFC tags to replace the ultrasonic sensor.

View all 8 project logs

  • 1
    Begin printing 3D-printed parts.

    Using un-glossy generic PLA filament, print the parts at 15-30% filament with tree supports. They potentially take 2-17 hours to print depending on which part. The un-glossy filament allows for easier spray painting.

  • 2
    Solder connections for normal LED strips, LED rings, and the button.

    Use single core wire (recommended) to prevent ripped connections, rendering the strip useless.

  • 3
    Solder specific specialized LED strips and LED rings.

View all 9 instructions

Enjoy this project?

Share

Discussions

Similar Projects

Does this project spark your interest?

Become a member to follow this project and never miss any updates