mircemk
A hourglass, also known as an sand clock, is a device used to measure the passage of time. It consists of two glass bulbs connected by a narrow neck, through which sand flows from the upper bulb to the lower one.
The flow of sand is controlled so that it takes a set amount of time to completely empty the upper bulb. Hourglasses are often used as time management tools and decorative items. This time I will present you a very simple way to make a digital version of such a clock. This is another example in my collection of DIY unusual clocks which you can check out on my playlist. At first I tried to make the project with an Arduino Nano microcontroller, but it soon became clear to me that stronger performance was needed, so I used an ESP32 which is quite sufficient, even for a more complex project.
Honestly, my initial idea was to make a total simulation with the movement of sand according to the law of fluid motion using an IMU sensor, but at least so far I have not managed to completely realize that idea.
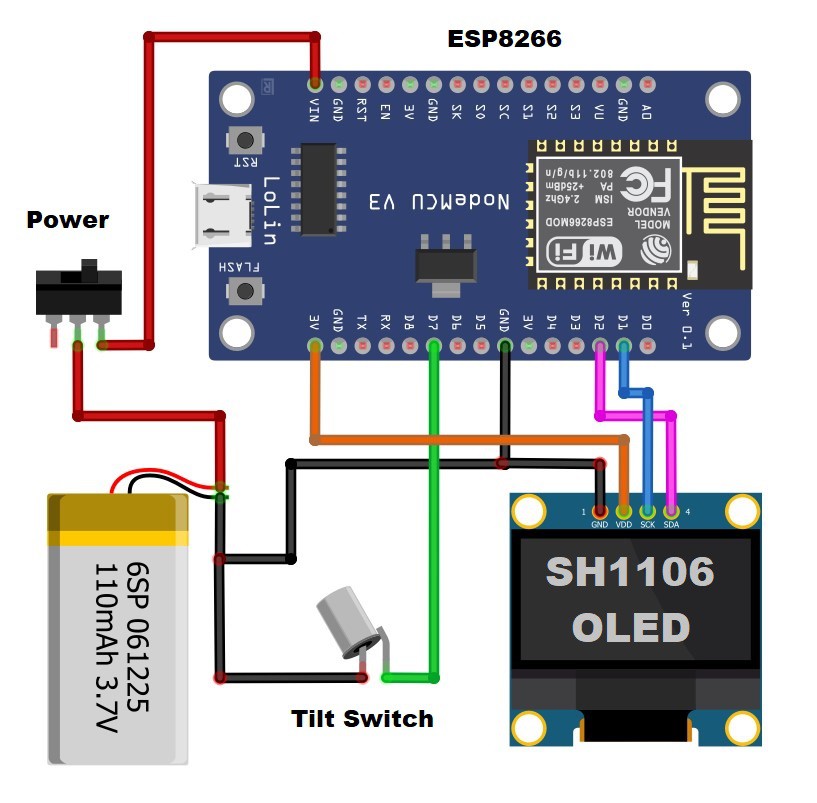
The device presented in this project is extremely simple to make and consists of only 3 components.
- ESP8266 microcontroller board
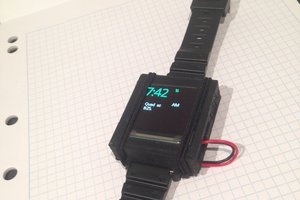
- SH1106 Oled display with resolution of 128x64 dots,
- and Tilt sensor
A single lithium cell is used to power the device.

This project is sponsored by PCBWay. They has all the services you need to create your project at the best price, whether is a scool project, or complex professional project. On PCBWayyou can share your experiences, or get inspiration for your next project. They also provide completed Surface mount SMT PCB assemblY service at a best price, and ISO9001 quality control. Visit pcbway.com for more services
The tilt sensor is essentially a switch that is in the open state when the legs are facing up, and in the closed state when it is rotated 180 degrees.
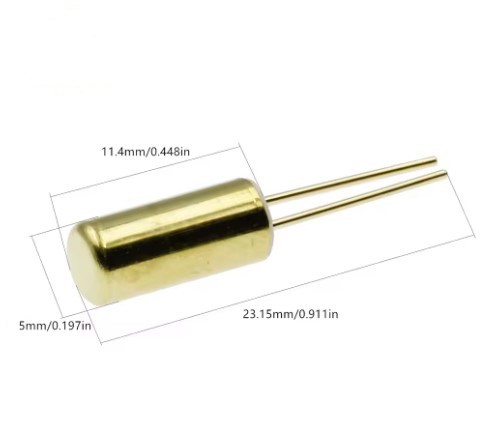
This component offers the simplest way to display both states of an hourglass while avoiding the use of additional sensors and libraries.
Now let's see how the device behaves in real conditions. Immediately after turning on the screen, the hourglass appears in the starting position and grains of sand randomly flow from the upper to the lower container. The time for which all the sand flows from the upper to the lower container is set in the code, and in this case it is set to exactly 1 minute. In the upper part above the hourglass, the percentage of time elapsed from the beginning of the flow to the moment of reading is displayed.
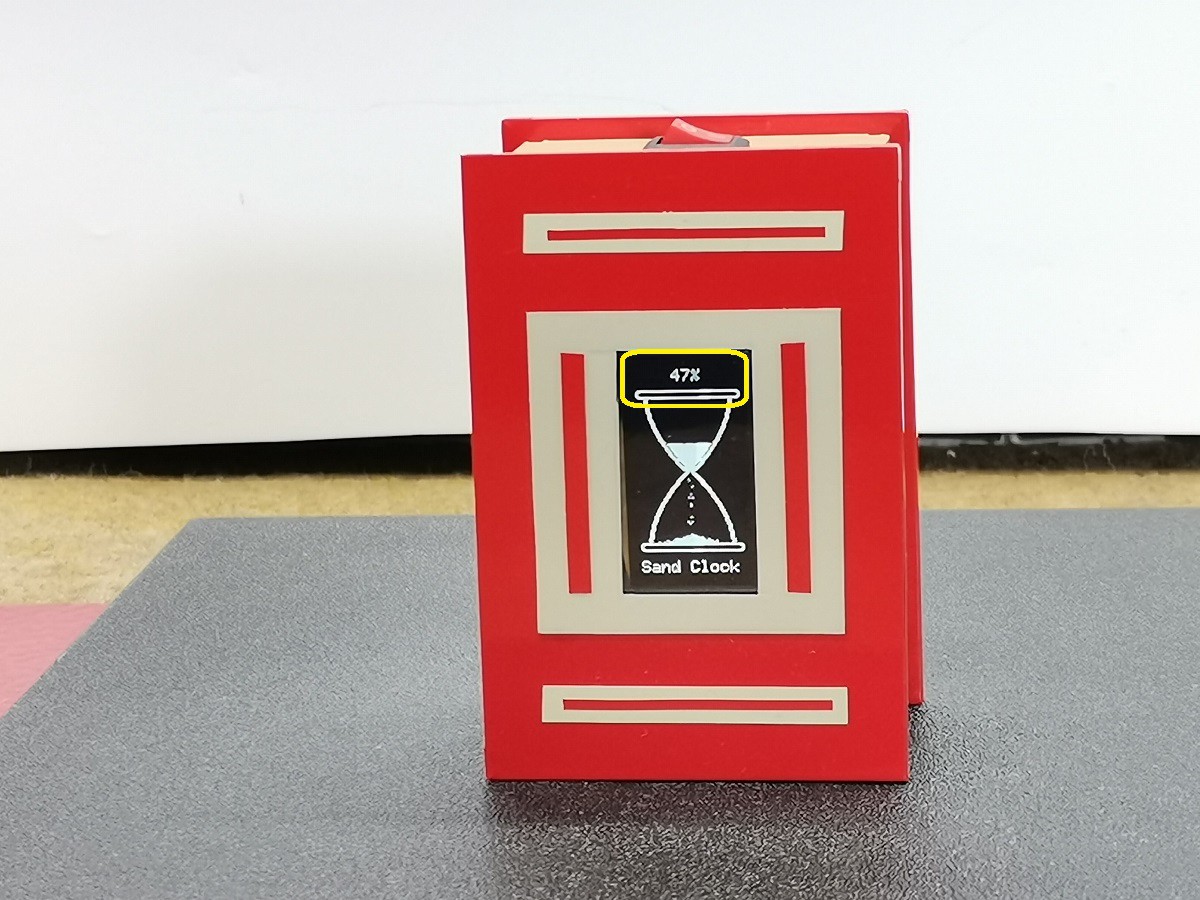
In this case, a certain animation can be observed in the upper and lower background as well as when the grains of sand flow in order for the hourglass to be as realistic as possible. When the sand runs out completely (that is in 60 seconds) we can turn the clock 180 degrees, and the countdown starts again. If we rotate the hourglass at any given moment, it starts counting down the time from the beginning.
Now a few words about the code. Namely, you can immediately see that it is not completely optimized, it is divided into several parts, but all in order to be easier to customize.
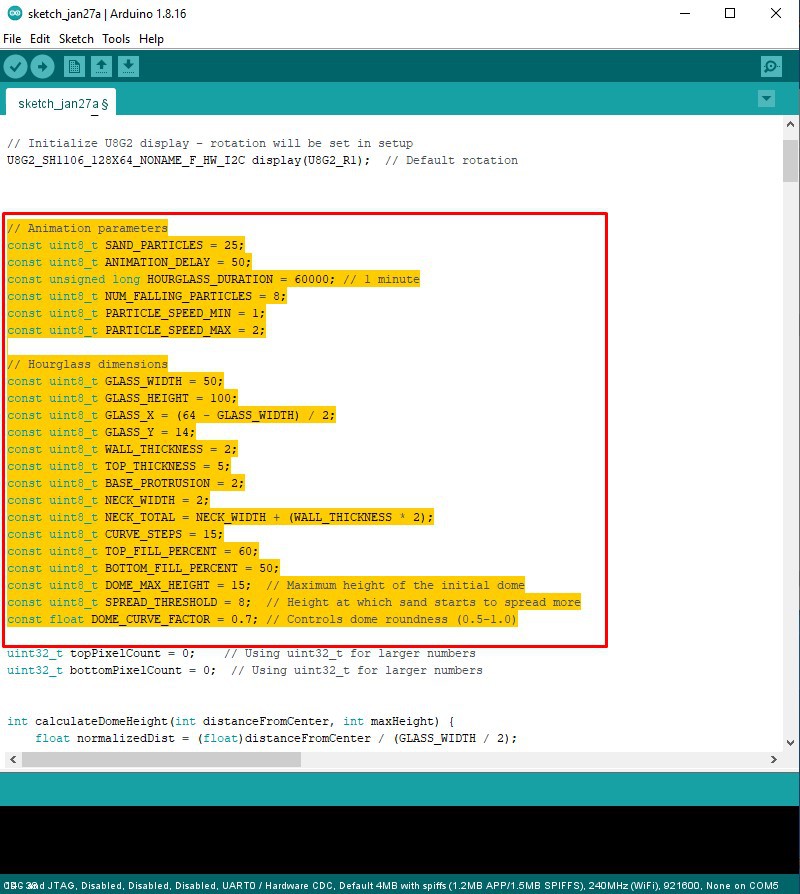
Very simply at the beginning of the code by changing the constants, you can change every parameter, starting from the size and shape of the glass container, the amount of sand, the duration and speed of the sand leakage, dome parameters, up to the intensity of the animation and the number of falling particles.
And finally, a short conclusion. A visually and functionally effective beginner project that only required three components to build, but at the same time highly customizable, so that we can almost unlimitedly change all phisical parameters according to our own idea of the way such a device should function. The assembly is mounted in a suitable box made of PVC board with a thickness of 3mm and covered with colored self-adhesive wallpaper.

 SereNada
 Austin Marandos