 Guillermo Vera
The making of this map can be split into a few sections: making a 2D map, making the 3D models, electronics and software and final assembly. Here I provide some details about each of these steps.
Making the Digital Map
In the past I have briefly worked with maps so I am familiar enough with some GIS tools to pull and combine data from various sources. The first step in this project was the map’s data needed to display the trains. The absolute must haves were:
- Manhattan coastline
- Subway routes
- Subway stations
I also wanted to show streets, but this was not strictly necessary.
The coastline of manhattan I was able to pull from OSM (Open Street Map) with a very simple Overpass query:
[out:json][timeout:25];
(
  way["natural"="coastline"](40.6839,-74.0479,40.8820,-73.9070);
);
out body;
>;
out skel qt;
The subway stations were also easily queried with Overpass:
[out:xml] [timeout:25];
 {{geocodeArea:manhattan}} -> .area_0;
(
    node["railway"="station"](area.area_0);
);
(._;>;);
out body;
The subway routes were trickier to get because I could also use OSM, but this approach had several disadvantages:
- The lines of the routes usually follow the train tracks underground which means they have some subtle curves that I would have to clean up later.
- The data has a line for each subway track, so one for each: northbound, southbound, local and express. I only needed one per color
- The data also includes the platform footprints, something I also don’t need
I found that New York City has an open data website with a lot of different sources. One of them was a subway line centerlines, exactly what I needed. Unfortunately it is no longer available in their website.
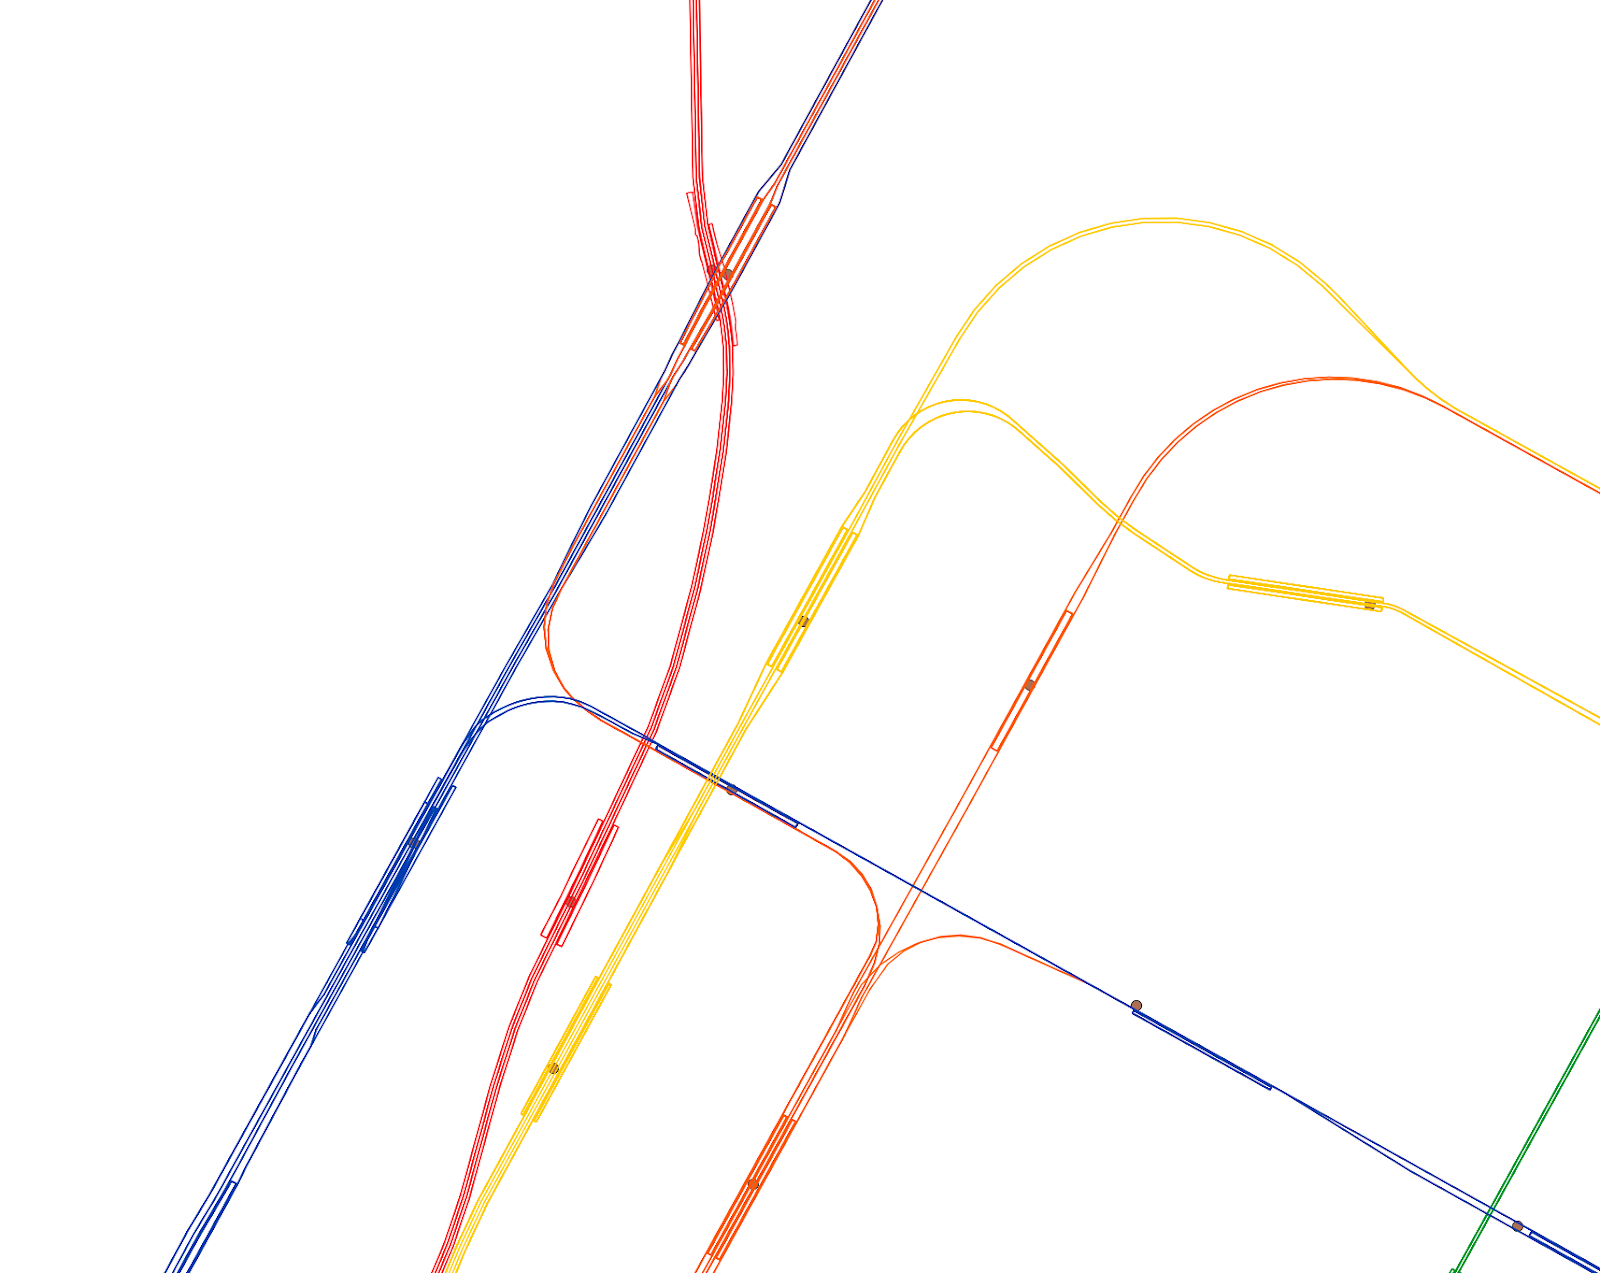
I combined all these sources in a QGIS project and exported a DXF file so I could clean up and edit the data for 3D printing. I used the ESPG:3857 Pseudo-Mercator projection. No real reason, it was the default and it looked alright so I kept it.
Real Data to Usable Data
I imported all the map data into Illustrator for cleanup. This was by far the most time consuming part of this project, in part because I needed to do a lot of tweaking and in part because of my inexperience with Illustrator. The map data is highly accurate but it also means it’s impractical for 3D printing: very thin lines represent subway lines and streets, stations are just points (no area), overlapping stations, overlapping subway lines and many other small issues.
To make the map 3D printable I did the following:
- Removed all coastline data that wasn’t part of Manhattan
- Removed coastline features that were too small to be 3D printed correctly
- Made all streets and subway lines thicker lines, then outlined them to turn them into polygons
- Added two circles per stations and move them around so they would be close to the original location but without overlapping
- Wrote a custom Illustrator script to remove all polygons that were too small to 3D print
- Played around with the position of subway lines so they would be close to their original location but without overlapping
This sounds simple but it took many, many hours of very fiddly and manual labor. This was an iterative process where I would make changes to the 2D map, then export the map as an SVG, create a 3D model and either slice it or even print part of it to see how it would look.
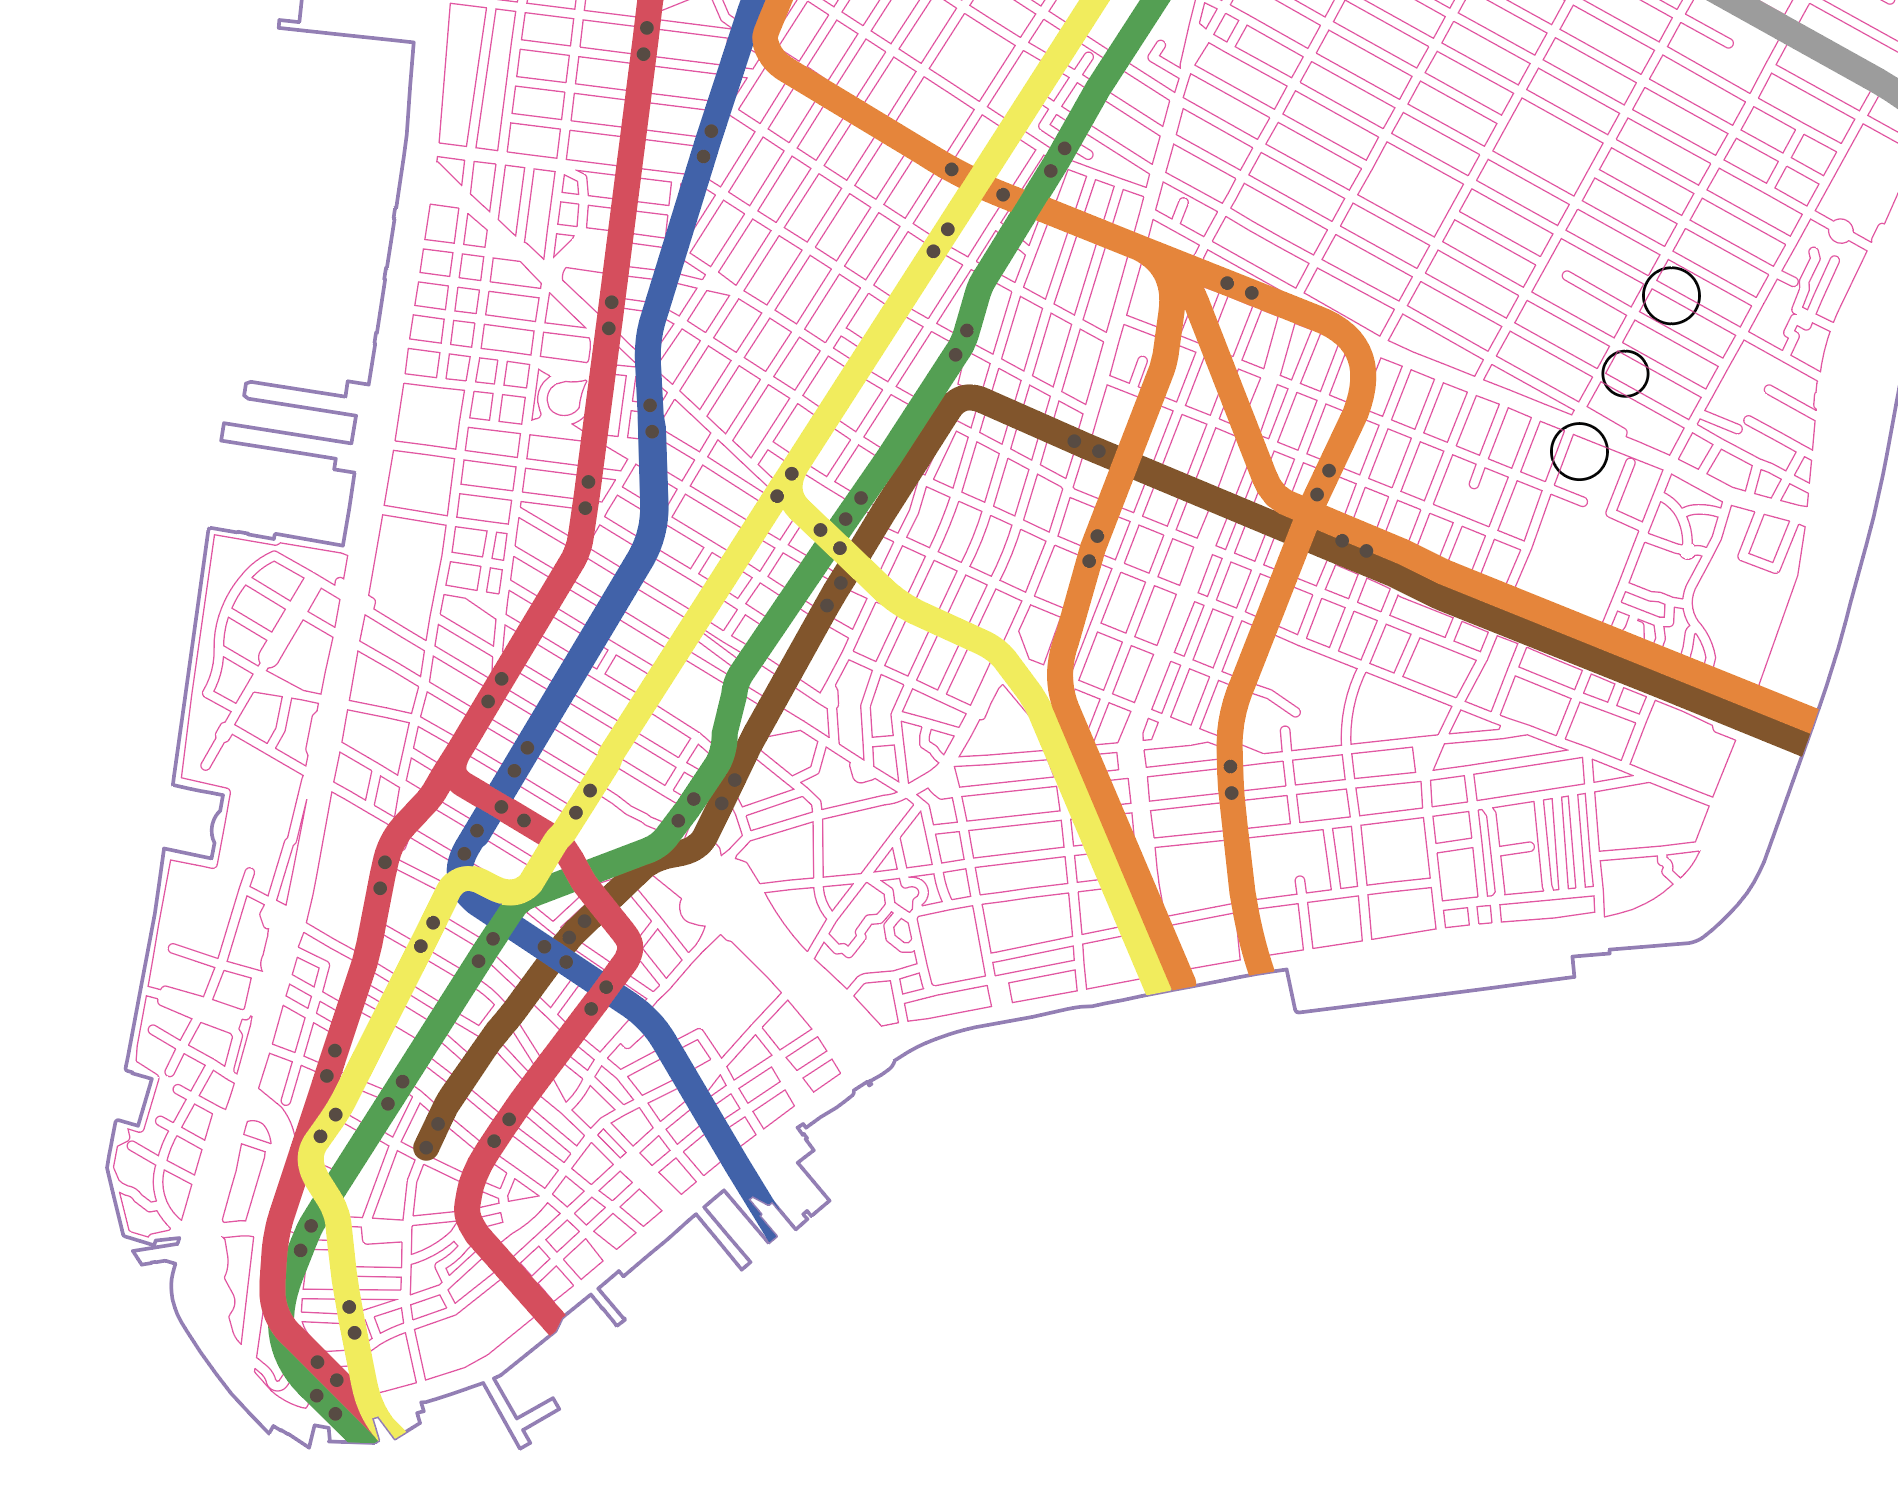
In the end, the Illustrator map also had additional layers that I would use for features in the 3D model, like the 3 black circles in the image above which represent the location of posts and threaded inserts to attach the base of the completed map to the top.
Making the 3D Models
Polygon Cleanup
I tried creating the map with OnShape and Fusion 360, both of which failed, either by slowing down to a crawl or crashing due to the number of polygons. Even the island alone was enough to make both of these struggle, the buildings/streets were a non-starter.
I decided to use OpenSCAD which I had never used, but it turned...
Read more »