Close
0%
0%

Turbo Lexus IS200 (on the cheap!)

Improving the performance of an IS200. Goal - Under £1000

Similar projects worth following
Lexus IS200's are very cheap in the UK. You can easily pick a nice one up for £1000. The reason they are so cheap is that they use a lot of fuel and they aren't really very fast. I aim to solve that but I don’t want to spend too much money on the project. I could just buy a faster car after all... This will be an exercise in sourcing the cheapest parts through ebay and alternative manufactures (hand rail suppliers for exhaust tubing for example)!

The aim of the project is to fit a turbo charger to the engine and reliably make the car faster. There are a few main areas of work to consider

Engine management (ECU)

I will be using a microcontroller (Arduino or similar) to supply more fuel to the engine when required. Extra fuel will be calculated by comparing the engine RPM and boost pressure to values in a look up table (the fuel map).

The factory ECU will be responsible for normal running of the engine. I will be adding fuel and adjusting timing where needed. I have a couple of ideas on how to do this which will be discussed in the build logs.

Exhaust Modifications

The exhaust and Inlet manifolds need to be plumbed into the turbo. I will make a new exhaust manifold to the turbo using laser cut flanges. The manifold will be steel to save costs and ease of fabrication. Stainless manifolds require back purging of the inside of the manifold to stop corrosion. This uses allot of argon which is costly. The output of the turbo will connect to the existing exhaust. I intend the turbo exhaust side to be a straight swap with the existing exhaust headers.

Inlet Modifications

The cold side of the turbo will pass through an intercooler mounted inside of the front bumper. There is already a grill of good dimensions available. I don’t want to have to cut any part of the front of the car to keep it looking stock. Plumbing will be aluminium pipework made to accurately fit the engine bay with a minimum of silicone joiners.

Turbo Sizing

I am not going for an enormous increase in power by turbo project standards (+80HP) and I want the car to be driveable. I need to accurately size the turbo to the car to avoid turbo lag. On a whim i brought a second hand turbo from a Saab 9-5, part number TD04-15T, originally from a 2.3L 230HP engine. We will see how this goes...

Turbo oil feed/drain

The oil drain is now fed through a port in the sump originally used by the oil level switch.

ChineseGT285BoltFlange.dwg

DWG Drawing - 23.98 kB - 02/01/2018 at 15:25

Download

DashDisplayR3.zip

Arduino sketch running an LCD display on the dash. This recieves data via UART and also feeds data out of the usb serial port for logging. Also displays text and audiable alarms.

x-zip-compressed - 2.04 kB - 11/20/2017 at 22:05

Download

PiggyBackSoftwareR07.zip

Current software running on the piggy back controller. Runs the engine well at around 450 mBar of boost. Runs on Infinion Dave

x-zip-compressed - 7.06 MB - 11/20/2017 at 22:02

Download

PiggybackDesignR01.pdf

Current piggy back design. Running well in the car.

Adobe Portable Document Format - 62.83 kB - 11/20/2017 at 21:59

Preview

Part005R1 Turbo Exhaust outlet.dwg

Part checked to fit

DWG Drawing - 131.26 kB - 04/05/2017 at 10:23

Download

View all 9 files

  • 1 × Ebay aluminium tubing kit. 2.5'' This is theBay kit that contains 2 straight lengths, 2 x 45° bends, 2 x 90° bends, 2 x 180° bends, joiners and clamps
  • 1 × Universal intercooler 550x140x65mm 2.5'' conections welded on
  • 1 × Various sheet steel, aluminium etc
  • 1 × TD04HL-15T Turbocharger Seem to have been suppled with a number of cars. Mine had the round 3 bolt exhaust outlet
  • 5 × Laser cut flanges See files section

View all 11 components

  • 2000Km Turbo Test

    Rory02/01/2018 at 15:46 0 comments

    So after having the new turbo installed for 2 weeks and covered 100 miles I decided to go on a last minute ski trip in the French alps. Rather than booking flights I thought I'd just take the car. This was a 2000Km round trip from london. Luckily the turbo didn't blow up, the electronics survived the sustained low temperatures and I arrived safely in the alps. The turbo must have been assisting the high-altitude performance, quite an exciting drive for the last few miles!


    I even got home without issues and the turbo is still working! How can this be done for £120 delivered?

  • New Super Cheep Chinese Turbo!

    Rory02/01/2018 at 12:15 0 comments

    So after the track day I knew that the Saab 9-3 turbo was too small for my engine. Although in normal driving the turbo added power at low RPM where you need it, on the track performance could have been better. That's why i started the whole project after all. Also in normal driving i was getting very rich AFRs probably due to the small turbine housing restricting the exhaust.

    I had some spare pay pal cash and one lunchtime the temptation got the better of me and I ordered a very cheep brand new turbo off Ebay. This was totally at random without any research. Didn’t even think about the size. Just ordered it.

    To be fair I did do a little bit of googling about the quality of these parts. There were a few reports of turbos blowing up but they must sell thousands of these. I reasoned that they were half decent.

    So this turbo cost £120 delivered. I assumed it must be shipped direct from china for that price so sort of forgot about it. This was the week before Christmas.

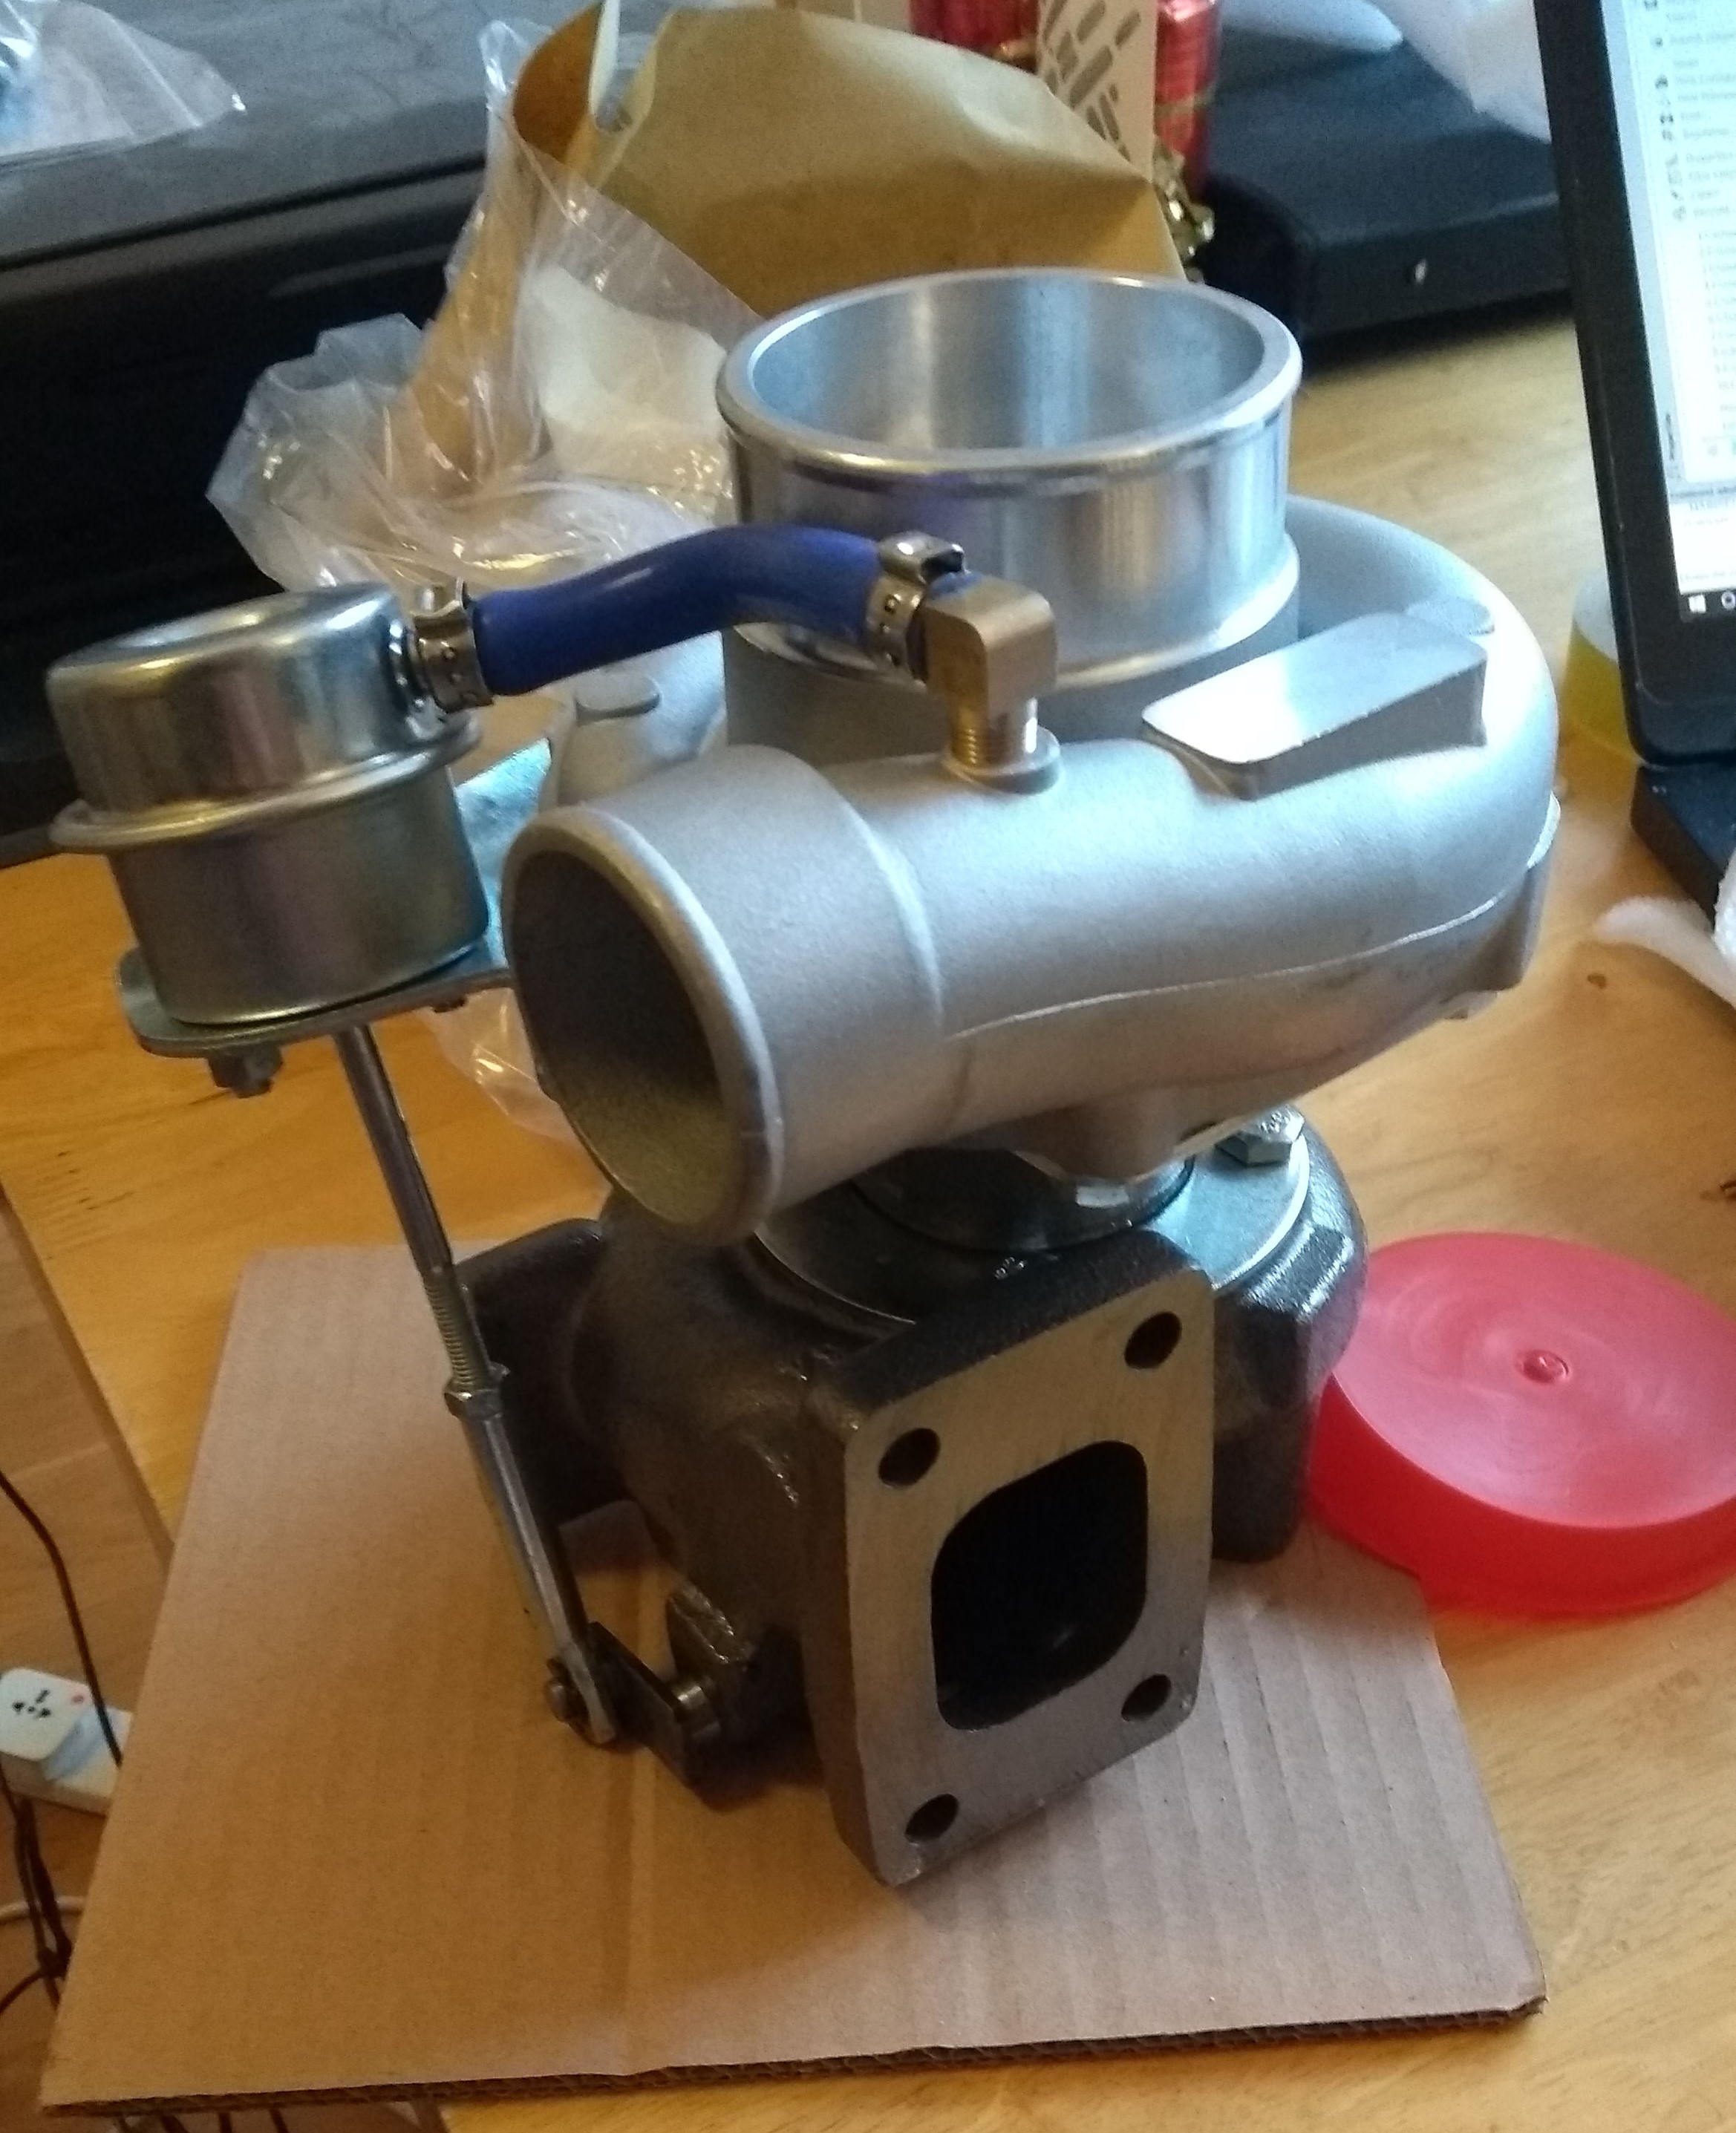
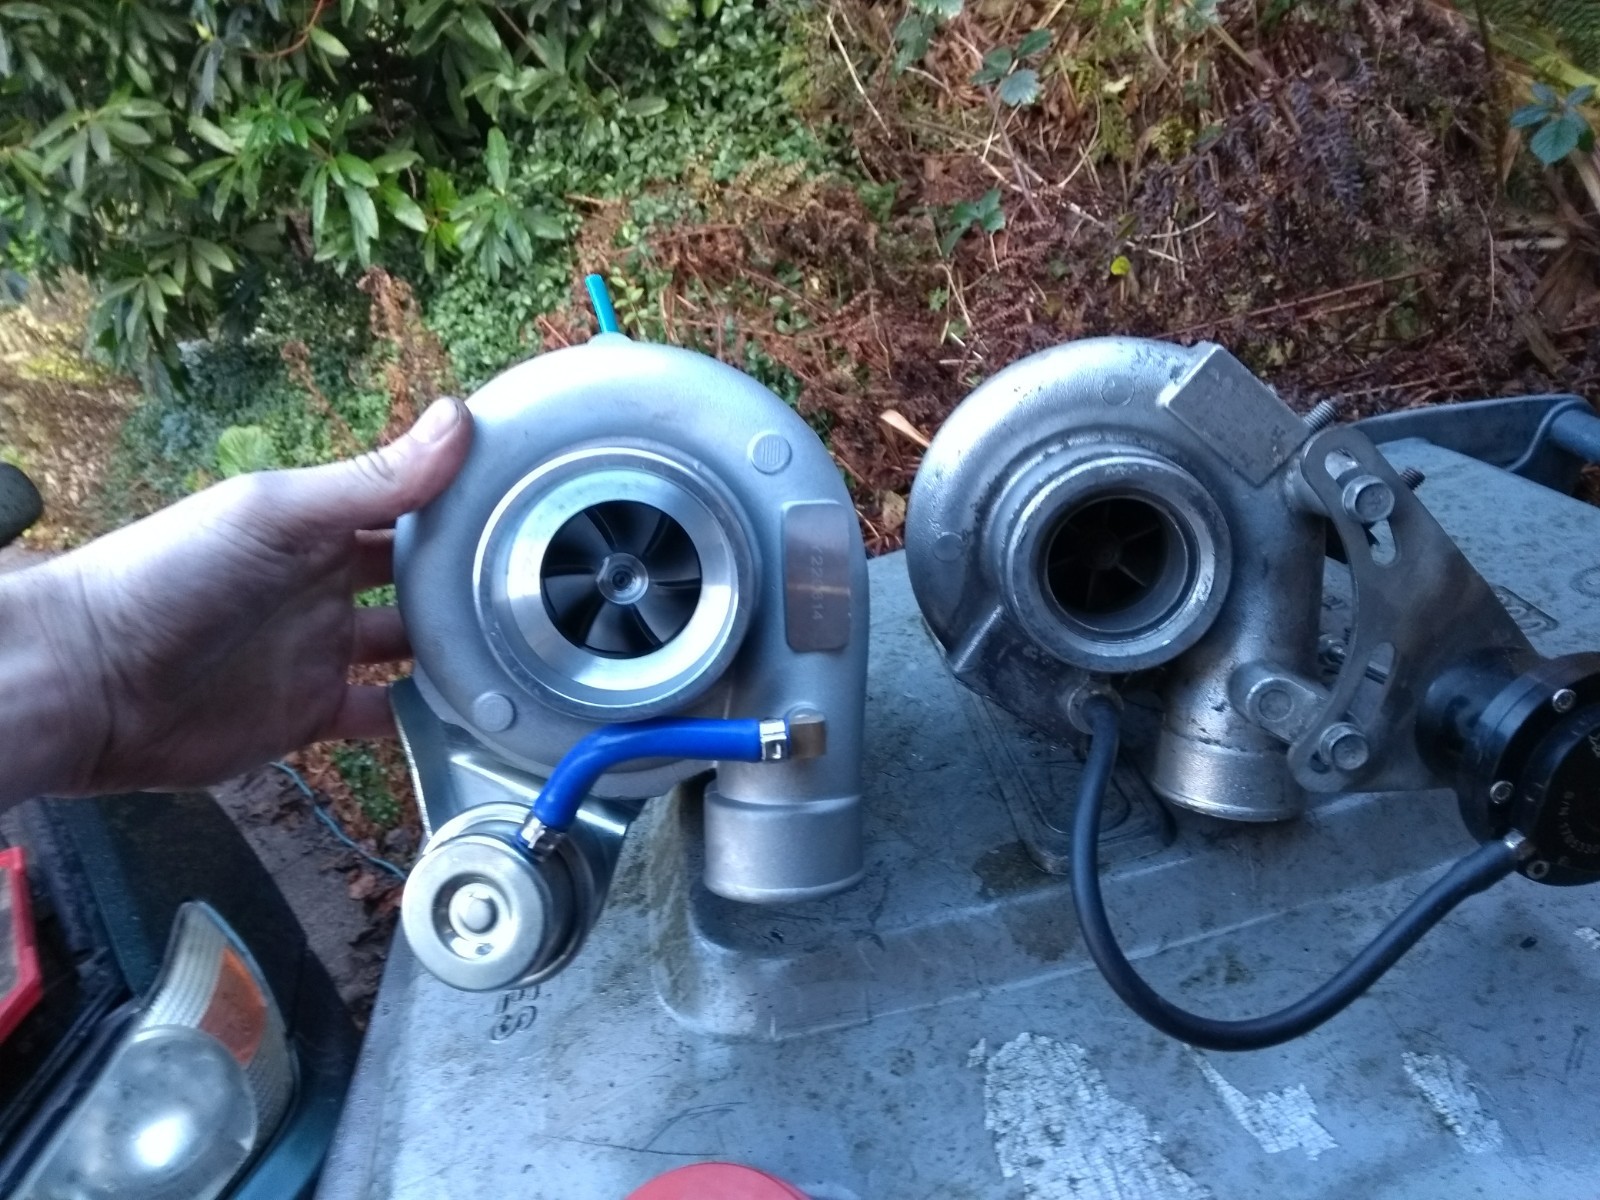
    I ordered a GT2871 Garrett copy. The manufacturer seems to be called 'maxpeedingrods'

    To my surprise, a few days later the turbo arrived! it was a real turbo, the quality seemed really good. how can anyone make a turbo for £120?

    It came with a well written instruction book which was actually very useful and a few gaskets and bits and pieces,

    I suddenly realised that i could use the Christmas break to fit this while I was back at my parents place. This was the last trading day before Christmas and I needed a few parts due to differences to the old turbo:

    • Exhaust outlet flange - No time to order one. will have to make from scratch
    • Exhaust outlet gasket - Couldn’t get hold of one. Will have to use exhaust paste
    • Compressor Inlet silicone joiner - The old turbo has a 2" inlet. New has 2.5" managed to get a 2.5" to 2" reducer from burton power in east London
    • Oil feed banjo bolt - different M12 thread - I actually had one of these from ordering the wrong parts last time.
    • M14 banjo fittings for coolant lines - This was a bit of a pain, I couldn’t get any. All of the hydraulic suppliers were closed. A stroke of luck though, M14x1.5 is almost the same as 1/4"BSP plumbing fittings. I managed to use these to bodge something up to drive the car home.

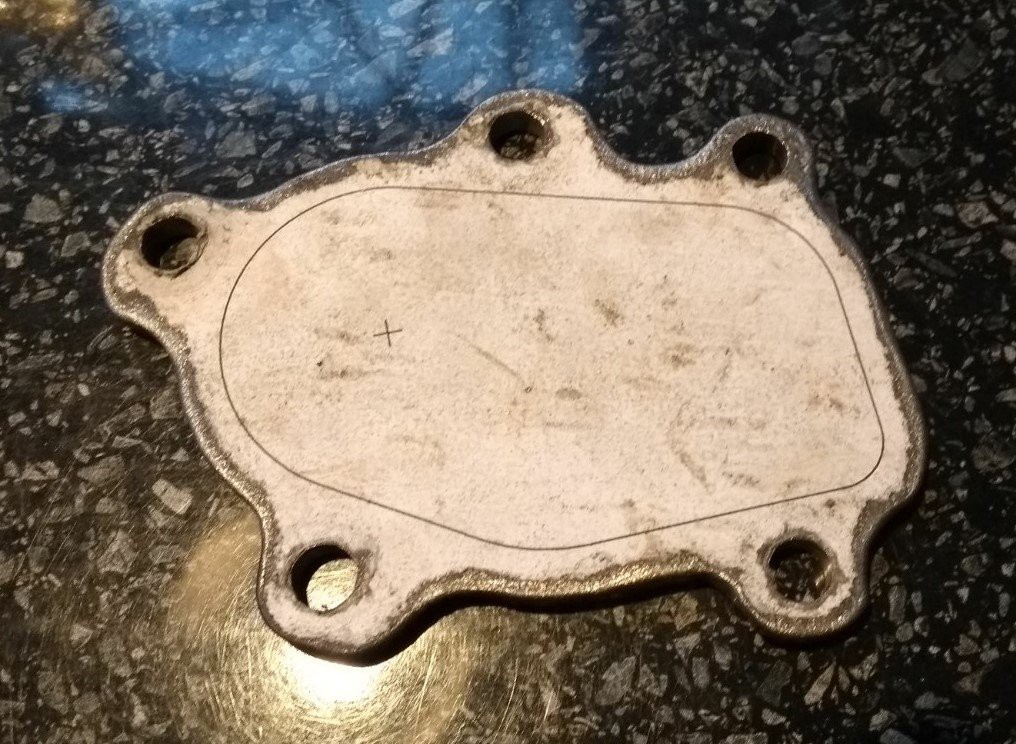
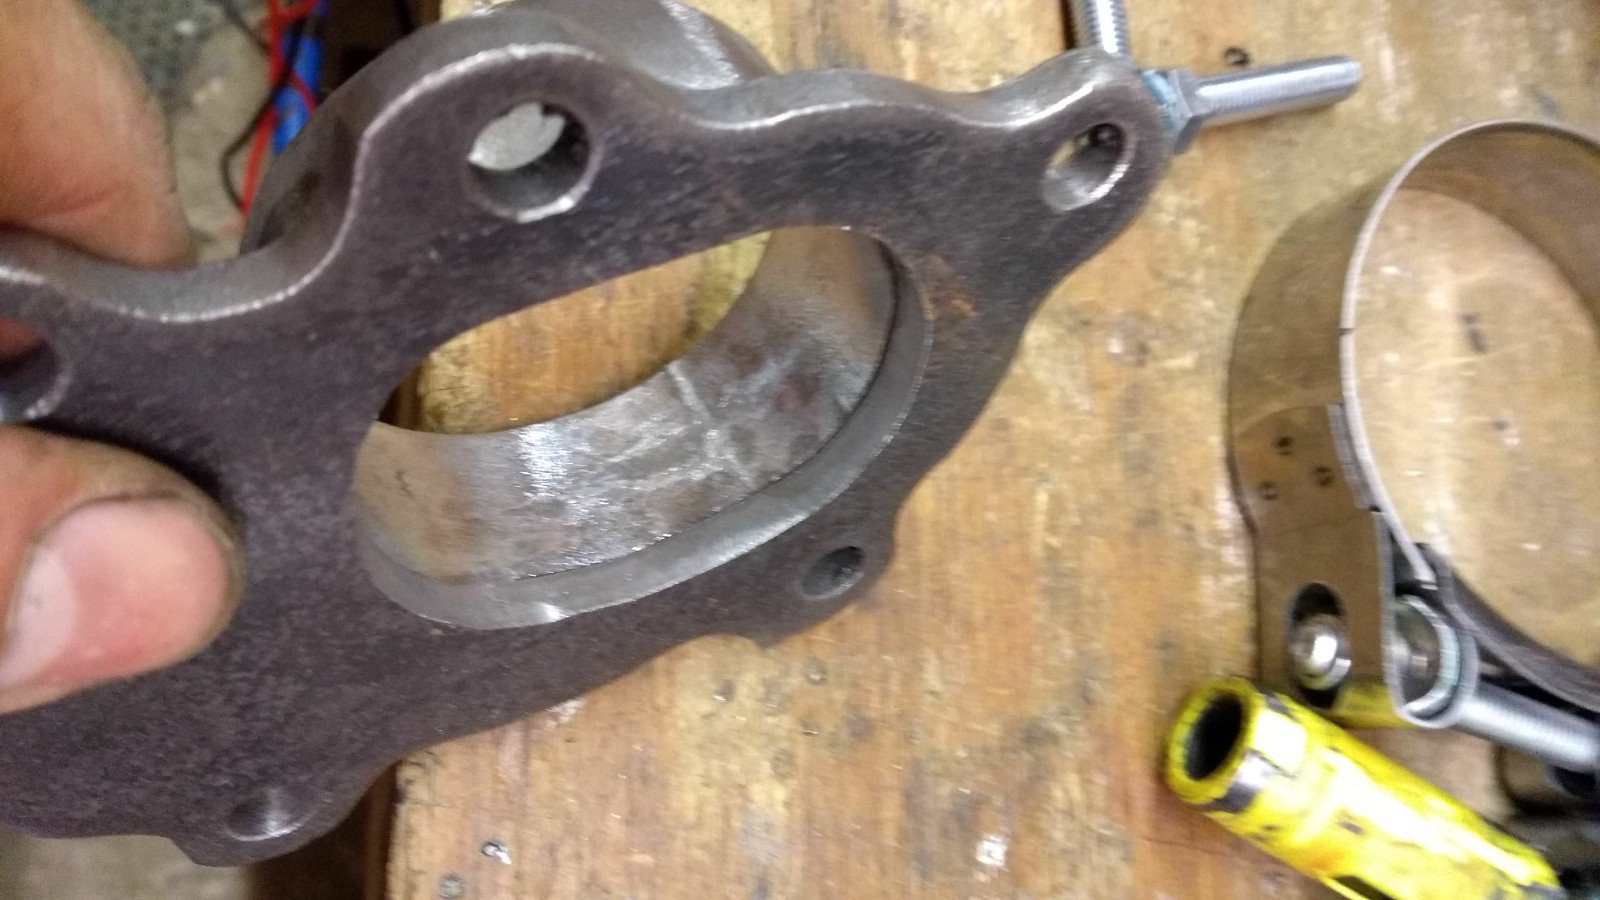
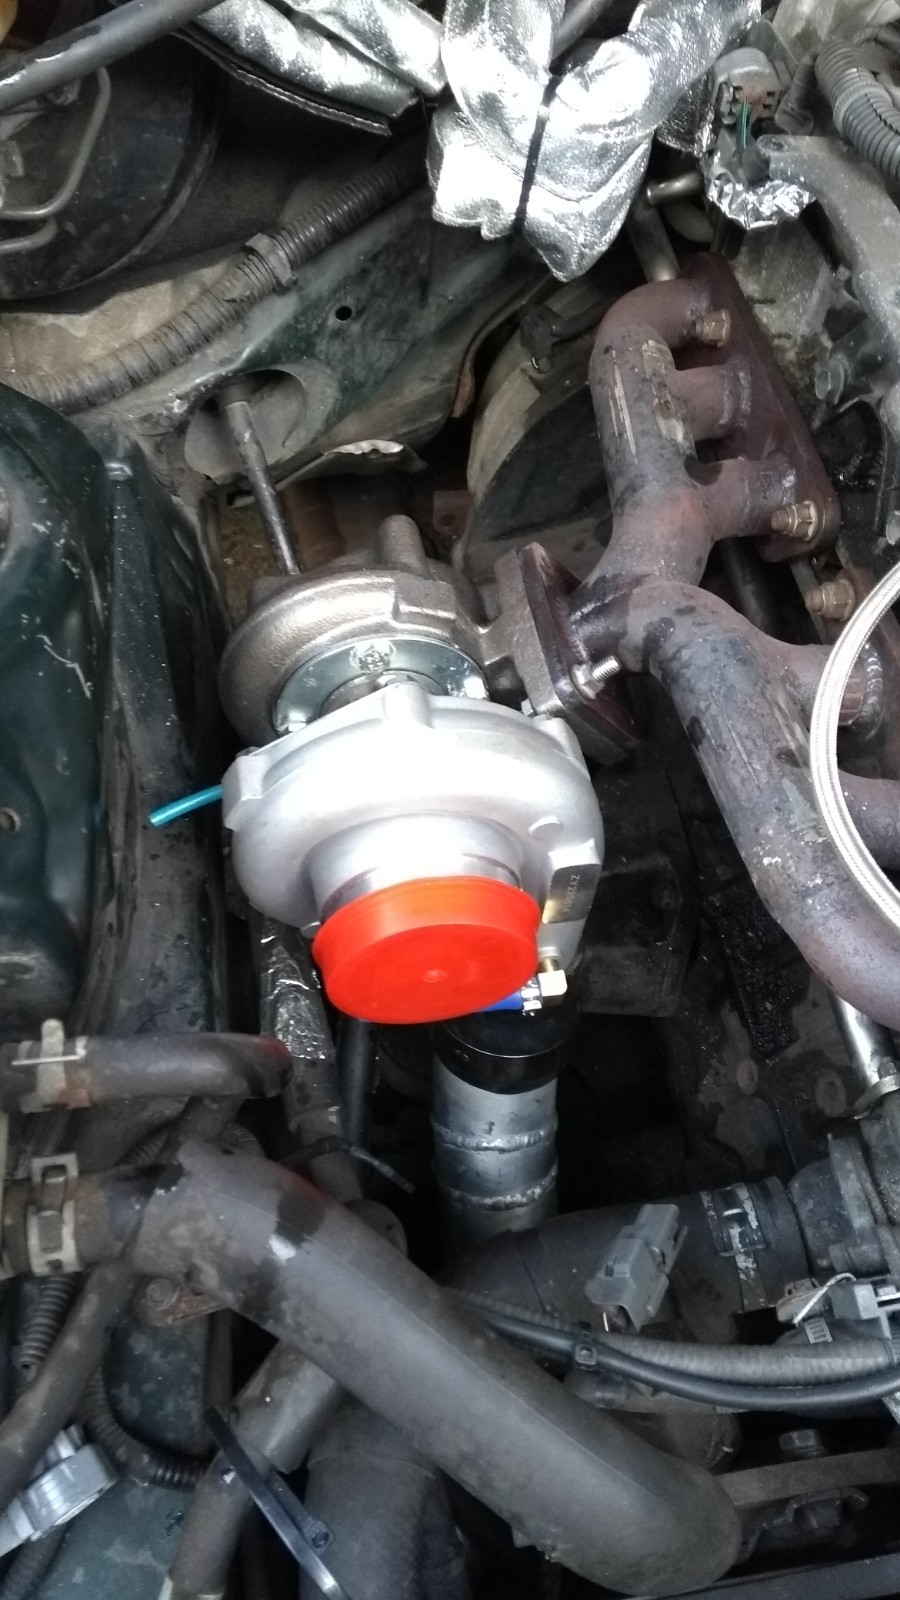
    The first step was to make the turbine outlet flange. I downloaded garret's datasheet for a GT2871 and draw up the flange in cad. I printed out the design and found the exhaust housing on the turbo is not quite the same as the original. A normal 'garret 5 bolt flange' as they are known will not fit these turbos. The gaskets will fit and seal but you need to trim off a corner of one of the bolt holes. I will put my flange design in the files section

    Made from a piece of steel plate.

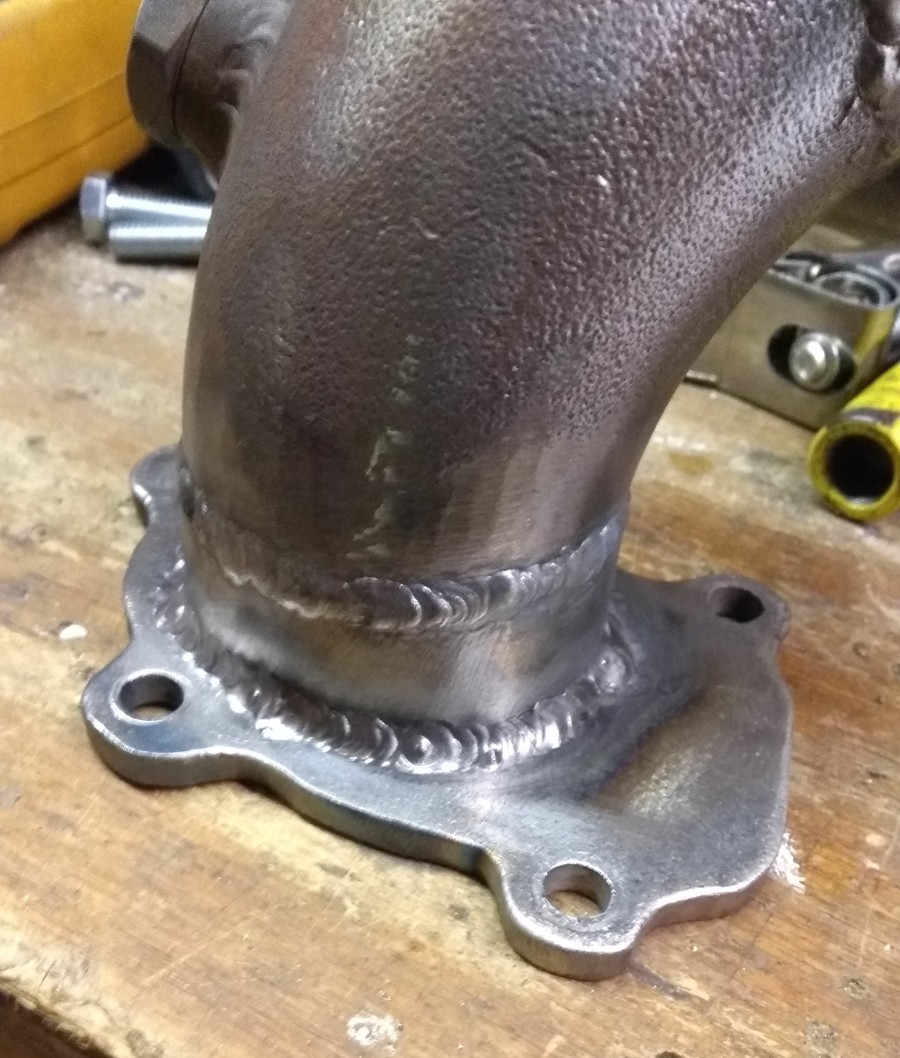
    I chopped off the old flange from the down pipe and fitted the new on

    The exhaust inlet is the same flange so that bolted straight on.

    The compressor inlet and outlet bolted straight up after rotating the housings to the correct position. Coolant lines and oil feeds not shown here. The coolant lines were lashed up with some 1/4"bsp to 8mm copper compression fittings. A short length of copper linked to the coolant lines. These have now been replaced with the correct bits!

    Apart from working in the snow and in the dark it wasn’t that difficult a job.

    The first test drive was a bit disappointing. The turbo wouldn’t spool up until about 5KRPM. 'the turbo is much too big' I thought. Testing revealed that the wastegate on these turbos needs quite allot of preload to seal properly. Once that was sorted it was building boost from about 3.5KRPM. I am using the wastegate actuator supplied with the turbo. The instructions advised that the spring was set to .5BAR boost pressure.

    Performance is now much better at high RPM. with .5 bar all the way to the red line. A slightly smaller turbo would be better if you’re doing this yourself but for £120 you cannot argue

    Old vs new


  • Track Day

    Rory02/01/2018 at 11:33 0 comments

    So, the first proper test of the car, a full day ripping it at Brands Hatch. The day went well, no blown up engine. The car was much better out of the turns as the turbo comes on very early giving a big boost in torque.

    I was able to keep up with some much quicker cars, at the end of the day I was following a new M3 and they had to let me past. Must have been lacking driver skill as the engine is advertised with 425BHP!

    The conditions during the day were 'interesting'. The morning started very wet and cold. The track was incredibly slippery, and cars were spinning all over the place with a few expensive cars hitting barriers. At one-point I was following a track prepped Golf down paddock hill (notorious fast off camber corner). He spun off into the gravel, wheels dug in and he rolled 360°. Nice dent in the roof...

    Don’t let me put you off doing a track day though. Normally nobody crashes, and everyone has a good time.

    However, I observed that at high RPM the turbo compressor was well out of its performance range and the boost pressure was dropping down to almost zero. I think i need a bigger turbo!

    Need to think about this as the car is currently working quite well.

  • Blow Off Valve

    Rory02/01/2018 at 11:21 0 comments

    While collecting parts for the project, in my cheap as possible style I brought a second hand VAG diverter valve to act as the blow off valve. My reasoning was that I would just divert the boost pressure to atmosphere rather than back into the intake, as VAG intended for this valve.

    However, the valve didn’t work as expected. The first problem was that on idle (high inlet vacuum and no boost pressure) the diverter valve would open, sucking in unfiltered air from behind the radiator. Not ideal.

    The second issue was that the valve didn’t seem to open when it was supposed to (coming off the throttle on high boost) this would cause the turbo compressor to 'surge'. This is bad for the turbo, also it makes a very loud 90's boy racer noise 'zoot zoot zoot' noise. Initially i loved this but I quickly grew tired of it.

    I reasoned that perhaps the vacuum source I was picking up from was unreliable (vac source for the inlet manifold actuator) and tapped into the line for the brake servo. This made no change.

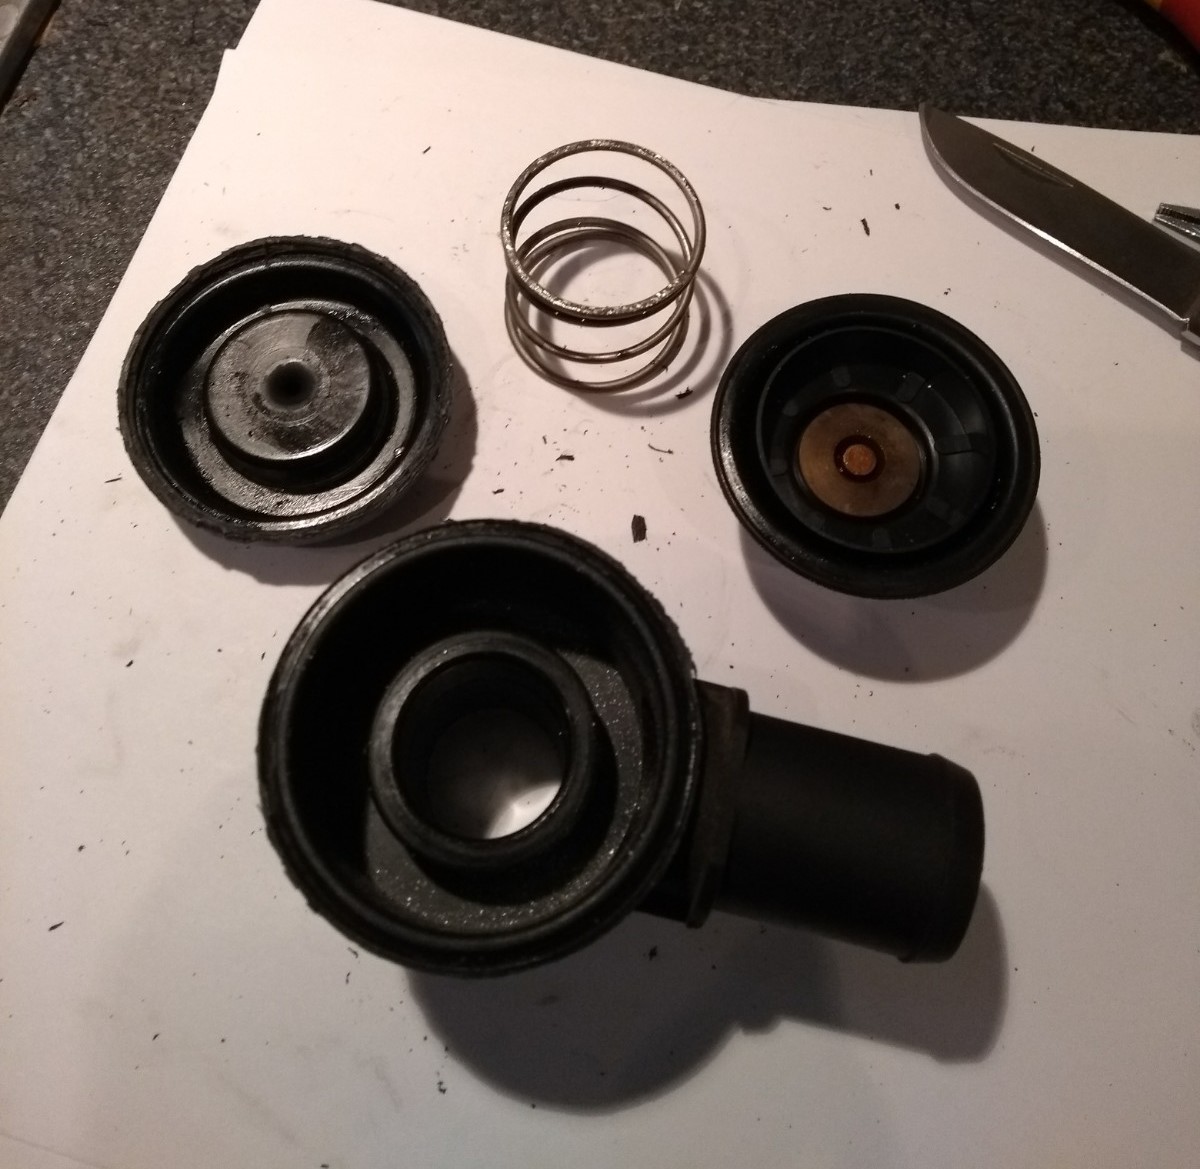
    I thought that perhaps the preload spring on the diverter valve diaphragm was too strong. After market items all seem to have adjustable springs. I dismantled the valve which wasn’t easy (all moulded plastic) with the intention of trimming the down and found a split in the diaphragm.

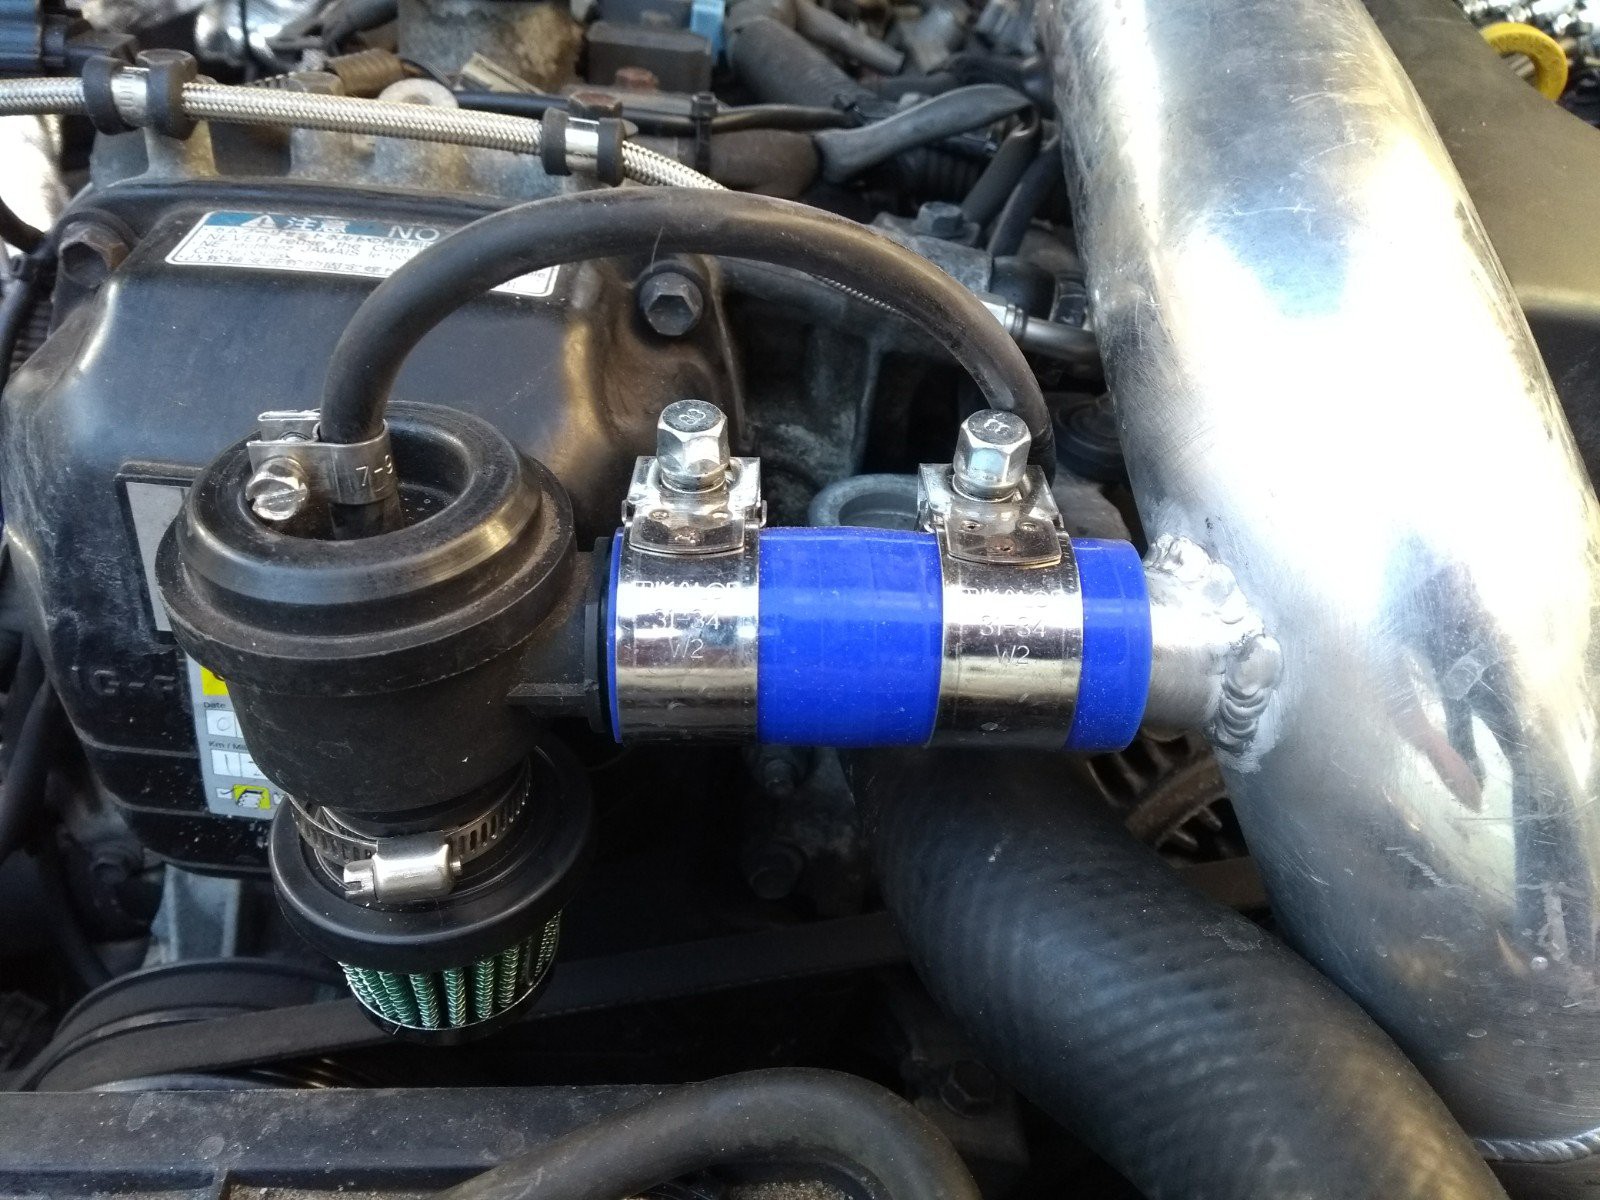
    New valve ordered (part number 06A145710P) and it worked flawlessly. The 'zoot zoot zoot' noise was now replaced with a loud 'whoosh' noise. At least the compressor wasn’t surging risking damage to the turbo.

    I fitted a small air filter to the outlet of the valve to filter air on idle. This also had the effect of silencing the 'whoosh' noise to a much more acceptable level. I suppose the filter is also 'self-cleaning' too!

  • Controller working and Turbo Running Well!

    Rory11/20/2017 at 22:32 0 comments

    I sorted the issue with my piggy back controller missing crank pulses. Turned out the UART port was sending using interrupts instead of DMA and messing things up. Now everything works well.

    I installed a stronger spring in the wastegate, now set to just below .5 Bar. The car is much more powerful now and much more fun to drive. No idea what kind of HP the engine is pushing out now but it must be close to 200.

    I took things easily at first as I had added some approximate values into the fuel map. Eventually I was able to get somebody to drive the car with me sitting in the passenger seat logging the boost pressure, RPM and air fuel ratio. Initially at low RPM the air fuel mixture was running a bit too lean for comfort (around 0.95 lambda). I was able to modify the fuel map to get a lambda between 0.8 to 0.85 at all RPMs (12 to 1). This only took a few runs up and down the road.

    The map is set to retard the ignition timing by 1° per PSI starting around 0.15Bar. I could lower this value and potentially get more power for the same boost pressure but i would be risking detonation and destroying the engine.

    I am very happy with how the project has turned out. There were times when I almost gave up with the engine controller and brought one. Bit of an emotional roller-coaster towards the end!

    I have started to upload diagrams and software etc.

    Tasks remaining are to tidy up the engine bay a bit and to sort out the dump valve. At the moment it doesn’t vent the inlet pressure quickly enough causing compressor surge which is noisy and becoming quite annoying.

    I have booked a track day at Brands Hatch race circuit in mid December. We will see how long the engine lasts!

  • Cam sensor issues continue

    Rory11/11/2017 at 15:05 0 comments

    I sorted out the issues with the RC filter on the cam sensor input. Now every pulse is received by the microcontroller. The micro misses the occasional pulse though. Almost certainly due to may bad code… The cam sensor is read via an interrupt, but so are allot of other things. Need to shorten some of the interrupt routines I think.

  • Piggyback Engine Controller

    Rory11/10/2017 at 09:29 0 comments

    I have made many changes to the engine controller. I started the project using an Arduino mega to control the fuel injectors. This did work quite nicely although I decided that I should also be controlling the engine timing, retarding the ignition on boost to avoid the inevitable detonation that would destroy the engine.

    A friend suggested the Infineon line of micro controllers. These have much more processing power, many more hardware timers and a floating point unit for super-fast calcs.

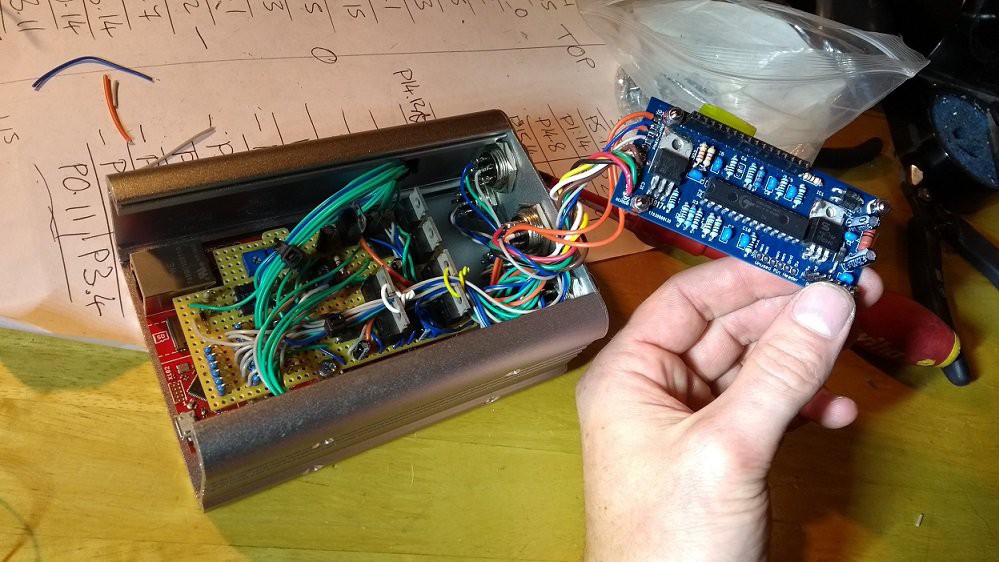
    I rebuilt the controller using an XMC4700_relax kit. The XMC4700 lite kit would have been adequate. The relax kit features an ethernet port, SD card slot and a CAN transceiver. I had dreams of a web server based dashboard for the car at one point. I will spend some time on this when the car is fully working.

    Here is the controller all wired up in its box. The blue PCB is the wide band lambda sensor controller:

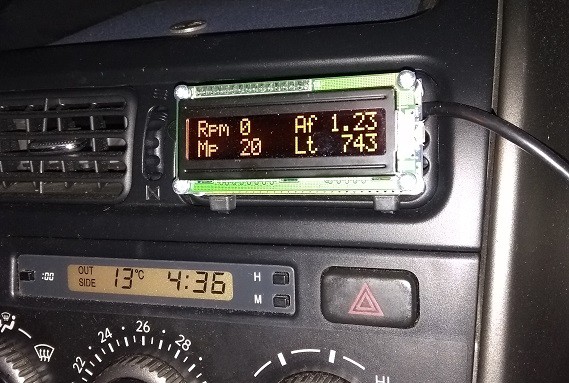
    The XMC4700 feeds serial data to an Arduino in the car which presents this on a LCD display. This works quite nicely. I can also connect my laptop to the USB port on the Arduino which feeds CSV data out of the virtual serial port for data logging. I spent ages looking for a program to graph and log the live data. I finally stumbled across telemetry viewer http://www.farrellf.com/projects/software/2017-02-11_Telemetry_Viewer_v0.3/ which is very good. The Arduino display also has an alarm buzzer which sounds when 100% injector duty is reached or when the fuel burn goes lean on boost.

    The serial data contains quite allot of information. Currently I am displaying RPM, MP = manifold pressure (gauge, mBar), Af = air fual ratio (lambda), Lt = lambda sensor temperature (°C). The lambda temperature is important because the sensor won't return an accureate reading untill the sensor is 780°C. Initially I installed the sensor too close to the output of the turbo. It wasnt getting too hot but the wide temperature fluctuations made it hard for the lambda controller to maintain the correct temperature.

    I can now control the fuel injectors and add fuel where I want to based on the engine RPM and boost pressure. The pressure sensor input to the car ECU is limited at a certain voltage (to prevent it thinking the sensor has failed out to high output and cutting the fuel) this is called a ‘fuel cut defender’ in the car word and can be purchased for £140 from AEM. I made one using 1 op-amp IC. Will cad up the schematic and post at some point.

    Still outstanding is control of the ignition timing. The engine uses inductive sensors monitoring a toothed wheel on the crank and cam shafts to determine its position. I am monitoring the sensors, detecting the peaks with a comparator and feeding a signal back out to the car ECU. When I want to retard the ignition, I can delay these signals.

    Initially I was picking up interference causing the controller to trigger on false inputs. A RC filter sorted this out. I was getting a nice clean pulse for every high signal from the inductive pickups however the engine still would not run. A friend suggested that perhaps the car ECU is looking for the point in which the inductive sensor swings from positive to negative.

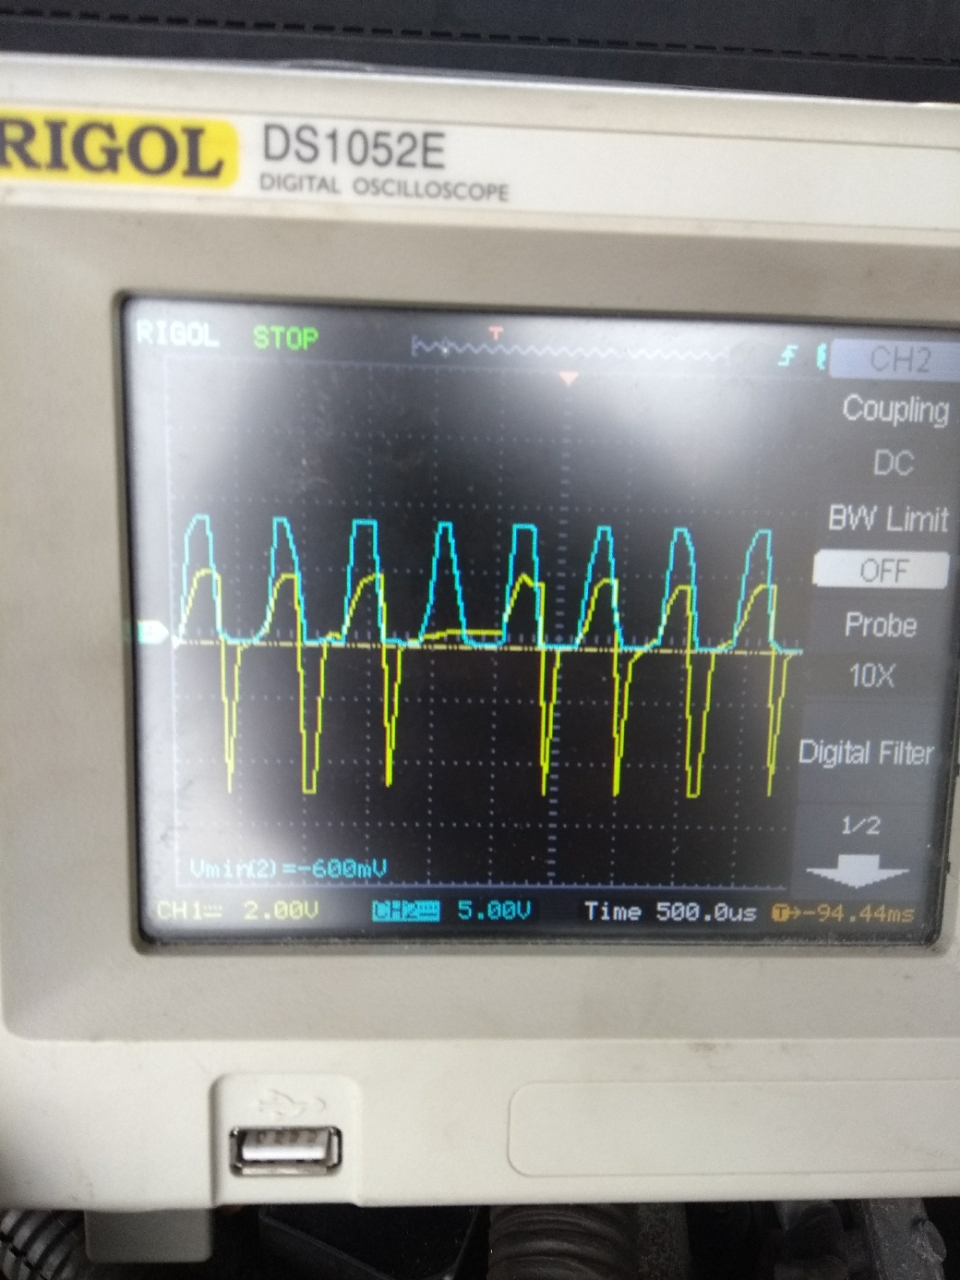
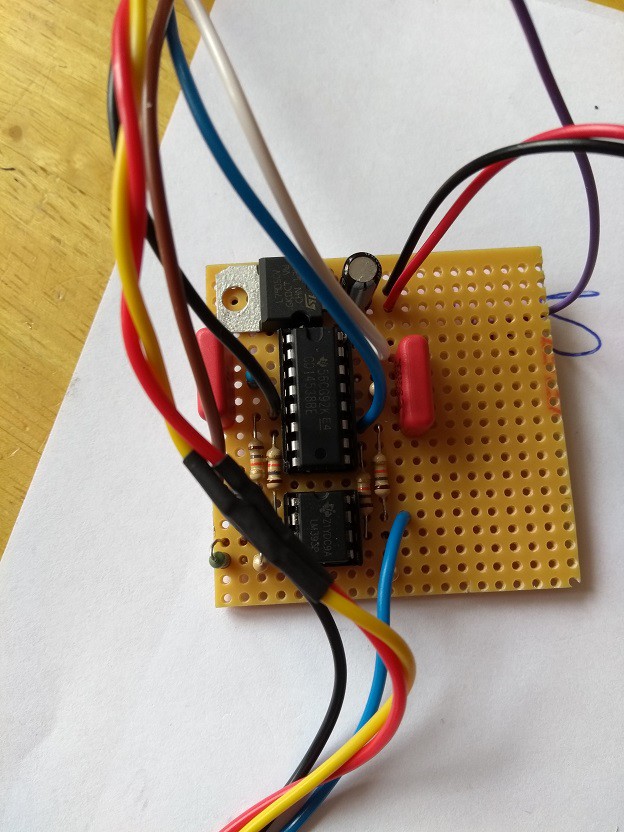
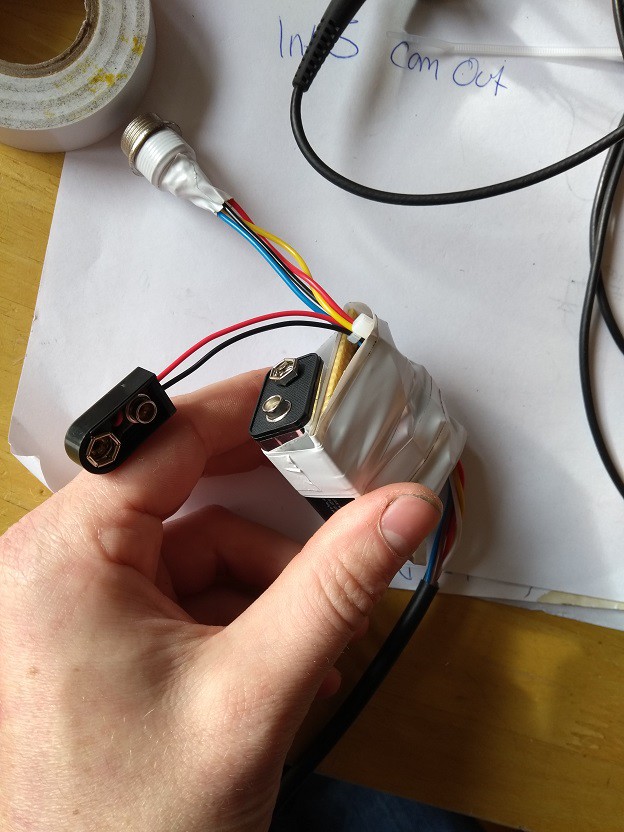
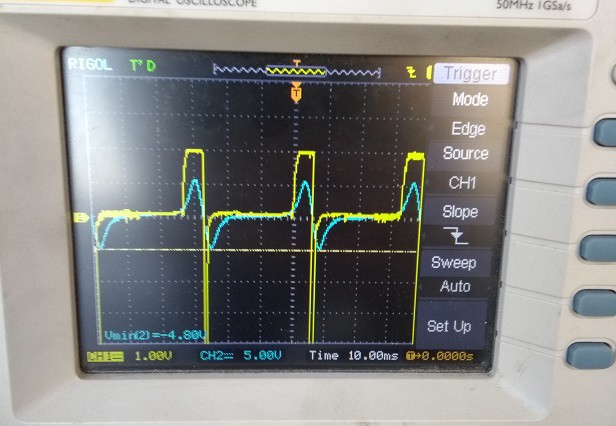
    I made a circuit to add a negative pulse after the positive pulse using a cd14538. I’m temporarily using a 9V battery to get a -5V signal. This is only for testing hence the horrible bodge tape.

    This is the pulse generated. Blue is the output from the cam sensor and yellow is the signal fed to the car ECU:


    I connected this up and the engine started and ran perfectly at tick over. Increasing the revs caused the engine to cough and splutter.

    Using a scope I could see that sometimes the comparator monitoring the inductive pickup would miss pulses. This happens after the missing tooth on the trigger wheel. I can increase the threshold voltage on the comparator to prevent this to a certain extent but then the small peak after the missing tooth gets missed....

    Read more »

  • Clutch Slip!

    Rory11/10/2017 at 08:57 0 comments

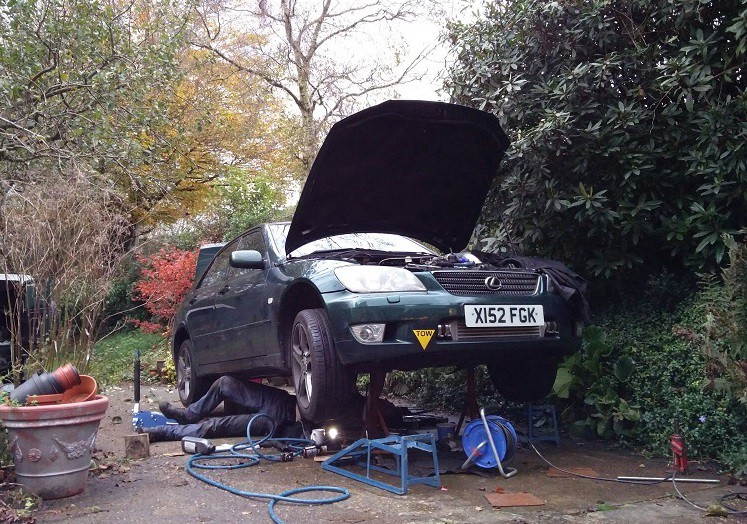
    With the turbo the clutch was slipping very badly even on only 200mbar of boost pressure. I suspected that the clutch was worn out after 125k miles of service. I brought a new one that is supposed to have a better (more grippy) friction material and stronger spring pressure. I changed this myself and it wasn’t easiest thing to do. When I plan major car maintenance it always seems to rain heavily all day. The release bearing was also wrong which needed some modification with the welder to get it to work properly. Here's a picture of my legs having a bad time under the car during a break in the weather:

    After about 12 hours it was done and there is no more sipping. The performance of the car is much better now, even running on only 250mbar. I plan to run at about 500-600mbar when the piggyback engine controller is finished. See next post.

  • Turbo in Car and Almost Working!

    Rory11/09/2017 at 17:49 0 comments

    So, the turbo has been installed in the car for quite some time now. I have been changing and improving things with regards to the electronics and the wastegate actuator over time and the project is almost fully working. The next few posts will detail these.

    Firstly, the wastegate actuator.

    I had originally make a wastegate actuator which was controlled by a hobby servo, this is described in a previous post. This was controlled by an Arduino in my piggy back engine controller using a PID loop to the manifold pressure. The mechanical side of the actuator worked quite well however I could not get the PID settings correct to maintain control of the boost pressure.

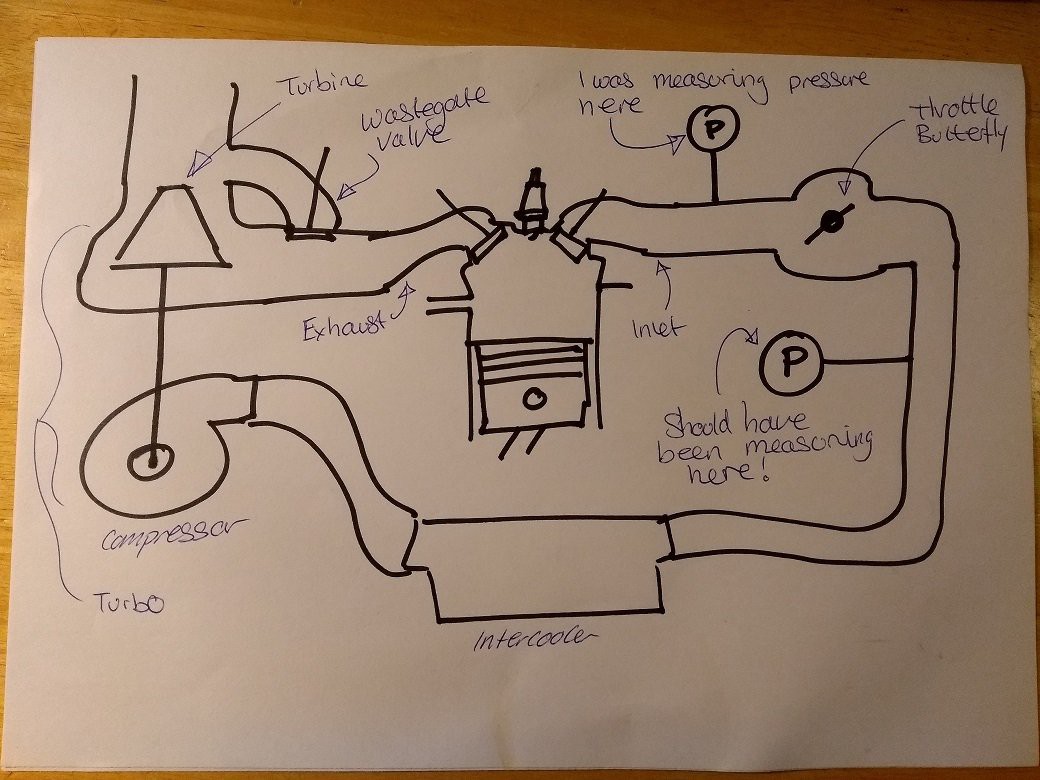
    Having a bit of a think I realised my mistake. The engine controller operates to the manifold pressure, this is the pressure after the throttle butterfly which normally operates at a vacuum. Using this pressure to control the wastegate actuator was not going to work. I should have been controlling the wastegate actuator based on the pressure BEFORE the throttle butterfly valve. Otherwise when the throttle is part open, the boost pressure can build up in front of it without the actuator controller knowing. When the throttle is fully opened all of this pressure floods into the inlet manifold causing a large pressure spike. I would have to install another pressure sensor before the butterfly valve.

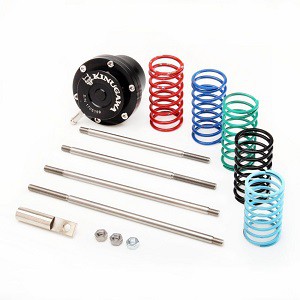
    At the time I needed the car to work to some extent so I ordered a pressure actuated wastegate with an adjustable spring to set the maximum boost pressure. Search 'kingawa adjustable turbo actuator' on ebay. I had to modify the bracket a bit to fit my turbo but it comes with most of the stuff you need. Heres a picture:

    This works nicely although it is quite hard to change the spring particularly when the exhaust system next to it is red hot.

    I may revisit the electronic actuator at some point in the future.

  • Turbo Oil Drain

    Rory10/12/2017 at 10:31 0 comments

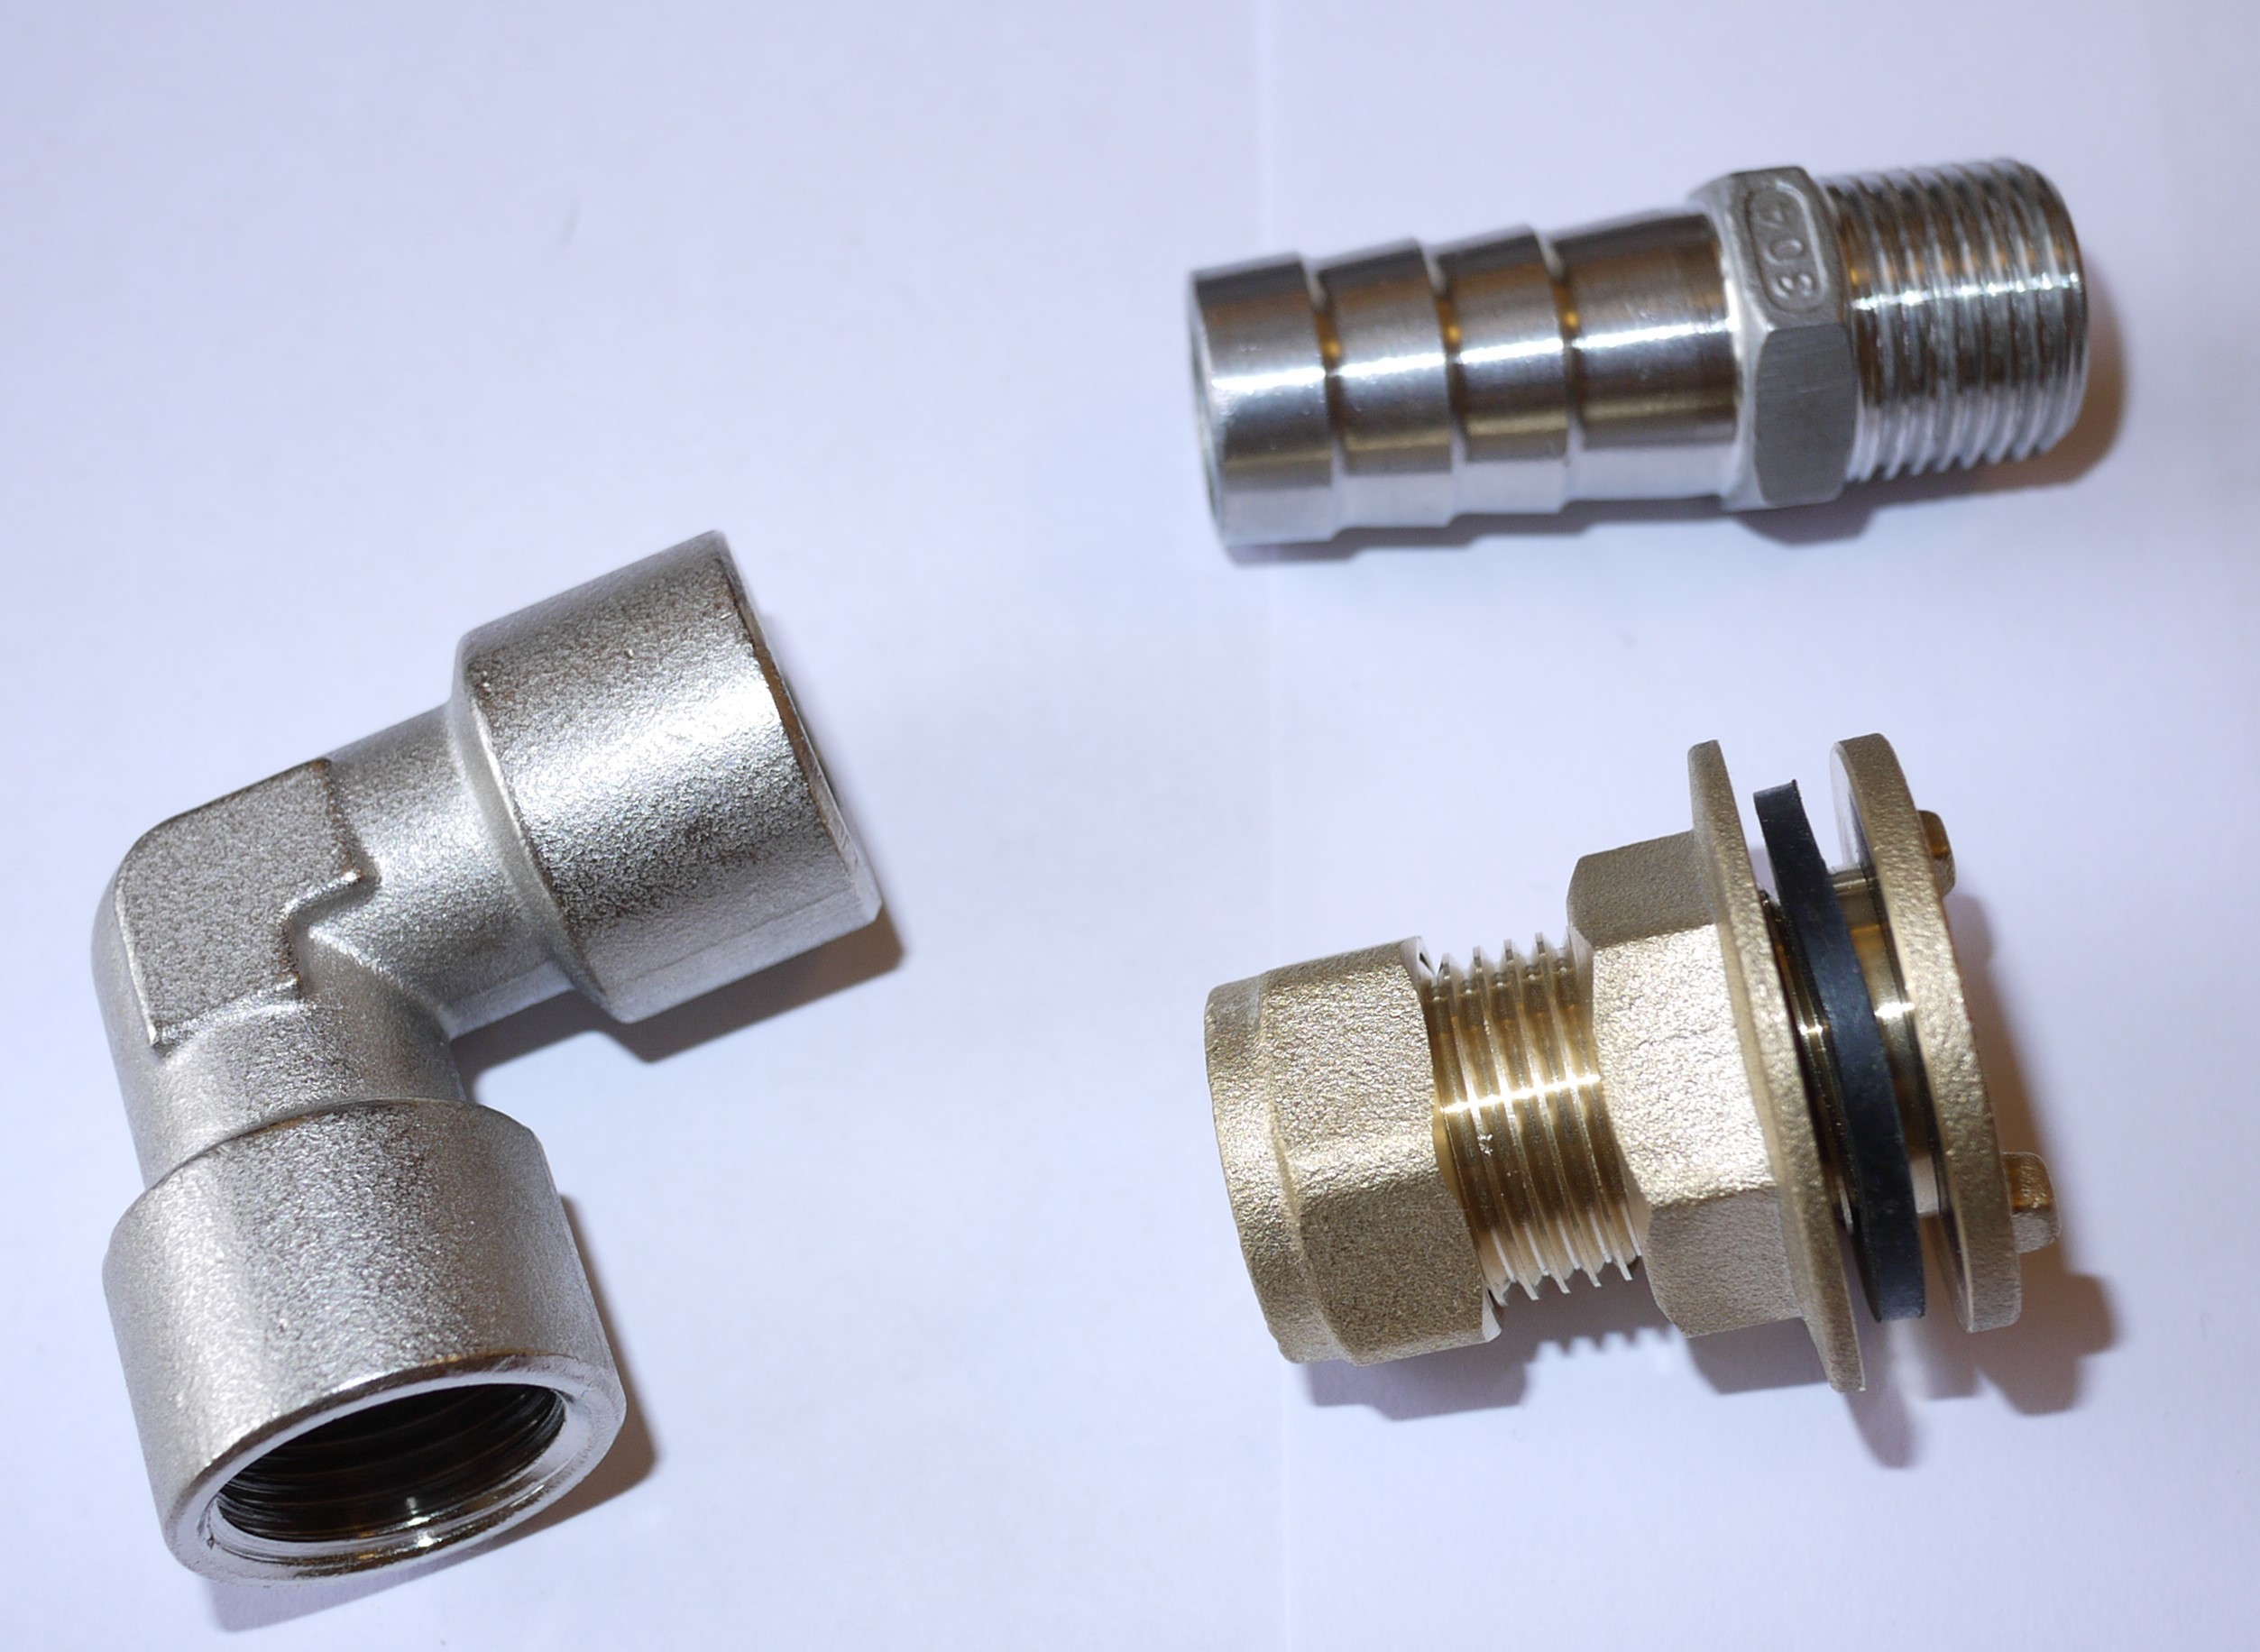
    The turbo charger needs a return line to feed oil back to the sump. I brought a few bits and pieces planning to drill a hole in the sump and fit a tank connector.

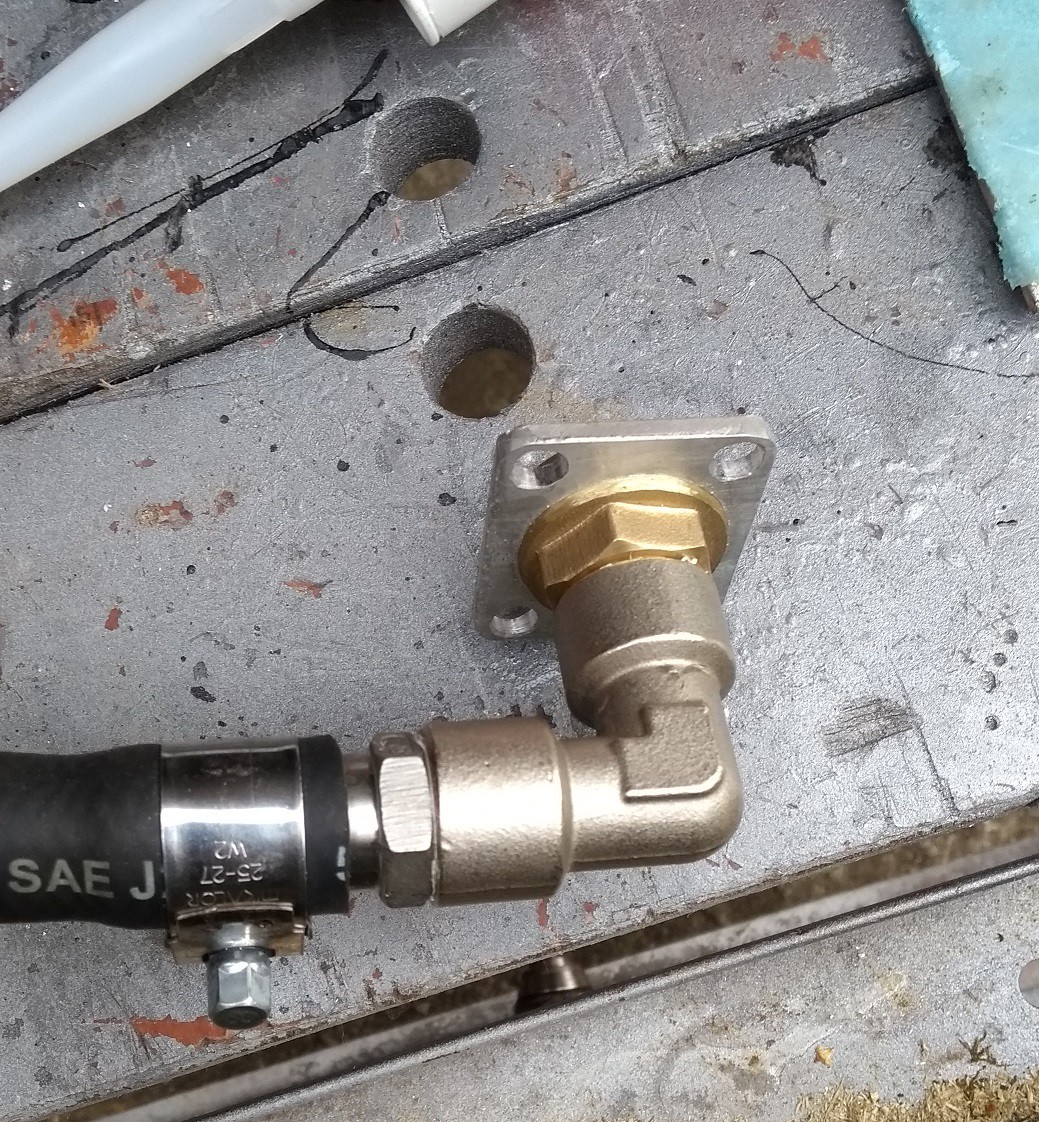
    Here we have:

    15mm flanged tank connector
    1/2'' BSP female elbow
    1/2'' BSP to 16mm hose barb
    To fit the tank connector I would have to remove the sump. This turned out not to be possible without removing the front cross member. To remove this I would have to remove most of the front suspension, steering rack etc, a big job to do on my back in the street.

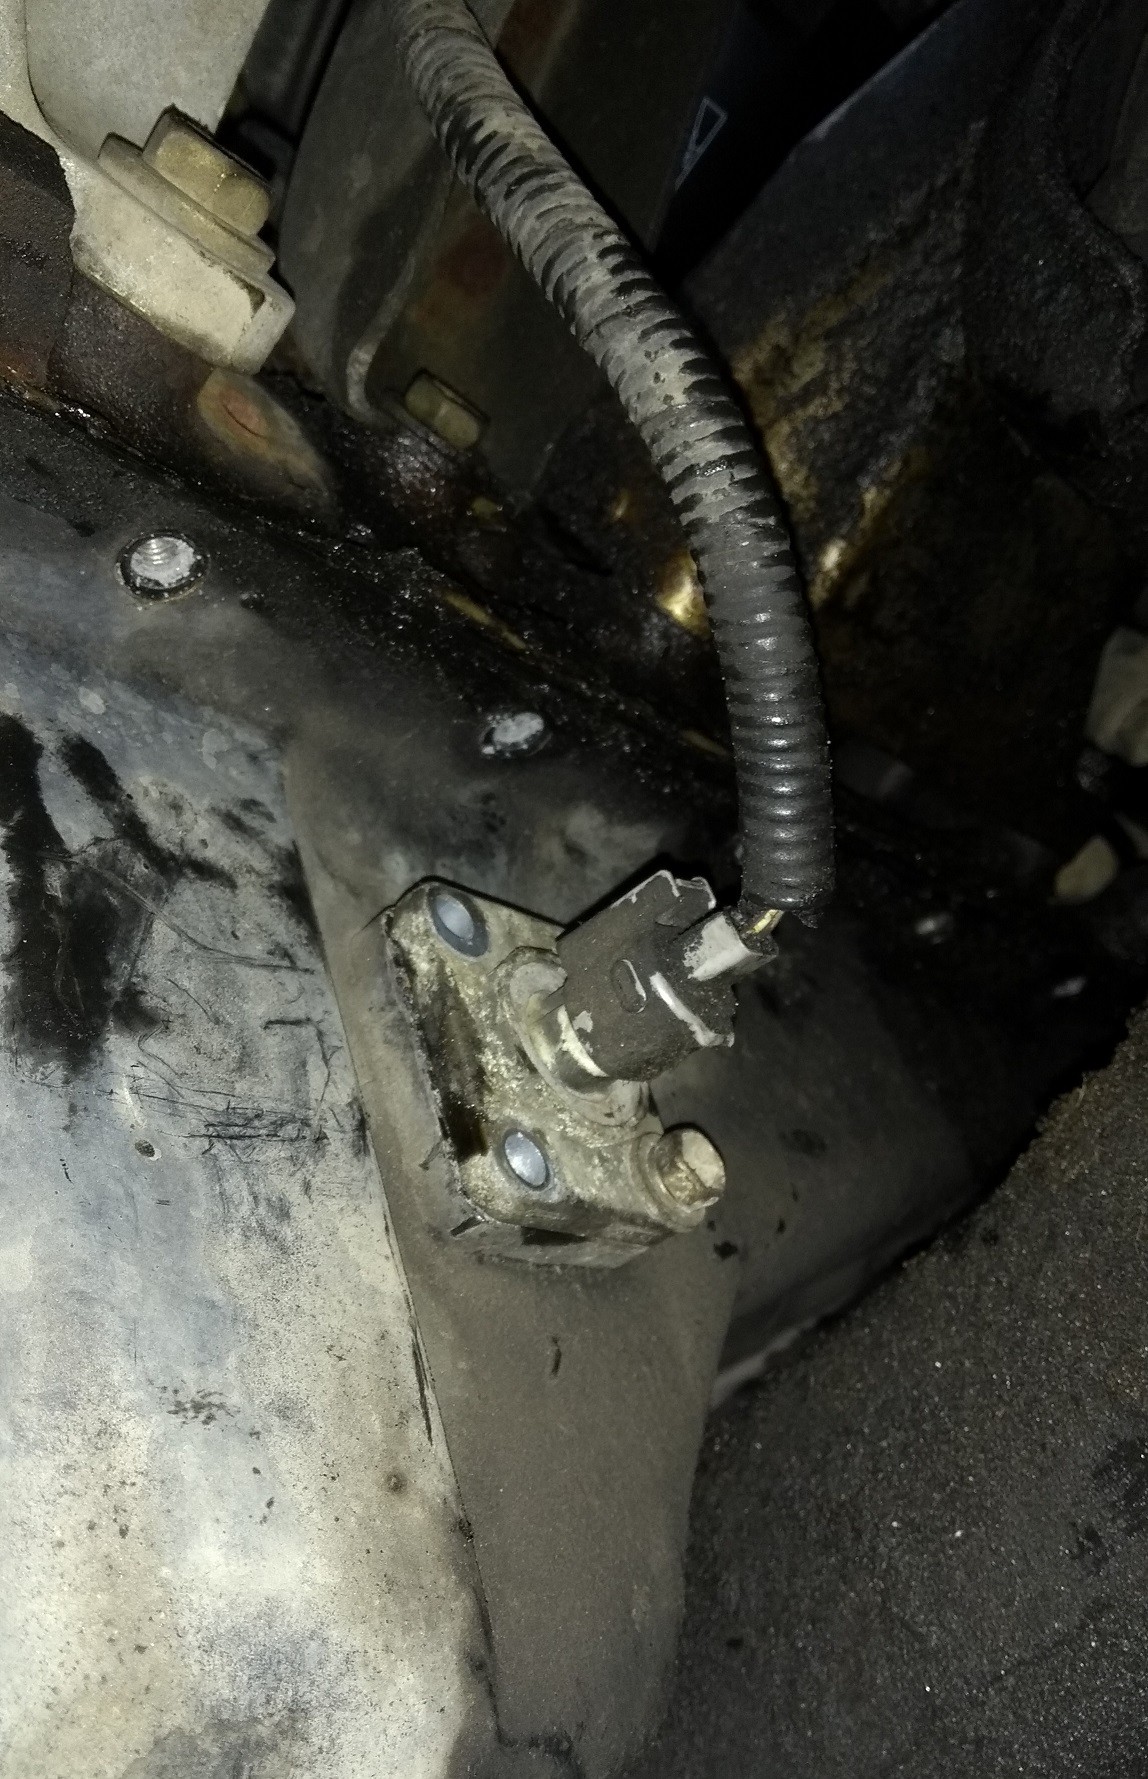
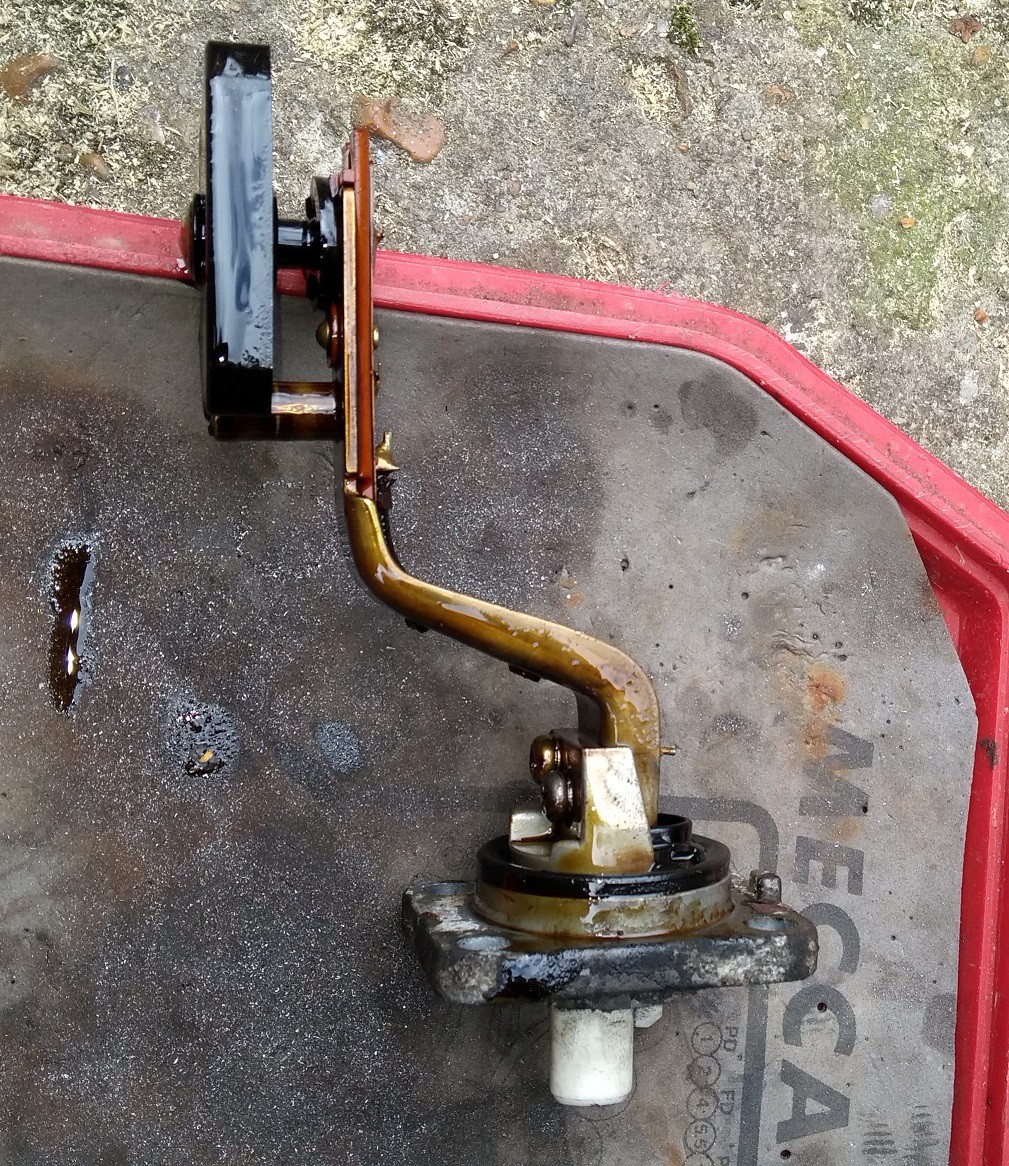
    I spotted the oil level switch. This came to my rescue.

    Above: oil level switch (some bolts removed at this point
    Above: Oil level switch removed

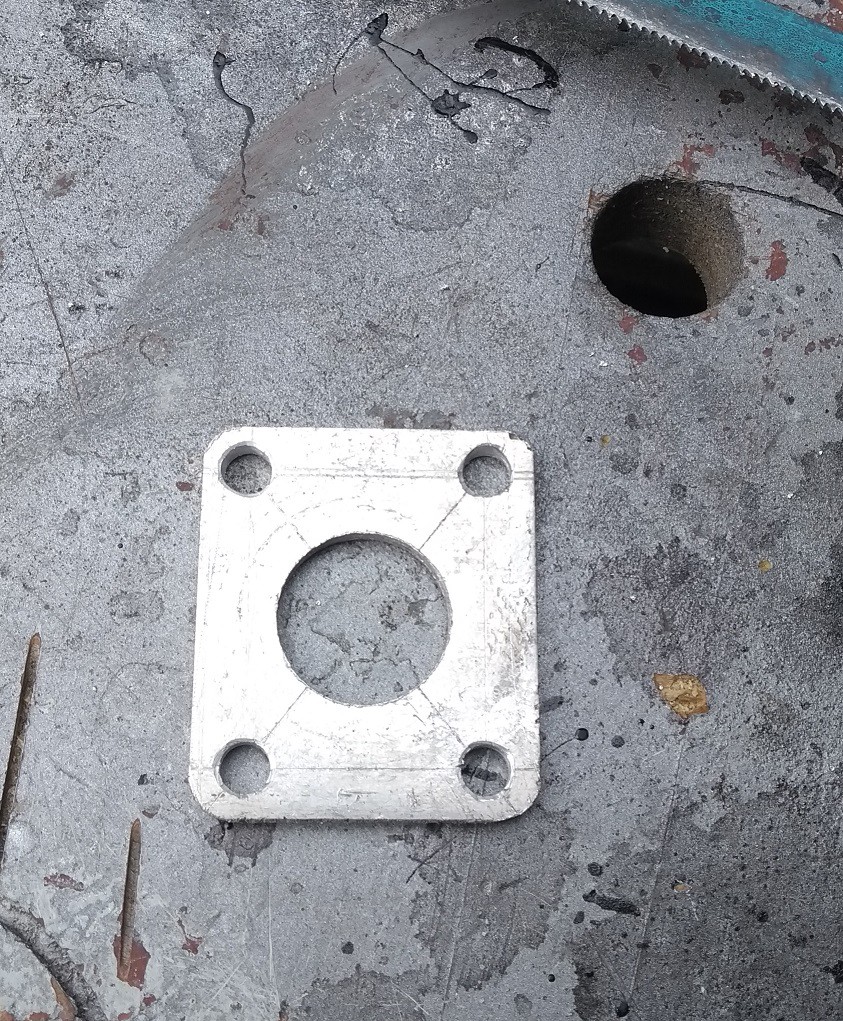
    As luck would have it, the round part of the oil level switch was almost exactly the same size as the flange on the tank connector. I made an aluminium plate to pick up the bolt holes                    

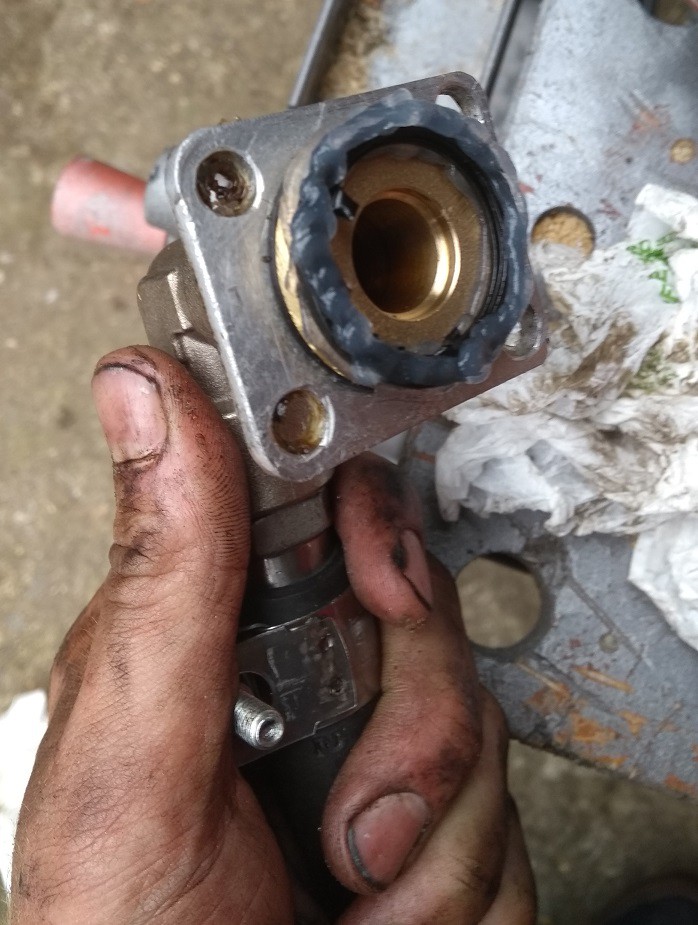
    Some builder's silicone and the gasket from the oil level switch got the oil drain to seal properly. Note that the seal is on the face of the tank connector. Due to the construction of the sump this will not seal if you make a traditional style gasket fitting over the aluminium plate part. Took me 4 attempts to work this out...

View all 25 project logs

Enjoy this project?

Share

Discussions

kitusa44 wrote 06/12/2024 at 11:37 point

These developments place Swiss businesses at the forefront of the global automotive supply chain in addition to serving the local market. https://automo.ch/

  Are you sure? yes | no

Jrturner89 wrote 10/12/2021 at 21:56 point

If you have time I have a few questions about your piggy back design.

  Are you sure? yes | no

Per wrote 04/12/2019 at 16:49 point

Hello there. I would be interest in a video on how that manifold design sounds. It seems like a nice flowing and easy to build manifold but does it sound sweet? Thanks!

  Are you sure? yes | no

kdiogo92 wrote 08/30/2021 at 11:54 point

MEE TOO

  Are you sure? yes | no

Similar Projects

Does this project spark your interest?

Become a member to follow this project and never miss any updates