 simongraus
🌿 The ultimate guide to creating a bottle garden🌿
For plant lovers, aesthetic fans, and anyone who wants to combine "green" with "magical."
✨ What is a bottle garden, exactly?
A bottle garden is a self-contained mini-ecosystem—like a stylish terrarium. It lives, breathes, grows (mostly well)—and requires surprisingly little maintenance. Ideal for anyone with or without a green thumb.
Fun fact: A bottle garden is like a fine wine: the older, the better. (Just don't drink it!)
Whether in the living room, on your desk, or as a topic of conversation on a Zoom call—the bottle garden is the green must-have in the urban jungle interior.
🛒 Two paths lead to green happiness:
1. DIY (Do-It-Yourself):
Do you have a pretty jar at home and fancy some soil under your fingernails? Perfect!
And now let's get started:
🧼 Cleaning – The Underrated Ritual
Before you start, take the time to thoroughly clean:
Some glasses have slight cloudiness due to the manufacturing process – this is normal. Never use metal scouring pads! Instead, use a plastic sponge and dish soap. Afterward, clean with a microfiber cloth and glass cleaner until streak-free. Avoid fingerprints! And: Always handle with both hands – glass is glass.
Pro tip: Hold the cleaned glass up to a light source – this way you can see any remaining streaks and dust particles.
🌱 Step-by-step instructions – From an empty glass to a living mini jungle:
🔧 Preparation:
Make space: Find a work area with plenty of light (but not direct sunlight).
Gather the components: glass, sand, lava gravel, volcanic rock, activated charcoal, soil, plants, decorations.
Optional: Use clay granules – the miracle cure for drainage, air supply, and water buffering.
→ Mix it with potting soil in a 1:1 ratio for best results.
1. Construction
Build a drainage layer: Start with a layer of sand or Seramis.
Then: Lava gravel or clay granules (prevents waterlogging and allows air to circulate – important for healthy roots).
Optional: Work activated carbon into the drainage layer → protects against mold and filters pollutants.
2. Add planting substrate:
Mix soil with clay granules (1:1).
Always press the soil down lightly – do not press. Play with different layers of soil, sand, and granules to create beautiful soil patterns and increase drainage.
3. Plant plants:
Form a small depression, plant plants, and carefully cover with substrate.
Lichens and mosses help conceal gaps – pay attention to the moisture balance!
4. Decorate
Use stones, pieces of bark, moss, or small figurines. Don't overdo it: "Less is more" also applies to glass jars.
5. Water
Two to three generous gulps of water – then: a break! No pool in the jar! The drainage layer stores excess water.
💡 Condensation & the Microclimate
In the morning, a light mist should form on the jar – that's good! If the jar stays misted all day → remove the lid for a while so that excess humidity can evaporate. No more misting? → Add a little low-lime water. Rainwater is best.
This is photosynthesis in the jar – a cycle that functions like a miniature rainforest.
🧠 Location & Light – Your bottle garden needs to live
No direct sunlight! Otherwise, it's tropical house alarm.
Ideal: A bright location out of direct sunlight – a windowsill with a curtain, a shelf opposite the window.
The darker the location, the more important the light.
→ The LED lamps from flaschengartenmanufaktur.de are worth their weight in gold. They make absolutely any location possible and also serve as passive lighting for the surrounding area!
Power consumption? Minimal (approx. €6 / year with 12 hours of daily lighting).
For a consistent supply: Use a timer. (Included in every package)
🧪 Low maintenance = pure joy of life
Only water every 3-4 weeks – really!
Observe your plants – they'll show you what they need.
Regularly remove dead plant parts.
Don't forget to clean the outside – the cork lid is antistatic, meaning dusting is unnecessary – unfortunately, the...

 Chris.Hicks
 M. Bindhammer
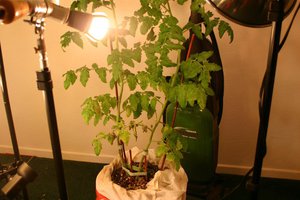
 Em
Em