Ai-Thinker
1. Project Overview
- Environment
- Xiaozhi MCP
- Connection
- Testing
- Demo
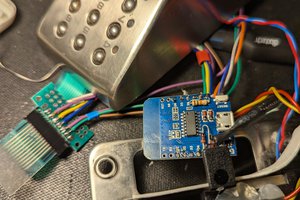
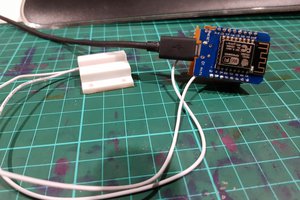
Voice temperature reading, switch/LED control, MQTT console prints
2. Environment Setup
2.1 Docker
1. Download & install Docker Desktop.
2. Mirror acceleration →Docker Engine settings → add the mirror list provided in the original doc, then Apply.
Go to Settings - Docker Engine and add the following code
{
  "builder": {
    "gc": {
      "defaultKeepStorage": "20GB",
      "enabled": true
    }
  },
  "debug": true,
  "experimental": false,
  "insecure-registries": [
    "registry.docker-cn.com",
    "docker.mirrors.ustc.edu.cn"
  ],
  "registry-mirrors": [
    "https://docker.registry.cyou",
    "https://docker-cf.registry.cyou",
    "https://dockercf.jsdelivr.fyi",
    "https://docker.jsdelivr.fyi",
    "https://dockertest.jsdelivr.fyi",
    "https://mirror.aliyuncs.com",
    "https://dockerproxy.com",
    "https://mirror.baidubce.com",
    "https://docker.m.daocloud.io",
    "https://docker.nju.edu.cn",
    "https://docker.mirrors.sjtug.sjtu.edu.cn",
    "https://docker.mirrors.ustc.edu.cn",
    "https://mirror.iscas.ac.cn",
    "https://docker.rainbond.cc",
    "https://do.nark.eu.org",
    "https://dc.j8.work",
    "https://dockerproxy.com",
    "https://gst6rzl9.mirror.aliyuncs.com",
    "https://registry.docker-cn.com",
    "http://hub-mirror.c.163.com",
    "http://mirrors.ustc.edu.cn/",
    "https://mirrors.tuna.tsinghua.edu.cn/",
    "http://mirrors.sohu.com/"
  ]
}
Just select Apply.
HA deployment- Open the command line terminal and execute the command
- Wait for the HA image to finish pulling.
- Create a homeassistant folder in the disk's root directory, and create a new docker-compose.yaml file, and add the following code
version: '3'services:
  homeassistant:
    image: homeassistant/home-assistant:latest
    container_name: homeassistant
    restart: always
    volumes:
      - /data/homeassistant/config:/config
    environment:
      - TZ=Asia/Shanghai
    ports:

      - "8123:8123"
- Save the file, open the folder in the terminal, execute the docker compose up -d command, and complete the HA container creation
- Go to the Containers page, click the homeassistant port link, enter the HA browser page, create an account, and log in.
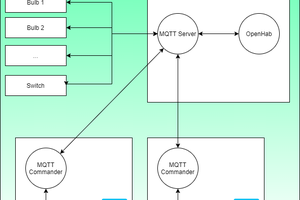
EMQX deployment
After adding the software image source, execute the command
docker pull emqx/emqx: latestto pull the latest version of the emqx image.
Execute the command
docker run -d --name emqx -p 1883:1883 -p 8083:8083 -p 8084:8084 -p 8883:8883 -p 18083:18083 emqx/emqx:latest
Create and run the emqx container.
If you receive an error message indicating that the port is already in use, delete the emqx container you created, go to the Images tab, click the Start button corresponding to the emqx/emqx image, and manually configure the container name, host port, and other parameters. Enter 0 for the port, and the system will randomly assign an available port.Configure EMQX
(1) Go to the Containers page, click the emqx port link, and enter the emqx browser page. The initial login username is admin and the password is public.
(2) Open Access Control - Client Authentication - Create - Password-Based - Built-in Database - (Default Configuration) - Create.
(3) User Management - Create New User - Customise the username and password.
MQTT Configuration(1) In the command line terminal, enter ipconfig to obtain... Read more »