 Julius Curt
A very cheap, premium looking enclosure for your electronics project. Let's profit off that consumerist mass production (it's happening anyway, at least put it to good use).
This Ikea Vårsyren thing costs $2, for which you get 6 sheet metal grille panels. A third of $1 each. I'm pretty sure I wouldn't be able to source the raw metal at that price.
Oh, they come in both white or retro-futuristic friendly orange.
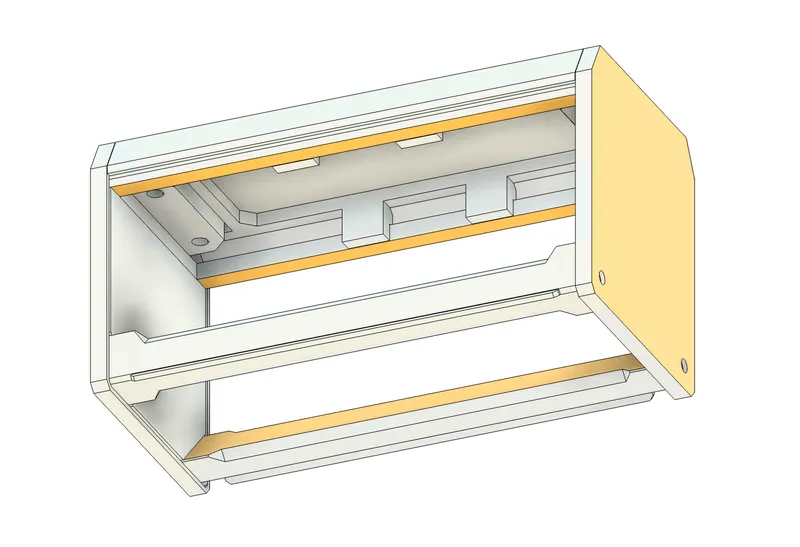
So you bet I couldn't resist, here's a proof of concept for an enclosure. Ideally you'd get the STEP file and make it useful for your project. I resisted the urge to chamfer and fillet everything so it should be really easy to tweak to your needs.

Note: the yellow faces are the ones that were designed to be on the bottom on the print bed.
You'll need:
- 2 x EndCap
- 2 x Post
- 1 x SupportFrame
- 1 x SideFace
The EndCaps and Posts are symmetric, they can just be printed twice.
Print Settings
On my printer I use a 0.6mm nozzle and I usually print at 0.4mm layer height because I have a slow printer, so those are the main references I used when designing (basically having multiples of that in the respective directions). This doesn't mean it won't print well on other settings.
If anything fits poorly, simply go in the STEP file, identify the face that would best fix it and offset by say 0.1mm in the proper direction. (Offset Face in Fusion).
Fastners
For the purpose of this demo I attached the EndCaps to the Posts using self-tapping screws made for plastic and I then attached the SideFace using regular M3 bolts and threaded inserts into the EndCaps' sides.
Personally I prefer self-tapping screws, it's much quicker, require less space in the design (smaller holes), and they do the job just fine. (https://www.aliexpress.com/item/1005006095334364.html)
 Sam Smith
 jeremy.geppert
 TAIBHSE DESIGNS
 Josh Starnes