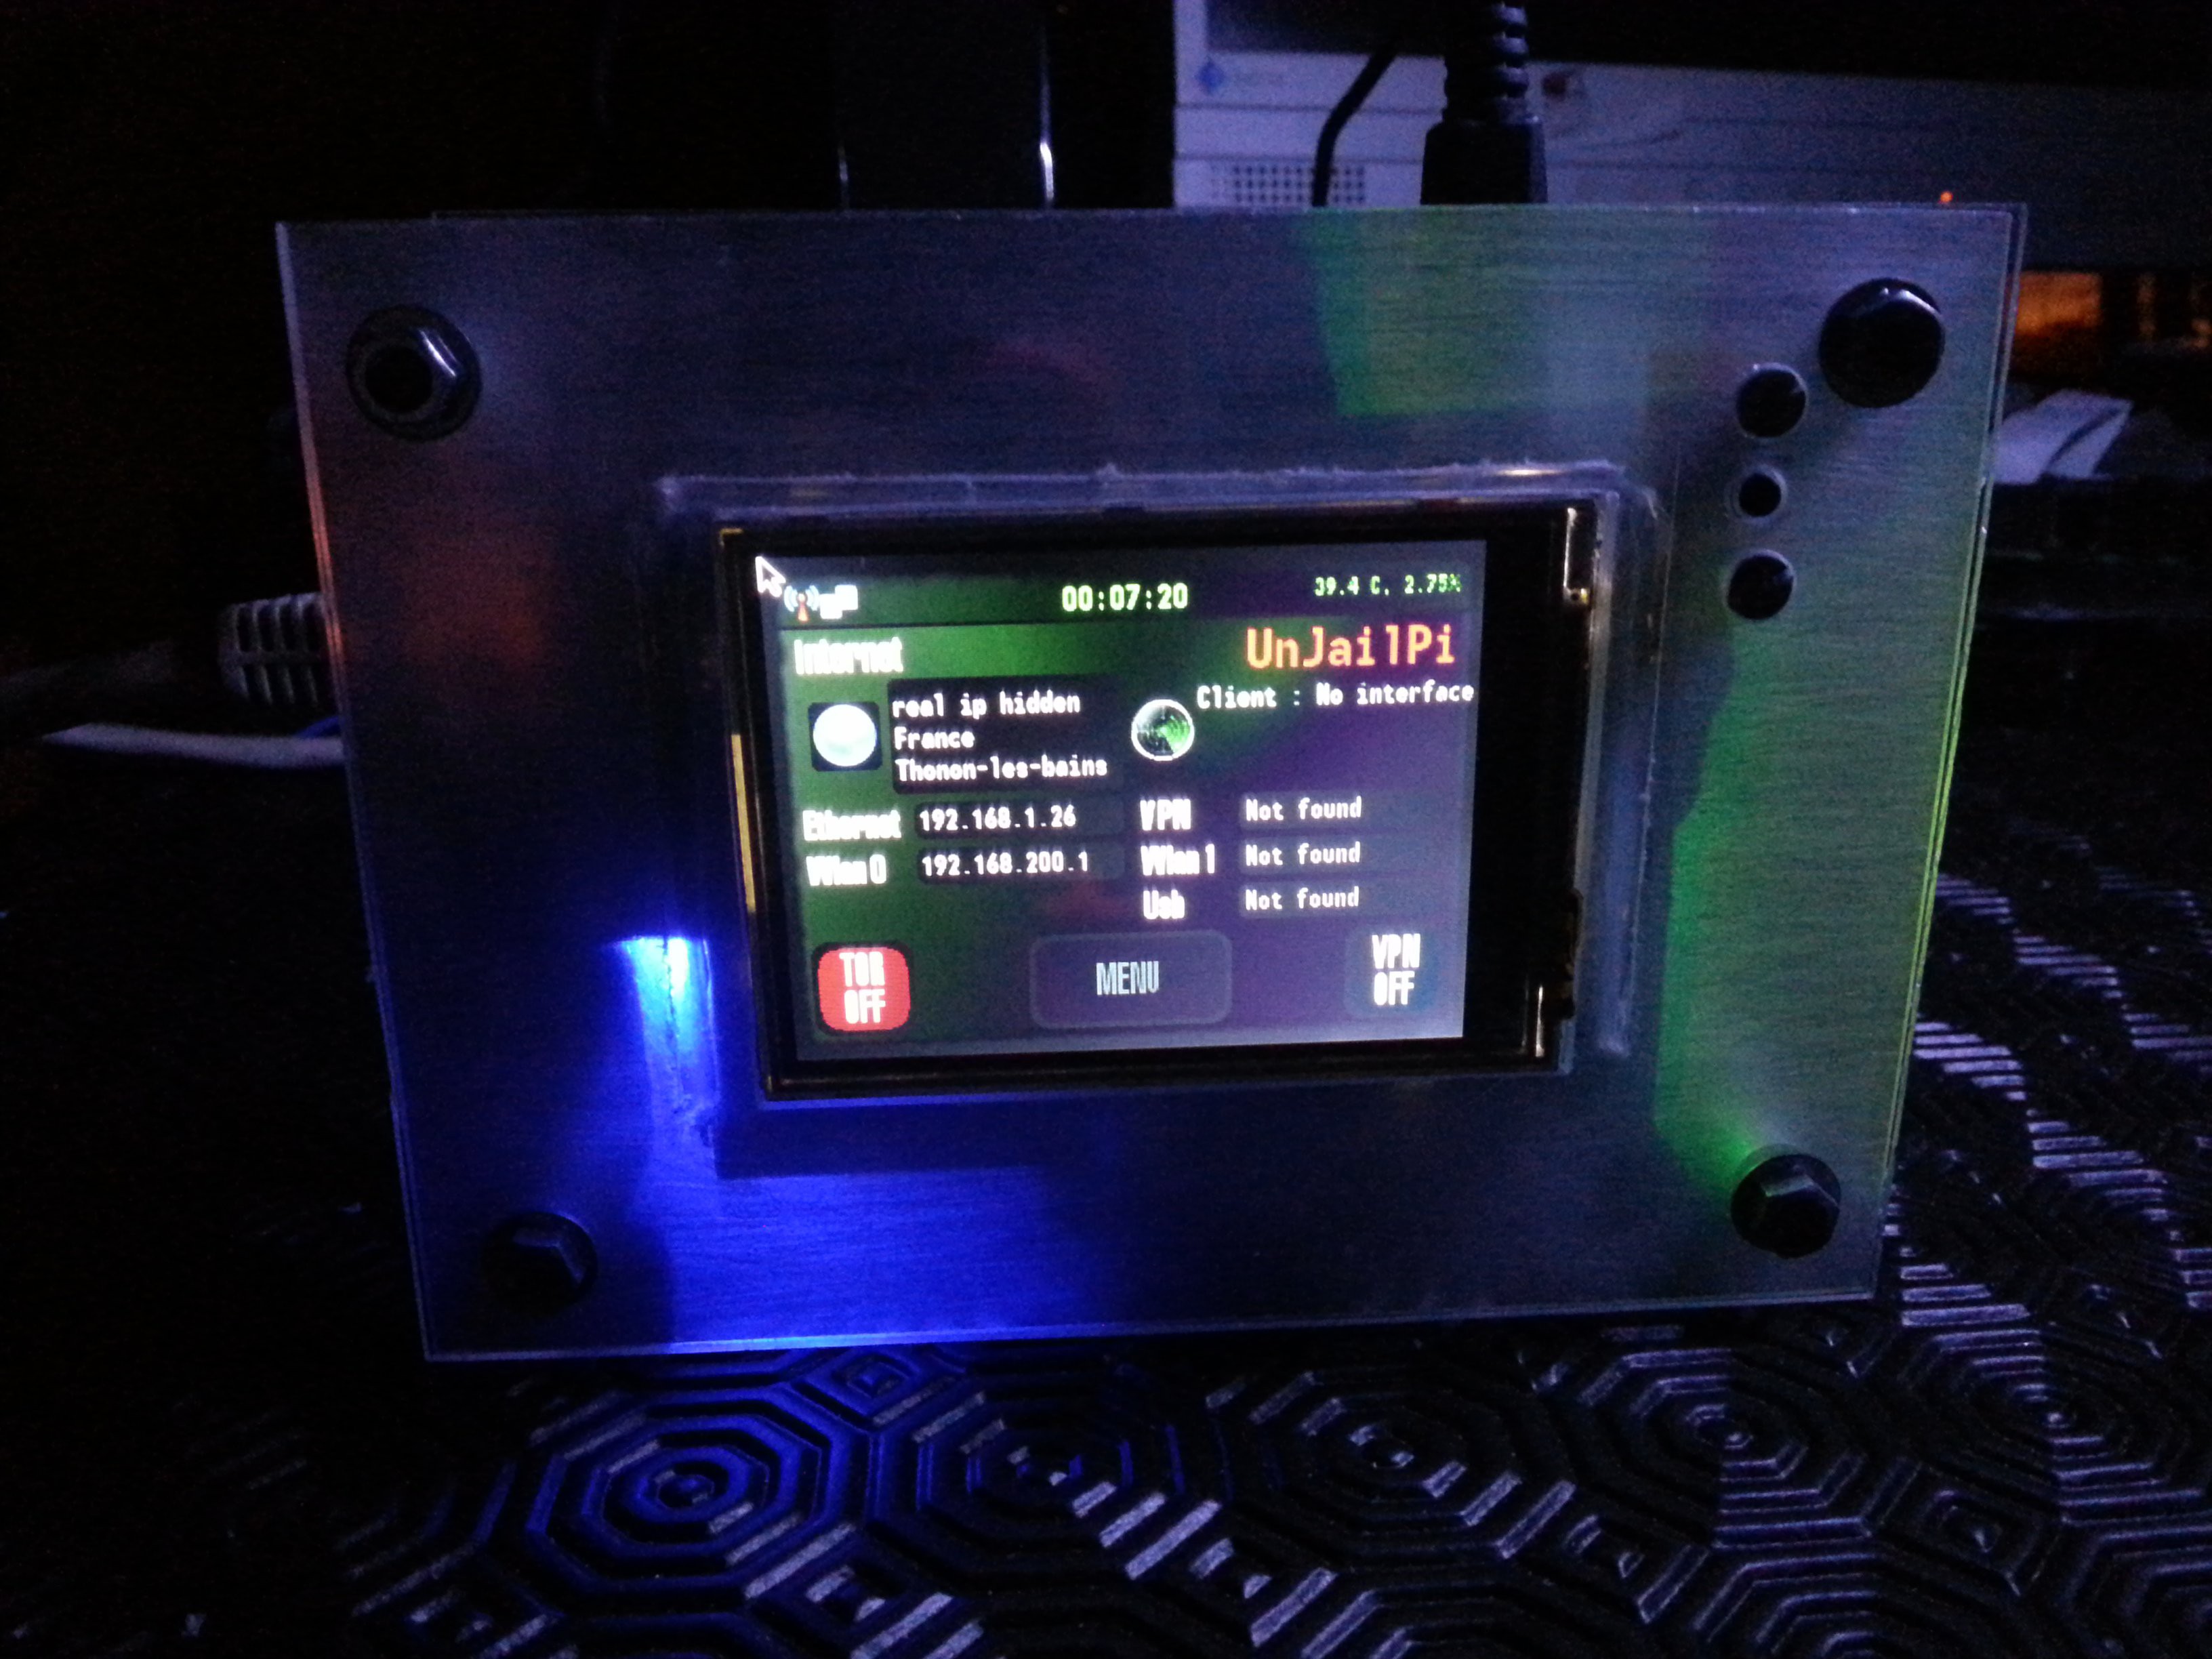
-
Looking for the good way...
09/21/2016 at 13:09 • 2 commentsAfter a lot of time thinking about this sad story, I decided to release the project to public domain. I won't sell it and I won't make any real money with it, so in my opinion, this is the best option : with a strong license, it should prevent any fishy corporation / administration to exploit it, still allowing users to do whatever they want with it.
So I'm left with 2 questions for the Hackaday readers :
- what would be the best license to use ? I want the device to be free (as in freedom), but I don't want nasty corporations to use it for bad purposes, locking it to the public or make insane money with it (it would not be fair in my opinion)
- is asking for a donation a bad idea ? Would you give one ? I think getting some money back would be fair, as I lost so much designing a useful tool I'm now willing to give for free.
Do you have a better idea ?
I still want to write about the story surrounding this project : we often read about successful stories, failures not so much...
-
One year later...
05/26/2016 at 23:19 • 4 commentsI really had to write an update to this project, but it's a difficult task.
This project has been a major part of my life for almost 2 years. From the 2014 semi finals to a swiss company scam in May of 2016, I encountered almost everything possible and lost a lot :
- I've been threatened by a major company
- I dodged 5 scams (from venture capitalists to big well known industries)
- I lost a lot of money
- Finally I lost my wife and my home
So, despite I still believe this device is a very important one, I now prefer devoting my time and skills to other projects. I've lost too much because of it.
The device is running well, but the code is not secure enough to give it to the public, so I won't release it in the actual state. The device is too critical to be used lightly, or by someone who is not aware about its actual limits. I don't want this kind of responsibility anymore.
However, I learned a lot, from designing to dealing with lawyers. And it was a great experimentation.
You are free to email me if you want to discuss about it.
Thank you hackaday, and many thanks to the hackaday readers who supported this project.
-
The new prototype
03/03/2015 at 19:13 • 4 commentsIt's been a long time since the last update...
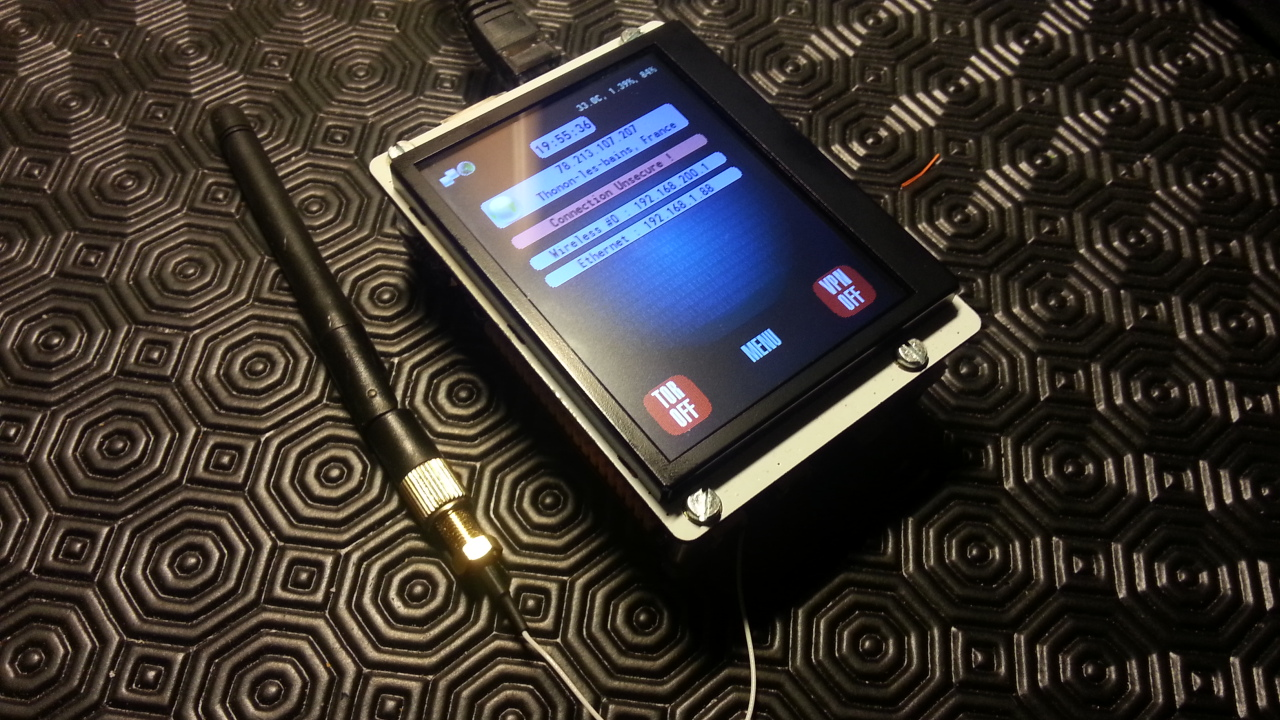
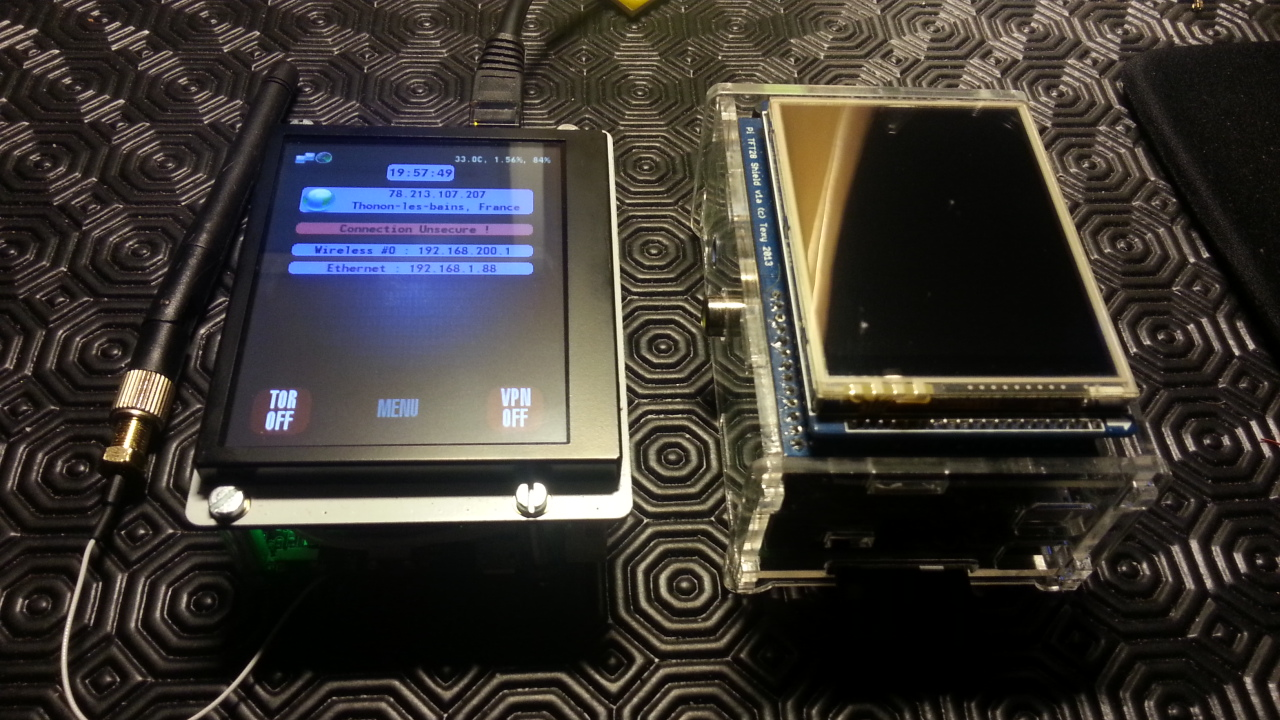
I now have the planned hardware built and running. Here are the changes :
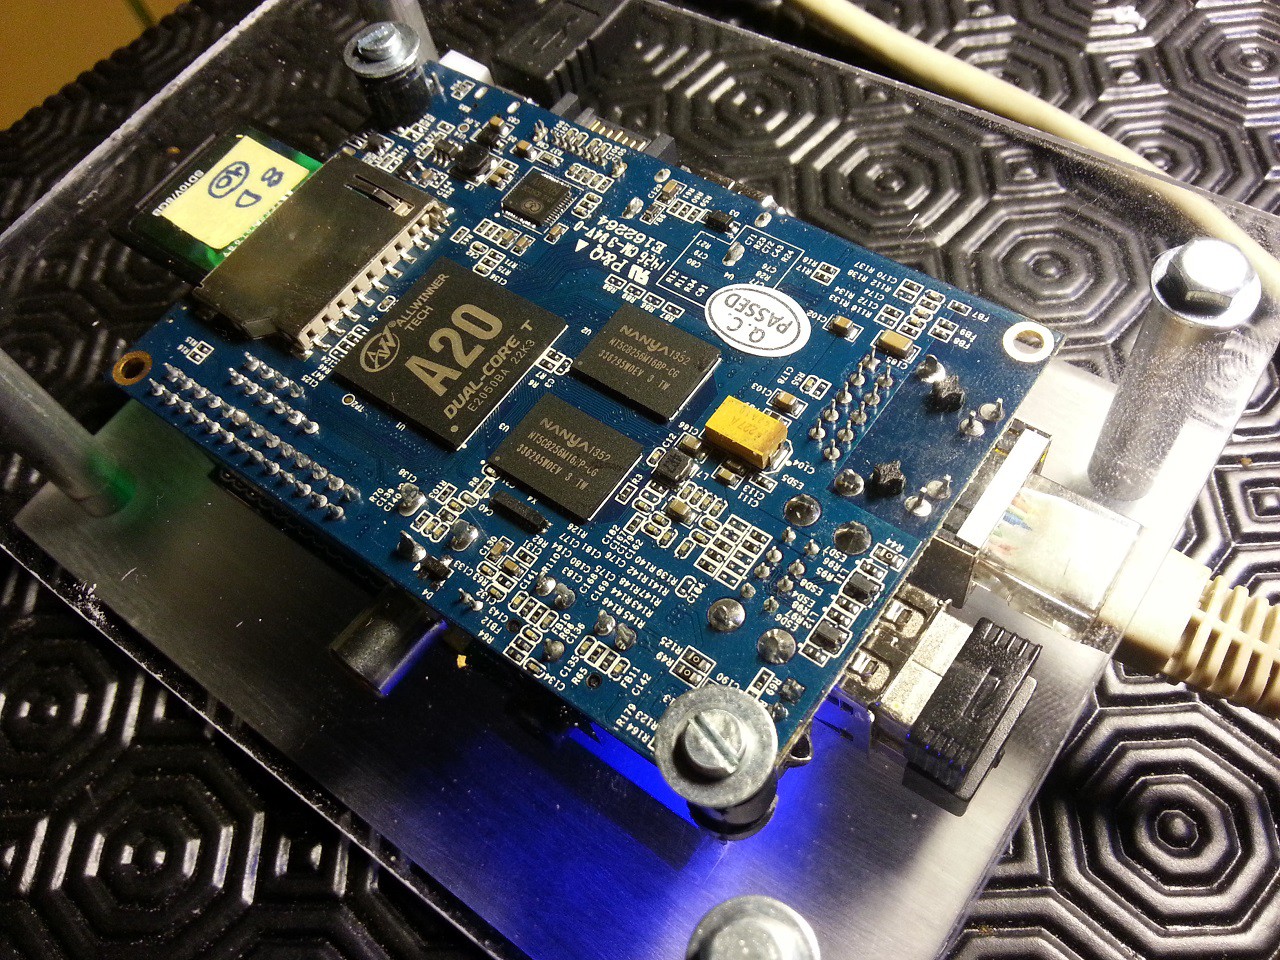
- More powerfull : dual core CPU, 1 GB RAM
- Gigabit ethernet
- Onboard wifi with external antenna
- Onboard charging circuit with onboard power on/off and reset buttons
- 2000 mAh "internal" battery
- less power hungry (going from +1A to 650mA)
- Specially designed LVDS capacitive touchscreen
- A lot smaller than previous prototypes
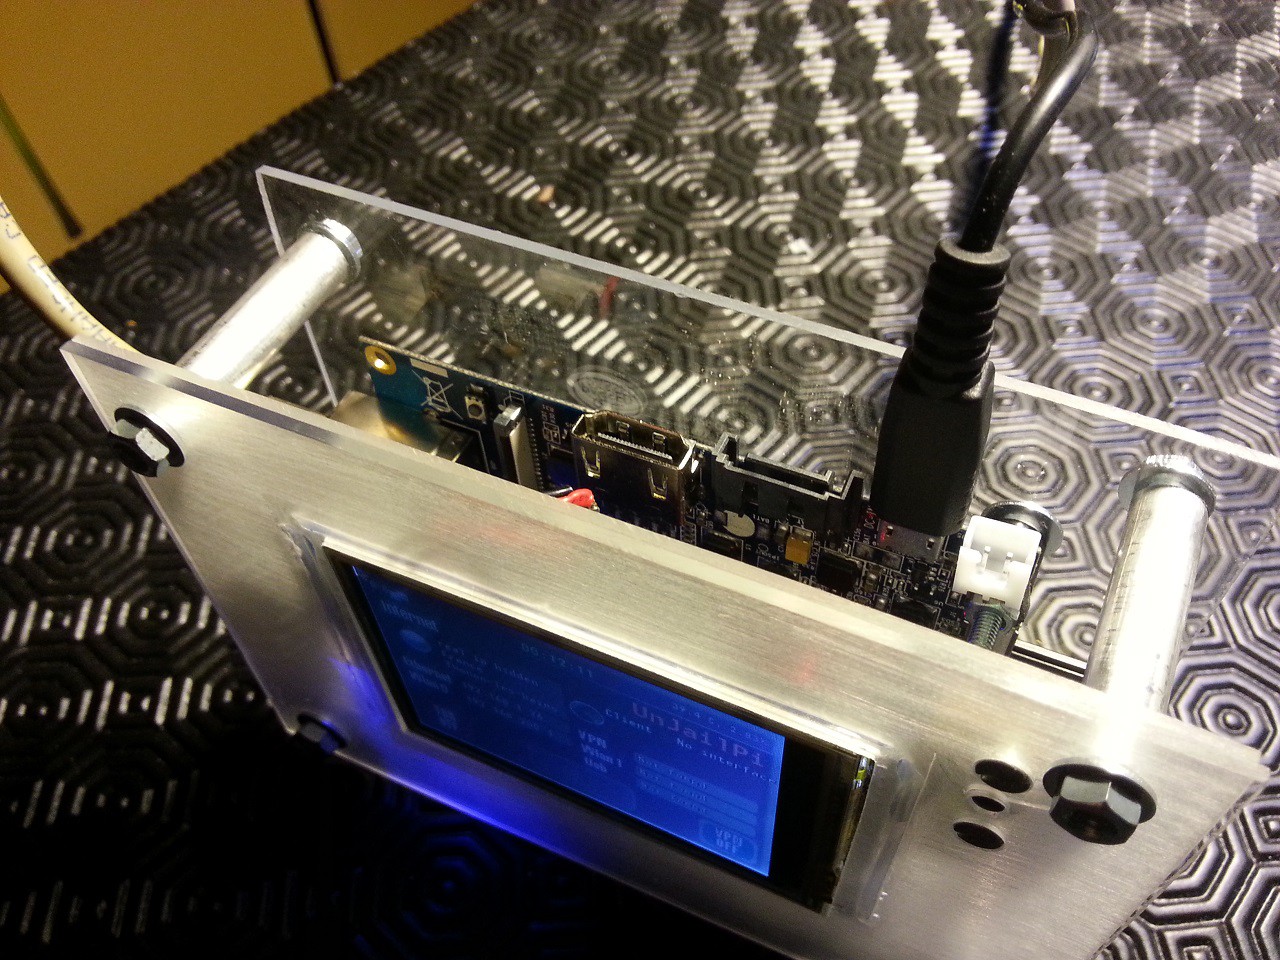
I still don't have an enclosure for it, but I think it really looks like a final consumer product, and it is running very well and fast.
There are also some software updates, but I will make a dedicated log about that.
![]()
![]()
What are your thoughts about this one ?
-
Wireless AP advanced features
11/17/2014 at 13:17 • 4 commentsI've been very busy with the device lately.
First, I added some Wireless AP advanced features to the user interface :
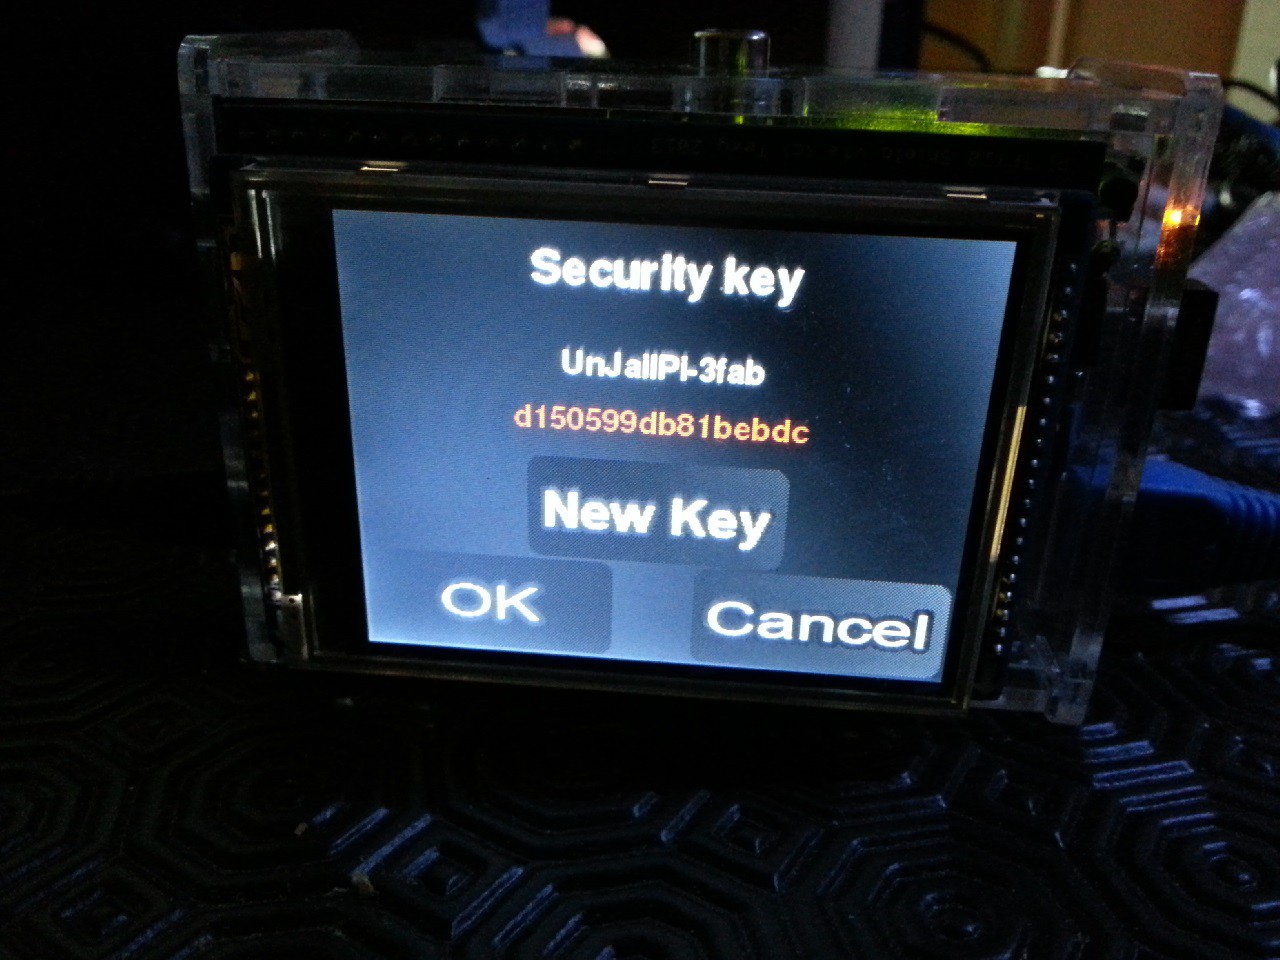
- Random SSID and passphrase generator : each time the Wireless AP is restarted, a new random SSID and passphrase combo is generated. It could be enabled on boot (default enabled).
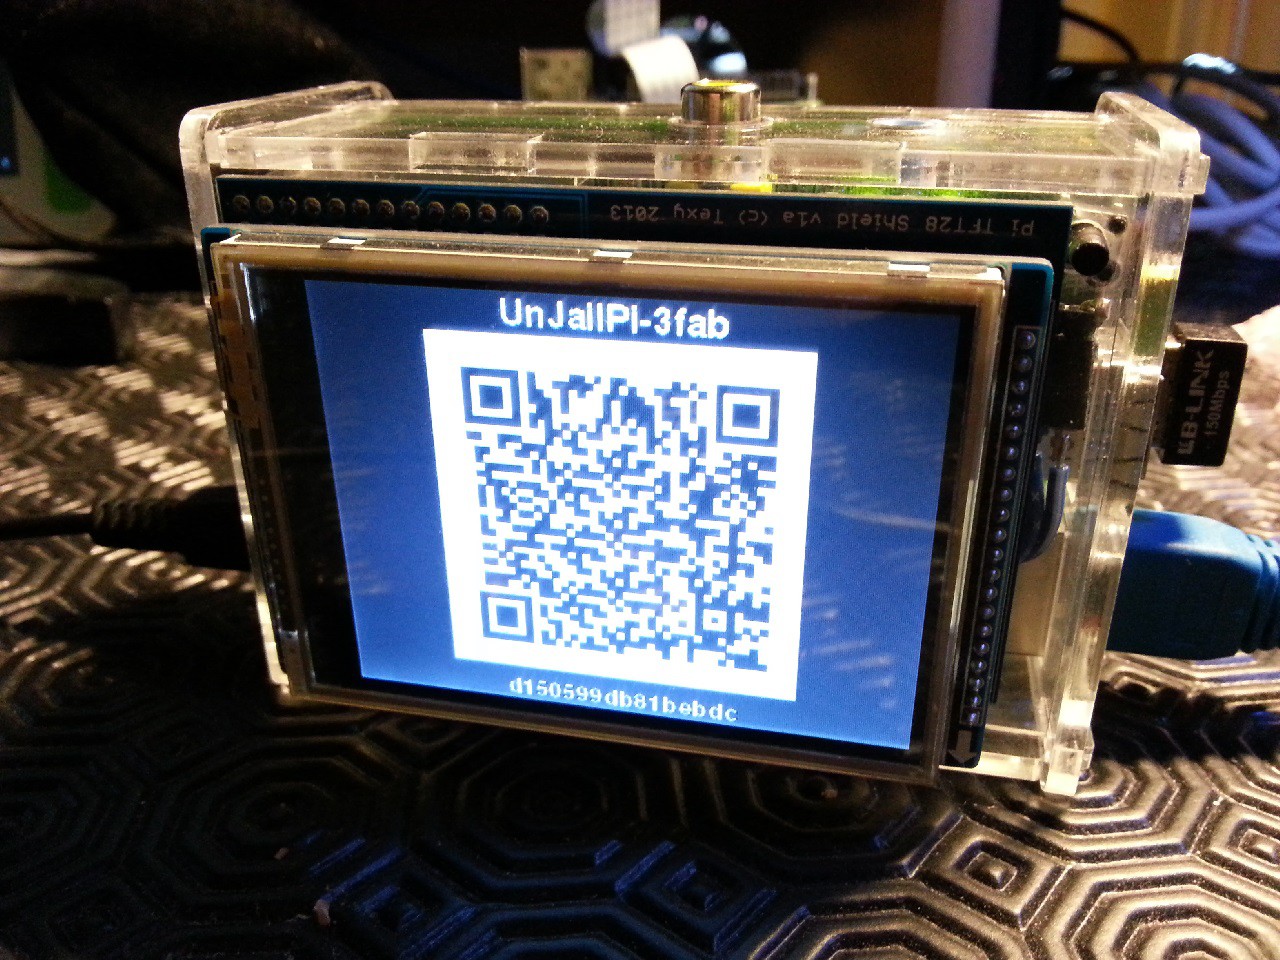
- Quick connect : when the Wireless AP is restarted (or SSID / passphrase combo changed), a screen shows these informations (for PC users) along a QR code for quick Android connection.
- Advanced settings : I added new Wireless AP user settings :
- key lenght (32-64-96-128-196-256 bits, defaults 128),
- AP Channel (1 to 13),
- random SSID (defaults on),
- random SSID / passphrase on boot (defaults on),
- request new AP SSID/passphrase
Wireless AP security is locked on WPA2-PSK (hardcoded).
I also added some hardware monitoring :
- Device temperature monitoring. An icon appears if the device runs hot (never happens anymore but we never know) and shuts down on overtemp
- Battery power gauge
Finally, I finished porting the software to the BananaPi board, but I have an issue with the touchpanel driver. More details on this page. I own the official (and very nice) BPi 3.5" display but it is not touch enabled (yet), so I may have to find another display to complete the porting.
Some pictures :
![]()
![]()
-
Clarifying... Again...
10/17/2014 at 20:46 • 0 commentsTo the many people who are asking if I have something to do with "Anonabox" cancelled kickstarter campaign :
NO, I have nothing to do with them. They took advantage of this project when starting their campaign a few hours before the contest judging, and used my phrasing, but that's all. The tech savvy people could even check anonabox.com registrar to see the mentionned website was registered long after my project was registered to the contest.
Edit : Hackaday just posted an article about this here. Thanks for your support, Hackaday !
Here is also a good analyze about the Anonabox scam.
I'm also very interested in starting a KickStarter campaign or anything else that could make this device reach market (KickStarter is not available officially from France). I'm open to every proposition, so please drop me a line !
I just added a small Paypal Donate button on the project homepage... Do whatever you want with it :p
-
Random Security Key
10/16/2014 at 21:42 • 0 commentsI just pushed a new update (5_11)
Along minor changes, there is now the possibility to manually or automatically generate a random security key. This key is being used by the wireless access point software (hostapd).
A new menu entry allows to use this feature and see the actual key. I have yet to add other access-point related options but it's now easy. WPA2-PSK setting being hardcoded is not necessarily a bad thing for the moment :p
Another hardcoded variable is key lenght. It is meant to be user-definable between 40-256 bits (for scalable security vs usability), but I didn't add it to the menus yet.
The random key generation is also possible on boot, but it's still (also) a hardcoded config variable.
Of course, hostapd and the related interface are automatically restarted when needed to apply the new config.
-
Clarifying
10/16/2014 at 12:37 • 0 commentsHackadayPrize semifinals ore now over. Congratulations to the 5 finalists ! You really deserve it !
Now, move on, there's still a lot of work with this device...
With the hype created by the (very questionnable) "Anonabox", it is very important I clarify a few things :
- Tor is not meant to encrypt traffic, "Anonabox" is very wrong about this. Tor is meant to hide your IP address, nothing more : each end of the Onion circuit could see your traffic. Encrypting traffic is OpenVPN job.
- Tor is not meant to be used all the time : for an example, using it to stream videos, like said on "Anonabox", will cause harm to the Onion network. This is the reason UnJailPi is not fully automatic, and you are still able to activate/deactivate Tor and OpenVPN : you use them when you need them.
- This device won't protect your privacy if your end-point device (tablet, computer) is compromised already. You will also have to change some of your browsing habits : disable Javascript in your browser, carefully use credentials, and some more. Quoting Kali Linux meme : "With great power, comes great responsability"
- For the moment, UnJailPi is built on top of a cut-down Raspbian Operating System. It was the best way (IMO) to start with a clean base : Raspbian repos are used widely so there shouldn't be anything really suspiciousn and software updates still remain easy. However I'm actually looking for a more specialised operating system : Moebius, OpenWRT, PORTAL are options.
- UnjailPi prototypes use Raspberry Pi / Banana Pi boards. Raspberry Pi is a well known board, we can be 100% sure it doesn't have any hardware backdoors. About Banana Pi, I'm sure LeMaker people will be more than happy to have some of their boards handle an audit.
- I never said anywhere I'm a security specialist. My code is easy enough to prove there are no flaws in it, and if there are, I'd be more than happy to correct them.
- UnJailPi is still at the HackadayPrize semifinals status : it is still in a prototype stage and final revision is not there yet. The device is looking for some funding, some feedback, and could benefit of some technical help. If you are willing to support this project, feel free to contact me...
I'm also being asked the differences with Adafruit OnionPi. Here are some of them :
- OnionPi is fully automatic, Tor is enabled on startup. This was a good start base, but Tor needs to run only when we need it.
- OnionPi doesn't provide any OpenVPN features
- OnionPi doesn't offer access-point random key generation features
- UnJailPi has a very easy-to-use user-interface
- UnJailPi allows to block/force Tor relays depending on their location
- UnJailPi is really autonomous with its internal battery (2-3 hours running-time)
- UnJailPi works with every type of outside access : cable ethernet, private/public wifi, mobile data network with android USB/wifi tethering. There are also plans to include LTE 4G dongles support.
I'm very open to discussion about this device. If you're interested, please drop me a line... -
A long-awaited feature...
10/03/2014 at 20:20 • 0 commentsFinally, it's there : we can now black-or-white list TOR relays based on location, from the main interface.
It's a little difficult to explain, so here is the demonstration video (I apologize for the video quality, filming this tiny screen is not so easy) :Basically, it allows to force or block relays, based on their location (246 countries....). It was a really important feature from start, but some work had to be done to allow this possibility.
One could notice the menu is not so nice yet, and this feature still needs a "complete reset" and a easy to read list of white-or-black listed node locations : it may be a little difficult to know the current settings. But hey, it's not a big deal, the hard part is done already.
Now, I want to be able to determine the exact circuit TOR is using, maybe show it on a map. I already have a few ideas about how to do it, even some code snipplets ready, but it is another story.
Now, I could easily watch Doctor Who's new season live episodes on BBC from France... :-)
-
Time to thank people
09/28/2014 at 13:09 • 0 commentsWe are now a few hours to the next vote, so I think I won't work on the documentation anymore until then. The project will make the cut to the next contest stage, or will not, it's now too late to change this fate.
So, I think it is a great time to thank the people who contributed to this project, either with providing some hardware, or with giving some time, or both. This project could not have gone so far without these people :
- PiModules donated the main prototype's powering circuit and laser cut enclosure. On the other hand Ioannis is always present when I encounter problems.
- LeMaker team worked so hard to improve their software and allow the BPi prototye to work in time. They are also of great help with many things along the way.
- Many people offered their help in one way or another : the swiss people that invited me for a device's show, the hackaday readers who gave some very contructive critizism about the project, the friends and relatives who donated time, advices and critizisms, and of course my best half who supports me day after day.
Of course, I wish to thank HackaDay team for bringing me the chance to get some attention about this device. Before this contest, I wasn't that sure my device concept could be interesting to people. Now, I don't have any doubts about it.
This contest is only the beginning about this device. Many more improvements are planned, and I'm already working hard towards a future marketing scheme. Partners and customers are identified already, it is just a matter of time (and money) right now.
Now, back to coding...
-
Finally, this one is working just in time
09/27/2014 at 02:34 • 0 commentsI was not sure I could make it work before the next vote, but finally it is there and I could show it.
This prototype shares the first prototype's display and enclosure, it is so nice to make experiments without breaking anything... Software is cross compatible with the "official" device. Other than that, this is a completly different beast.
This prototype is not meant to remplace the actual device which runs very well, but to live side by side with it. Each one offers its own unique hardware features (the Raspberry Pi advantages being the most advanced device, easily buildable, and offers a large support community).
![]()
Hardware :
The main board is the Banana Pi from Lemaker people. This is a Allwinner A20 SOC featuring a 1GHz dual-core Cortex A7 CPU, with 1GB DDR3 memory, Gigabit ethernet, a SATA port, and battery charging circuitry. The user defined led and onboard on/off button are also very appealing. It shares the Raspberry Pi GPIO scheme and runs a Raspbian-compatible operating system.
So it made perfect sense to port the Web Security Device to this board first.
The most difficult part was about the display, it finally worked only today. This prototype still misses its internal battery, but I already made some progress about it and Lemaker people do a great job helping me along the way with their hardware.
Software :
Like I've done with the actual device, it runs a stripped-down version of Raspbian-like OS, cleaned up of every component non-essential to the device. Less software components means better security. I also updated the main software to be 100% cross-compatible with RPi and BPi (except the powering management part for the moment). Next move may be moving both boards to some barebone distro.
It still needs a lot of work, but this new prototype runs very well already, and is pretty fast...
![]()
![]()
Web security everywhere
Secure your Internet, control your data, fight censorship. Bring your autonomous all in one privacy device everywhere.
 Arcadia Labs