Florian Wilhelm Dirnberger
0. Outline
The underlying physical principle is radiation. Every warm body radiates heat, and every (warm-blooded) creature radiates in the infrared spectrum.
The infrared sensor cost about fifteen Euros (September '25). With the other components, the expenses for a prototype amounted to forty-odd Euros.
1. Prototypes
The prototypes are built around a Raspberry Pi Pico W, components are connected thru the I2C bus (see farther below).
I am using a Raspberry Pi for program development, obviously (the actual SW is written in C language) and for checking raw data on the serial port (debugging). A Raspberry Pi is also on the receiving end of thermal data (IoT prototype).
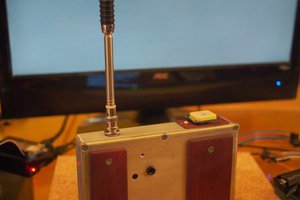
1.1 IoT Prototype
Reading web data provided by the Pico W by means of a Python program. An ML algorithm is trained with data, and capable of detecting a person within the angle of the sensor's vision.
1.2 non IoT Prototype w/ display
A first smoke test with the prototype, OLED display is intended for demo purposes. Displayed are 60 FIR pixels (out of 768) picked from certain rows and columns, but otherwise picked at random.
2. I2C bus components
The Raspberry Pi Pico W is, by default, the I2C bus master. Fast mode operates with 400 Kb/s baud rate, what entails an IR array refresh rate of 16 Hz, or lower.
Slaves:
* MLX90642 IR array (the actual sensor)
Optional:
* OLED display 0,96'' w/ SSD1306 controller (for experimenting / presentation / basic data output)
* TSL25911 ambient light sensor (for night activation or error correction / bright sunlight compensation if applicable; interrupt pin is not wired)
The Raspberry Pi is not part of this network. The components are just "daisy-chained" on two GPIO pins of the Pico W (SDA on Pin 4, and SCL on Pin 5), so normally I wouldn't bother with a schematic but I attached one anyway here in the file section (generic design for I2C projects).
3. InfraRed (IR) array details
The MLX90642 IR array consists of (32 columns x 24 rows =) 768 FIR pixels/sensors, each individual IR pixel delivering 2 Byte of thermal data to be acquired via I2C commands i. e. registers. Simple math formulas have to be applied on the data to get object temperatures.
Temperatures in the range -40°C to 85°C can be measured, values can be acquired continuously or step-wise. I2C clock speed has to be high enough to be able to deal with the array refresh rate to avoid glitches.
Emissivity of the object could be modified too, but that's not necessary in the project context: human skin has an emissivity of approximately 1 what is the default value anyway.
4. IoT
Many options for realizing an IoT-device, but as mentioned I am using a Raspberry Pi Pico W and the home WiFi.
Analysis, rendering and display of thermal data on a computer makes more sense than on the IoT webserver itself, or on any attached off-the-shelf display for that matter.
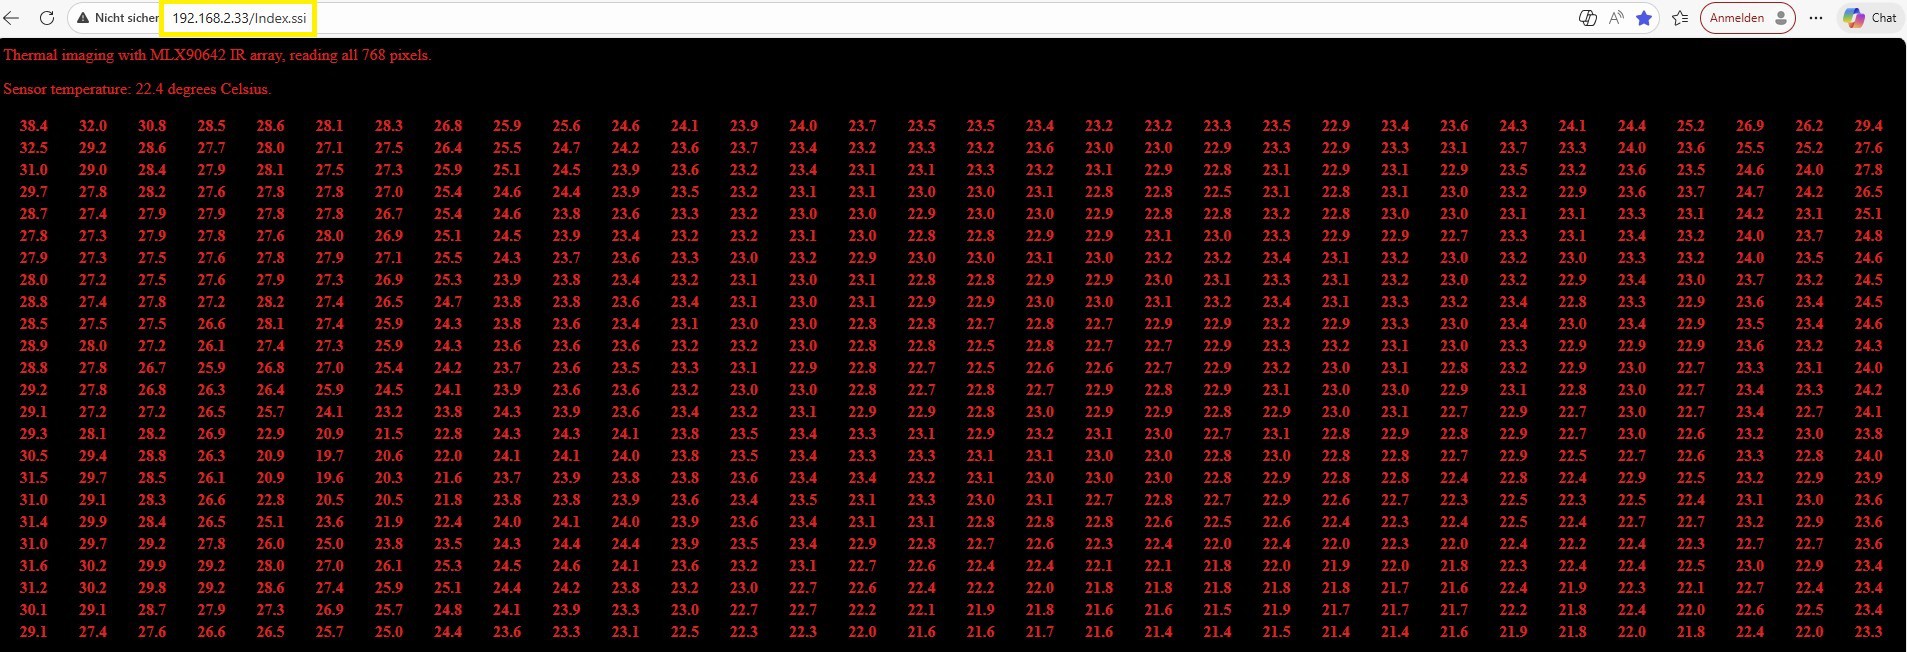
Implementation where all 768 pixels are read and temperatures are just shown in a web browser. You see that it's just a simple http connection with no certificates implemented, so I do not recommend making such a device available to the wider world (security is a whole different subject-matter).
The thermal data can automatically be imported via MS Excel web interface, or crawled and visualized via Python scripts.
This "webcrawling" is rather cumbersome, there exist faster and more elegant solutions such as MQTT I will not dive into here.
Quite another problem is making SSID and password configurable for a random WiFi. One way to solve it is making these variables accessible for Picotool. SSID and password have to be permanently hardcoded otherwise.
5. Challenges
There are numerous challenges along the way until I have a useable home intrusion system that does not boast with too many false positives.
Perceiving / visualizing a moving object in a couple of meters distance outdoors...
Read more »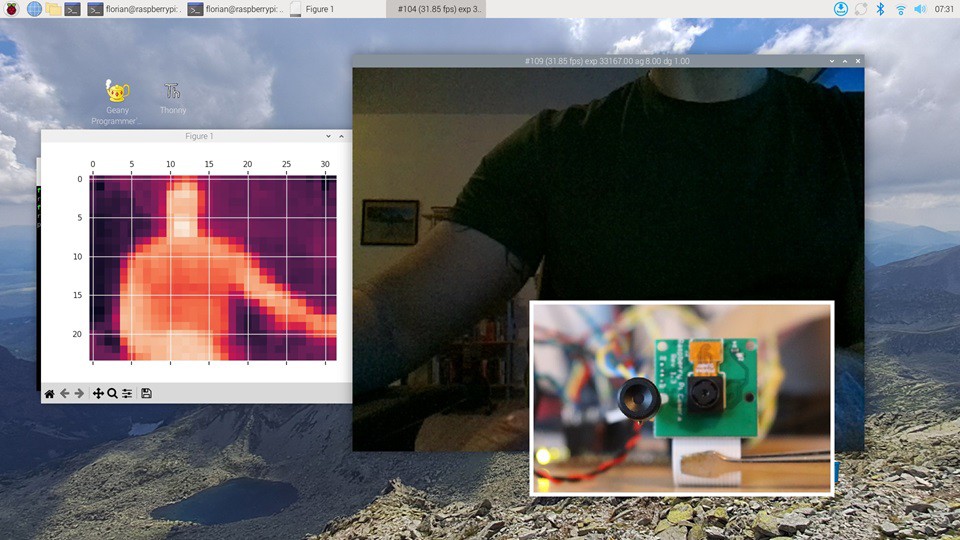
 AlfredC
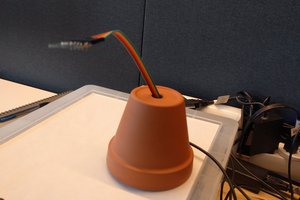
 Alpha Charlie