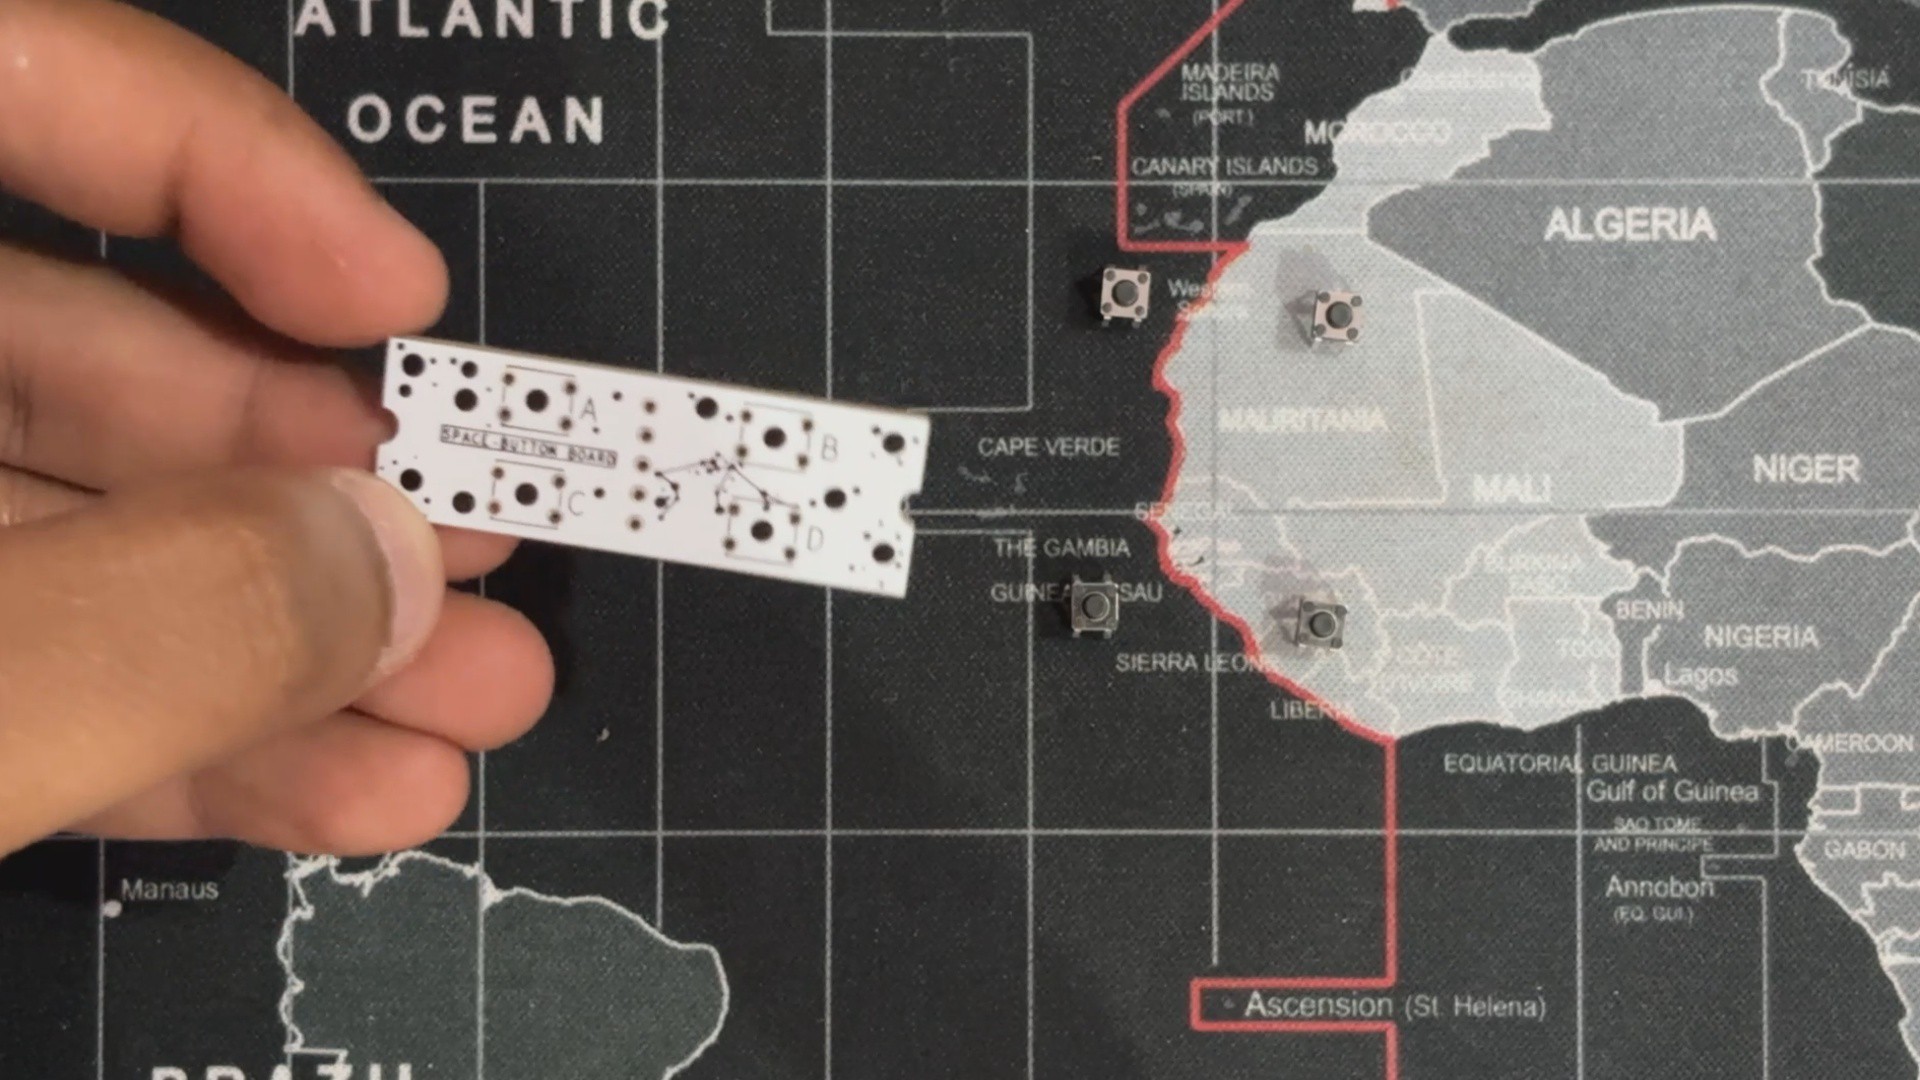
The switch PCB assembly begins by placing all the tactile push buttons in their position.
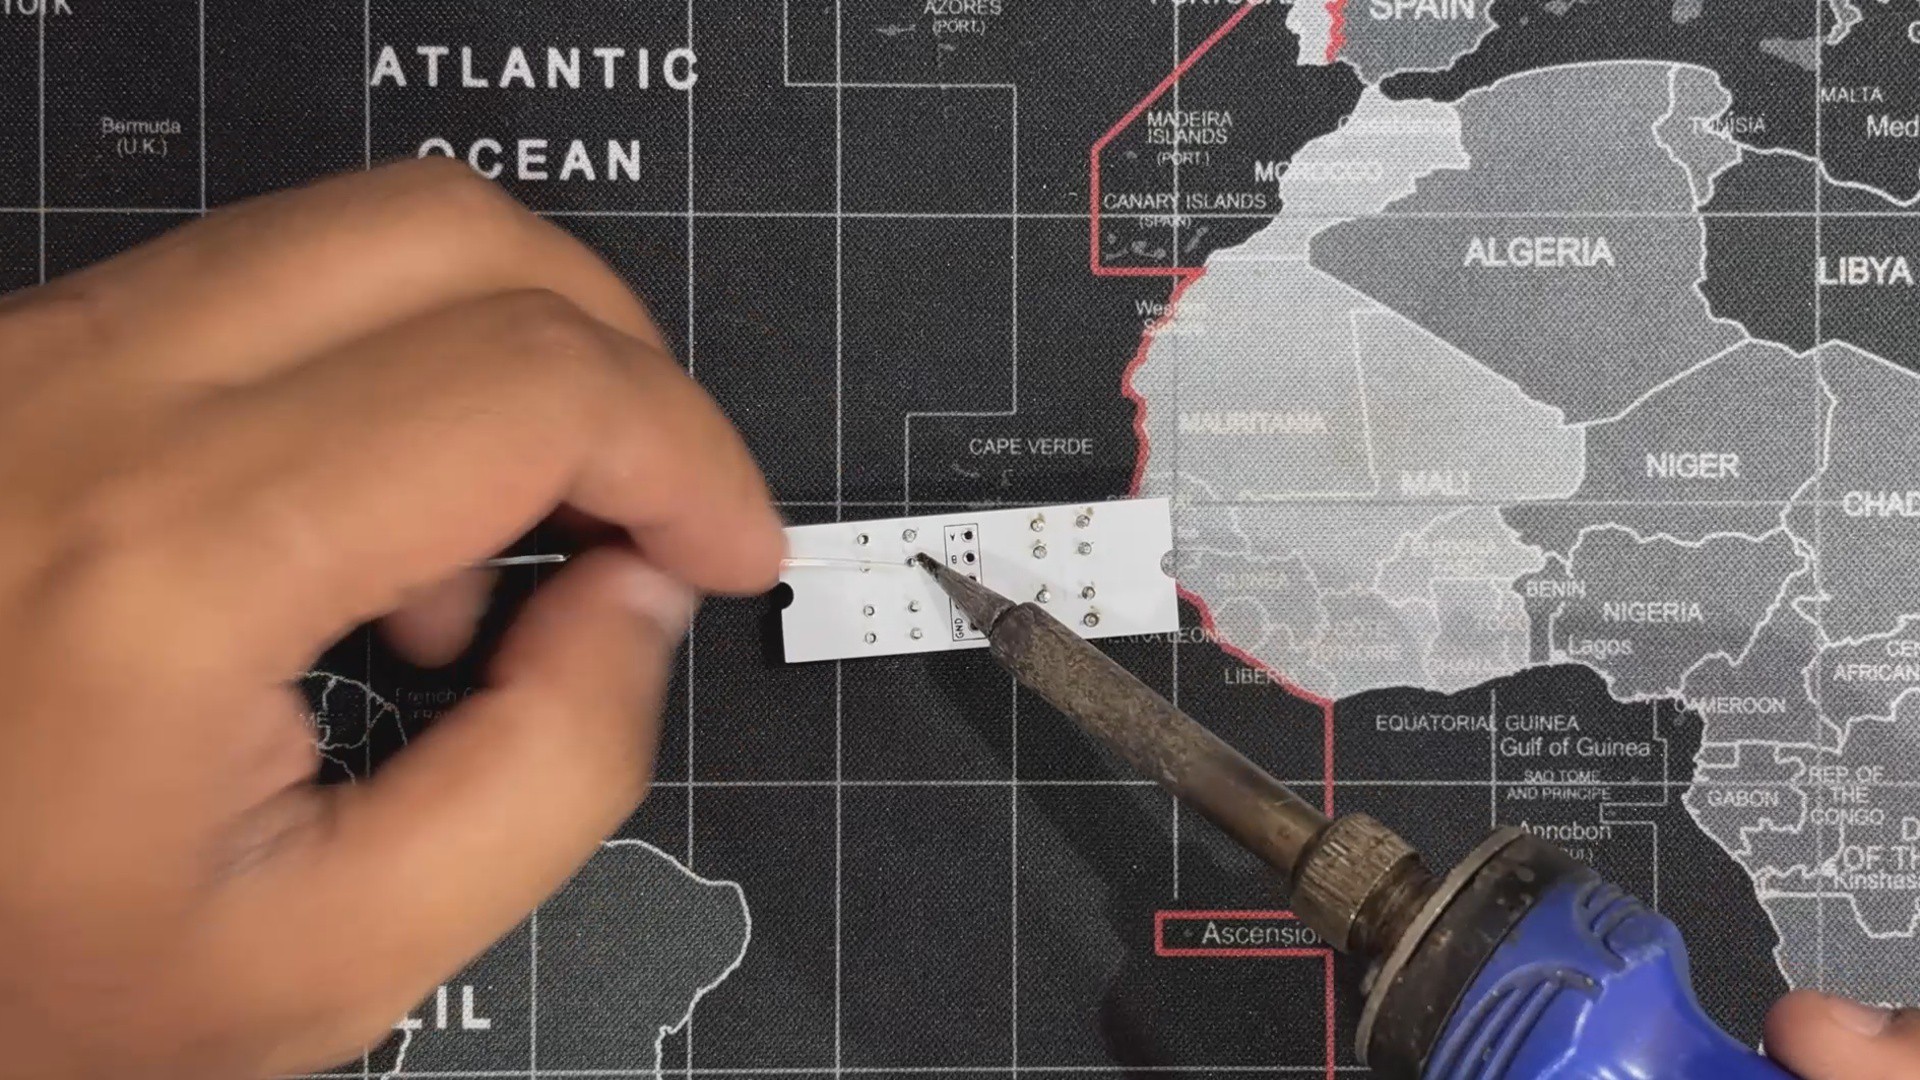
We turn the board over and use a soldering iron to solder each pad.
2
ESP32 S3 1.68 Inch Display
The ESP32-S3-LCD-1.69 truly shines at the heart of this build. Compact yet mighty, it packs a dual-core Xtensa LX7 processor clocking up to 240 MHz—delivering smooth performance across input, logic, and display tasks. Thanks to built-in Wi-Fi and Bluetooth 5, it connects effortlessly without extra modules or messy wiring.
Memory-wise, it’s stacked: 512KB of SRAM, 384KB of ROM, plus 8MB of onboard PSRAM and 16MB of external Flash.
This board is loaded with features that enhance our Guessatron, including a 1.69-inch capacitive LCD screen, a lithium battery charging chip, and a six-axis sensor with a three-axis accelerometer and gyroscope.
It has an ETA6098 lithium battery charging chip for long-term power management, a QMI8658 inertial measurement unit (IMU) for motion tracking, and an RTC chip for clock functions.
Although the ST7789V2 LCD controller's active display area is 240(H) × RGB × 280(V), it offers a 240 × RGB × 320 resolution. It is compatible with RGB444, RGB565, and RGB666 color formats; for best visual results, our project uses RGB565.
The display's smooth corners add to its elegant, small appearance, and the four-wire SPI interface guarantees effective GPIO usage and quick communication speed.
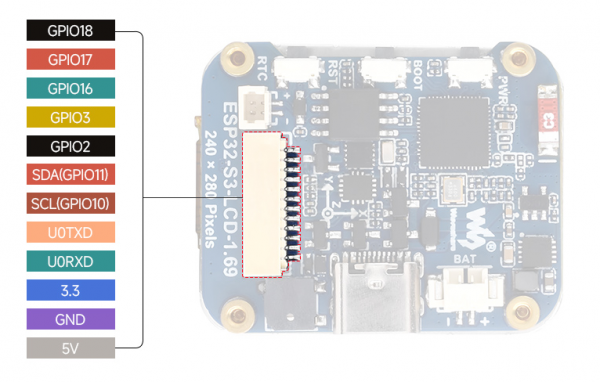
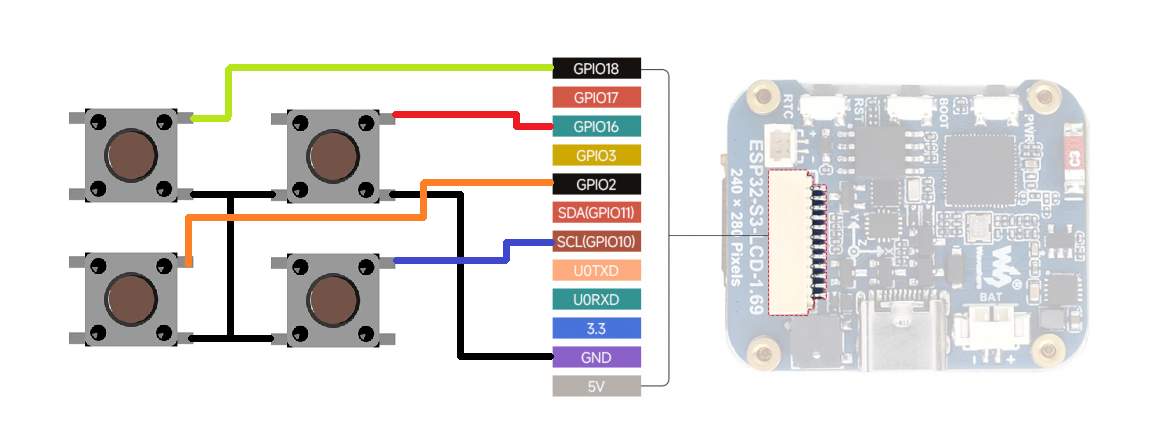
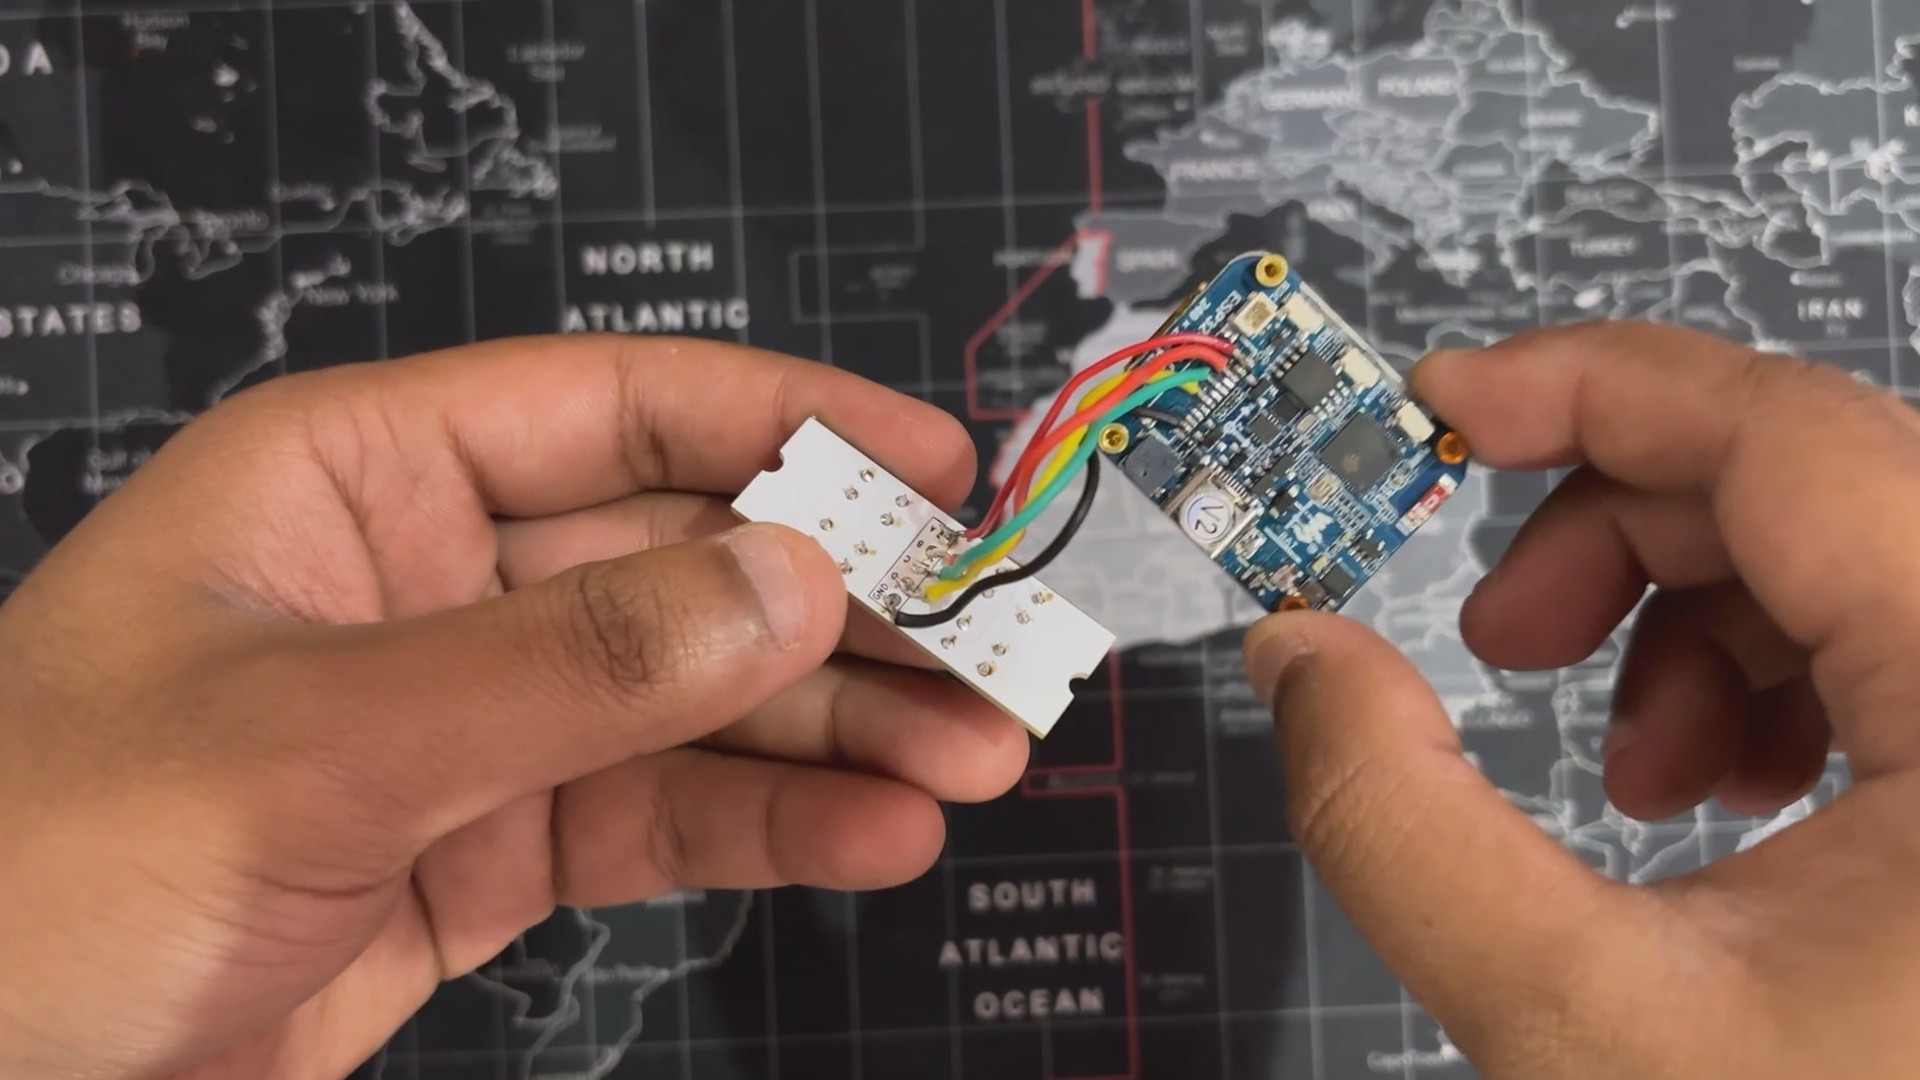
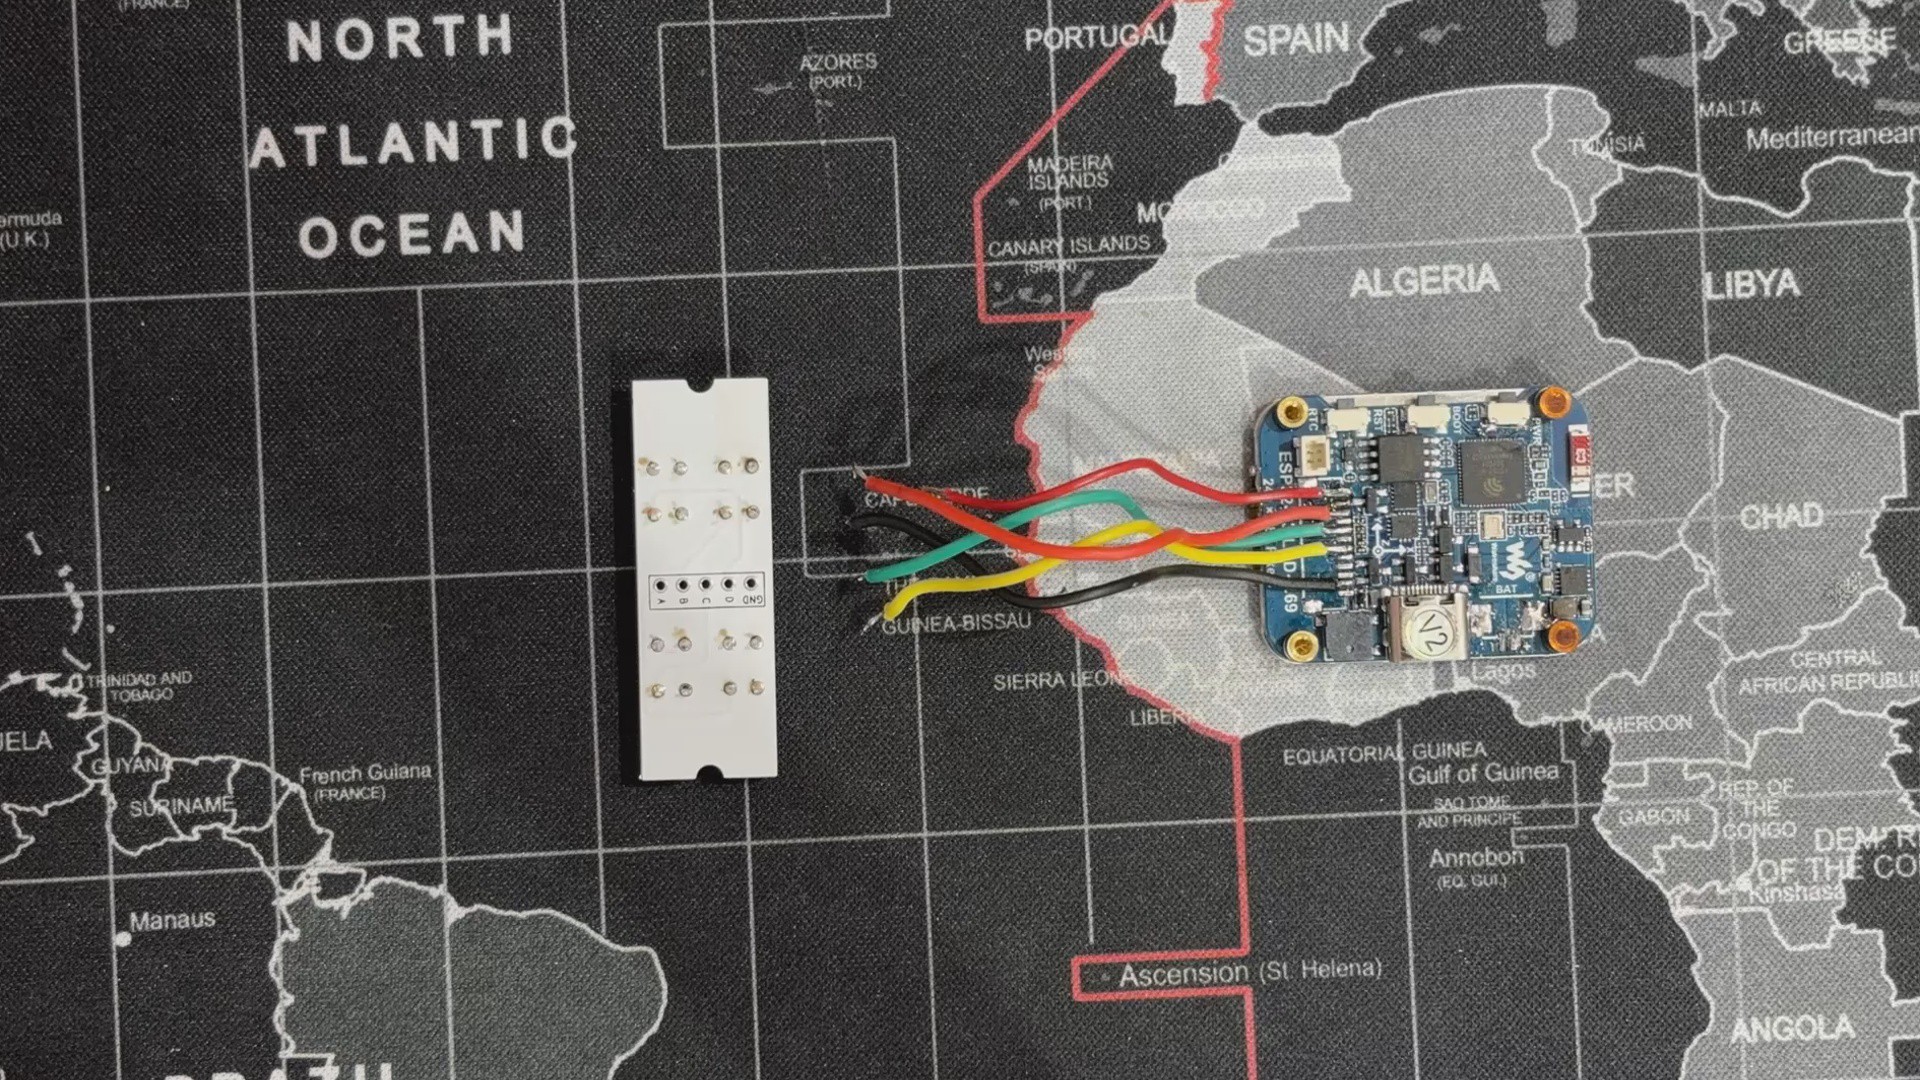
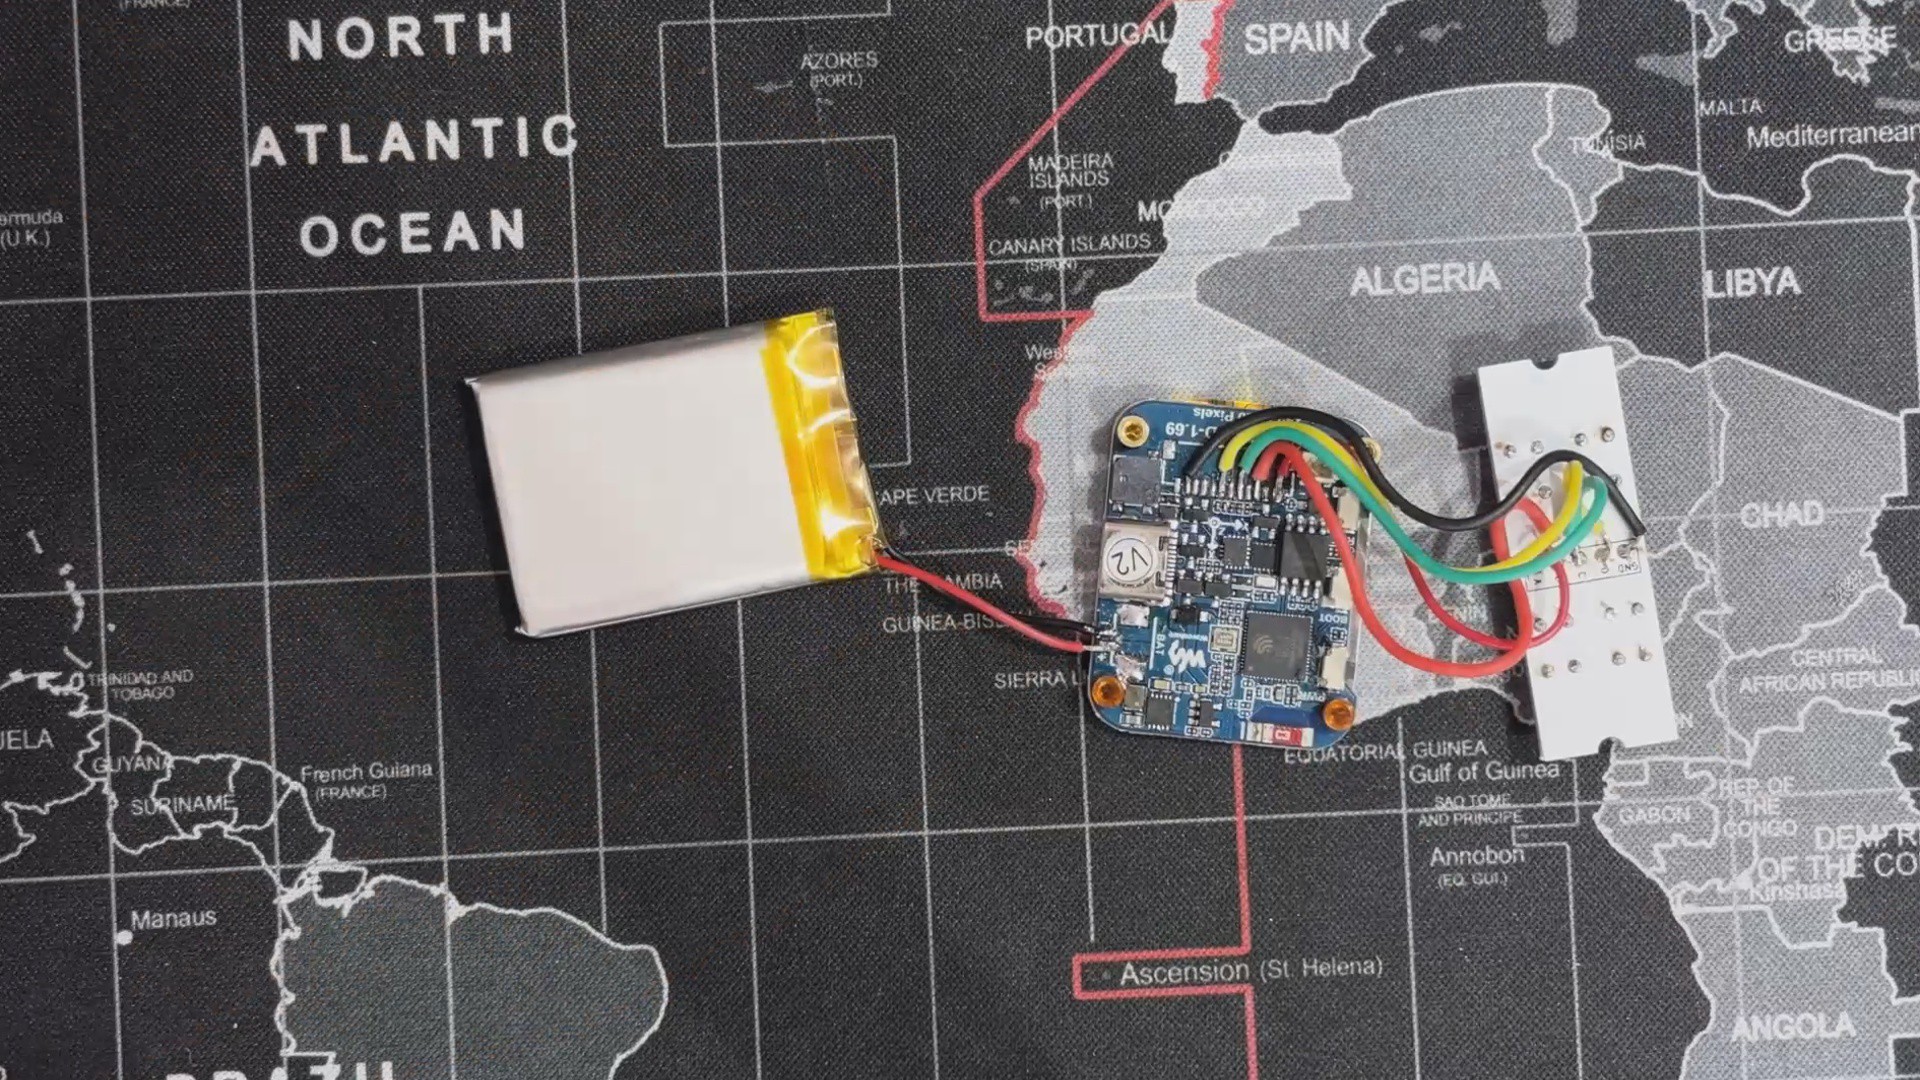
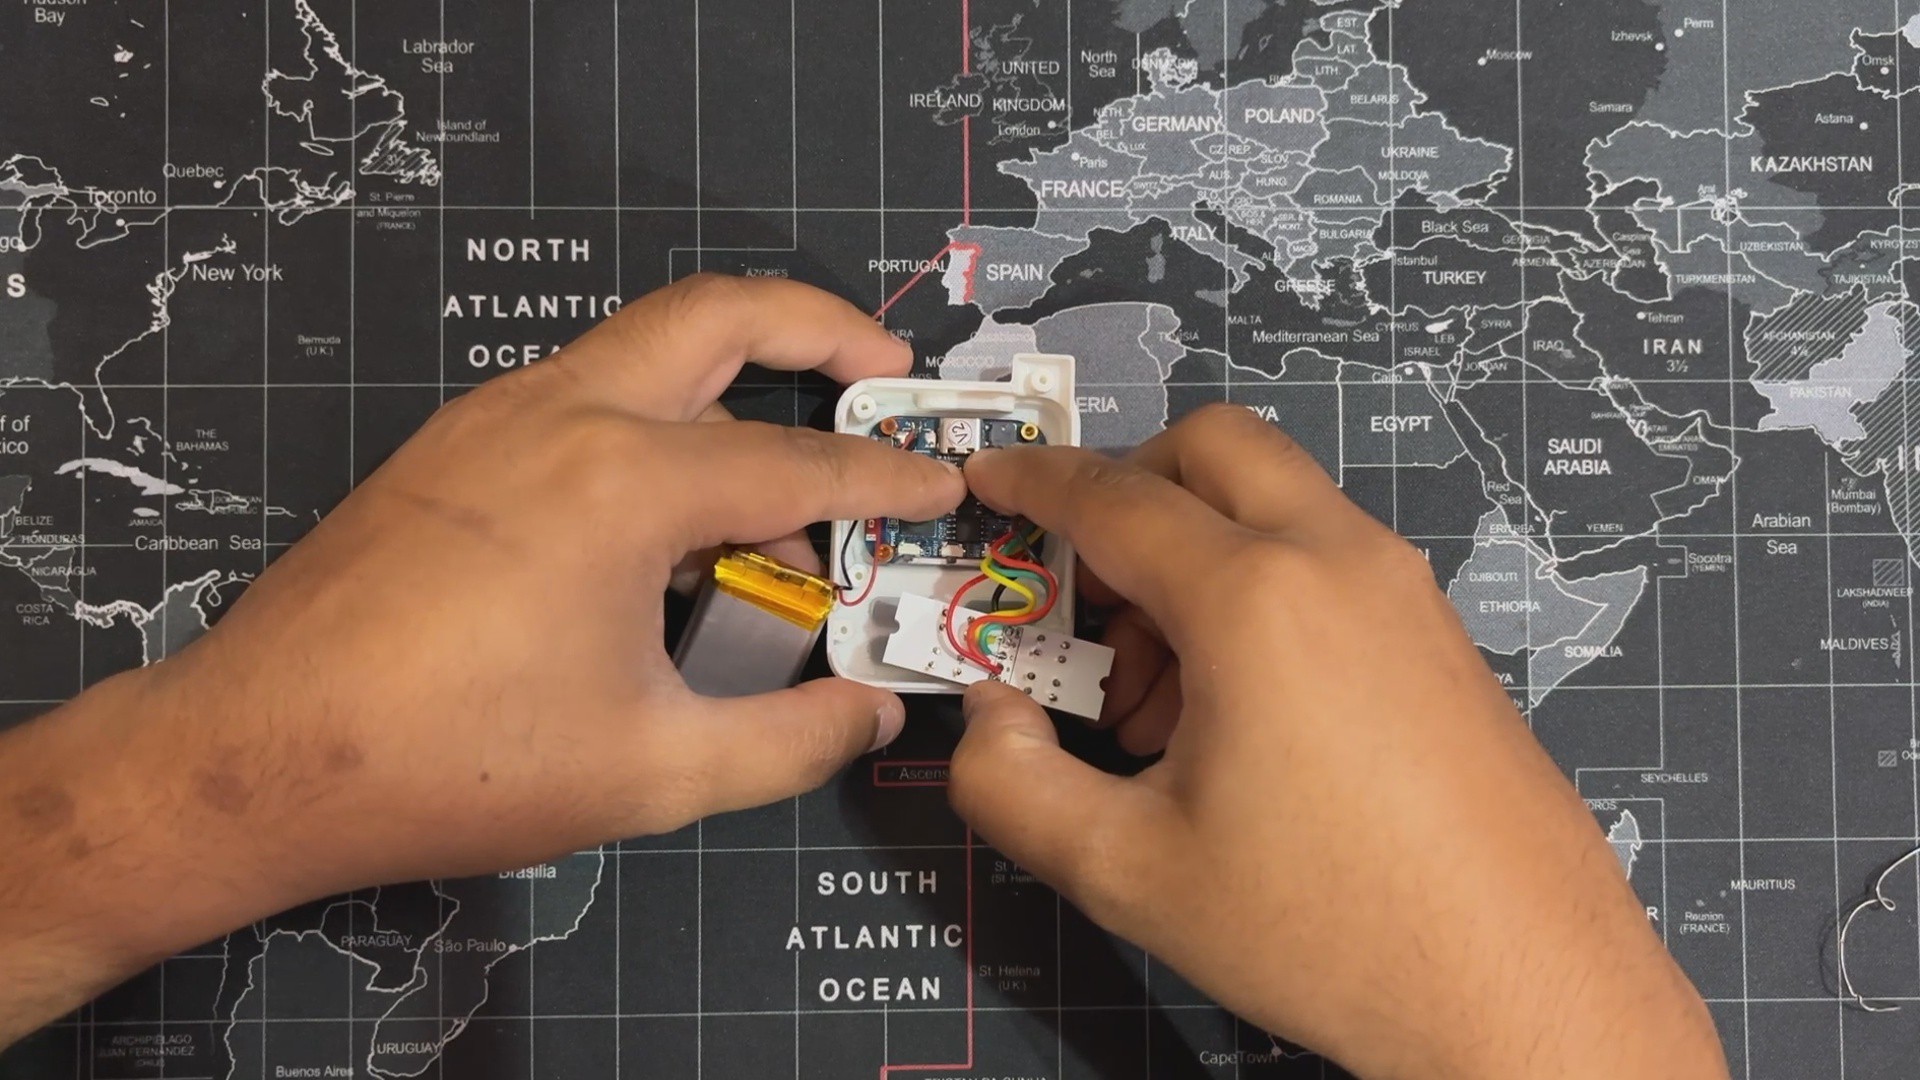
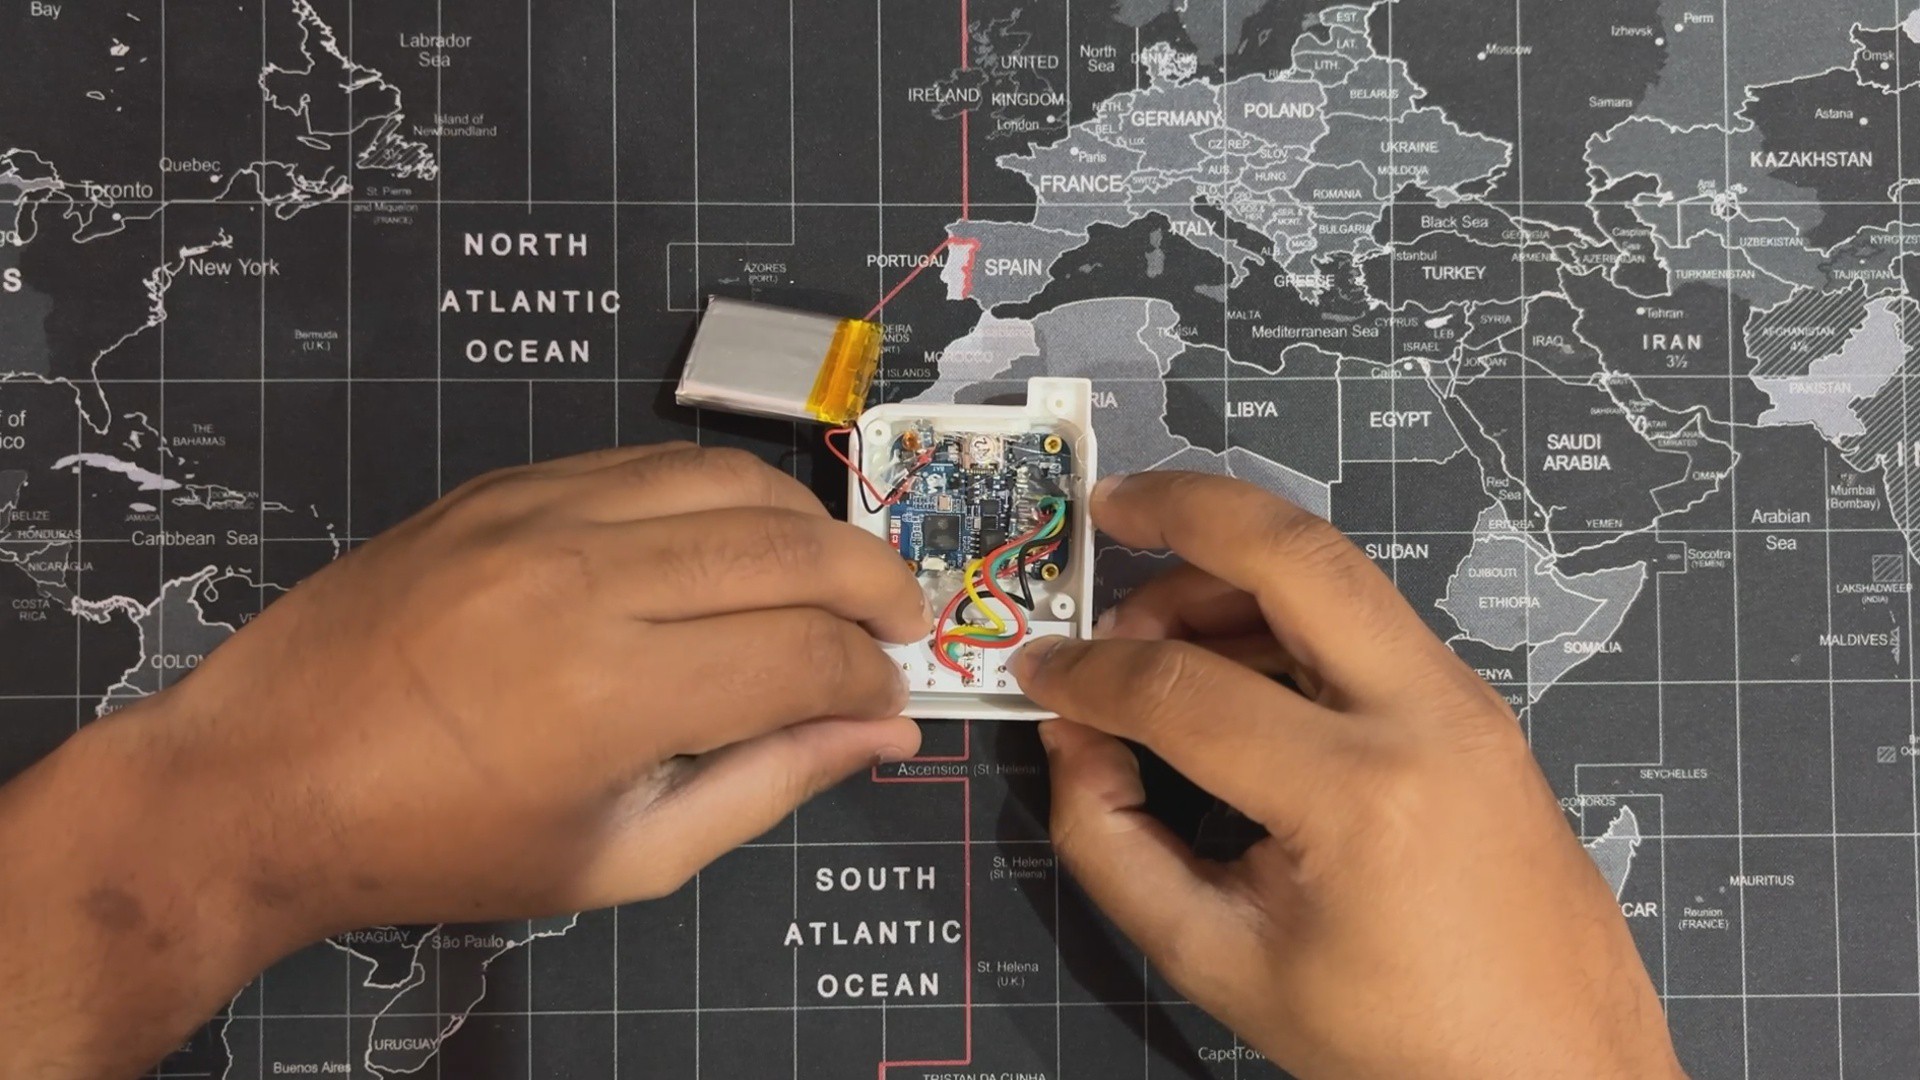
We start the switchboard and display assembly process by soldering jumper wires to ESP32's GPIO18, GPIO16, GPIO2, GPIO10, and GND.
Next, we paired the switchboard with the ESP32 display board using the jumper wires; we simply followed the attached wiring diagram for connection.
4
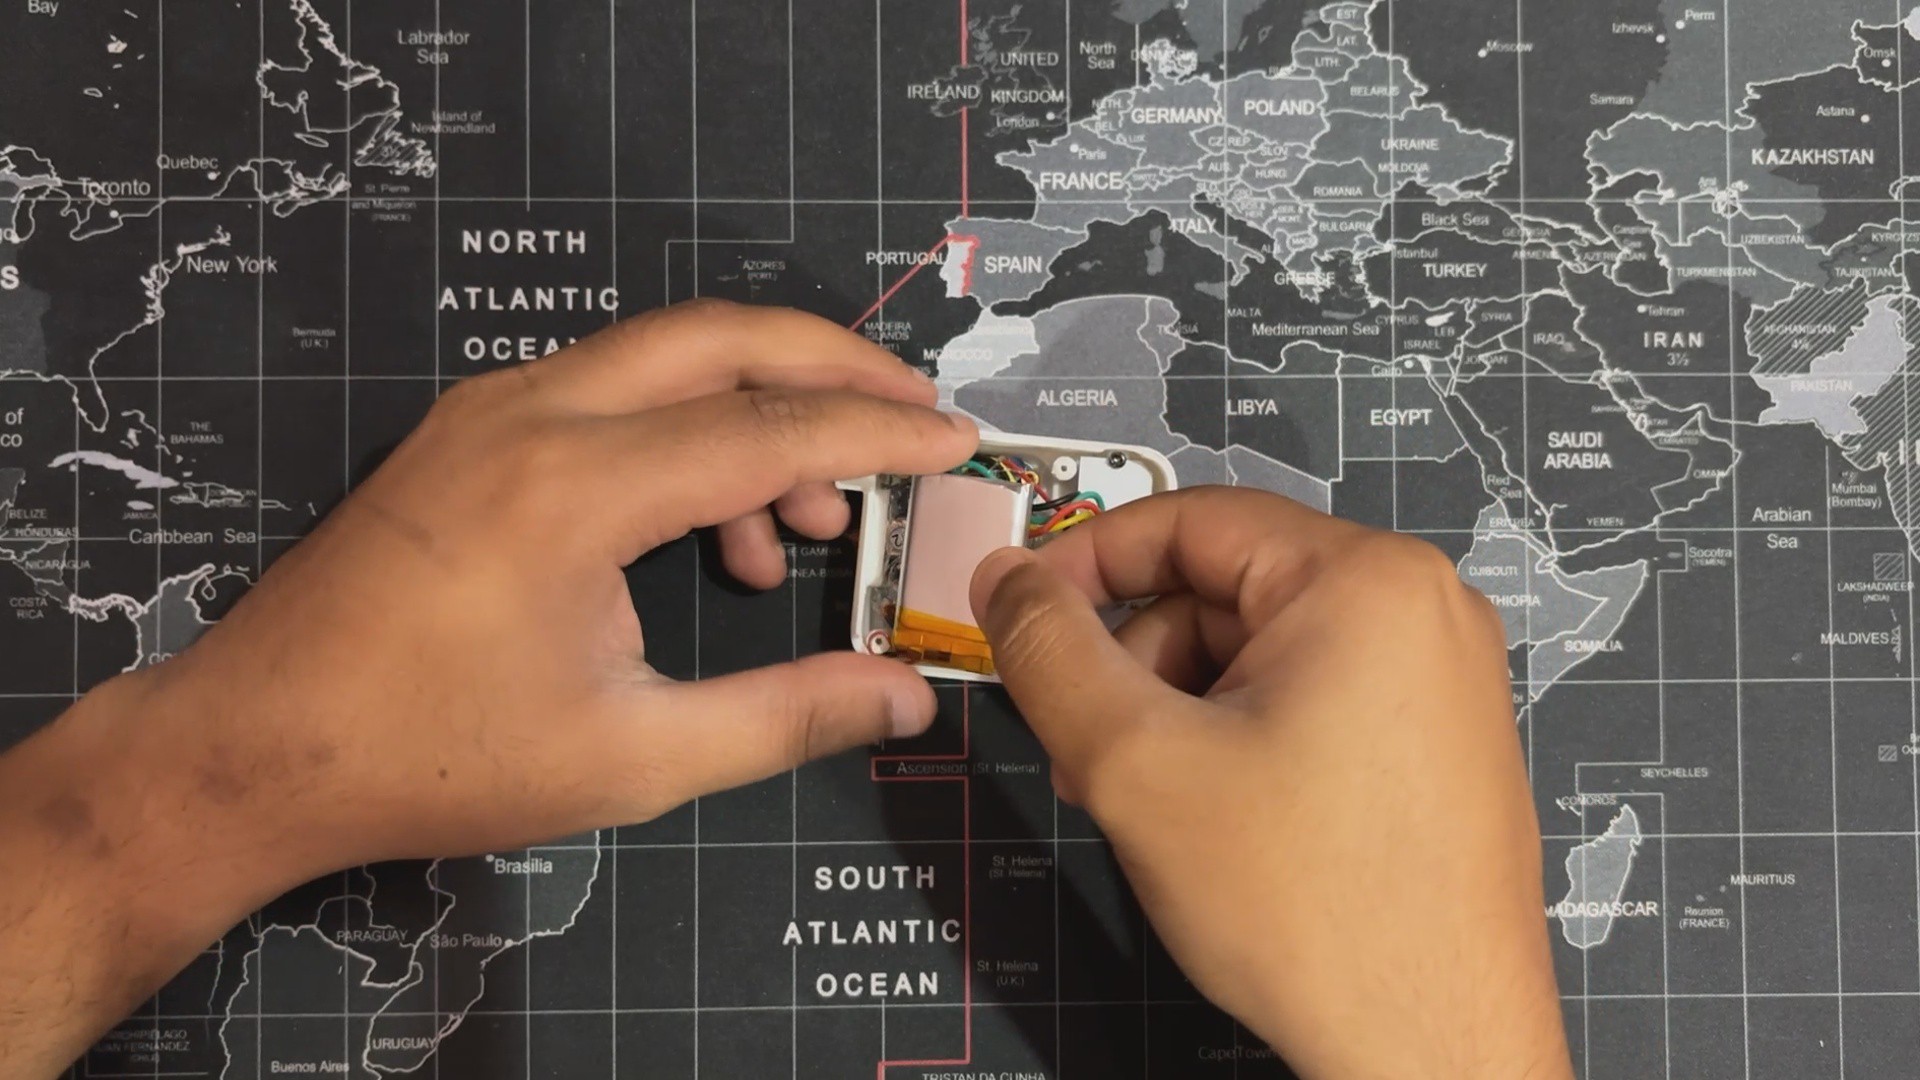
Power Source Assembly
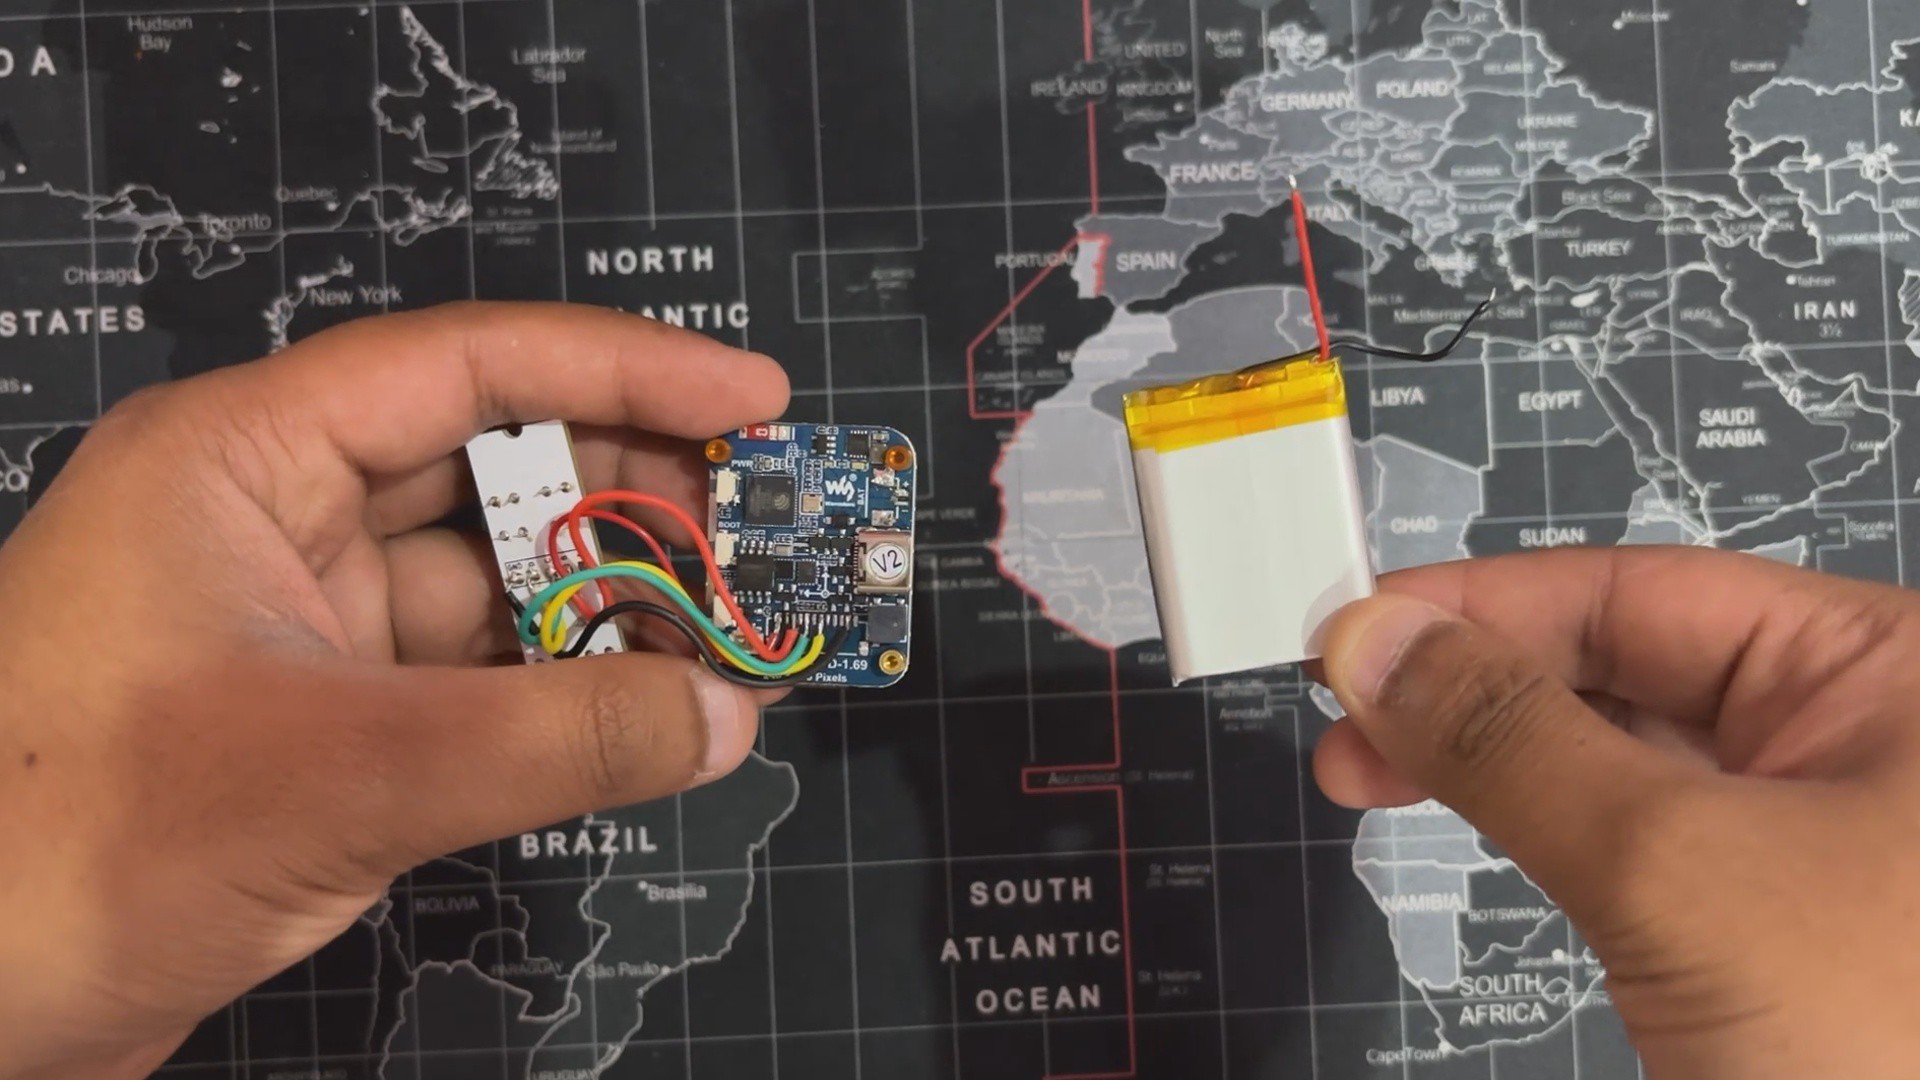
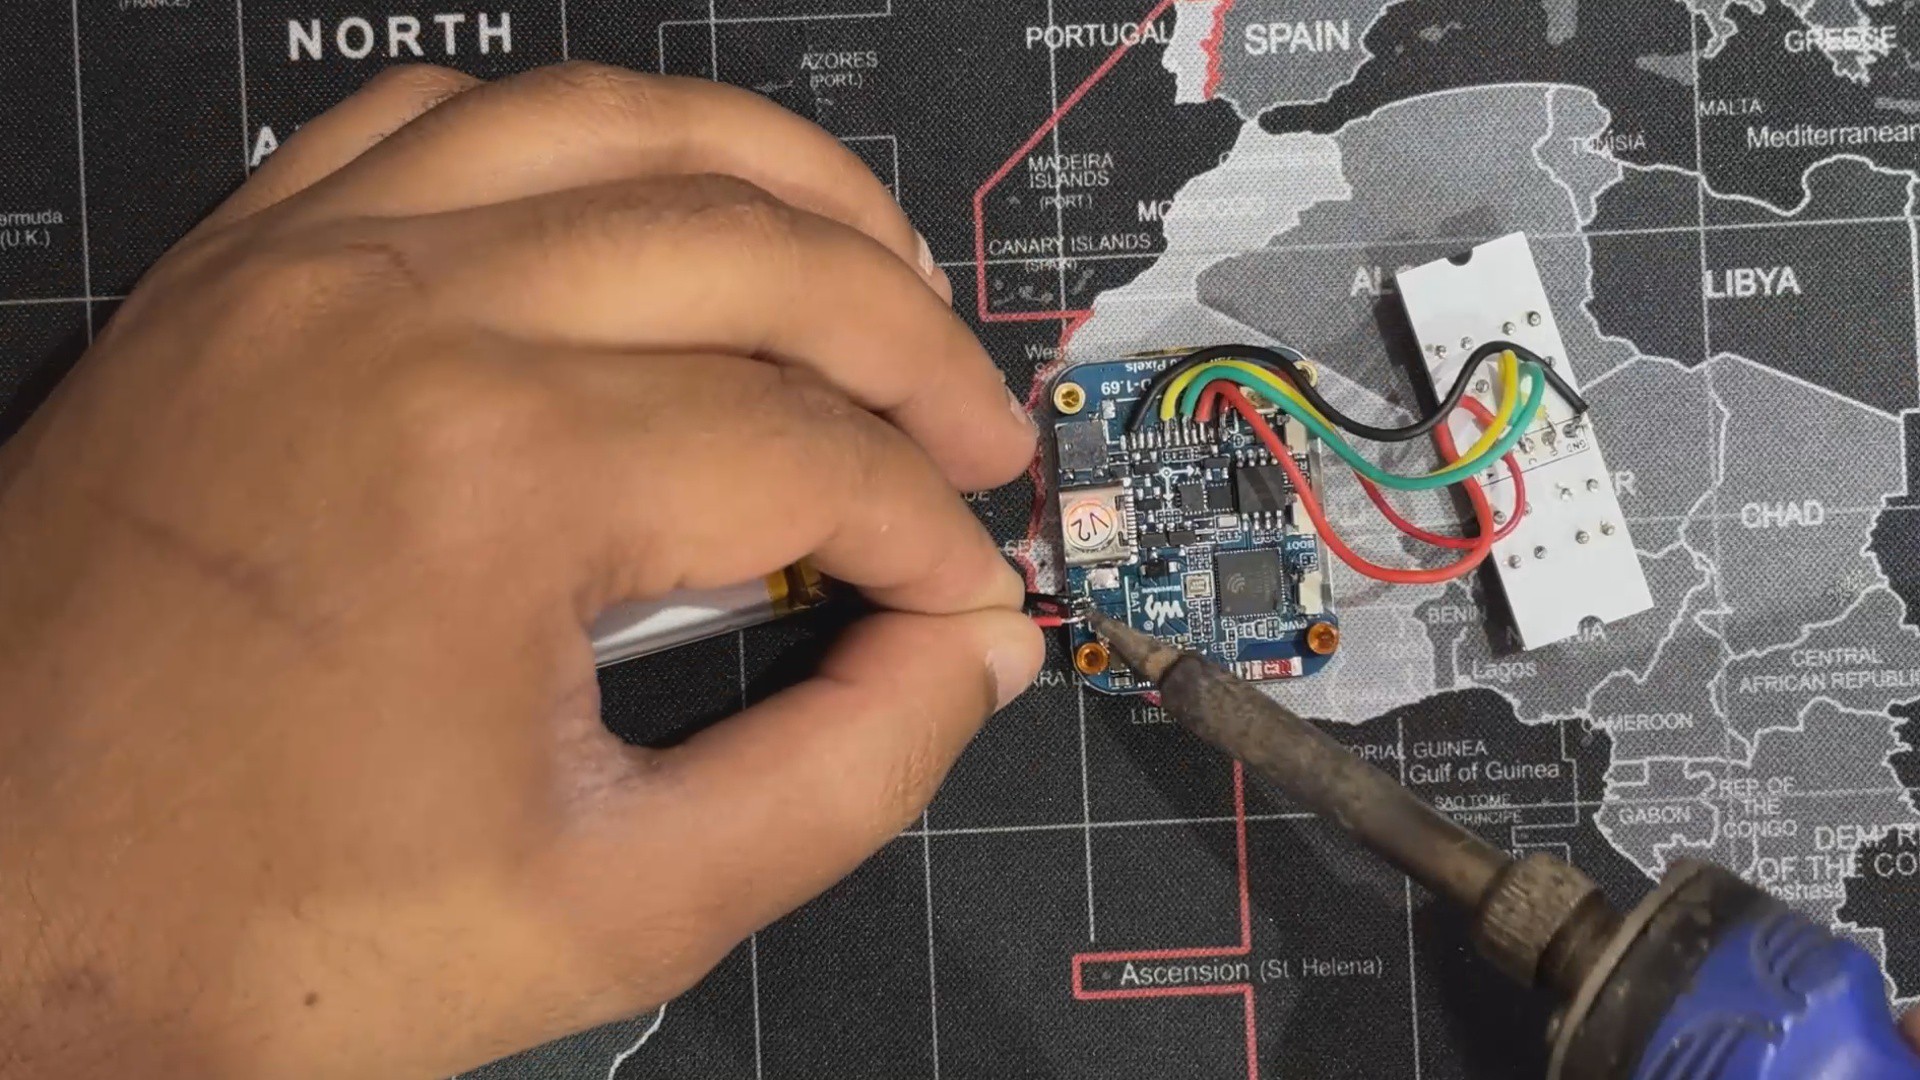
Next comes the power source assembly process; here we are using a 600 mAh 3.7 V LiPo cell whose positive and negative terminals we connect with the ESP32 Display's battery terminals using a soldering iron.
The ESP32 1.68-inch display we are using features a built-in lithium/LiPo charging IC that charges and discharges the cell properly, eliminating the need for a power circuit.
5
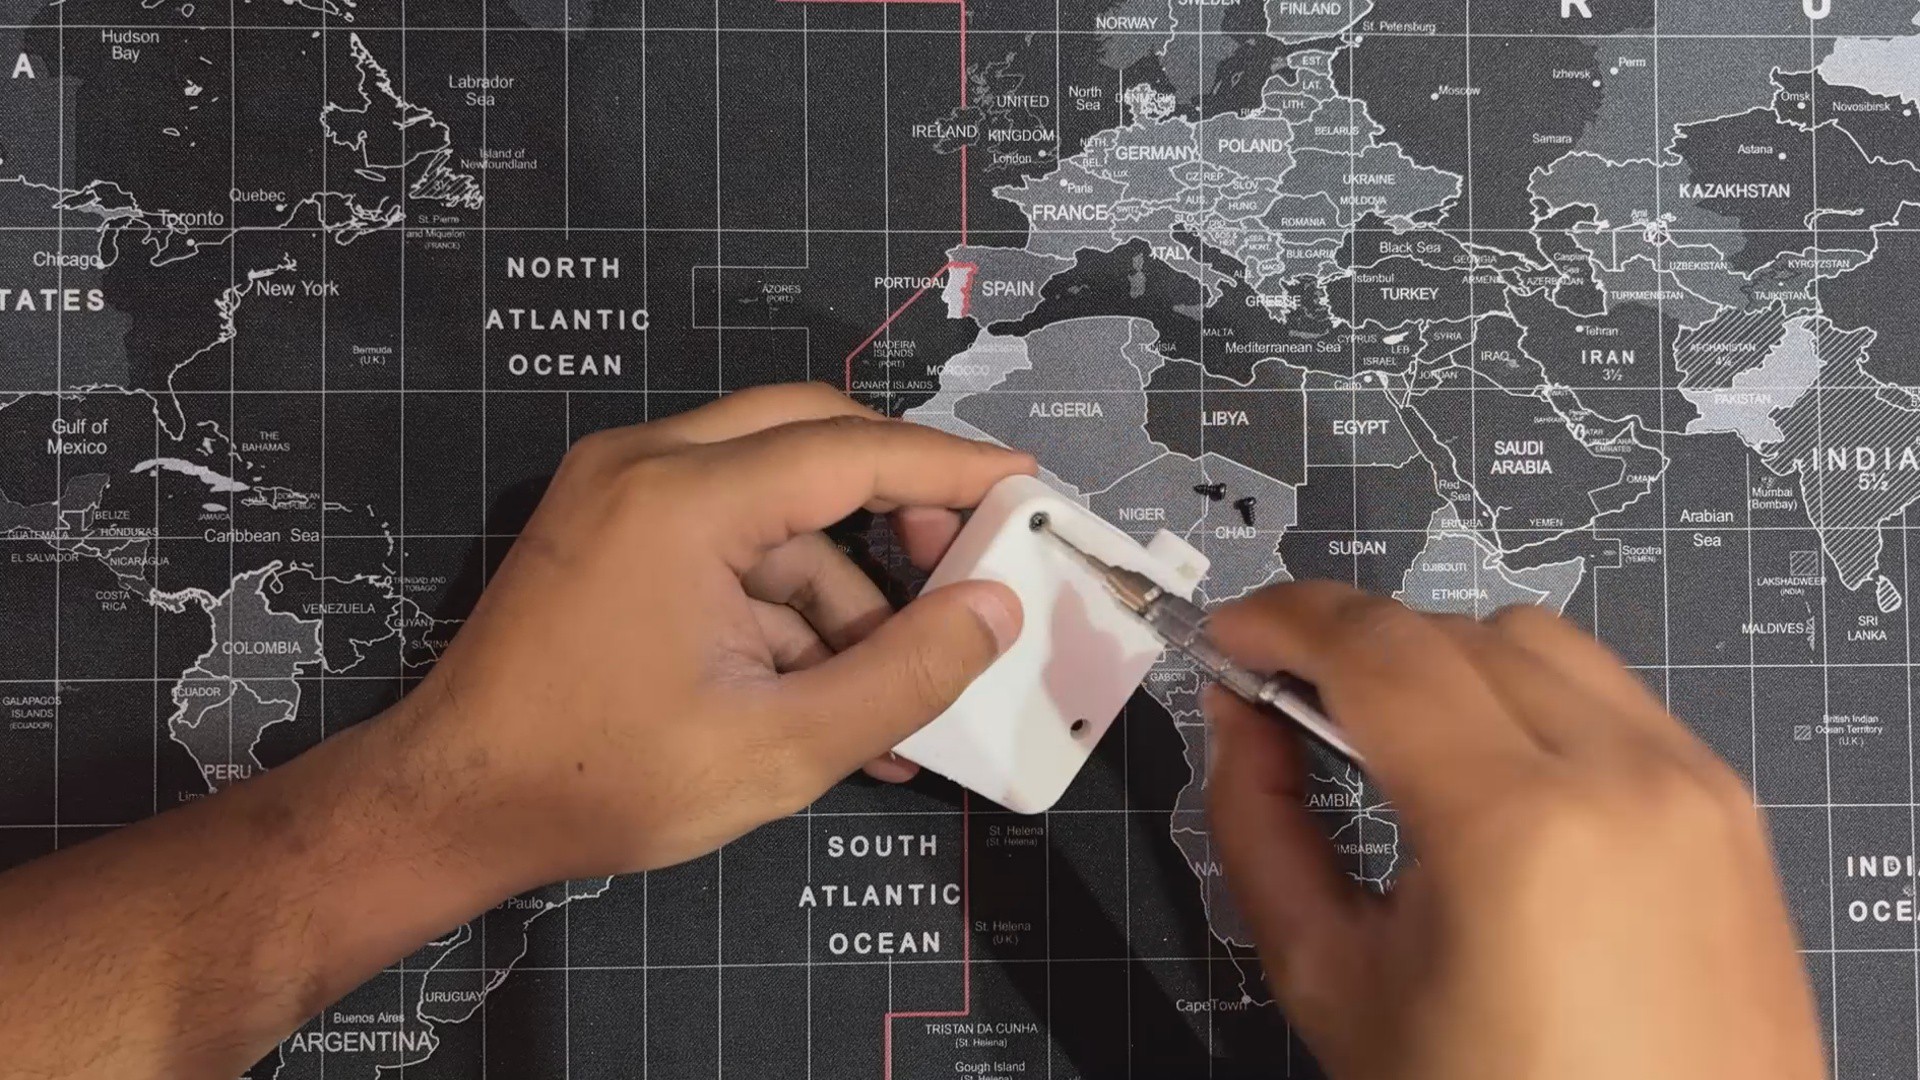
Body Assembly
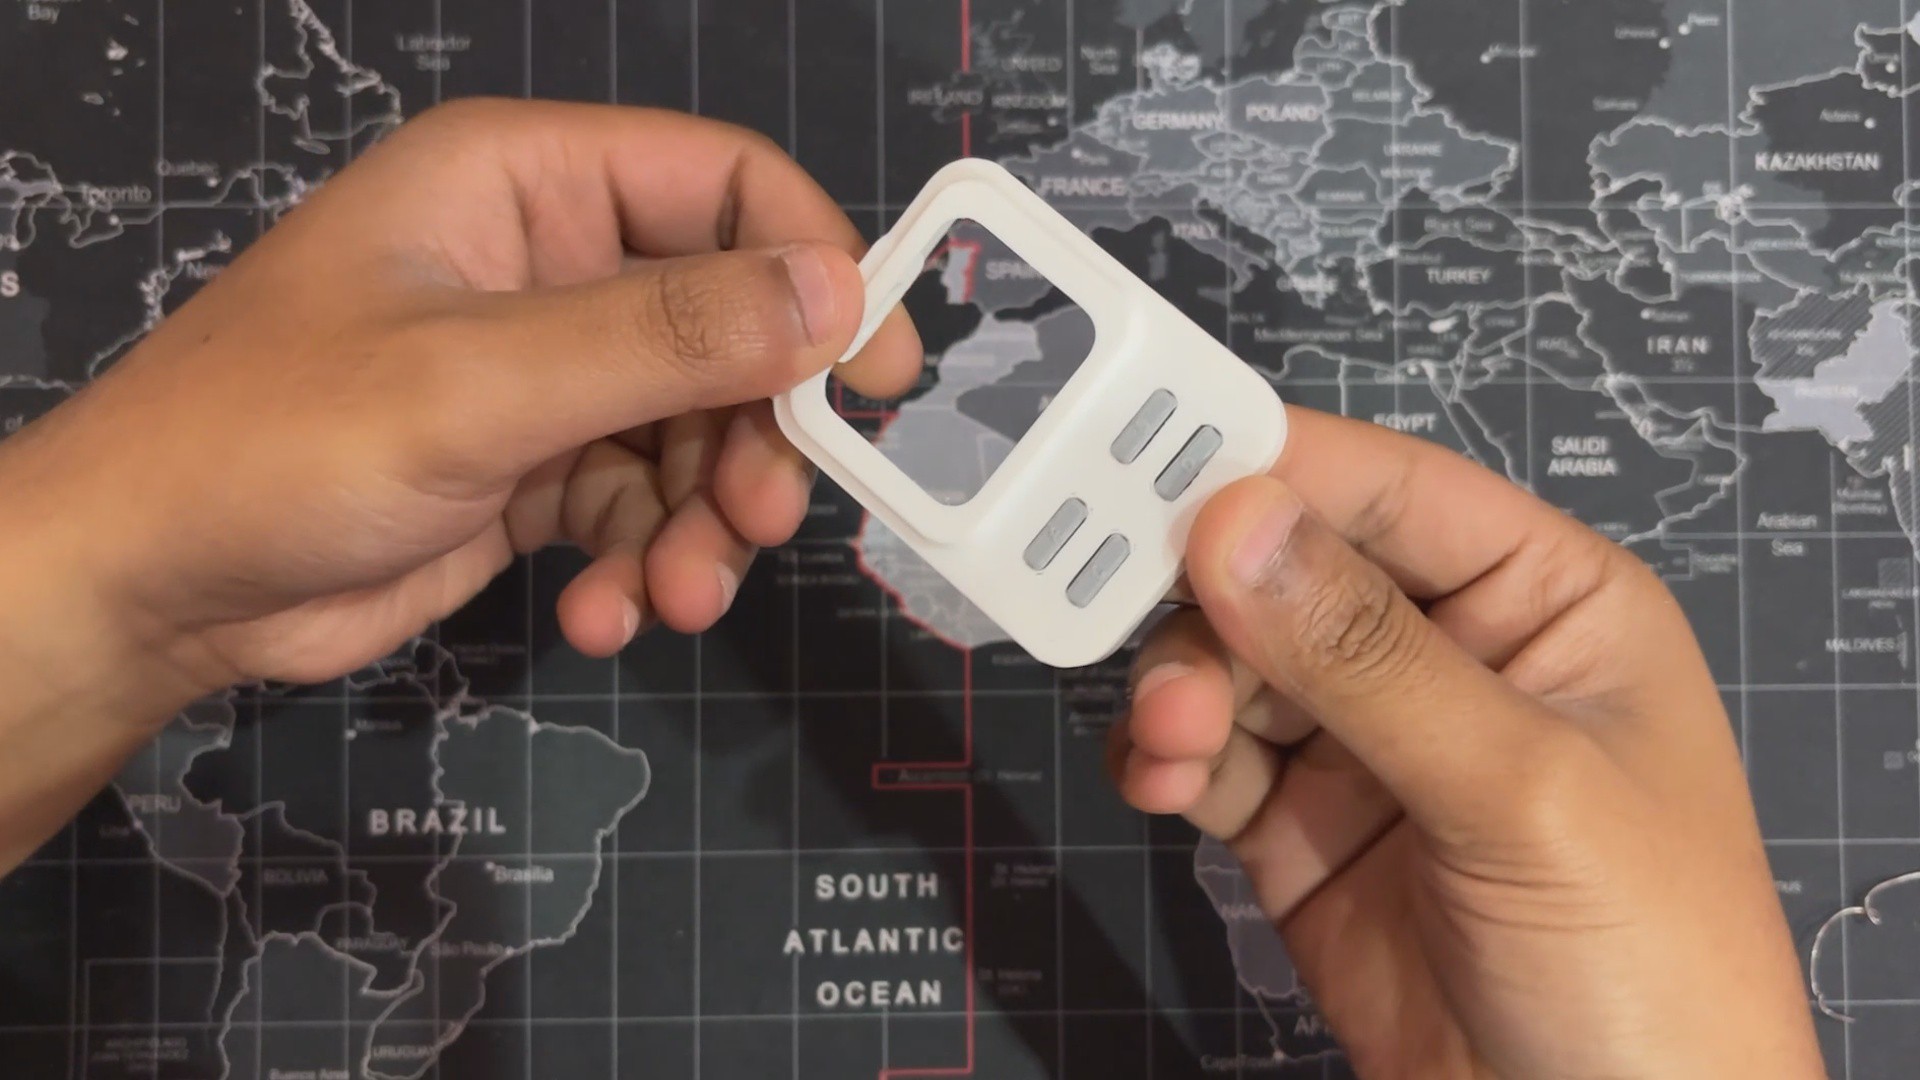
We begin assembling the body by placing the 3D-printed button actuators into their designated slots. Each button is labeled A, B, C, or D to ensure correct placement and orientation.
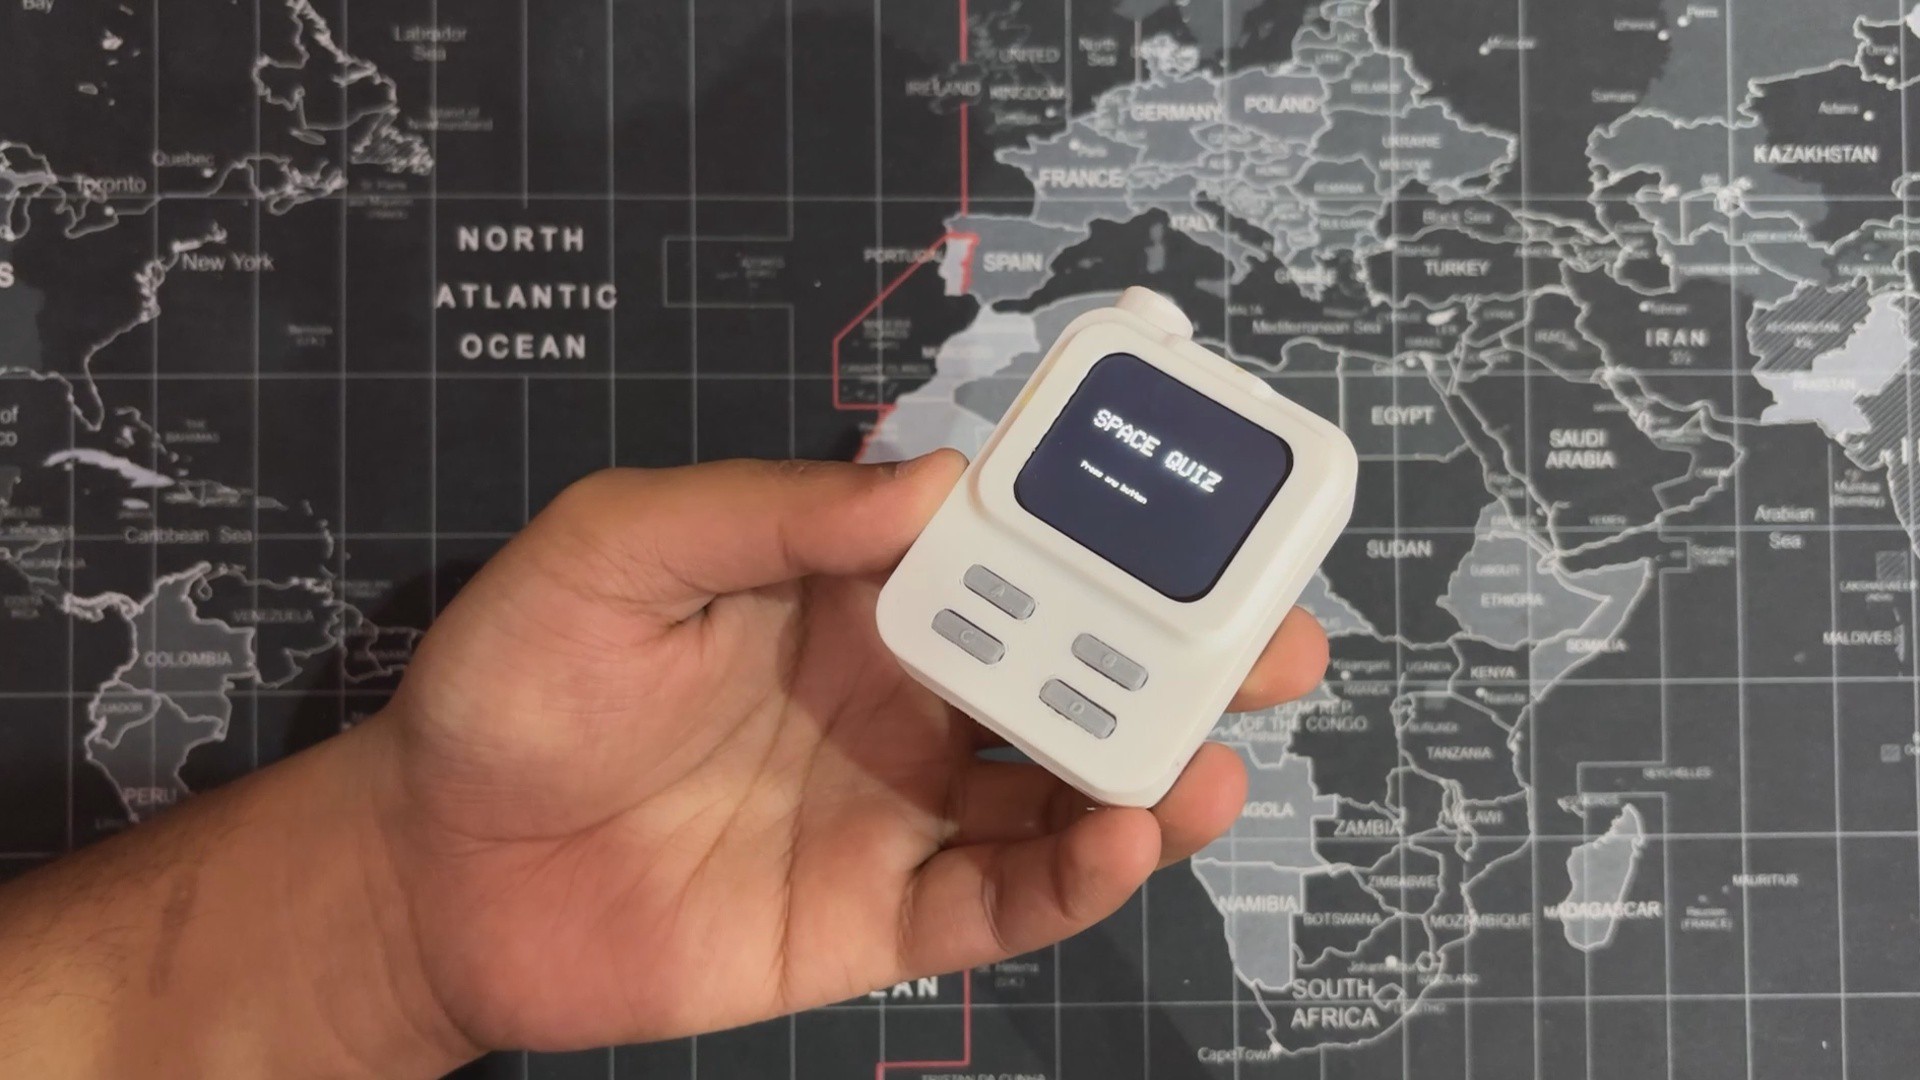
Next, the ESP32 display is positioned and secured using a bit of hot glue.
The switchboard is then mounted onto two screw bosses and fastened with two M2 screws.
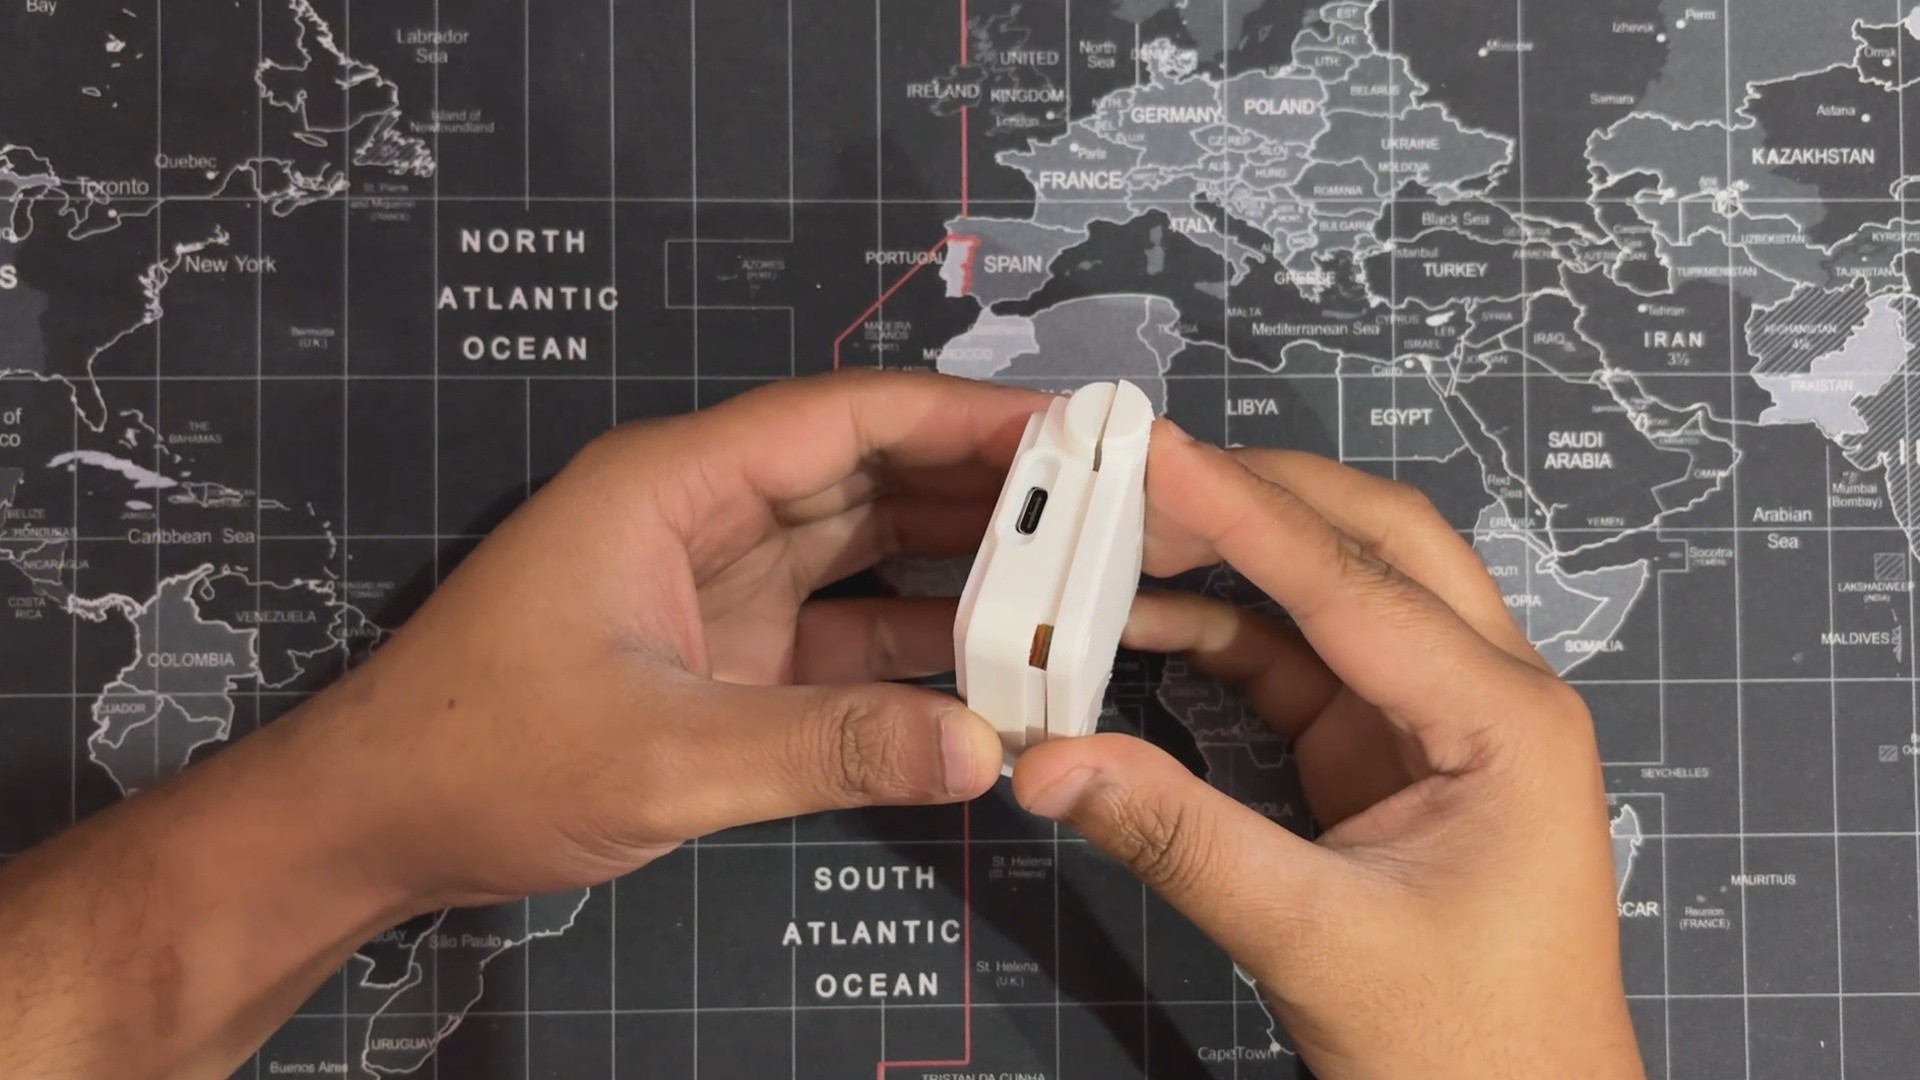
After that, we insert the LiPo cell into the enclosure and close the device from the back using the lid. The lid is held in place with four M2 screws.
With that, the device assembly is complete.
6
CODE
Now comes the most important bit of this project, which is the code. here's a small breakdown of the code we used and it's a simple one.
#include<Arduino_GFX_Library.h>// --- Color Definitions ---#define BLACK 0x0000#define WHITE 0xFFFF#define RED 0xF800#define GREEN 0x07E0// --- Display Setup ---
Arduino_DataBus *bus = new Arduino_ESP32SPI(
4/* DC */, 5/* CS */, 6/* SCK */, 7/* MOSI */, GFX_NOT_DEFINED /* MISO */
);
Arduino_GFX *gfx = new Arduino_ST7789(
bus, 8/* RST */, 3/* rotation */, true/* IPS */,
240, 280, 0, 20, 0, 20
);
#define LCD_BL 15// --- Button Pins ---#define BTN_A 18#define BTN_B 16#define BTN_C 2#define BTN_D 10// --- Screen / layout constants ---#define SCREEN_W 240#define SCREEN_H 280// Layout adjustmentsconstint QUESTION_X = 5;
constint QUESTION_Y = 17; // question Y shifted down 5 pixelsconstint OPTION_START_Y = 80; // vertical start for first optionconstint OPTION_SPACING = 45; // vertical spacing between optionsconstint LETTER_SIZE = 3; // medium-large letters (A/B/C/D)constint CENTER_X = SCREEN_W / 2;
// --- Quiz Data (ISS question updated with full names) ---structQuestion {constchar* text;
constchar* options[4];
int correctIndex;
};
Question questions[20] = {
{"Which planet is the Red Planet?", {"Venus", "Mars", "Jupiter", "Saturn"}, 1},
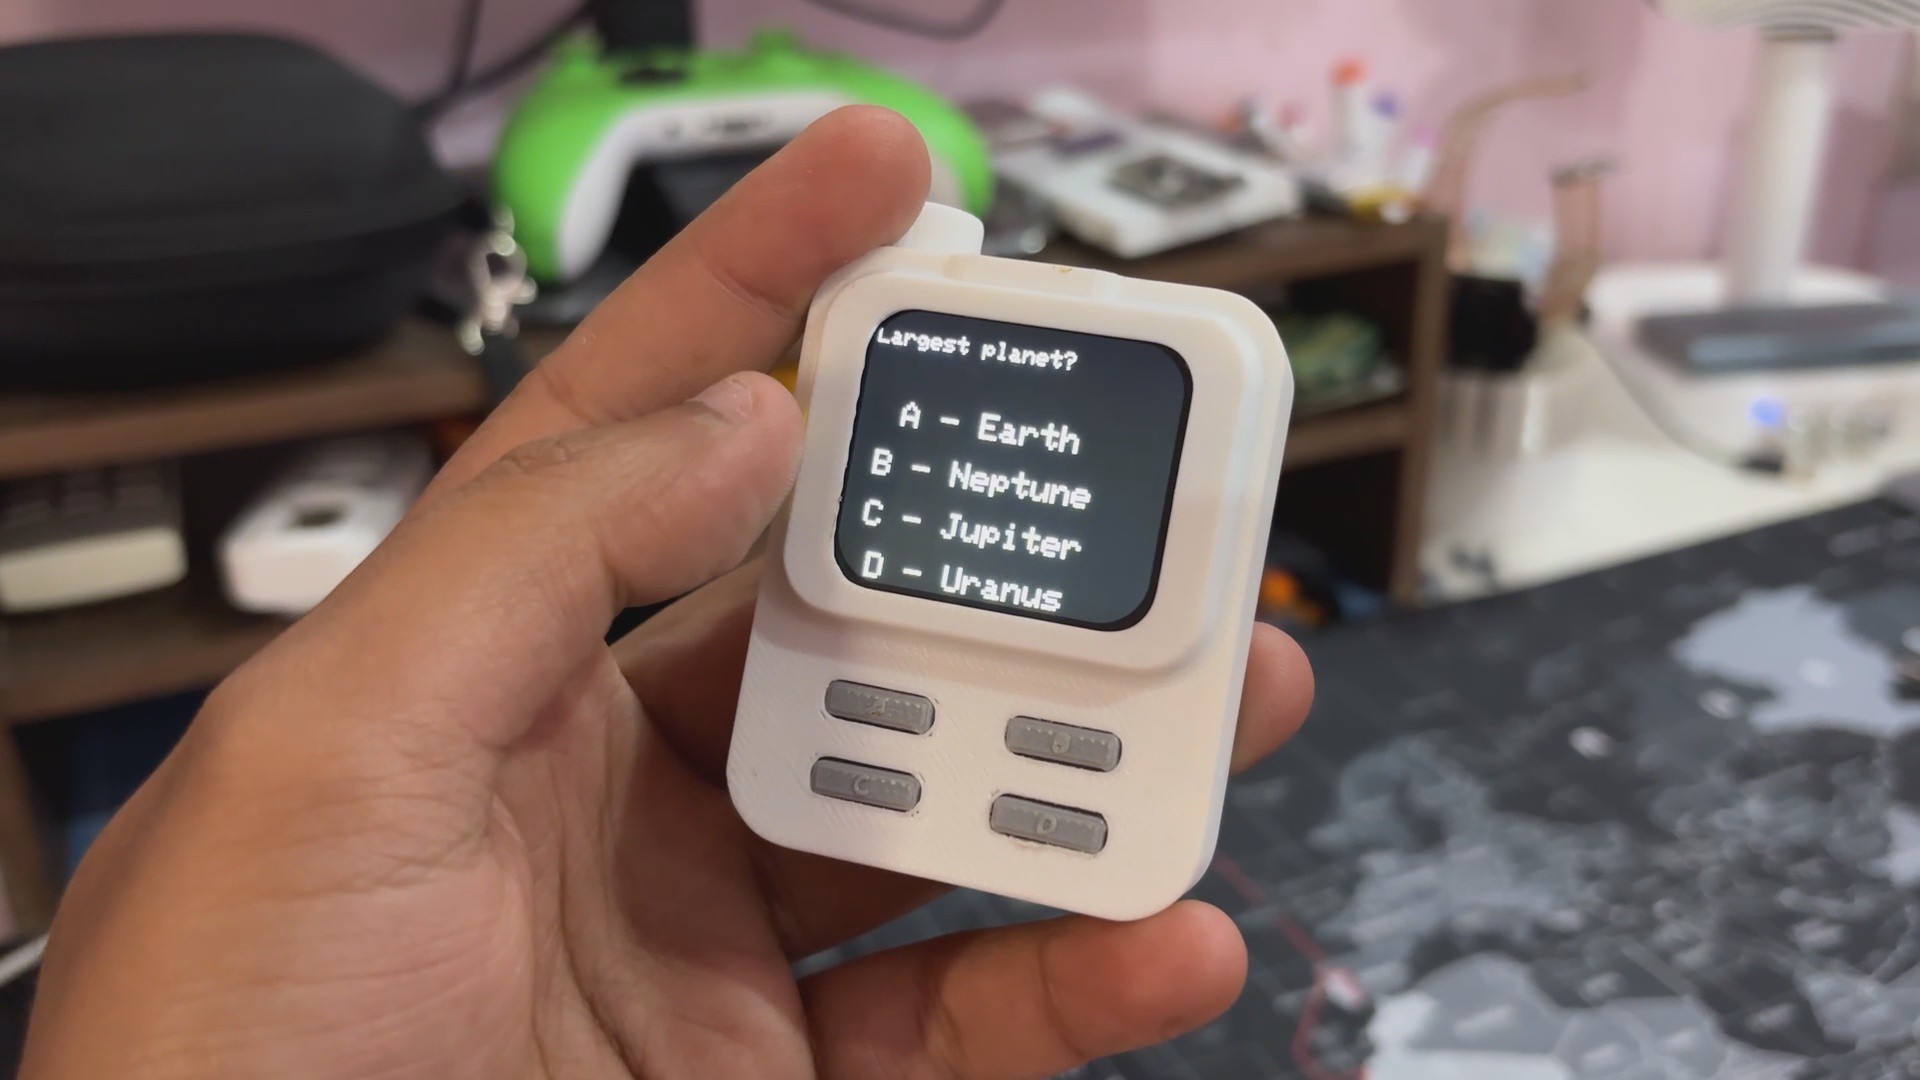
{"Largest planet?", {"Earth", "Neptune", "Jupiter", "Uranus"}, 2},
{"Most moons?", {"Saturn", "Mars", "Earth", "Mercury"}, 0},
{"Our galaxy?", {"Andromeda", "Whirlpool", "Milky Way", "Sombrero"}, 2},
{"First person in space?", {"Armstrong", "Gagarin", "Aldrin", "Shepard"}, 1},
{"Closest star?", {"Sirius", "Alpha Centauri", "Sun", "Betelgeuse"}, 2},
{"Moon landing year?", {"1965", "1969", "1972", "1959"}, 1},
{"Planet with rings?", {"Mars", "Venus", "Saturn", "Earth"}, 2},
{"Smallest planet?", {"Mercury", "Mars", "Venus", "Pluto"}, 0},
{"Hubble is a...?", {"Satellite", "Probe", "Telescope", "Rover"}, 2},
{"Which is a dwarf planet?", {"Neptune", "Pluto", "Jupiter", "Saturn"}, 1},
{"Mars rover name?", {"Spirit", "Apollo", "Voyager", "Hubble"}, 0},
{"Brightest planet?", {"Venus", "Mars", "Jupiter", "Saturn"}, 0},
{"First Indian in space?", {"Kalpana", "Rakesh Sharma", "Sunita", "Vikram"}, 1},
{"Planet with day longer than year?", {"Venus", "Earth", "Mars", "Jupiter"}, 0},
{"What does ISS stand for?", {"International Space Station", "National Aeronautics and Space Administration", "European Space Agency", "Indian Space Research Organisation"}, 0},
{"Most volcanoes?", {"Earth", "Venus", "Mars", "Io"}, 3},
{"Farthest planet?", {"Neptune", "Uranus", "Pluto", "Saturn"}, 0},
{"Not a planet?", {"Ceres", "Mars", "Earth", "Neptune"}, 0},
{"No moons?", {"Mercury", "Mars", "Venus", "Earth"}, 0}
};
int currentQuestion = 0;
int score = 0;
// --- Button press / long press handling ---unsignedlong pressStart = 0;
bool holdingA = false;
// --- Sleep flag (display-off sleep) ---bool isSleeping = false;
unsignedlong sleepStartTime = 0;
constunsignedlong SLEEP_LOCK_DELAY = 500; // lock after entering "sleep"// --- Quiz active flag ---bool quizActive = false;
voidsetup(){
pinMode(BTN_A, INPUT_PULLUP);
pinMode(BTN_B, INPUT_PULLUP);
pinMode(BTN_C, INPUT_PULLUP);
pinMode(BTN_D, INPUT_PULLUP);
pinMode(LCD_BL, OUTPUT);
digitalWrite(LCD_BL, HIGH);
gfx->begin();
gfx->fillScreen(BLACK);
gfx->setTextWrap(true);
gfx->setTextSize(1);
gfx->setTextColor(WHITE);
showSplash();
}
voidloop(){
bool btnA = !digitalRead(BTN_A);
bool btnB = !digitalRead(BTN_B);
bool btnC = !digitalRead(BTN_C);
bool btnD = !digitalRead(BTN_D);
// --- If display is "sleeping" (backlight off) ---if (isSleeping) {
// allow a small lock window so the same long-press doesn't immediately wakeif (millis() - sleepStartTime > SLEEP_LOCK_DELAY) {
// Wake only on Button A (per your request)if (btnA) {
digitalWrite(LCD_BL, HIGH);
isSleeping = false;
showWakeUpMessage();
showSplash();
quizActive = false; // wait for user to press to start
}
}
delay(50);
return;
}
// --- Start quiz from splash (splash stays until button pressed) ---if (!quizActive) {
if (btnA || btnB || btnC || btnD) {
quizActive = true;
currentQuestion = 0;
score = 0;
showQuestion();
}
delay(50);
return;
}
// --- While quizActive handle inputs ---// Button A: detect long-press for "sleep", short press for answer Aif (btnA) {
if (!holdingA) {
pressStart = millis();
holdingA = true;
} elseif (millis() - pressStart > 1500) {
// long press detected -> enter display-off "sleep"
enterSleepMode();
}
} else {
if (holdingA) {
// button released: treat as short press if it wasn't longif (millis() - pressStart < 1500) {
checkAnswer(0);
nextQuestion();
}
holdingA = false;
}
}
// Other buttons: immediate selectionif (btnB) { checkAnswer(1); nextQuestion(); }
if (btnC) { checkAnswer(2); nextQuestion(); }
if (btnD) { checkAnswer(3); nextQuestion(); }
delay(50); // small debounce
}
voidenterSleepMode(){
// stop treating A as held
holdingA = false;
isSleeping = true;
sleepStartTime = millis();
// turn off backlight and show going to sleep message
digitalWrite(LCD_BL, LOW);
gfx->fillScreen(BLACK);
gfx->setTextSize(2);
gfx->setTextColor(WHITE);
gfx->setCursor(40, 100);
gfx->println("Going to sleep...");
}
voidshowWakeUpMessage(){
gfx->fillScreen(BLACK);
gfx->setTextSize(2);
gfx->setTextColor(WHITE);
gfx->setCursor(40, 100);
gfx->println("Good morning!");
delay(1500);
}
voidnextQuestion(){
delay(1200);
currentQuestion++;
if (currentQuestion < (int)(sizeof(questions)/sizeof(questions[0]))) {
showQuestion();
} else {
showFinalScore();
}
}
voidshowSplash(){
gfx->fillScreen(BLACK);
gfx->setTextSize(3);
gfx->setTextColor(WHITE);
gfx->setCursor(40, 80);
gfx->println("SPACE QUIZ");
gfx->setTextSize(1);
gfx->setCursor(60, 150);
gfx->println("Press any button");
}
voidshowQuestion(){
gfx->fillScreen(BLACK);
// Show question
gfx->setTextWrap(true);
gfx->setTextSize(2);
gfx->setTextColor(WHITE);
gfx->setCursor(QUESTION_X, QUESTION_Y);
gfx->println(questions[currentQuestion].text);
// --- Vertical options with medium letter and text, centered ---int y = OPTION_START_Y;
for (int i = 0; i < 4; i++) {
gfx->setTextSize(LETTER_SIZE);
gfx->setTextColor(WHITE);
String line = String((char)('A' + i)) + " - " + questions[currentQuestion].options[i];
int16_t bx, by;
uint16_t bw, bh;
gfx->getTextBounds(line, 0, 0, &bx, &by, &bw, &bh);
int startX = (SCREEN_W - bw) / 2;
gfx->setCursor(startX, y);
gfx->print(line);
y += OPTION_SPACING;
}
}
voidcheckAnswer(int selected){
gfx->fillScreen(BLACK);
gfx->setTextSize(3);
gfx->setCursor(40, 80);
if (selected == questions[currentQuestion].correctIndex) {
gfx->setTextColor(GREEN);
gfx->println("Correct!");
score++;
} else {
gfx->setTextColor(RED);
gfx->println("Wrong!");
gfx->setTextSize(2);
gfx->setCursor(20, 150);
gfx->setTextColor(WHITE);
gfx->printf("Answer: %s", questions[currentQuestion].options[questions[currentQuestion].correctIndex]);
}
}
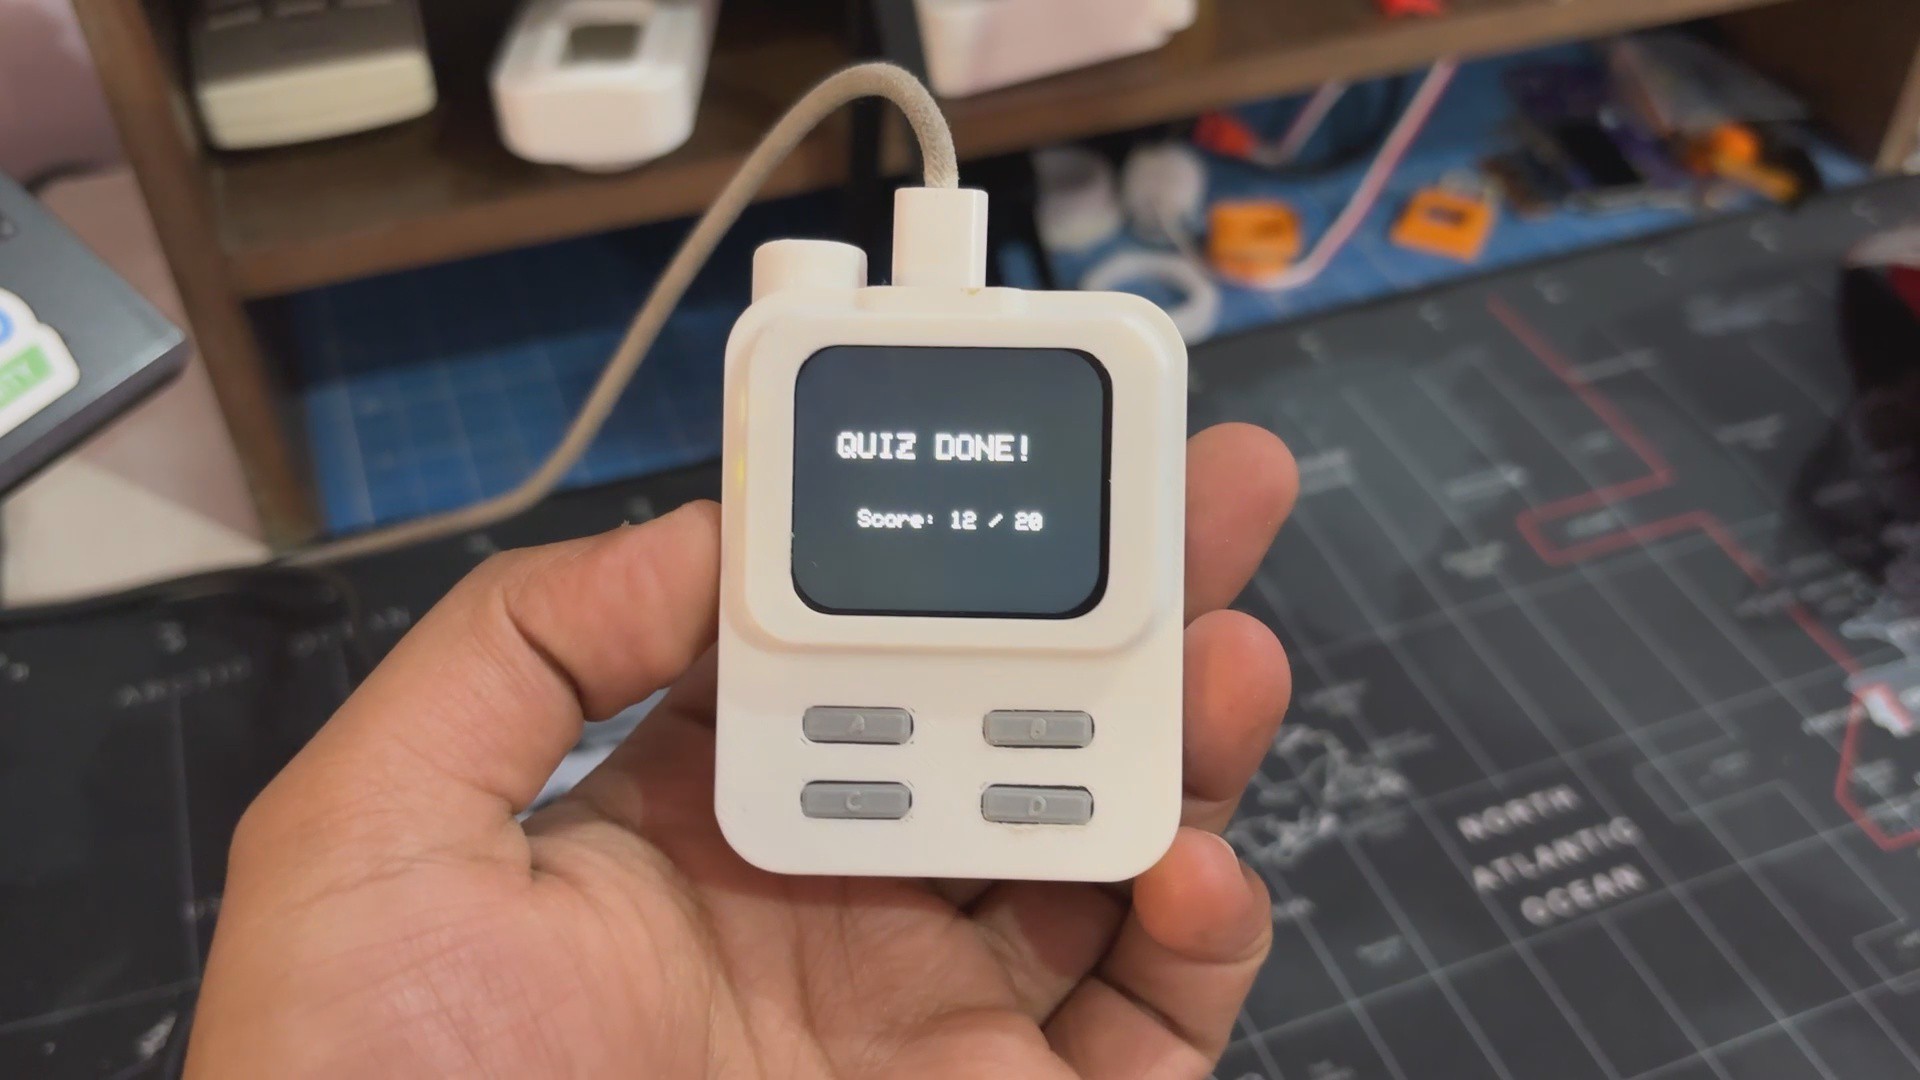
voidshowFinalScore(){
gfx->fillScreen(BLACK);
gfx->setTextColor(WHITE);
gfx->setTextSize(3);
gfx->setCursor(40, 80);
gfx->println("QUIZ DONE!");
gfx->setTextSize(2);
gfx->setCursor(60, 150);
gfx->printf("Score: %d / %d", score, (int)(sizeof(questions)/sizeof(questions[0])));
// Wait 10 seconds then reset to splashunsignedlong start = millis();
while (millis() - start < 10000) {
delay(50);
}
quizActive = false;
currentQuestion = 0;
score = 0;
showSplash();
}
We start by including the graphics library and defining basic colors for use throughout the UI.
#include <Arduino_GFX_Library.h>#define BLACK 0x0000#define WHITE 0xFFFF#define RED 0xF800#define GREEN 0x07E0
Next comes the Display Initialiazation, we use the below section that Sets up SPI communication and initializes the ST7789 display with 240×280 resolution and portrait layout.
Arduino_DataBus *bus = new Arduino_ESP32SPI(...);Arduino_GFX *gfx = new Arduino_ST7789(...);
This Section Defines the backlight pin and four input buttons mapped to answer choices A–D.
In Loop first there is the Sleep Mode Handling part.
if (isSleeping) { ... }
If the device is in sleep mode (backlight off), it waits for Button A to wake it. We also added a short delay (SLEEP_LOCK_DELAY) to avoid accidental wake from the same long press.
Then there is the Quiz Start Trigger.
if (!quizActive) { ... }if (!quizActive) { ... }
If the quiz hasn’t started yet, any button press will begin the quiz.
In the end, we have added the answer checking and progression function.
checkAnswer(...);nextQuestion();
After an answer is selected, the device shows feedback and moves to the next question. If all 20 questions are done, it shows the final score and resets after 10 seconds.
7
RESULT
Here's the end result of this small build—QuasarQ, a space quiz device designed to spark curiosity and make learning fun. It’s compact, responsive, and built with care, from the custom 3D-printed enclosure to the tactile button layout and crisp display interface.
Right now, we’ve only added a set of 20 questions just for testing purposes. The actual plan is to build a full database of 200+ space-related questions. The idea is that the device will randomly pick 20 questions from that larger pool every time it runs, so each quiz session feels fresh and different.
That’ll make it way more engaging, a bit more challenging, and definitely more educational—especially for kids who keep coming back to play and learn.
For now, the build is complete, and all the related files are included in the attachments.
Special thanks to HQ NextPCB for providing components that I've used in this project; check them out for getting all sorts of PCB or PCBA-related services for less cost.
Thanks for reaching this far, and I will be back with a new project soon.
 Arnov Sharma


Discussions
Become a Hackaday.io Member
Create an account to leave a comment. Already have an account? Log In.