 Arnov Sharma
-
1SWITCH PCB ASSEMBLY
![]()
![]()
![]()
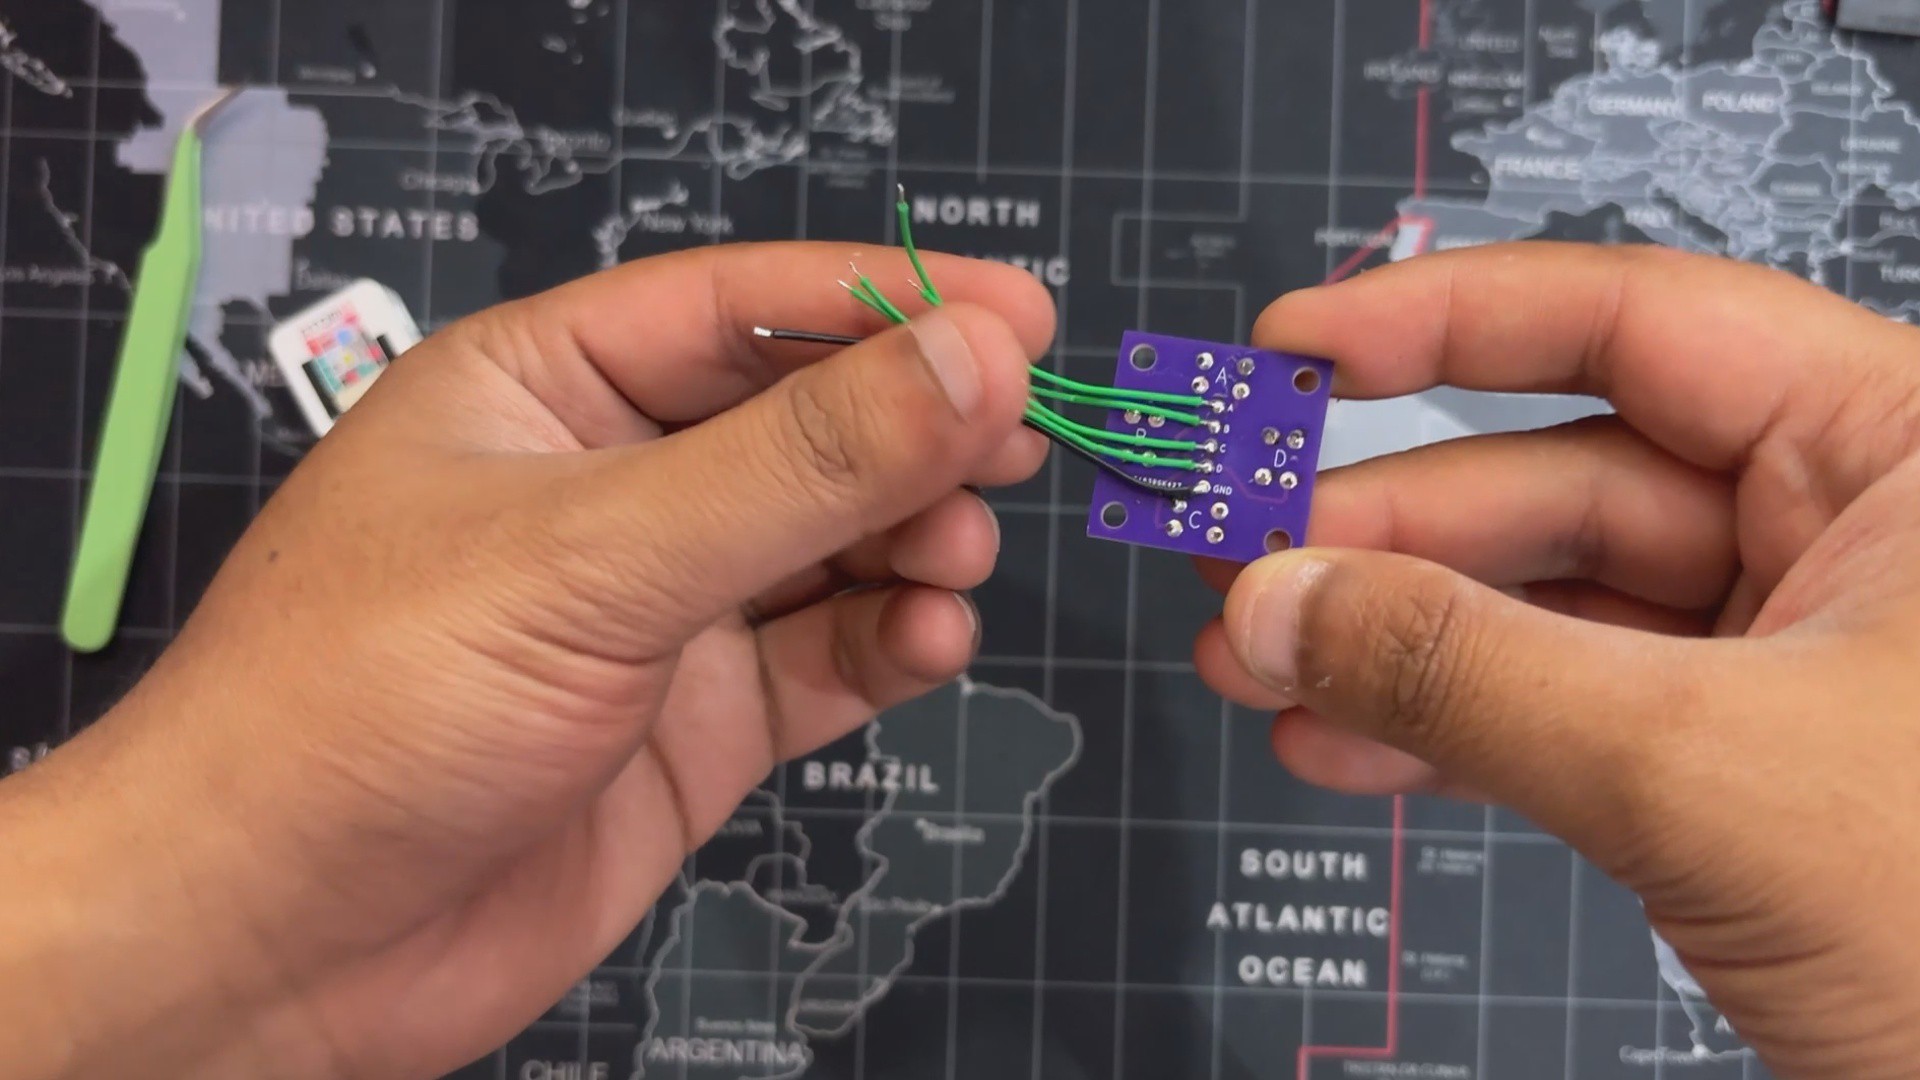
- The switch PCB assembly process starts by placing all the 4x4 through-hole push buttons in their place, then flipping the board over, and then using a soldering iron to secure all components by soldering their pads.
- Next, we added five connecting wires with the CON5 terminal on the backside of the Switch PCB.
-
2WIRING PROCESS
![]()
![]()
![]()
![]()
- We began the wiring process by adding a CON4 header to the back of the M5Stack AtomS3’s pin header. This connector serves as the interface between the switch PCB and the Atom module.
- Each of the four push button outputs—A, B, C, and D—was carefully soldered to G5, G6, G7, and G8 on the Atom, respectively. The ground pin from the switch PCB was then connected to the GND pin of the Atom to complete the input circuit.
- Next, we wired the speaker, connecting its positive lead to G2 and its negative lead to GND, enabling PWM-based audio output.
- Finally, we connected the lithium cell, which powers the entire device. The positive terminal of the battery was soldered to the 5V pin on the Atom, while the negative terminal was connected to GND, completing the power circuit and making the device fully portable.
-
3CODE
Here's the code we used in this project
#include <Arduino.h> #include <M5CoreS3.h> #include <driver/ledc.h> #include <math.h> #include <stdlib.h> // ----------------------------- // Pin Assignments // ----------------------------- #define BUTTON_A 8 // Kick #define BUTTON_B 7 // Snare #define BUTTON_C 6 // Hi-Hat #define BUTTON_D 5 // Clap #define SPEAKER_PIN 2 // GPIO 2 for audio // ----------------------------- // LEDC (PWM audio) Config // ----------------------------- #define SPEAKER_CHANNEL LEDC_CHANNEL_0 #define SPEAKER_TIMER LEDC_TIMER_0 #define SPEAKER_RES LEDC_TIMER_8_BIT #define BASE_DUTY 128 // ----------------------------- // Waveform Variables // ----------------------------- float phase = 0; // horizontal scroll offset float waveAmplitude = 5; // current amplitude float waveFrequency = 2.0; // base visual frequency float targetAmplitude = 5; // amplitude target float amplitudeDecay = 0.95; // decay factor per frame // ----------------------------- // Speaker Setup // ----------------------------- void setupSpeaker() { ledc_timer_config_t ledc_timer = { .speed_mode = LEDC_LOW_SPEED_MODE, .duty_resolution = SPEAKER_RES, .timer_num = SPEAKER_TIMER, .freq_hz = 2000, .clk_cfg = LEDC_AUTO_CLK }; ledc_timer_config(&ledc_timer); ledc_channel_config_t ledc_channel = { .gpio_num = SPEAKER_PIN, .speed_mode = LEDC_LOW_SPEED_MODE, .channel = SPEAKER_CHANNEL, .intr_type = LEDC_INTR_DISABLE, .timer_sel = SPEAKER_TIMER, .duty = 0, .hpoint = 0 }; ledc_channel_config(&ledc_channel); } // ----------------------------- // Drum Sounds // ----------------------------- void playKick() { for (int f = 150; f > 50; f -= 5) { ledc_set_freq(LEDC_LOW_SPEED_MODE, SPEAKER_TIMER, f); ledc_set_duty(LEDC_LOW_SPEED_MODE, SPEAKER_CHANNEL, BASE_DUTY); ledc_update_duty(LEDC_LOW_SPEED_MODE, SPEAKER_CHANNEL); delay(5); } ledc_set_duty(LEDC_LOW_SPEED_MODE, SPEAKER_CHANNEL, 0); ledc_update_duty(LEDC_LOW_SPEED_MODE, SPEAKER_CHANNEL); } void playNoise(int duration_ms) { unsigned long start = millis(); while (millis() - start < duration_ms) { int val = random(0, 256); ledc_set_duty(LEDC_LOW_SPEED_MODE, SPEAKER_CHANNEL, val); ledc_update_duty(LEDC_LOW_SPEED_MODE, SPEAKER_CHANNEL); delayMicroseconds(50); } ledc_set_duty(LEDC_LOW_SPEED_MODE, SPEAKER_CHANNEL, 0); ledc_update_duty(LEDC_LOW_SPEED_MODE, SPEAKER_CHANNEL); } void playSnare() { playNoise(120); } void playHiHat() { playNoise(50); } void playClap() { playNoise(80); ledc_set_freq(LEDC_LOW_SPEED_MODE, SPEAKER_TIMER, 600); ledc_set_duty(LEDC_LOW_SPEED_MODE, SPEAKER_CHANNEL, BASE_DUTY); ledc_update_duty(LEDC_LOW_SPEED_MODE, SPEAKER_CHANNEL); delay(50); ledc_set_duty(LEDC_LOW_SPEED_MODE, SPEAKER_CHANNEL, 0); ledc_update_duty(LEDC_LOW_SPEED_MODE, SPEAKER_CHANNEL); } // ----------------------------- // Waveform Visualizer // ----------------------------- void drawScrollingWave() { CoreS3.Display.fillScreen(TFT_BLACK); int width = CoreS3.Display.width(); int height = CoreS3.Display.height(); int midY = height / 2; for (int x = 0; x < width; x++) { int y = midY + waveAmplitude * sin((x * waveFrequency * PI / width) + phase); CoreS3.Display.drawPixel(x, y, TFT_WHITE); } phase += 0.2; // scroll wave horizontally waveAmplitude = waveAmplitude * amplitudeDecay + targetAmplitude * (1.0 - amplitudeDecay); } // ----------------------------- // Handle Button Presses // ----------------------------- void handleButtonPresses() { if (!digitalRead(BUTTON_A)) { // Kick playKick(); targetAmplitude += 15; waveFrequency = 3.0; } if (!digitalRead(BUTTON_B)) { // Snare playSnare(); targetAmplitude += 10; waveFrequency = 5.0; } if (!digitalRead(BUTTON_C)) { // Hi-Hat playHiHat(); targetAmplitude += 8; waveFrequency = 7.0; } if (!digitalRead(BUTTON_D)) { // Clap playClap(); targetAmplitude += 12; waveFrequency = 4.0; } if (targetAmplitude > 30) targetAmplitude = 30; // cap amplitude } // ----------------------------- // Setup // ----------------------------- void setup() { auto cfg = M5.config(); CoreS3.begin(cfg); setupSpeaker(); pinMode(BUTTON_A, INPUT_PULLUP); pinMode(BUTTON_B, INPUT_PULLUP); pinMode(BUTTON_C, INPUT_PULLUP); pinMode(BUTTON_D, INPUT_PULLUP); CoreS3.Display.setTextSize(2); CoreS3.Display.setTextColor(TFT_WHITE, TFT_BLACK); CoreS3.Display.setTextDatum(middle_center); CoreS3.Display.fillScreen(TFT_BLACK); CoreS3.Display.drawString("Drum Pad Ready", CoreS3.Display.width()/2, CoreS3.Display.height()/2); delay(1000); } // ----------------------------- // Main Loop // ----------------------------- void loop() { handleButtonPresses(); drawScrollingWave(); delay(30); // adjust speed of wave } -
4RESULT
![]()
![]()
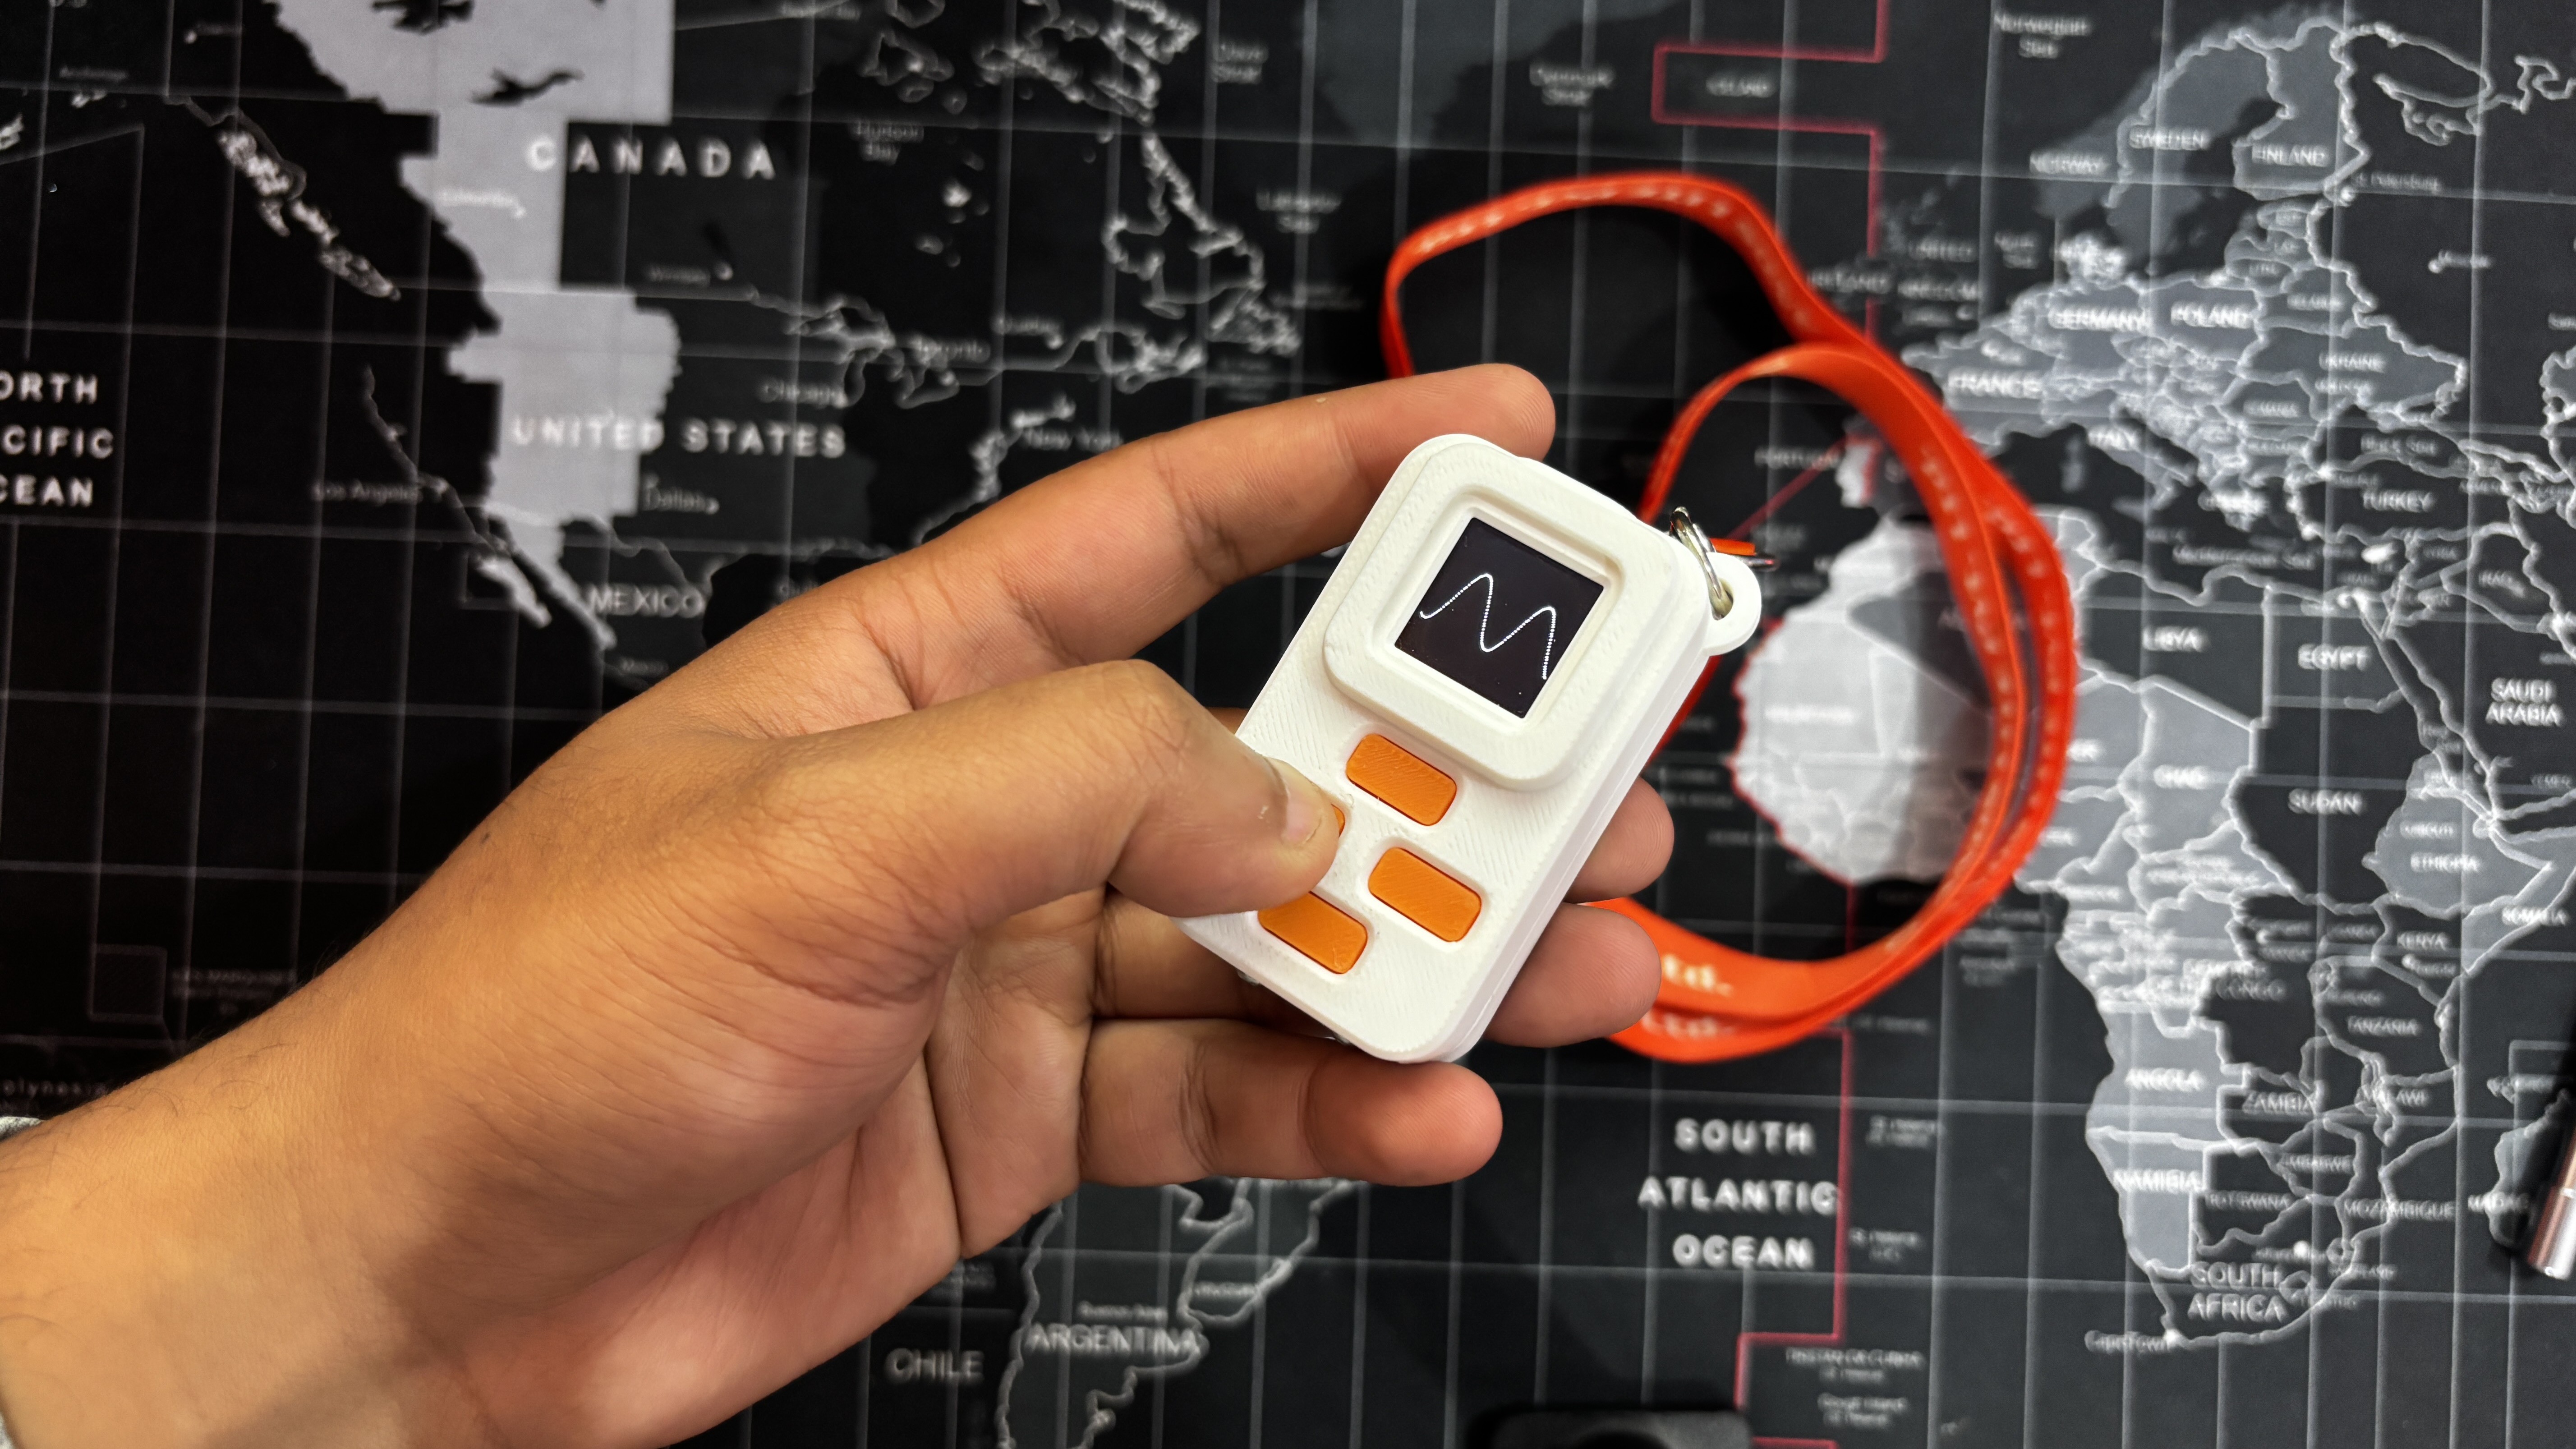
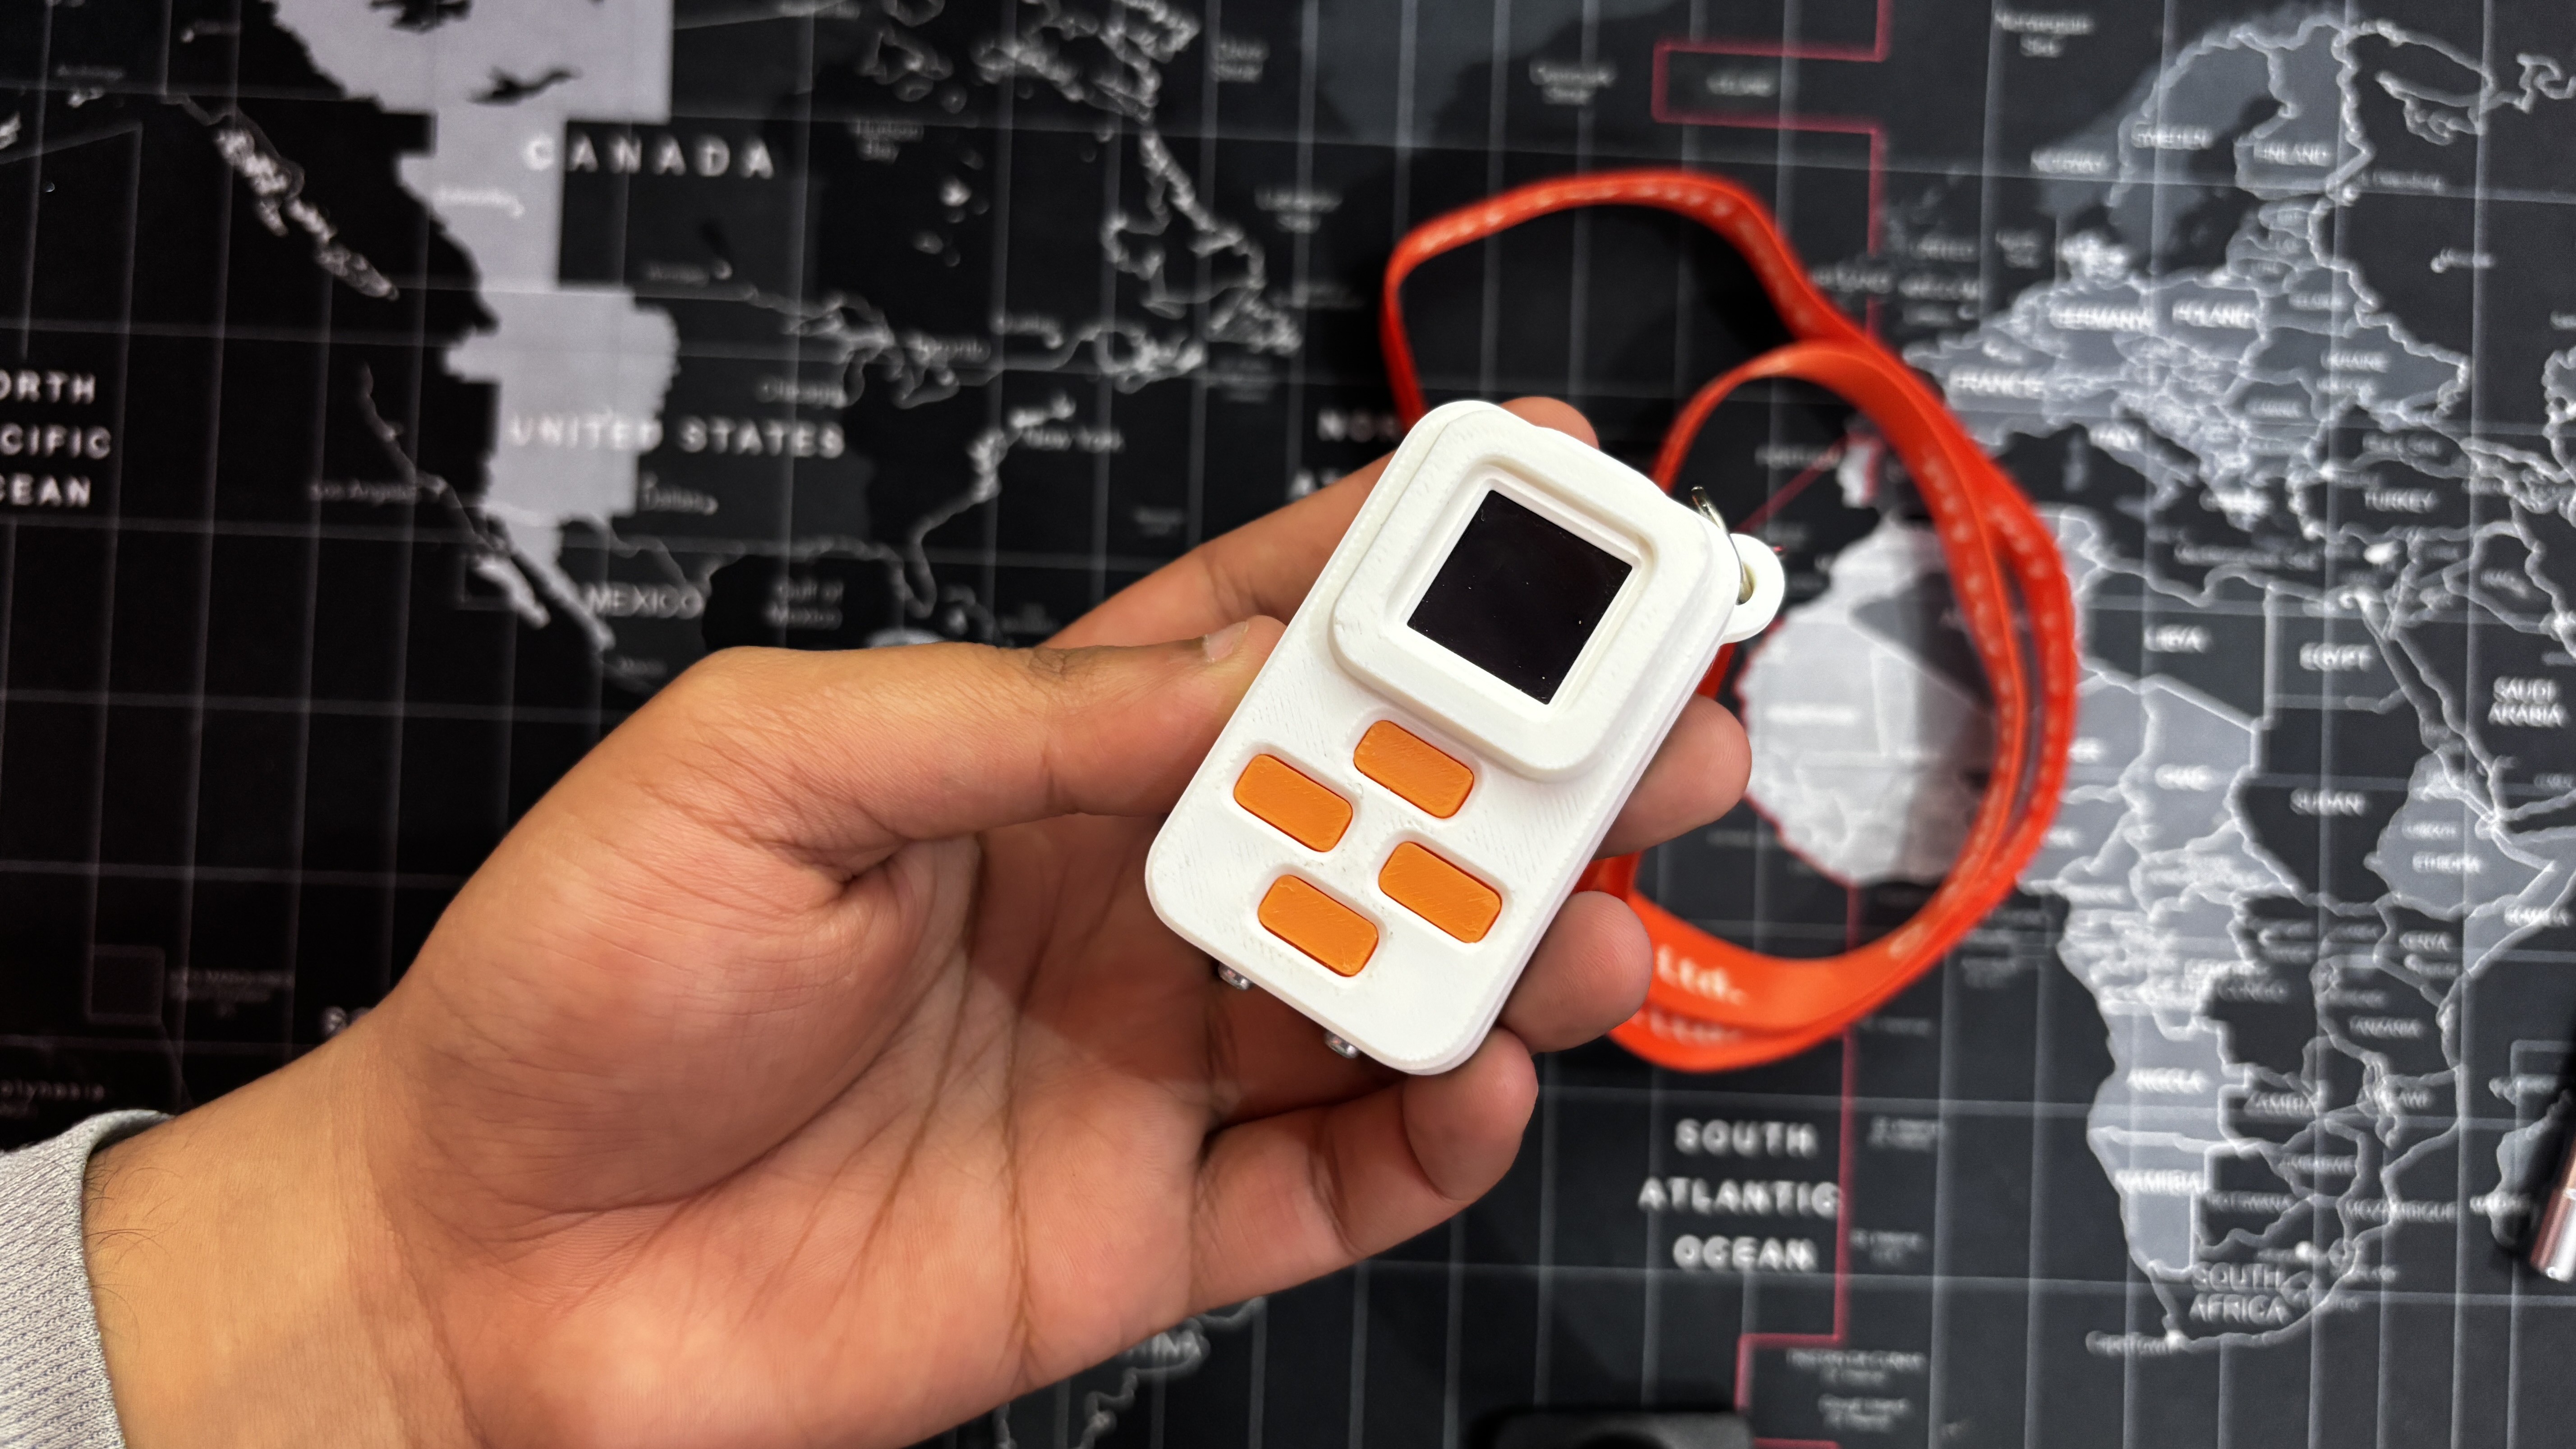
Here’s the end result of this small build—a HitPad. Compact, responsive, and fun to use, it delivers exactly what I set out to create: a pocket-sized tone generator that’s easy to carry and satisfying to play.
I added an ID card strap to the provided hook on the enclosure, which lets me wear it around my neck just like a badge. This makes it super convenient to play on the go—whether I’m walking around, waiting somewhere, or just passing time.
Thanks to its onboard 600 mAh lithium-ion cell, HitPad offers up to 5 hours of continuous use, making the entire device completely wireless. No cables, no external power—just tap and play wherever you are.
For now this project has been completed.
Thanks for reaching this far, and I will be back with a new project pretty soon.
Peace.
HitPad
Portable Tiny-Music Maker based around M5ATOM and a custom enclosure.


Discussions
Become a Hackaday.io Member
Create an account to leave a comment. Already have an account? Log In.