 Ruslan Nadyrshin
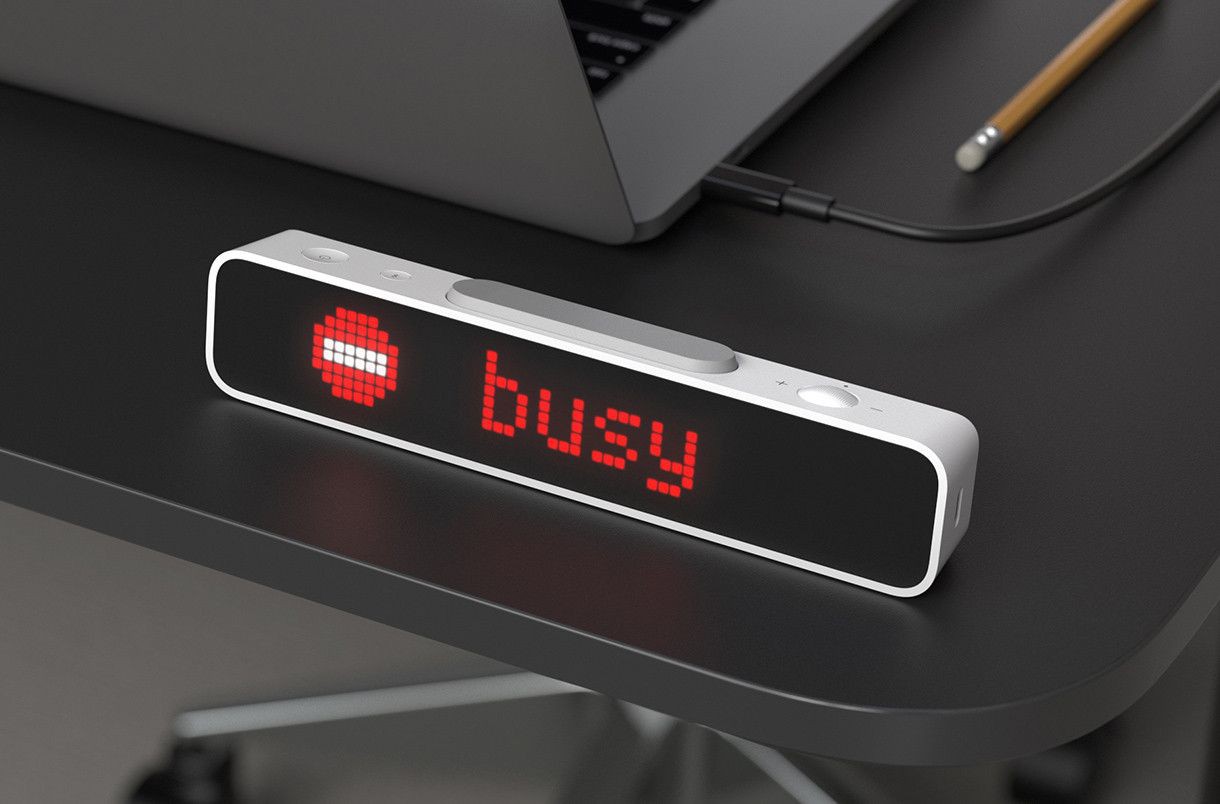
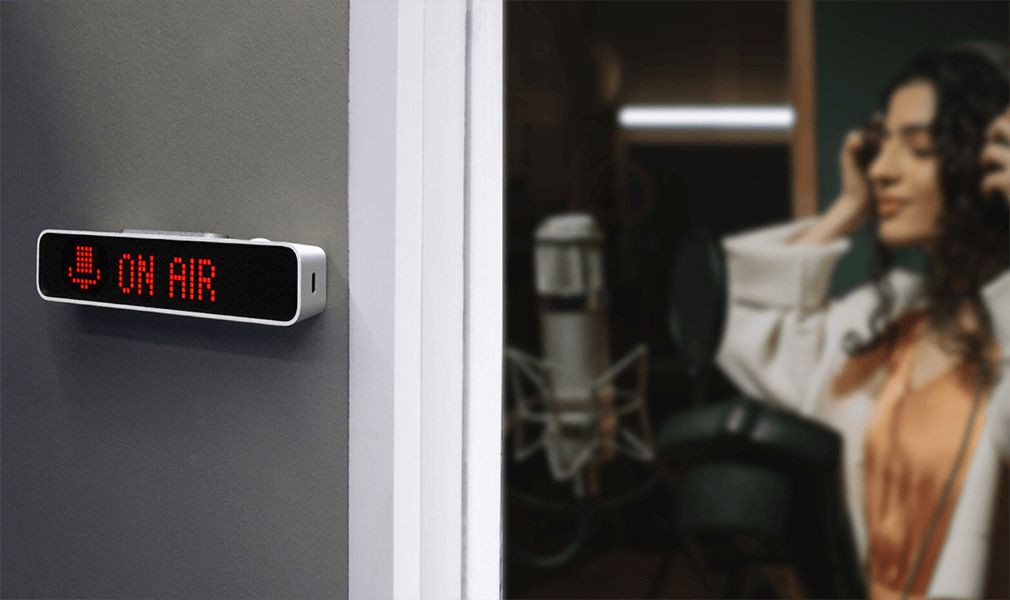
The status bar size was reduced to one line, which is enough to display the status and remaining time (pixel font 8x64 pixels). We did not find a ready-made matrix, so we decided to make our own. Due to the compact size, we wanted to be able to move the status bar from the outlet, for example, hang it on the door and activate the message DO NOT ENTER, so we decided to add a battery.
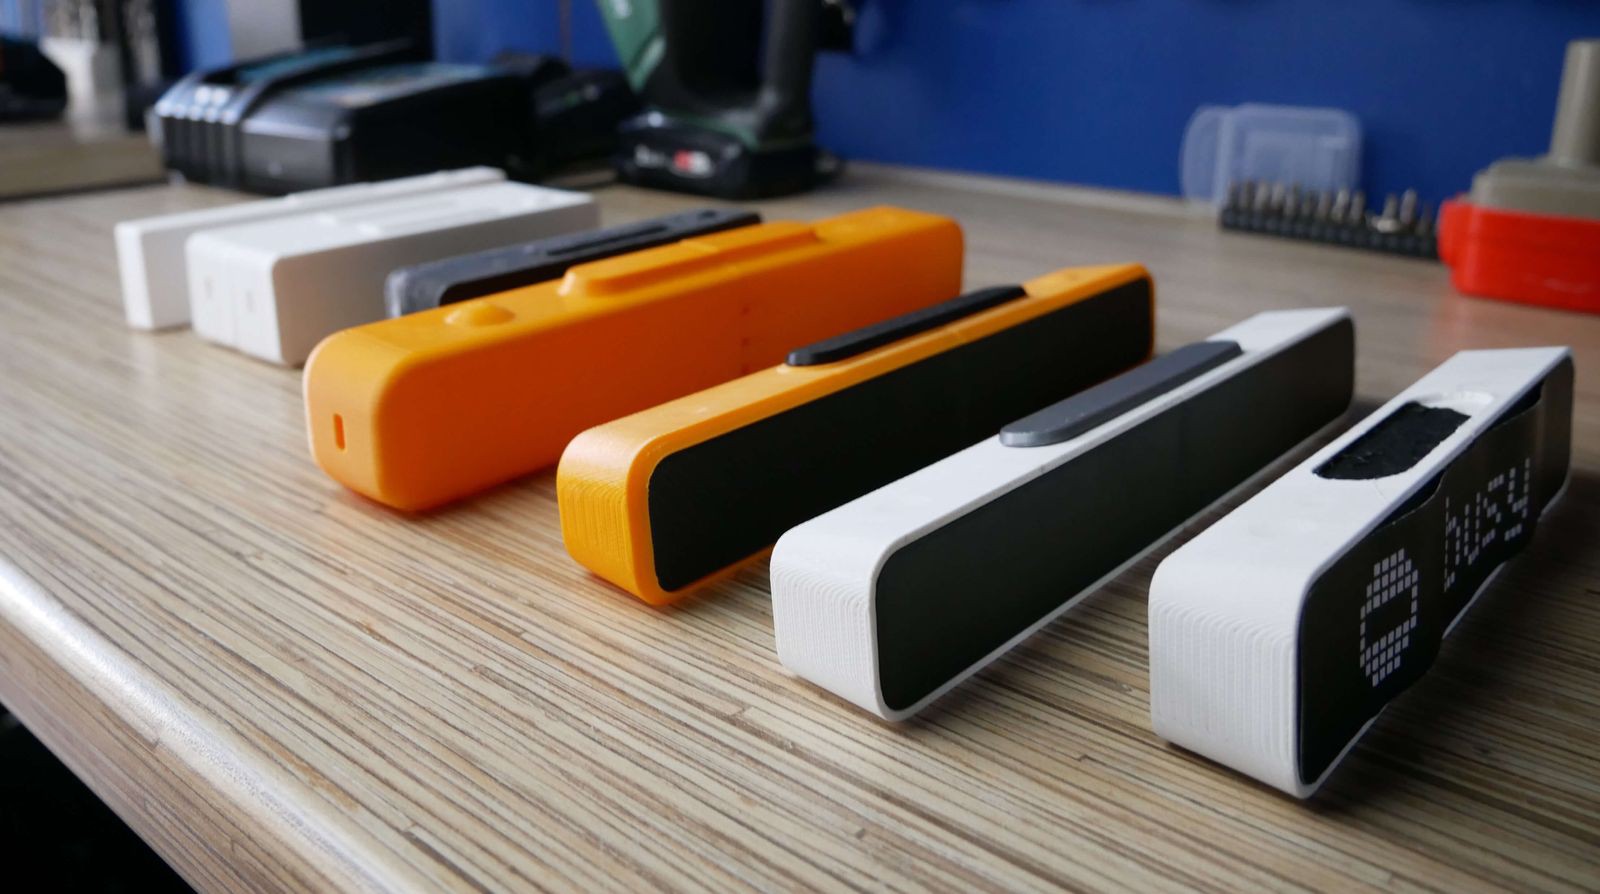
We are still experimenting with the size and shape of the status bar. The first prototypes were smaller and thinner because they did not consider the electronics and the battery. The size of the newer variants is based on the electronics requirements and overall stability on flat surfaces.
So far, we have made seven iterations, finalizing the shortcomings after each version: changing the dimensions, chamfers, and tilt angles. In the latest versions, the display is tilted so that a person standing next to the table can better see the displayed status.
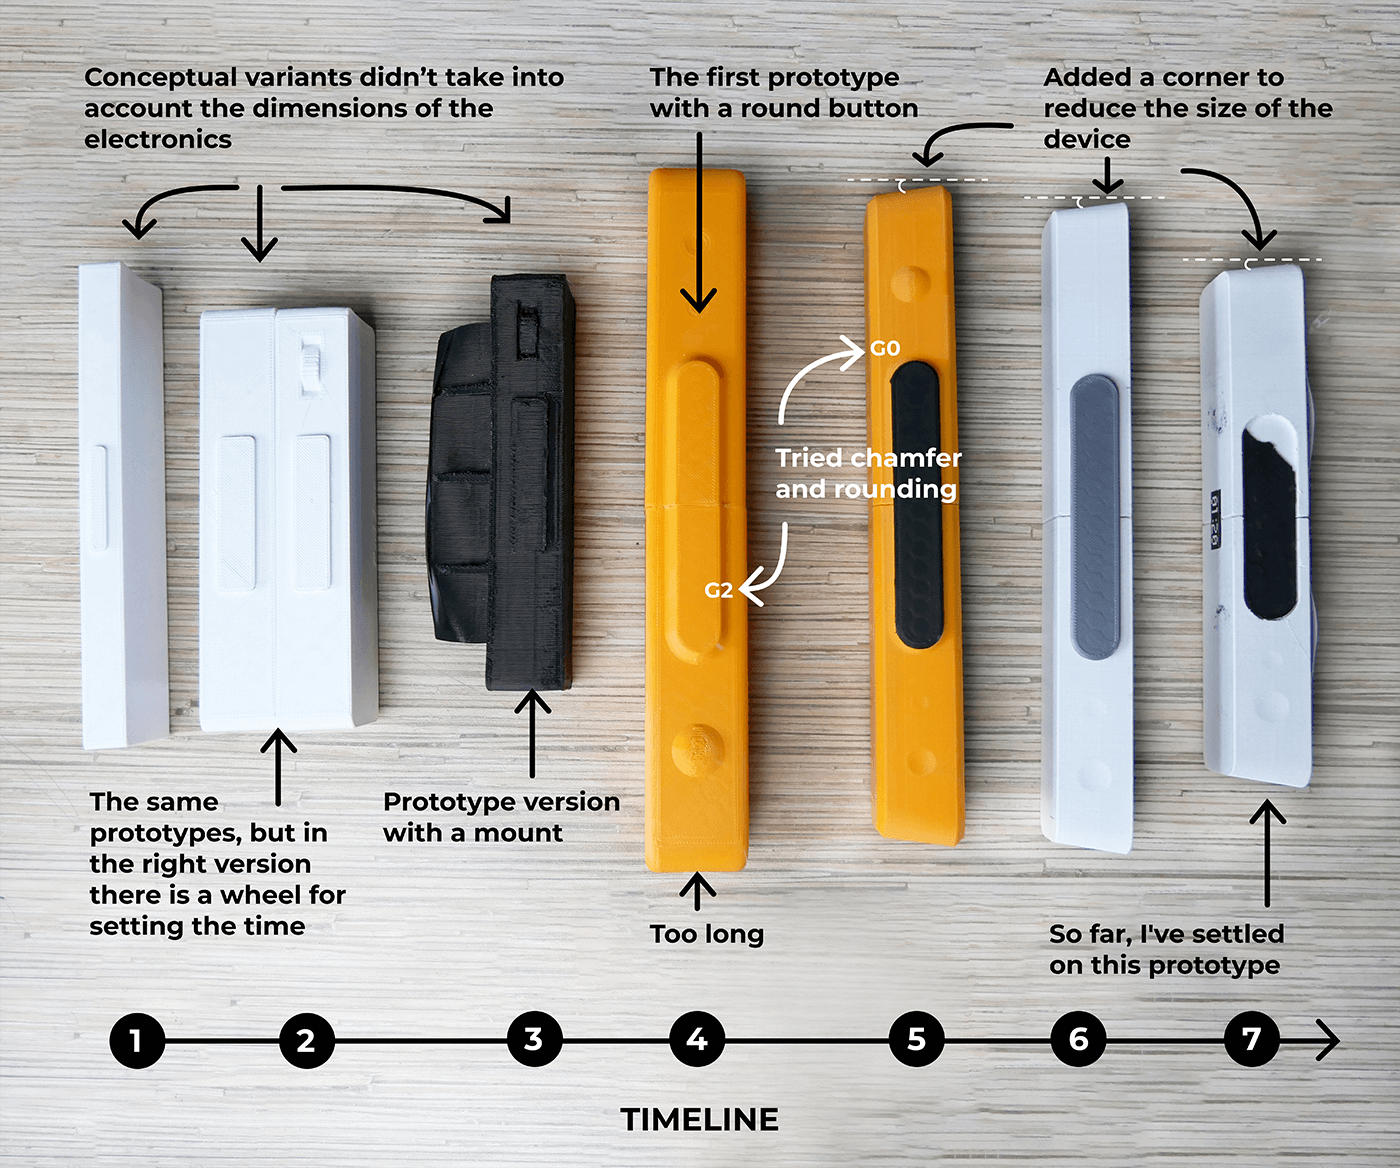
Initially, there were ideas of making holes at the back of the status bar so we could mount it on a wall or door. But this idea was rejected because we needed a more straightforward way to mount the device. Now we have an idea of easily attaching and removing the status bar on vertical surfaces using a magnetic mount.

The status bar form has been finalized. It is a white rectangle with a tinted plastic front panel that covers LEDs. As for the location of the USB port, there is no certainty yet. It seems correct to place it on the side, but it is not very handy when the device is mounted on a monitor. What do you think?
Mounting on vertical surfaces
Sometimes I record sound in my room and don’t like it when my family members knock or open the door. To let my family know that I am busy, I wanted to be able to attach the status bar to the door of my home studio. To do that, I plan to install neodymium magnets inside the status bar casing and add a thin metal plate on double-sided foam tape to the kit. Once I glue the plate on the door, I can easily mount and remove the device.
The status bar installed on the door will require periodic charging. For simple charging, removing and putting it back easily is vital. Therefore, using magnets and a metal plate to mount the status bar seems the best option.
Stay tuned
If you enjoyed this project and its development story, follow for the latest updates and feel free to share your feedback.
Discussions
Become a Hackaday.io Member
Create an account to leave a comment. Already have an account? Log In.