 Samir
SamirDesign process The Mini Series
When I was young (primary school) electronics components such as LED's immediately grabbed my attention. After school, I would jump behind the computer to learn more about them. However, I soon encountered a lot of complicated symbols and electronics terms that I simply couldn't wrap my mind around at the time. This was very discouraging and caused me to give up on exploring electronics – at least for a while. Only later, when I began formal studies, I chose to learn electronics properly and was able to understand it.
Years later, I realized that struggling the way I did wasn't right, and I didn't want others to have the same discouraging experience. That's why I designed modern, beginner-friendly soldering kits that help you explore electronics in a way you can understand exactly how each part and the circuit works.
The Mini Series have been designed with 3 goals in mind:
1. They should speak the language of the 21st century;
2. Teach you about electronic components, soldering, circuits and programming;
3. Interact with you as you learn.
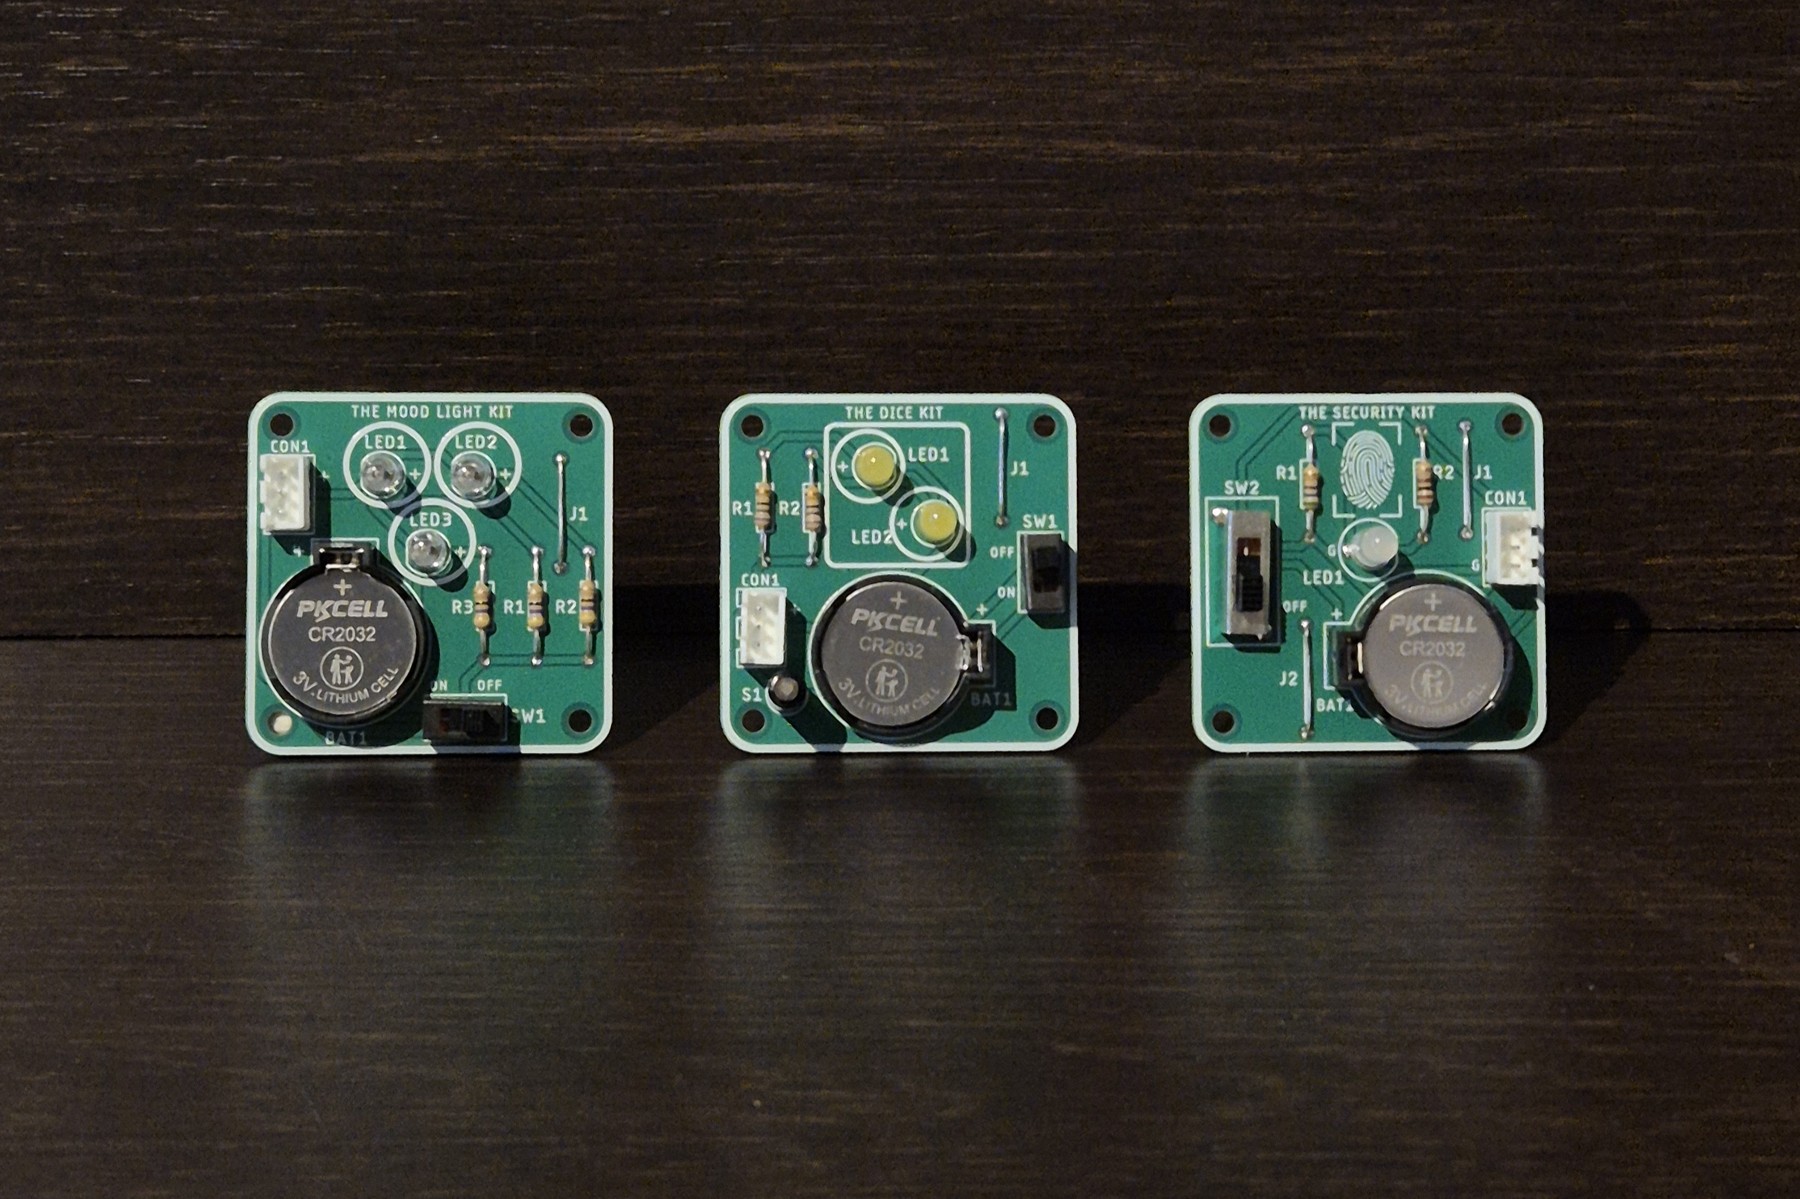
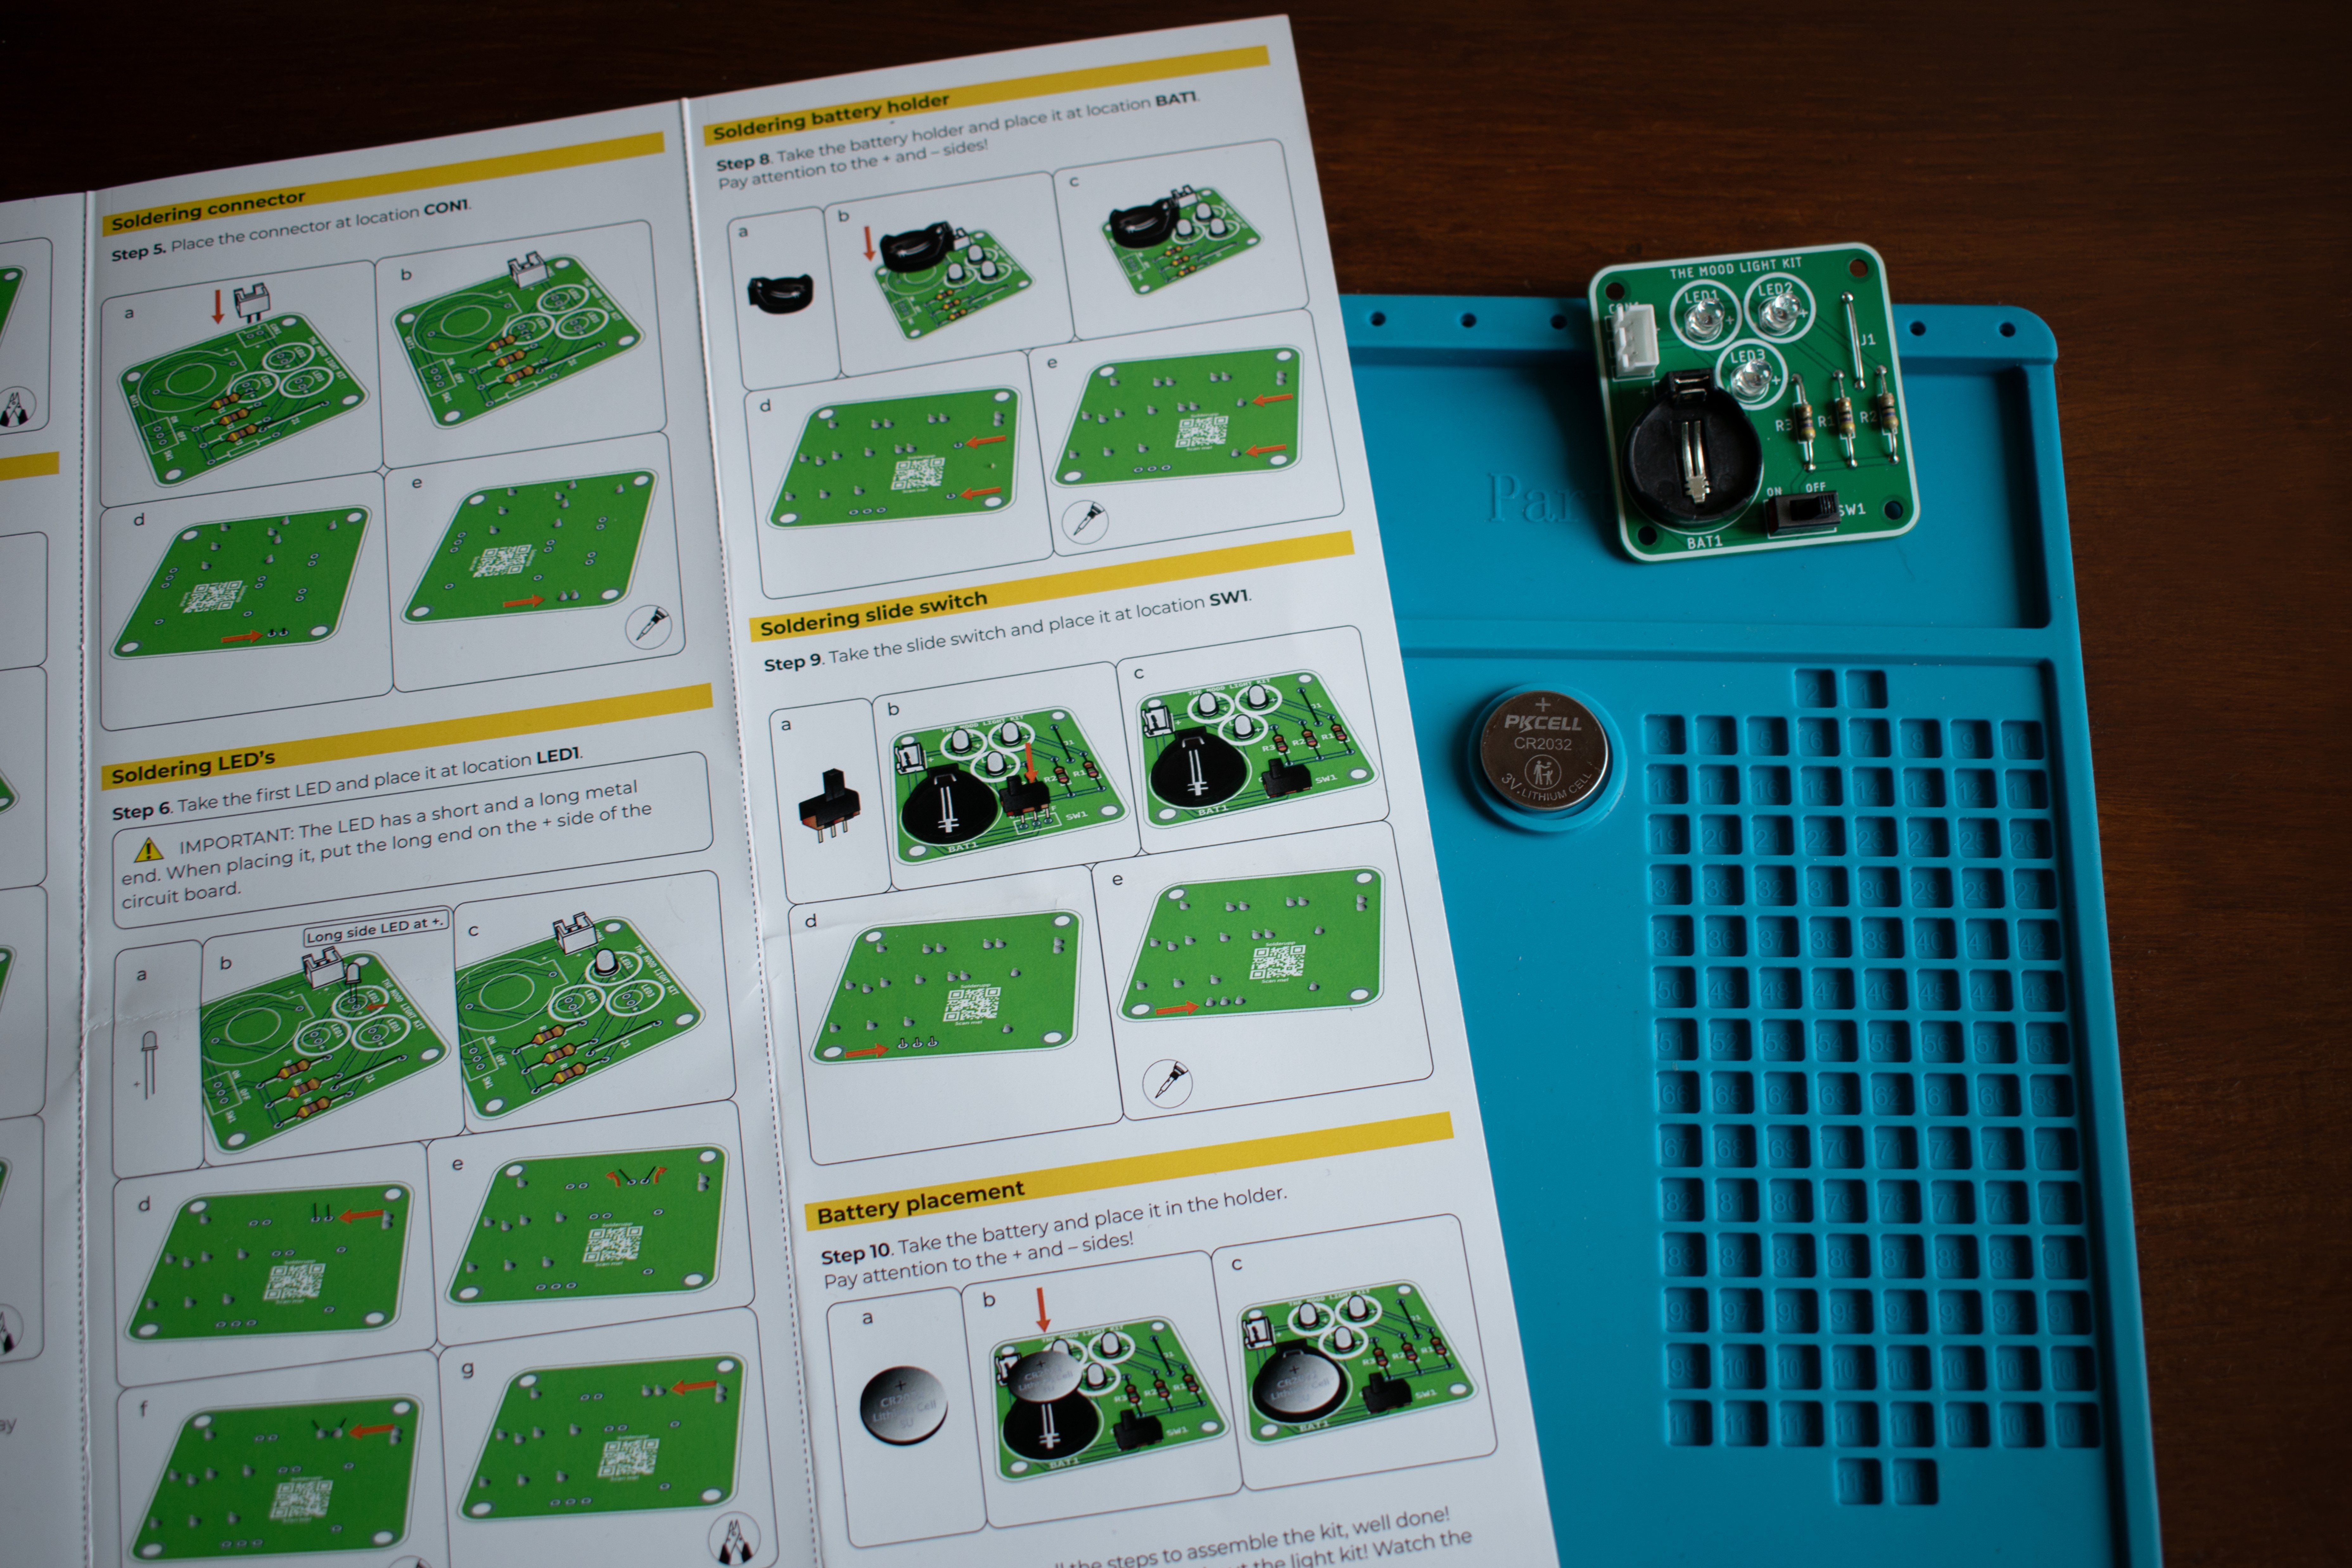
Each kit contains a manual filled with illustrations of components, and teaches you about the parts in the kit. On the first side, it also has a QR code, that leads to a video with an explanation about soldering. On the back side of the manual, you will find a LEGO-style step-by-step build guide, showing you exactly how to assemble the kit. After you are finished with assembly, you can scan the last QR code, which will show you a video that explains how the parts from the kit work, show you a couple of components from the inside and explain how your circuit works.
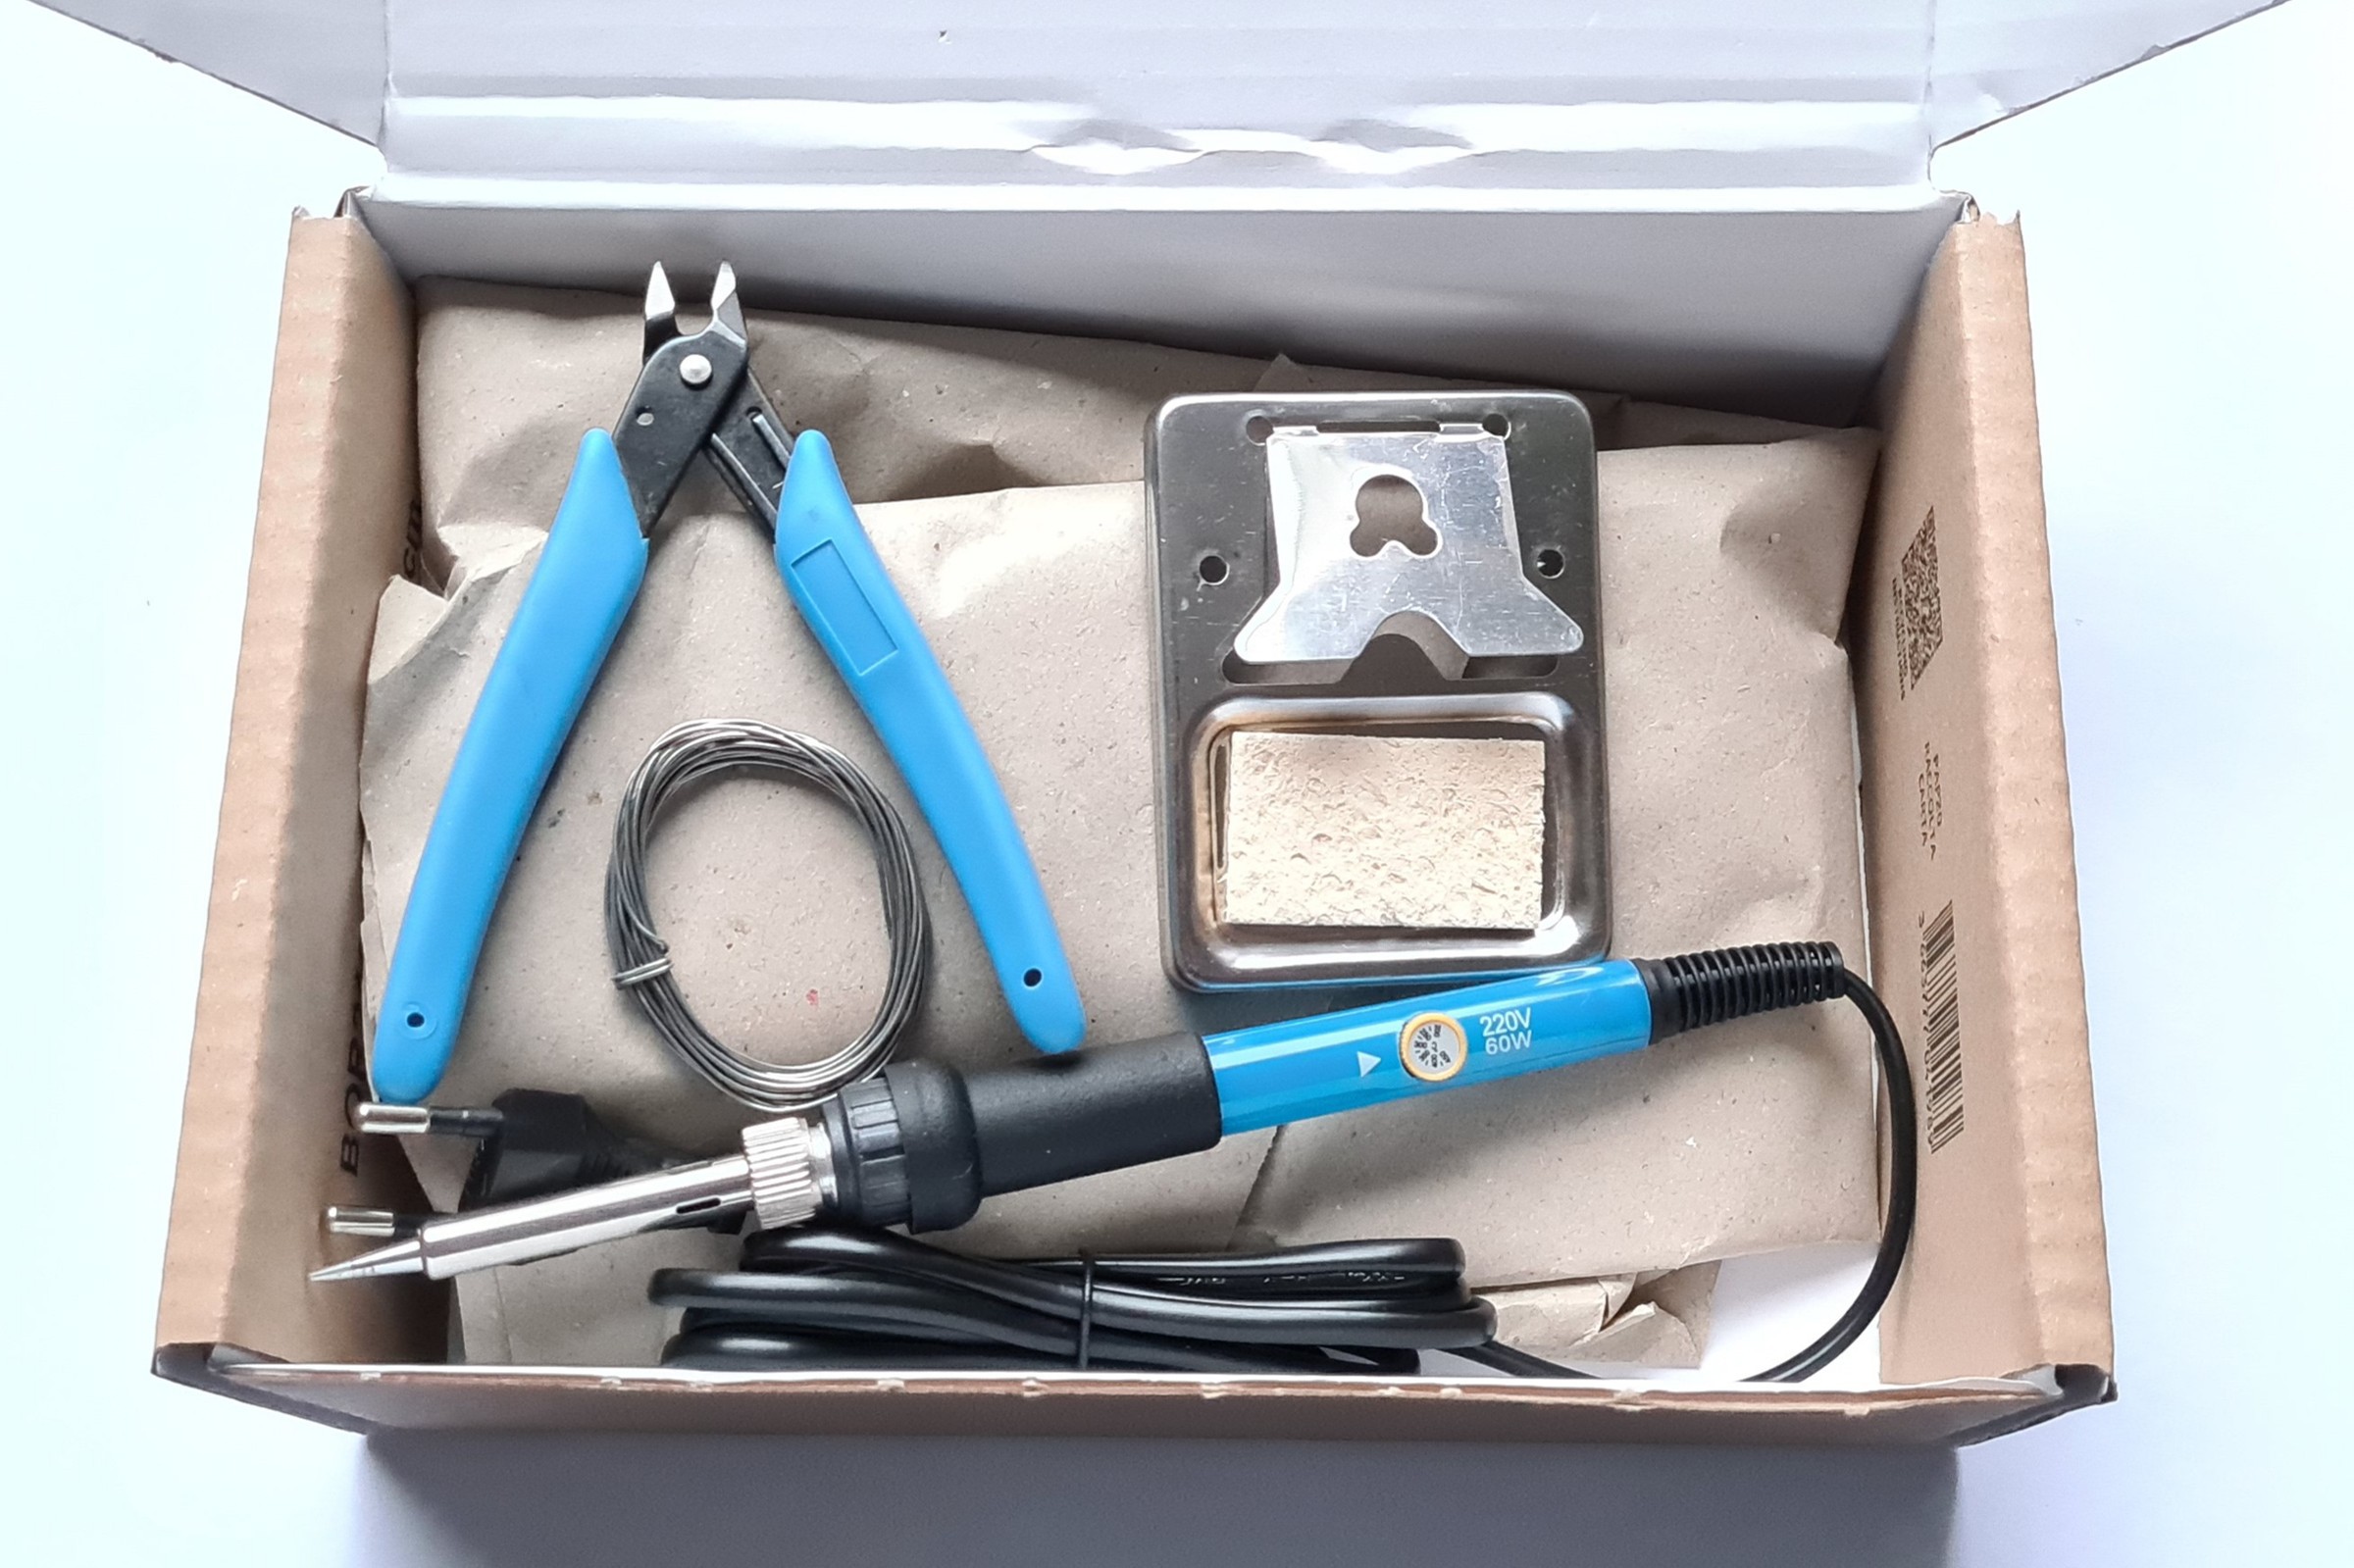
For assembling, you only need a few basic tools:
- Soldering iron
- Soldering iron holder and sponge
- Solder wire
- Side cutters
Optional tools (for fixing small mistakes):
- Desoldering pump
- Needle nose pliers
Iterative design of ambience light enclosures
Let me explain the design process of The Mini Series enclosures. It all started with the assembled Dice Kit placed inside a small glass jar for the first iteration. The goal was to spread the light evenly and create an ambient glow that instantly grabs your attention. Unfortunately, this did not work well, since glass does doesn't spread light evenly.
In iteration 2, a piece of standard paper was wrapped around the glass jar. This drastically improved the effect, as the light no longer travelled only upwards, but was diffused through the paper's structure. The downside was that some light was still blocked due to paper’s thickness.
For iteration 3, a paper tissue was used instead. This allowed more light to pass through while still keeping it evenly spread. The trade-off was fragility: the paper is delicate, and the glass can break relatively easy.
In iteration 4, a stronger foil paper is used. It lets sufficient light through, while maintaining an even spread. Combined with a wooden structure, this proved to be the ideal solution. Below you can see iteration 1 (on the left side) and iteration 4 (on the right side).

Designing One Programmer
The One Programmer is designed to program any kit from The Mini Series modern soldering kits. It features a 32-bit RA4M1 Renesas microcontroller, which can be programmed through a USB-C connector. It also has several additional features, such as a battery connector, 2 connectors for kits from The Mini Series, a GPIO connector for connecting various modules and boards, a QWIIC connector for interfacing with different sensors, and two connectors for future development boards. Besides these standard features, it also includes a MEMS microphone, light-, temperature-, and acceleration sensors, an LED ring, a small speaker and a motor driver for small motors.
The One Programmer easily connects with any of the kits from The Mini Series using a 3-pole connector and cable, and it comes pre-soldered. You simply connect it using a USB cable and code in...
Read more »
 David O. Smith
 GearheadRed
 MDreamer