 Paul
Paul-
1Quick Start — Ready Demo
💡 Ready binaries for instant start.
You’ll Need
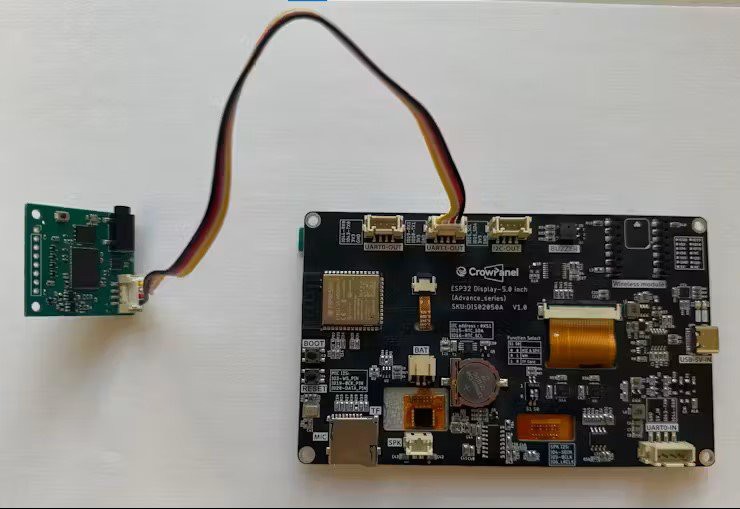
![TinyTTS Module]()
- TinyTTS kit (Elecrow, or Tindie) — MCU module with embedded neural TTS
- CrowPanel Advanced (Elecrow) (ESP32-S3 display controller)
- Speaker — connect to TinyTTS audio out
1. Connect the CrowPanel (ESP32-S3) to your computer via USB/Serial.
Set the panel’s function-select switch to “WM(0,1)” (UART1-OUT mode).Do not connect the tinyTTS module yet.
2. Flash the firmware.
Option A — Use prebuilt images:
Infirmware/, pickbinaries_album/for the album scenario, orbinaries_travel/for the traveling scenario.
Flash using the provided flasher (see
firmware/flash_tool.md).Option B — Build from source:
Install ESP-IDF v5.4, clone the repo, choose the scenario incomponents/ui/scenario_build.h, then run:idf.py fullcleanidf.py buildidf.py -p PORT flash
3. After flashing:
Connect the tinyTTS module to the CrowPanel (UART0 ↔ UART1-OUT) with the 4-pin cable.
Attach the audio output (3.5 mm jack) from tinyTTS to a speaker or headphones.![]()
4. Run the demo:
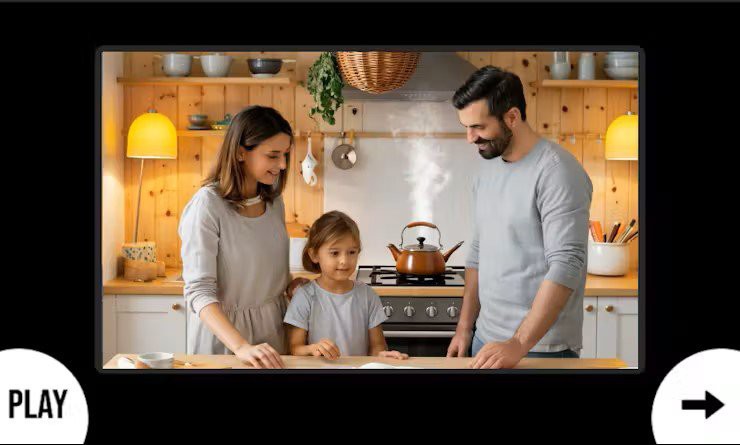
The screen shows a photo card.
- Press Play - the card text is spoken by tinyTTS.
- Press "→" - next card appears (looped list).
![]()
More details in the Readme
-
2Make Your Own Album - Example: third
(Based on the Add Scenario Guide)
1. Create Scenario Folders
In the repository root, add:
components/ui/third/         ← new folder for visuals
spiffs_root/assets_third/    ← new folder for binary images
Each must follow the naming convention: lowercase scenario name =
third.2. Enable Scenario in Code
Edit
components/ui/include/scenario_build.h#define UI_SCENARIO_ALBUM 0 #define UI_SCENARIO_TRAVEL 0 #define UI_SCENARIO_THIRD 1 // activate the new oneOnly one scenario can be set to
1.3. Add Assets
Place
.binimages (RAW format) insidespiffs_root/assets_third/.You can generate them using SquareLine Studio or the LVGL Image Converter
(Color format:True color (RGB565), Output:Binary).4. Add Texts and Visuals
Texts:
Createcomponents/ui/builtin_texts_third.c—
defineskThirdTexts[]array with your text strings.Visuals:
Createcomponents/ui/third/visuals_third.c—
maps each text to an image (import fromimg_third_*.c).Example:
const case_visual_t kVisuals[CASE_TXT_COUNT] = {
  [CASE_TXT_01] = { &ui_img_third_01, ui_img_third_01_load },
  [CASE_TXT_02] = { &ui_img_third_02, ui_img_third_02_load },
  [CASE_TXT_03] = { &ui_img_third_03, ui_img_third_03_load },
};
5. Update CMakeLists.txt
Add the new block inside
components/ui/CMakeLists.txt:elseif(_SCEN_SELECTED_NAME_LOWER STREQUAL "third") list(APPEND UI_SCENARIO_SRCS ${CMAKE_CURRENT_LIST_DIR}/builtin_texts_third.c ${CMAKE_CURRENT_LIST_DIR}/third/visuals_third.c )6. Build and Flash
Clean, build, and flash:
idf.py fullcleanidf.py
buildidf.py -p
PORT flash monitor
Expected log output:
-- UI scenario selected: THIRD (lower='third')
TinyTTS — The Neural Module That Makes Photos Talk
Your pictures don’t just sit there anymore — they speak. Add short captions to your family album, and turn them into natural voice
_stG7dHwQyE.png?auto=compress%2Cformat&w=740&h=555&fit=max)
Discussions
Become a Hackaday.io Member
Create an account to leave a comment. Already have an account? Log In.