fl@C@
fl@C@READ THE PDF FILE
Hebbian learning (in this project) is a simple local learning rule often summarized as “neurons that fire together wire together.” In this device, the “neurons” are just a small set of weights that connect a short history of recent button presses to a prediction of the next press. Each tap updates the weights immediately: the connections that helped predict the correct next button are strengthened, while competing connections are weakened. Over time the device learns short-term correlations, and it gradually forgets them if they are not reinforced.
Minimal RP2040 Hebbian Button Pattern Learner
This project is a small, physically legible demonstration of online Hebbian-style learning on an RP2040 microcontroller using only:
-
Two momentary buttons (A and B) as inputs
-
Two LEDs as outputs (PWM brightness encodes belief/confidence)
The device learns next-symbol prediction from a short, decaying history of recent button taps. Every button press simultaneously:
-
Evaluates the current prediction (shown on the LEDs)
-
Updates synaptic weights immediately using a competitive Hebbian / anti-Hebbian rule
-
Shifts the new event into the history buffer
There are no training vs inference modes, no hard-coded pattern detectors, and no stored “patterns” beyond what the system reinforces through continued interaction.
What it demonstrates
This is intended as a hands-on teaching aid for the following concepts:
-
Online learning (learning happens continuously, not in sessions)
-
Temporal correlation learning (short context → next event)
-
Competition between outputs (one prediction suppresses the other)
-
Forgetting (fast decay of short-term context + slow decay of weights)
-
Uncertainty (belief is expressed continuously rather than as hard decisions)
How it works (high level)
The model maintains a fixed-length history window of the last N taps, represented as a positional one-hot activity trace. This trace decays continuously with time, so prediction confidence fades during silence.
Two output neurons compute activations from this history trace. Belief is computed from the activation difference using a logistic function, and LED brightness is derived from belief. The exact LED mapping is intentionally treated as a user-interface choice; the reference firmware dims both LEDs under high uncertainty rather than acting as a literal probability meter.
Learning occurs only on valid button-press events, using the pre-tap context as input and the observed event as the label (event-supervised local learning).
Hardware
The hardware is intentionally minimal:
-
RP2040 board (Raspberry Pi Pico or equivalent)
-
2x momentary buttons (active-low, using internal pull-ups)
-
2x LEDs + 2x resistors (220Ω typical)

 danjovic
 0xCAFEAFFE
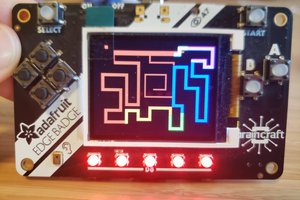
 Ben
Ben