 b.sverdlyuk
Lilka is an ESP32 console that makes it easy to create your own apps. Once your app is ready, you can publish it to the catalog at catalog.lilka.dev.
You will need a GitHub account. Fun fact: GitHub is built on Git, a protocol created by Linus Torvalds, the author of the Linux kernel. I will show you how to add an app directly through the browser, without installing any additional software.
1. Create Your Own Repository
First, you need a GitHub account. Go to github.com and sign up — it's free.
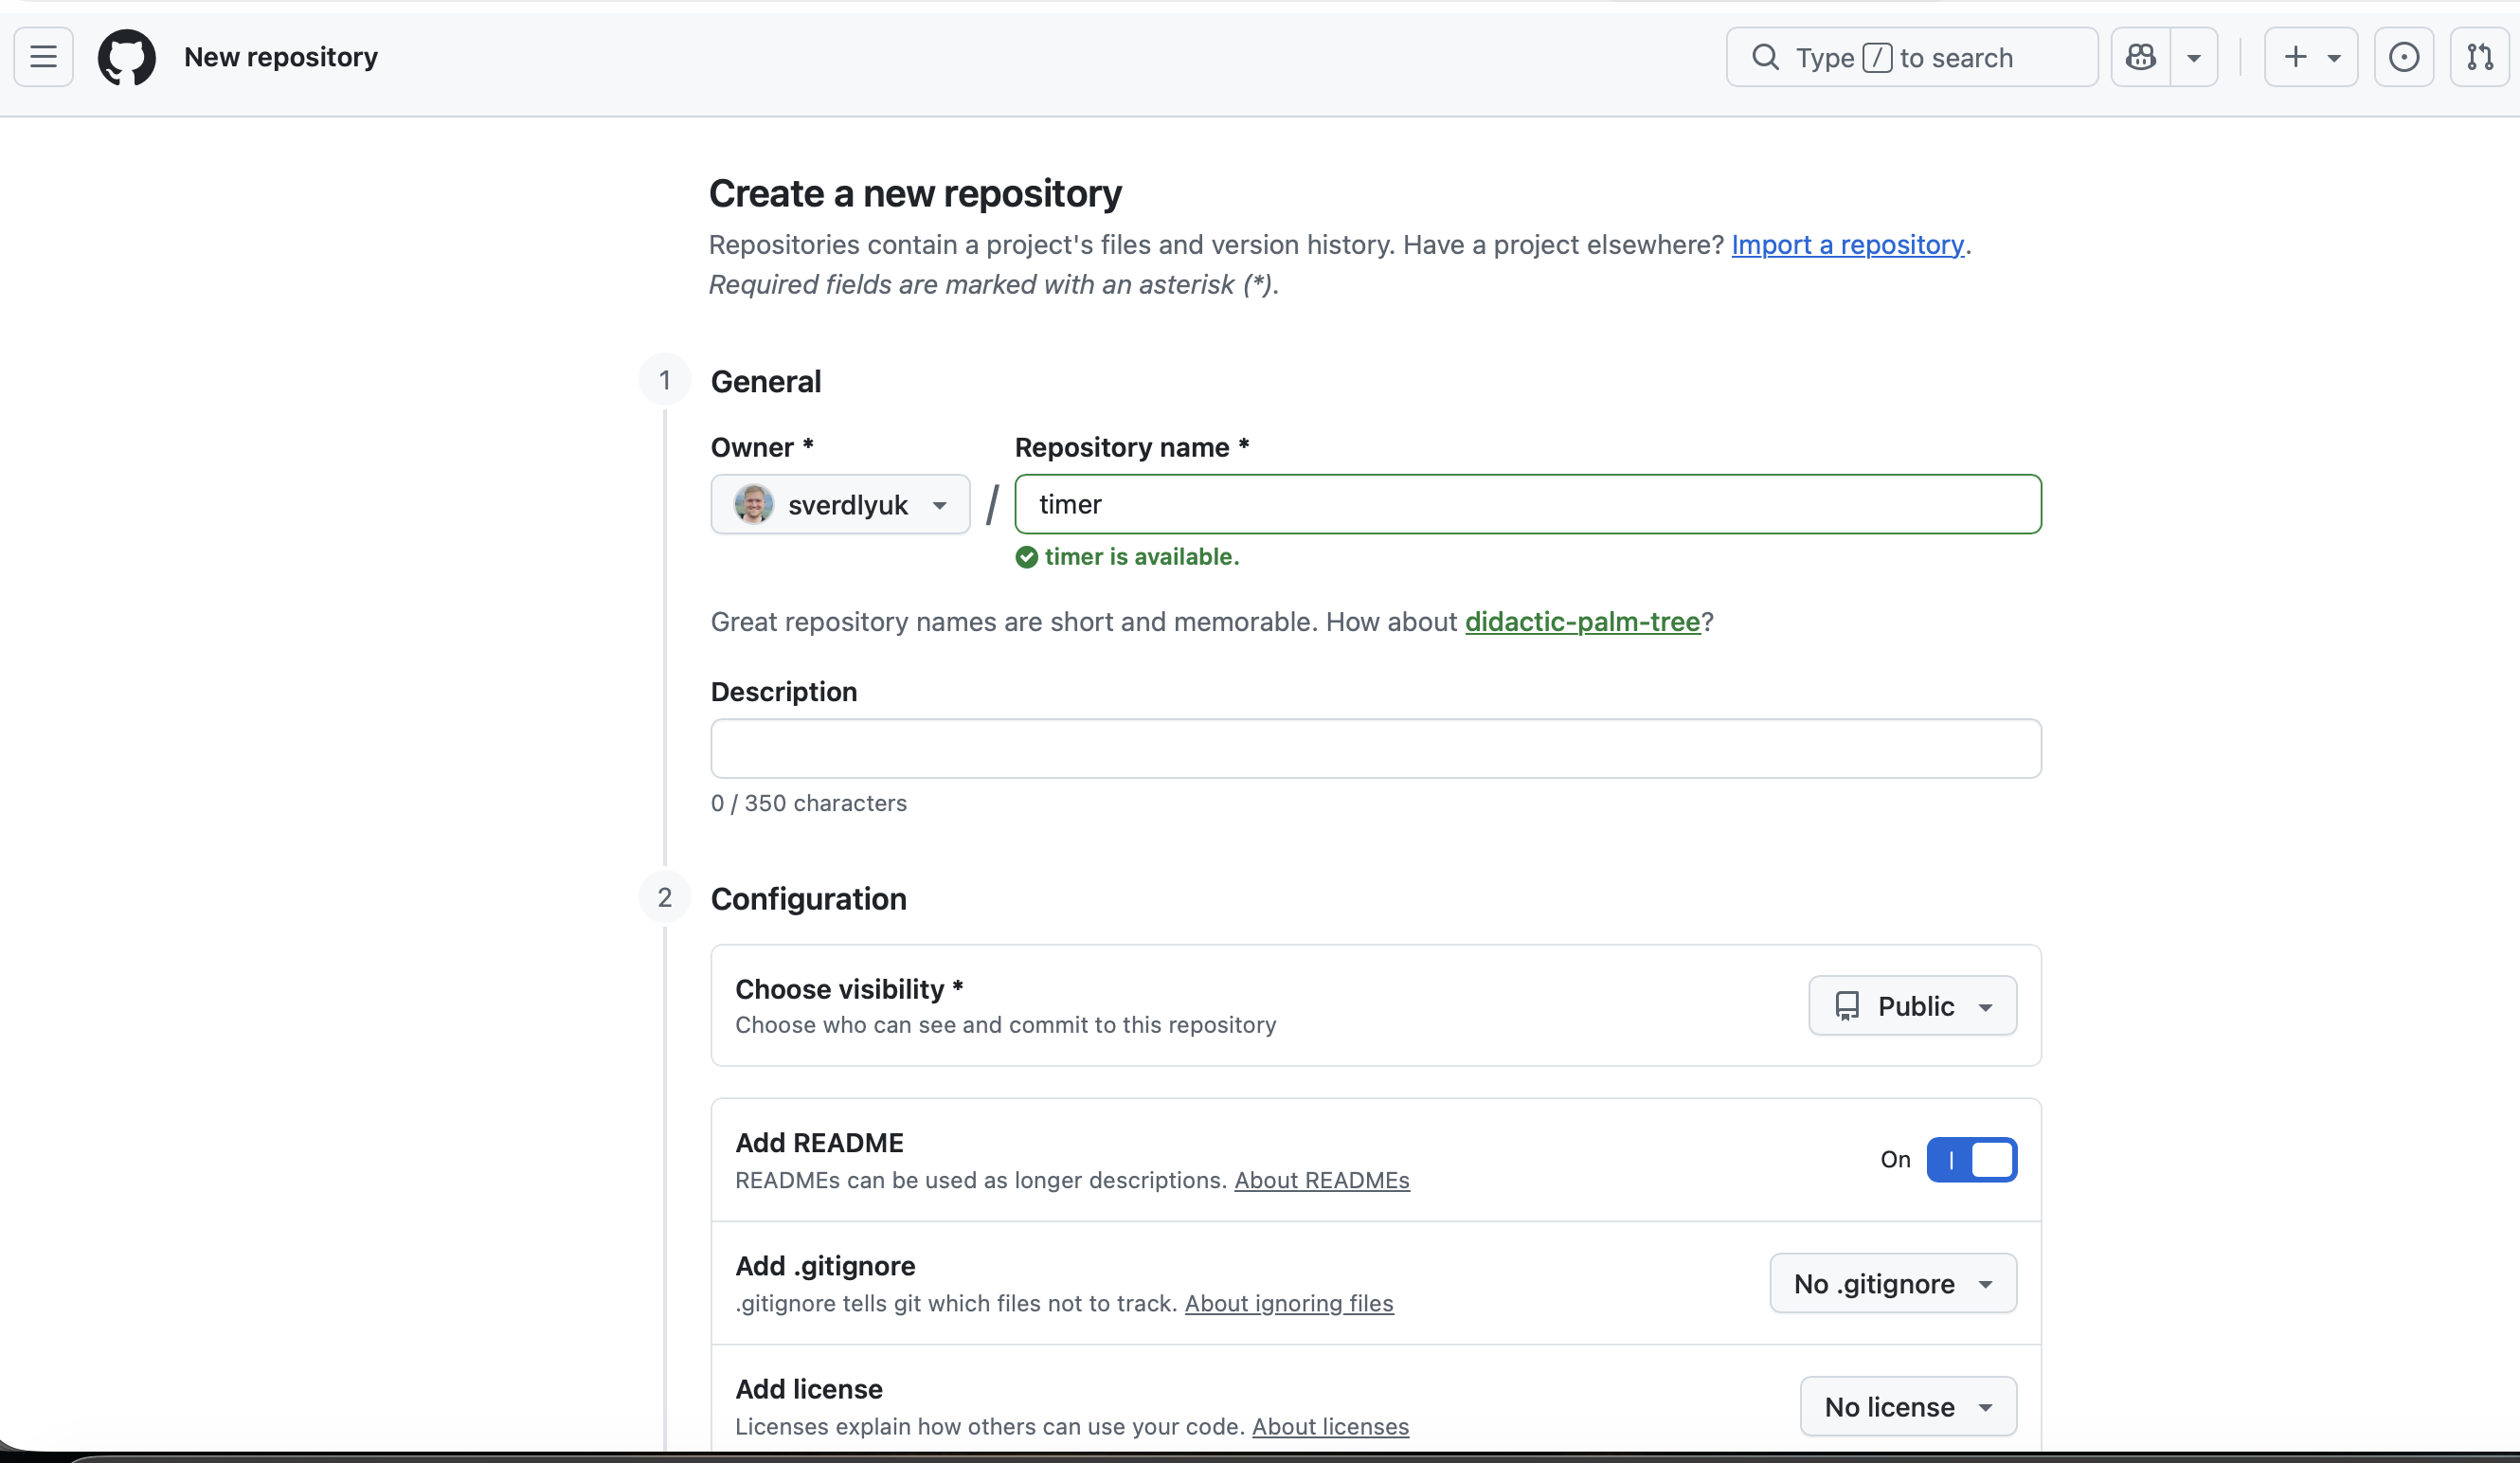
Once registered, create a repository for your app's code. Click New repository, choose a name, check Add a README file and click Create repository.
2. Add Files to Your Repository
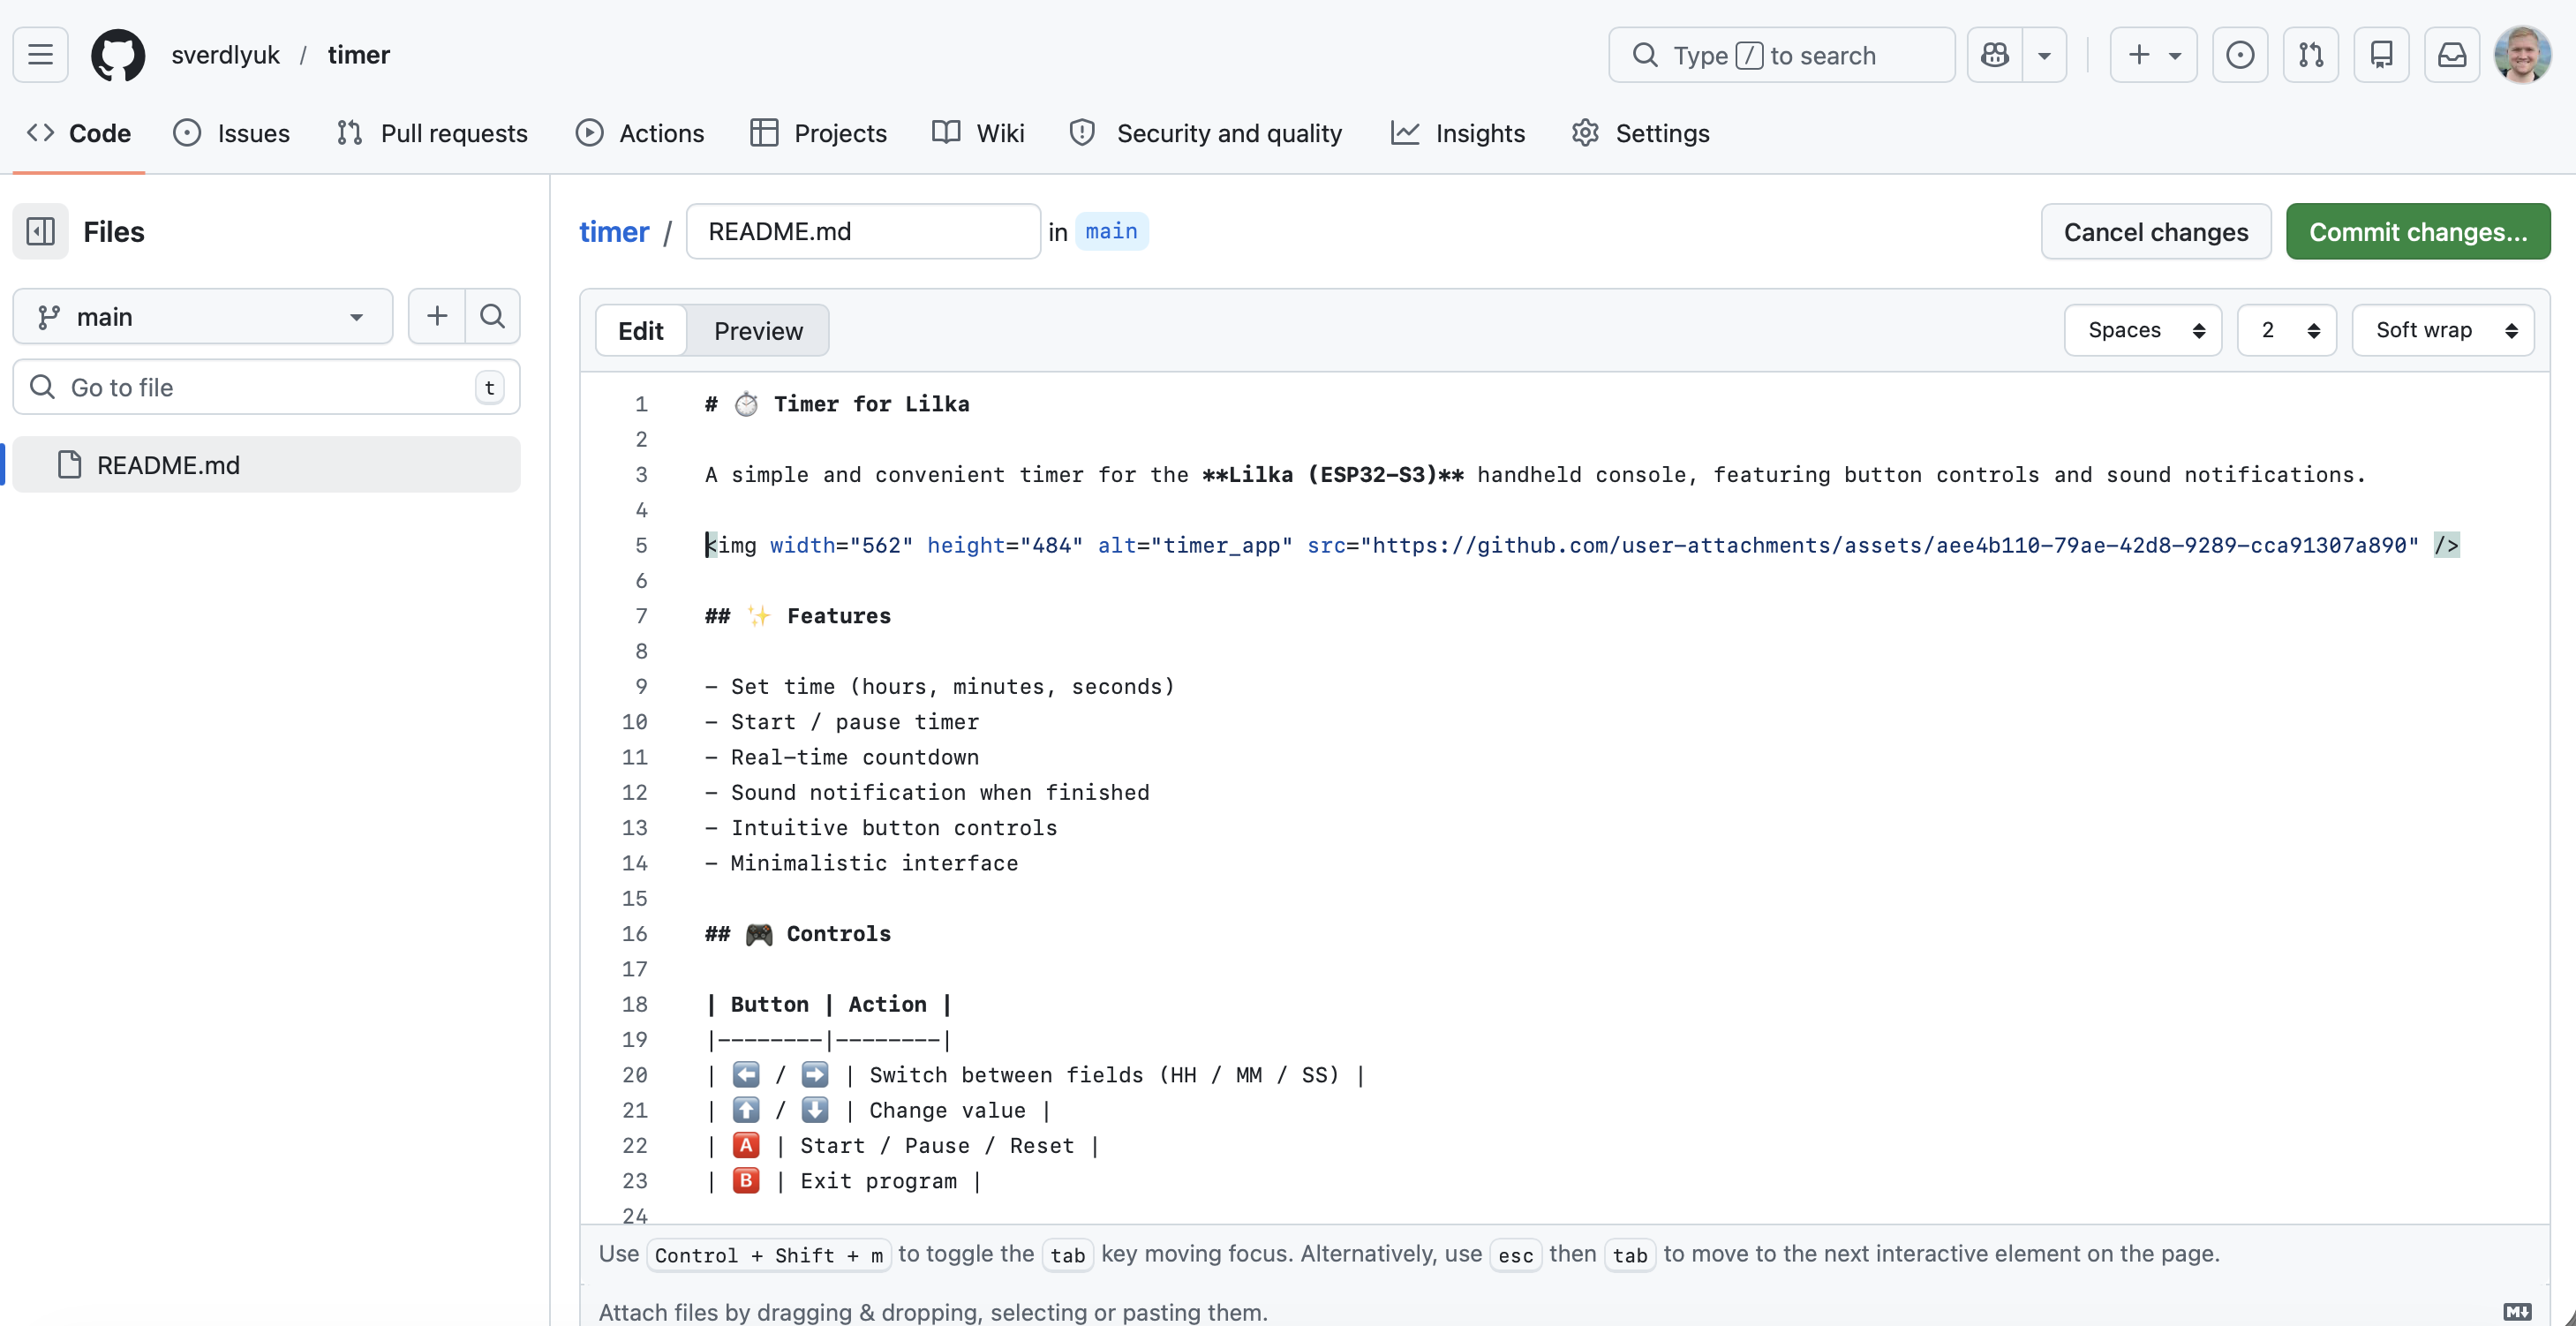
Once the repository is created, you can edit the README.md file by clicking the pencil icon in the upper right corner — add a short description of your app. When done, click the green Commit changes button in the upper right corner to save. The README file uses Markdown format — a simple and easy-to-understand text markup language.
You can write the description yourself, use an online editor like markdownlivepreview.com or stackedit.io, or ask an AI to generate a Markdown description for GitHub based on your code.
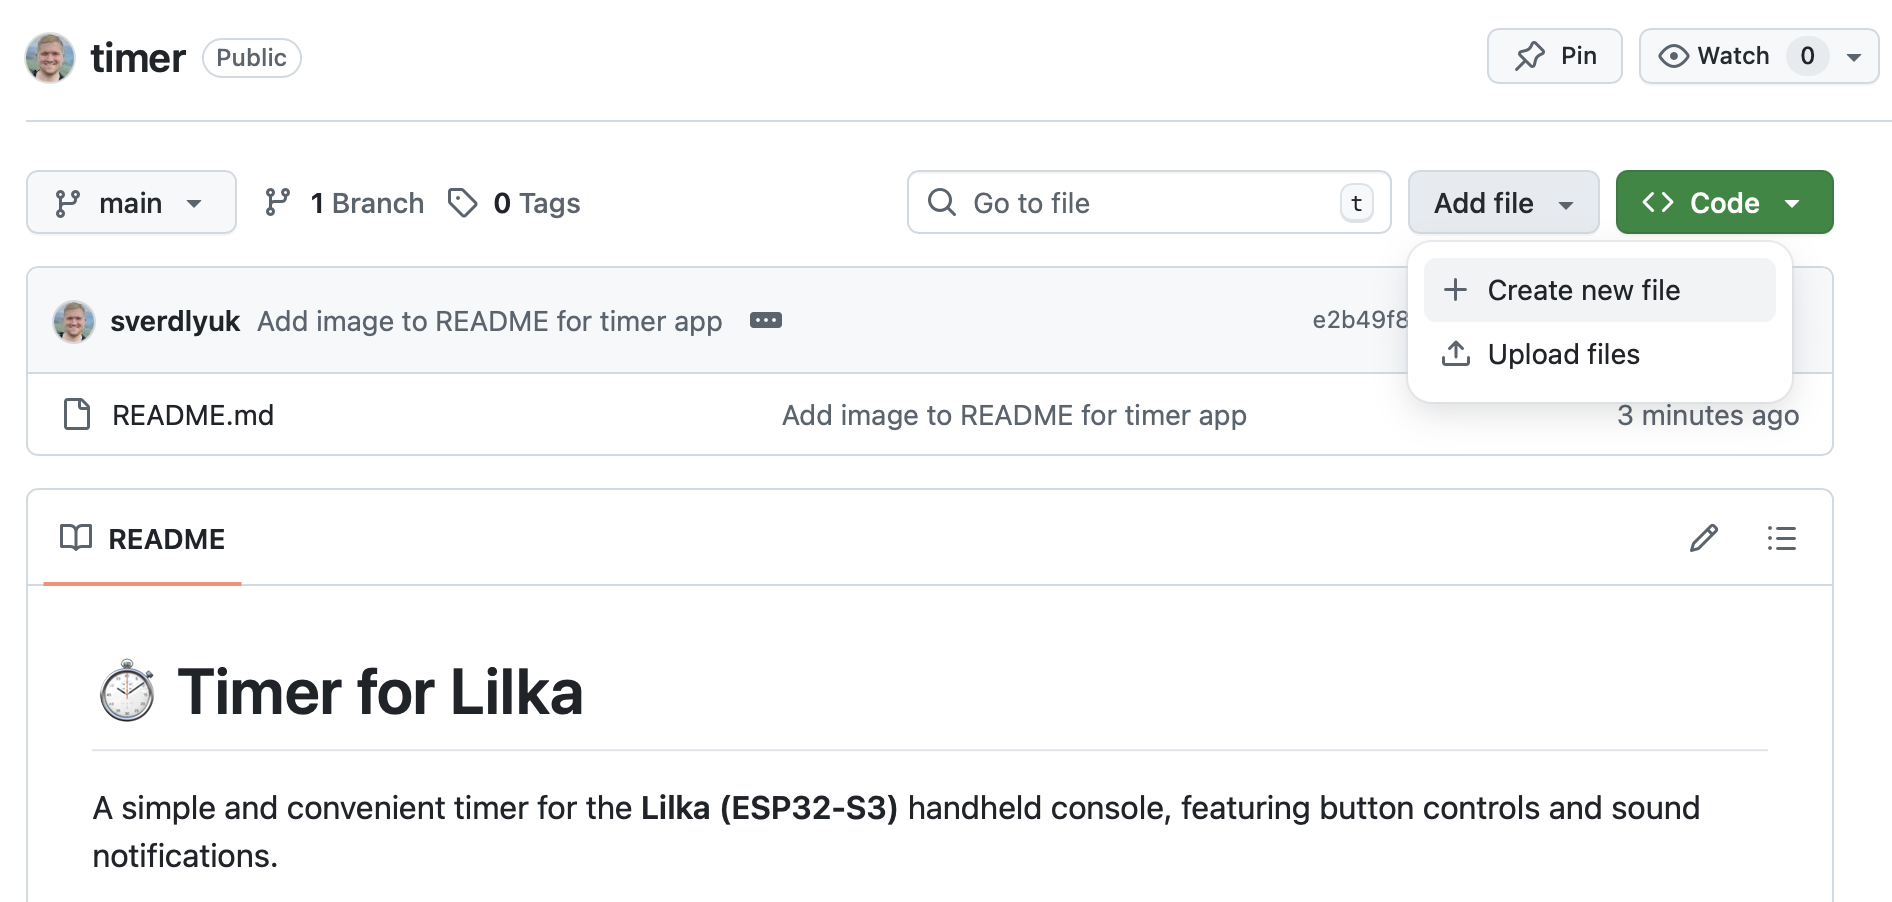
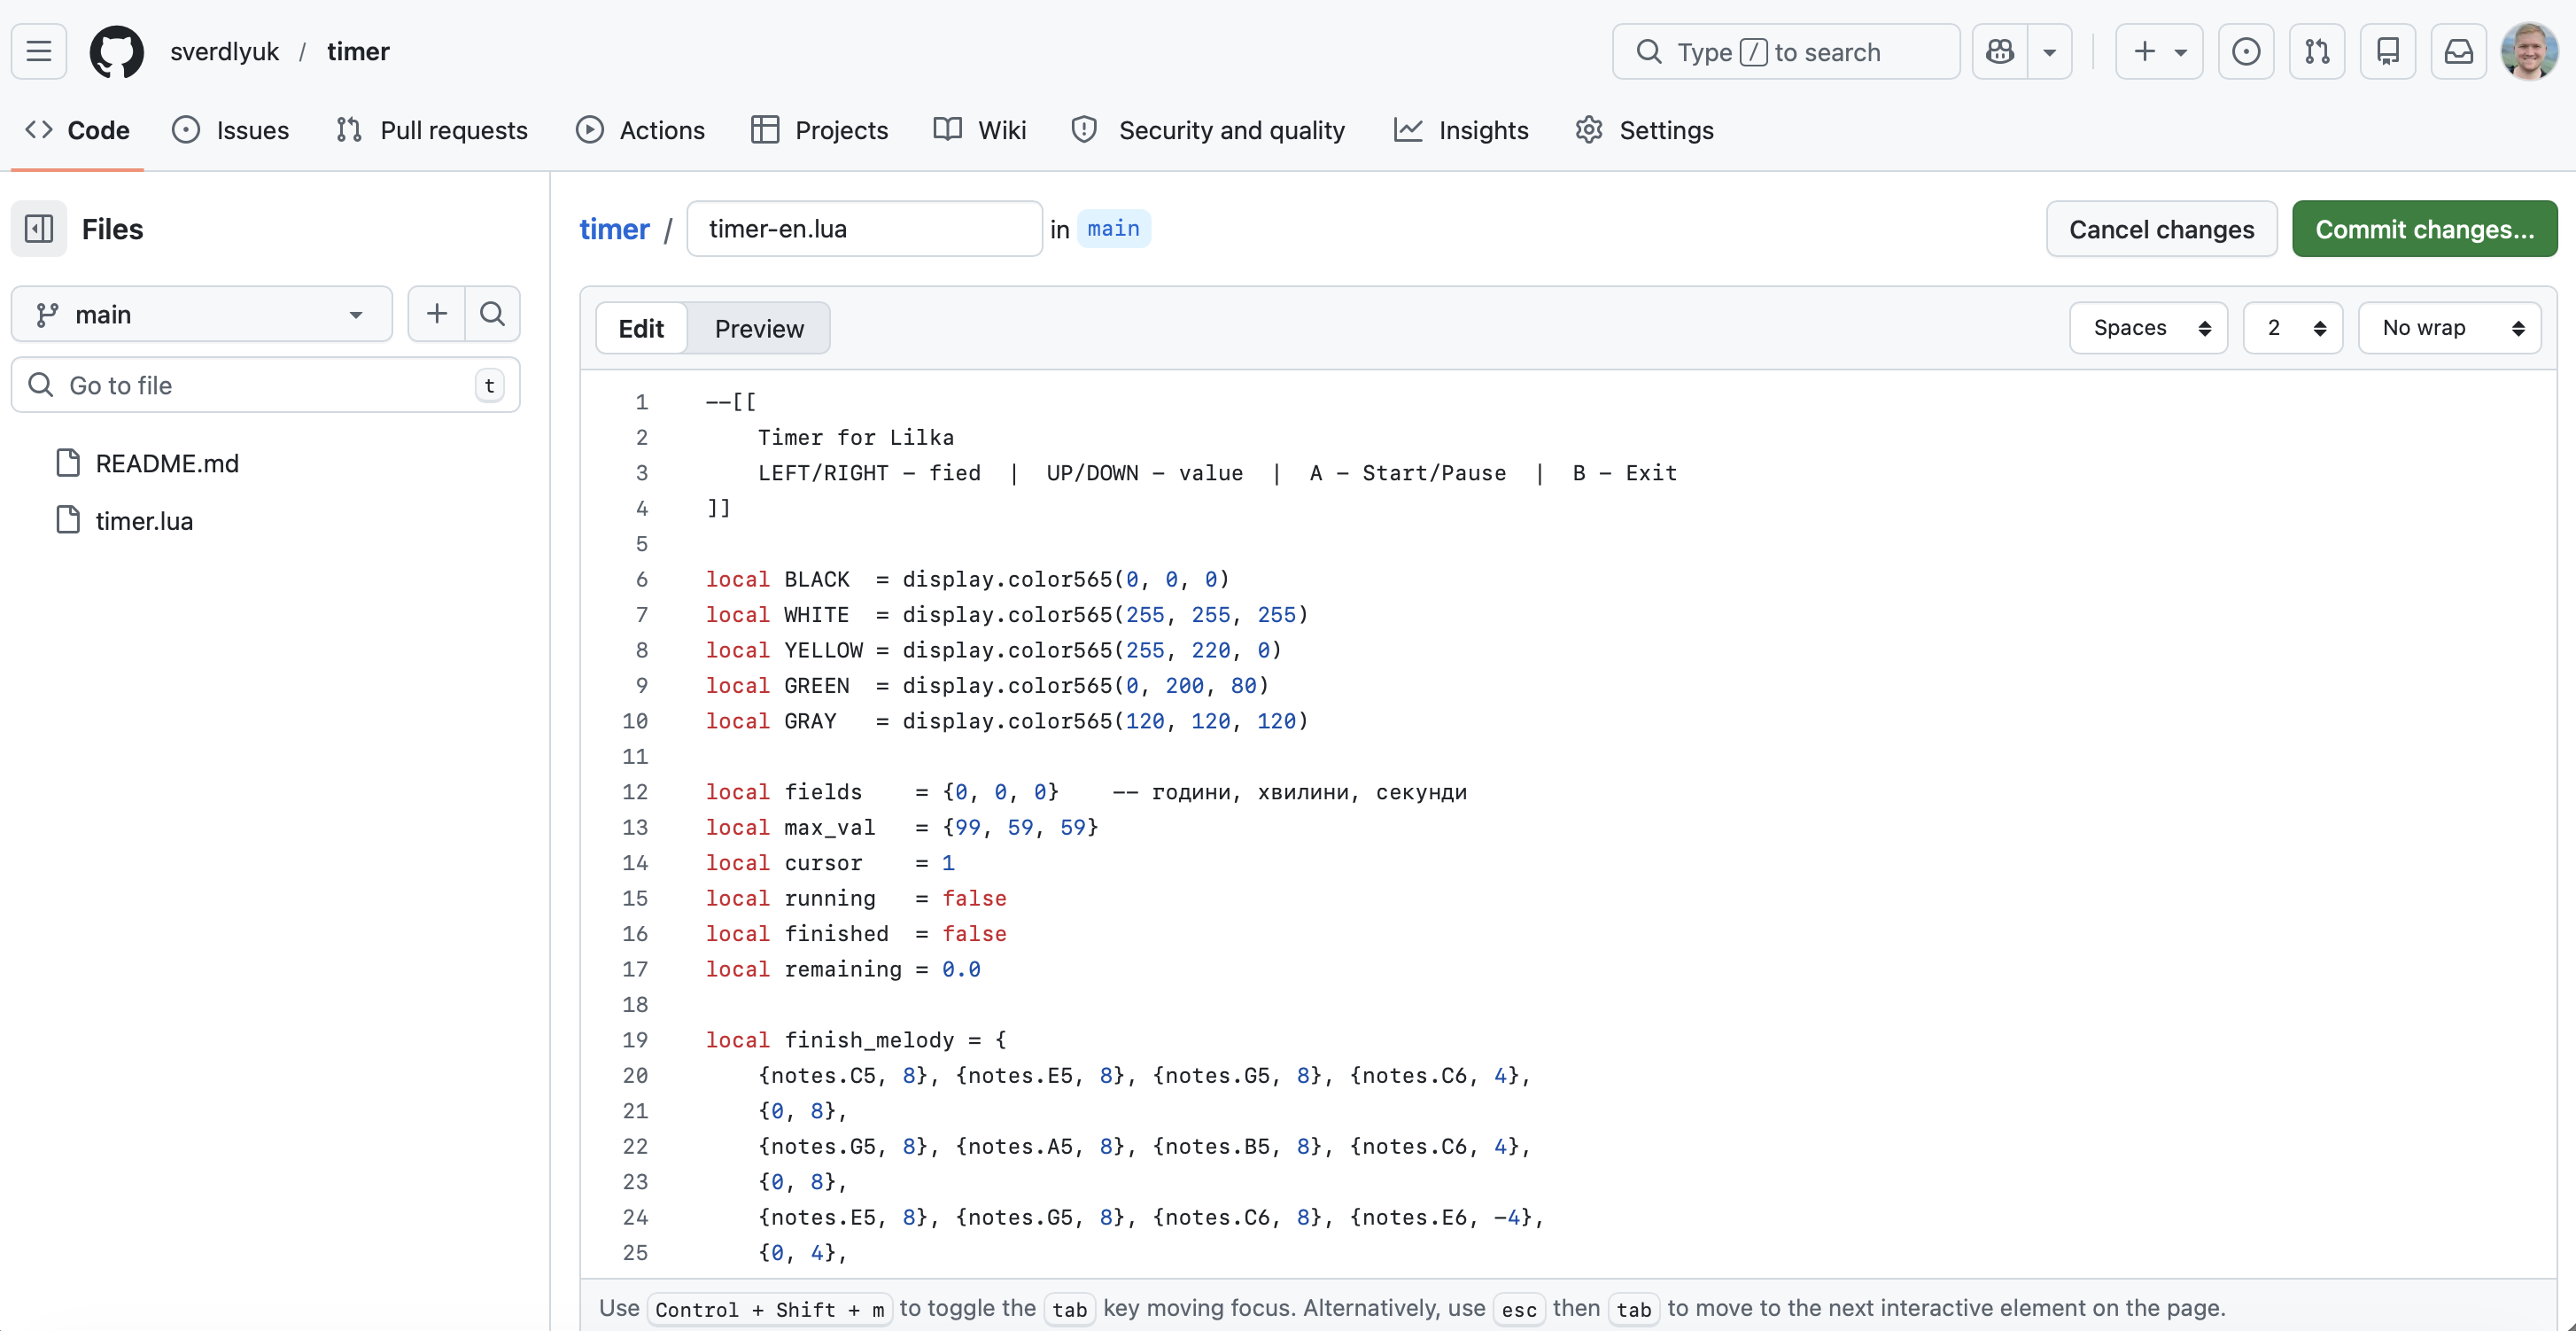
Add your code file by clicking Add file → Create new file in the upper right corner. At the top of the screen, enter the file name, for example timer.lua, and paste your code. Then click the green Commit changes button in the upper right corner.
3. Fork the Catalog Repository
To make changes to any existing repository, you need to copy it to your own space — create a fork — make your changes, and then send them for review to the repository owner.
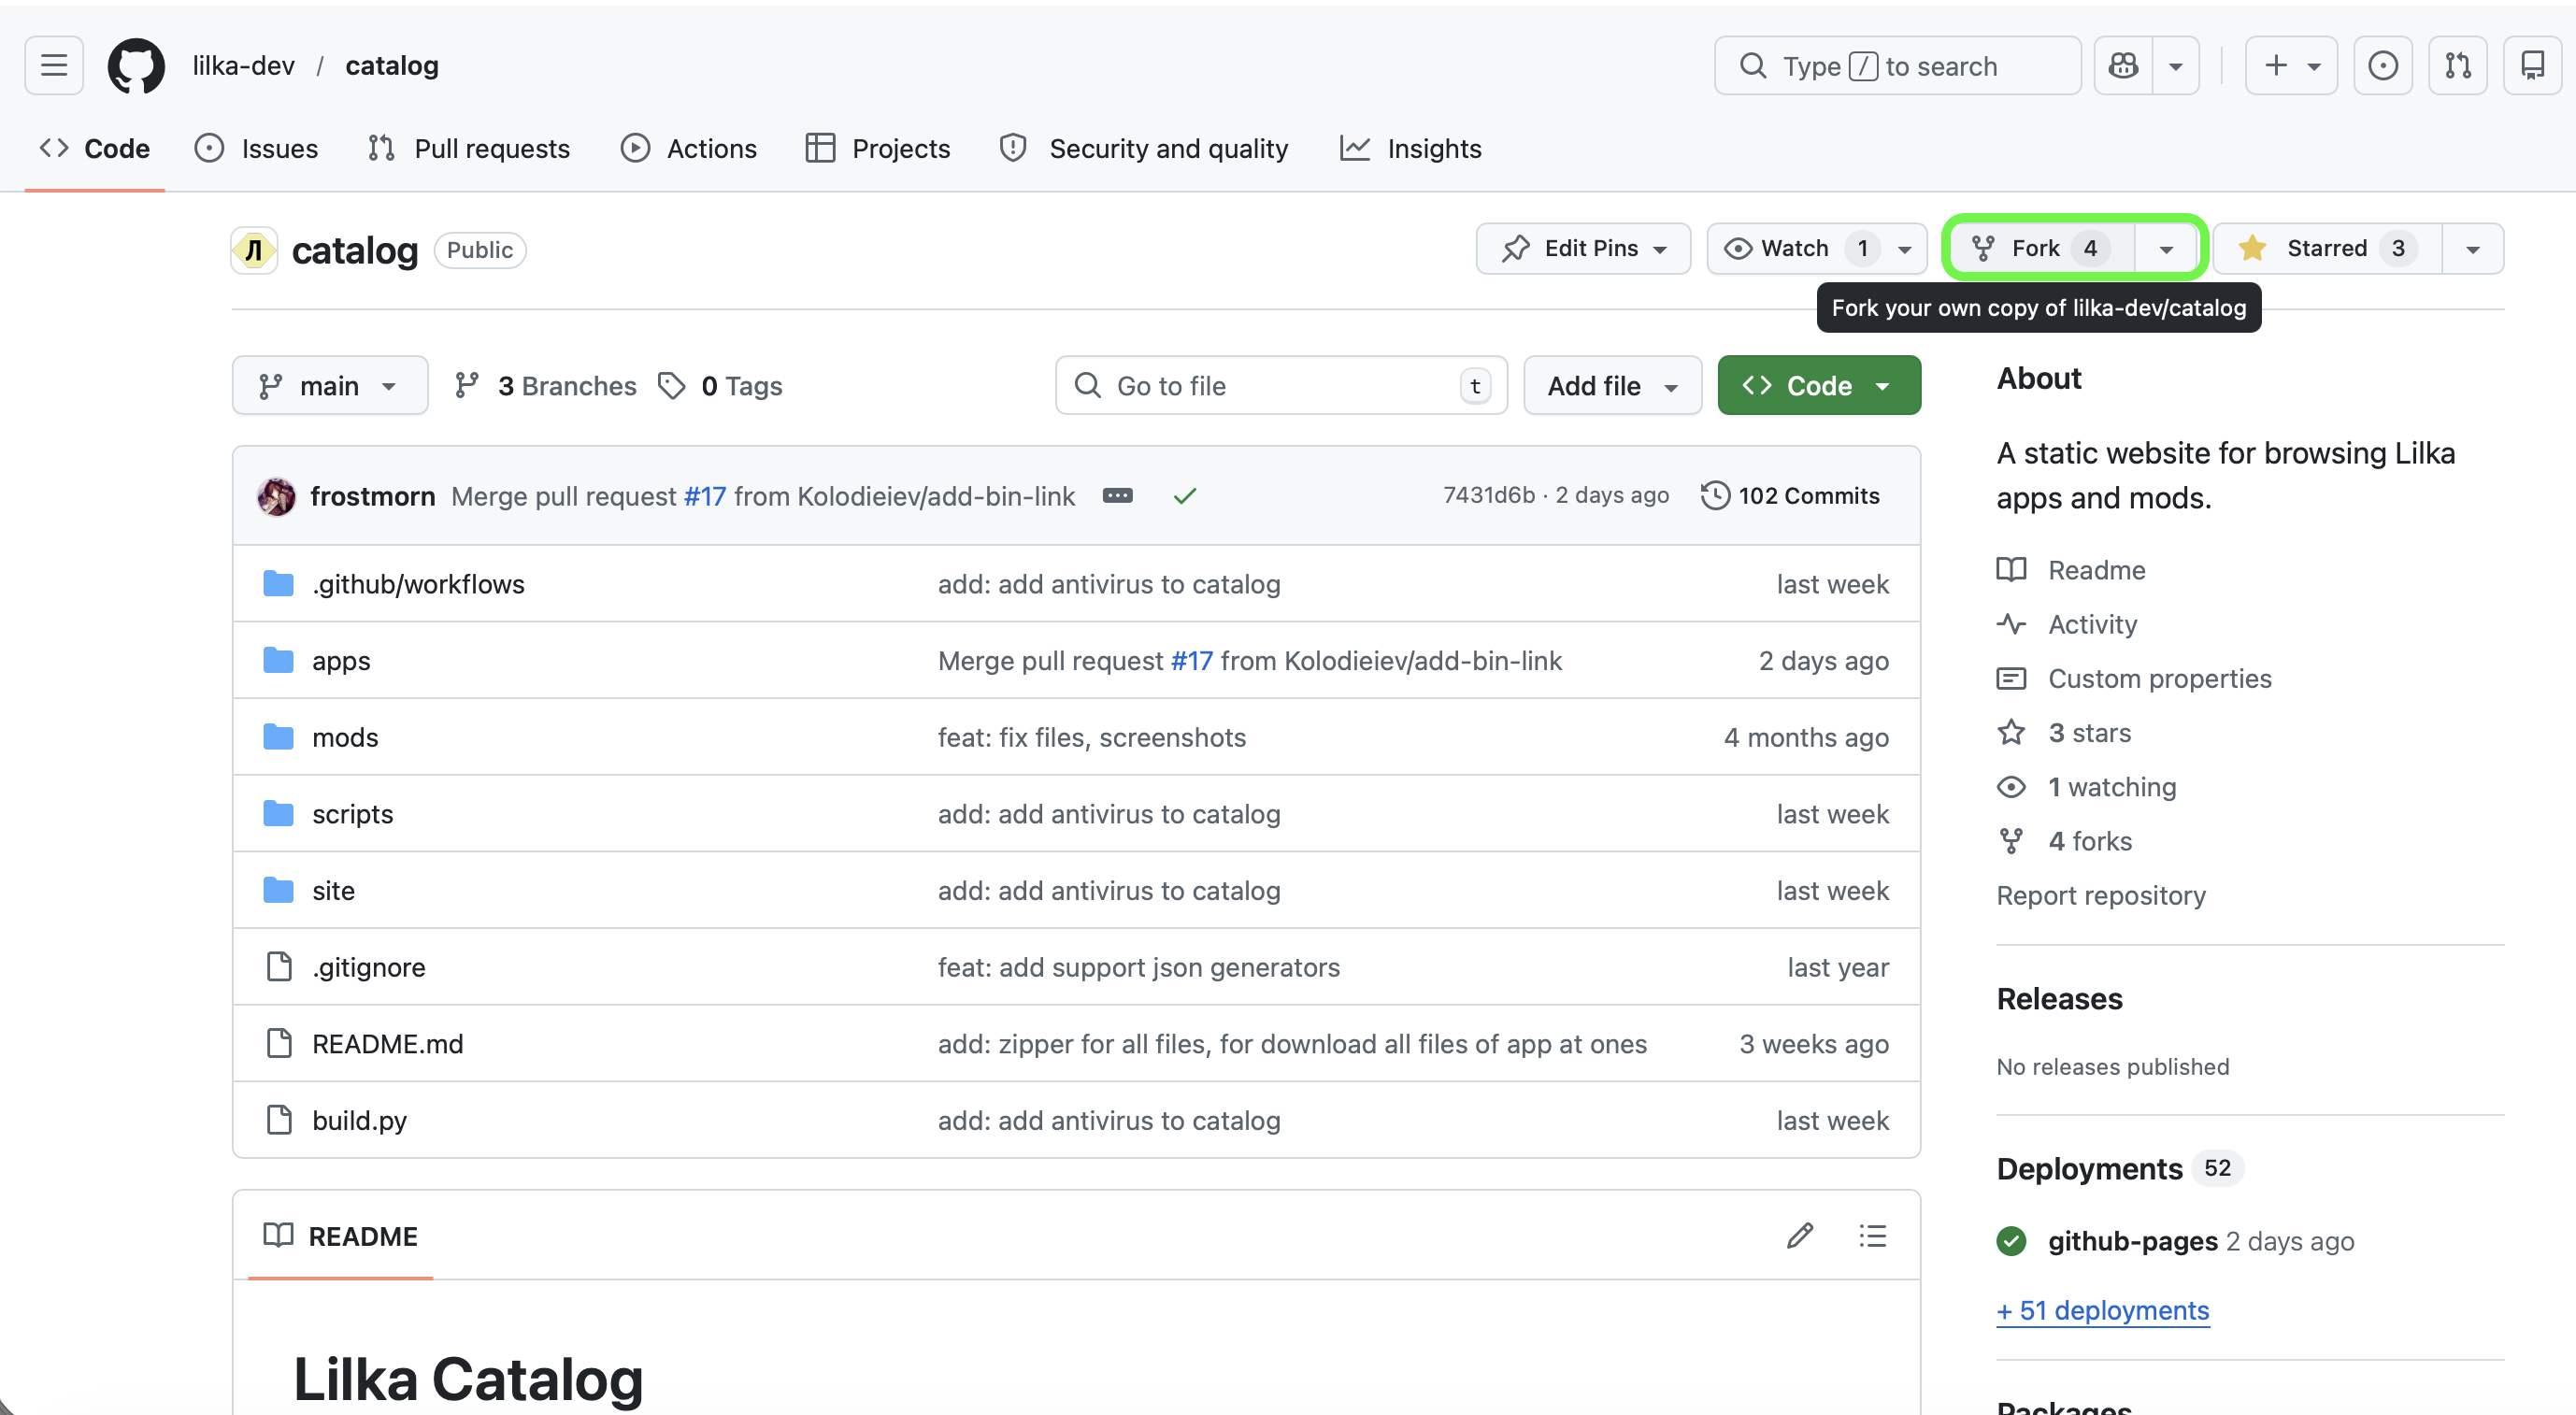
To fork the App Catalog, go to github.com/lilka-dev/catalog and click the Fork button with the fork icon in the upper left corner of the screen. This creates a copy of the catalog in your GitHub account.
4. Add DESCRIPTION.md
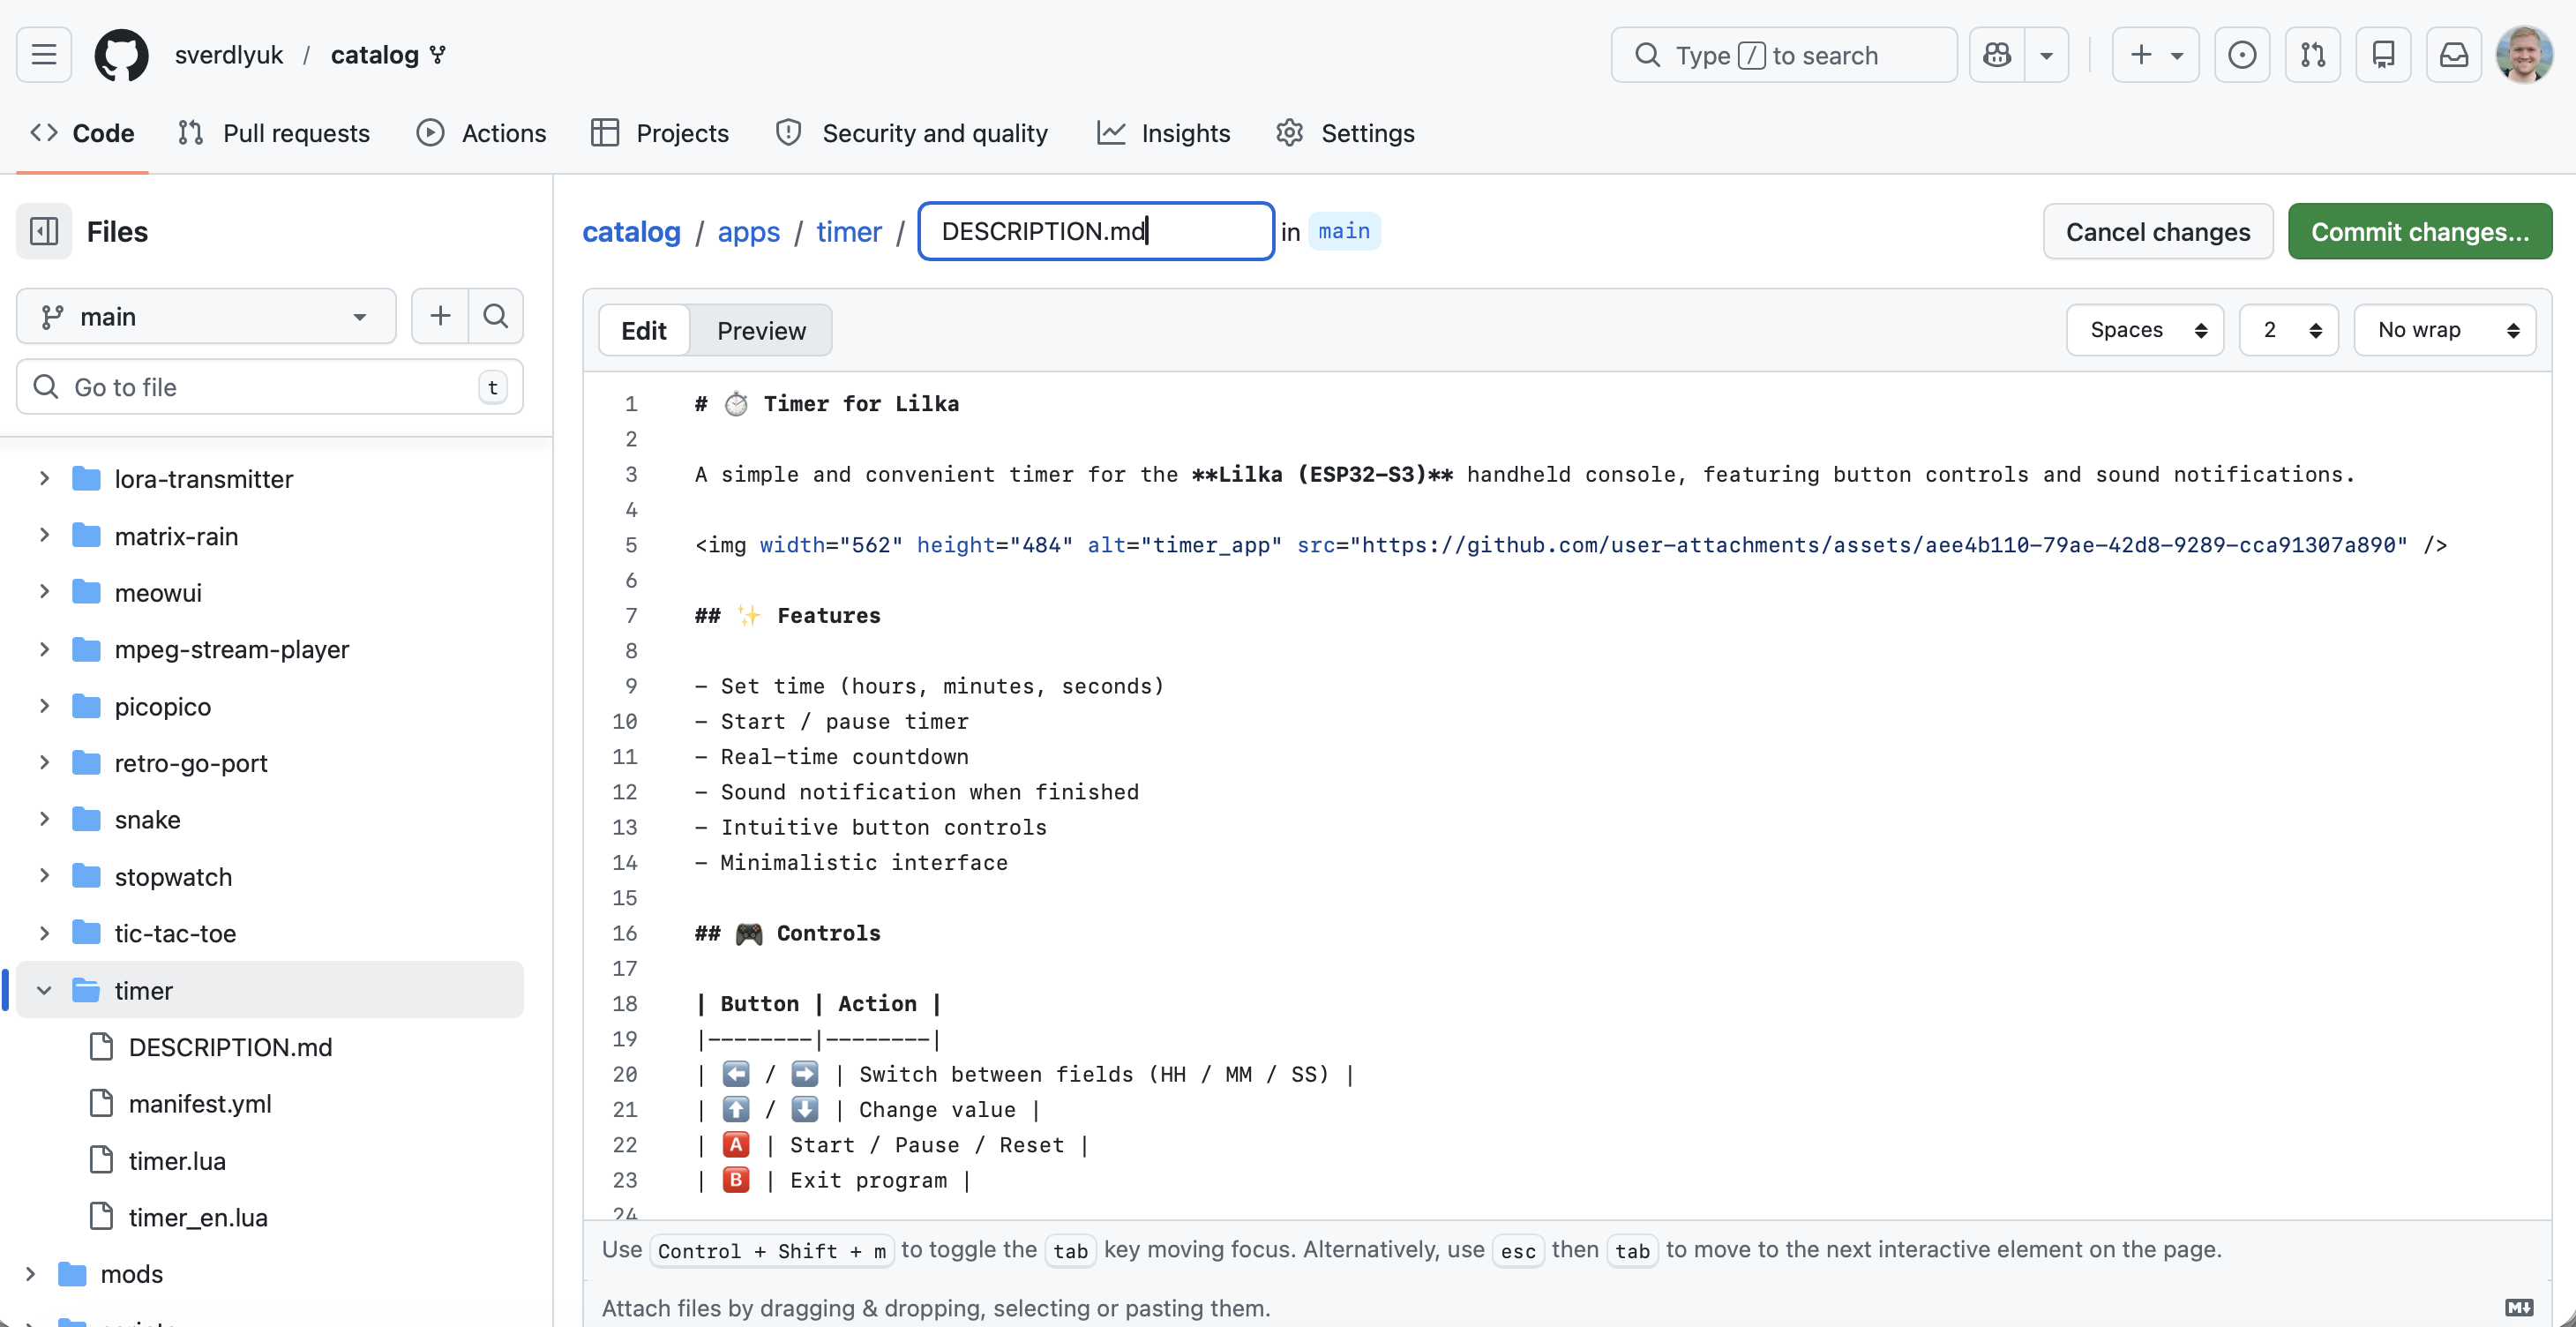
Once forked, the repository will appear in your repository list under the same name lilka-dev/catalog. Open it, navigate to the apps folder and click Add file → Create new file in the upper right corner.
Enter the file name as timer/DESCRIPTION.md — this automatically creates a folder named timer with the file inside. This file is the app description for the Lilka Catalog and can be a full copy of the README.md from your own repository created earlier.
5. Add manifest.yml
The last required file is manifest.yml. It is essentially the app's passport: the catalog uses it to find out the name, author, where the code is located and which files need to be downloaded to the console. Without this file the app will not appear in the catalog.
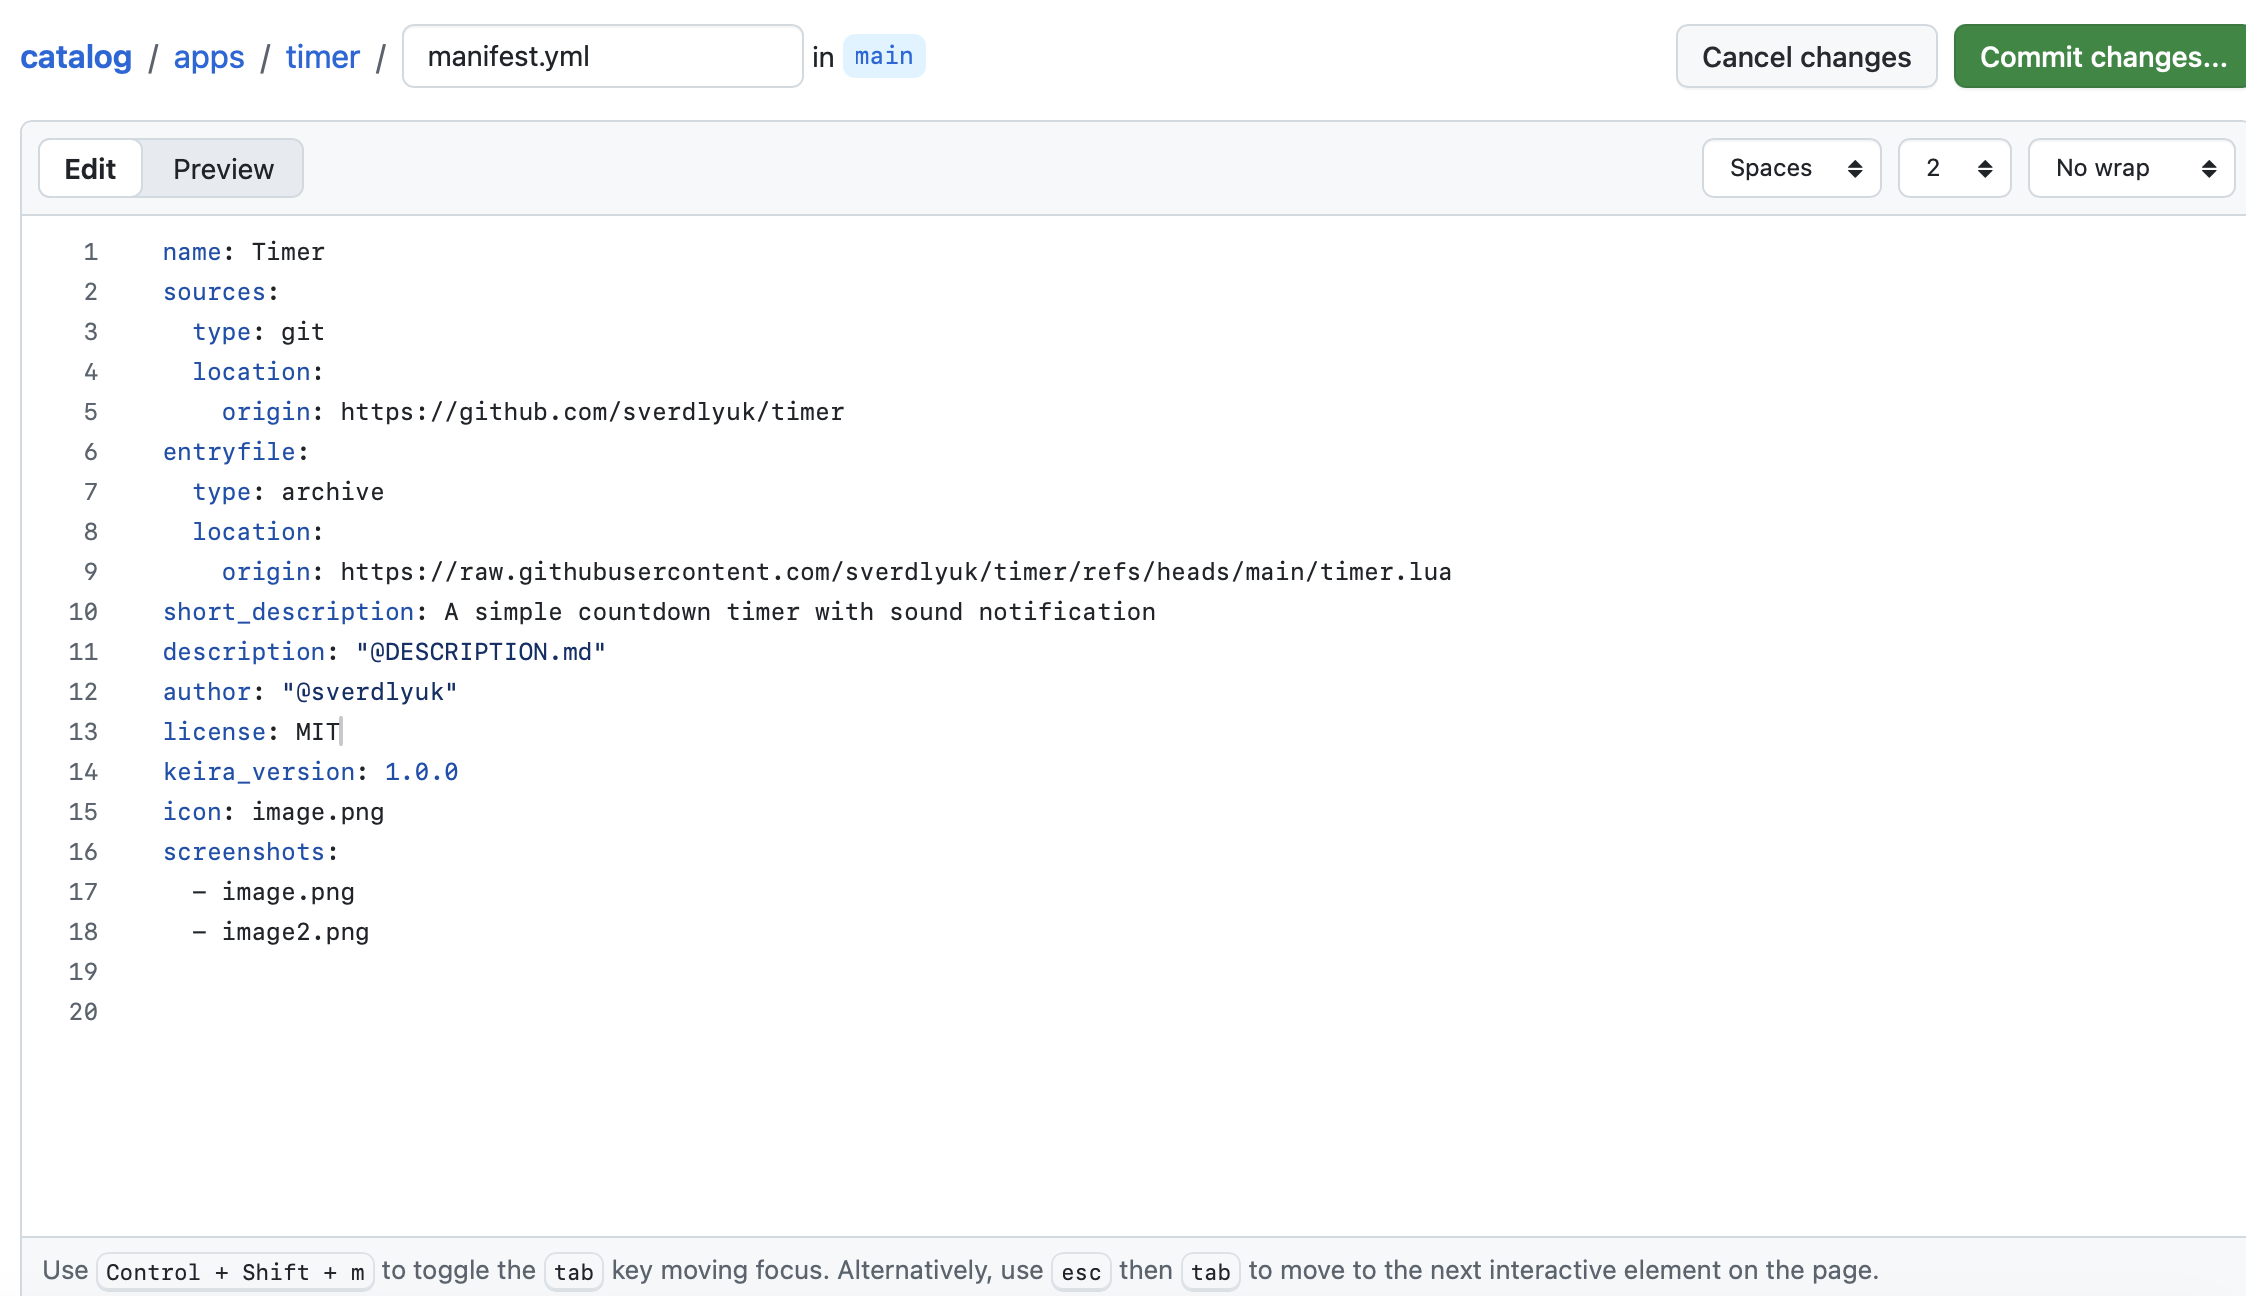
Create the file timer/manifest.yml the same way as the previous files — via Add file → Create new file. Below is an example for the timer and an explanation of each field:
name — the app name as it appears in the catalogsources — link to the repository with the source code. This is the regular GitHub repository addressentryfile — a direct link to the main file that Lilka launches. To get the link, open the file in your repository and click the Raw button in the upper right corner — then copy the address from the browsershort_description — a short description visible in the catalog listdescription: "@DESCRIPTION.md" — means the full description is taken from the DESCRIPTION.md file in the same folderauthor — the author's GitHub username with the @ signlicense — allows you to specify a license. You can use an open license so that other users can use and modify your code — for example MIT, GNU or any other. NONE means the author has not specified onekeira_version — the minimum Keira OS firmware version required to run the appicon — the main app image, displayed in the center of the page and used as a preview thumbnail in the catalogscreenshots — screenshots of the app, displayed below on the page in the Screenshots section
name: Timer
sources:
  type: git
  location:
    origin: https://github.com/sverdlyuk/timer
entryfile:
  type: archive
  location:
    origin: https://raw.githubusercontent.com/sverdlyuk/timer/refs/heads/main/timer.lua
short_description: A simple countdown timer with sound notification
description: "@DESCRIPTION.md"
author: "@sverdlyuk"
license: MIT
keira_version: 1.0.0
icon: image.png
screenshots:
  - image.png
  - image2.png
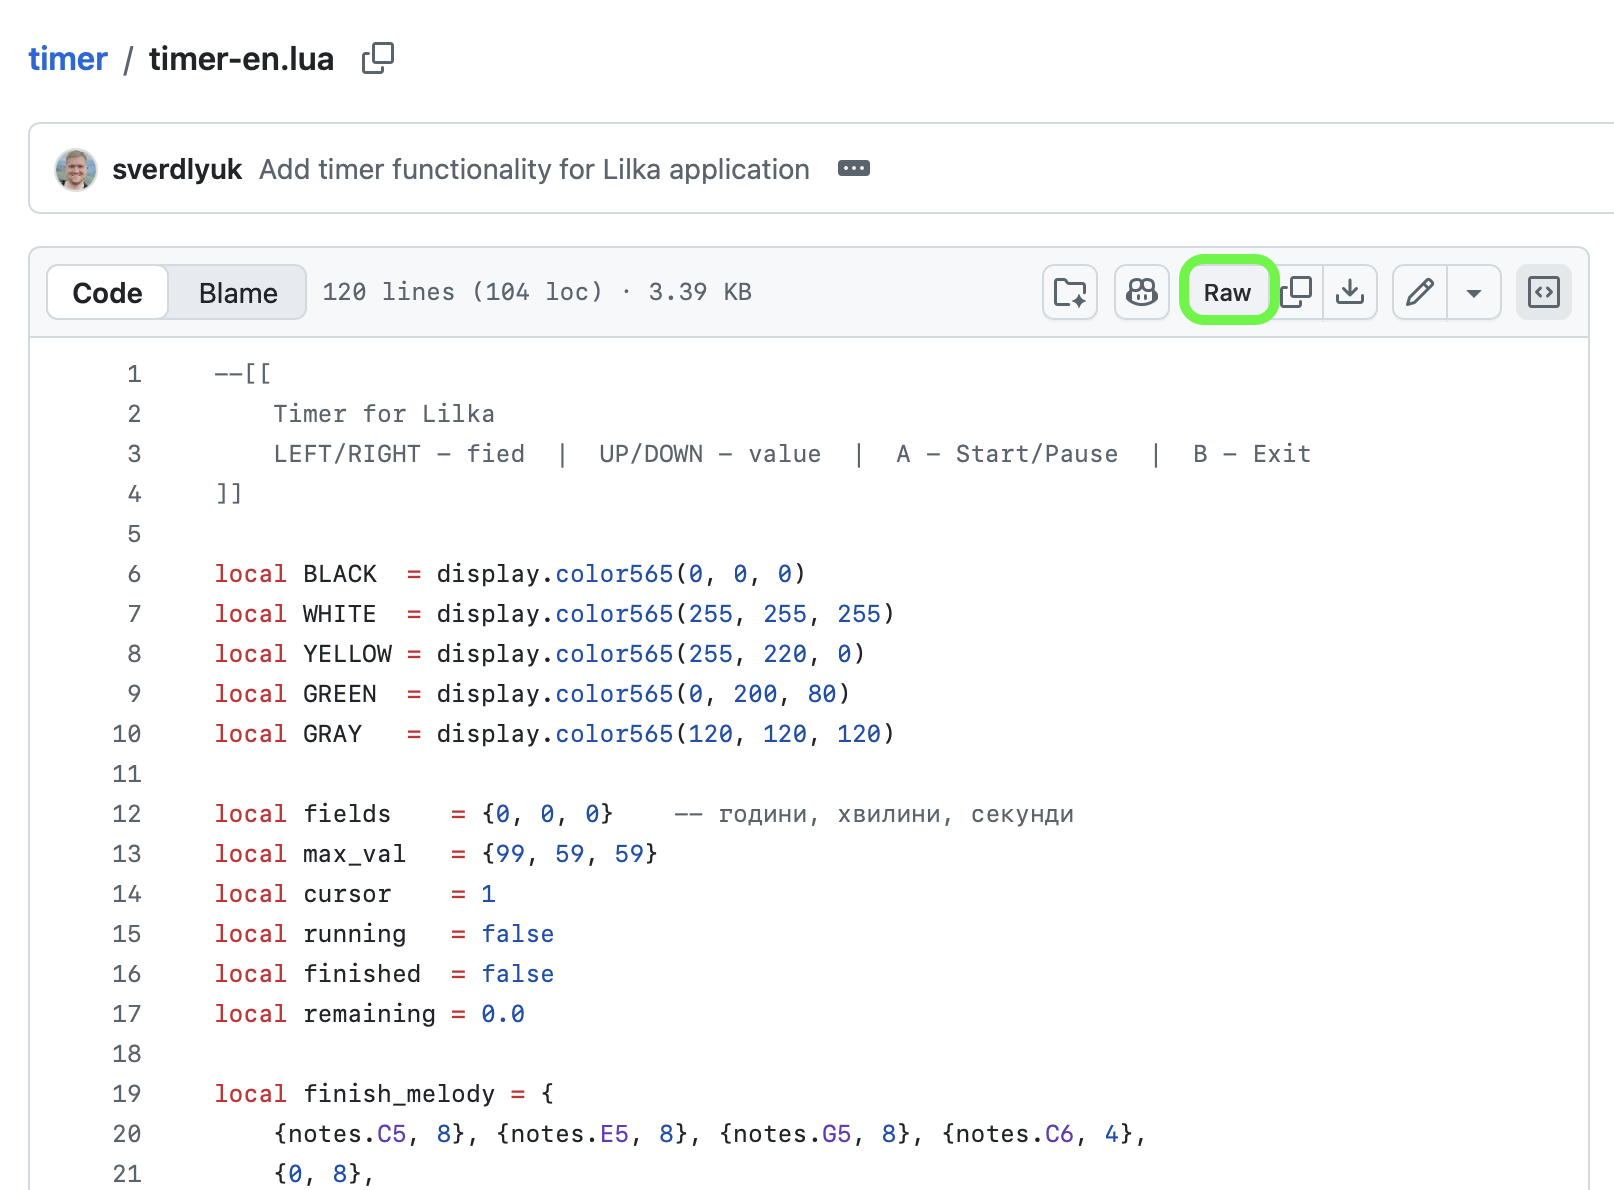
One thing that may not be immediately obvious is where to get the origin link for your Lua file. To do this, simply open your code file on GitHub and click the Raw button at the top, next to the Copilot icon. A new page will open — the URL of that page is exactly the link you need to use as the origin location.
6. Add Icon and Screenshots
To display images in the catalog, they must be placed in your app folder and their filenames must match the values specified in manifest.yml under icon and screenshots.
Upload images the same way as other files — via Add file → Upload files in your app folder. For example, if your manifest.yml contains icon: image.png and screenshots: [image.png, image2.png], then files with exactly those names must be present in the timer/ folder.

7. Open a Pull Request
Once the DESCRIPTION.md and manifest.yml files are created and the screenshots are uploaded, you can send a request to add your changes to the main repository.
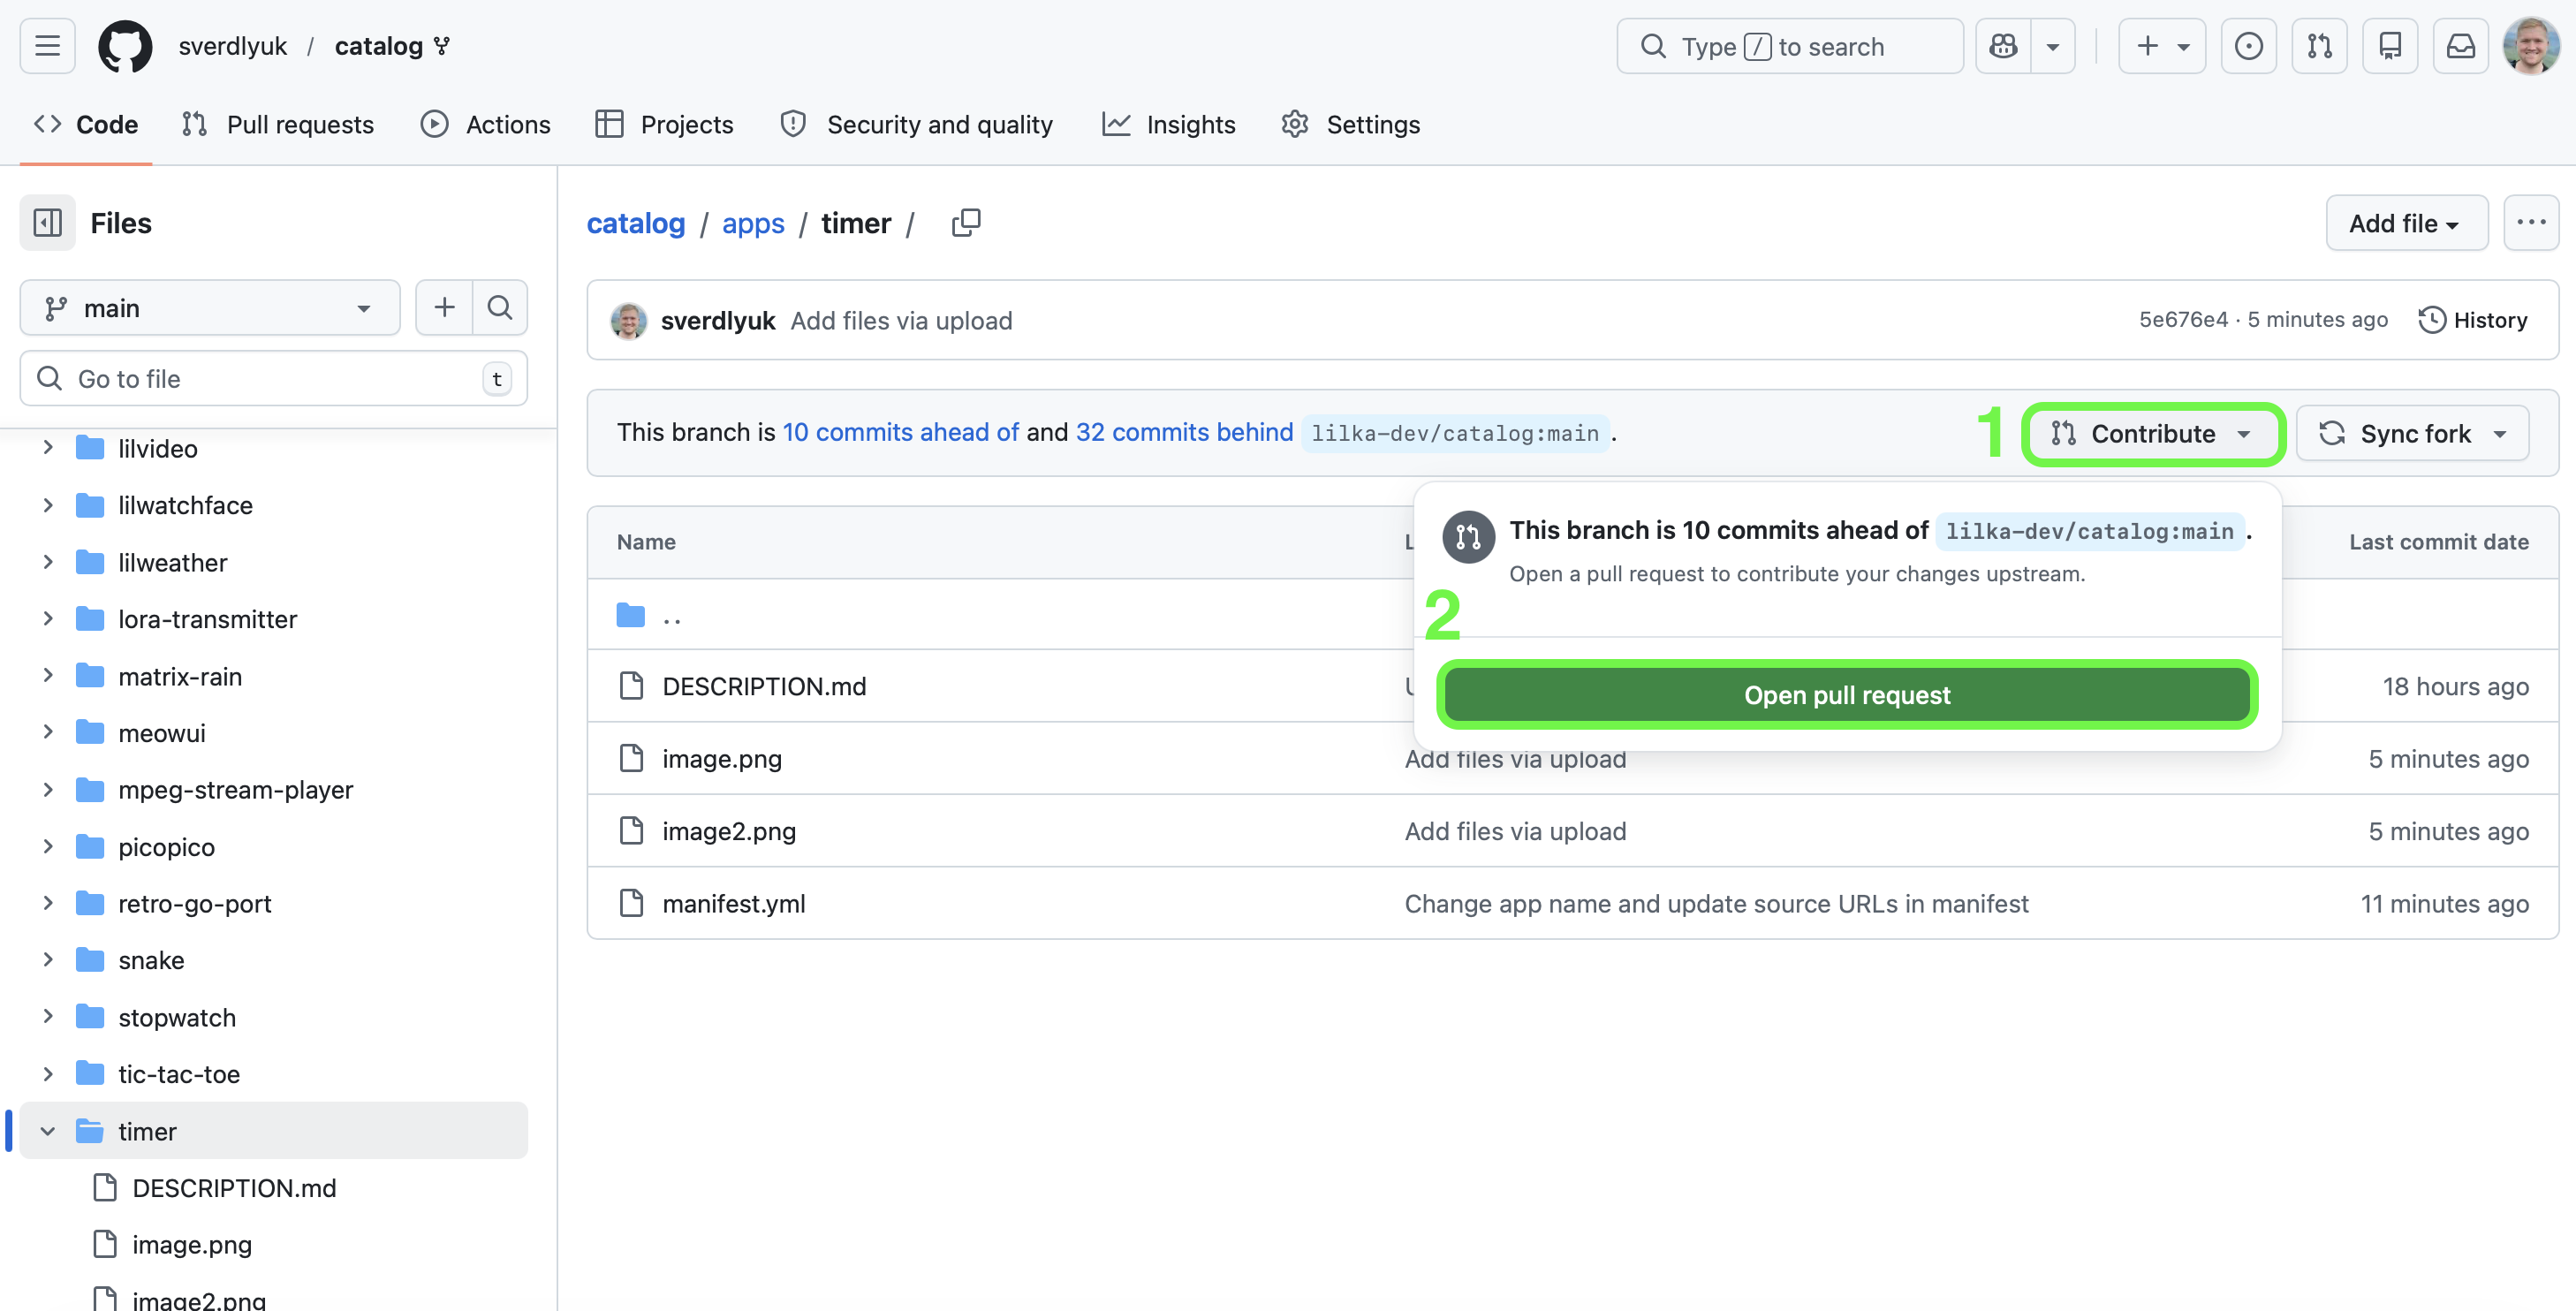
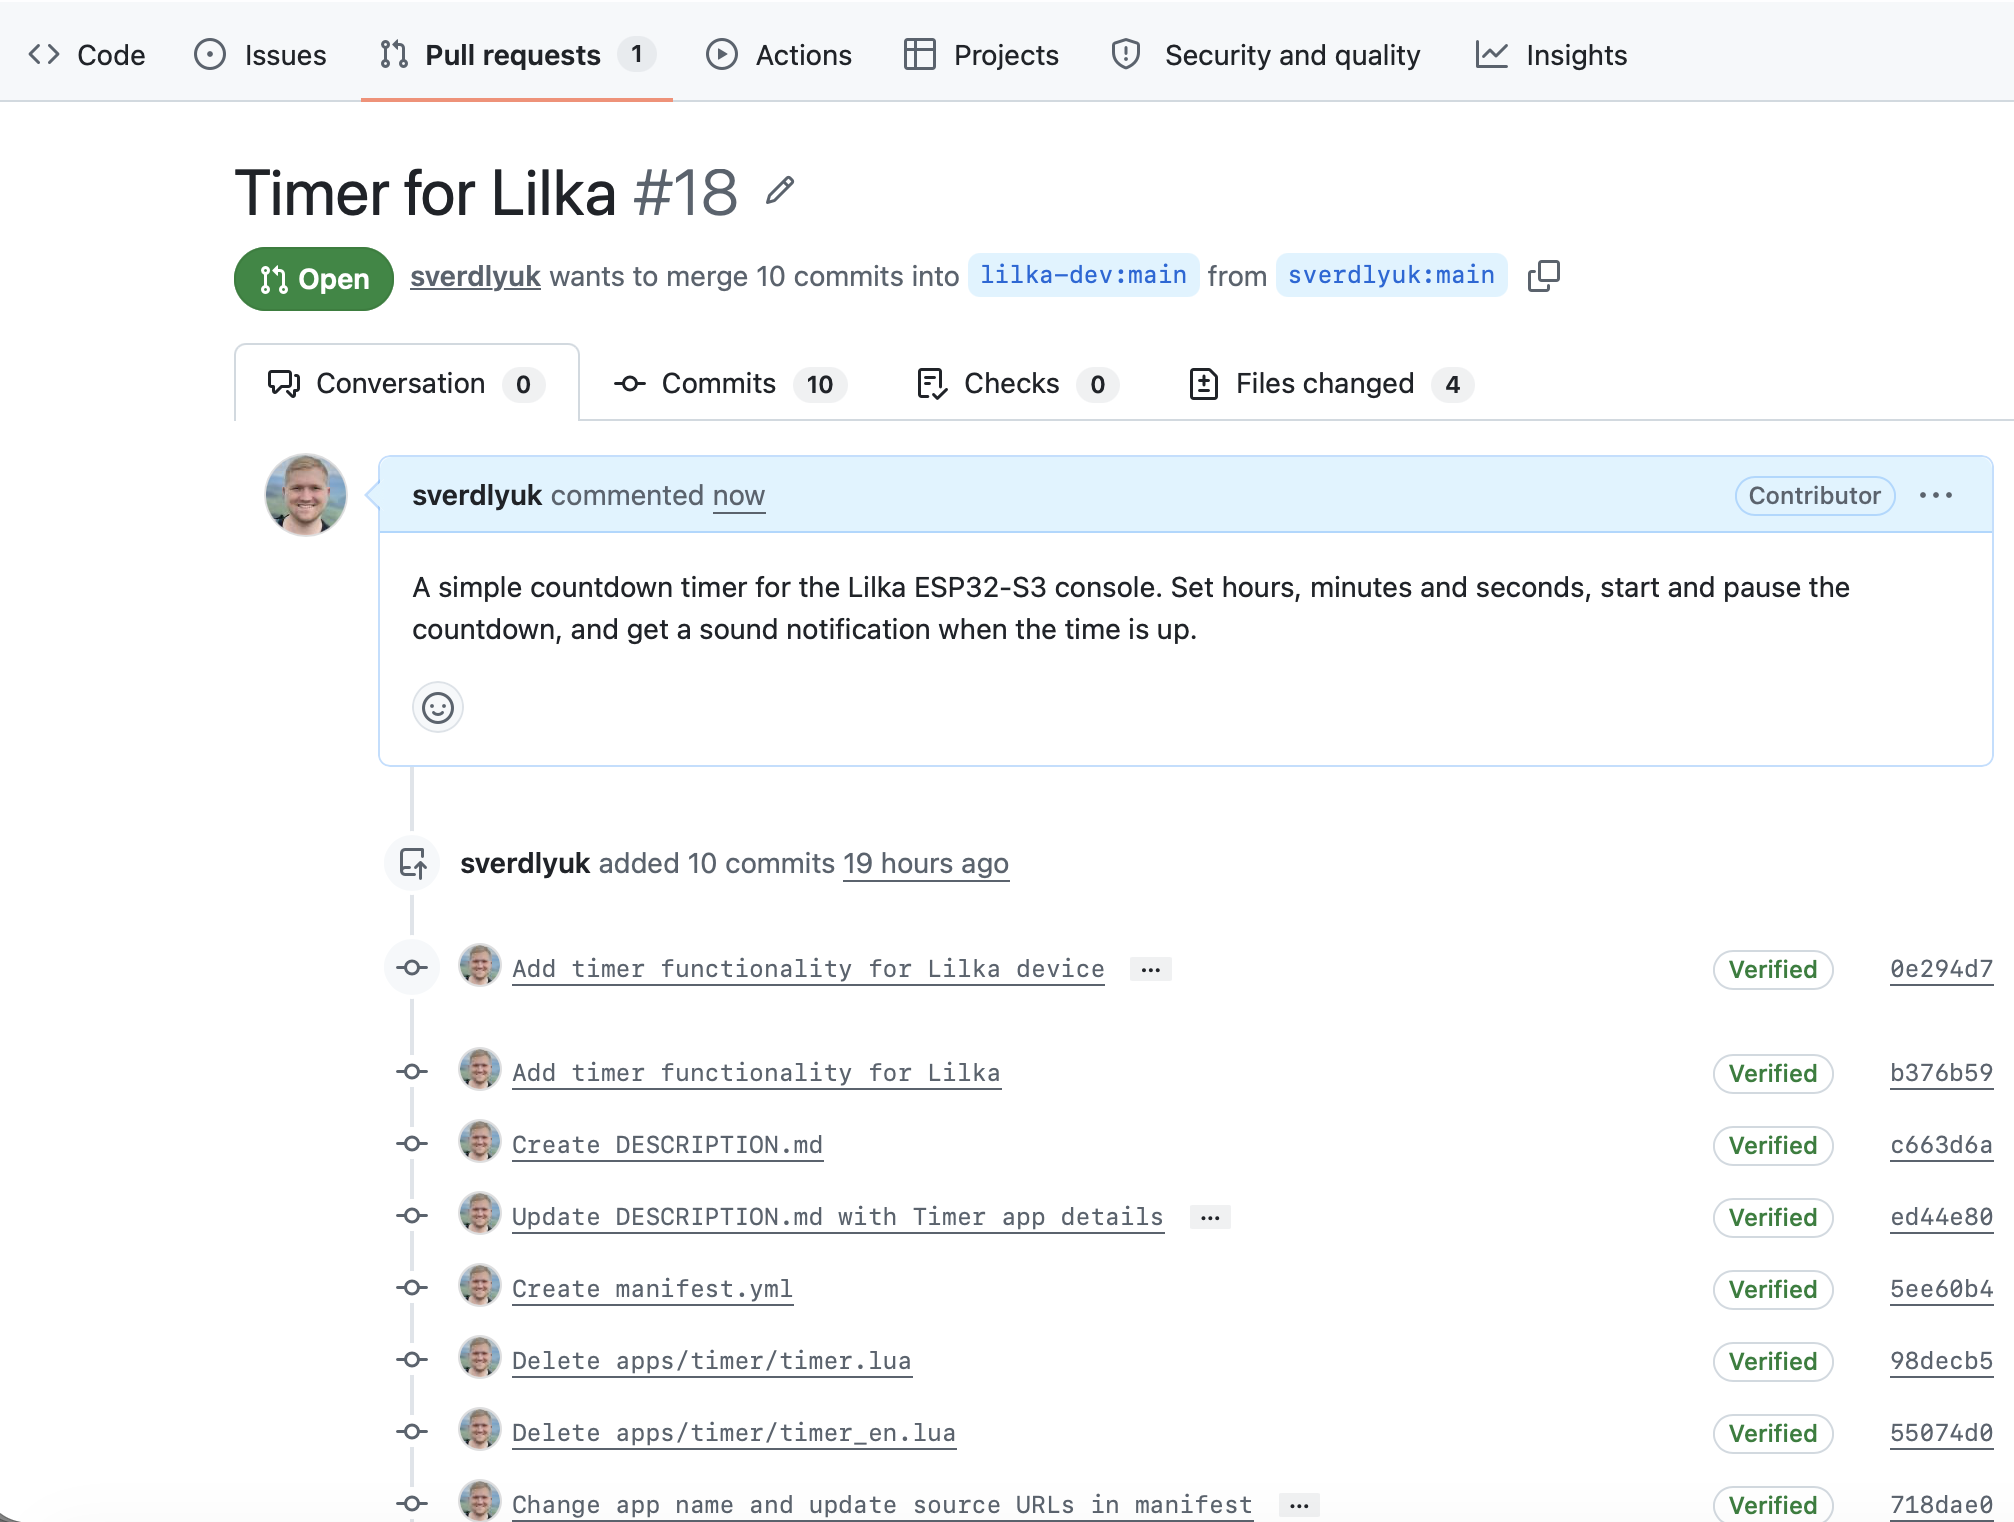
It is very straightforward. Click the Contribute button — it has an icon that looks like a fork in the road, where two paths merge into one. That is exactly what happens: your changes are merged into the main repository. Then click the green Open pull request button, add a short description of your app and click Create pull request. After review by the moderators, your app will appear in the catalog at catalog.lilka.dev.
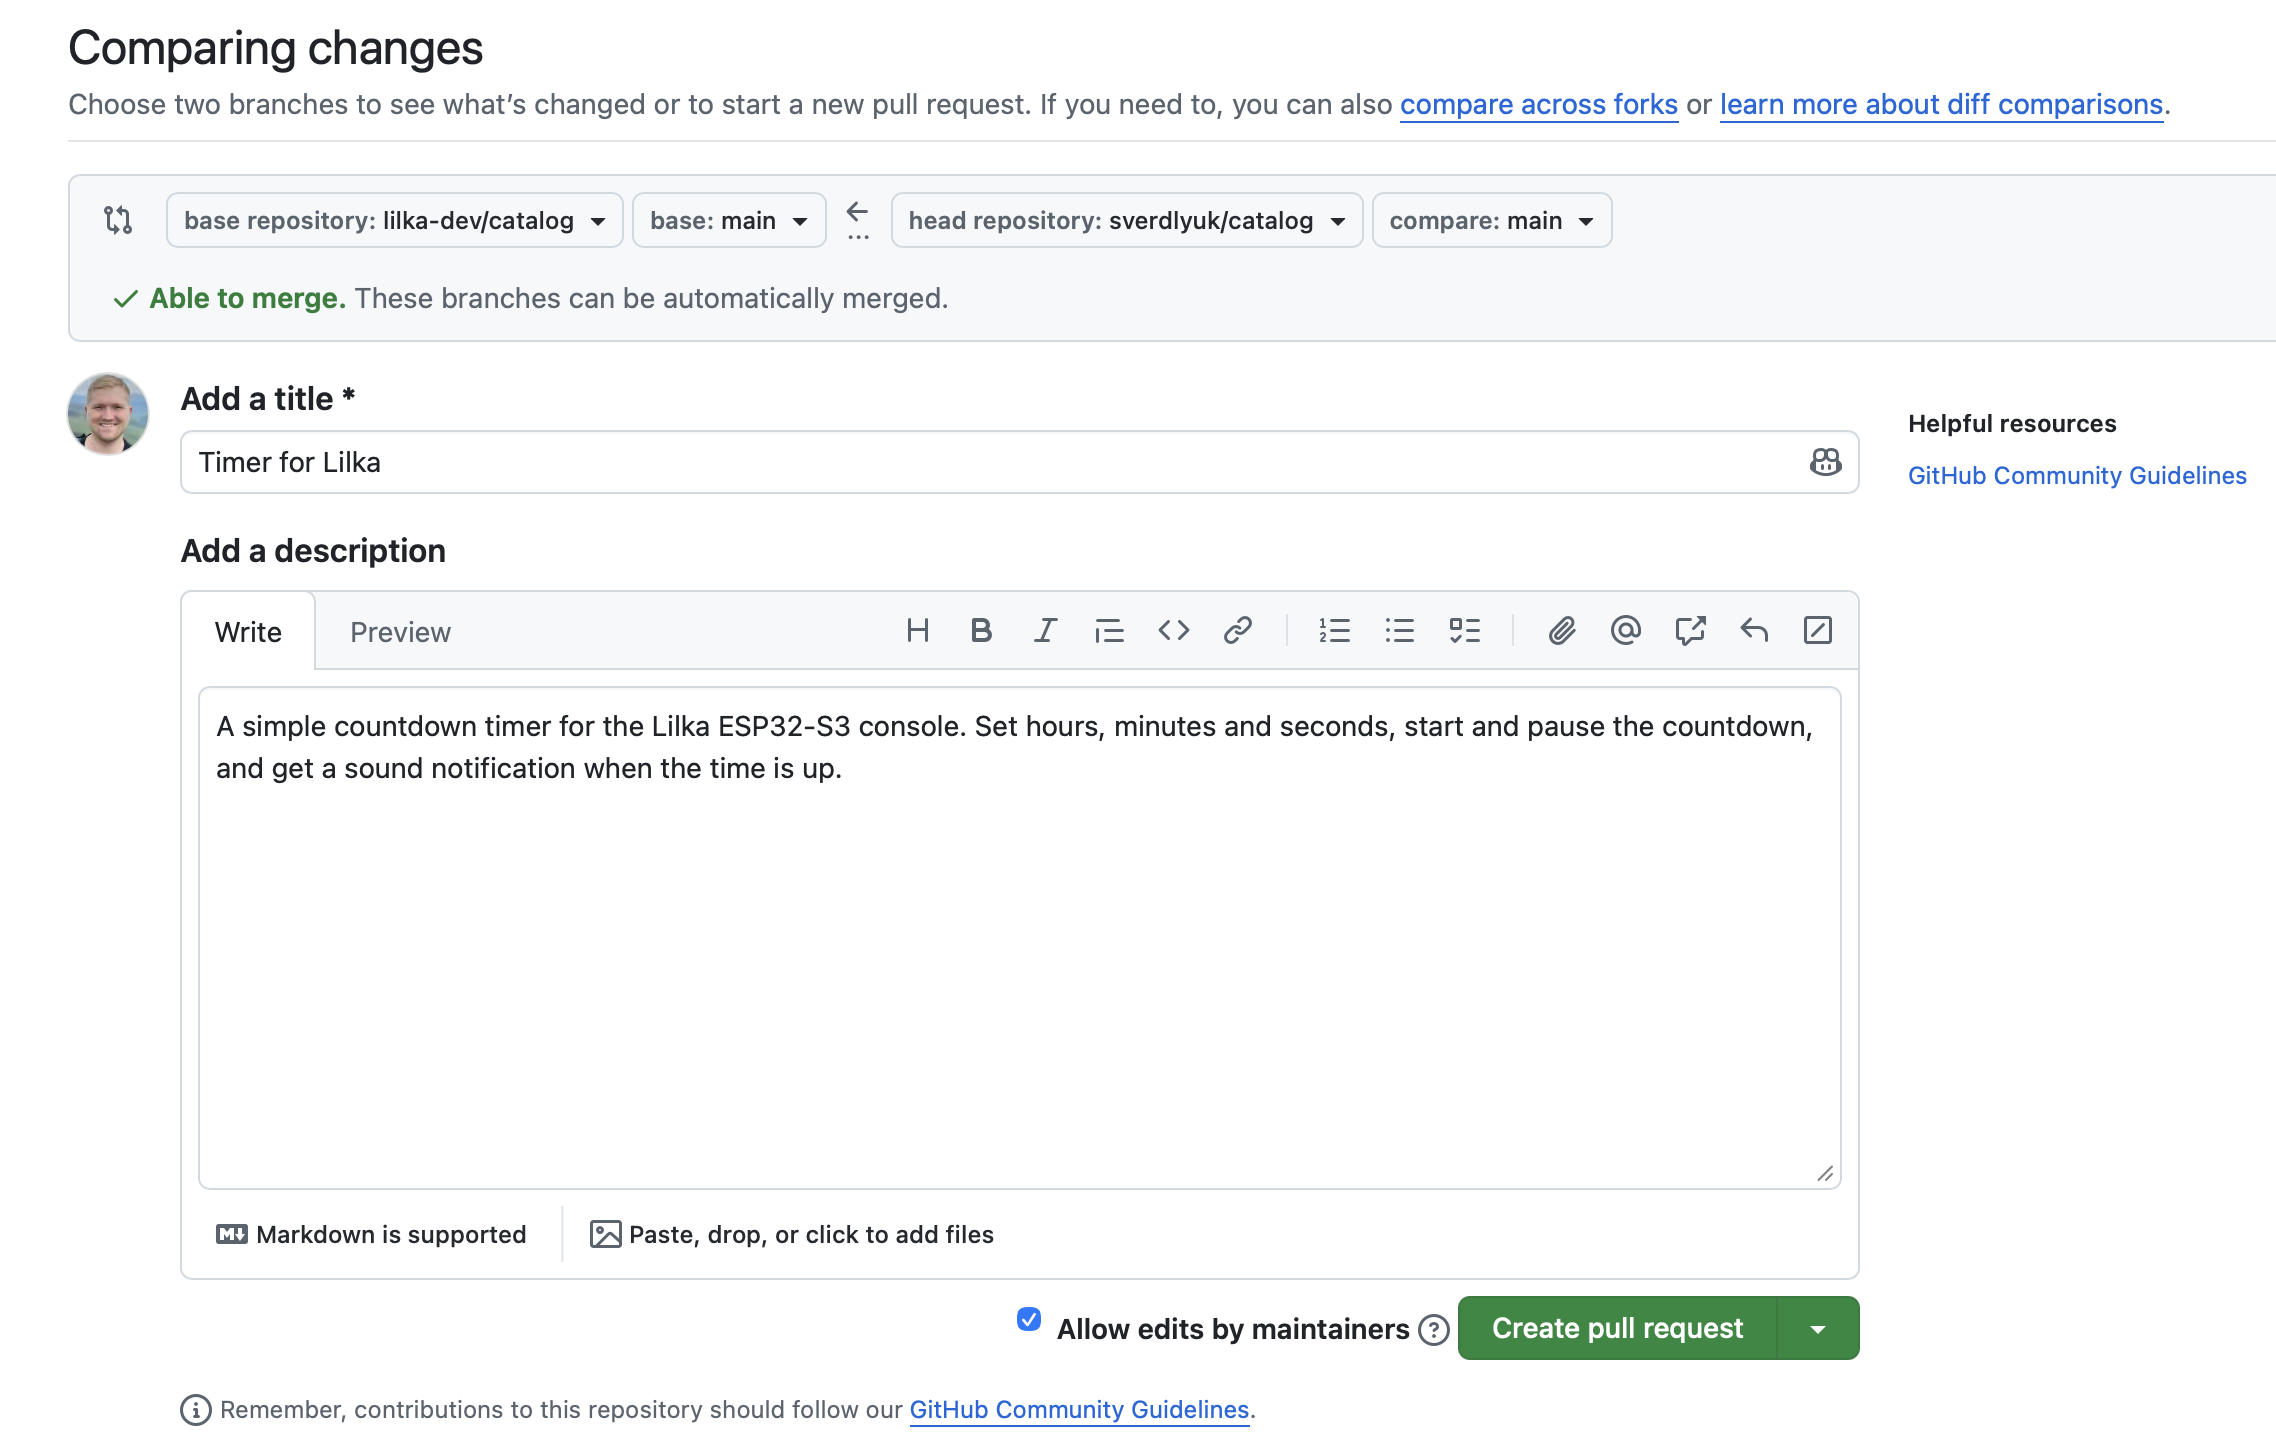
Leave the Allow edits by maintainers checkbox checked — this allows the moderators to make minor fixes if needed. Then click the green Create pull request button.
Discussions
Become a Hackaday.io Member
Create an account to leave a comment. Already have an account? Log In.