 ElectroScope Archive
Overview
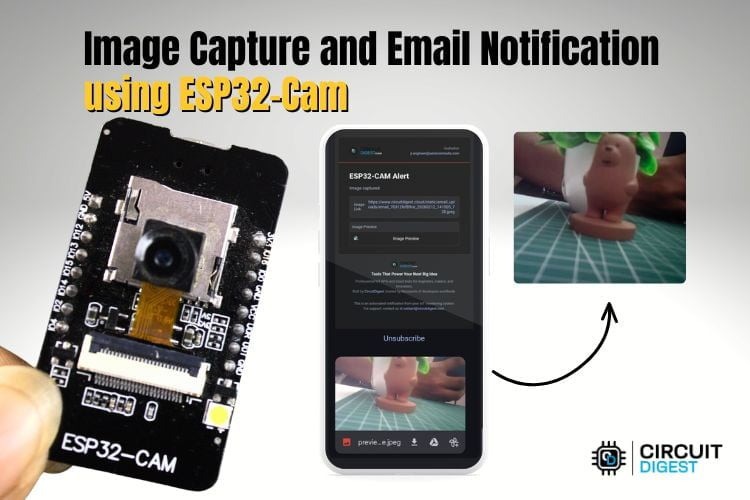
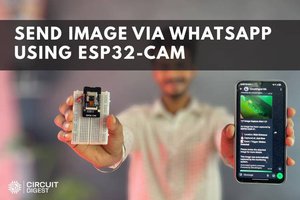
Turn an ESP32-CAM into a smart photo capture and email notification device. With two push buttons and a small OLED screen, this build lets you take a picture and then send it directly to an email address over Wi-Fi using a cloud email API. It’s ideal for DIY security, remote monitoring, or just learning how to integrate camera IoT designs with cloud services.
What You’ll Build
When a button is pressed, the system:
-
Captures a photo using the ESP32-CAM onboard camera.
-
Displays status on the OLED (e.g., “Capturing”, “Sending”).
-
Sends the image via HTTPS to a cloud email API.
-
Receives the image in your inbox with the photo attached.
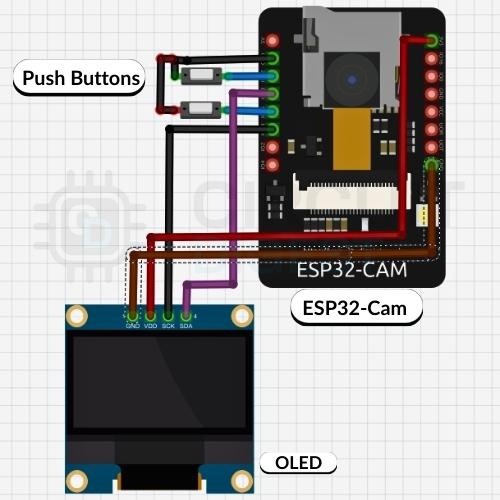
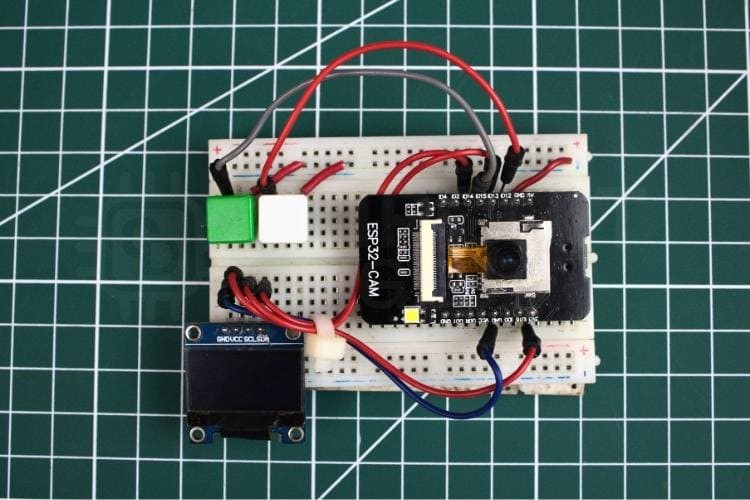
Required Parts
These are the components needed for ESP32 Cam capture image and send email.
| Component | Purpose |
|---|---|
| ESP32-CAM module | Camera + Wi-Fi brain of the project |
| 2 × Push Buttons | One to take a photo, one to send it |
| I2C OLED Display | Shows status messages |
| Breadboard + Jumper Wires | For wiring everything together |
Note: If your ESP32-CAM doesn’t have a USB port, use a USB-to-TTL adapter to program it.
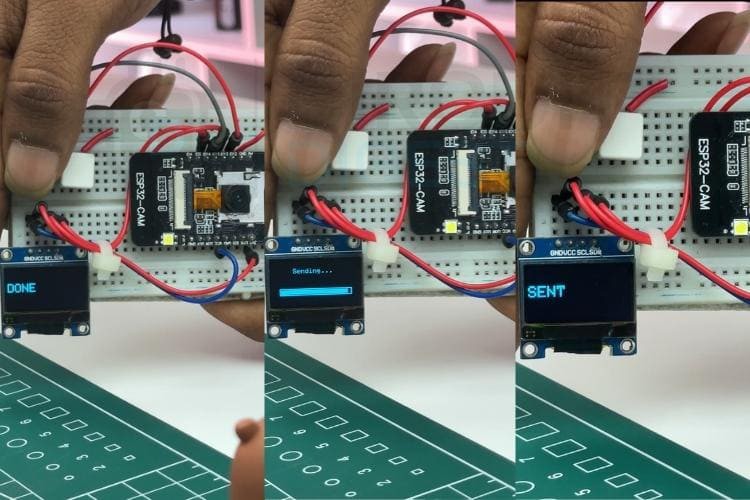
How It Works
-
Power & Setup:
Connect the ESP32-CAM, OLED display, and buttons on a breadboard. Set the I2C pins for the OLED and assign GPIOs for the buttons. -
Button A — Capture:
When pressed, the camera module snaps a photo. The OLED displays a flash animation and a “Done” message when the image is stored in memory. -
Button B — Send:
After capturing, press the second button. The ESP32 CAM connects to your Wi-Fi and sends the stored image to a cloud API endpoint. This API relays the photo to your registered email. -
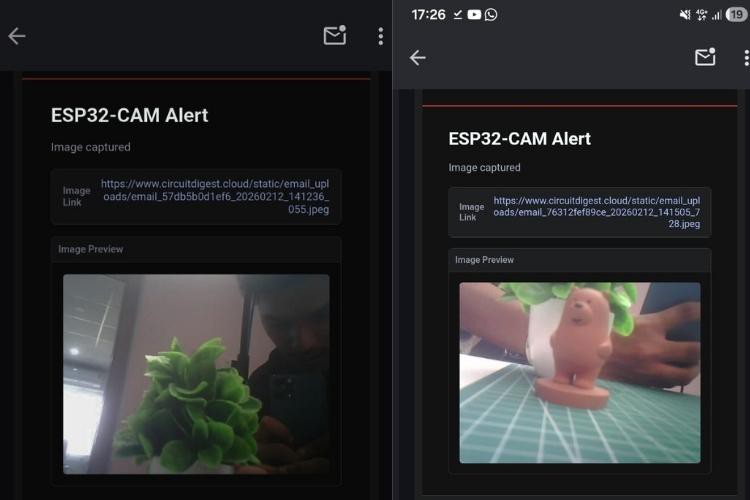
Email Delivery:
The email arrives with the photo attached, letting you view or download it immediately.
Code Highlights
Your sketch will:
-
Initialize the camera and Wi-Fi.
-
Wait for button presses for capture and send actions.
-
Use secure HTTPS to communicate with a cloud email API.
-
Update the OLED display with status messages like BOOT, CAPTURE, SENT, or error messages.
Key features in the code include:
-
esp_camera.h — Camera interface
-
WiFi & WiFiClientSecure.h — Wi-Fi and secure HTTP
-
Adafruit_SSD1306 & Wire.h — OLED control
#include "esp_camera.h"
#include <WiFi.h>
#include <WiFiClientSecure.h>
#include <Wire.h>
#include <Adafruit_SSD1306.h>
// (… setup, buttons, camera init, Wi-Fi logic here …)

void loop() {  // Check buttons  // Capture photo when button A is pressed  // Send photo when button B is pressed  // Update OLED status
}
(Adapt this template to include API keys and Wi-Fi credentials.)
Practical Uses
-
Home security camera trigger system
-
Email alerts with visual confirmation
-
Visitor verification without dedicated hardware
-
IoT learning platform for camera + cloud integrations
Next Steps (Future Enhancements)
-
SD card support: Save photos locally before email.
-
Autotrigger: Add motion sensor (PIR) to capture/send automatically.
-
Mobile dashboards: Build an app or web interface to view images.
-
Facial recognition: Add basic AI to detect people.
Tips & Troubleshooting
-
Ensure stable 5 V power — ESP32-CAM is sensitive to drops.
-
Check Wi-Fi SSID/password carefully in the code.
-
Confirm API key and cloud endpoint details match the service you’re using.
Explore a curated list of ESP32-CAM Projects.
 Sagar 001
 Martin Fasani