 Zduka
ZdukaBe warned, this will likely be a bit longer post where I want to talk briefly about all the shapes and forms that RCkid had over its history. It all started as a humble Remote Controller for kids that would just put together some spare MCU[1], thumbstick and some radio to control plethora of pretty ancient LEGO technic motors I had lying around. Spoiler alert: they are still lying around, but their time will come!
Feature Creep...
...is a real thing. I quickly realized that with an MCU, I can do a lot more and the device grew to also support walkie talkie, simple Nokia screen, simple games, multiplayer games (I have walkie talkie, repurpose for multiplayer), but this required beefier MCU, which enabled better display, and so on. Long story short, all of the spare parts I wanted to put into the project at the beginning are still lying in my drawers somewhere. In fact, I have a lot more spare parts for future projects now:)
One important design step was when I updated the MCU from ATTiny3217 to RP2040. At the time this was the new MCU from Raspberry Pi shrouded in mystery. I have got my hands on RPi Pico board and poked around the datasheet and tried the basics such as talking to an ILI9341 screen. I really liked programming for the chip, and I started thinking about RCKid more seriously at the time, profiling it as a STEM education toolkit where kids would be able to create their own simple games. I did some PCB routing on my chosen formfactor (horizontal, pill shaped, very round & toy like), work progressed and I was a happy man.
But I was mortified of the chip's QFN package (words cannot describe how bad I am at soldering, but some of the prototype pictures later in this post might). In the end I gave in and I upgraded to RPi Zero.
Yet Another Retro Gaming Handheld
With RPi Zero I had all the power of Linux available and I used it "well", The first prototype & firmware was essentially heavily stripped down Raspbian with retroarch, vlc and my own GUI created in Raylib. It was full linux, so adding things was easy and it would be an insult to leave the abundant power of the RPi chip at idle. So after a few months, it did oh so many things - played games (up to N64), played video, played audio, had WiFi and you could SSH to it, it could send messages through NRF24L01P radio, and at this point being true to its name, had next to it a breadboard a ball of wires that was lego remote controller (more on it sometime later:)
But feature creep was still a thing - I have discovered LoRa and realized that I can increase my range by a lot with it. But its expensive, so I naturally wanted to have both LoRa and NRF. And the device was starting to be really, really crowded.
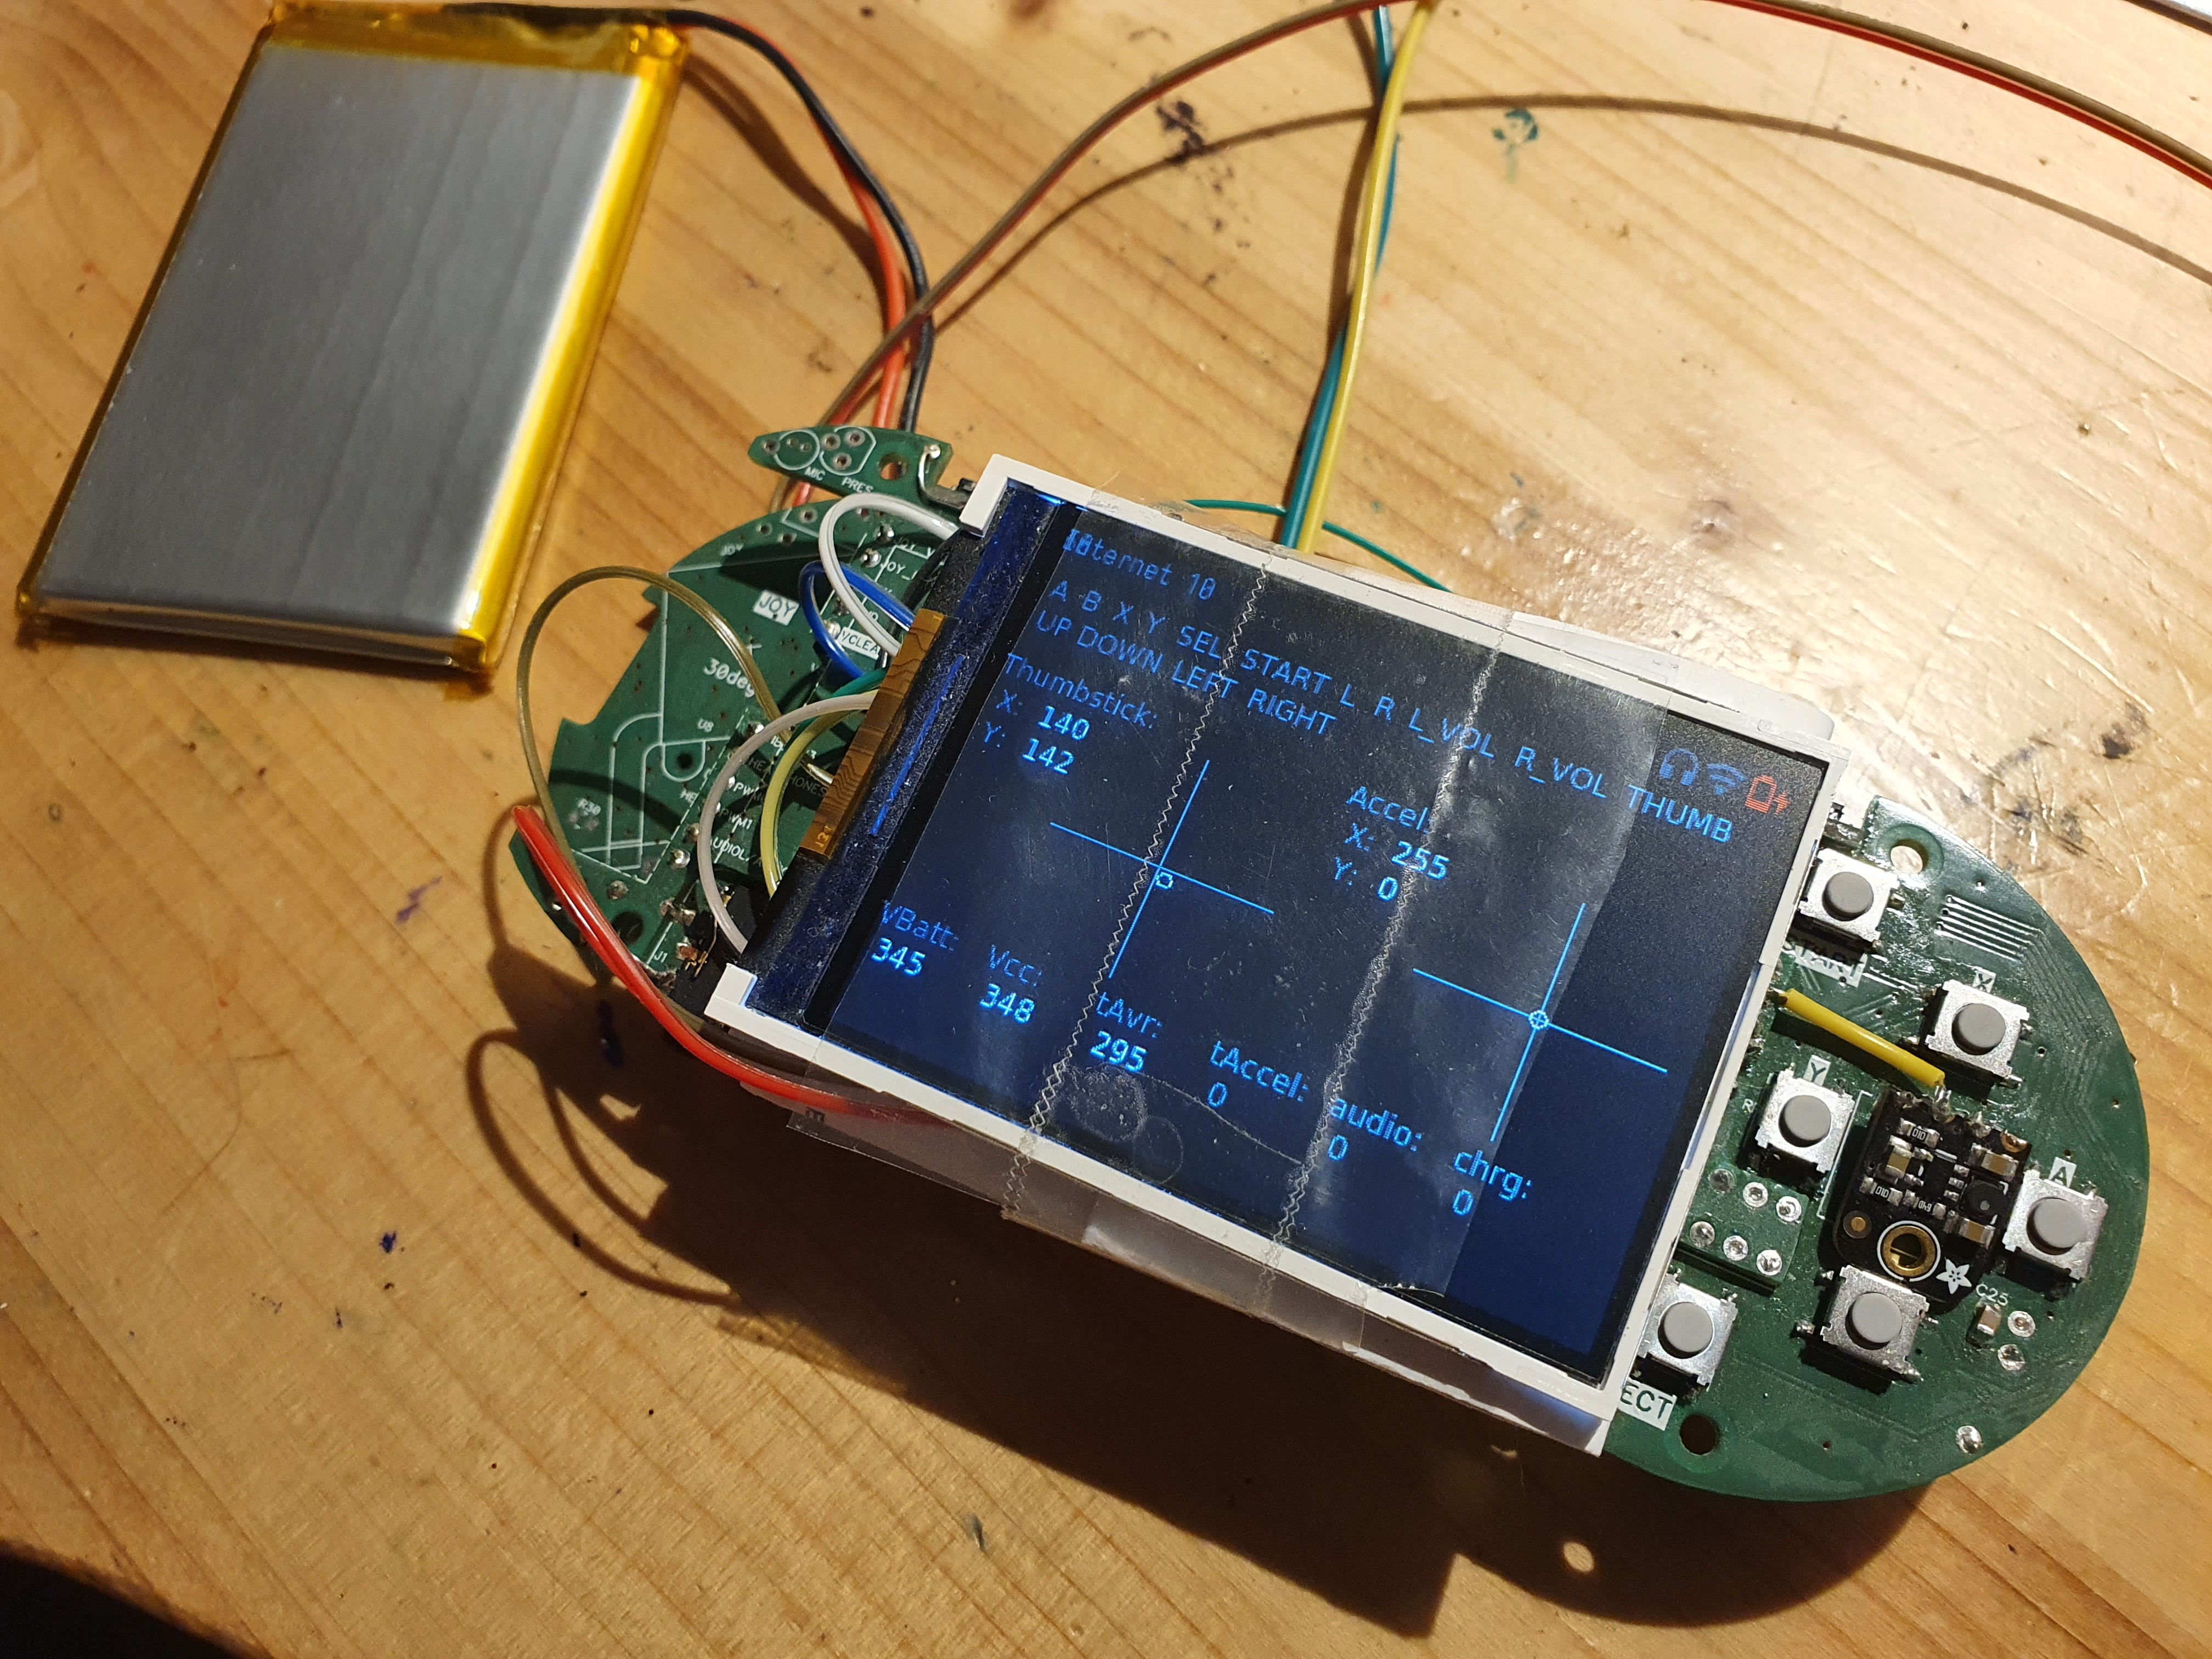
The image does not do it justice, but it consisted of a really intricate layers of PCBs in strange shapes that were soldered together, sometimes in right angles to give the device its shape. It is fair to say at that point DFM held no meaning for me.
Going Vertical
But then I had a revelation - the pill form factor was dead end:-) I have switched to vertical layout, like the original GameBoy had. By doing so, I got about 50% more volume, room for thumbstick and dpad, drastically simpler PCB stackup, much better thermals and far easier routing and assembly (yet I still managed to shoot myself in the foot by some clever use of right angle PCB soldering:). All this for a device that looked a lot more modern and slimmer.
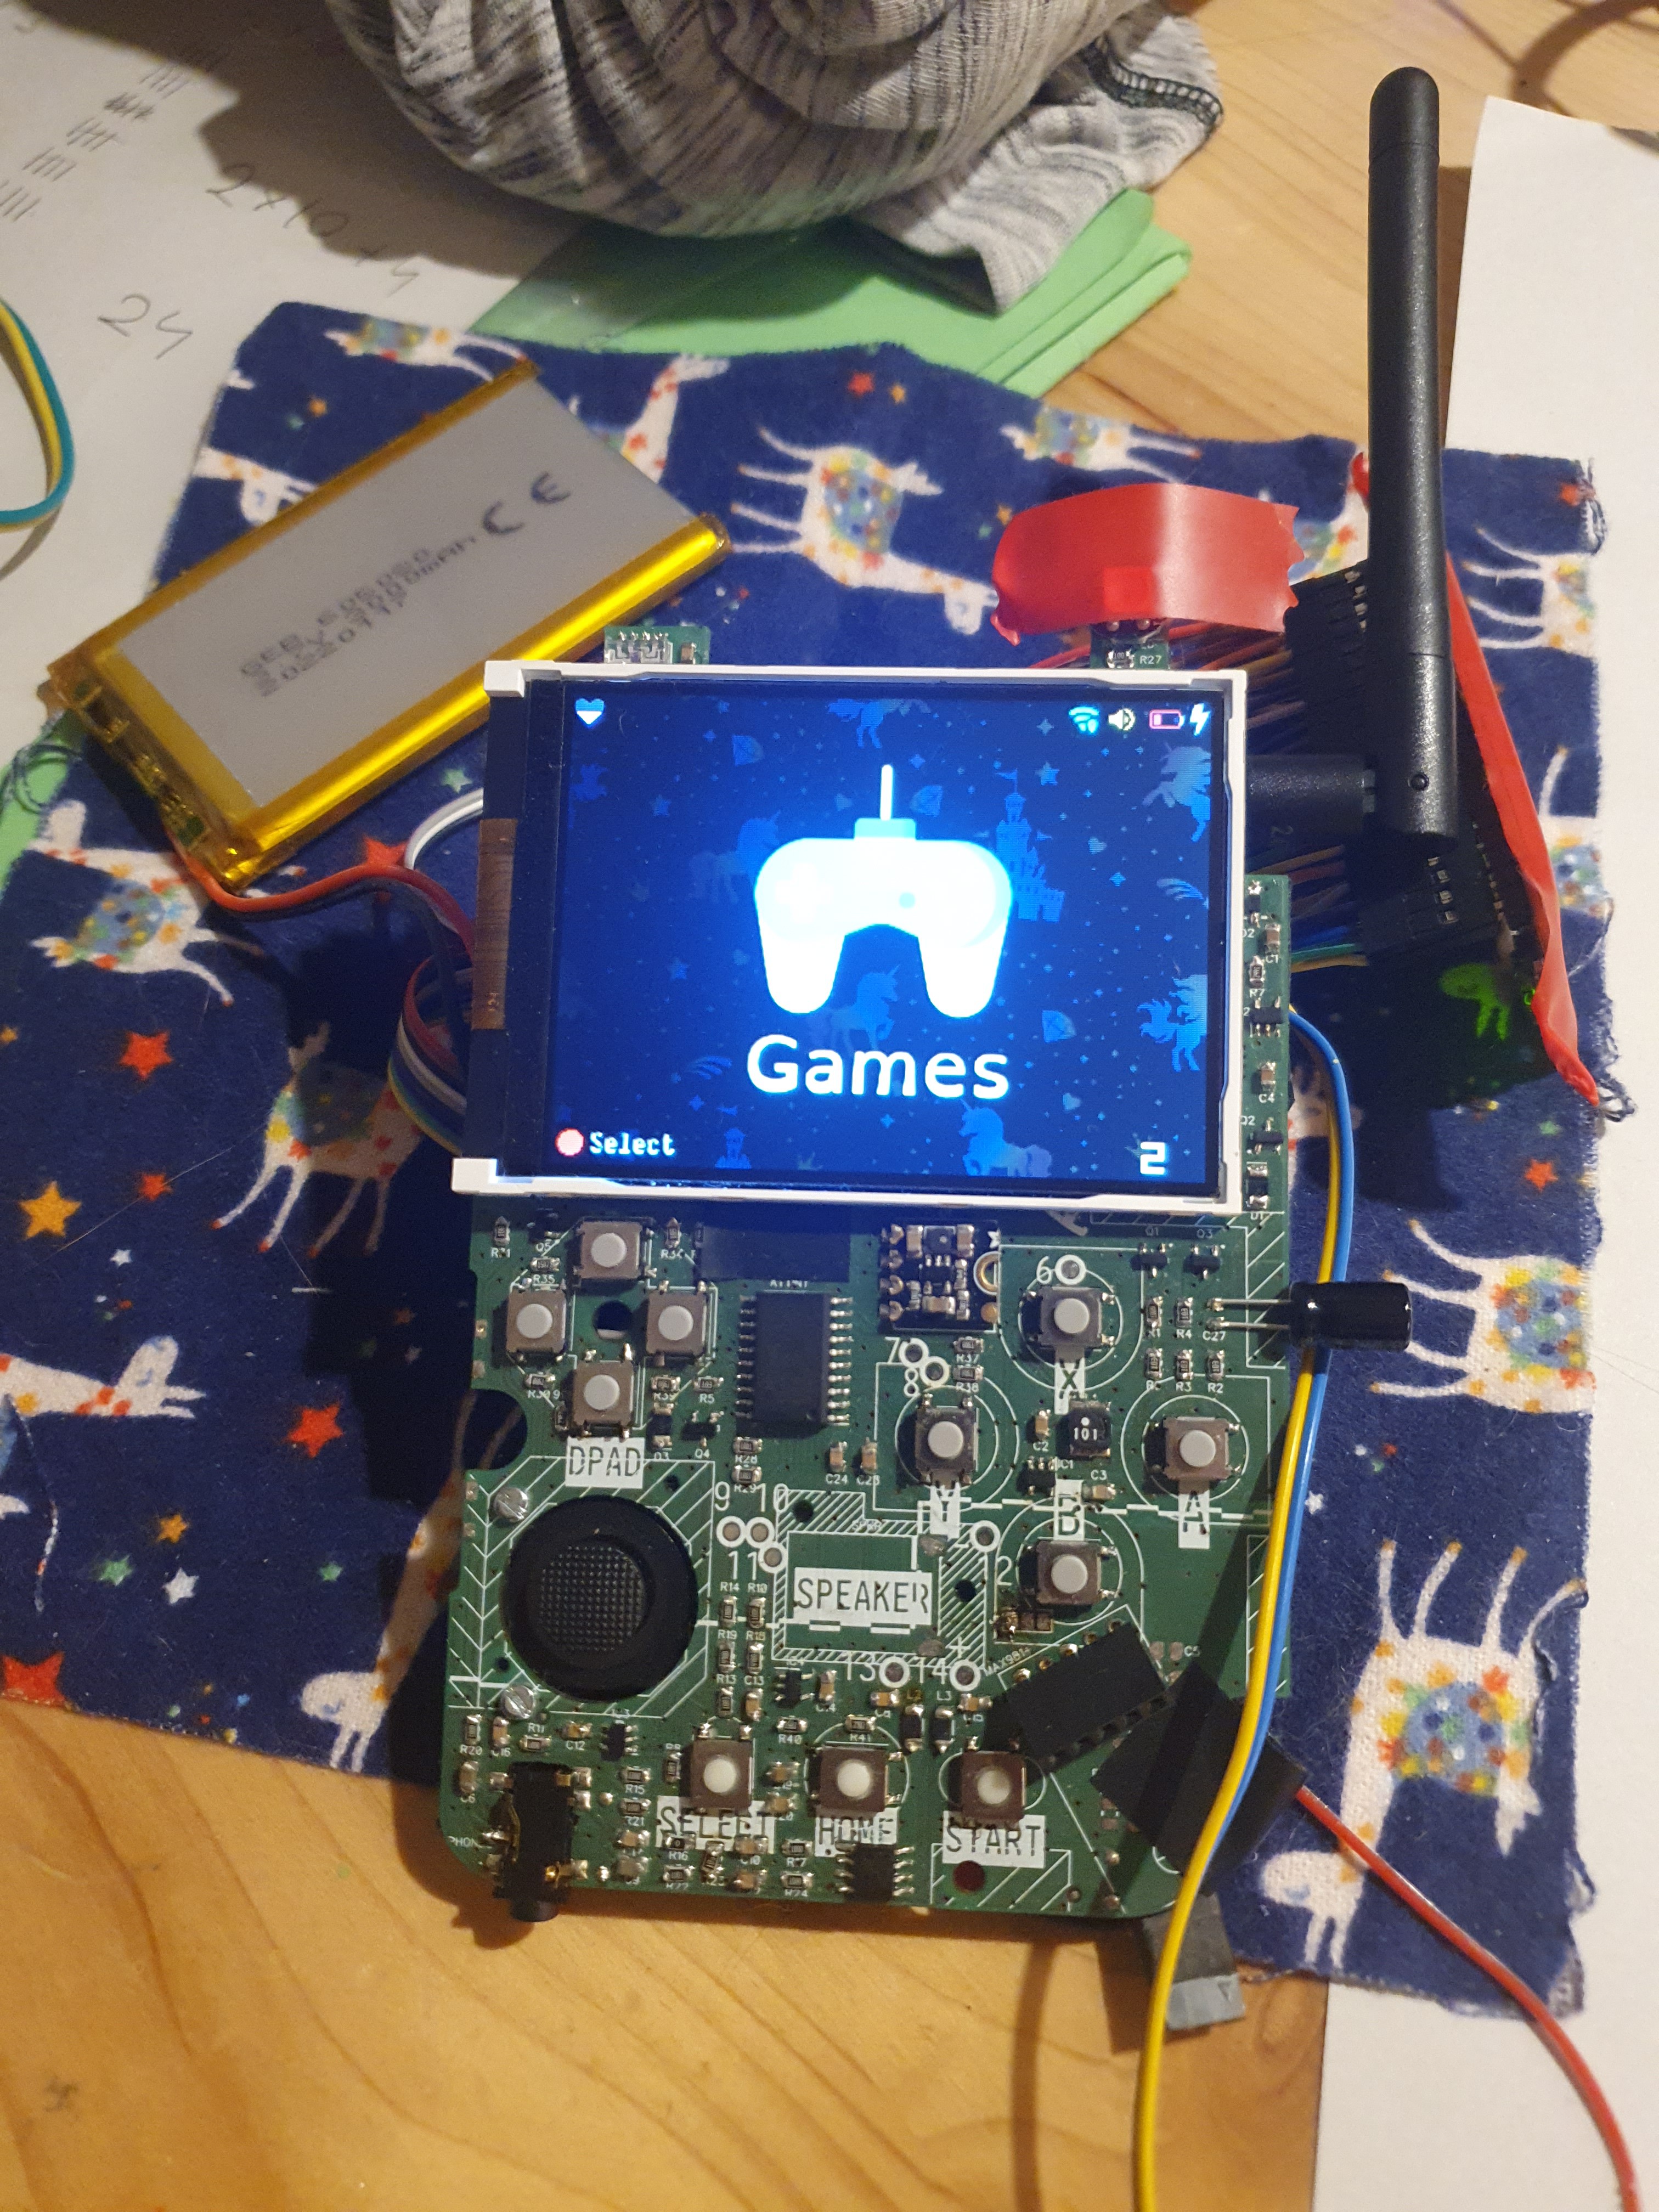
The bigger problem was that I really did not enjoy programming the device (and I am software engineer by trade). Fair warning - my opinions below are just mine: I liked Raylib for its simplicity (and it is the only part that survived till now), but I am C++, not C person, and some of the architectural choices were perplexing. Performance was not stellar either, I could hardly squeeze out 30fps (interestingly though screen tear, which I feared because it used SPI with no tear mark info to update parts of the display at a time to save bandwidth (courtesy of juj/fbcp-ili9341: A blazing fast display driver for SPI-based LCD displays for Raspberry Pi A, B, 2, 3, 4 and Zero), did not visibly happen). The rest of the software stack was far worse though - I learned to appreciate the GPU drivers a RPi and realized that their design was really clever - a lot of the things I feared (such as showing overlays of my gui over other apps that will be running) were extremely simple. Documentation was not though. I spent most of my time sifting through internet finding bits and pieces.
The biggest problem was that I could not convince myself that giving this to my kids, is a good idea as it would be yet another screen to consume stuff on (and one that I would have to maintain for them:).
Crosssing the Rubicon
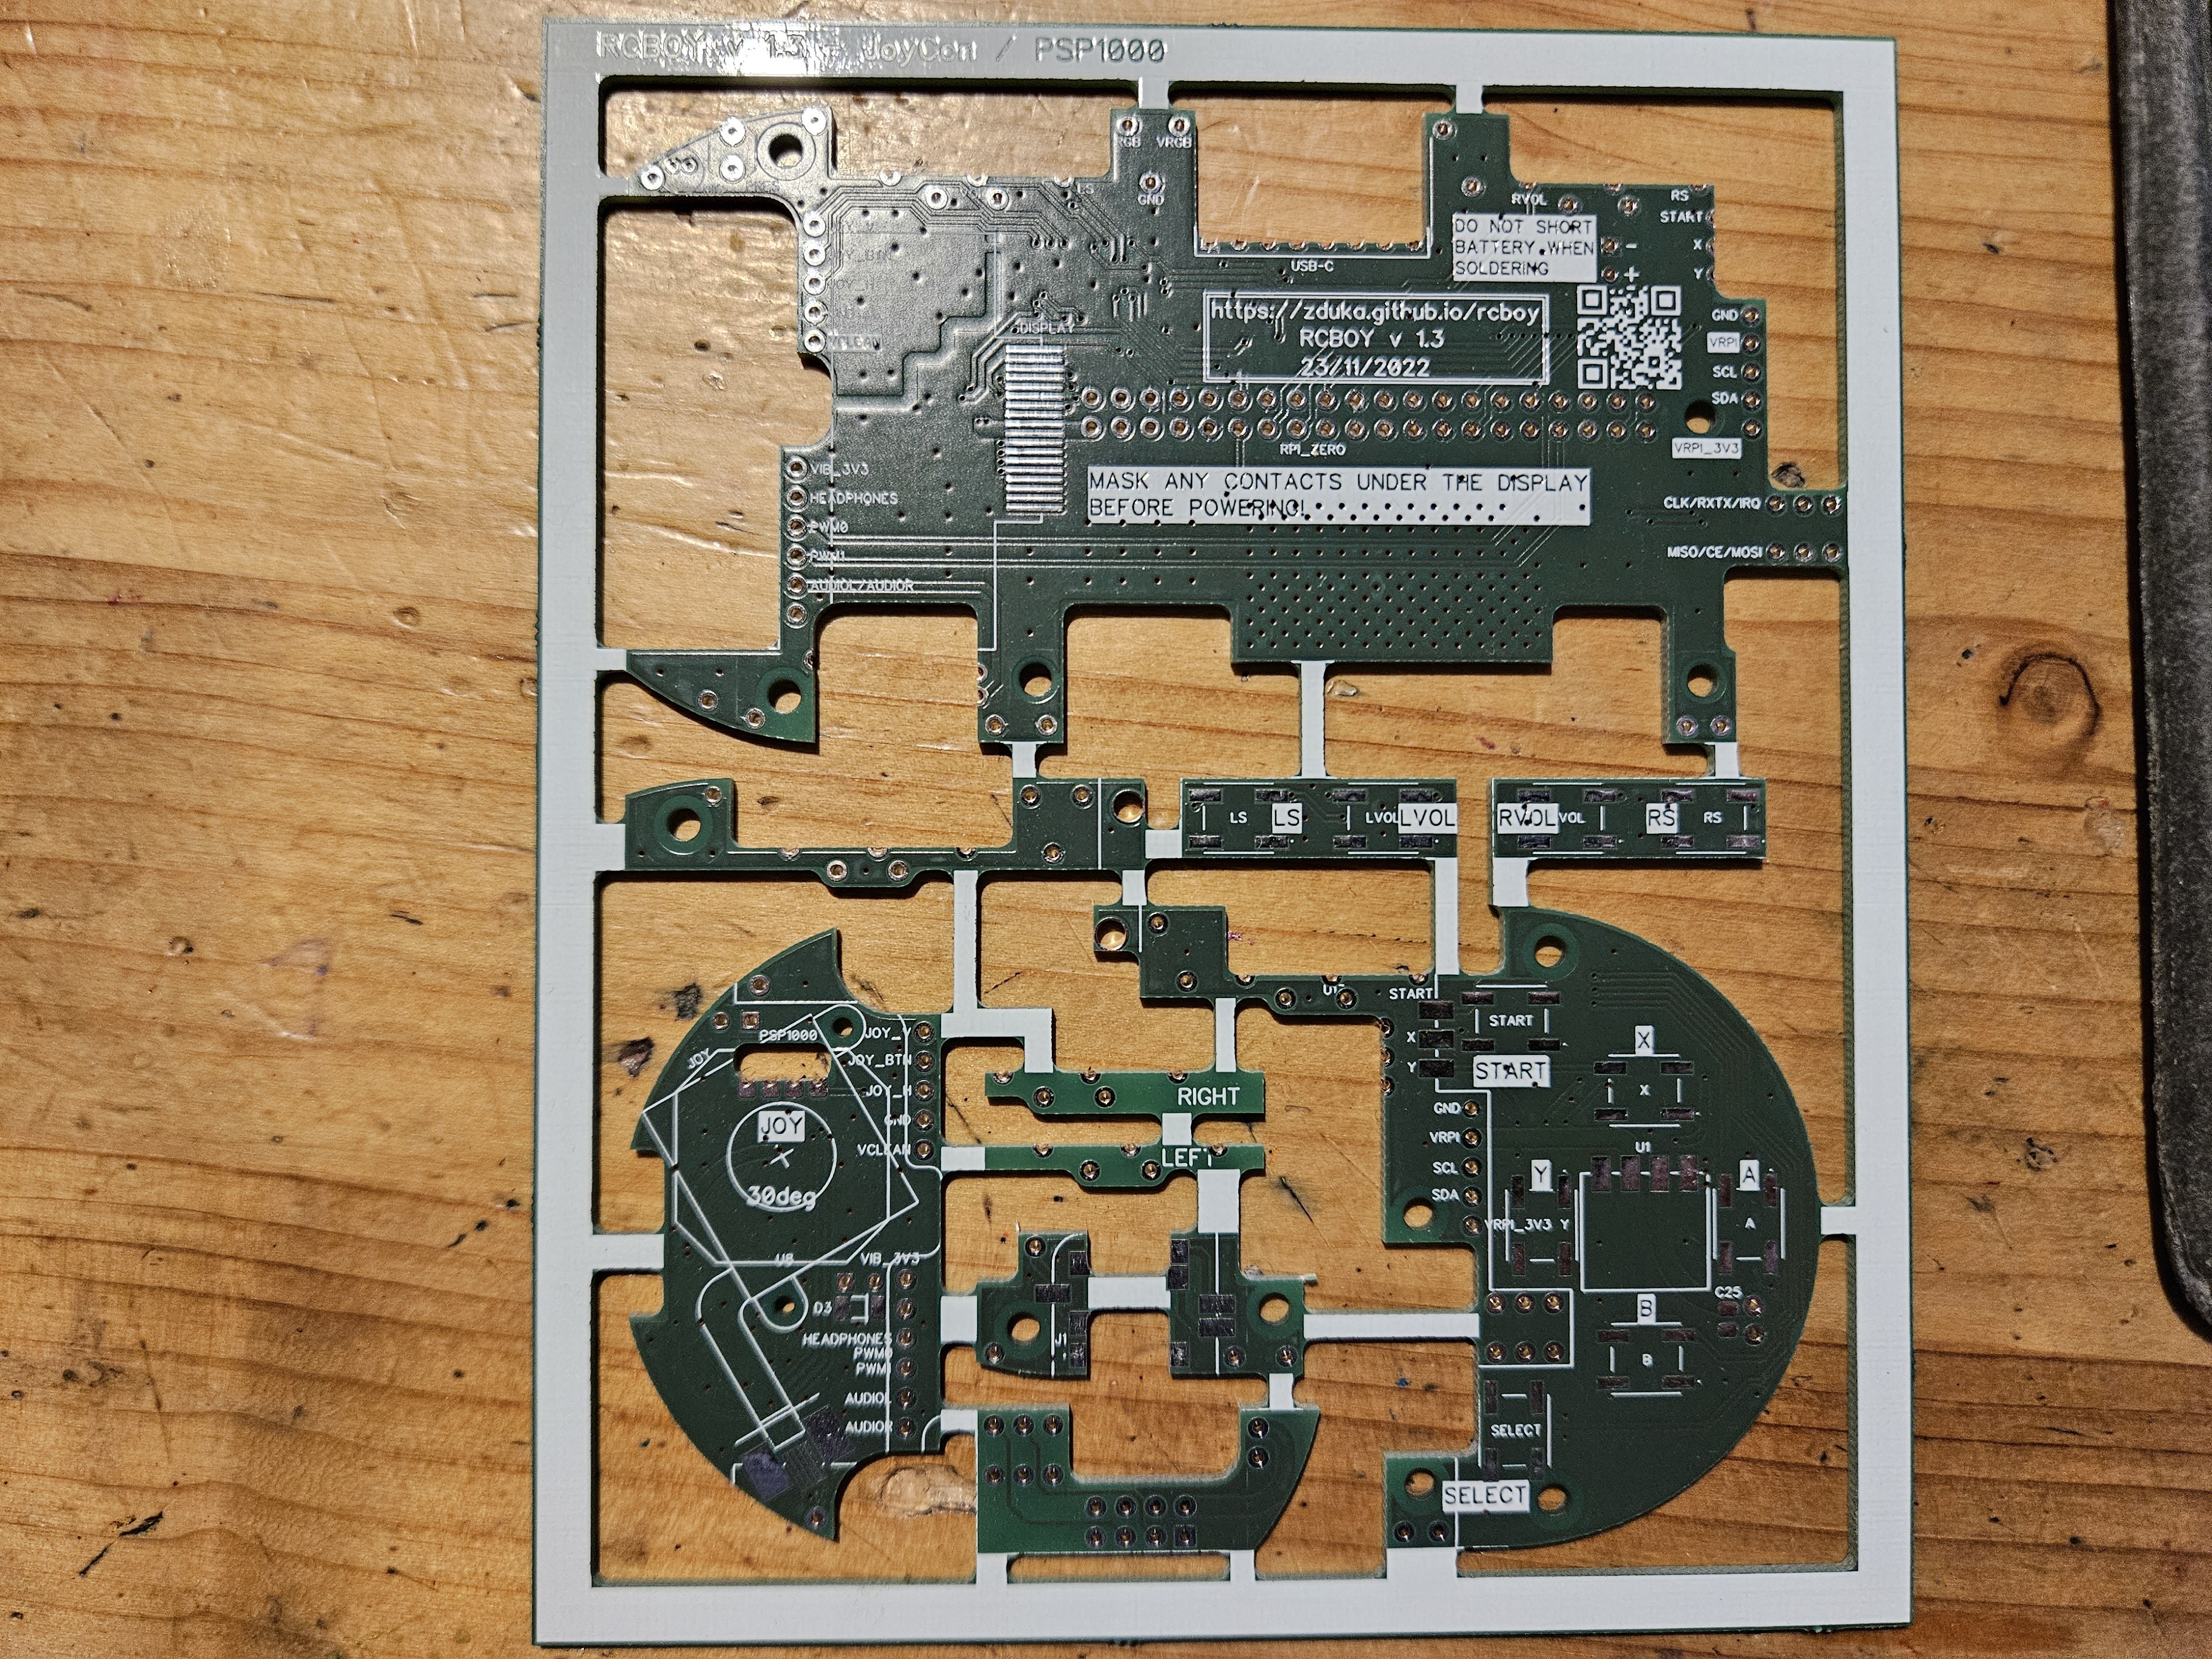
So I realized I wasted a year of my life. Back when I had the RP2040 prototype, I was happy - the chip was super fun to program, just enough power to do what I wanted, no retroarch, no linux stack. It was perfect. Except for the QFN package. But we do live in amazing times, and automated assembly, while still pretty expensive, cost around same amount that people spend in pubs or so. I crossed the rubicon, went back, resurrected the old RP2040 project, converted it to the amazing vertical layout and realized that I can make it *much* smaller - yet have enough room for all the peripherals I envisioned (I was stuck in the LoRa + NRF world still).
At this point another revelation came to me: RP2040 was really amazing chip, but unlike any other MCUs I worked before, the flash was not integrated. At first, I viewed it as a minor annoyance as I had to place & route another component, but then I remembered the old days and gameboys and segas and how they all had cartridges. You swapped cartridge and you had completely different game. O... K..., but digital content download is oh so much better, right? Well, not when you are a kid (more on that later), and digital content download will never add an accelerometer to your cartridges, or camera, or, wait... LoRa, or NRF, or WiFi (which is the one good thing I lost when I switched from RPi Zero to RP2040).
The Humble Cartridge
And so cartridges become part of RCKid's identity: the base hardware is simple, the flash for RP2040 and whatever else you might want to have sits in the cartridge and can be swapped in & out. At this time I used the precision machined pins for a really reliable contact and the mkII was born (pictured here with the backside showing the cartridge connector, unpopulated NRF and working display from front):
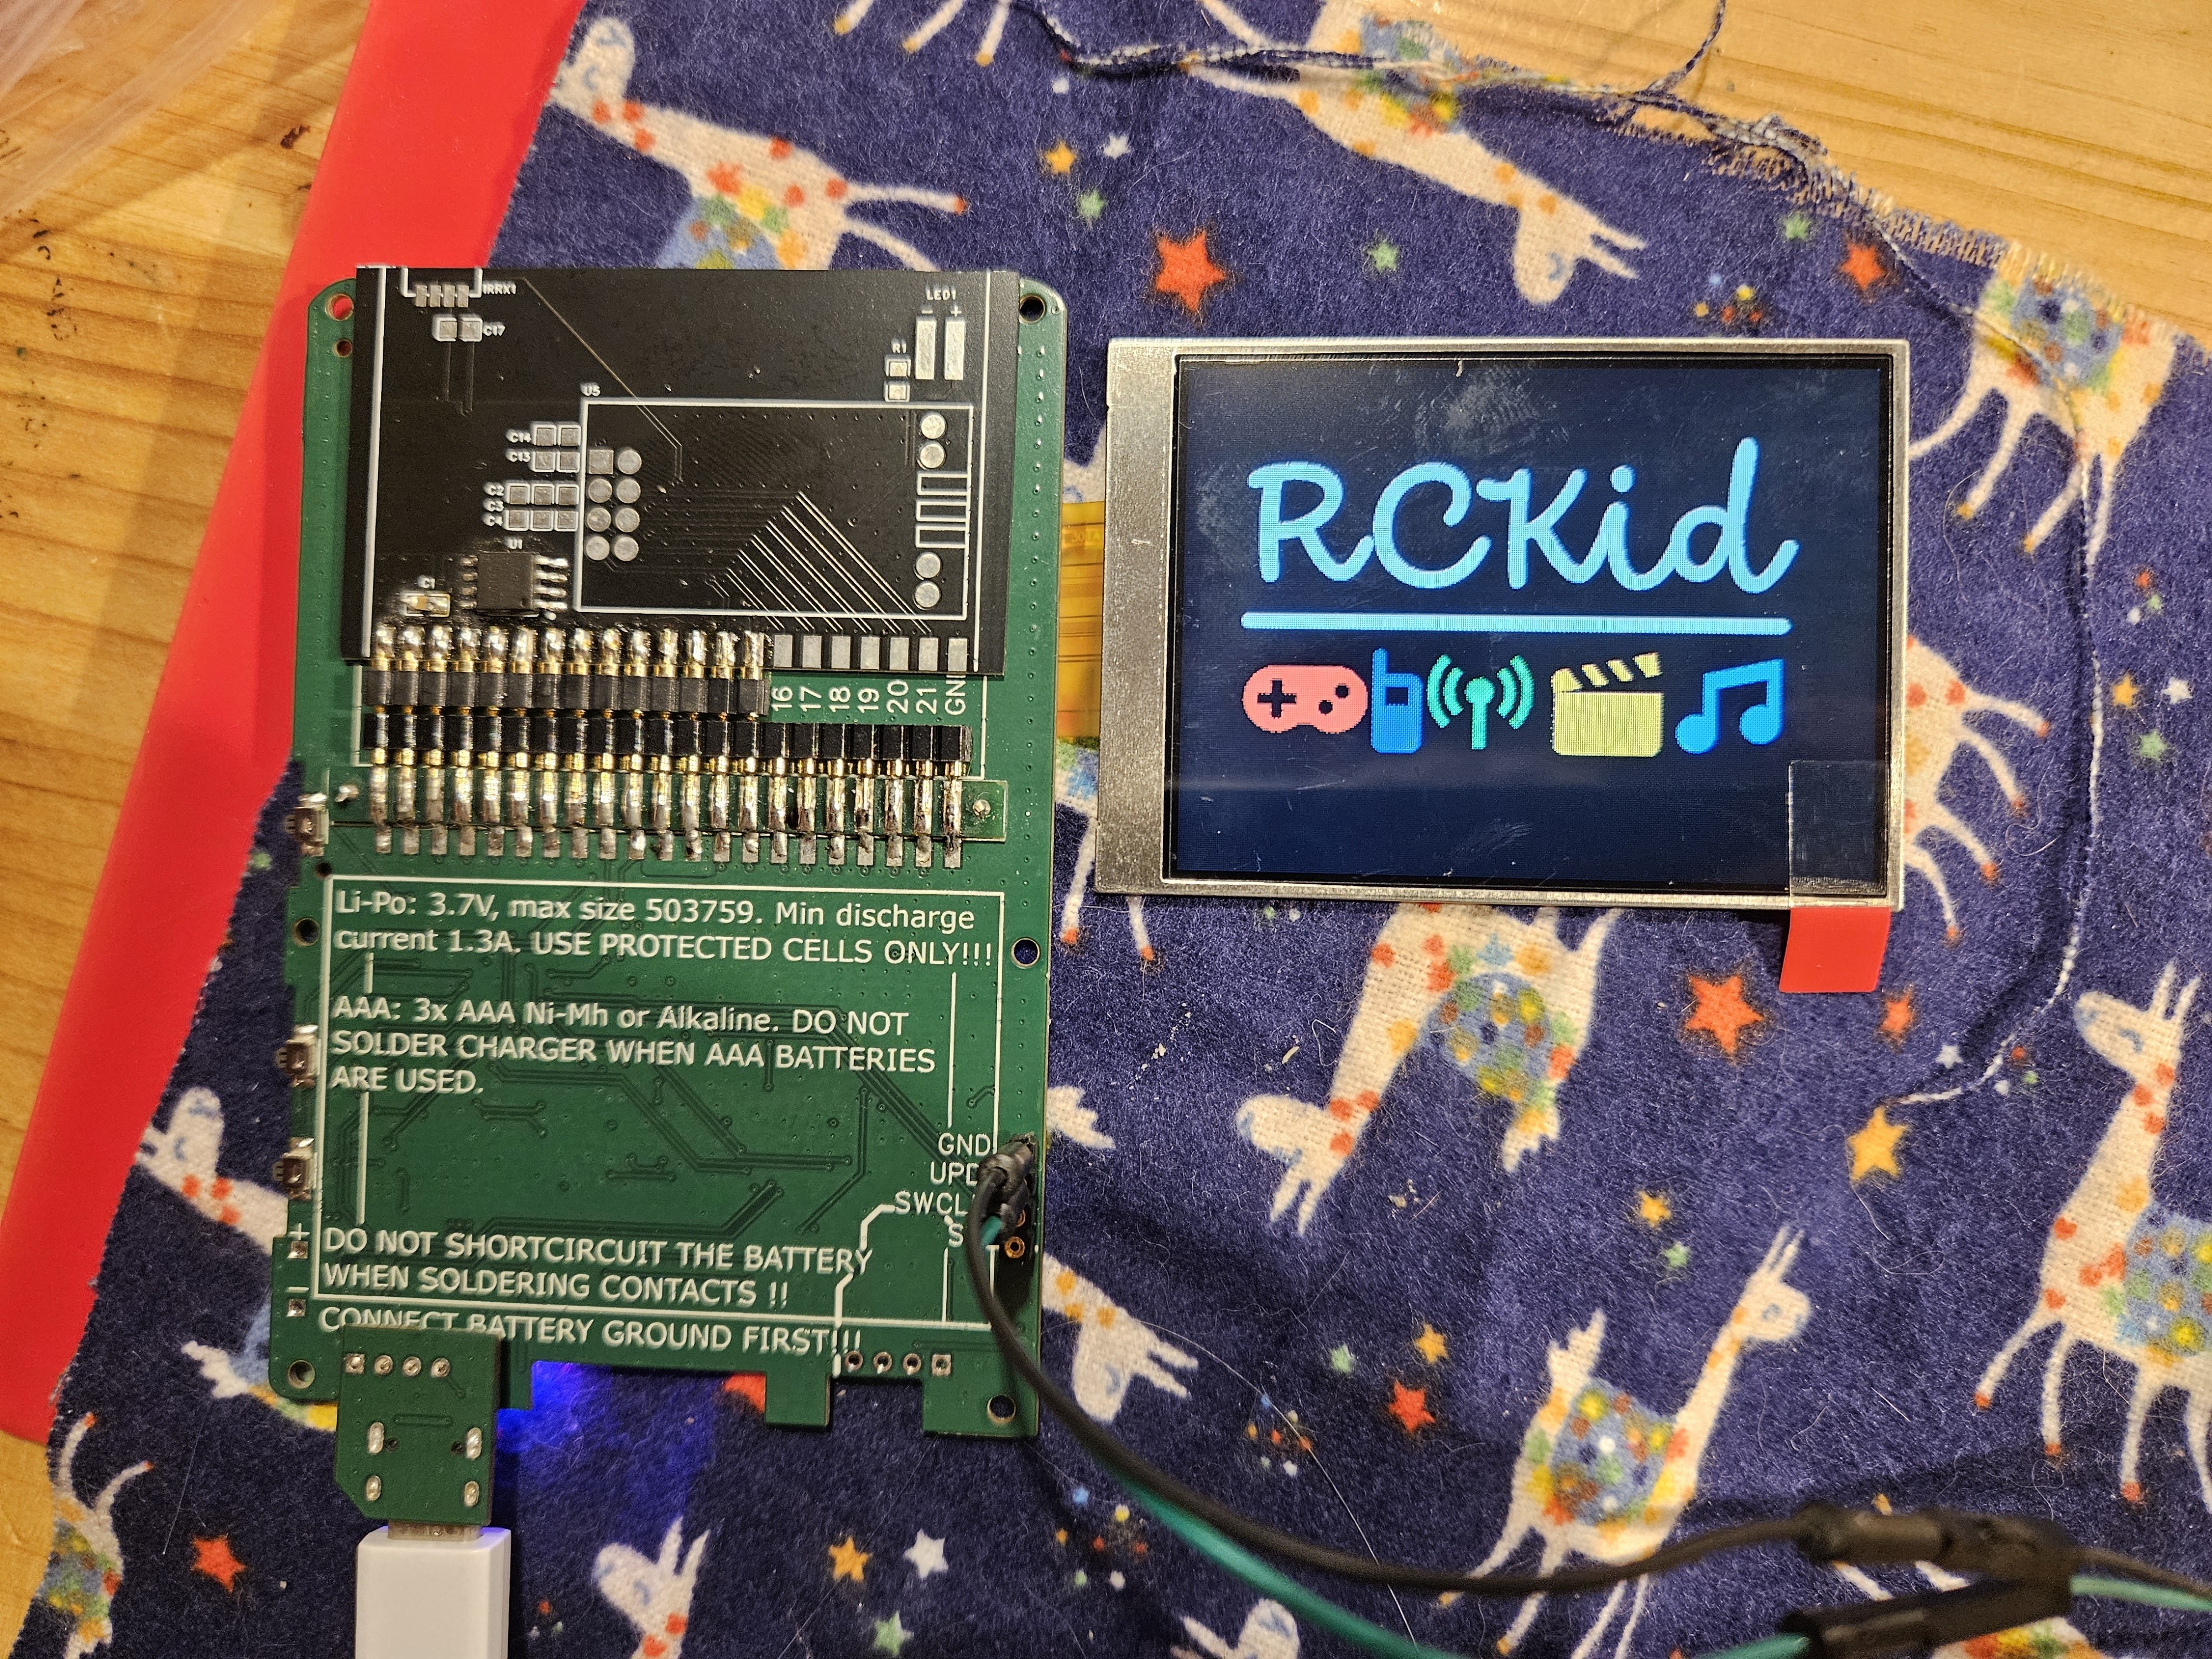
This is, sadly, still heavily abridged. The mkII went through great many PCB iterations. Mostly to deal with coil whine (unsuccessfully), added RGB lights everywhere, and power management - after watching some youtube videos, I am really scared of LiIon batteries:) Then xmas 2024 came and I had 2 devices ready for my betatesters. This is important, I had exactly two working devices ready. At this point the device did the following:
- 320x240 IPS display connected via 8bit 8080 interface and controlled by PIO on RP2040 (oh-so-satisfying:)
- PWM sound - I essentially copied the sound output of early raspberries with a Schmitt trigger and a filter. I then spent months poking around it with oscilloscope and multimeter trying to figure out why my sound sounds so horribly bad, only to realize that the circuit was right and this is just the nature of 8bit audio. Updated my PWN to 12bit and was happy.
- accelerometer, light sensor, PDM microphone, the cartridge of course:)
- C++ SDK where I implemented a few games (tetris, space invaders, sokoban, pong, 15 puzzle), mp3 player and a few utilities (clock, data sync).
- SD card inside for data storage
One thing that deserves special mention is the absolute ease of use with which the RP2040 can be reflashed from any computer via the UF2 bootloader - absolutely amazing!
At this point RP2350 was hot & new and I was debating with myself whether to give in to feature creep again, but I knew better. I felt like physics at the end of 19th century - everything was beautiful, and I only had a few tiny problems to fix. Boy was I wrong...
TO BE CONTINUED...
[1] ATTiny3217 - historically I have been using AVRs ever since university, barebones, not Arduino. My beef with the older versions was the 6pin ISP programmer, but the new ATTiny series programmable via the UPDI (1 pin and serial-to-usb programmer simple hacking is a bliss. The chip is pretty powerful too with really decent ADC, RTC support, good sleep modes and relatively large number of pins, all of which I put to good use in this project.
Discussions
Become a Hackaday.io Member
Create an account to leave a comment. Already have an account? Log In.