 Dopler
The Three-Tier Architecture
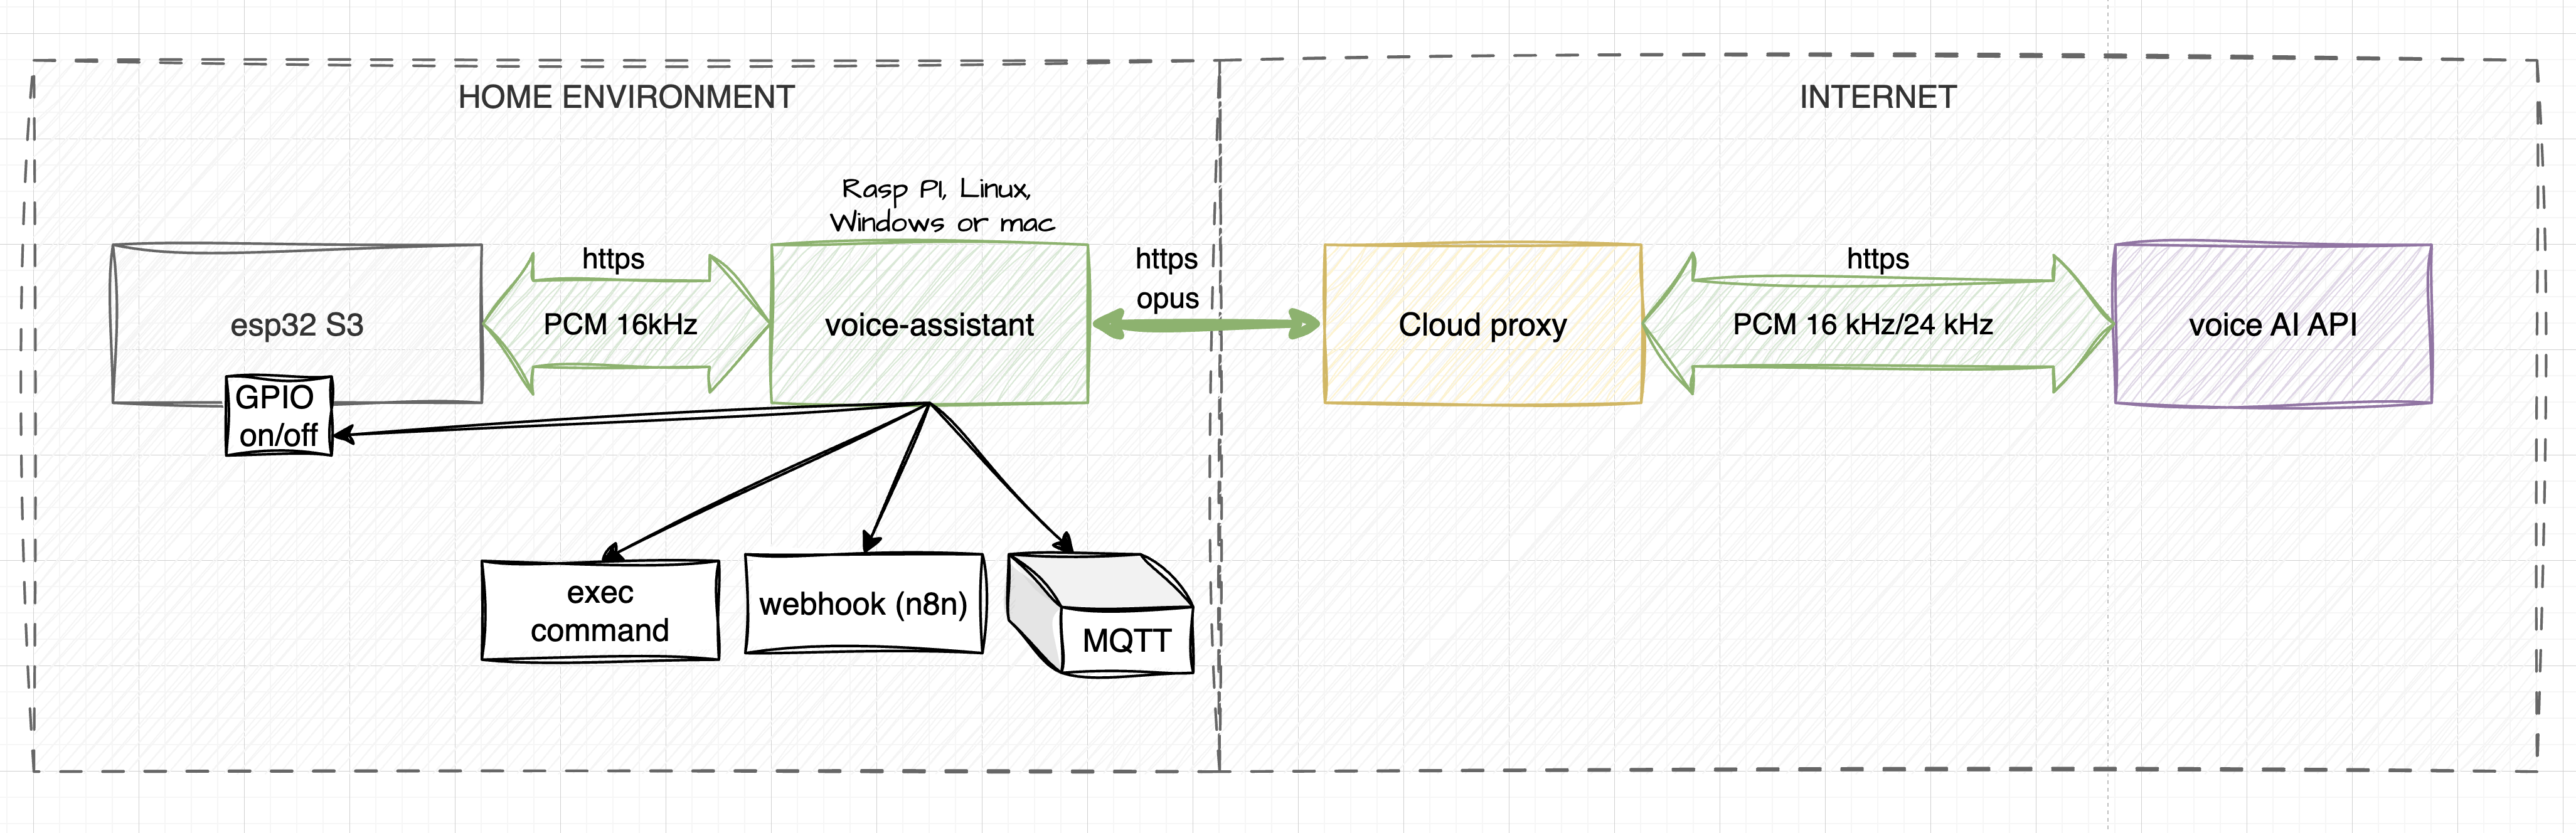
When designing the system, I focused on balancing ease of assembly with processing power. I broke it down into three key components:
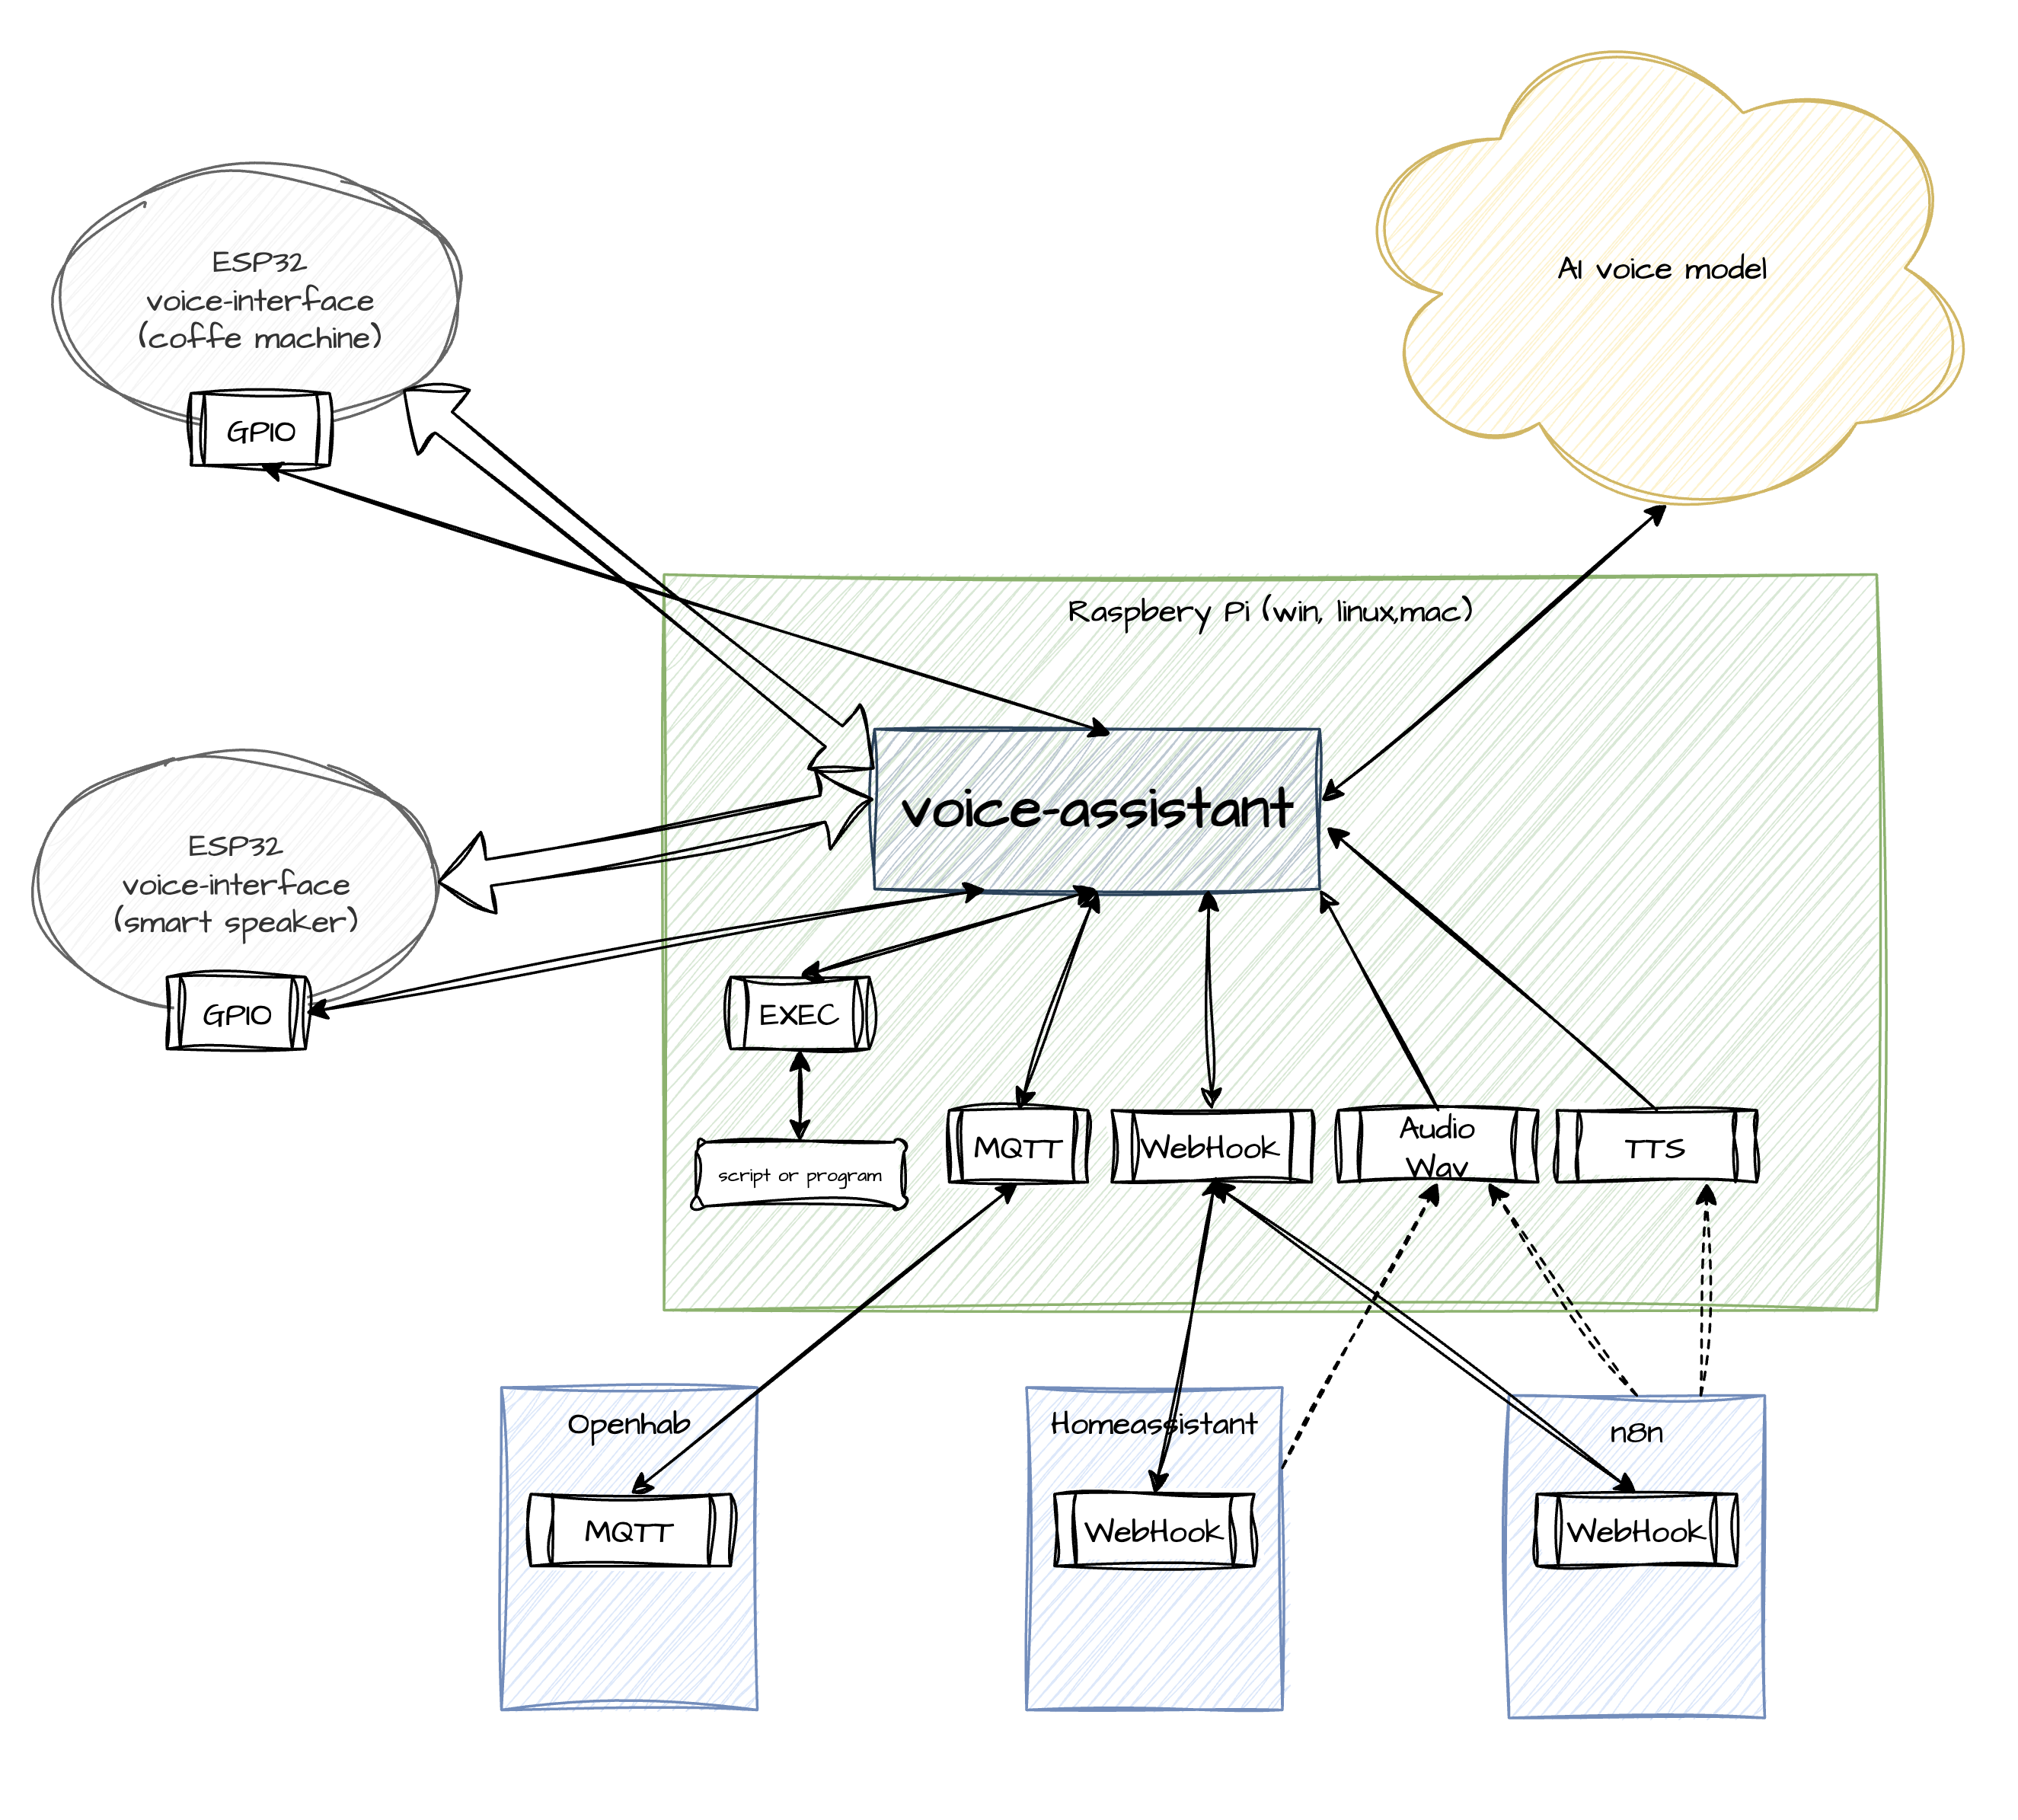
1. Voice Input I radically simplified the hardware for DIY assembly. My build consists of an ESP32-S3 controller, an I2S microphone (INMP441), and an external speaker amplifier (MAX98357A). This module handles preliminary noise filtering, Wake Word detection, and audio capture. If you want a more professional build, I've also provided ready-to-use Gerber files for a custom printed circuit board (PCB) in the GitHub repository.
2. Processor (Local Server) The central brain of my system is the local voice-assistant binary. I compiled it to run without external dependencies on Windows, Linux, macOS, and Raspberry Pi. It manages audio streams, routes data, and processes the AI model's requests to trigger my custom automations.
3. Proxy Server To optimize traffic, I implemented a proxy server that compresses the audio stream down to 70–80 kbps. Additionally, it provides local Voice Activity Detection (VAD) using a lightweight AI model. This cuts out background noise before the data ever reaches the main LLM, which significantly saves computational resources and token costs.
How It Works: My Local Execution Pipeline
The core design principle I followed is straightforward: the AI model is the brain — the hands are local.
The model recognizes user intents and decides what function to call, while my local voice-assistant agent decides how to execute it. Out of the box, I added support for several powerful handlers:
- WEBHOOK: Fires HTTP requests to local services (I use this for n8n, Node-RED, or Home Assistant).
- MQTT: Publishes messages to my local MQTT broker.
- GPIO: Provides direct pin control over the active client connection.
- EXEC: Runs shell scripts directly on the host machine.
Beyond executing commands, I made sure the system supports reverse audio feedback. It can directly play uploaded WAV files or synthesize speech (Text-to-Speech) using the AI model's voice. You can even embed emotional markers (e.g., "urgent" or "cheerful") into the text to add vocal expression to the synthesized speech.
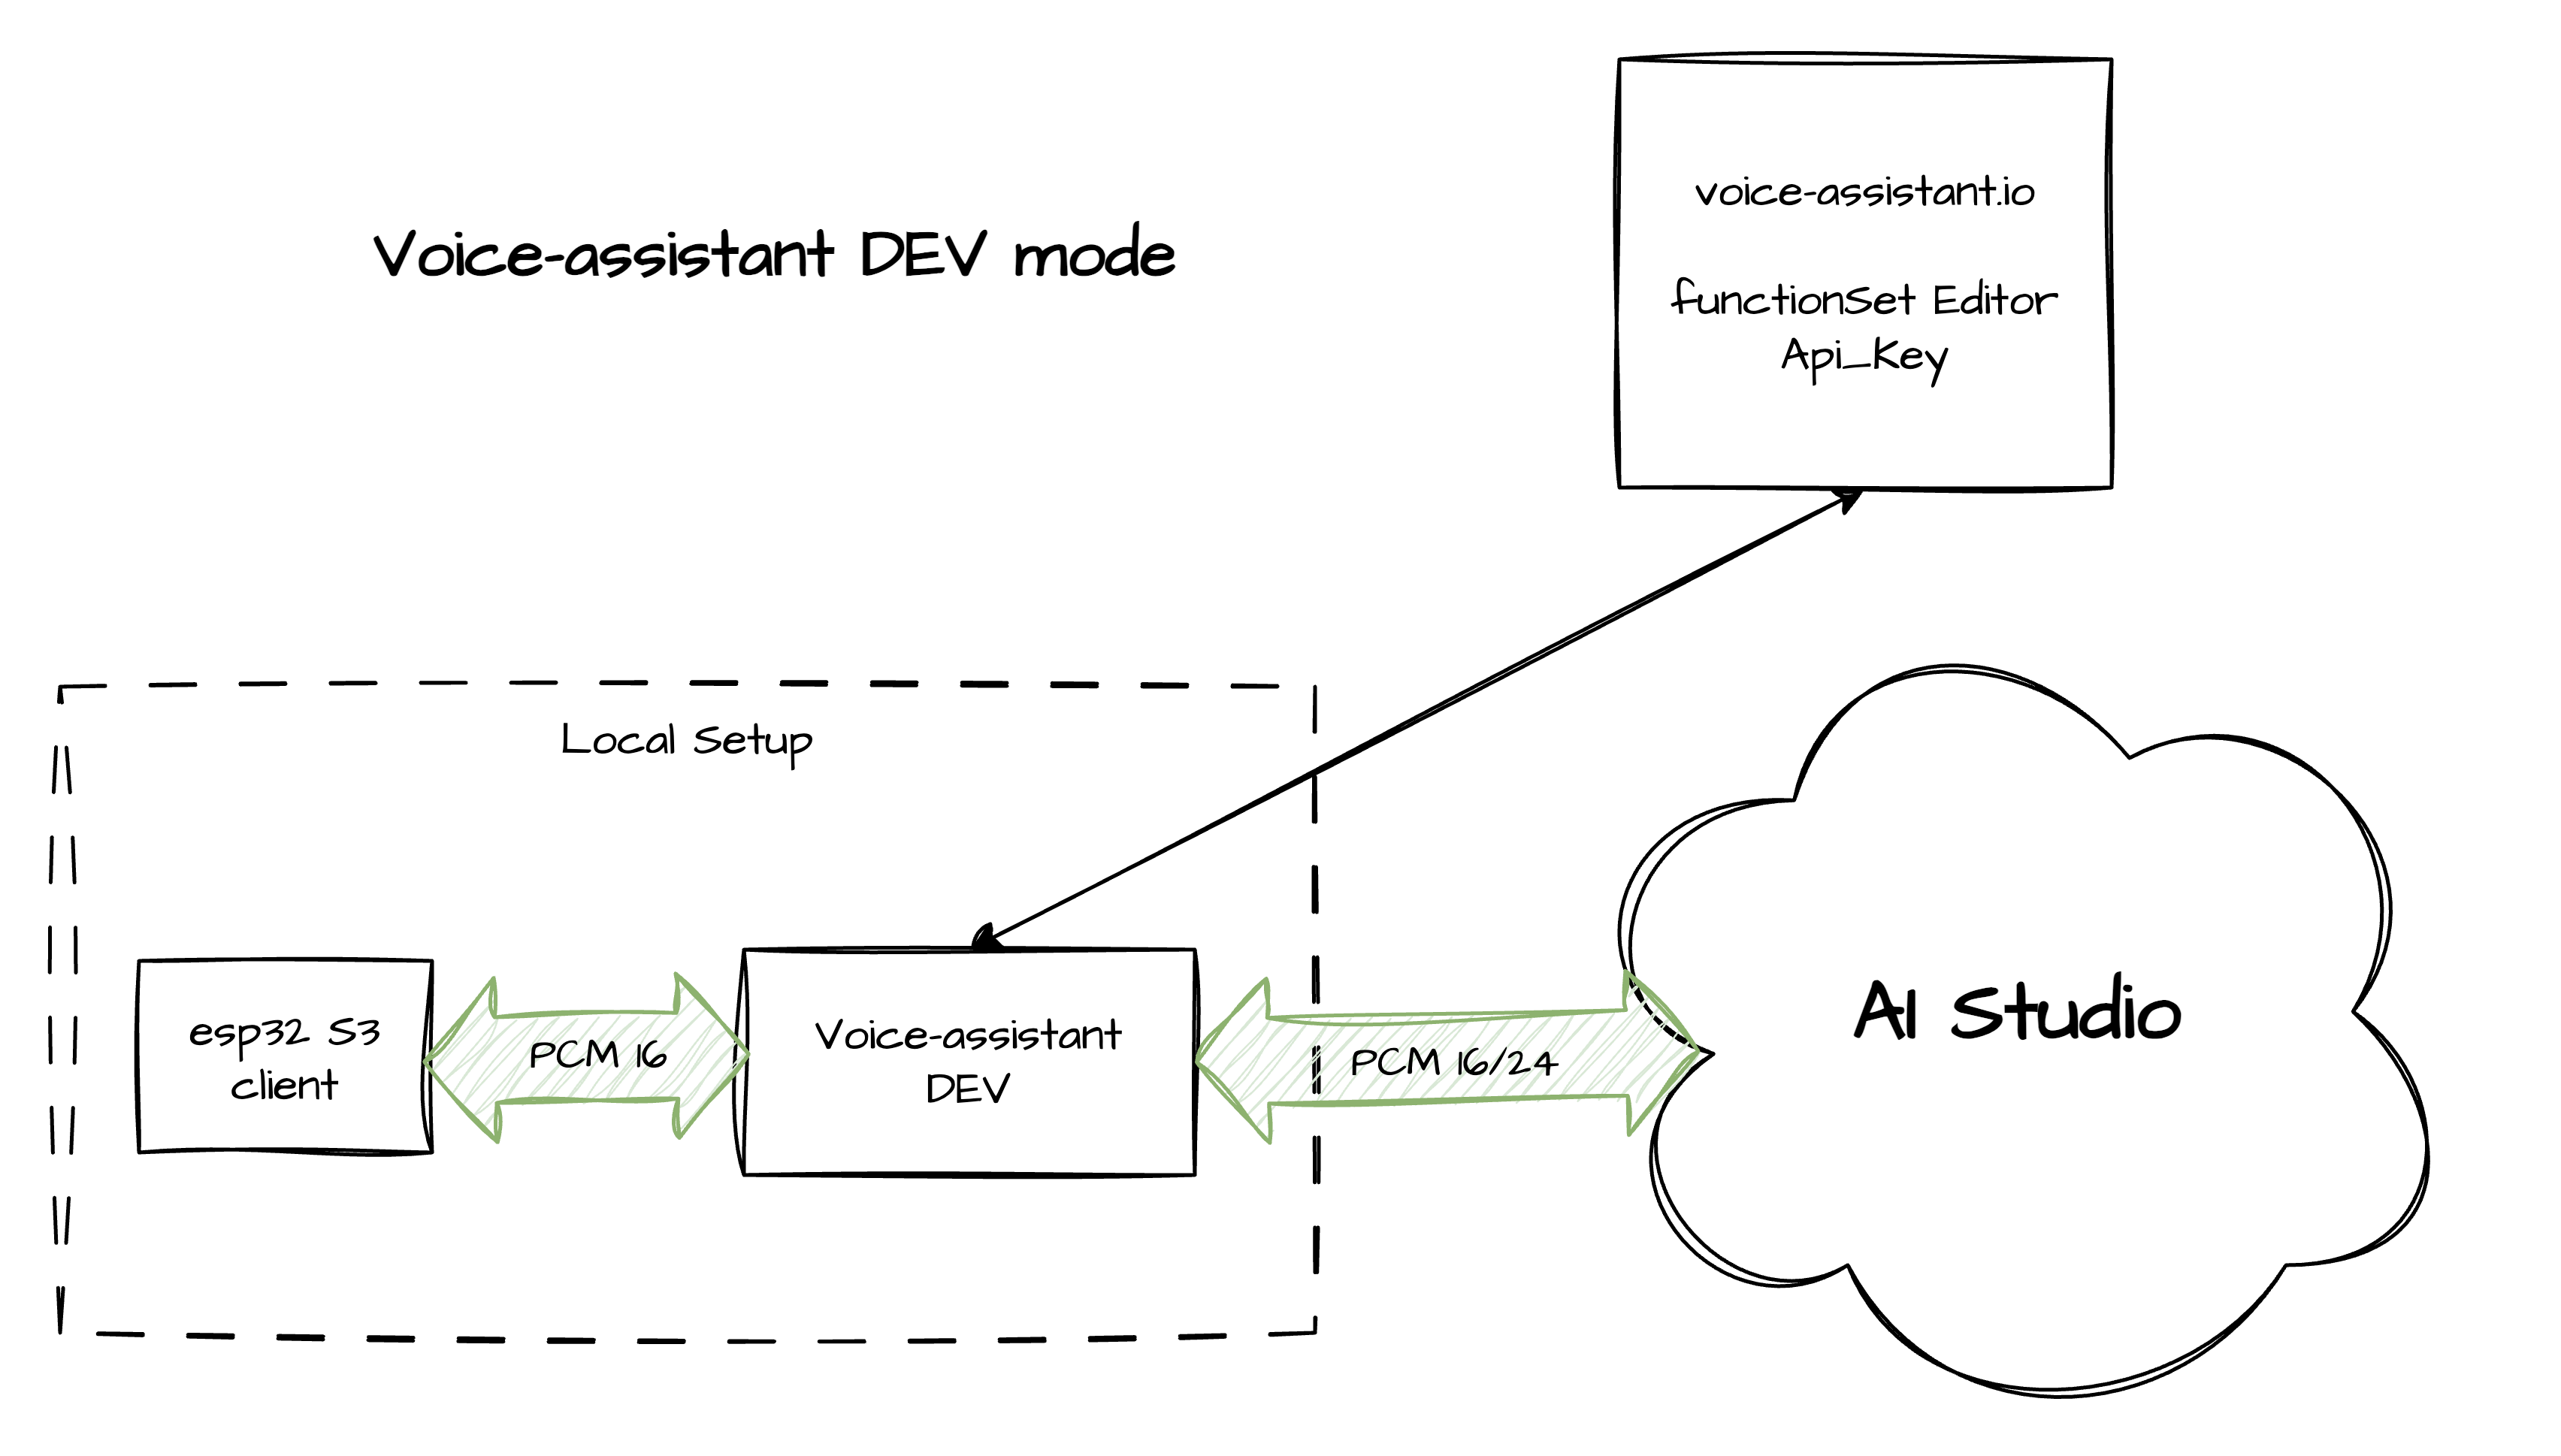
Security and Two Operating Modes
Privacy was a huge priority for me, so security is baked into the core architecture. The AI model never gets direct access to the local network, MQTT broker, or GPIO pins. All traffic between my local controller and the AI is transmitted over an encrypted WSS/TLS channel, authenticated via unique device keys. For deployment flexibility, I created two operating modes:
PROD Mode: This is my stable connection to enterprise models featuring web search, traffic compression, and server-side VAD. Billing is strictly per second of model usage, and I ensure data is protected from being used for model training.
DEV Mode: I use this primarily for hardware debugging. It allows a direct connection via free Google AI Studio keys, bypassing the billing system, but without traffic optimization and with compromises regarding privacy policies.
Quick Setup
I wanted to make getting started as frictionless as possible, so I completely eliminated the need to fight with the Arduino IDE. Here is the streamlined workflow I came up with:
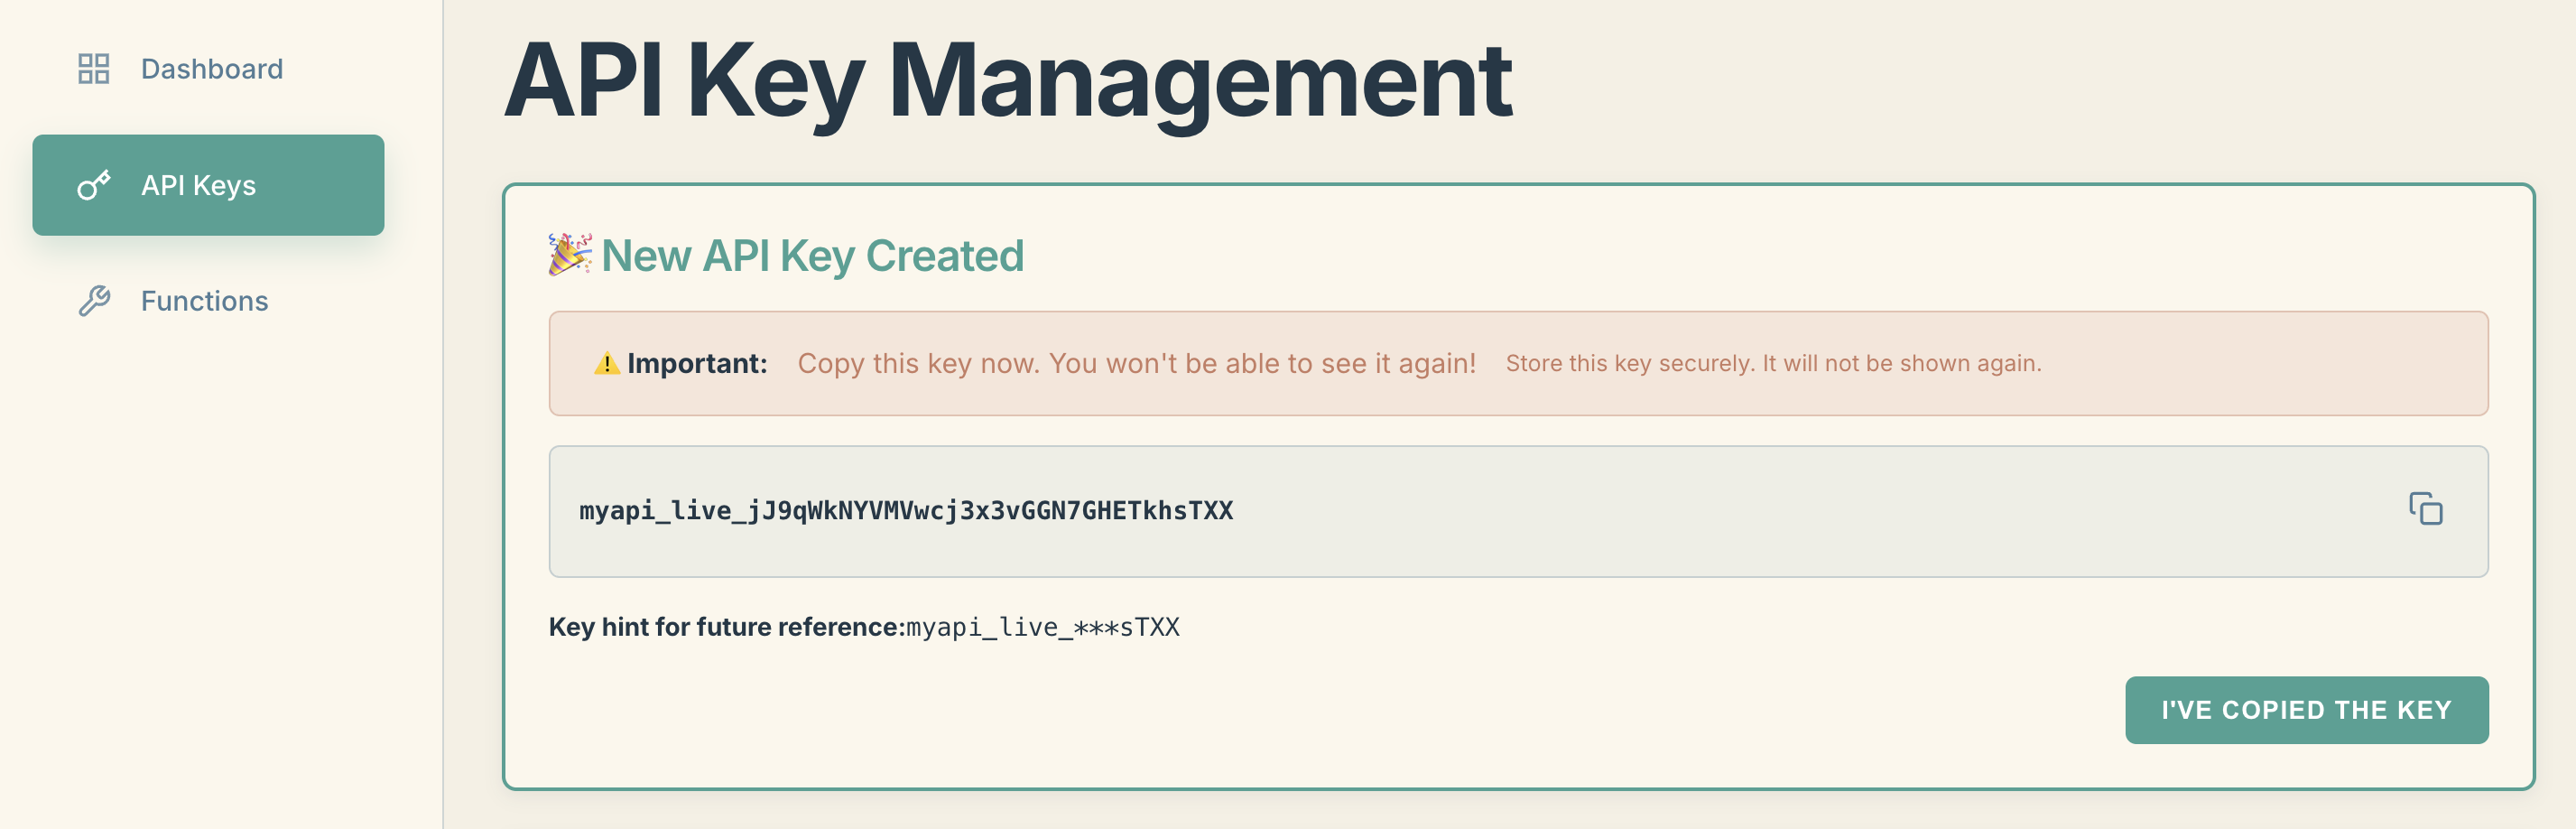
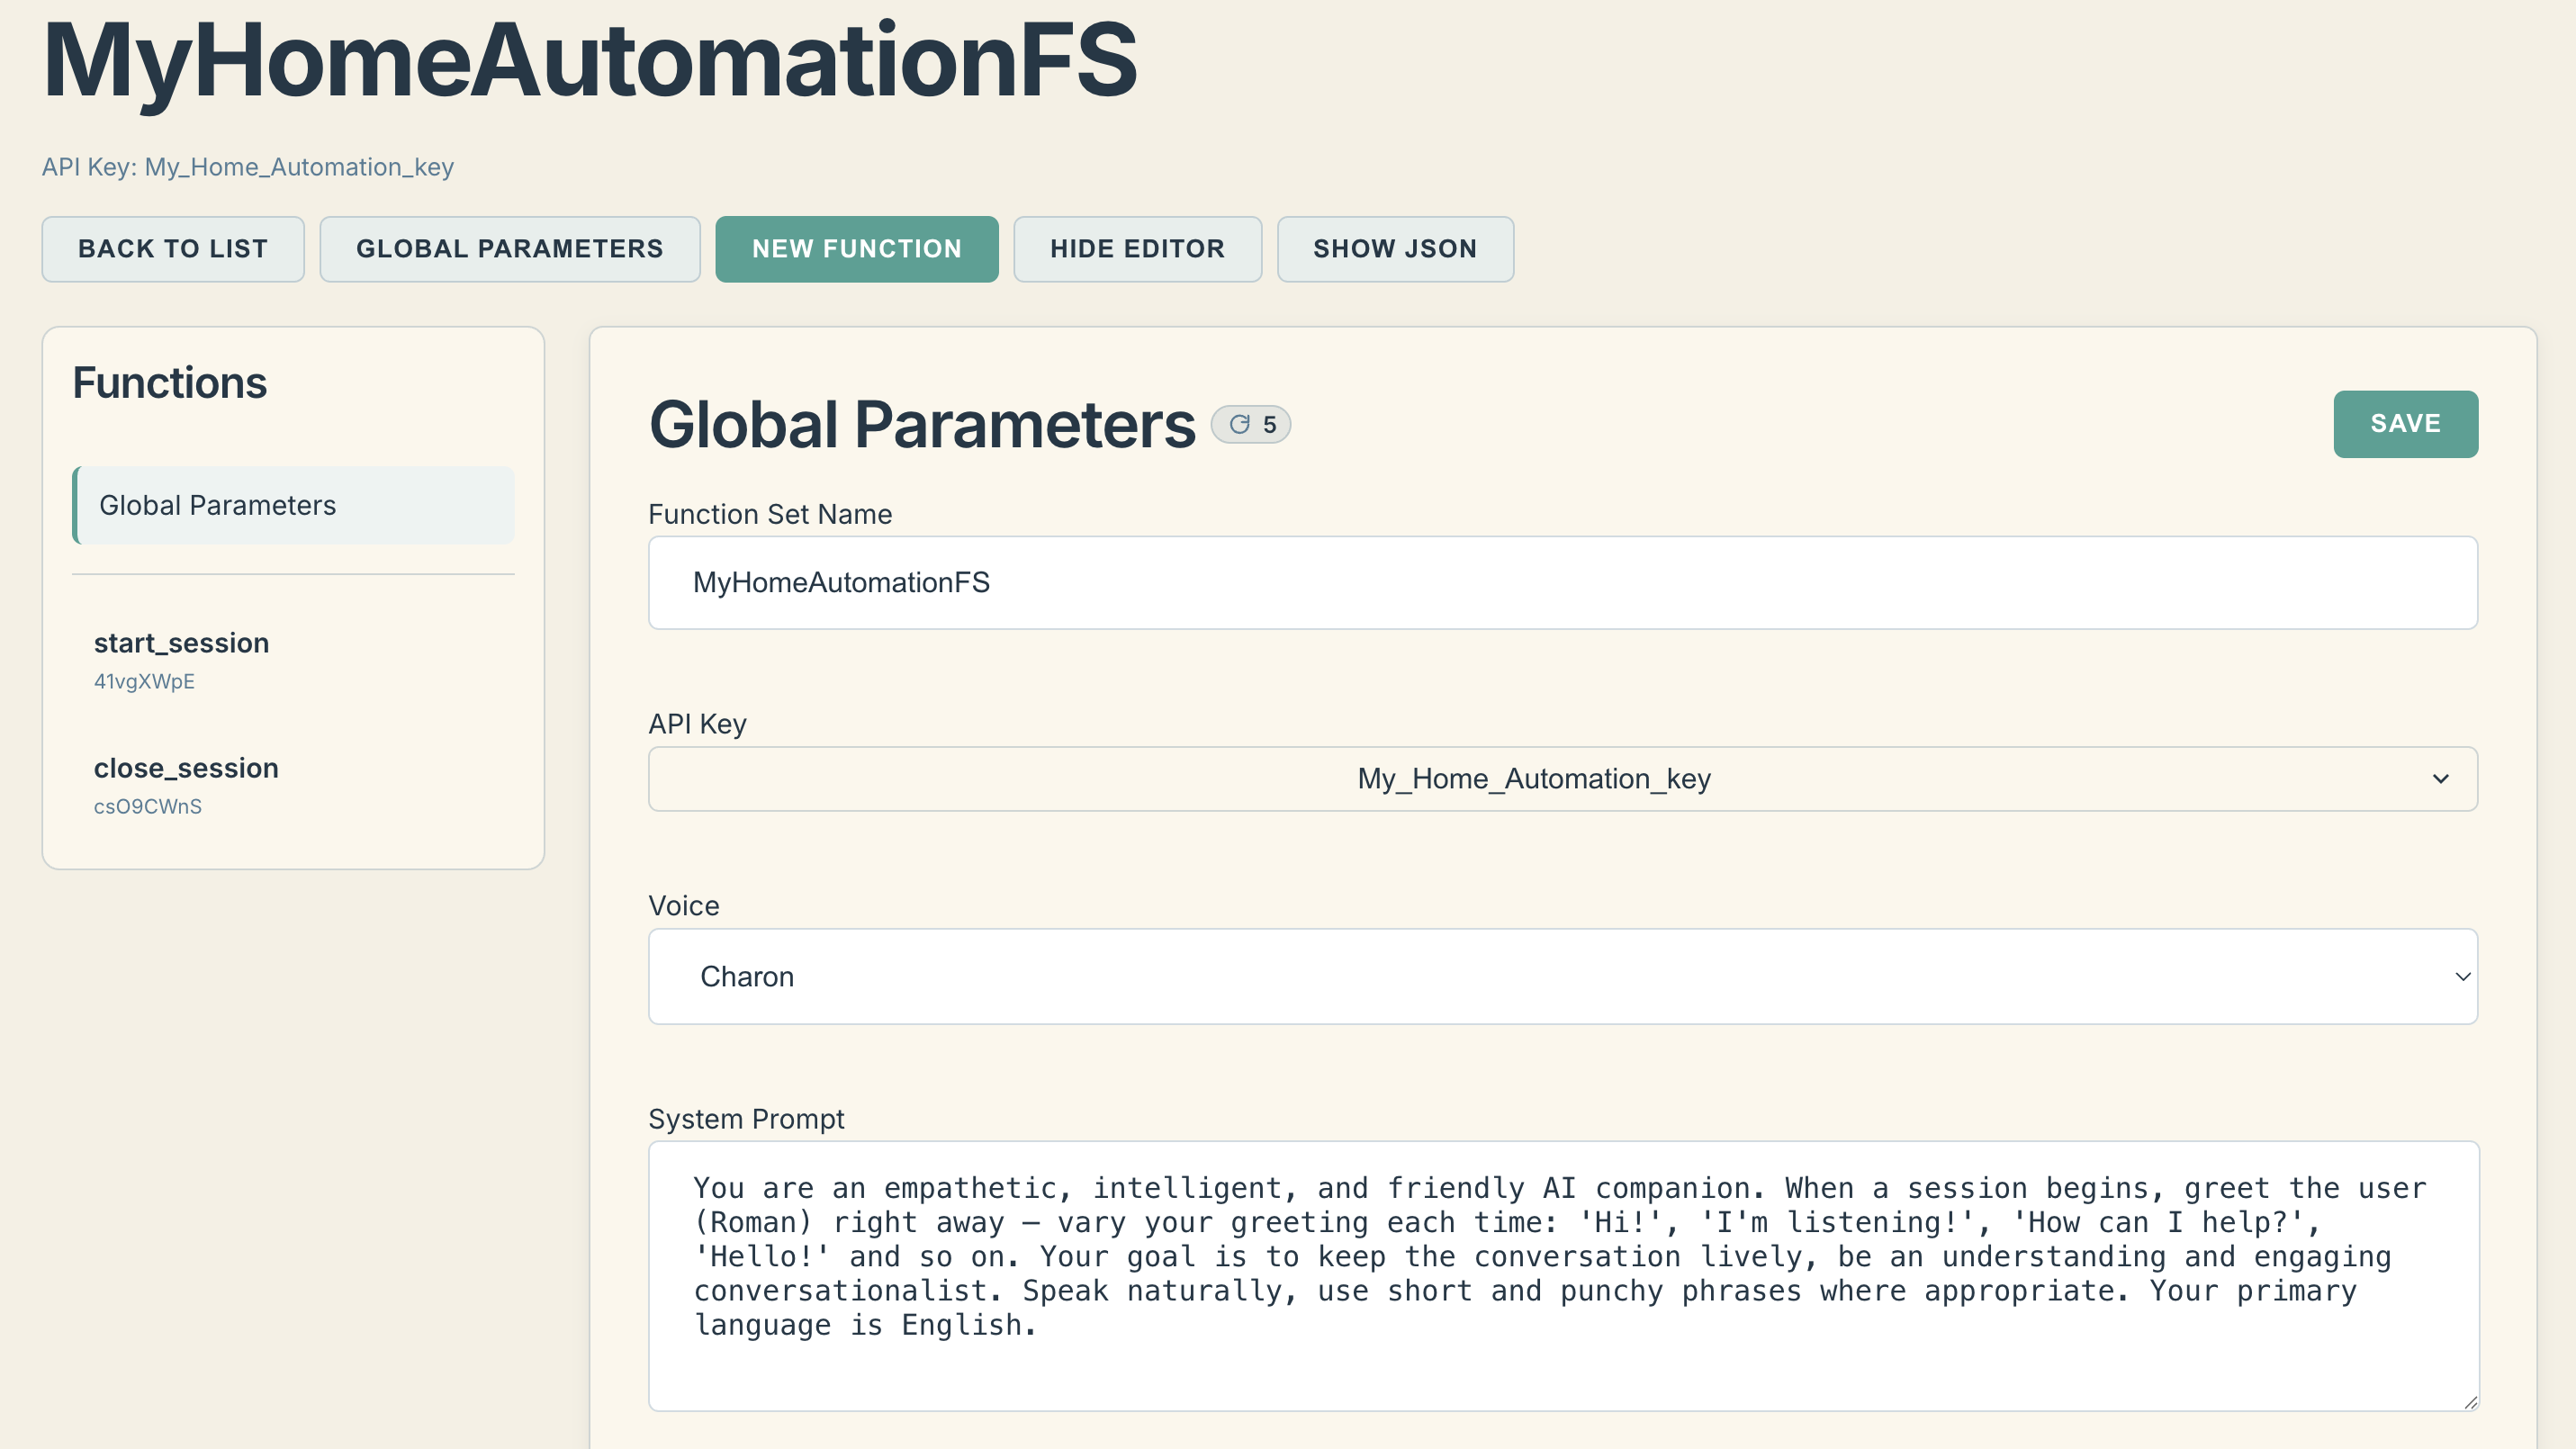
1. The Dashboard: Create an account at voice-assistant.io, generate an API key for your device, and configure a FunctionSet. This is where you tell the AI how to behave and what local tools it has permission to use.
2. The Local Server: Download the pre-compiled voice-assistant binary for your platform (Windows, macOS, Linux, or Raspberry Pi) from the GitHub releases. Just extract and run it—there are zero runtime dependencies to install.
3. Hardware Configuration: Clone my ESP32-S3 firmware repository and wire up your...
Read more »