 Kutluhan Aktar
-
1Development process, thinking in terms of creating an Arduino App Lab application, and final results
As mentioned in the introduction, the development process of this AI-driven lab assistant differs quite a bit from my previous AIoT projects since I built a single application within the confines of the Arduino App Lab development environment, specifically constructed to capitalize on the dual-brain (MPU-MCU) nature of UNO Q, even though I developed a feature-rich web dashboard and analog lab assistant interface individually. Arduino App Lab provides built-in Bricks (Docker containers) for adding various fundamental attributes to an App Lab application, such as web UI hosting, inference running for custom models, etc., and manages all of the operations of the included Bricks while executing the completed application. Thus, although I still utilized specific programming languages to develop the different aspects of the lab assistant App Lab application, Arduino for programming the STM32 microcontroller (MCU), Python for the application backend (Qualcomm MPU), and HTML, CSS, JavaScript for the web dashboard, as a whole, I built a single application that the App Lab runs and manages.
I think the most prominent feature of UNO Q, with the support of the App Lab, is the built-in RPC (Remote Procedure Call) managed by the Arduino Router background Linux service, which enables developers to borrow and run functions between Qualcomm MPU and STM32 MCU interchangeably. App Lab also provides a built-in web socket to establish data transfer between the web dashboard and the Python backend. In this regard, it makes the communication between the STM32 MCU and the web dashboard effortless through the same Python backend. In light of these built-in features, I decided to build the second iteration of my AI-driven lab assistant with UNO Q.
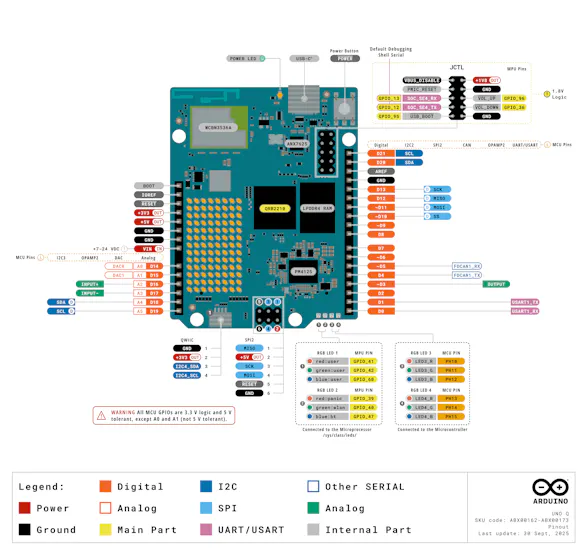
Generally, I thoroughly explain the setup process of my interconnected software and hardware applications according to the employed development boards, modules, environments, third-party APIs, etc. However, since I only utilized the built-in Arduino App Lab attributes to enable anyone with a UNO Q to replicate and examine this project effortlessly, I highly recommend inspecting the official Arduino UNO Q specifications and tutorials.
![]()
To be able to use UNO Q as a single-board computer and connect a USB camera, I needed to use a USB-C hub (dongle) with reliable HDMI, USB-A, and USB-C external power ports. Nonetheless, since UNO Q does not have a dedicated GPU, the processing power was too slow to run the App Lab and develop the lab assistant application solely in the SBC mode, especially the web dashboard. Thus, I utilized the SBC mode and the network mode simultaneously, supported by the App Lab, to access UNO Q remotely on any machine connected to the local network. In this regard, I was able to build the lab assistant App Lab application by accessing the full capacity of the Arduino App Lab.
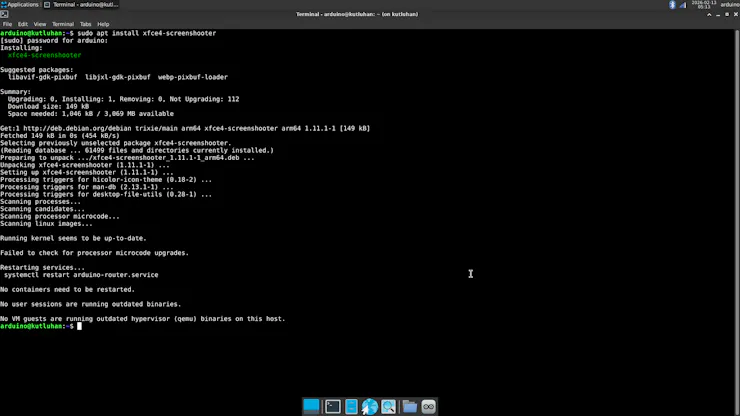
#️⃣ Since I needed to capture screenshots for this tutorial while utilizing the SBC mode, I installed a simple program to enable taking screenshots on Debian-based Linux distributions via the terminal.
sudo apt install xfce4-screenshooter
![]()
I documented the overall development process for the finalized ancillary lab assistant in the following written tutorial. Even though I exhibited all of the lab assistant features in the tutorial, I highly recommend checking the project demonstration videos that thoroughly showcase the device structure and real-time user experience of the analog assistant interface and the web dashboard.
-
2Integration and use cases of Google Gemini
Since I wanted users to generate AI lessons based on questions about specific lab equipment and inspect the LLM-generated lessons via the web dashboard, I decided to fine-tune the large language model responses appropriately to obtain lessons directly in the HTML format. According to my previous experiments with different large language models that I conducted while developing LLM-oriented projects, Google Gemini produced reliable, informative, and concise HTML pages about simple inquiries. Thus, I decided to utilize Google Gemini to enable the ancillary lab assistant to produce AI lessons. Furthermore, Google Gemini has a very low barrier to entry for utilizing its primary chat application and API services.
#️⃣ First, to be able to integrate Google Gemini into my Arduino App Lab application, I opened Google AI Studio and created a new API key specific to this project.
#️⃣ Since the App Lab already provides a Brick to integrate and use cloud LLMs in Python, I only needed to register the produced API key into my custom application. I will explain how to utilize Bricks in detail in the following steps.
![]()
![]()
![]()
#️⃣ Although I enabled users to produce AI lessons freely on different lab equipment based on predefined or specific questions, I decided to make the web dashboard present LLM-generated but curated guides with simple experiment tips about the selected lab sensors. To ensure the consistency between the user-generated AI lessons and the static (default) lab sensor guides with experiment tips, I employed the official Google Gemini chat application to produce dedicated HTML pages for each lab sensor.
❓ Such as: "Create me an HTML page explaining Gravity: Factory Calibrated Electrochemical Alcohol Sensor and the importance, dangers, and usage of alcohol in labs."
#️⃣ Since I am not a talented graphic or logo designer, I also decided to employ Gemini to produce custom logos and CSS animations for the web dashboard. I specifically made Gemini to contain each CSS animation in a separate HTML page, which helped me to manage my primary web dashboard layout and Gemini-generated elements. For each Gemini-generated static lab sensor information page, animation page, and logos (images), I added the gemini moniker to their file names.
- gemini_alcohol_concentration.html
- gemini_fingerprint_waiting.html
- gemini_text_to_speech_stop_logo.png
![]()
![]()
![]()
![]()
![]()
-
3Continue reading the full project tutorial
AI-driven Web-based Lab Assistant | UNO Q & Gemini
Able to show sensor readings, identify users by fingerprint, detect lab equipment, generate lessons via Gemini, and talk via its dashboard.


Discussions
Become a Hackaday.io Member
Create an account to leave a comment. Already have an account? Log In.