Close
0%
0%

SensorStation3

Open-source ESP32 CYD environmental station: T/H/pressure/CO2eq on a touchscreen, MQTT (HA autodiscovery, ThingsBoard, Domoticz), OTA

Similar projects worth following
0 followers
An open-source ESP32 environmental monitoring station built on the CYD (Cheap Yellow Display) board. It shows temperature, humidity, dew point, pressure, and CO2-equivalent on a built-in LVGL touchscreen dashboard, pushes telemetry over MQTT — with Home Assistant autodiscovery, ThingsBoard and Domoticz support — and updates itself over the air. Sensors are auto-detected over I2C: wire one up and it just works. Prebuilt binaries available, no toolchain needed.

Why another sensor station?

I've been into IoT and home/office automation for quite a while, but the hobby went on a fairly deep pause for the last few years — a job change, a temporary move to another country, the usual life reasons. Lately the desire to get back into it came back, even if the free time hasn't necessarily followed. I wanted to properly equip my current place with something similar to what I used to run.

So I dug up two old projects, SensorStation and SensorStation2. Both had their place, but each fell short in its own way — rough edges specific to how they were built that made them not quite worth resurrecting as-is. Rather than patch old code, I decided to build something new: something affordable, and — this time — public and open source from the start.

The result runs on hardware anyone can order for about $10. The ESP32-2432S028, better known in the community as the Cheap Yellow Display (CYD), is an ESP32 with an integrated 2.8" ILI9341 TFT touchscreen and an onboard light sensor. All you add is one I2C sensor.

What it does

The touchscreen dashboard shows:

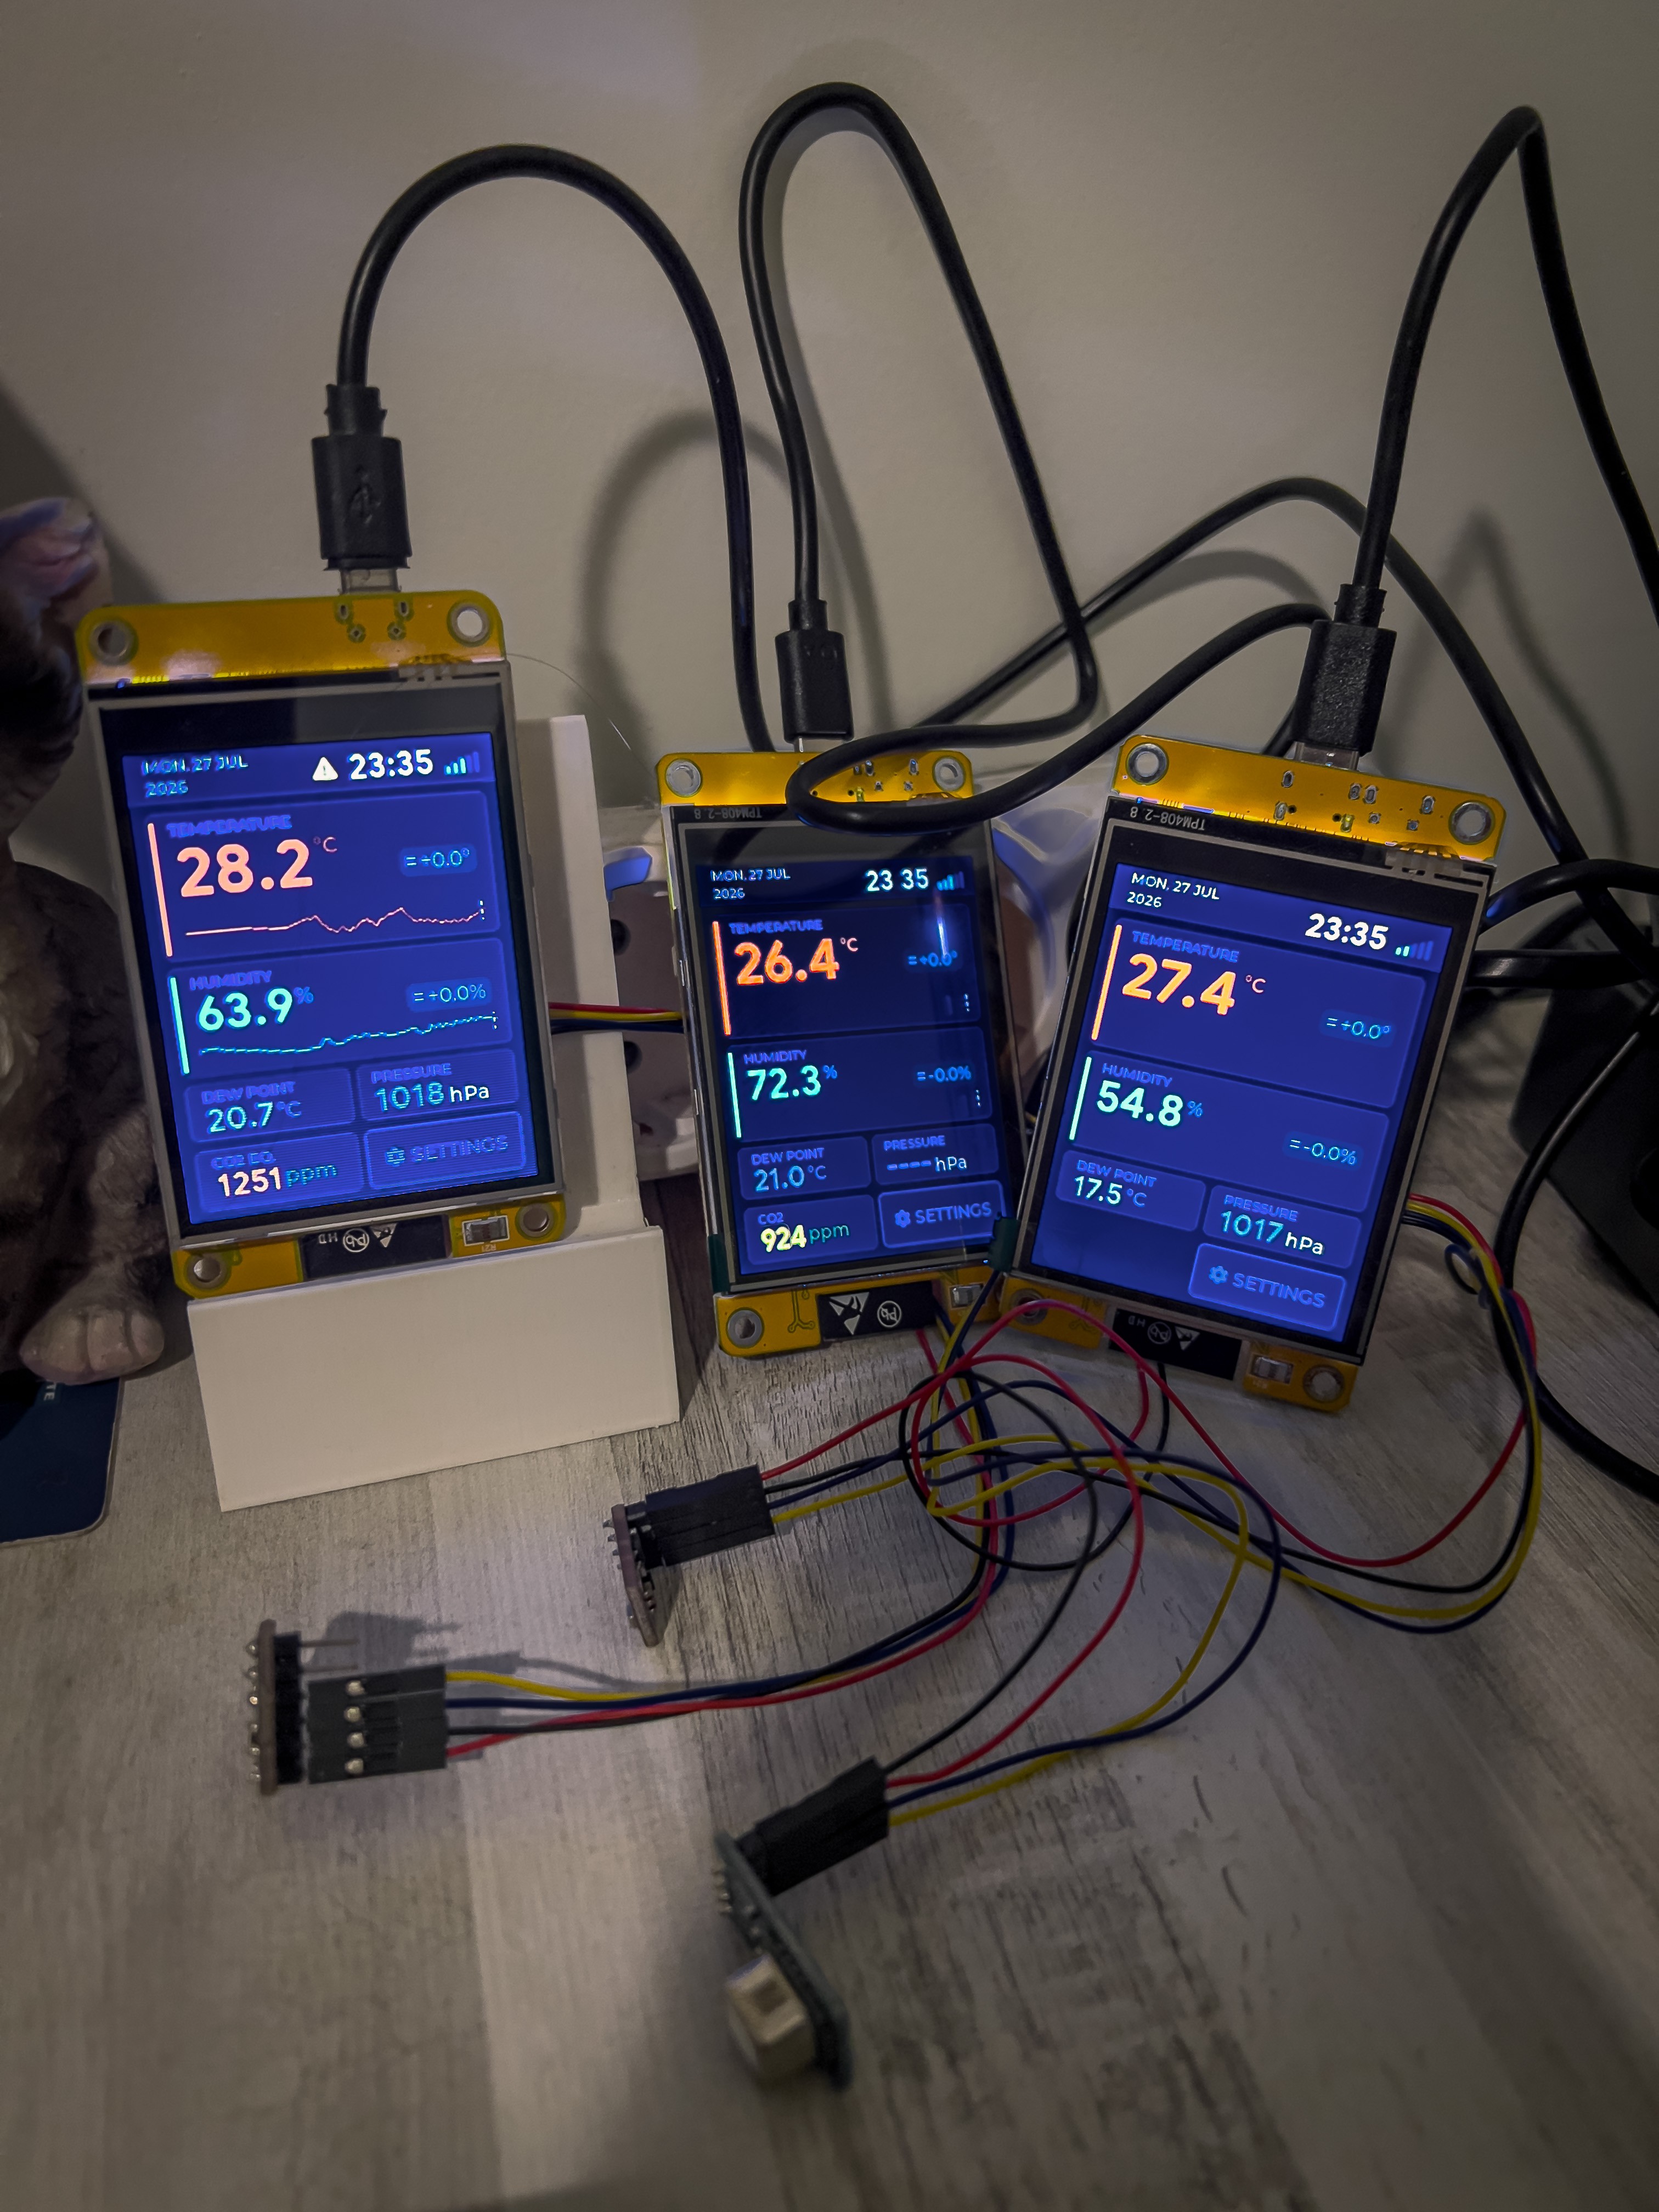
  • Current temperature and humidity, each with a 24-hour graph, trend arrow, and rate of change
  • Calculated dew point
  • Atmospheric pressure
  • CO2-equivalent / IAQ when a BME680 with Bosch BSEC is connected
  • Date, time (NTP-synced, timezone configurable), and Wi-Fi signal strength

Beyond the screen:

  • MQTT telemetry to ThingsBoard and Domoticz, plus Home Assistant MQTT Autodiscovery — flash it, connect it to your broker, and the station announces its own sensors to Home Assistant with zero manual configuration
  • OTA updates — the device checks for new firmware, shows an on-screen notification, and can install automatically
  • Auto-dimming backlight driven by the CYD's onboard light sensor, so it doesn't glow like a beacon at night
  • On-device settings — Wi-Fi, MQTT broker, timezone, temperature offset — all configured from the touchscreen with an on-screen keyboard. No config files, no recompiling.

Hardware

The bill of materials is refreshingly short:

  • ESP32 CYD (ESP32-2432S028) — the whole computer, display, touch, and light sensor in one board
  • One I2C sensor, connected to the board's I2C header:
SensorMeasures
BMP280temperature, pressure
BME280temperature, humidity, pressure
BME680+ IAQ / CO2-equivalent (with Bosch BSEC)

Sensors are detected automatically on the I2C bus — no menuconfig flags, no code changes. Plug in a BME280, get temperature/humidity/pressure; swap in a BME680 and the CO2 panel appears.

One honest caveat: the BME680's CO2 figure is an IAQ-derived CO2-equivalent, not a direct measurement. Direct NDIR CO2 via SCD40/41 is on the roadmap.

Firmware

The firmware is written in C on ESP-IDF v6.0.2 with LVGL (v9.5) for the UI. A few design decisions worth calling out:

You don't need a toolchain to try it. Releases ship a merged binary (bootloader + partition table + app in one file), so flashing is a single esptool command:

esptool.py --chip esp32 --port /dev/ttyUSB0 write_flash 0x0 SensorStation3-esp32.bin

Web-based flashing straight from the browser is on the roadmap, which will drop the barrier even further.

Everything is runtime-configured. All settings live in NVS and are managed from the on-device Settings screen (PIN-protected). You can hand a flashed device to someone who has never seen a compiler and they can get it on their Wi-Fi and connected to their broker entirely from the touchscreen.

BSEC is optional and cleanly separated. Bosch's BSEC library (which turns BME680 gas readings into IAQ and CO2-equivalent) is proprietary and can't be redistributed, so the build doesn't include it. If you want IAQ, you download BSEC from Bosch yourself and drop it into components/bsec/algo/ — the build system picks it up. If you don't, a menuconfig switch disables it and the BME680 still reports temperature,...

Read more »

  • 1 × ESP32-2432S028 (CYD) Cheap Yellow Display (ESP32 + ILI9341 2,8" touchscreen)
  • 1 × BME280 BOSCH temperature + humidity + pressure sensor
  • 1 × BME680 BOSCH temperature + humidity + pressure + VOC sensor

  • The BME680 that ran 3 °C hot, and the twin experiment that proved it

    Viacheslav14 hours ago 0 comments

    The project didn't start with air quality at all. The first working version used a BME280 — just temperature, humidity, dew point, pushed to a server. That was enough to make me want something more universal, something that would also make sense in a living room or an office. Which meant air quality, and I remembered a BME680 sitting in an old box labeled "climate sensors."

    I wired it up and extended my BMP/BME driver component to read it, including the sensor's gas resistance (VOC). The station samples everything every 500 ms, and in the first pass I read gas resistance at that same rate. The dashboard immediately started showing about 3 °C more than the same room used to read with the BME280.

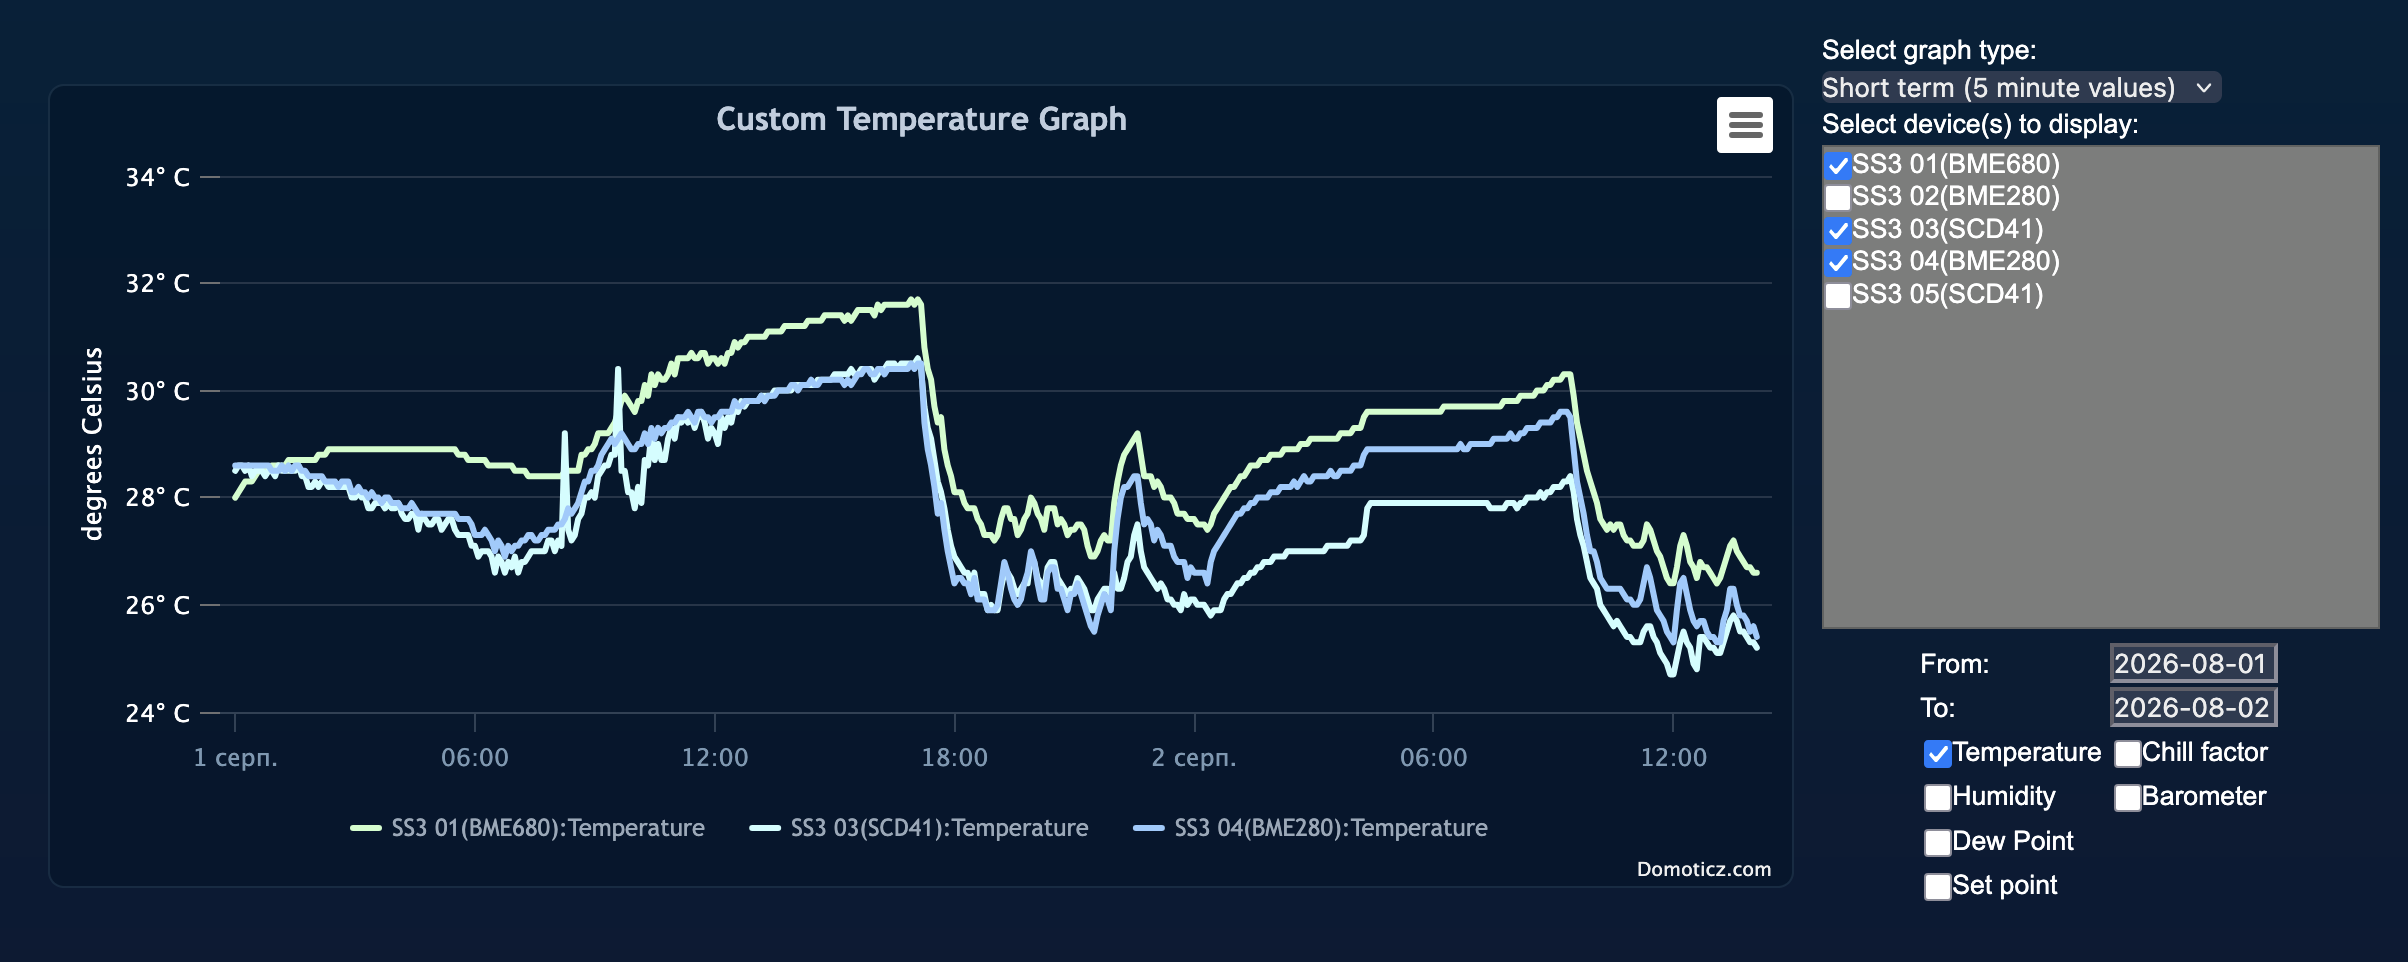
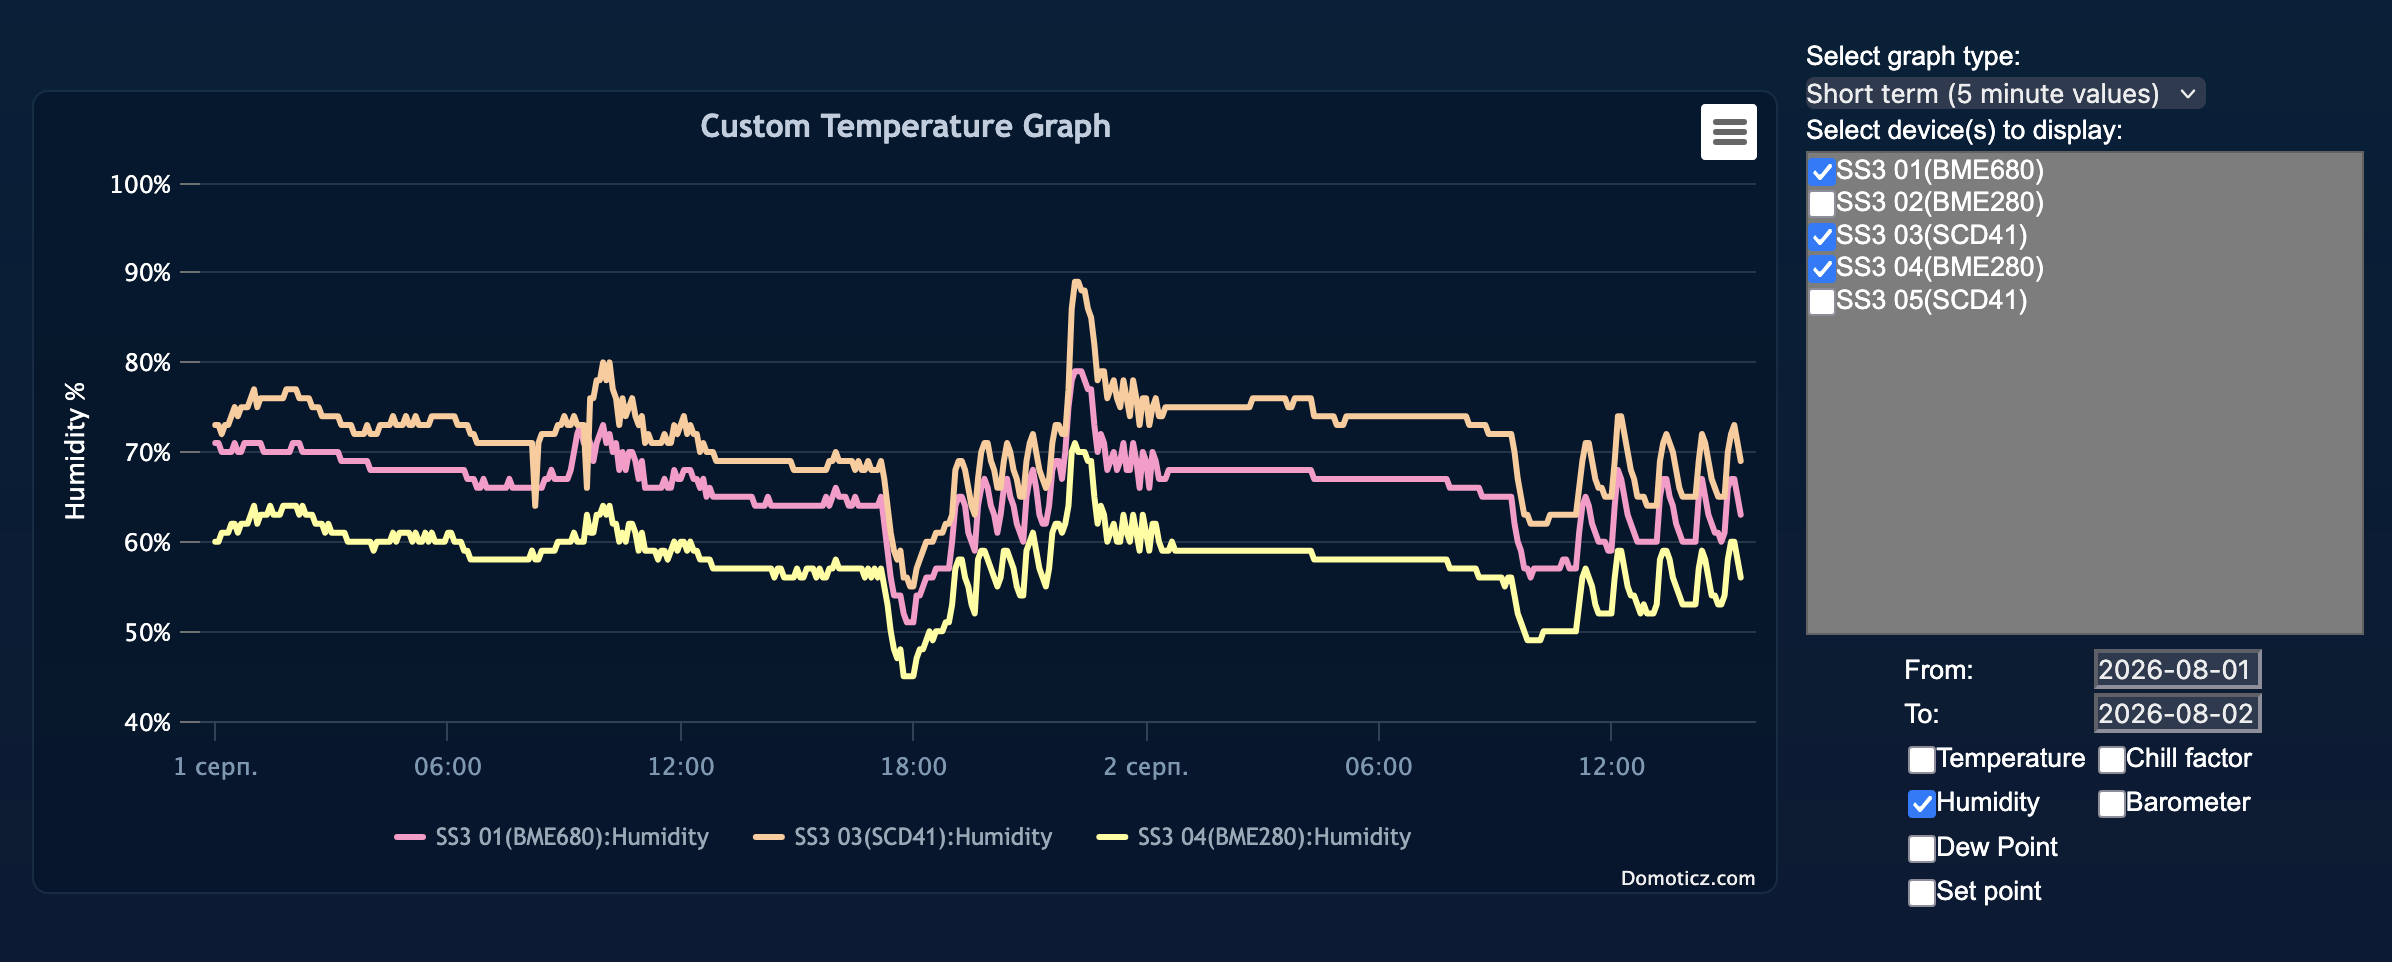
    Trust, but verify with a twin. A constant +3 °C smelled like self-heating rather than a bad sensor, but I didn't want to guess. So I built an identical second station — same firmware, BME280 instead — and ran both side by side on the desk. The twin confirmed it: the BME680 unit read almost exactly 3 °C higher, consistently. Not drift, not calibration. Heat.

    Why: the BME680's gas sensor works by firing an internal hotplate to a few hundred °C on every gas reading, millimeters from the temperature element on the same die. Reading gas resistance every 500 ms meant firing that heater constantly.

    Fix, round one. I cut the VOC sampling rate by 10x, keeping temperature/humidity/pressure at 500 ms. That helped a lot — but the BME680 was still running 0.5–0.7 °C above the reference. Here's the detail that explains that residual: the station writes every reading into a 60-entry ring buffer and displays the average of the last 30 seconds. That averaging smooths the heat spike from every tenth gas reading into what looks like a steady bias instead of a visible spike — great for a readable display, bad for spotting the real cause.

    At this point I added a ±5 °C temperature offset setting for the BME680, adjustable right on the touchscreen. Useful to have regardless — but papering over self-heating with an offset felt like the wrong fix, and the raw VOC numbers still didn't look particularly realistic.

    Fix, round two: BSEC. I'd used a BME680 with Bosch's BSEC library years ago on an Orange Pi Zero — it worked, but the integration experience left mixed impressions. Still, BSEC is where Bosch put the actual sensor know-how: heater scheduling, compensation, IAQ processing. I downloaded BSEC 2.6.1.0 and wired it into the project. (It's proprietary, so it's not bundled in the repo — the README explains how to drop it in, and the firmware still builds fine without it.) After the switch, the twin stations finally agreed with each other, and I stopped needing to compare two displays every time I walked past.

    What's still bugging me: the CO2-equivalent numbers from BSEC still don't fully convince me. I've ordered SCD41 sensors and dug an old MH-Z19 out of a parts bin to compare against real NDIR CO2 — that comparison will be the next log.

View project log

Enjoy this project?

Share

Discussions

Similar Projects

Does this project spark your interest?

Become a member to follow this project and never miss any updates