Close
0%
0%

Vacuum Tube Computer

This is an 8 bit vacuum tube computer I built using recycled 1950s Vacuum Tubes I found in Eastern Europe a few years ago.

Similar projects worth following
The finest 6N3P tubes were selected at manufacture for military use, with up to 5000 hours life expectancy and printed with an additional code (Cyrillic 6Н3П-ЕВ). The rest were for domestic use, and with the ability to operate at over 200Mhz, the 6N3P was used in many East European VHF radios, televisions and in several beautiful radiograms in the 1950s and 1960s. The basic, domestic quality thermionic tubes have codes for a projected life span of either 1500 (6Н3П-Е) or only 500 hours (6Н3П). Many were used and then stored for over 50 years, so life expectancy may be questionable, both for the tubes and for me!

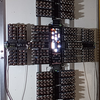
The Tube Computer integrates 920 thermionic triodes in 460 tubes with 5 Backplane boards into a functional general purpose computer.

It is still a work in progress, and it does need a lot of tweeking. But that's half the fun!!

I have written about why I built it and my many failures along the way and other stuff at: https://www.thetubecomputer.com/

All the tecky stuff is on the second page along with the new instruction set.

I have wondered if this is actually "retro" as it is not a copy of something old but a new vacuum tube computer. Just built with old recycled vacuum tubes but using the same hardware methodology as back in the 1950s with all the passive components under the tubes. Also the software is more 70s than 50s, so that t can be used as a general purpose computer. I hope it is retro, at least in a general sense!

  • 460 × 6N3P Dual Triode Vacuum Tubes
  • 1840 × 1N33A point contact germanium diodes
  • 2300 × Resistors 1M,110k,51k,1k 0.1 w
  • 460 × Trimmer potentiometers 220k 0.5w
  • 460 × Capacitors ceramic 100nF 200v

View all 7 components

  • 1
    Build Concept

    At the bottom of the website's first page I attempt to describe the concepts behind how I designed and built The Tube Computer, but I have not written a "how I did it" list. I am going to rebuild the website this winter with far more technical stuff on the second page which hopefully will cover it.

    And just a thought. If DigiKey could do a component kit, colleges could print the tube boards and combine them as a project to teach manual soldering to students. The colleges could build a DigiKey Vacuum Tube Computer in a day!

View all instructions

Enjoy this project?

Share

Discussions

Peabody1929 wrote 10/03/2026 at 17:25 • point

Check out the IBM 704 or 709 vacuum tube computers at the Computer History Museum in Mountain View, CA.  They have a clam shell design.  I have been inside them.  On the outside there is a "wall" of vacuum tube modules behind clear, plastic sheets.  On the inside there is yellow wire connecting the modules.  I think the tubes are on the outside so one can see any that have failed.

  Are you sure? yes | no

Mike wrote 09/25/2026 at 13:46 • point

Again thanks Arnauld c. Sorry I had left the old Instruction set from my previous vacuum tube computer! I have updated it now!

  Are you sure? yes | no

Mike wrote 09/25/2026 at 13:05 • point

Thanks Arnauld c. You are quite right it is an ultra secret instruction! I will amend the website text

  Are you sure? yes | no

arnauld.c wrote 09/22/2026 at 16:16 • point

Nice project! I'm a bit curious: on your website, you say there are 16 instructions, but only enumerate 15 of them (LOADA, LOADB, STOREA, STOREB, JUMPØ, GOTO, INPUT, OUTPUT, STATUS, ADD, XNOR, INC, NOT, CARRY and ADDC). So is the 16th one just some kind of NOP, or an ultra-secret instruction to take over the world? :-)

  Are you sure? yes | no

Paul McClay wrote 09/09/2026 at 17:42 • point

Your writeup... I don't know what to say. Except to let you know that someone read it.

  Are you sure? yes | no

Mike wrote 09/14/2026 at 06:39 • point

Thank you, I did wonder if I was writing the website to myself!

And thank you for looking at it.

  Are you sure? yes | no

Similar Projects

Does this project spark your interest?

Become a member to follow this project and never miss any updates