 Xavi Paz
The enclosure has taken almost as much iteration as the electronics.
I wanted RetroBox to look like a piece of hardware that could plausibly have sat next to a computer in the 1980s or 1990s, rather than simply putting the electronics inside a generic project box.
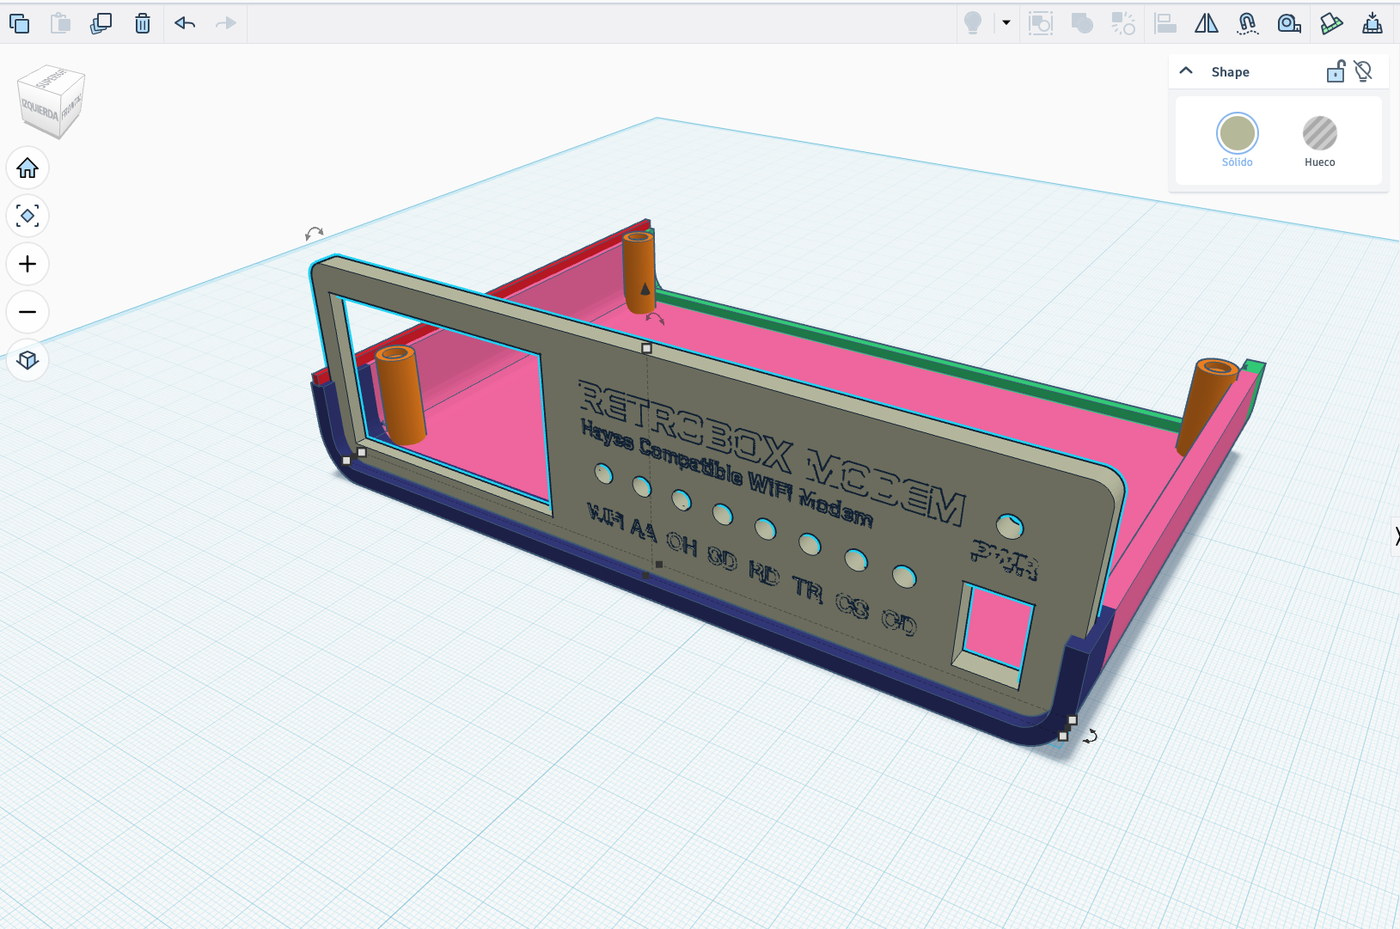
The case is 3D printed and has gone through many revisions while I adjusted the OLED position, LED alignment, front-panel lettering, PCB mounts, switch fit, internal clearances and ventilation.
Small changes turned out to matter a lot. LED holes were adjusted repeatedly to get the right fit and depth, the PCB mounting posts were refined so the LEDs sit correctly against the front panel, and the OLED opening and position were changed several times before everything lined up properly.
The front panel is printed in two colors, with a black face and cream lettering, while the enclosure uses a warm beige/cream inspired by vintage computer hardware.
Most of the recent prototypes have been printed on a Bambu Lab A1 using a 0.4 mm nozzle and a 0.16 mm layer height. The lettering is printed as an inlay rather than painted afterward.
One of the advantages of 3D printing this enclosure is that the mechanical design can evolve together with the electronics. When a connector, PCB position or internal component changes, I can modify the case and test another physical revision immediately.
At this point the enclosure is very close to the shape I originally had in mind, although I am still refining small tolerances and internal mounting details.
Discussions
Become a Hackaday.io Member
Create an account to leave a comment. Already have an account? Log In.