 0xdxn
-
1Draw it before you cut it
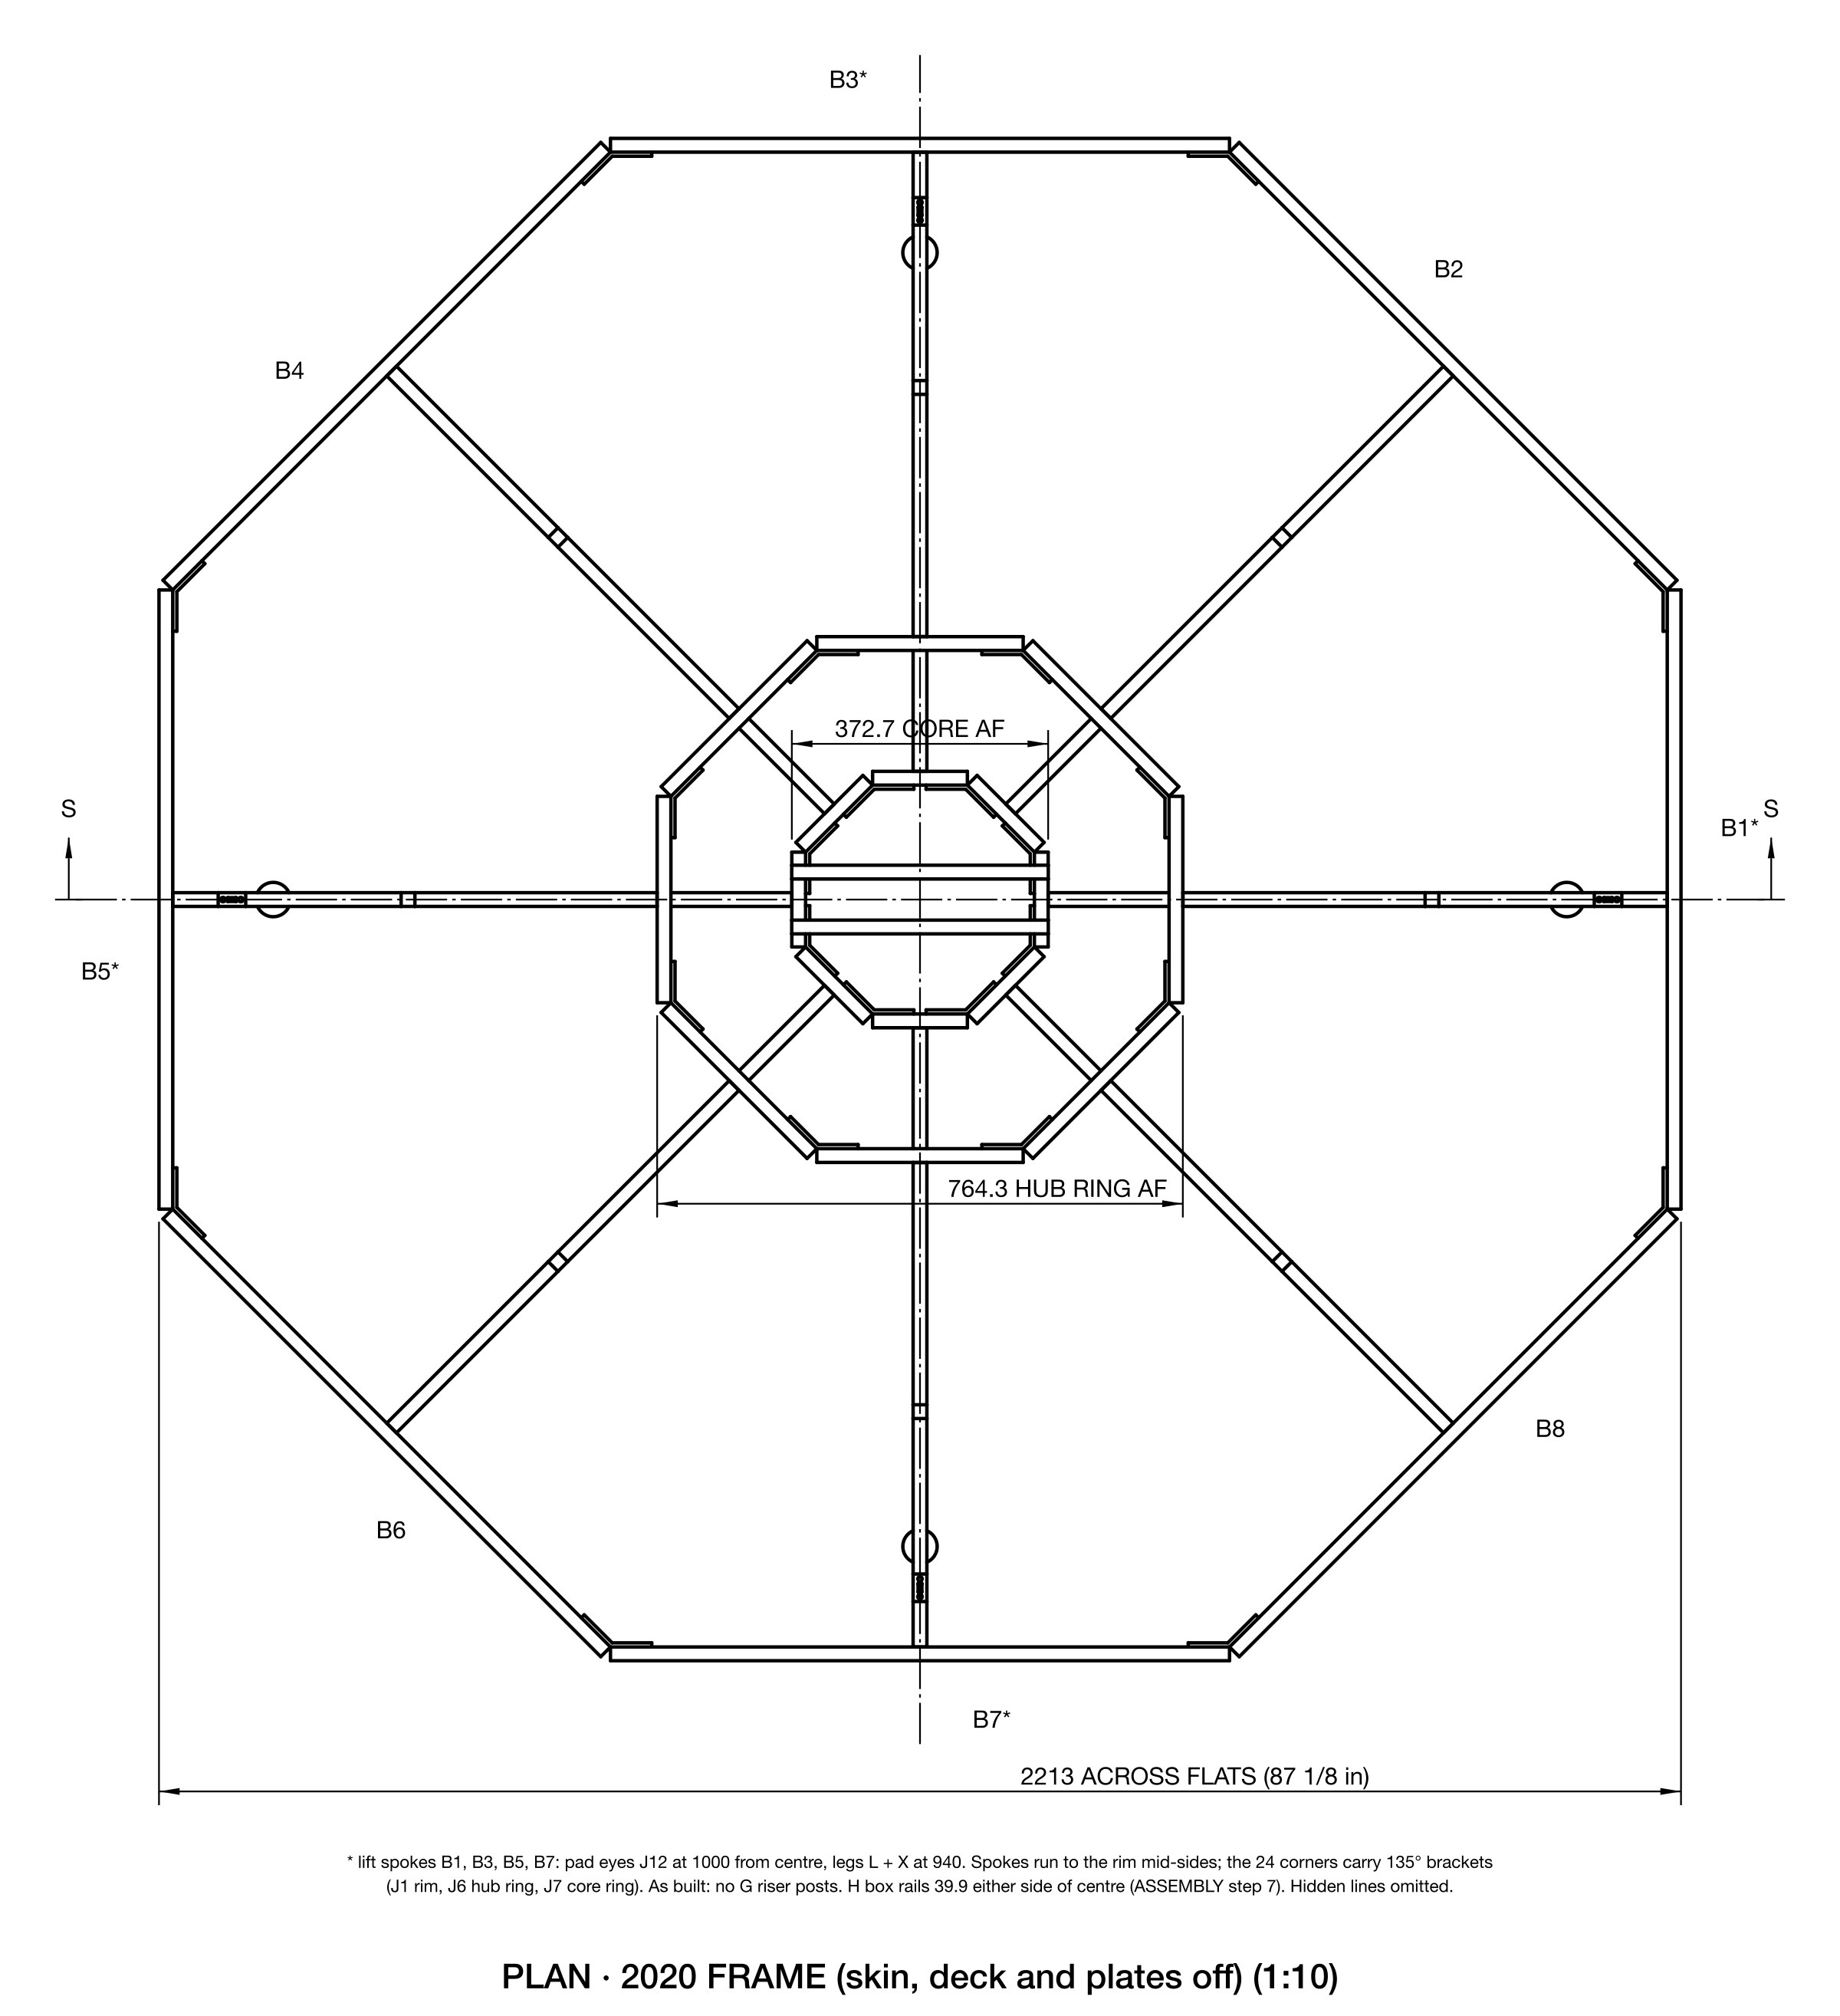
Draw the whole frame first: an octagon of 2020 extrusion, eight spokes to a hub ring on short posts, a small core ring, the dome on a deck plate. Keep every joint square or at 135 degrees and let the skin make the slope. It's stiffer, there's nothing to set by eye, and it's cheaper.
![]()
-
2Cut by letter, not by bar
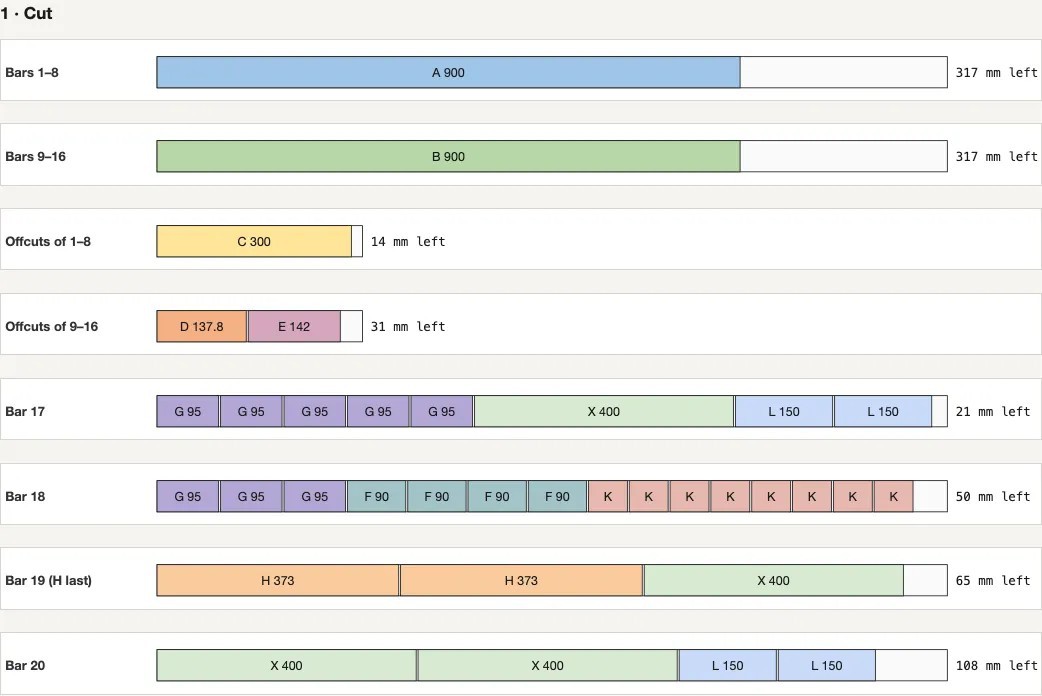
Pack every piece into twenty 1,220 mm bars on a cut sheet (allow 3 mm kerf). At the saw, set the stop block once per letter and cut every piece of that letter before moving it. Tape-label each piece as it comes off. Matching lengths within a letter matter more than the exact number.
![]()
-
3Tap, drill, deburr
Tap the ends that take a screw M6, 25 mm deep (88 ends here). Drill 6.5 mm clearance holes on the center line with a drill guide; mark bracket holes through the brackets themselves. Deburr every cut straight away; the chips get everywhere.
-
4Plan the lights around the reel you have
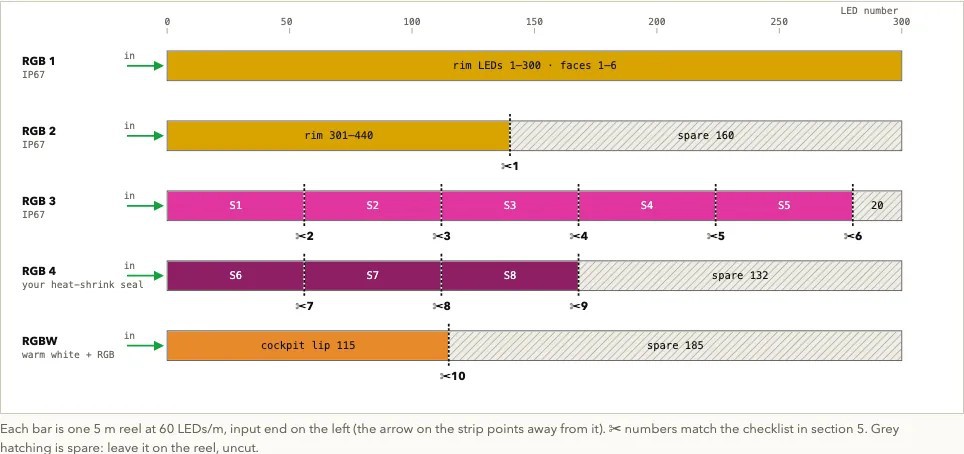
Bench-test every strip you already own and plan the cuts around what's on the reel. Change the firmware to match the ship, not the drawing (our spokes went from 56 to 60 LEDs). Group the runs into a few data lines: rim; dome lip; spokes snaking out and back, then the belly light; portholes, then the pilot's eyes.
![]()
-
5Wire the controller one wire at a time
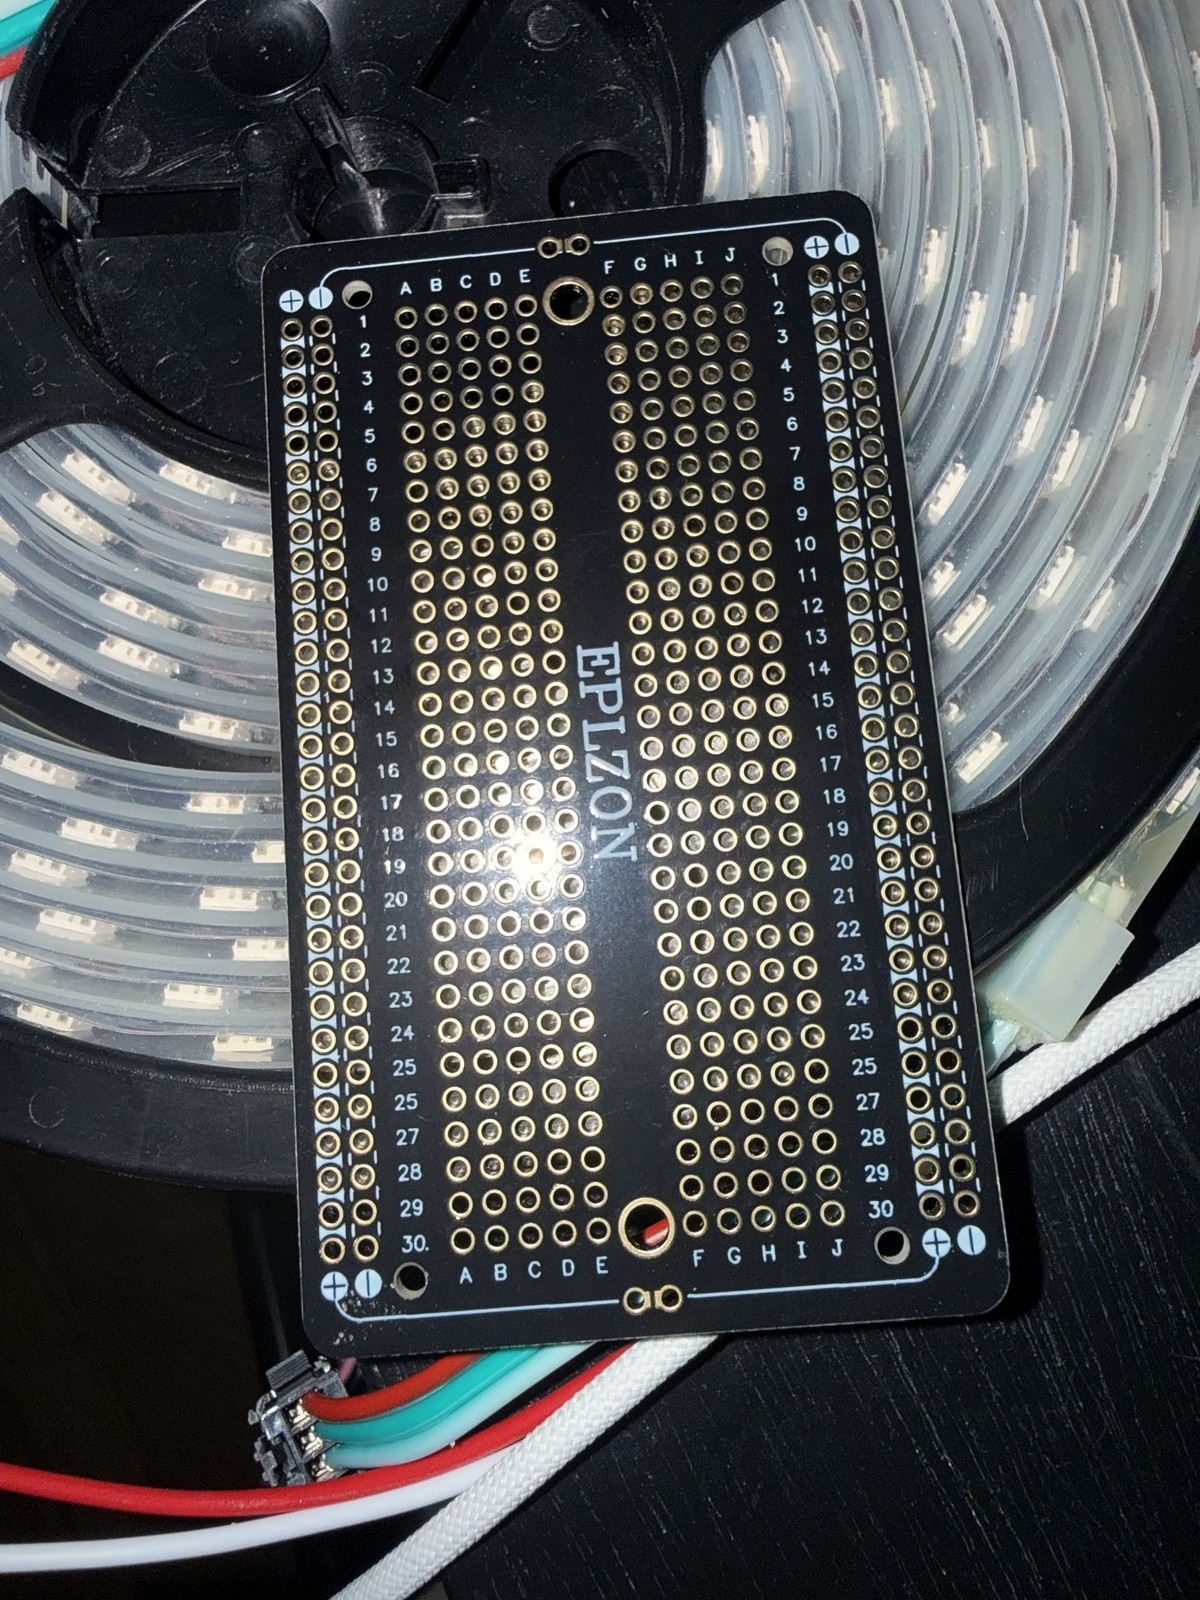
Nano ESP32 on headers, a 74AHCT125 in a socket to lift the four data lines to 5 V, a 330 ohm series resistor on each data line, 0.1 uF at the chip, 100 uF at the input. Each strip cable carries DATA plus a GND reference. Solder every wire; skip screw terminals. Write the steps down, one wire per step, and tick them off.
![]()
-
6Keep pixel power off the controller
Feed each run from the 5 V supply through its own inline fuse, with 100 uF at each strip start. The controller only sends data.
-
7Bench test, line by line
Run test firmware that lights each data line in its own color, and move a short test strip from cable to cable. If a line stays dark, go down the chain with a meter. Ours was the first resistor.
-
8Cap the current in software
Sum every frame before it goes out (about 20 mA per channel at full) and scale it down if it would go over your limit. We cap at 30 A on a 60 A supply.
-
9Count the flashes
If it faces a street, keep every area under 3 flashes a second. Render the show offline, measure every region in every one-second window across many random seeds, and fix what it finds. Rotating patterns over evenly spaced lamps: use a lobe whose harmonics cancel over the ring, like ((1 + cos x) / 2)^4 over eight windows.
-
10Skin it, fly it
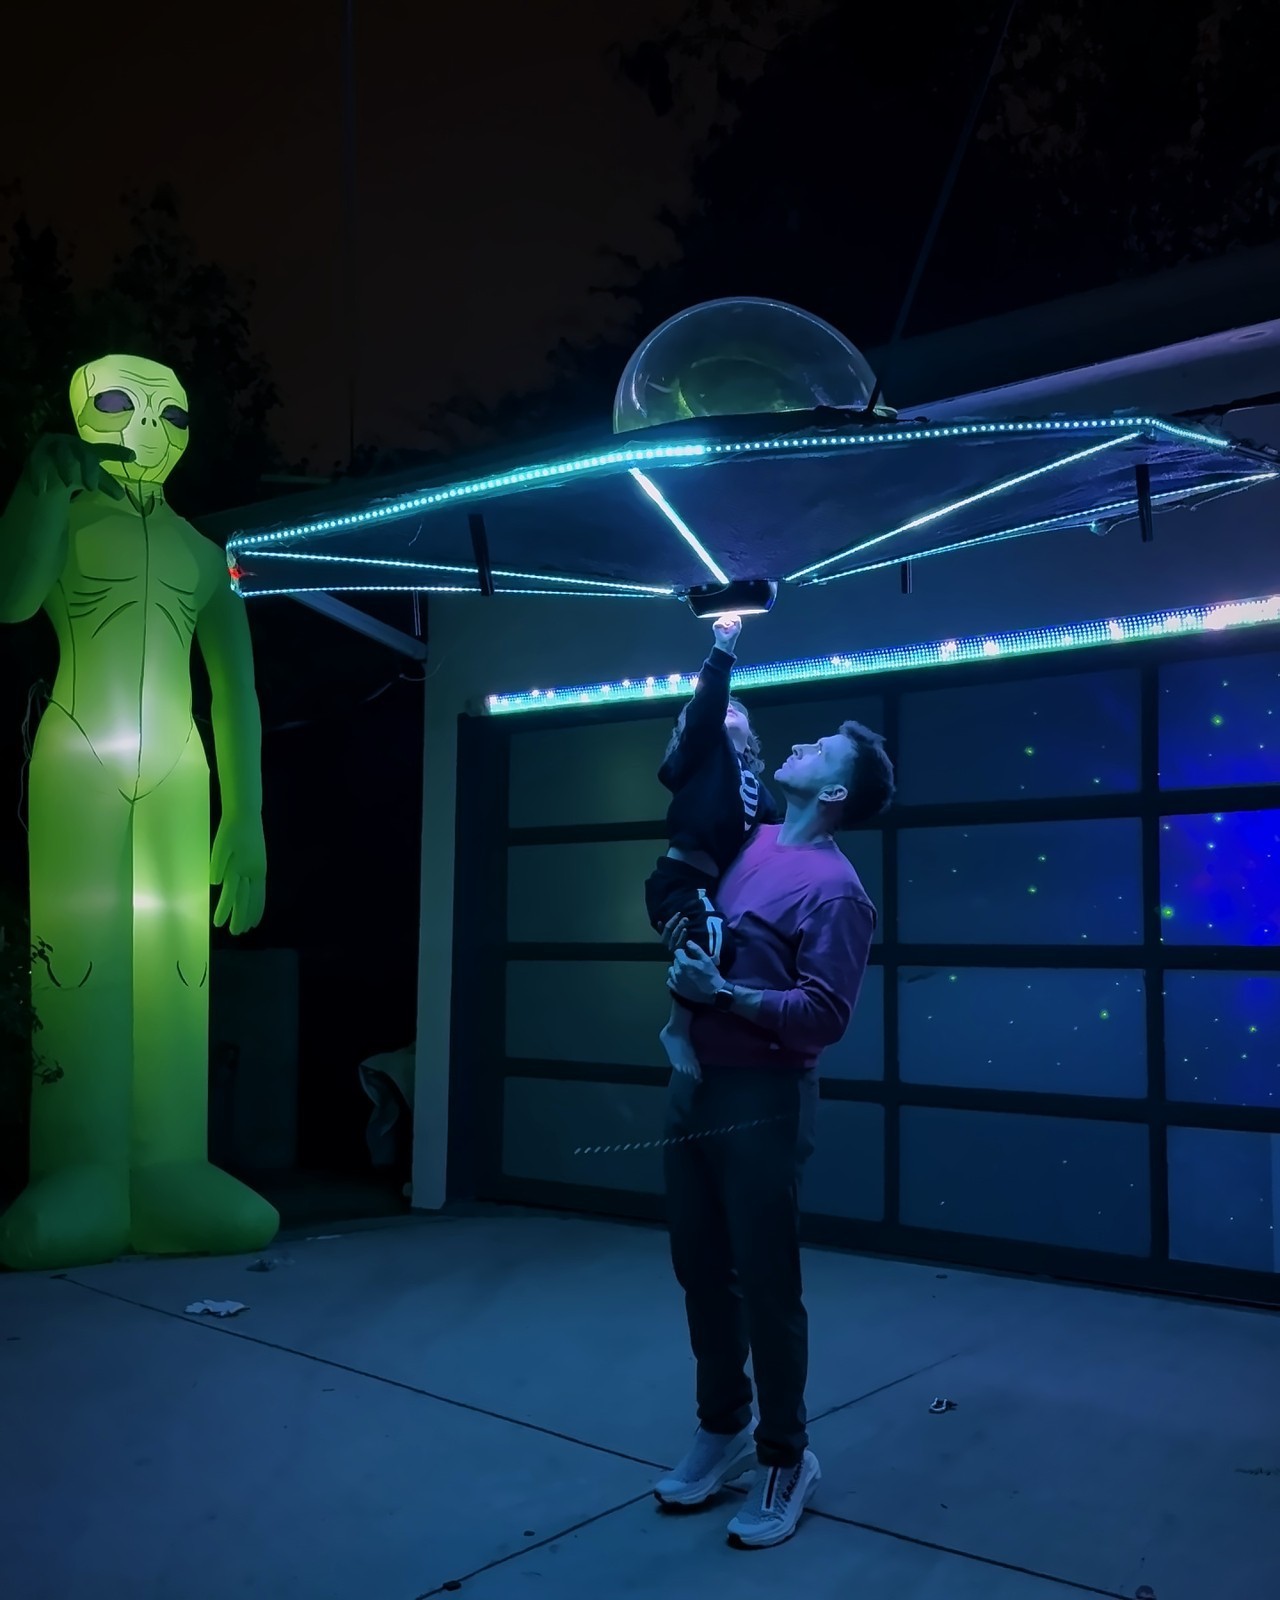
Pull the skin (Aluminet here) tight from the rim to the hub, top and belly. Inside metal, Wi-Fi drops out for seconds at a time, so make the updater wait for it (ours waits 10 s for the next bytes), turn Wi-Fi power saving off, and have a new build roll itself back if it can't get back online. Report a build id at boot. Then hang it up, and let a tiny flight engineer do the final flight check.
![]()
HULL/20: a flying saucer for a driveway spaceport
An 87-inch flying saucer of 2020 extrusion and 1,406 LEDs, the centerpiece of an interactive driveway spaceport with its own websites.
Discussions
Become a Hackaday.io Member
Create an account to leave a comment. Already have an account? Log In.