Close
0%
0%

Orthrus

SD card secure RAID USB storage

Similar projects worth following
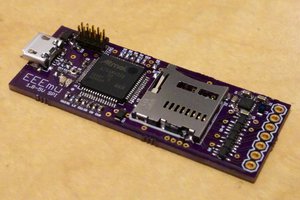
This project is a hardware mechanism to provide secure "two man control" over a data store. It is a USB microSD card reader, but it requires two cards. The data is striped in the style of RAID 0, but the data is also encrypted with a key that is stored in a key storage block on each card. In essence, each card is useless without the other. With possession of both cards, the data is available without restriction, but with only one, the remaining data is completely opaque.

This allows you to securely transport a data set by writing it onto a pair of cards and separately transporting them to a destination for recombination.

The intent is that only the pairing of two cards becomes in any way special. A card pair could be inserted in any Orthrus device and the data would be made available. But with only one card, all you get is half of the data encrypted with a key which you only half-possess.

I'd like to express my gratitude to Dean Camera of the LUFA project.

Orthrus dramatically simplifies the problems of providing a securely encrypted data store. There are no passwords or key material to manage. The act of pairing two cards together automatically creates all of the key material necessary to secure the store without any human action (other than initiating the paring process by pressing and holding a single button). The security offered by Orthrus is simple to explain and trivial to use. It's simply that if you have both of the cards, you have the data. If you have only one of them, then it is cryptographically opaque.

The first block of each card is reserved as a key storage block. The size of the volume reported to the USB host is determined by taking the smaller of the two card sizes, subtracting one and doubling that. The first block on each card contains a structure with the following:

  • A magic constant compiled into the firmware to identify the card as belonging to an Orthrus volume.
  • A flag bit identifying the card as either the "A" or "B" card (the cards can be inserted in either order and it should still work).
  • A 64 byte volume ID.
  • A 32 byte card key value.
  • A 16 byte nonce value for the block tweaking (of which 12 bytes are used).

When the device is initialized (either when its inserted into a host with two cards already installed or when the second card is inserted), each of the key blocks is checked. If the magic value is wrong, or if the two volume ID values don't match or if there isn't one "A" and one "B" card, then the error light is turned on and the volume isn't mounted. This prevents cards inserted mistakenly from being corrupted. To bootstrap, there's a button on the board. If the button is pushed while the error light is on, then the two key blocks are initialized and the device made ready.

If the pre-initialization checks succeed, then the two card key values are shuffled together  (in "A" "B" order) to make a 64 byte buffer. The two halves of this shuffled data is fed through AES CMAC with an all-zero key, with the two results concatenated together. The result of that becomes the new AES key and the CMAC is run over the two halves of the volume ID, again, with the two results concatenated together. The result of that becomes the AES key for the volume. At that point, the drive is ready.

To read and write individual blocks, AES XEX mode is used. The incoming block number in the request is translated by using the LSB to select either the "A" or "B" card. The rest of the block number is right-shifted once and 1 is added to make the physical block number for the card. The XEX mode uses a 16 byte nonce. The nonce consists of the first 12 bytes of the nonce value stored on the opposite card from the one being read or written, concatenated with the (logical) block number. The nonce is encrypted with the volume key to form the first "tweak" block. For each 16 byte AES block of the disk sector, the plaintext is XORed with the tweak block, then encrypted with AES ECB mode, then XORed again with the tweak block to form the ciphertext. Decryption is the same, except that an AES ECB decryption operation is performed in the middle (the tweak is still formed with an ECB encryption). After each block is processed, the tweak block is transformed into a new tweak block by multiplying it by 2 within a Galois Field of 2^128 (I confess I don't really understand GF math properly - I just read a bunch of examples and pseudocode on the net) and then is ready for the next 16 byte block.

In an earlier iteration of Orthrus, AES counter mode was used, which allowed us to precompute the cipher stream bytes for XORing with the card data, but counter mode has some cryptographic weaknesses that make up for the speed advantage that background precomputation affords. XEX mode can't be precomputed, and unfortunately gives us a 33% speed penalty, but is the mode used almost universally for whole-disk encryption (most implementations actually use XTS, but if the sector size is divisible by the encryption...

Read more »

Orthrus_3_1.pdf

Adobe Portable Document Format - 106.51 kB - 07/19/2020 at 16:24

Preview

Orthrus_3_1.sch

sch - 401.33 kB - 07/19/2020 at 16:25

Download

Orthrus_3_1.brd

brd - 162.29 kB - 07/19/2020 at 16:25

Download

Orthrus-firmware.zip

Released and signed firmware

Zip Archive - 15.92 kB - 05/27/2018 at 20:38

Download

codesign.x509

Code signing certificate

x509 - 644.00 bytes - 10/09/2017 at 18:39

Download

View all 6 files

  • 1 × ATSAMS70N19 LQFP-100 ARM microcontroller Microprocessors, Microcontrollers, DSPs / ARM, RISC-Based Microcontrollers
  • 2 × QS3VH257PAG Logic ICs / Buffers, Drivers, Transceivers
  • 1 × 5.62kΩ 1% 0805 resistor
  • 5 × 100kΩ 0805 resistor
  • 1 × PAM2305 3.3v buck regulator Power Management ICs / Switching Regulators and Controllers

View all 28 components

  • USB C

    Nick Sayer07/19/2020 at 16:24 0 comments

    I've updated the design to swap out the micro-B connector for a USB C receptacle. The only real change this requires is adding the CCx pull-down resistors. I've also added a ferrite bead on the power input to prevent noise getting sent back down the USB cable.

  • Another suggestion for the case

    Nick Sayer06/07/2018 at 15:28 0 comments

    I made a video a while ago testing the idea of whether with only two seals applied to the case you could still slide the middle layers out to get to the board. It turns out, you couldn't because the button gets in the way.

    In that video, I didn't have the captive nuts installed, and it turns out that those too would prevent a lot of movement without lifting the top layers up (which the seals would prevent).

    But to make it even better, I believe I am now going to recommend gluing the top two layers of acrylic together for best security. The bottom two layers aren't necessary to glue because the knurled portion of the captive nuts extends through both of them. But turning the top two layers into a solid unit means that the only hope to get to the erase pin would be getting enough of a gap in the middle to fish a wire in. As long as the seals are applied tightly, that ought to be really difficult.

  • Disabling the ERASE pin

    Nick Sayer05/27/2018 at 20:40 0 comments

    To raise the security bar just one more notch, I've checked in code (and released new firmware) that sets the bit in CCFG_SYSIO to disable the ERASE pin early in main(). What this means is that now you must short the ERASE pin at power-up for it to be effective. Once the firmware starts to run, the ERASE pin won't work.

    This isn't a huge improvement. It just makes the Vulcan neck pinch just a tiny bit trickier to apply.

  • Warrant Canary

    Nick Sayer05/22/2018 at 02:41 0 comments

    As of December 2019, no government agency of any kind has issued demands or requests of me concerning Orthrus, with the exception of the BIS in relation to my application for an export license. And since the final determination of that application, there has been no further interaction with the BIS.

    Watch this project log for that date to be regularly incremented. If I haven't incremented it in a while, then feel free to request/remind me to do so. The only reason I would not increment it by request would be if the statement were no longer true.

  • Also Sprach The BIS

    Nick Sayer04/19/2018 at 05:46 0 comments

    After just short of a year, I heard back from my request for classification of Orthrus from the Department of Commerce.

    Their response reads, for the most part...

    THIS ENCRYPTION ITEM IS AUTHORIZED FOR LICENSE EXCEPTION ENC UNDER SECTION 740.17(A) OF THE EAR  AND IS DESCRIBED IN SECTION 740.17(B)(1).

    In addition to that, they call it a 5A002.A item, which is more or less what I figured.

    This page seems to say that as long as I have made a classification request, and that request has been answered that I am free to export (other than to places like North Korea or Iran) without any reporting requirements.

    Huzzah!

  • On the export problem

    Nick Sayer02/01/2018 at 17:17 0 comments

    I requested an opinion from the EFF about the situation we're in and they were very kind to give me some of their time to provide some analysis.

    And that situation is, legally speaking, quite murky. No court has weighed in on the regulations in question at all, apparently, so the meaning of the regulations has been completely untested.

    After careful consideration, the best conclusion we have is that all of the project documentation, the schematics and even the EAGLE files posted here as well as the source code on GitHub are unencumbered by export law. So I'm not in trouble for posting them. That's good. That means that anyone who wishes to can reproduce the product anywhere in the world. Of course, the project is open hardware and open source firmware, so anyone should feel welcome to do exactly that.

    One thing I was considering was uploading the board file as a shared project at OSHPark. After consideration, I believe I cannot do that, nor can I sell bare boards in my Tindie store (other than to Canada). Exporting a physical item - even if it's non-functional by itself - skirts too close to the line. This also means that anyone outside of the US should not use a US fab to have their boards made, as the potential exists for your fab to wind up in trouble for it.

    If anyone outside of the US wishes to make Orthrus available for sale, I'd be happy to link to you. But until I hear back from the Commerce Department, my ability to export Orthrus remains limited to Canada.

    Thanks again to the EFF for their time and assistance.

  • A potentially simpler way

    Nick Sayer10/30/2017 at 22:54 0 comments

    It just occurred to me today another way Orthrus could be implemented.

    Instead of using a RAID-0 style, where each block is written to only one card, you could do this:

    For each incoming block, generate a block of random data (the SAMS70 has a true random number generator to facilitate that). Write the block of random data to one card (chosen at random) and then XOR that block with the incoming data block and write that to the other card.

    To read, read the two blocks from each card and XOR them together.

    There are a few big drawbacks with this approach:

    1. Instead of doing a single card I/O operation per block, you now must perform one to each card. Since we have only one hardware channel, we can't interleave them, so this likely means cutting the performance in half.
    2. It depends for security on the quality of the TRNG in the SAMS70 chip. The only word we have on that quality at the moment is Atmel/Microchip's marketing claims.
    3. Instead of a volume twice the size of the smaller card, the volume is the same size as the smaller card. This isn't that big a deal, though, because you can get truly massive µSD cards nowadays.
    4. There is no easy way to "nuke" a volume the way that overwriting the key block on an Orthrus card does today. You would instead have to overwrite one of the cards entirely.

    Given that set of drawbacks, I think I'll stick with AES-XEX and the current key derivation scheme.

  • Discussion of the new 256 bit key derivation sequence

    Nick Sayer10/30/2017 at 16:35 0 comments

    In going from AES-128 to AES-256 for the WDE in Orthrus, the key derivation sequence had to be revamped to result in twice as many bits of key. This was particularly complicated by the fact that the key size and cipher block size were no longer the same.

    To recall, the new key derivation sequence is:

    Each card has 256 bits of unique (private), random key seed material and 512 bits of common (public) key material. The two blocks of private material are shuffled together and an AES CMAC with a 256 bit zero key is performed on each half of the shuffled blocks. The two results are concatenated to form the intermediate key. The two halves of the public block are run through AES CMAC with the intermediate key to form the two halves of the final volume key.

    In examining a cryptographic method, what you're looking for is any weak spots - any places where an input into a method unnaturally constrains a key to a smaller number of bits. If there are any such places, then that's where an adversary can gain foothold.

    We start with the assumption that AES-CMAC is strong. We can prove that our implementation of AES-CMAC is interoperable, because there are test vectors available (and our code does produce matching results). I personally don't have the crypto chops to go into validating primitives like CMAC (or AES itself) and can only trust the lack of countervailing opinions in the literature.

    We use AES-CMAC twice with 256 bits of random input to generate the intermediate key. Half of those bits come from each card, so the holder of one card must still search a 256 bit key space to obtain a 256 bit intermediate key. Even then, that intermediate key must also be run through another pair of CMAC operations before it can be tried on the encrypted material. That second set of CMAC operations require a 256 bit unknown key in addition to the 512 bits of public key information (256 bits each round).

    So we can see that at every point, AES-CMAC is used with at least 256 bits of either random data or output from a previous CMAC for both the key and input (the one exception being the all-zero key for the first round). At no point is the CMAC performed on fewer than 256 bits - meaning there is no choke point where the strength is constrained.

    The purpose for the second round is simply to further the diffusion of the key material for the first round, which makes it more difficult to be able to predict that a search for the missing key material in the first round has succeeded.

  • Case design

    Nick Sayer10/23/2017 at 00:58 0 comments

    I've gotten a finalized case design teed up. Recall that the major reason for putting Orthrus in a case (beyond aesthetics and protection) is to isolate the ERASE pin of the controller. If you load the firmware in and set the security bit in the GPNVM register, there should be no way to compromise the firmware with access only to the available external interfaces (the button, the USB port and the two SD card slots). The only avenue is to short the ERASE jumper and load new firmware with SAM-BA (or the SWD port).

    To effect this, the case itself has to have barriers in place behind or around any openings in the case to prevent someone trying to fish a wire in. The case as currently designed is in 3 1/8" layers and one 1/16th inch layer. The thinner layer is the layer where the board sits, and is exactly the same thickness as the board. The layer immediately above the board is equipped with "dams" around the button, USB and SD card receptacles. Unless an attacker could damage those features without it being visible (which would be incredibly difficult for acrylic), then the interior of the board should be virtually airtight as long as the layers remain securely stacked. This is because the interior walls will sit exactly between the surface of the board and the top layer.

    To insure that, a pair of FIPS 140 holographic security seals will be placed on opposite corners wrapping from the top to bottom. As long as you know the serial numbers of the seals remain unchanged, you can be sure that no one has replaced the firmware.

    Unfortunately, to make this all work, I've had to move a handful of components on the board, so another revision will have to be made to go along with the new case. The case will be made available on Tindie as soon as these new boards come back from the fab (likely late this week). The case will add $25 to the cost. To facilitate field firmware updates, replacement security seals will be available for $3 a pair.

  • AES-256 FTW!

    Nick Sayer10/19/2017 at 01:28 0 comments

    One of the nice things we got for free with the SAMS70 upgrade was the ability to shift to AES-256. But I haven't done it before now because getting it to just work was a first priority, but also because I wasn't sure whether there would be any speed penalty.

    Well, I sat down and did it, and there is no discernible penalty, so the code has been upgraded to use it.

    The key generation steps had to change quite a bit because it's now no longer the case that the cipher block size and key length are the same. To make that work, the new volume key generation looks like this:

    The volume ID is now 64 bytes. The two key blocks remain 32 bytes and the nonce blocks remain 16 bytes.

    You take the two key blocks and shuffle them together into a new buffer alternating bytes (A first). Run AES CMAC (with a zero key) over each half of the shuffled buffer one after the other, concatenating the results. That is the 256 bit intermediate key.

    Using that intermediate key, run CMAC over the two halves of the volume ID, again concatenating the results. That becomes the volume key.

    I've validated that the code interoperates with the java decrypt program, and to avoid mishaps I've changed the volume magic value.

    The system is NOT backwards-compatible, so you must insure that you preserve the content of any volumes before upgrading the firmware. Alternatively, you can dump any version 1 volumes and use the old java decrypter to obtain the plaintext image.

View all 64 project logs

  • 1
    Using Orthrus

    To use Orthrus, just stick any two SDHC or SDXC microSD cards in the slots and connect a USB cable to your host. You can do this in the opposite order if you wish - the microSD slots are hot-swappable. If the two cards have not been previously paired with Orthrus, then the error light will turn on. Press and hold the button and the error light will blink for 5 seconds and then the cards will be paired and initialized. At that point the ready light will turn on and the host will see a volume with twice the space of the smaller of the two cards. You will need to use your host to initialize this volume. After that, it works just like any other USB storage. When ejecting the volume, you can either remove the USB cable or the two cards first.

    If you insert an Orthrus paired card into a computer (that is, without Orthrus), it will look like a card filled with garbage. If you damage the key block (block 0 on the card), then THE ENTIRE VOLUME ON BOTH CARDS WILL BE DESTROYED. Once the key material is corrupted, then all the data is irrecoverably lost. That's kinda the point, of course.

    There are three lights on Orthrus - ready, activity and error. "Ready" indicates that a correctly matched pair of cards have been inserted and the volume is available to the host. "Error" means that the two cards that are inserted are not a matched pair. You can press the button to pair two such cards, but that will destroy any data on both of them. You can hold the button down for 5 seconds (the error light will blink while you do this) at any time and the two cards will be initialized. If you do this while two paired cards are inserted then all the data on the volume will be destroyed and the volume made ready for new data.

    It does not matter which card of a pair is inserted into each slot. The two slots are marked on the board, but in use they are fungible.

  • 2
    Hardware build

    There are no particularly noteworthy steps for building the hardware - it's normal surface-mount assembly. For most users, there is no need to populate the two through-hole connectors. You can just short ERASE with a wire briefly when it's necessary, and the SWD interface is not used except for firmware development.

  • 3
    Firmware build

    To build the firmware, use Atmel Studio 7 and Atmel Start. This will make an ASF4 codebase from the .atstart file in the GitHub repository. Download the .atzip from Start and open it in Atmel Studio. You need to patch the result in a specific way:

    • You need to manually change the two bulk endpoint maximum sizes (CONF_USB_MSC_BULKIN_MAXPKSZ and CONF_USB_MSC_BULKOUT_MAXPKSZ in Config/usbd_msc_config.h) from 0x40 to 0x200 as the HS USB spec requires (and for better performance).

    After doing that, take all of the .c and .h files in the GitHub repository and overlay them on top of the project, overwriting any conflicting existing files.

    Select a "Release" build (for better performance) and compile the code. Find the ".bin" file in the Release directory. This is what you'll upload to the controller.

    Fetch and compile the source for the Micro-SAM-BA client.

    Short the ERASE jumper on the board and apply power, then remove the short. You will see a CDC (serial port) device show up on your host. Take note of the device name (the file in /dev that it added). Use the following usamba commands:

    usamba [device] write Orthrus.bin 0
    usamba [device] gpnvm set 1
    usamba [device] gpnvm set 8
    usamba [device] gpnvm clear 7
    export GPNVM0_CONFIRM=1
    usamba [device] gpnvm set 0

    That last two commands will set the security bit and "lock" the firmware in and disable all debug interfaces. This will protect you from rogue firmware being installed as long as you prevent access to the ERASE jumper. Unplug the USB cable to terminate SAM-BA and connect it again to start the new firmware.

View all 3 instructions

Enjoy this project?

Share

Discussions

CJ wrote 09/10/2017 at 18:41 point

Took a look at the new version of the schematic, overall it looks great. Some obvious big improvements (simplifications, really) compared to the previous AVR-based design. Getting rid of all that hardware RNG is a big win. This new design definitely seems much more by-the-book, which is rarely a bad thing. Some more specific comments:

- Looks like the LEDs, buttons, high-side card power switch, SD card slots, and 3.3V buck are all holdovers from Rev 2. So all that stuff should be proven already, nice.

- USB looks mostly the same, but with the ESD consolidated. Checked that, looks good.

- The bus-mux looks good. Takes a minute to understand IC2 and IC3 are essentially one "thing" doing one job but it's simple once you understand. It looks like the mux chips may be both missing their bypass caps?

- Right now you've got a single signal "/CRDEN" applying power to the SD cards *and* enabling the output drivers on your data mux. That's clever and likely fine, but considering you have crazy IO left over, consider separating those into two control signals. CRDEN_PWR and CRDEN_DATA or something. There may turn out to be some benefit to being able to sequence those slightly (power first, wait a beat, then data?) and even if there is no benefit, this change costs nothing in dollars or performance. Put them on the same logical port for the ARM and they can switch simultaneously.

- I would also consider adding a discrete pullup (1kΩ - 10kΩ) to the CRDEN signal(s) to guarantee that those parts stay hella off (esp during power-on) until the ARM explicitly turns them on. 

- Considering the short distances covered by these traces, and the likely good slewrate control (etc) offered by the ARM, I doubt signal integrity vis-a-vis rise times, reflections is going to be an issue at all. BUT if you haven't done at least a very basic estimate of this it's probably good to do it, just to prove to yourself. It may turn out to be smart to add source termination resistors to the ARM, the mux, or both.

- I said no nits, but here's a little one anyway. R12-R14 are the only discrete 100kΩ resistors in the design. If the array part you use for R19 is cheap, consider using it again instead of those discretes. Might be worth it to drop a line from your BOM and get rid of a couple placements. If you can add the CRDEN pull-ups (recommended above) to the second array, it'd be almost half full. Not bad.

  Are you sure? yes | no

Nick Sayer wrote 09/10/2017 at 18:53 point

Thank you so much for going over the design. I'm going to definitely take some of your advice. I'd like to get one more round of conversation, if you don't mind, about some of your points:

- The bypass caps for the two bus mux chips are there - they're C7 and C8.

- Separating the power and logic enable for the card bus is also not a bad idea, and you're right - I do have crazy GPIOs left over. The same could be done in software, in principle, by making those pins into inputs when the power is off, but an "input" isn't the same as "disconnected," certainly.

- pull-ups for the card power and enable are *definitely* a good idea. Thanks for mentioning that.

- The only reason I don't think reusing R19 is good is that it's *huge*. The R19 part in the schematic has a couple of resistors left over, but unfortunately, they're powered from the switched card power, so they can't be used as pull-ups elsewhere. Those pull-ups can't be powered straight from 3.3v, because of the possibility of power leakage via the logic lines preventing the cards from being truly powered off (though a 100k impedance may make that point moot). With the card power / enable pull-ups being added, there are now 5 discrete pull-ups, but placing them in a common location to use an array may be more trouble than it's worth.

  Are you sure? yes | no

matt venn wrote 05/09/2017 at 08:58 point

Hey Nick,

thanks a lot for posting this - I learnt a lot over my morning coffee! You made it very easy to browse - even a pdf schematic, nice.

  Are you sure? yes | no

Nick Sayer wrote 05/09/2017 at 13:34 point

You're quite welcome, and thanks for saying so! For security related projects, I feel like it's really important to shine a bight light onto every aspect so it's obvious that nothing is hiding behind a curtain. Inviting scrutiny is the only way you can have any confidence that you got it right.

  Are you sure? yes | no

tz wrote 05/08/2017 at 21:12 point

Depending on configuration, you might find my SPI transfer faster

https://github.com/tz1/sparkfun/blob/master/fat32lib/sdhc.c

I also have write protect and password protect routines, and the whole is a minimal FAT32 implementation, originally for Sparkfun's OpenLog.

  Are you sure? yes | no

Nick Sayer wrote 05/08/2017 at 23:13 point

Thanks for that! I'll definitely take a look. I bought an OpenLog a while ago to capture logs from my GPSDOs. I don't need filesystem support for Orthrus, but I'll take any opportunity to see if there are better ways to get the block I/O done.

  Are you sure? yes | no

Nick Sayer wrote 05/09/2017 at 00:51 point

The big difference I see is that you've been very clever about timing your writes to SPDR to eliminate the dead time caused by the read-and-test-branch busy-wait operation. I thought I could achieve something similar by using the ATXmega USART-in-SPI-master mode functionality - the transmit register is double-buffered, which in principle means that you can always have a byte going out. At least for my first experiments that didn't work out so well, but I am contemplating giving that another go at some point.

  Are you sure? yes | no

Clara Hobbs wrote 04/29/2017 at 00:25 point

Very interesting idea!  Couldn't the whole thing be done in software though, using two normal SD card read/writers, and with faster data transfer speeds than are possible with Full Speed USB?

  Are you sure? yes | no

Nick Sayer wrote 04/29/2017 at 00:57 point

Very likely. This does, however, turn the whole concept into an appliance that's very easy to use. You could write a FUSE module to do an interoperable version of this for Linux, certainly.

  Are you sure? yes | no

Martin wrote 04/14/2017 at 08:50 point

Be careful with your entropy generator. When you want to use noise as a RNG you have to keep noise out :-) That means any non thermal, non random noise. So you have to use good decoupling and shielding for your noise generator. Otherwise there could be some interference from power line hum or your local (AM) radio station which compromises your randomness and thus your security, because it ads a deterministic element.

If  the Atmel is too weak perhaps the recently discussed STM32F103 could be a solution.

  Are you sure? yes | no

Nick Sayer wrote 04/14/2017 at 13:40 point

I plan on gathering a goodly chunk of the entropy from the generator and running it through DieHarder to insure that it's of good quality, plus it's going to be run through AES to whiten it before it's actually used. This design is well worn. It's the basis for several open hardware entropy source peripherals out there, so I am fairly confident.

  Are you sure? yes | no

Similar Projects

Does this project spark your interest?

Become a member to follow this project and never miss any updates