Finally took the time to take a picture of the internals. Lots of photos below!
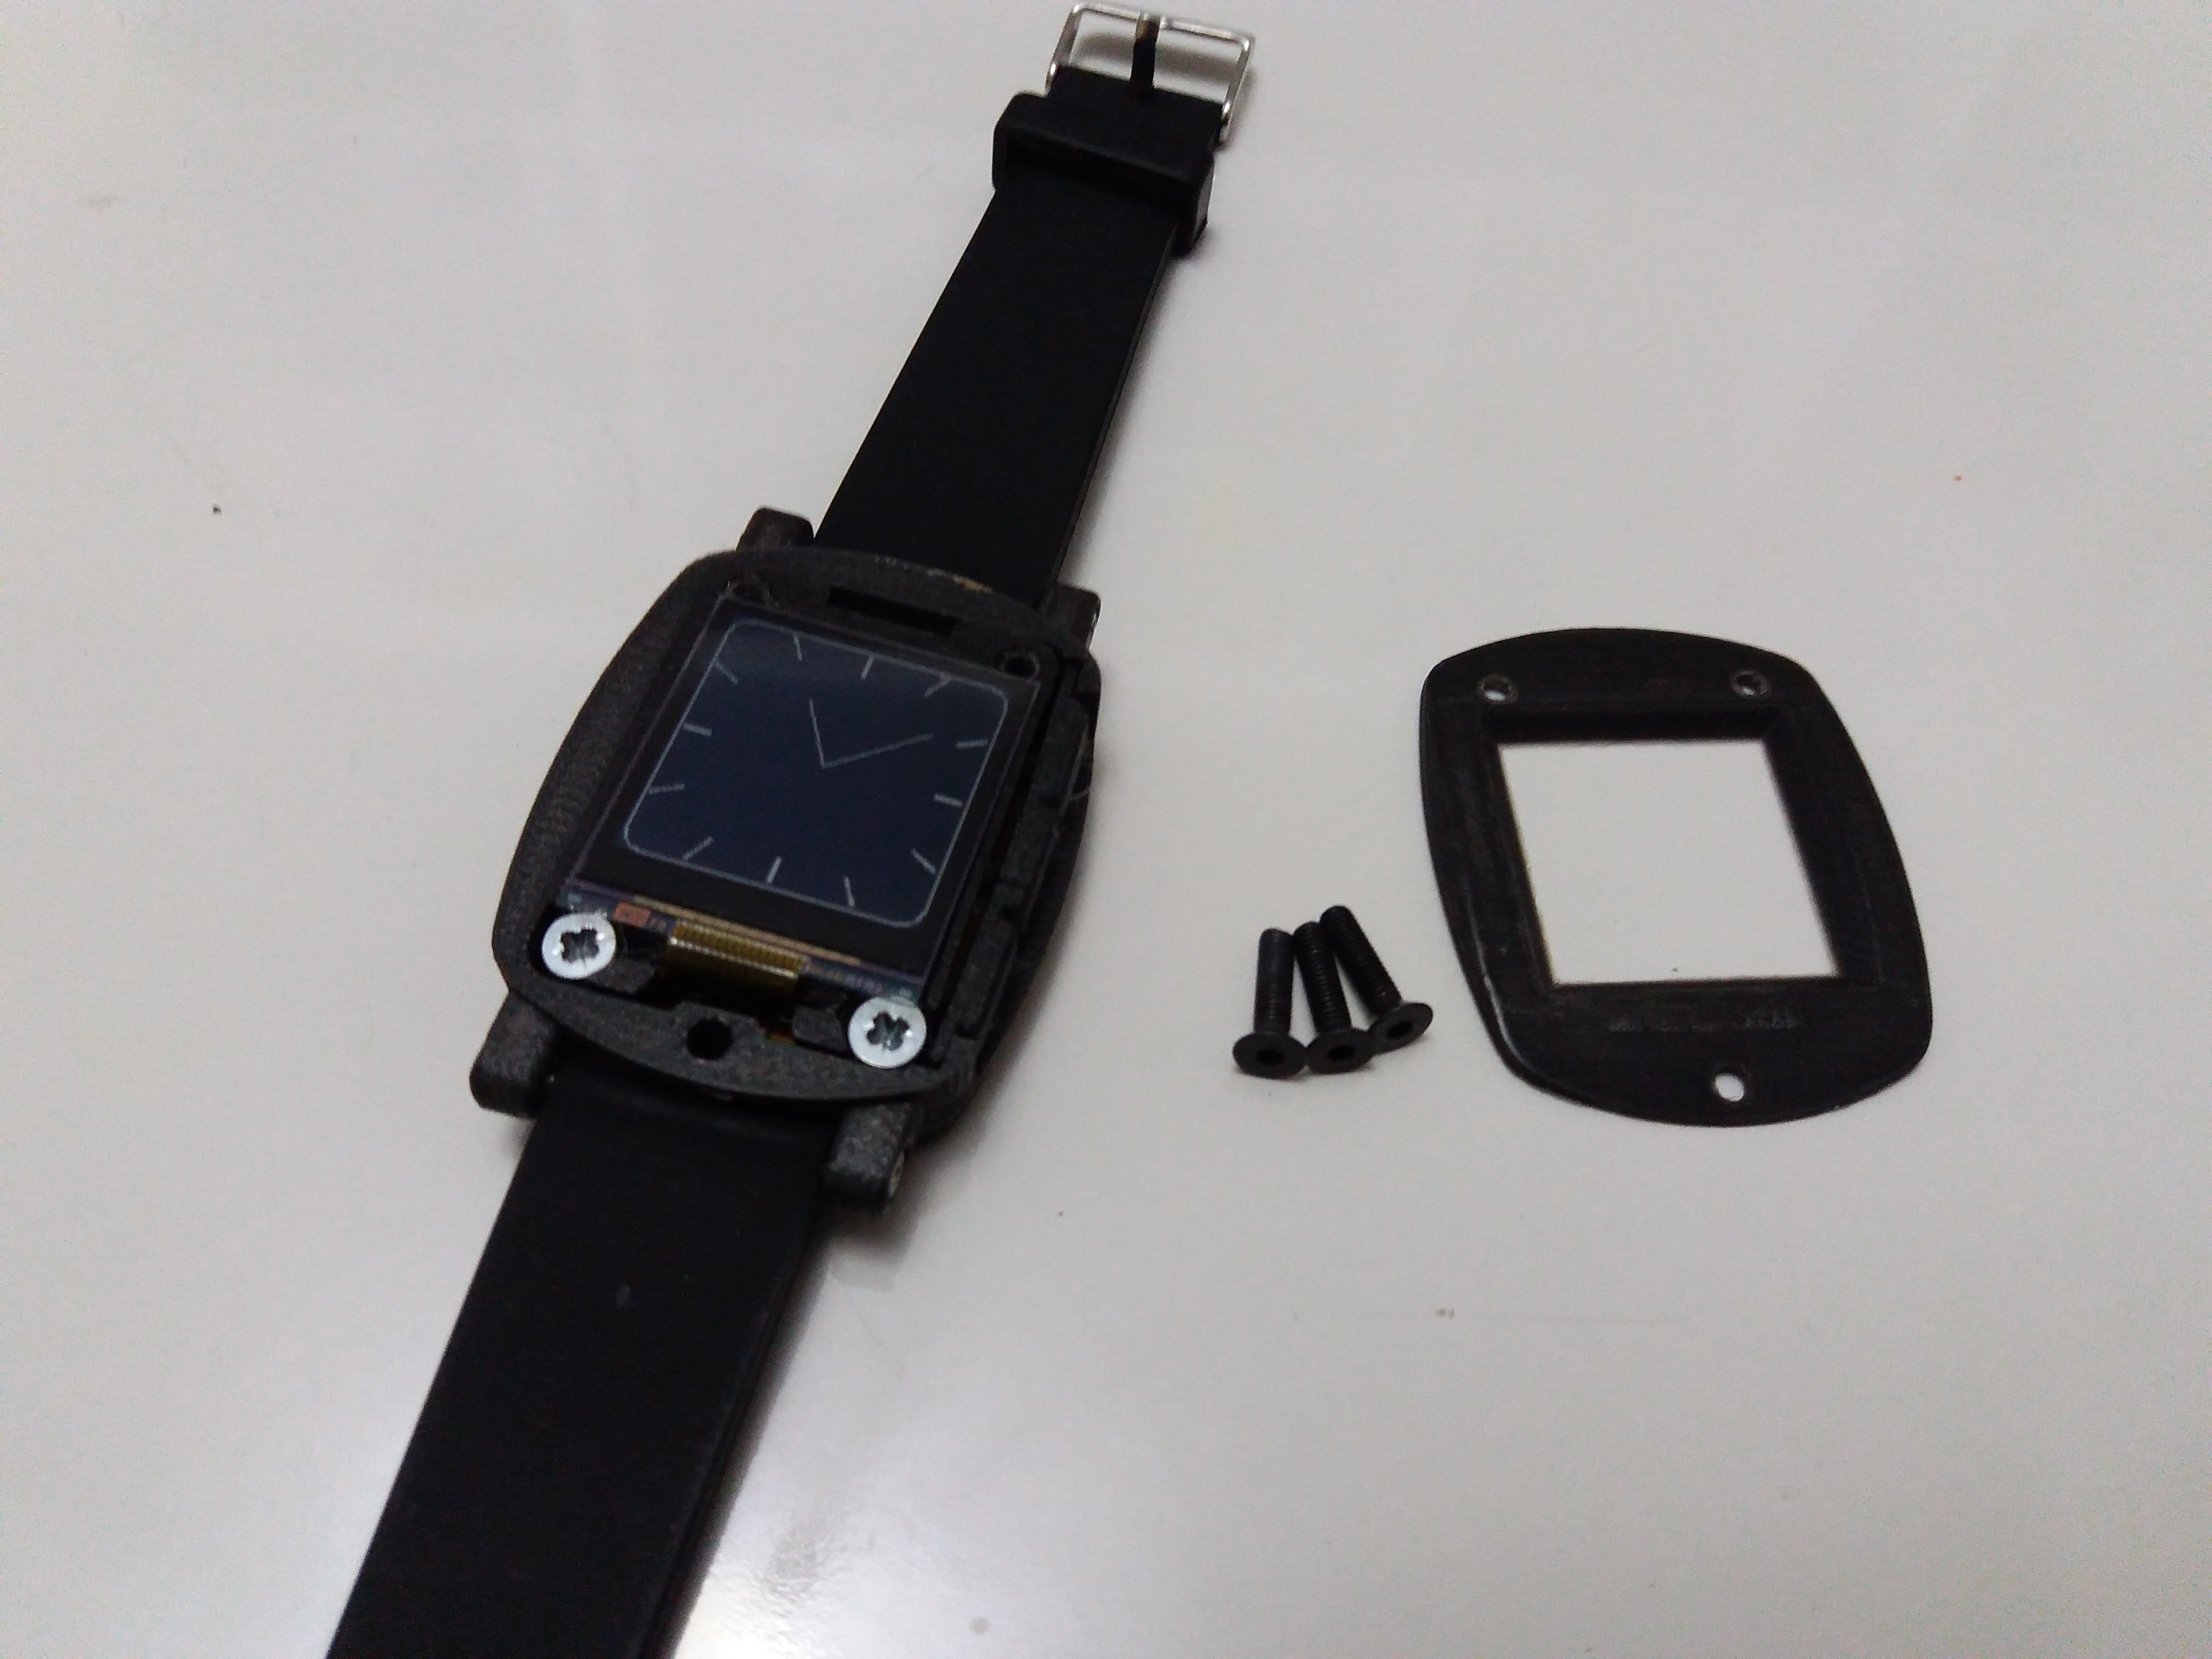 Top cover off. Watch face held together using M3x12 countersunk screws. The black blends well. See more photos below.
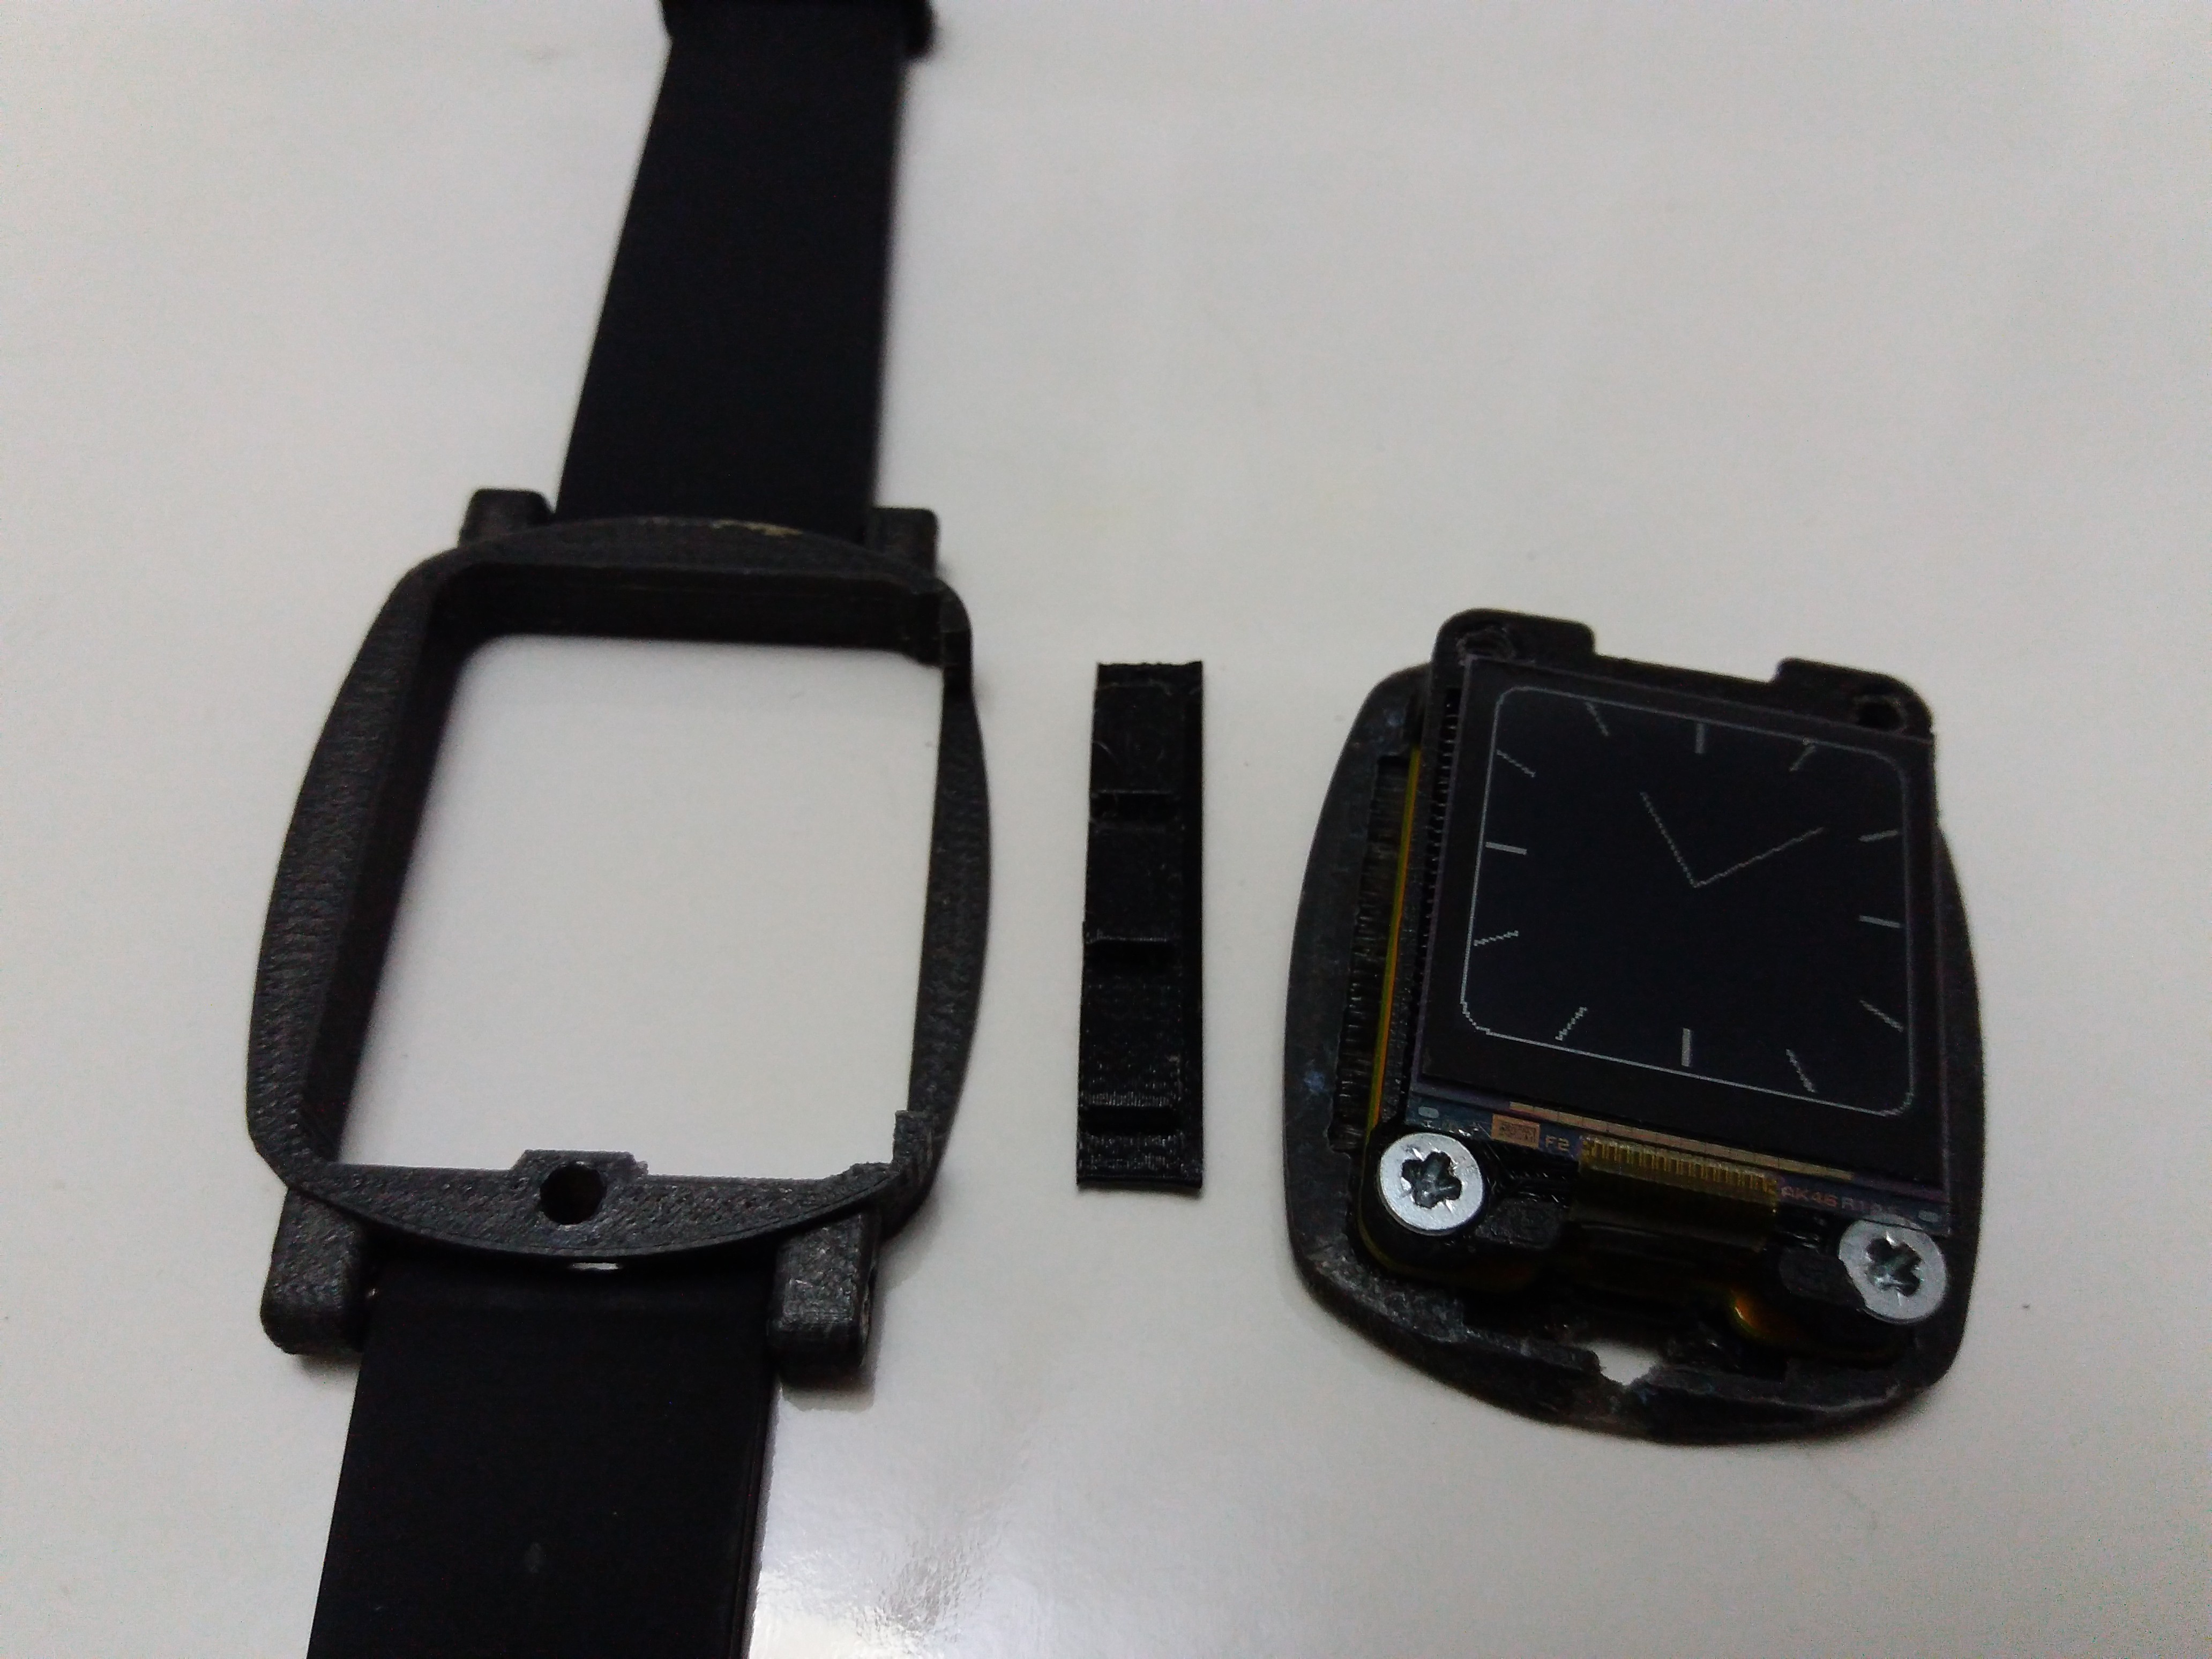
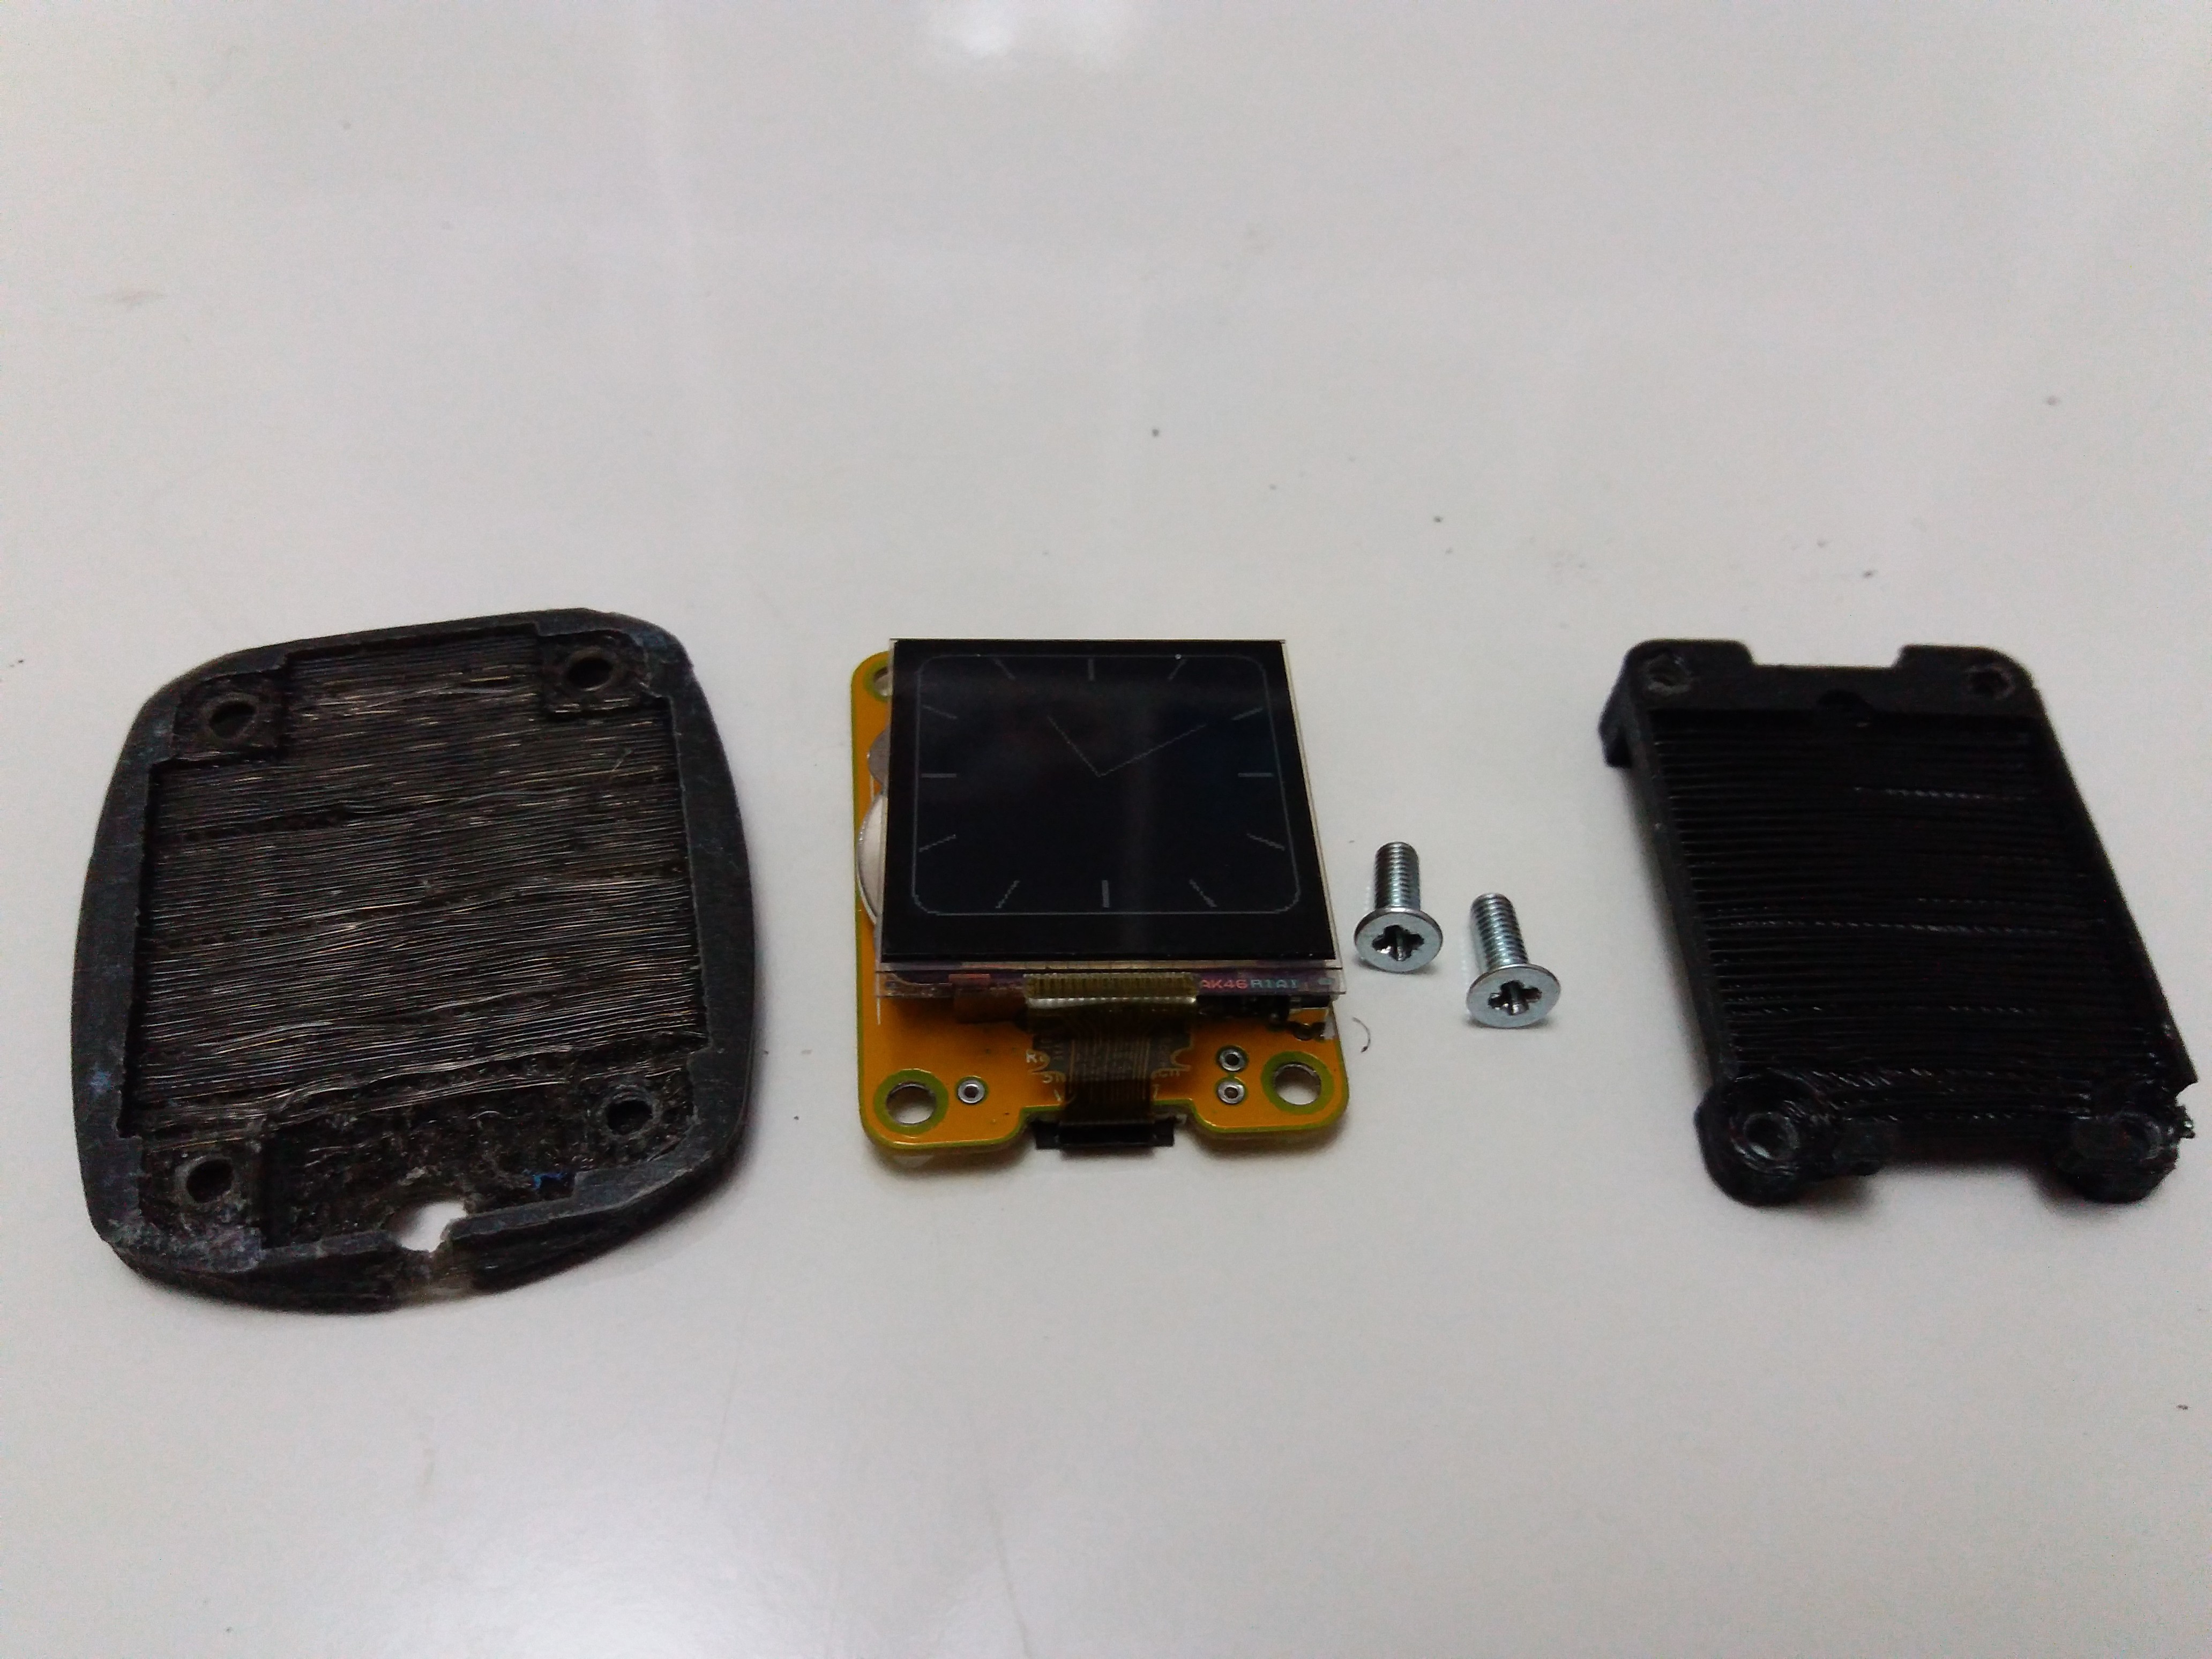 Closer look at the bottom part, PCB subassembly, and LCD support. The two on either side of the PCB are printed upside down of what they are now so you can see the bridging. Also, you can see I used countersunk screws everywhere.
NOTE WHEN HAVING PCB MANUFACTURED: These are 0.8 mm thick PCBs from SeeedStudio.
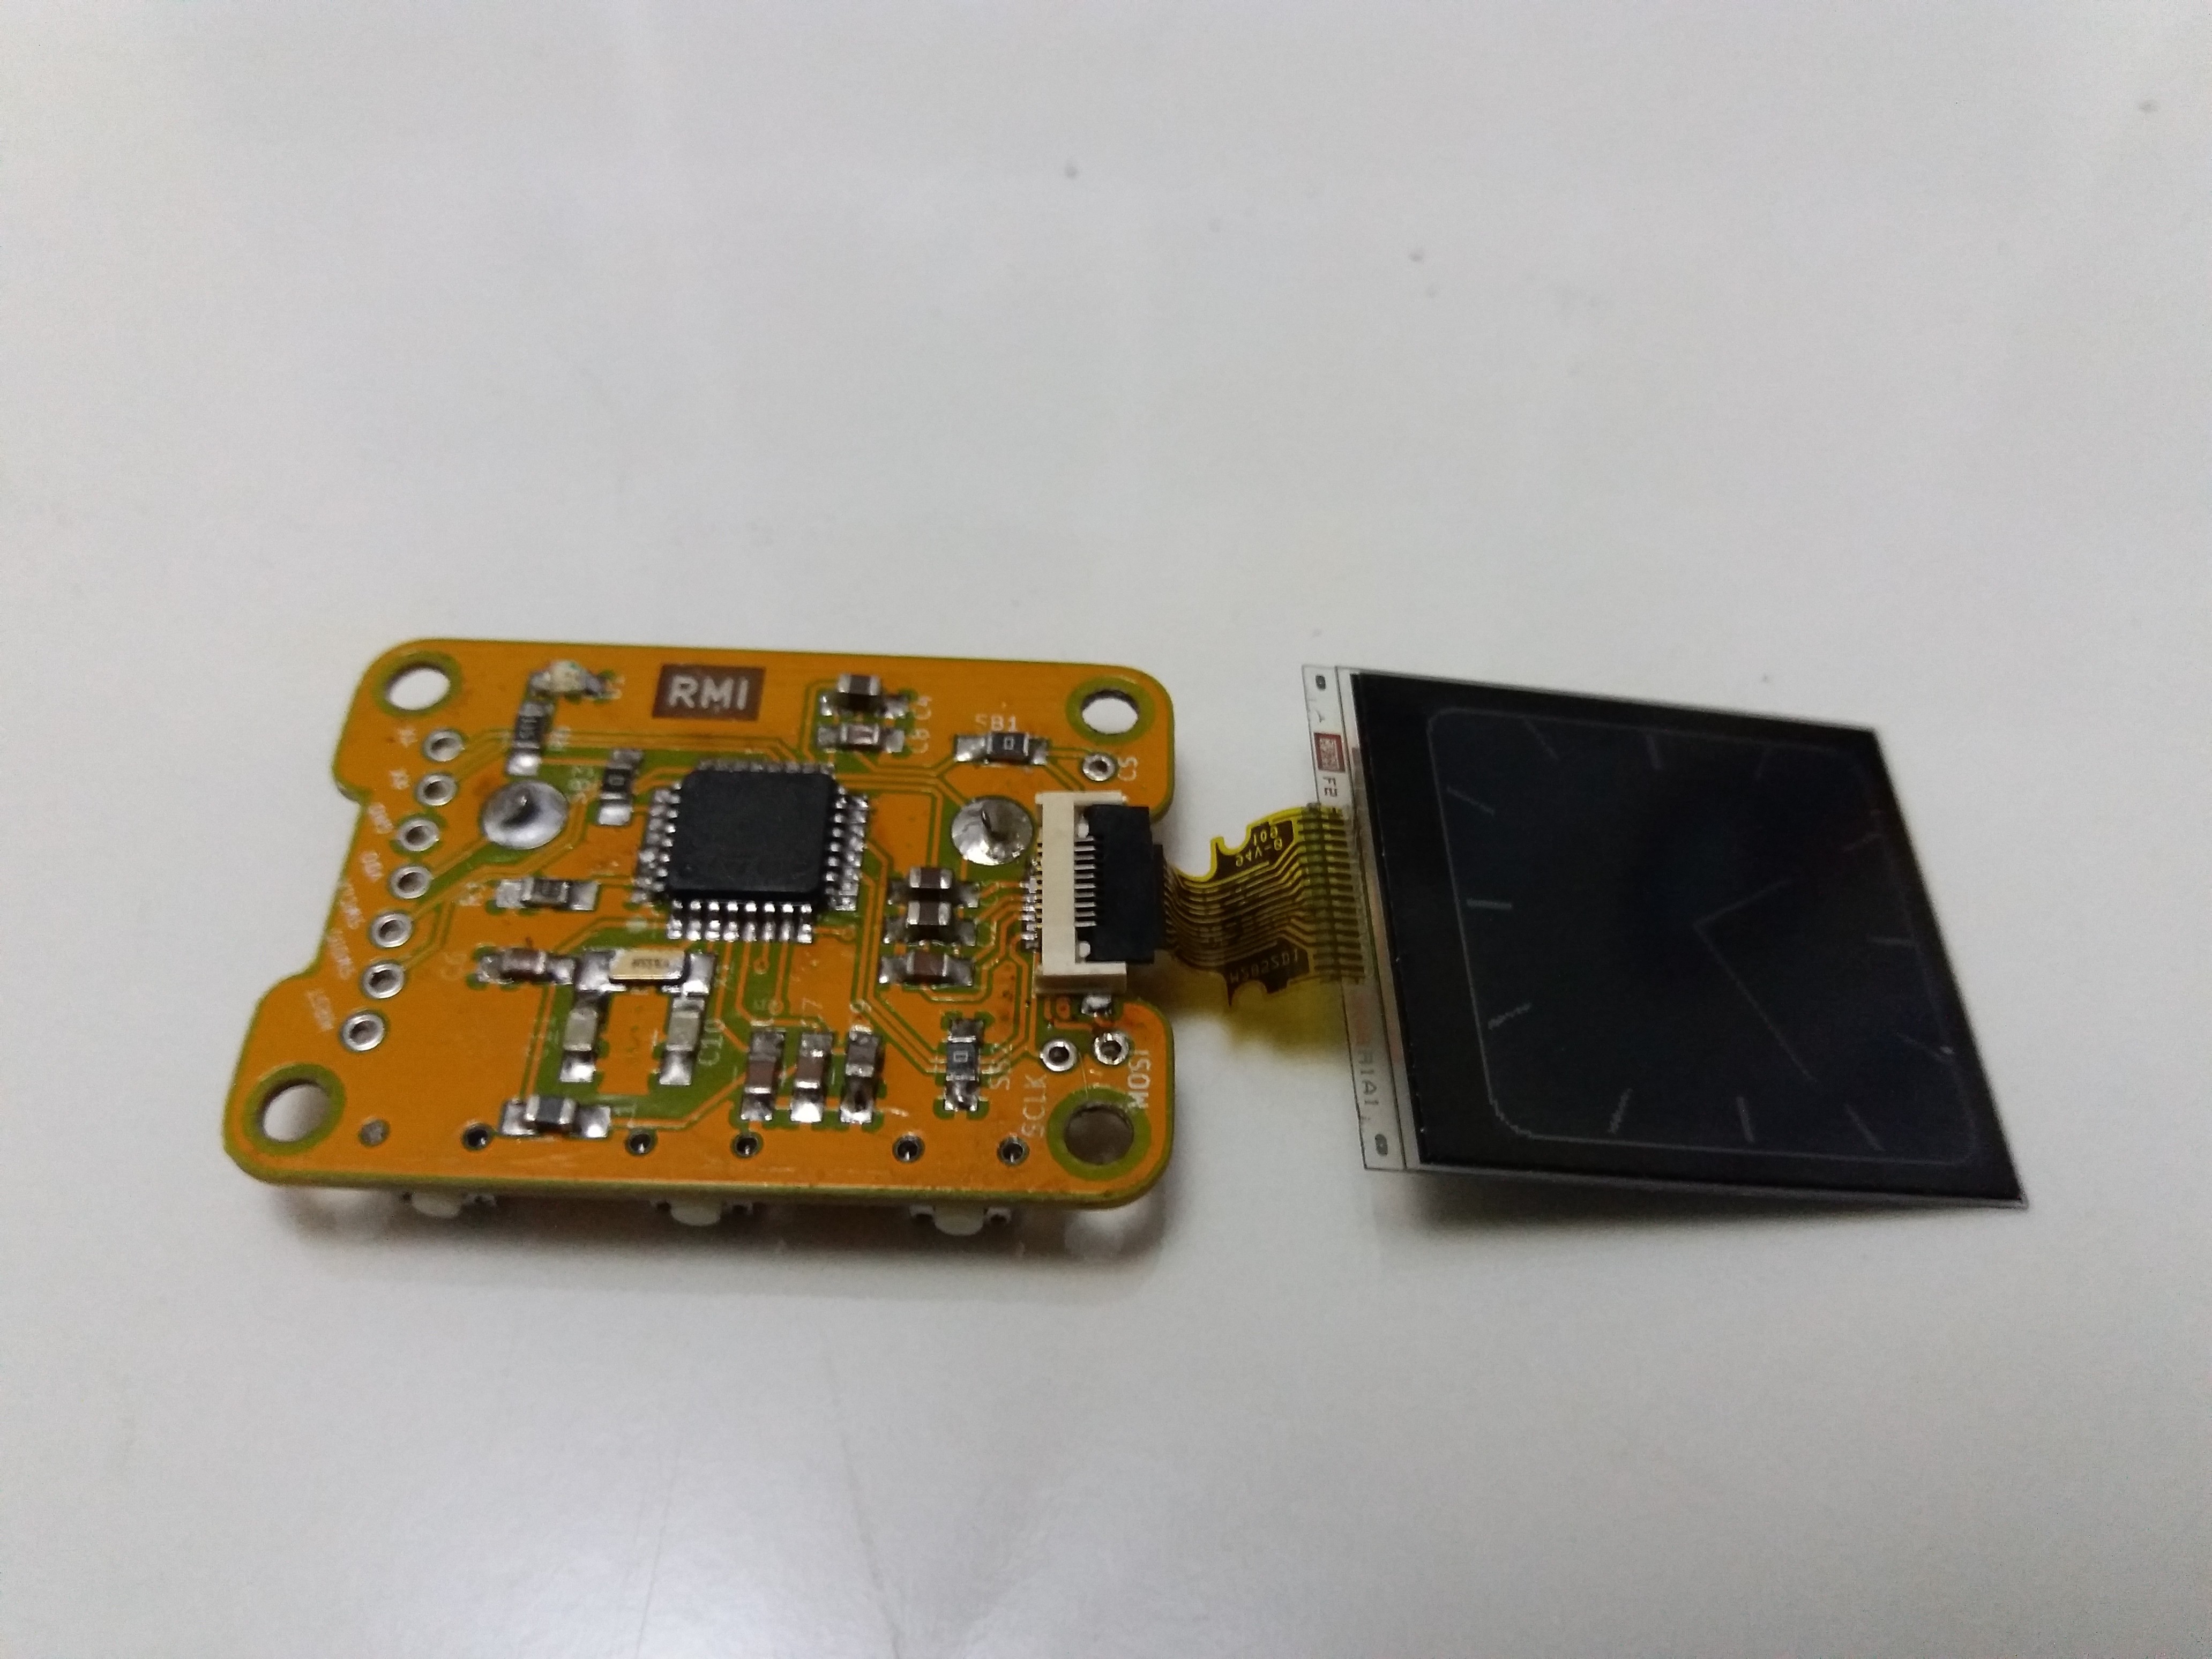 Closer look at the PCB. I used "beginner-friendly" 0805 parts. The most difficult part is the LCD connector as it has a 0.5mm pin pitch. Use plenty of flux and a clean fine soldering iron.
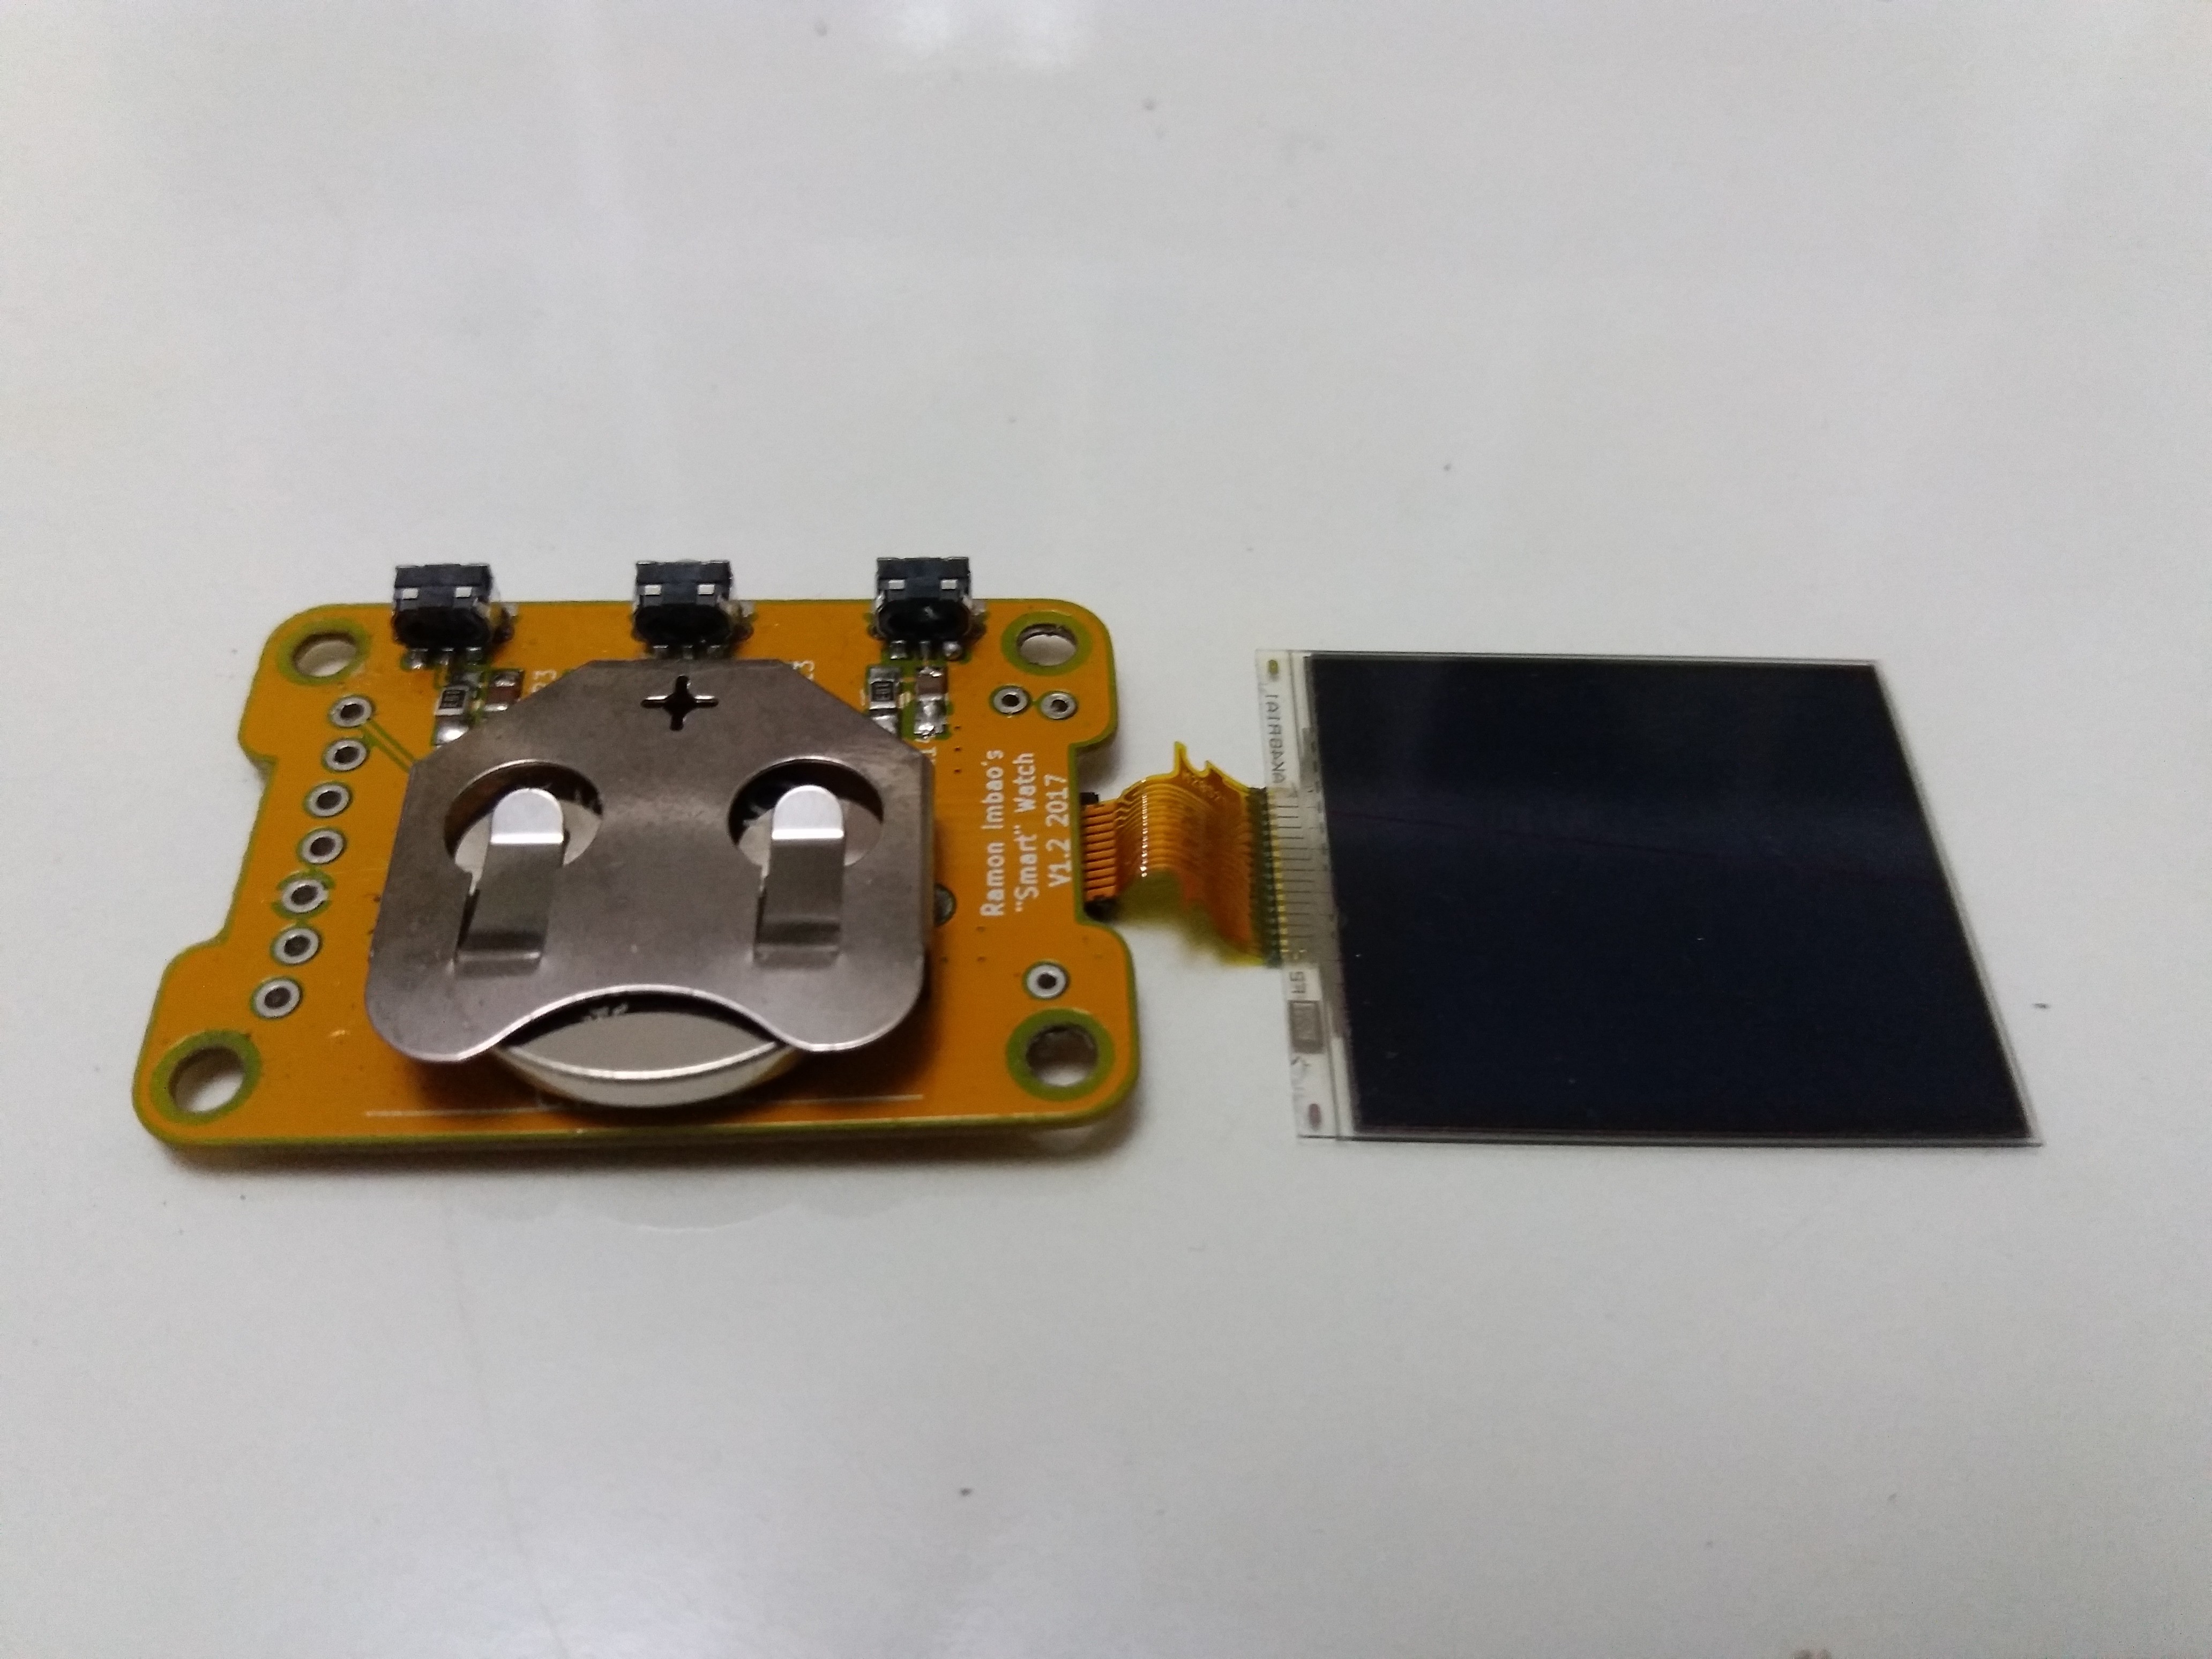 Close look at the underside. Only six passives, and three buttons for the SMD work. You can see the FPC connector of the LCD bent because it's stayed that way for a few months now.
 Ramon Imbao
Discussions
Become a Hackaday.io Member
Create an account to leave a comment. Already have an account? Log In.