Close
0%
0%

Coagulator Kit - Season 2

Advancing DIY Water Purification
with Students & Citizen Scientists Around the Globe.

Similar projects worth following
You can buy kits at https://MakeWater.org if you do not wish to build one yourself. Water coagulation plays a major part in large scale water purification processes. We're fascinated by the potential of electrocoagulation for its simplicity, reduced environmental impact, and economic value. We designed coagulator kits so students and citizen scientists can learn about coding, 3D printing, chemistry, teamwork and philanthropy all while helping humanity unlock the full potential of this process which we believe can empower people around the globe to solve water challenges.

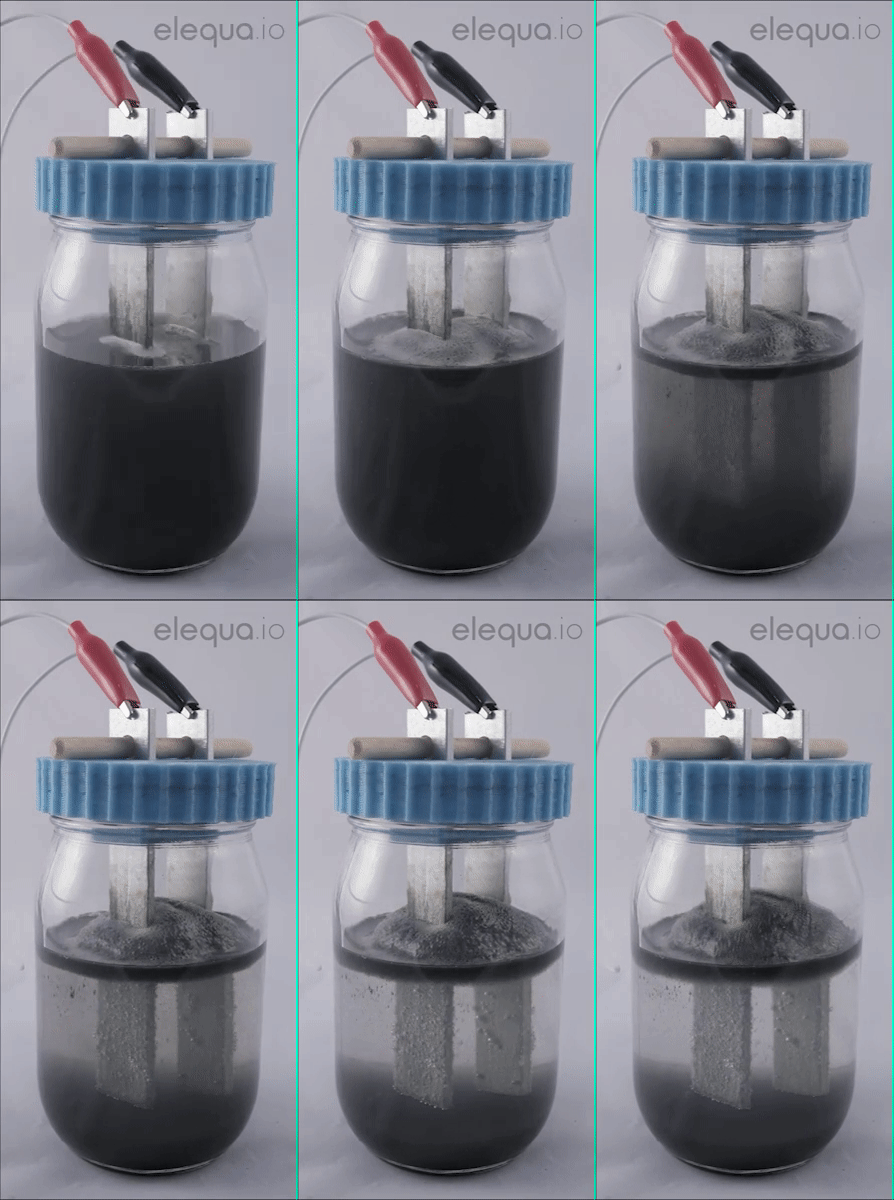
Electrocoagulation is process which utilizes electrolysis to bond pollutants in water until they are large enough to easily filter out.

Goals

  • Study & develop the electrocoagulation process collaboratively using DIY Open Source methods.
  • Activate and engage students and citizen scientists to participate.
  • Evolve the coagulator kits to simplify use and add data logging & sharing capabilities.
  • Share our progress through videos on our youtube make water series.


Thank Yous!

A big thank you to Les Hall. We wouldn't be this far in our project if it wasn't for his guiding light and mentorship. He introduced me to arduinos, 3D printing, and coding. He was there since the beginning when we had this idea to make small manageable coagulator kits for others to use and test and learn from.

10bitworks.com Hackerspace
Steam Central Makerspace

CoagulatorLudusSingle.ino

Arduino Uno sketch for a single coagulator with sparkfun ludus shield.

ino - 844.00 bytes - 04/29/2017 at 21:27

Download

Coagulator 16oz Full Lid.stl

3D Print STL file for full size screw on lid for 16 oz mason jars. Credit: Les Hall - Electrical Engineer

Standard Tesselated Geometry - 1.06 MB - 04/25/2017 at 16:38

Download

Coagulator 16oz Flat Lid.stl

3D Print STL file for 16 oz mason jar flat lid. Requires screw on outer ring that comes with mason jar. - Credit: Harmony High School

Standard Tesselated Geometry - 322.45 kB - 04/26/2017 at 13:03

Download

Coagulator Arduino Case-Lid.stl

3D Print STL file for Arduino Uno & Ludus Shield Case - Lid - Credit: Steam Central Makerspace

Standard Tesselated Geometry - 303.50 kB - 04/25/2017 at 17:33

Download

Coagulator Arduino Case-Base.stl

3D Print STL file for Arduino Uno & Ludus Shield Case - Base - Credit: Steam Central Makerspace

Standard Tesselated Geometry - 1.59 MB - 04/25/2017 at 17:33

Download

View all 6 files

View all 8 components

  • 1/23/18 (WATERBOYZ)

    WaterBoyz01/24/2018 at 17:46 0 comments

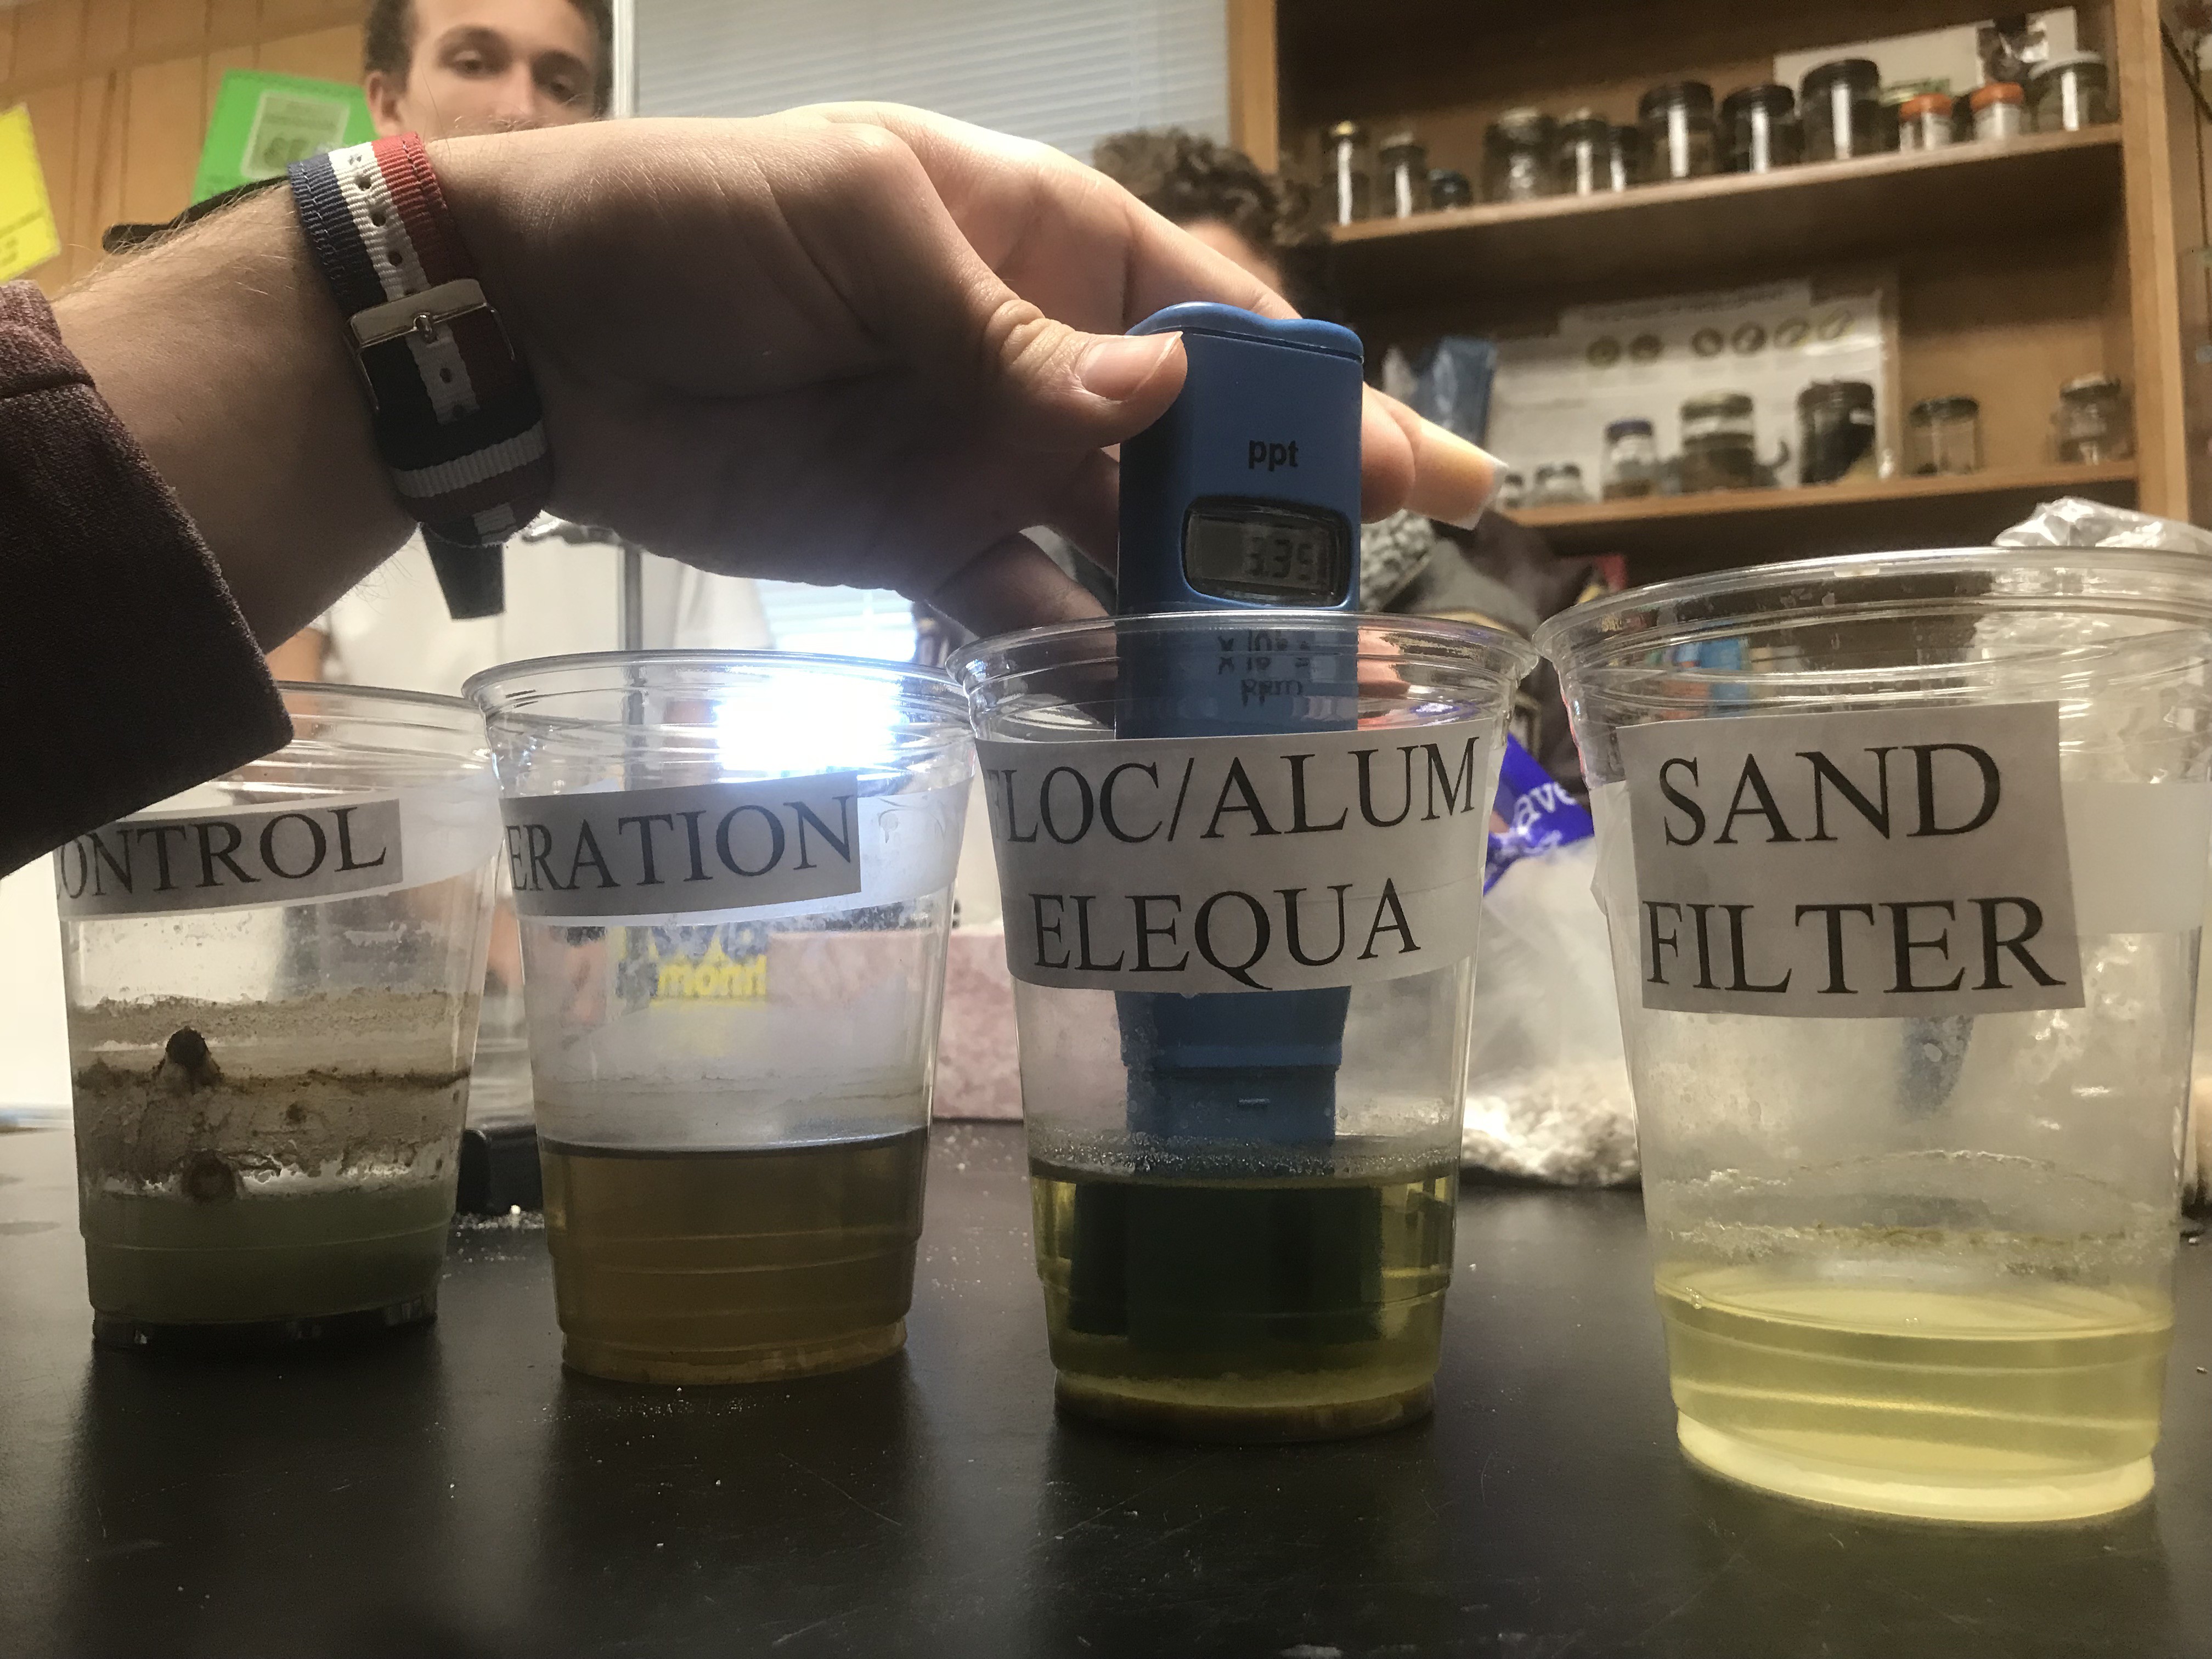
    The members of our engineer group have started the tests for the arduino project with the question of exactly how many pollutants can be cleaned out of the water. The group used a TDS meter to measure the total amount of dissolved solids in the water. To make sure results were accurate, the team used this method before and after each arduino test to track progress.


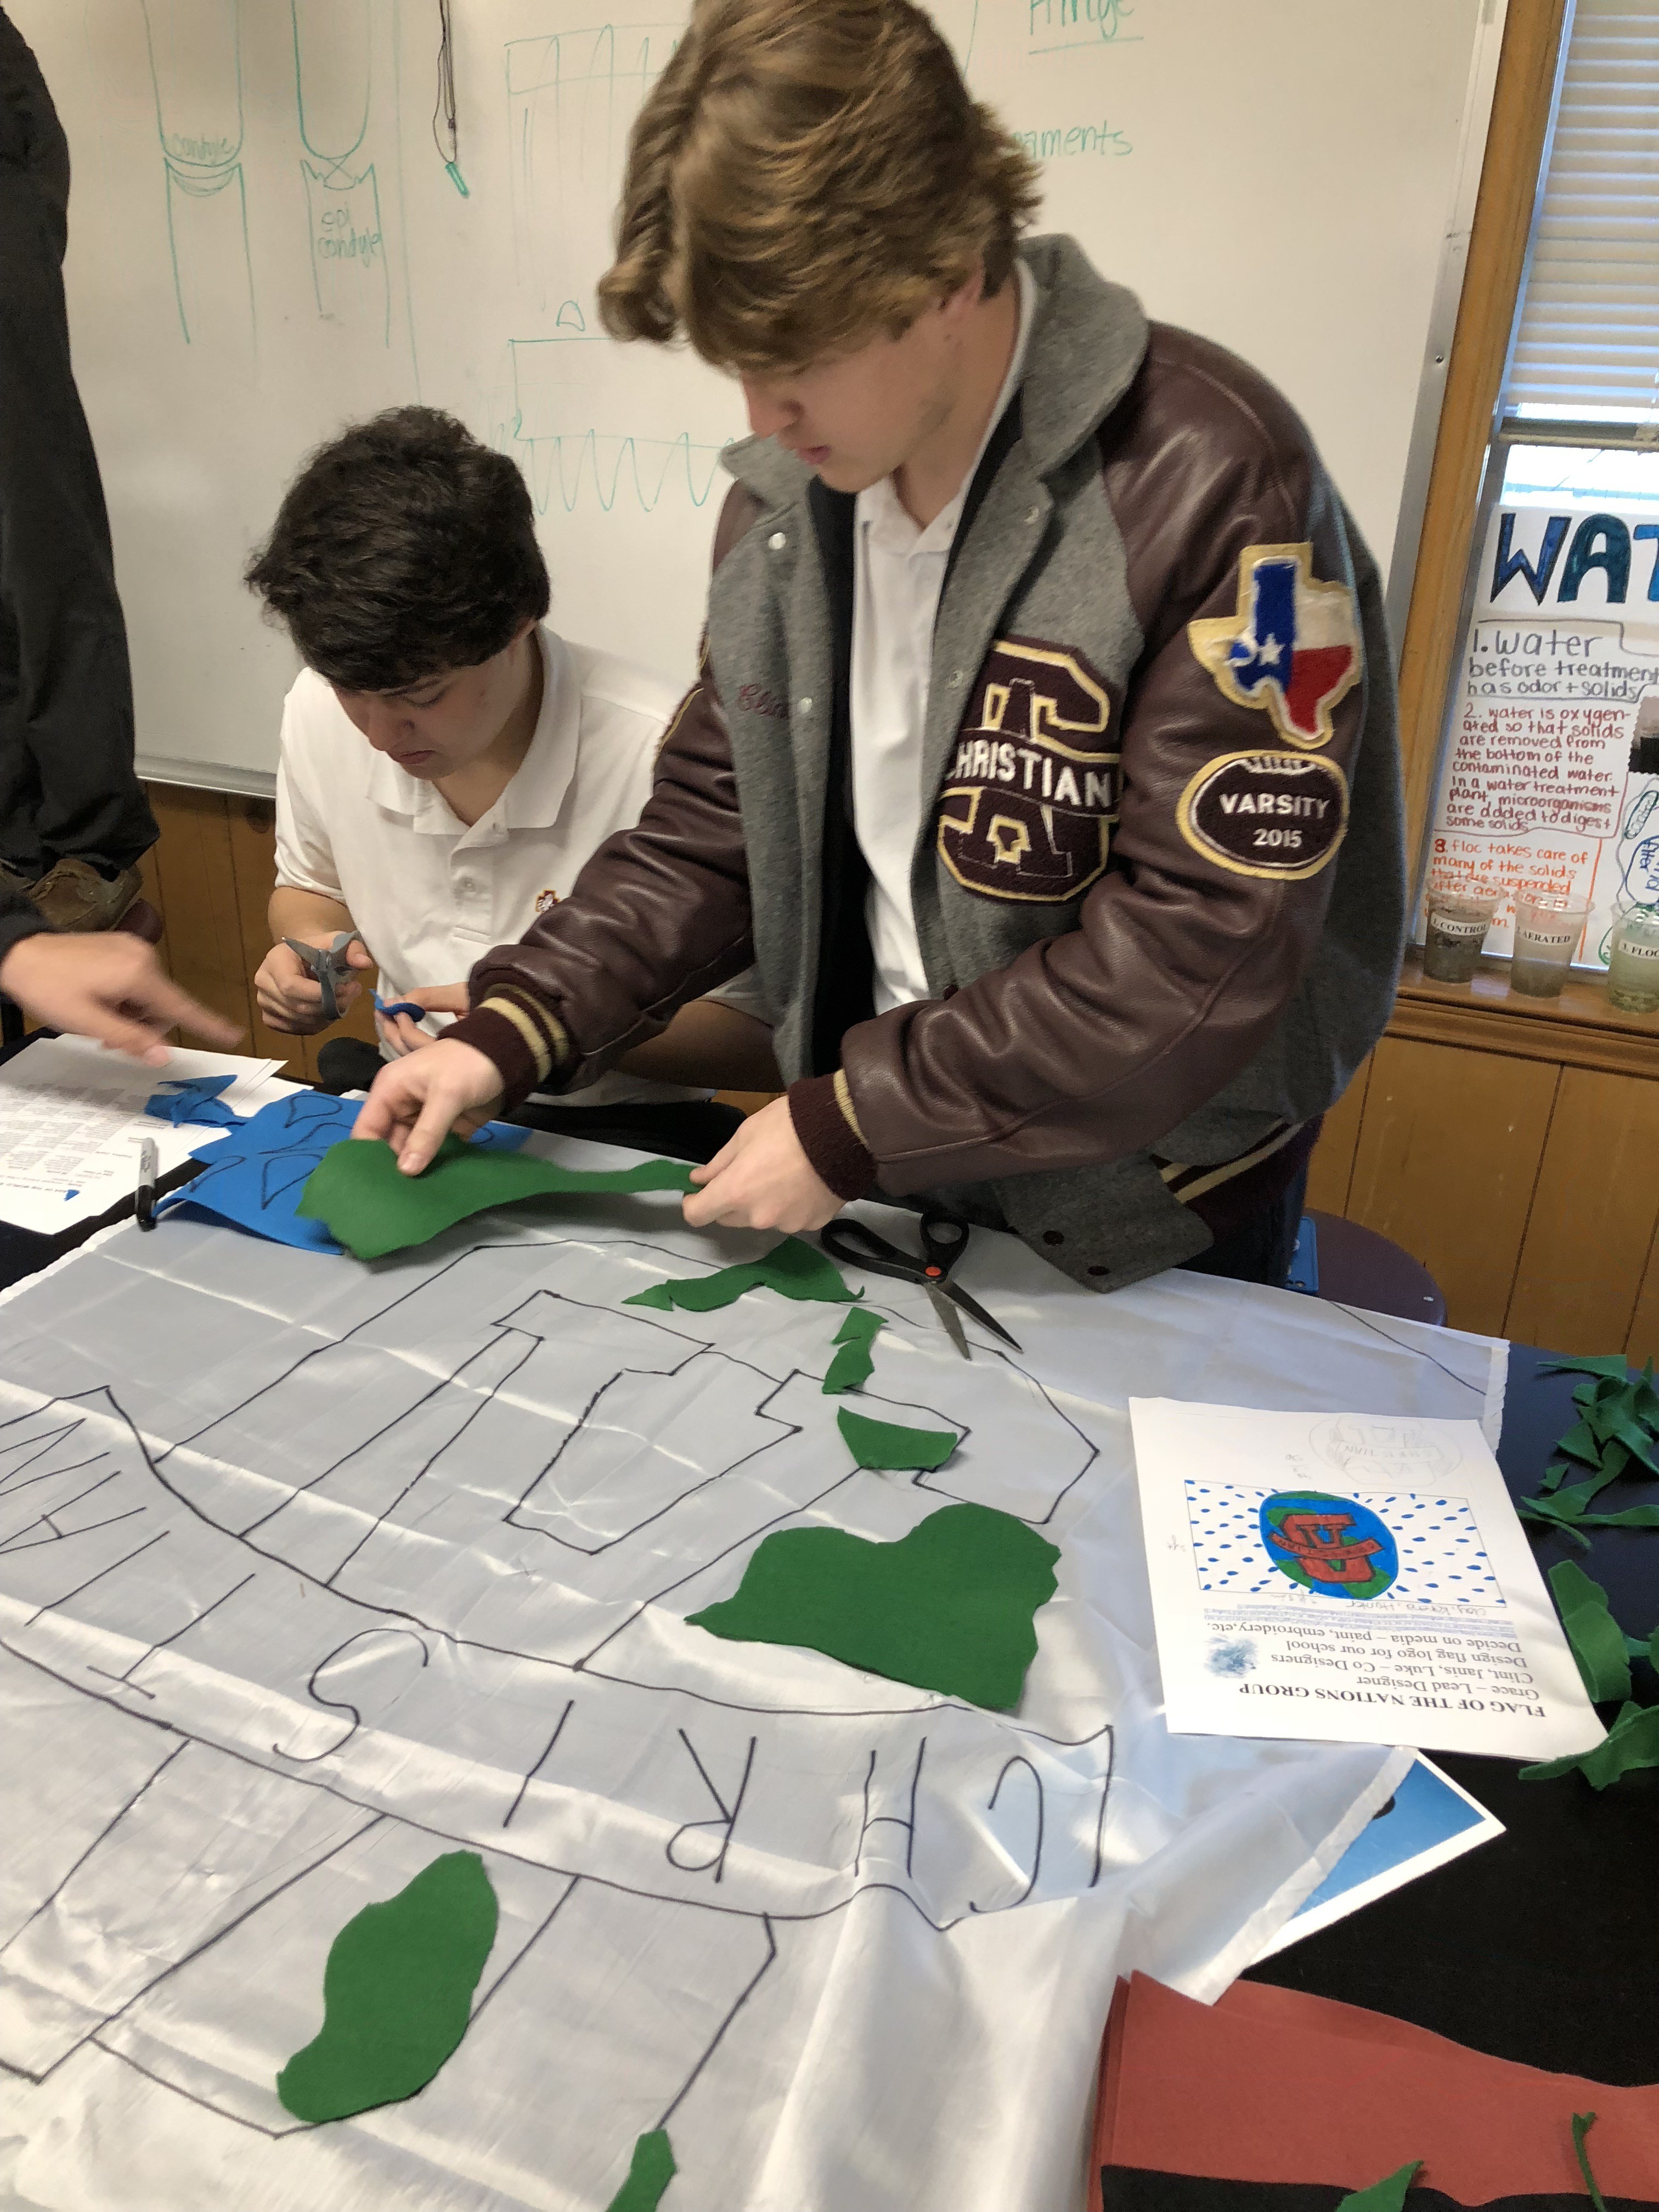
    Some of our team members spent time to cut out felt pieces to create a flag for the project. The flag has the project logo and a symbol of the earth on it.

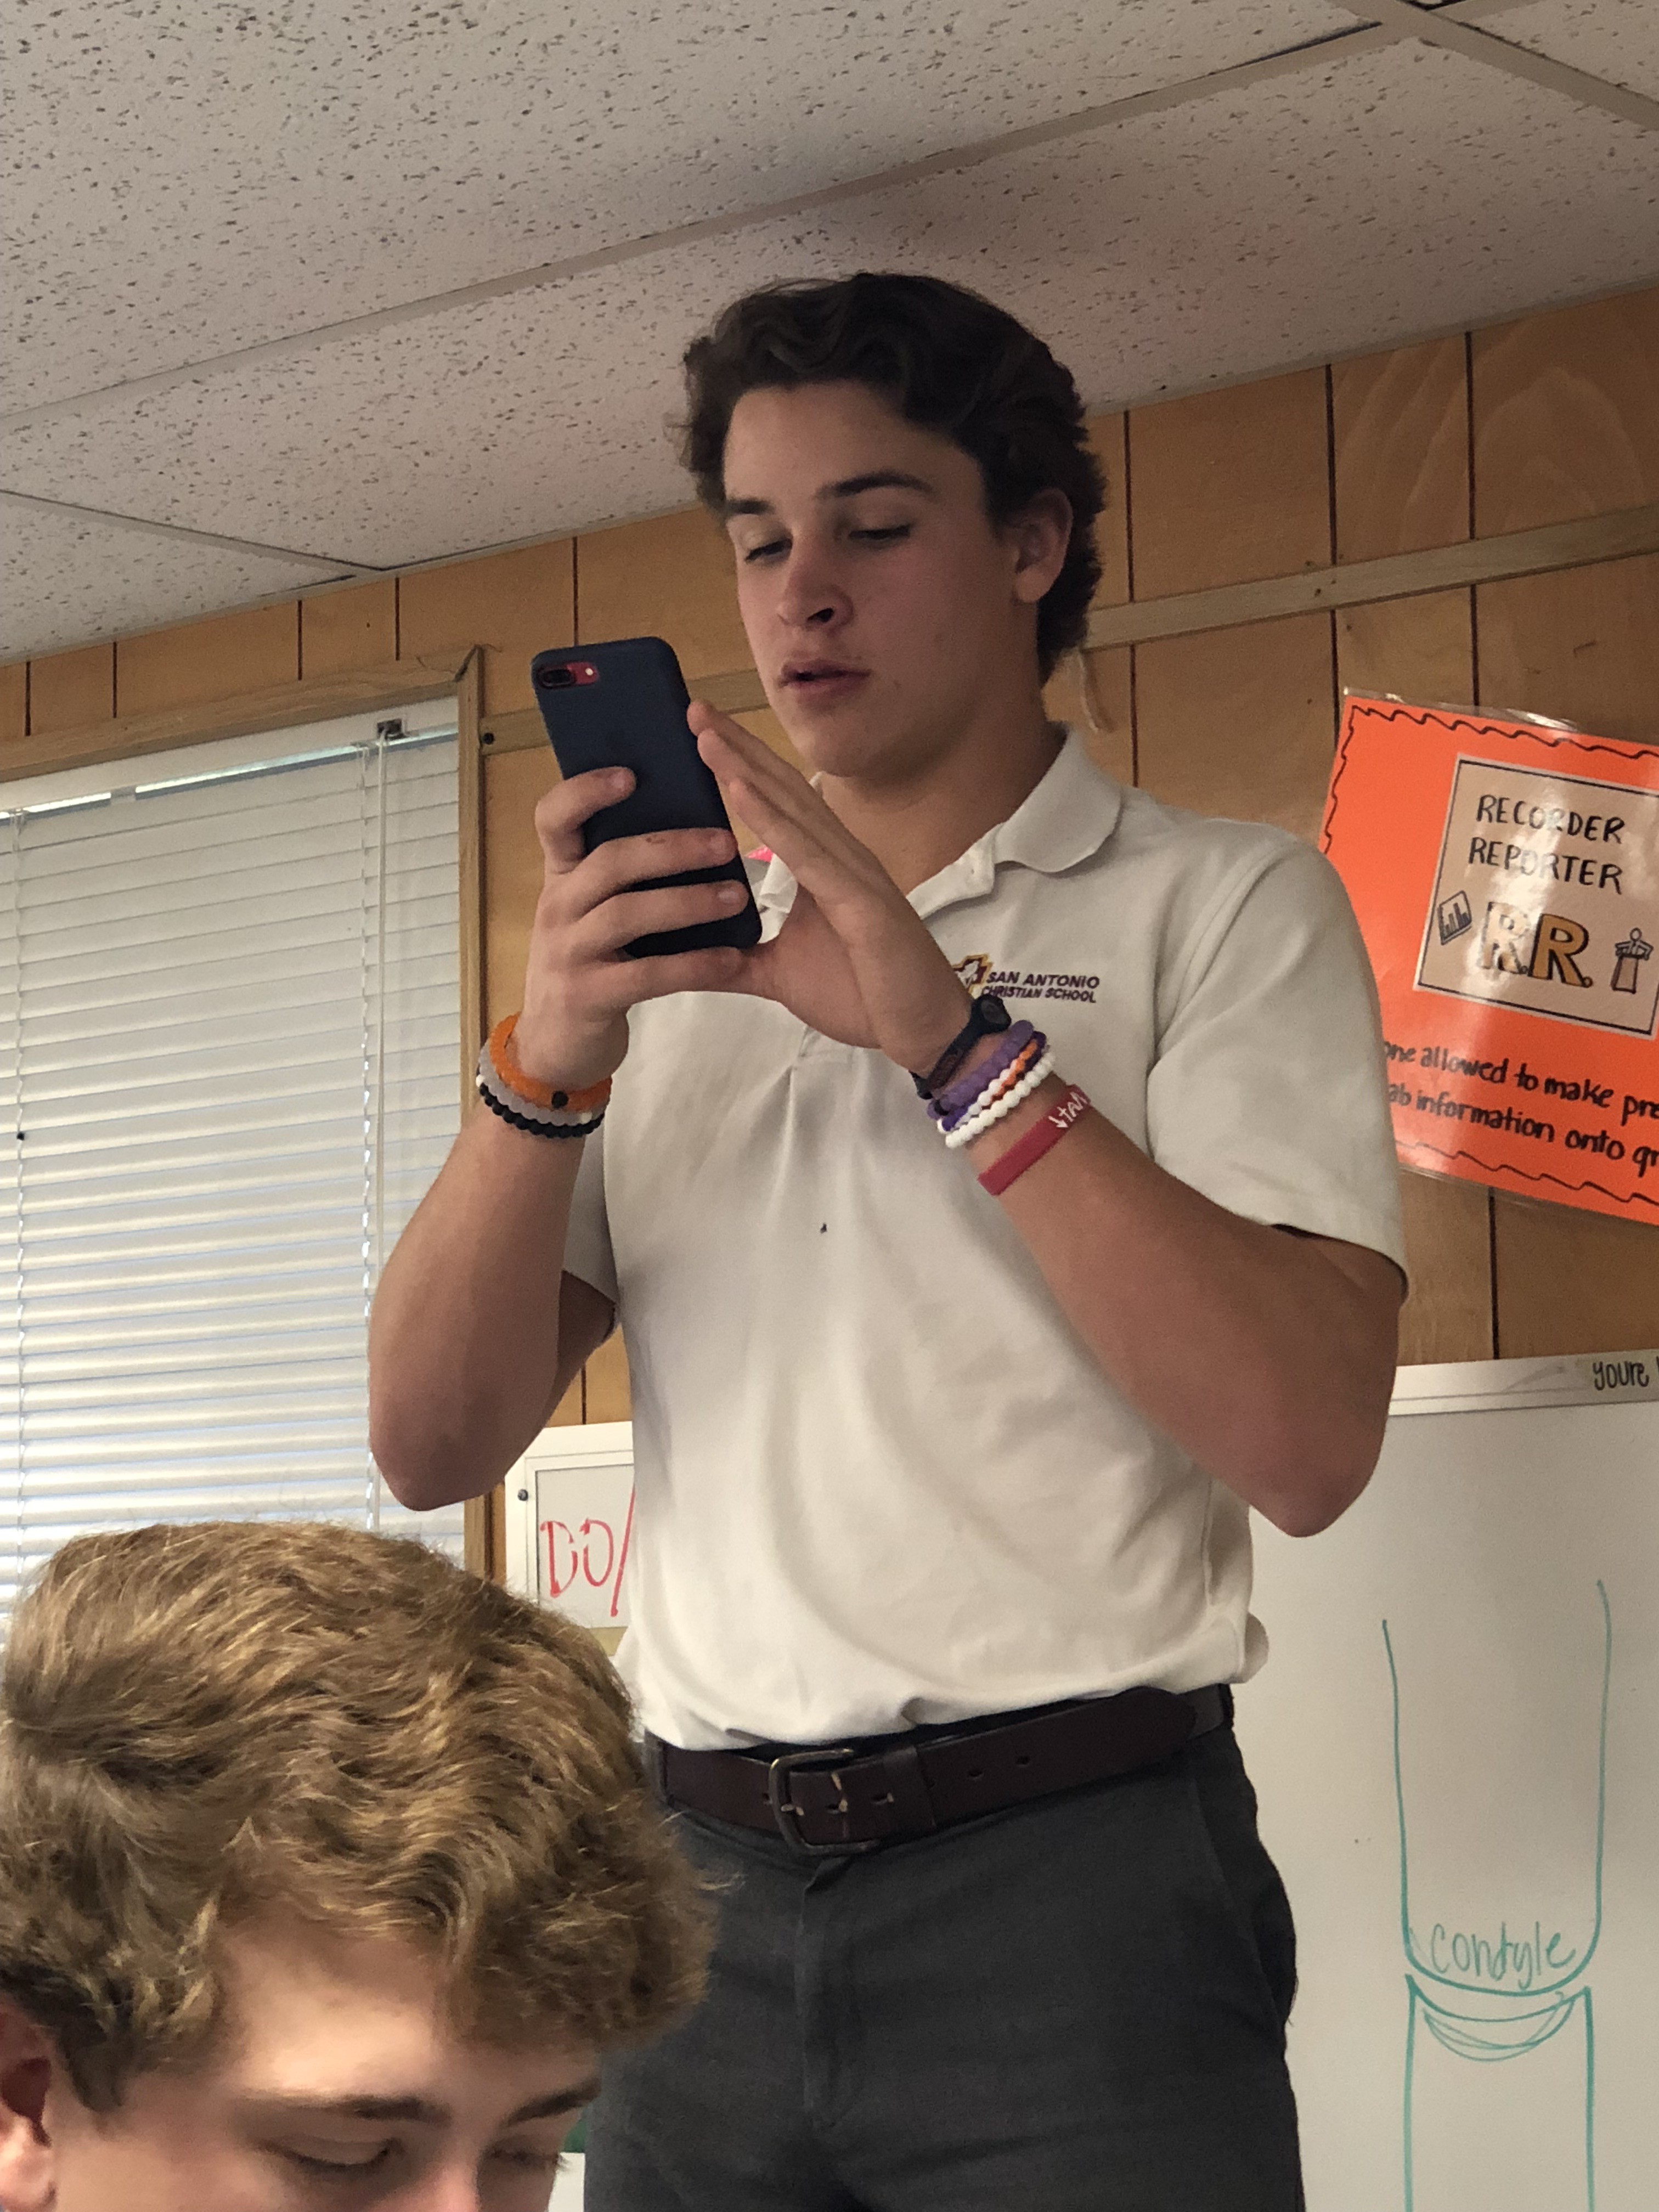
    Two of our team members, JT Garcia and Holden Philippus, have been spending their time photographing the process of each group during this project. They are using the photos they take to post to a website another team member Josh Sabatino is working on. 

  • A day with Ryan

    WaterBoyz11/15/2017 at 17:50 0 comments

    The Water Boyz spent the morning with Ryan. 

  • Make Water IMPACT Program Update

    Ryan Beltrán11/10/2017 at 19:26 0 comments


    IMPACT 2017/18 is here! 

    This is our second year in our partnership with SAWS water utility IMPACT education program. We have multiple high school teams all taking on challenges with the coagulator kit. 

    Here is our first update. 

  • Español

    Ryan Beltrán05/17/2017 at 14:10 0 comments

    We added Spanish translation for the instructions for our Spanish speaking students and collaborators!

    ¡Añadimos traducción al español para las instrucciones para nuestros estudiantes y colaboradores hispanohablantes!

  • First look at 3D Printed Coagulator Case

    Ryan Beltrán04/26/2017 at 16:31 0 comments

    The coagulator STL / 3D Print files are now uploaded. Thanks to @Clint Hudson for the designs!

  • We did it! Coagulator Redesign v1

    Ryan Beltrán04/20/2017 at 12:19 0 comments

    We've started our new redesign for coagulator kits. Check out the video for a quick update.

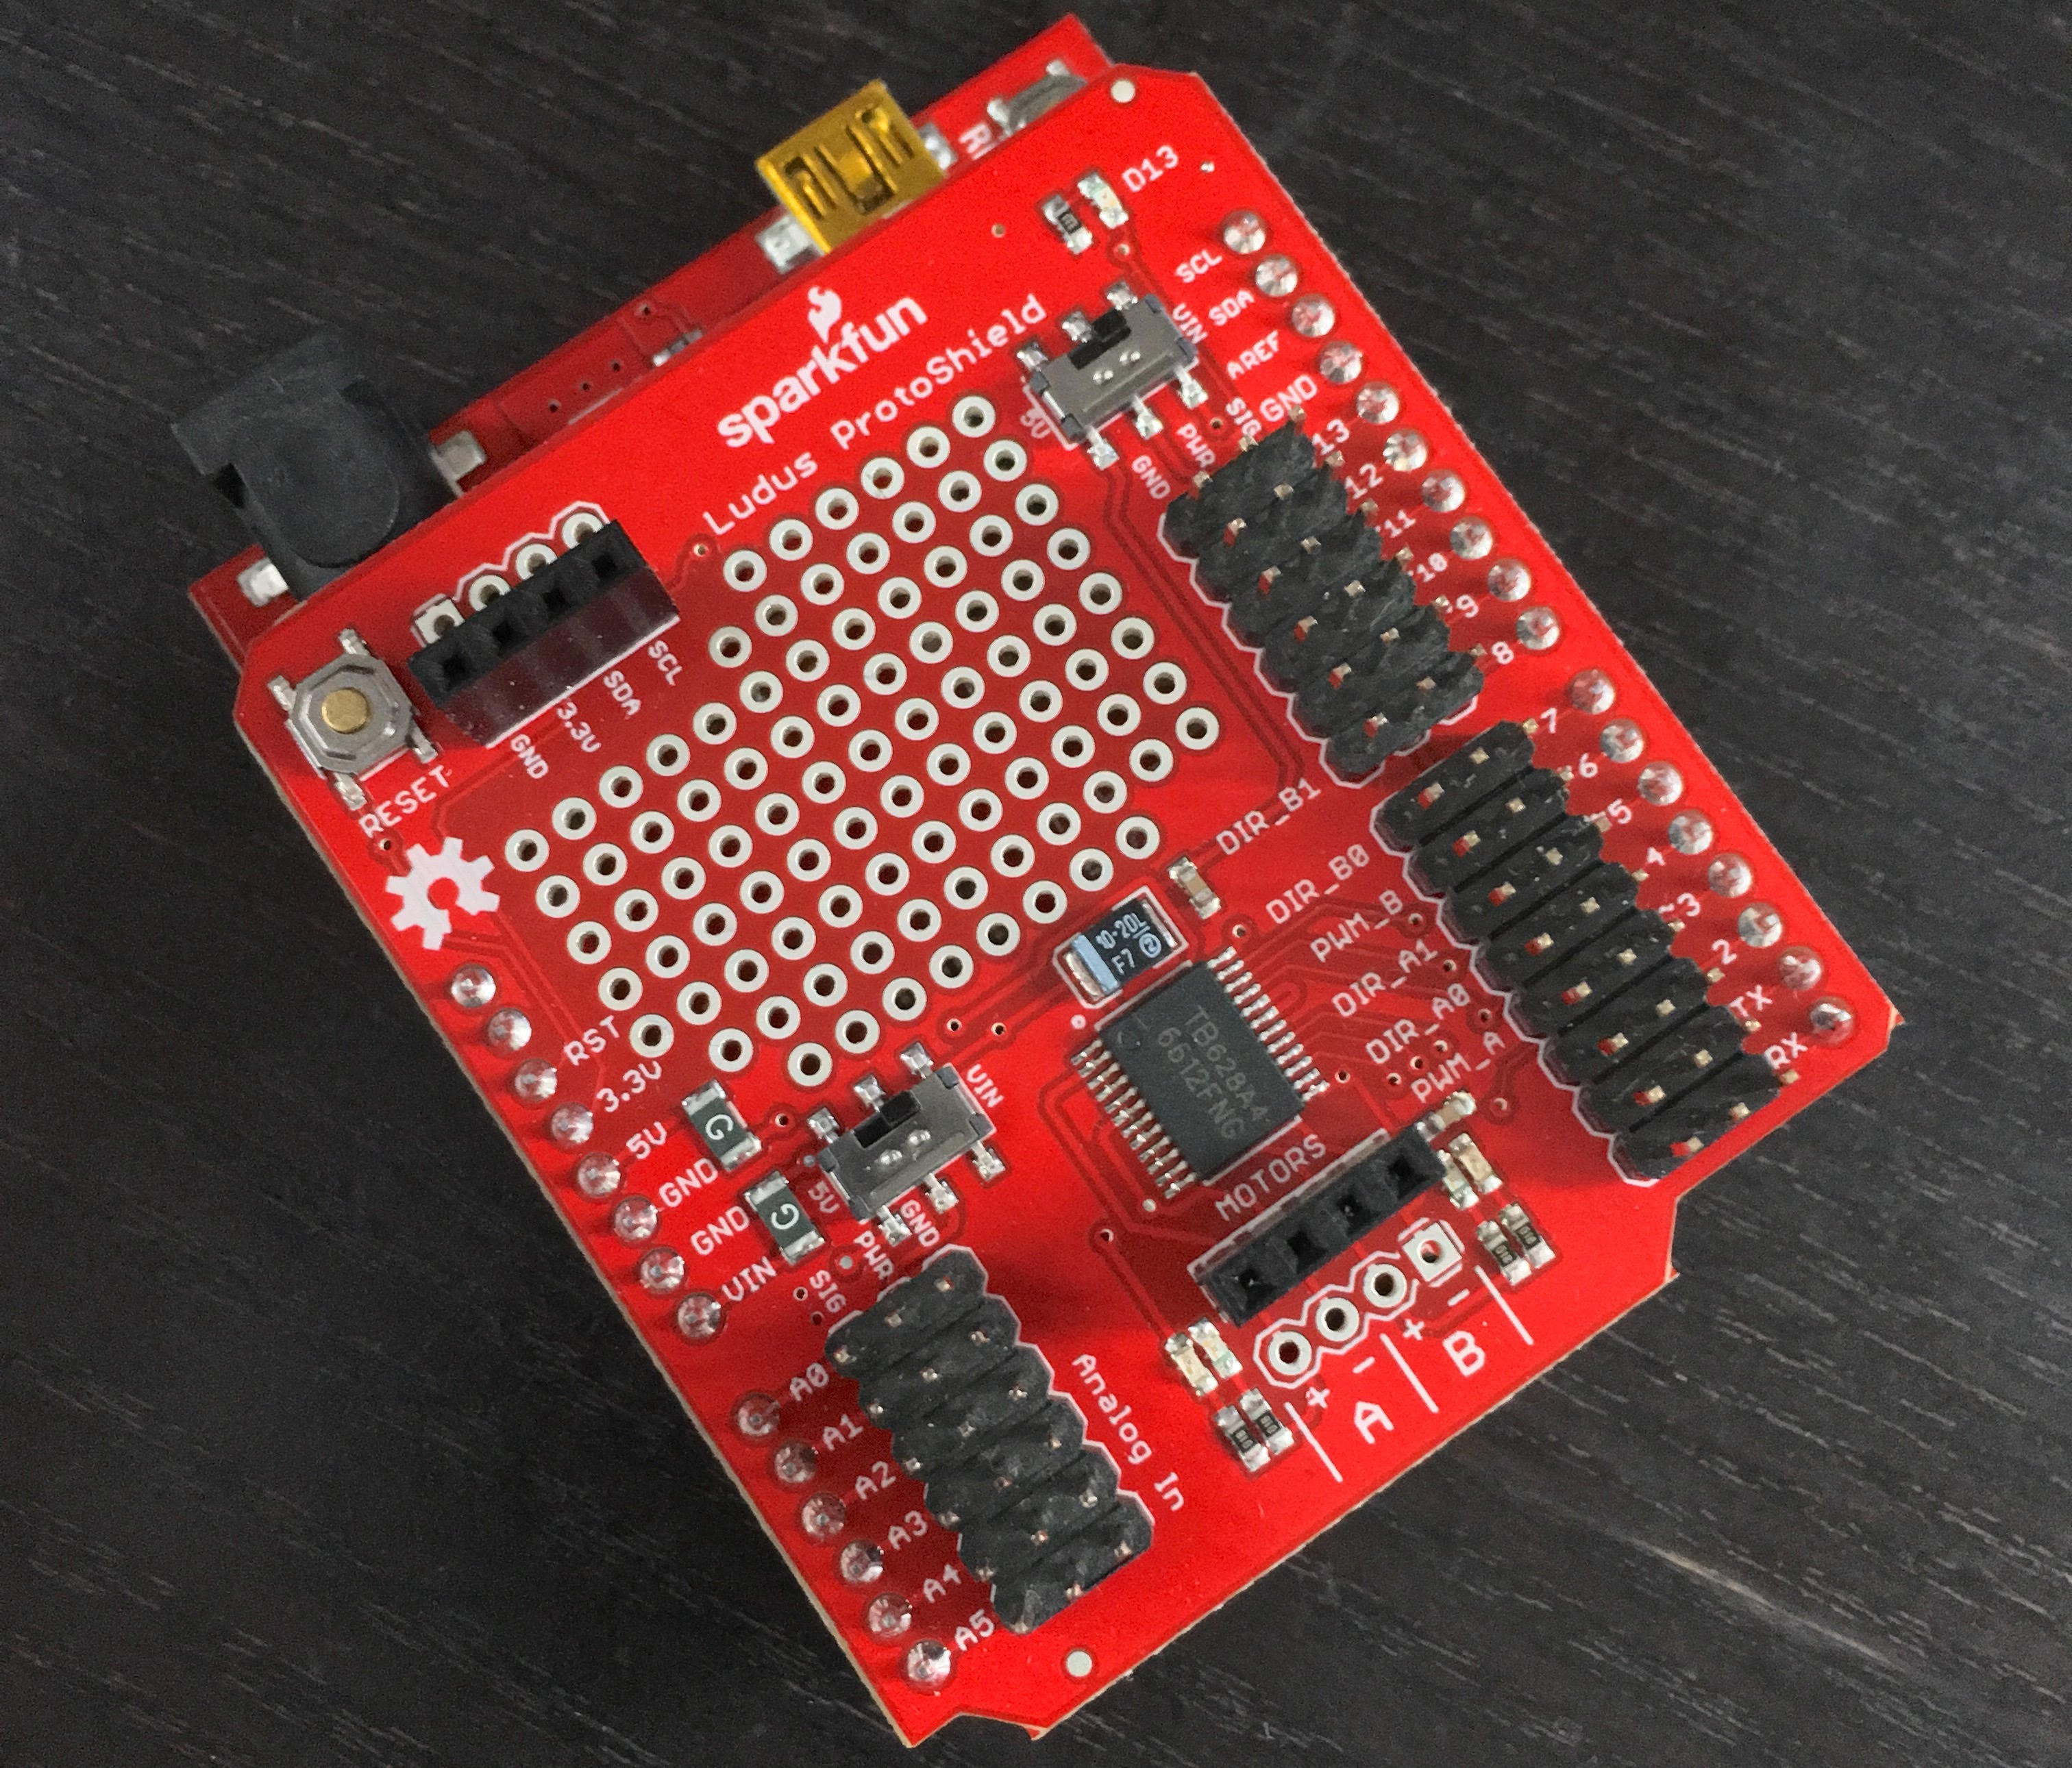
    Here are the files for the arduino uno and Ludus protoshield.

    https://github.com/ryanbeltran/coagulator

  • Working with the Ludus ProtoShield

    Ryan Beltrán04/12/2017 at 22:41 0 comments

    First entry here we go!

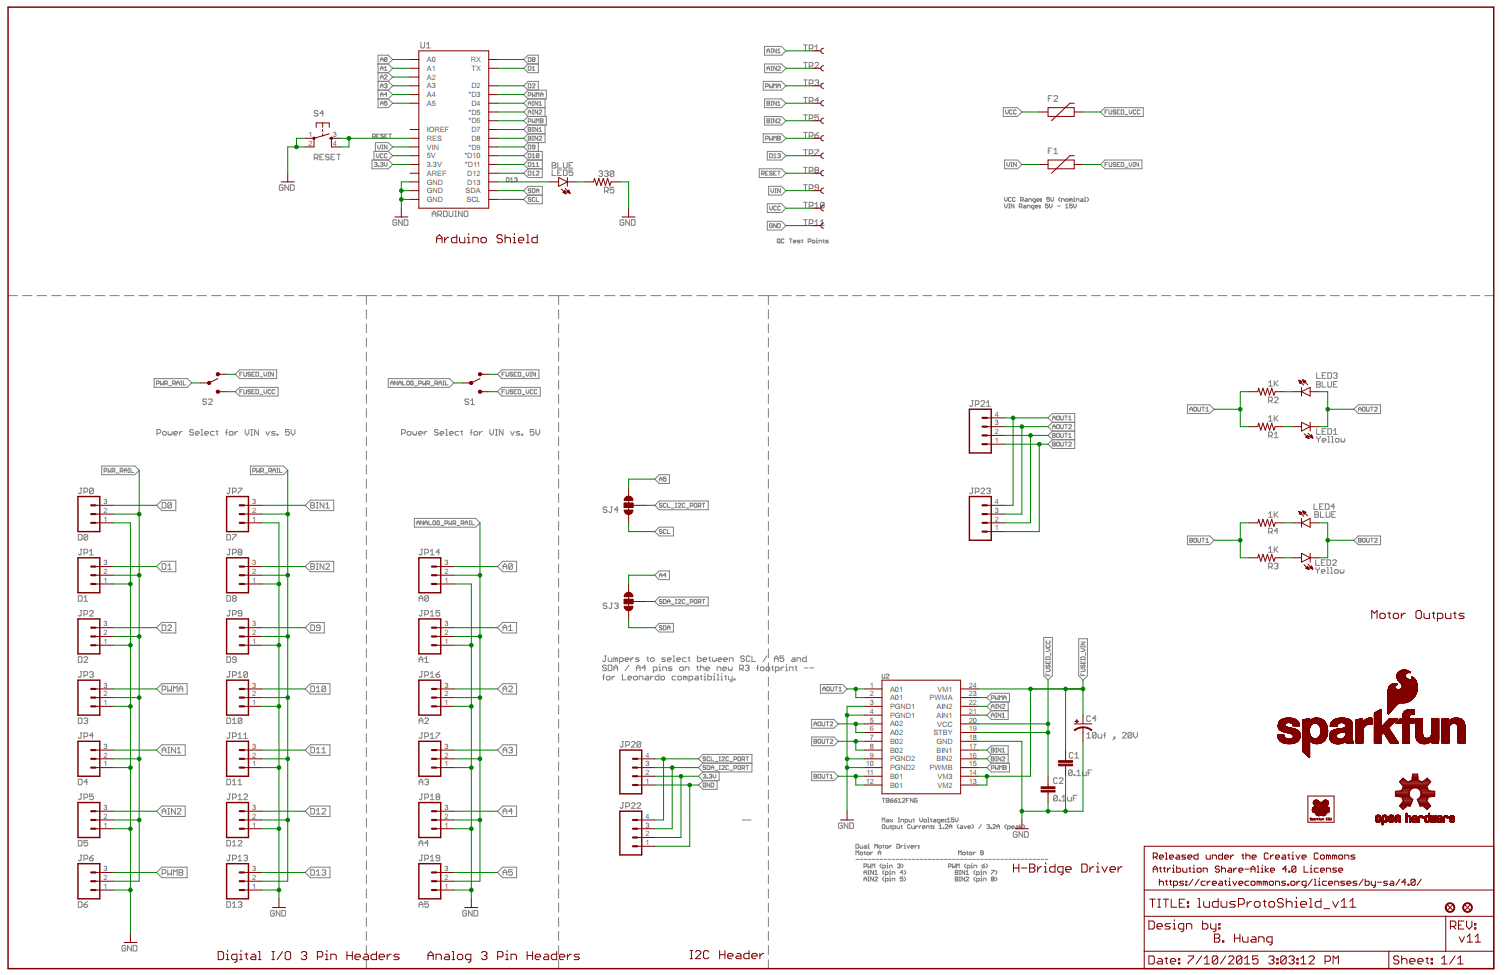
    Ok so we're swapping our old designs and moving towards using UNO type boards with a shield of some sort. We like the ludus protoshield because it already has an h-bridge so that we can swap polarities of the electrodes (a practice that should reduce the amount of gunk buildup on the electrodes). The TB6612FNG H Bridge, is rated up to 1.2A per channel at 13V but the guide recommend using less than 0.8 amps to keep from overheating. I'm using a 12VDC 600mA Power Supply Power Supply.

    So the goal is to utilize this ludus protoshield to send power to electrodes for 20-30 seconds then swap polarity. This should repeat indefinitely until we program a way to control intervals and overall time via an app or dials etc. If we can accomplish this with minimal wiring/soldering/parts this could save time and dinero for all those who want to participate.

    Skematics for Ludus ProtoShield


View all 7 project logs

  • 1
    Step 1

    So that's it? What do I do now?

    Well this is just the tip of the iceberg. There are many uses for electrolysis and one important one we believe is the ability to coagulate pollutants to they are easily filtered. If we learn more about the process together we can potentially empower communities to simply and affordably tackle some of their own water issues without resorting to costly methods or outside assistance that may never come.

    What can you do with electrocoagulation or electrolysis?

    How can I help the Make Water Project?

    • Add sensors so we can further study coagulation
    • Help build curriculum for the classroom around these kits (coding, chemistry, etc).
    • Share your DIY water hacks, stories, and videos for us to share via our youtube channel.
    • Help us improve our arduino code and UI so we can easily make adjustments to timing and data entry

    One way we introduce students to coagulation is by mixing a couple drops of acrylic paint (found at any crafts store) into the water and it gives a great visual representation of coagulation.

    ¿Eso es todo? ¿Qué hago ahora?

    Bueno, esto es sólo el principio. Hay muchos usos para la electrólisis y uno importante que creemos es la capacidad de coagular los contaminantes para que se filtran fácilmente. Si aprendemos más sobre el proceso juntos, potencialmente podemos potenciar a las comunidades para que aborden de manera sencilla y económica algunos de sus propios problemas de agua sin recurrir a métodos costosos o asistencia externa que quizás nunca llegue.

    ¿Qué se puede hacer con la electrocoagulación o la electrólisis?

    • Aprenda acerca de la producción de hidrógeno
    • Usted puede quitar el óxido de los objetos de metal que lo utilizan como un electrodo
    • Refinar / recuperar metales preciosos
    • Utilice materiales de metal reciclado para electrodos
    • Pruebe diferentes tipos de líquidos para coagular y compartir sus hallazgos
    • Aprender sobre la electrólisis con los estudiantes en la clase

    ¿Cómo puedo ayudar al proyecto Make Water?

    • Añadir sensores para poder estudiar la coagulación
    • Ayudar a construir el plan de estudios para la clase en torno a estos kits (codificación, química, etc).
    • Comparta sus cortes, historias y videos de agua de DIY para que los compartamos a través de nuestro canal de youtube.

    Ayúdenos a mejorar nuestro código arduino e interfaz de usuario para que podamos hacer ajustes fácilmente a la hora y la entrada de datos

    Una forma de introducir a los estudiantes a la coagulación es mediante la mezcla de un par de gotas de pintura acrílica (que se encuentra en cualquier tienda de artesanía) en el agua y que da una gran representación visual de la coagulación.


  • 2
    Step 2

    Lets make a coagulator!

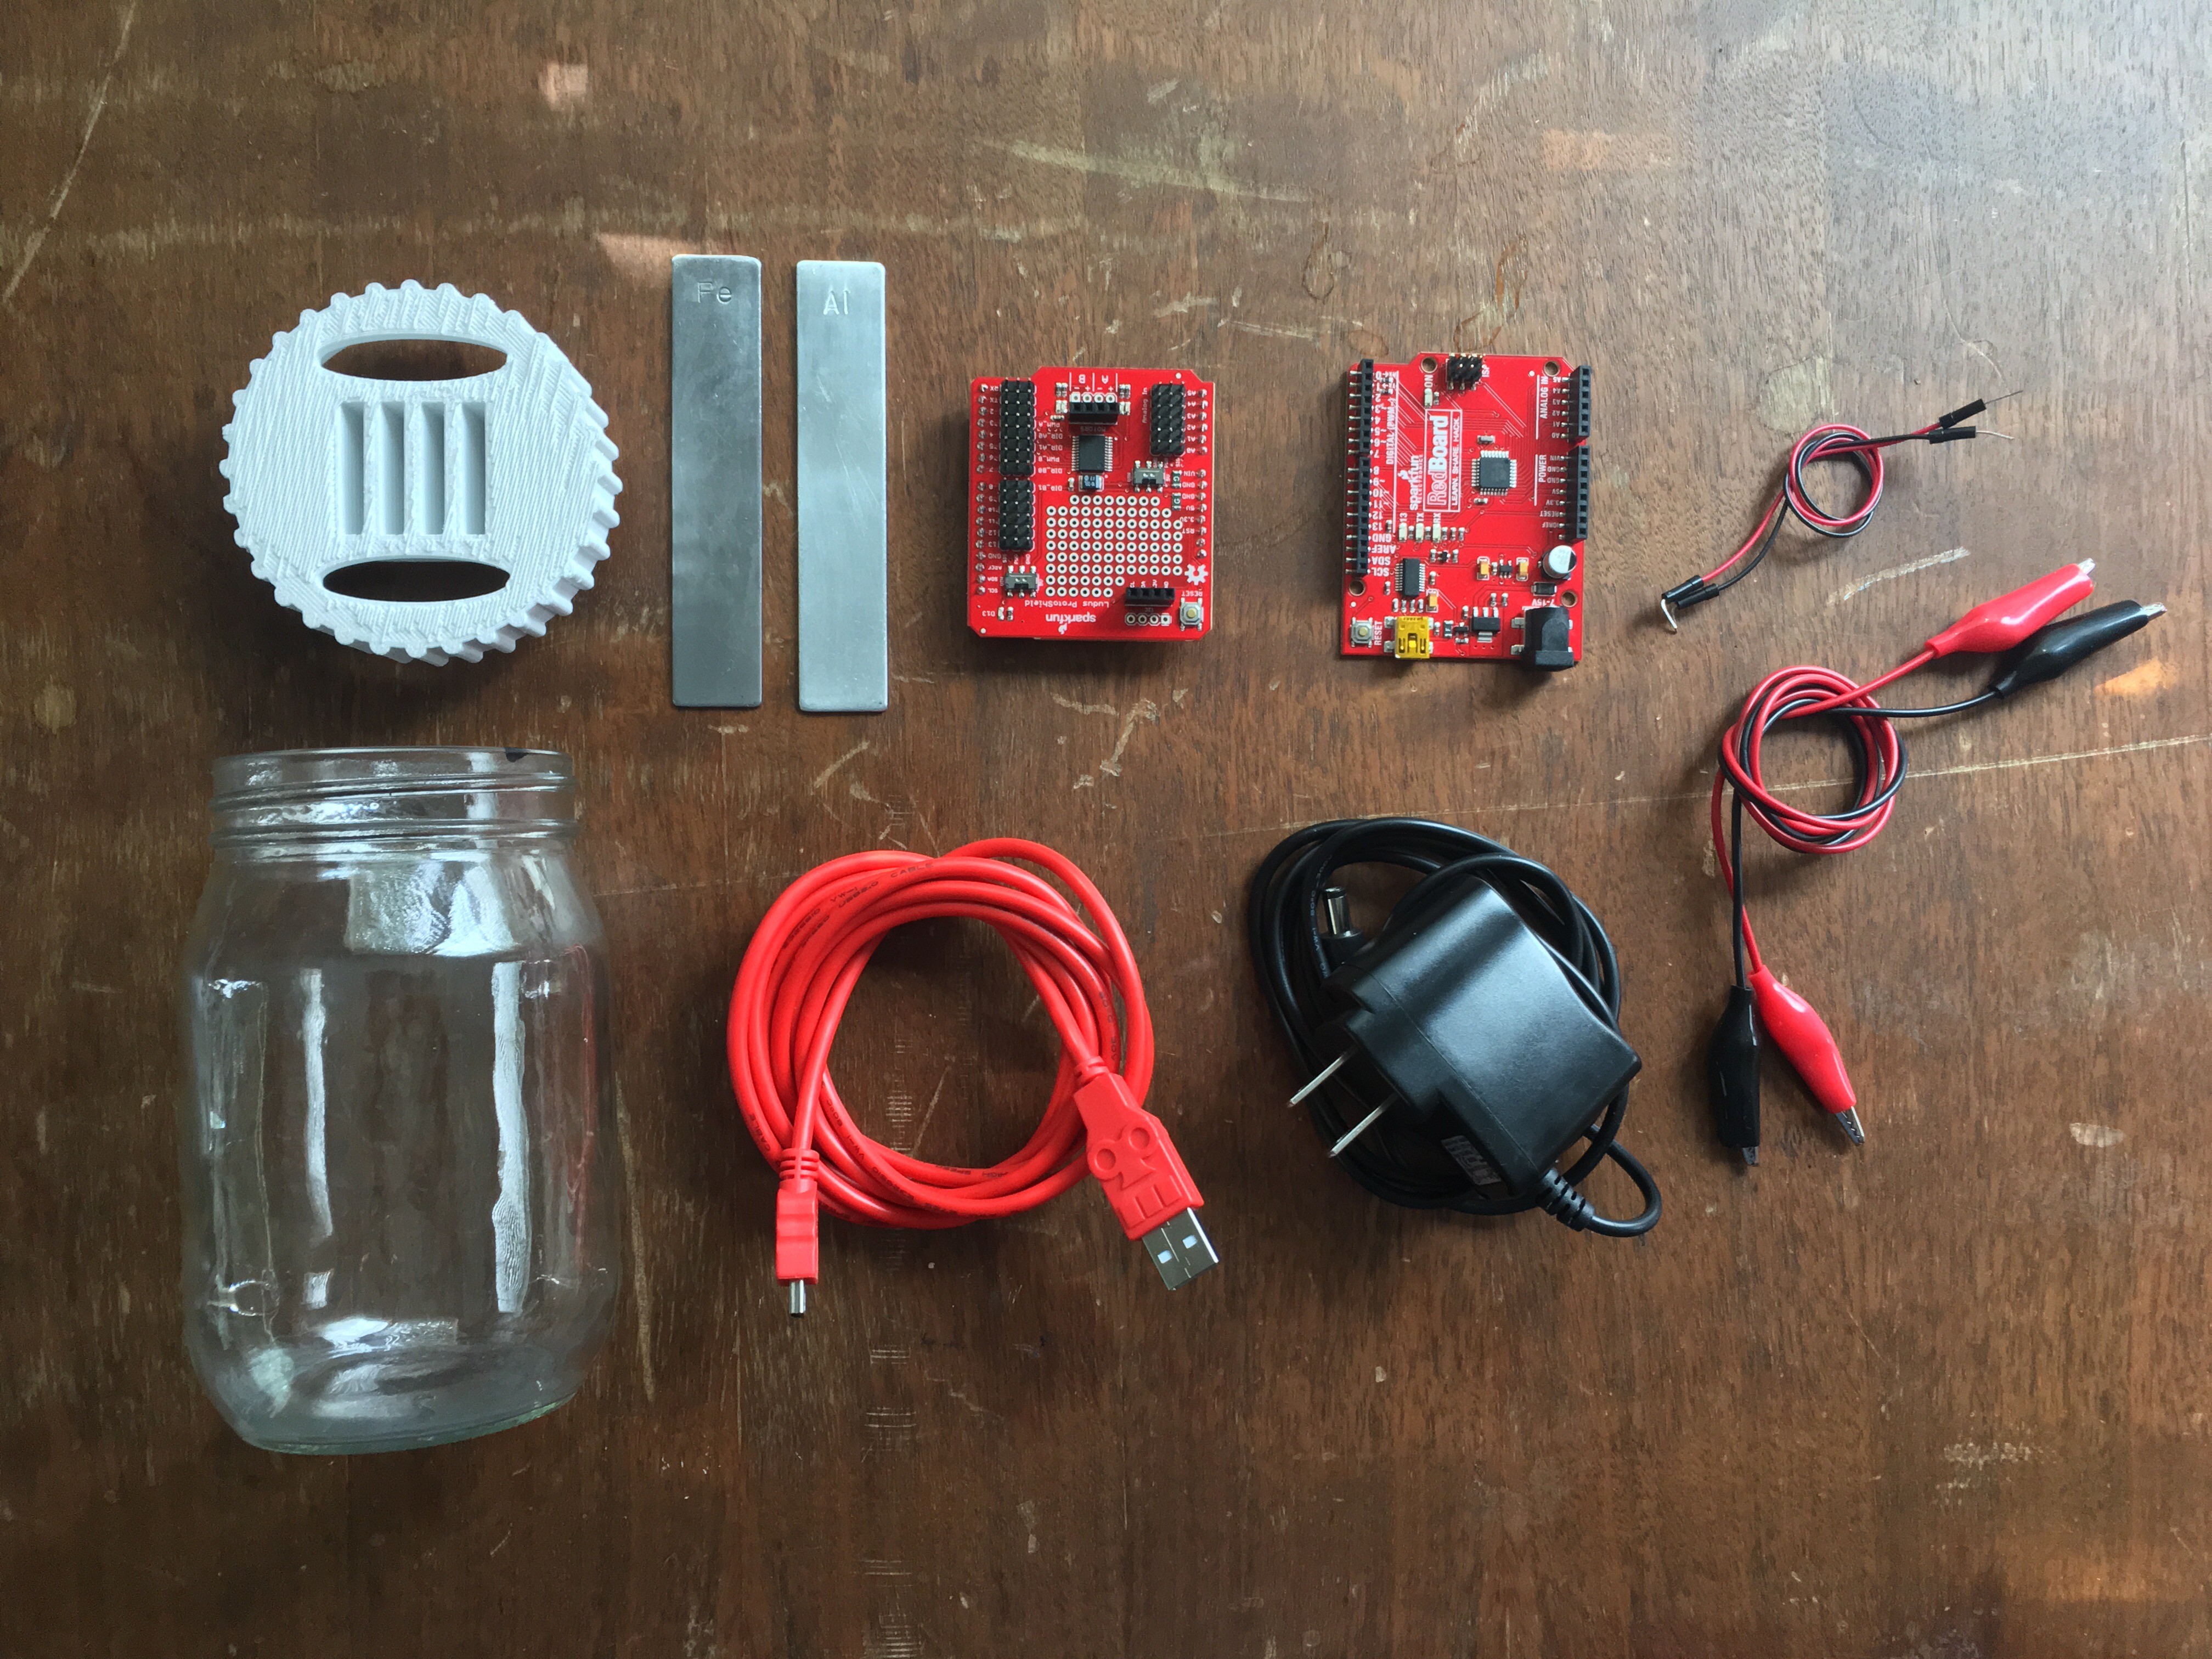
    Make sure you have all your parts ready.

    1x 3D Printed Coagulator Lid - 3D File Link

    1x Mason Jar 16oz

    2x Electrodes - Type of metal is really up to you but we tend to use one aluminum and one iron.

    1x Ludus ProtoShield

    1x Arduino Uno

    2x M/M Leads

    2x Alligator Leads

    1x Power Supply

    1x USB Cable (whichever size fits your arduino)


    Notas en Espanol.
    Si alli preguntas del la systema si hablamos espanol y nos puedes mandar mensajes.

  • 3
    Step 3

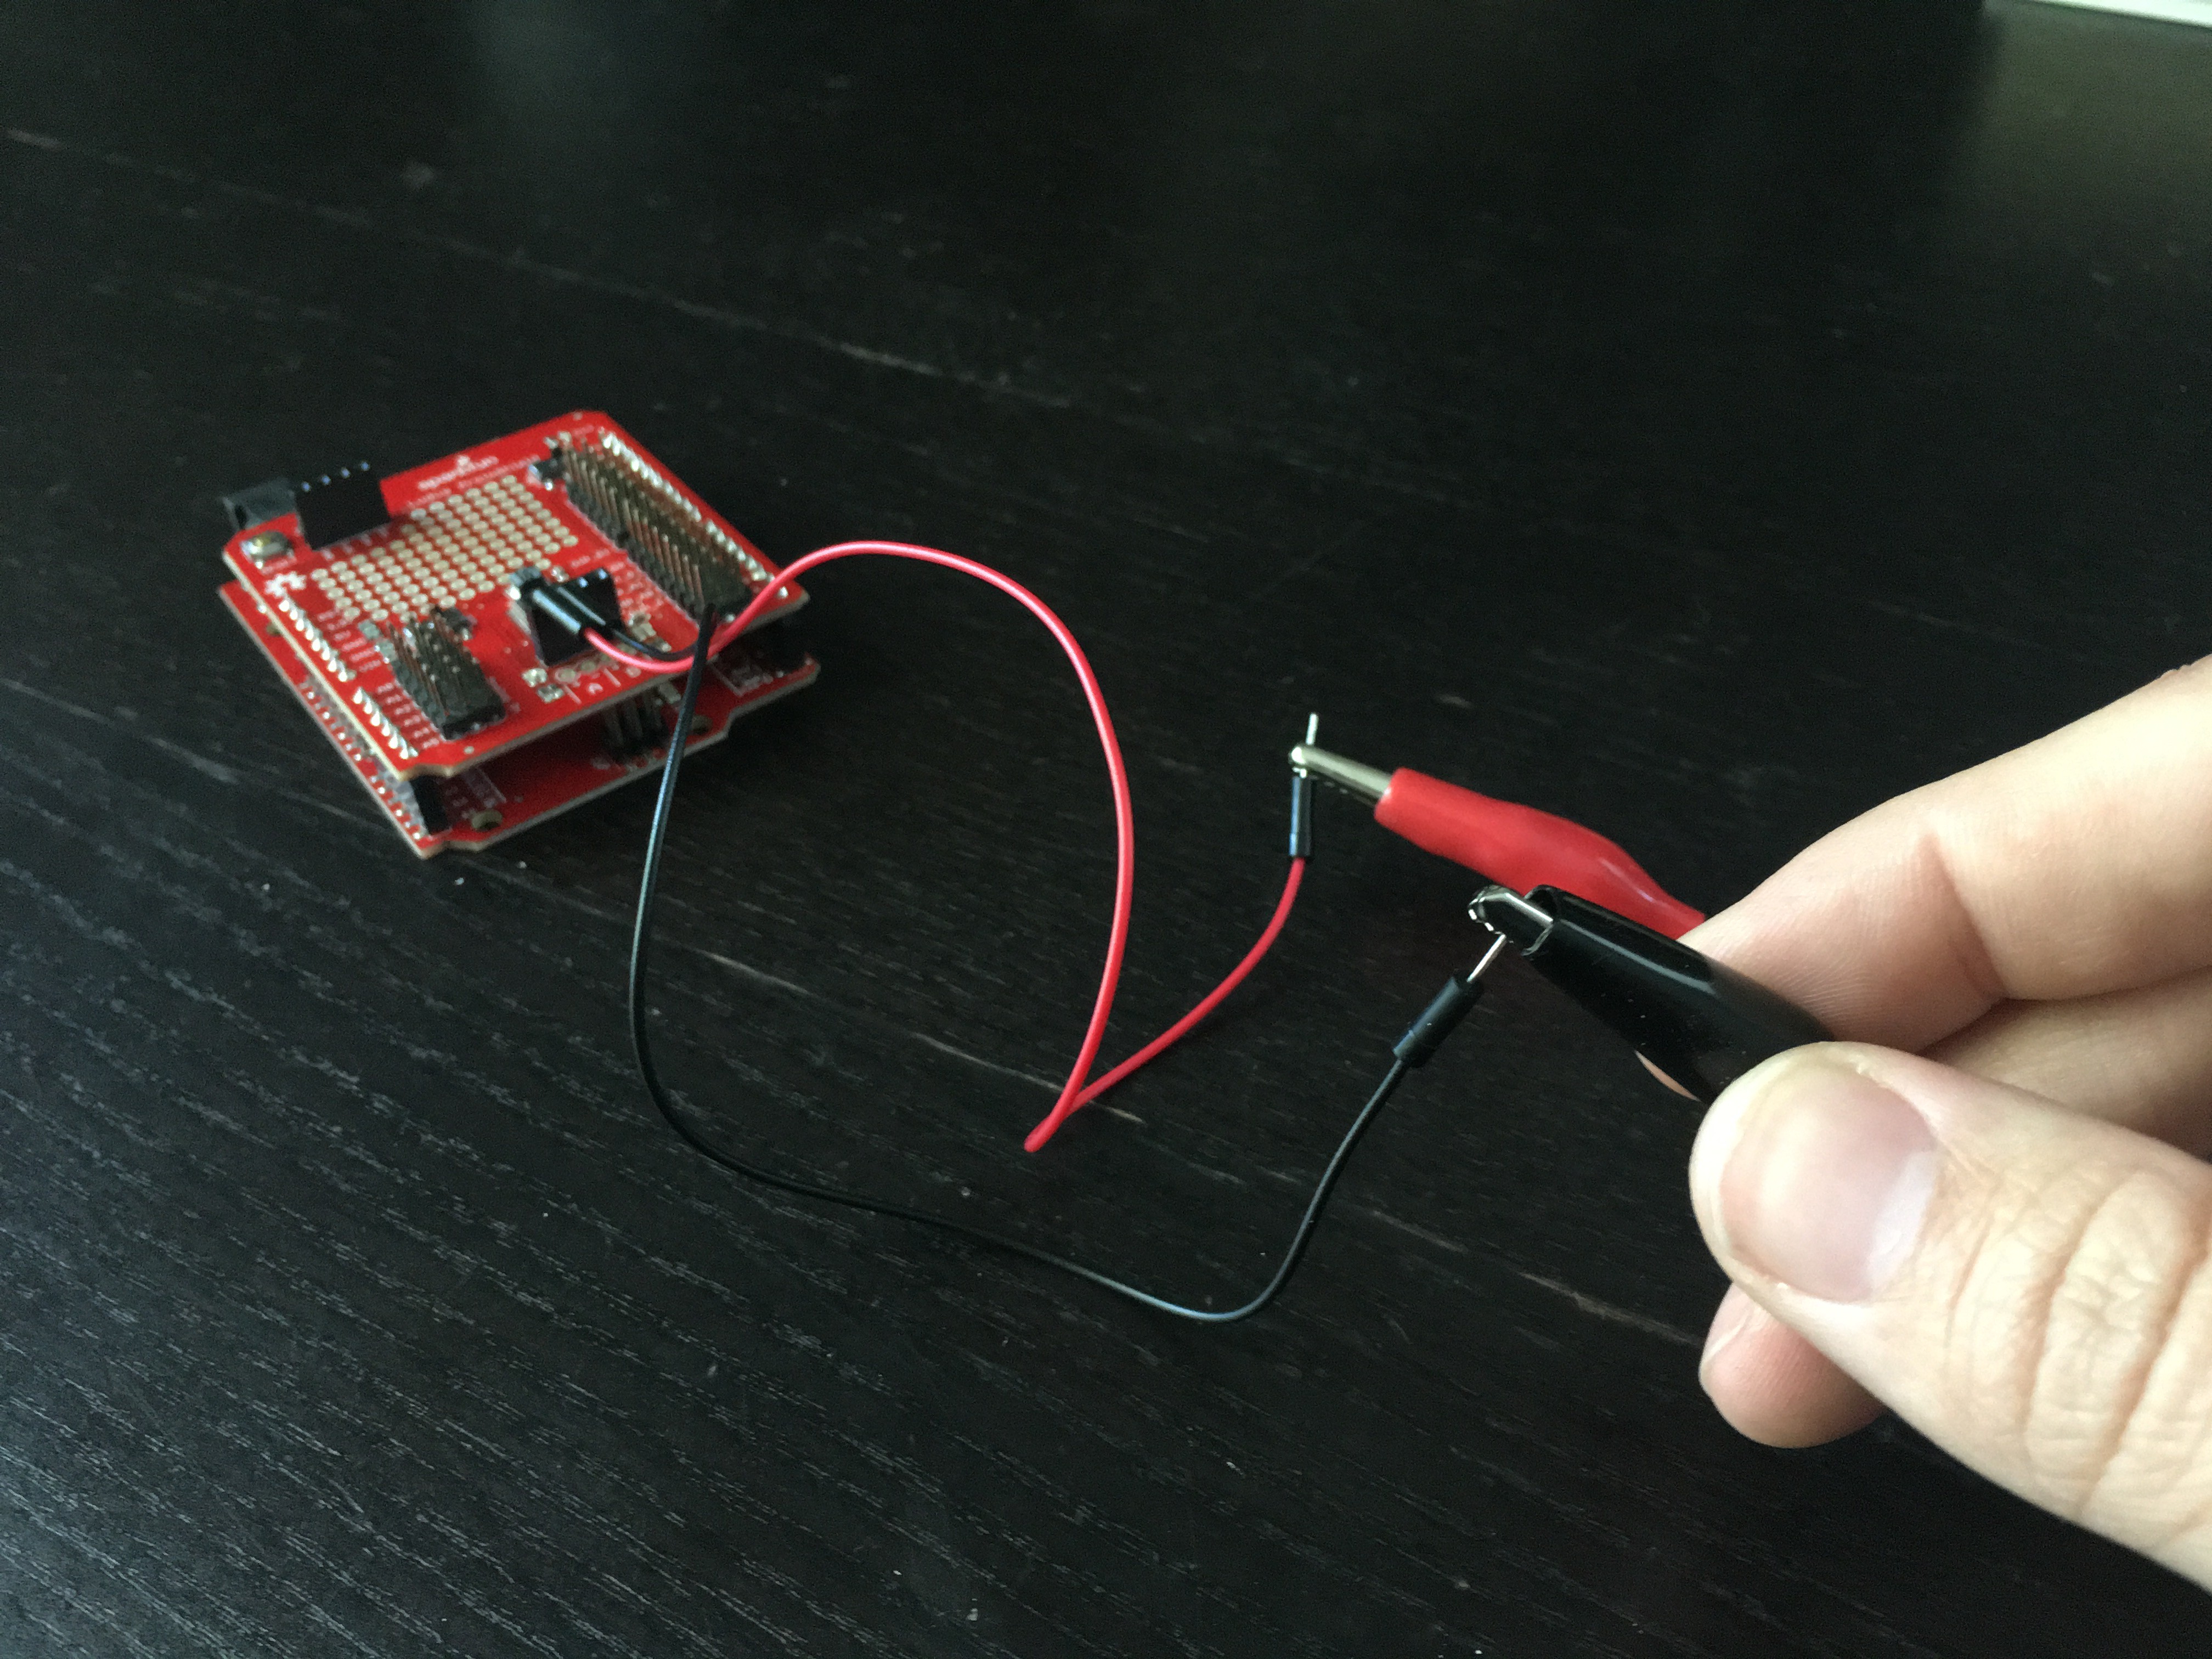
    Clip the alligator leads to the male leads coming from the ludus shield.

    Clip los alligator leads a los cables que vienen del ludus shield.

View all 13 instructions

Enjoy this project?

Share

Discussions

Ryan Beltrán wrote 05/02/2019 at 17:51 point

Everyone please check out our updated coagulator page and like it to participate in the contest!  https://hackaday.io/project/165346-coagulator-kit-make-water-season-3-4

  Are you sure? yes | no

Ryan Beltrán wrote 04/25/2017 at 16:44 point

Updated the files for the new coagulator kits using ludus boards and arduinio UNOs. Still need the 3D printed case base file. 

  Are you sure? yes | no

Similar Projects

Does this project spark your interest?

Become a member to follow this project and never miss any updates