Wow it's been a really long while since I posted the last update here! Well, I have not given up on this project - quite the opposite. It's just that I haven't had time to work on this project in a long while. To my delight there have been more followers to this project in the mean time, so it is about time to show a sign of life.
I have not done too much progress since the last update, the only thing I've done is adding more support for debugging. Now when single stepping I record more information than in the past:
- Program counter
- Address of last write to memory
- Data of last write to memory
- Status register contents
This stuff goes into a log file, the data is written by the Windows program running on the PC which controls the single stepping of the FPGA CPU. Basically it lets the CPU to step one instruction, then it reads the above data (below an example) and the continues with the next instruction.
line:pc  :addr:data:st
   1:0028:83FA:9800:8DC0
   2:002C:83FC:0100:CDC0
   3:0030:83FE:8C02:8DC0
   4:0034:83E0:0020:CDC0
   5:005C:83E0:0020:CDC0
   6:005E:83E8:0000:29C0
   7:0060:83EC:0020:C9C0
I compare this output of the FPGA based CPU to the output of the famous classic99 emulator (I modified the emulator to record the same stuff). Then I wrote a python script to compare the two files. This comparison cannot be done with a normal diff tool since there are some acceptable differences (for example my CPU sets the unused flag bits differently from a real TMS9900).
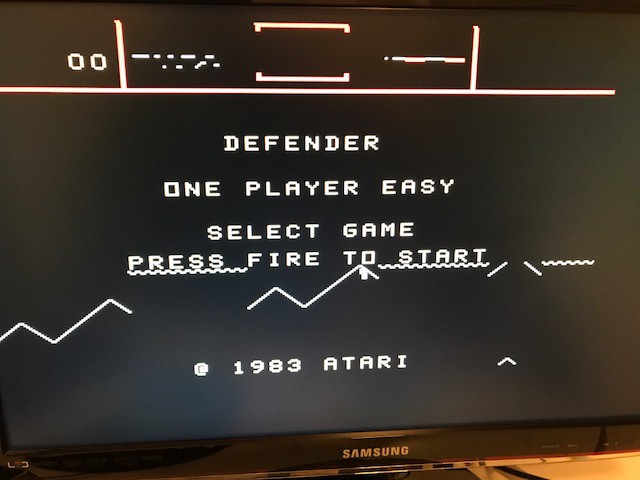
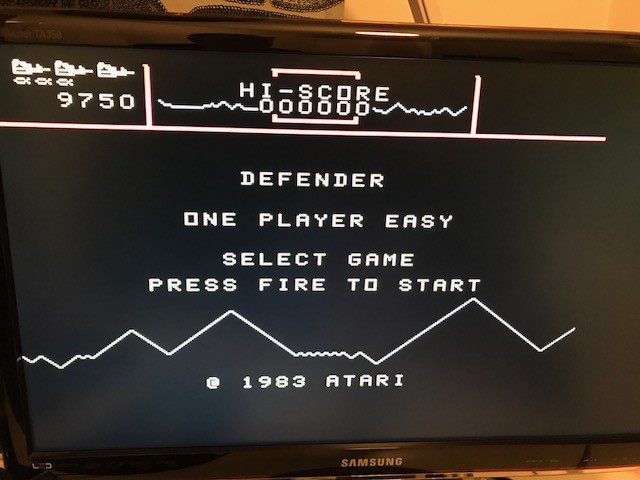
In the past I've tried to do the analysis with TI ROMs, but unfortunately that doesn't produce any output before the FPGA gets stuck somewhere after running correctly a large amount of instructions. Capturing the single step log is a slow process, due to the number of USB transactions needed - my debugging implementation is not that great in that respect. So I now decided to go with another strategy: rather than using the TI Basic ROMs, I'm trying to use the Defender game cartridge. Instead of the normal TI Basic routines firing up the game, I start the game "by hand" using a minimalistic boot loader. With the FPGA CPU that produces the following picture:

This clearly is bogus as can be seen. For reference, my other FPGA project which uses a real TMS99105 CPU chip produces the following picture with the same ROMs loaded:

So the positive thing is that the FPGA CPU does quite many things right... Now I need to load this boot ROM / defender combination to classic99 and capture the log and then make the comparison. For that I need to find out how to load my custom ROM in classic99 instead of the normal Basic ROM...
My motivation to use the defender game cartridge also comes from the fact that this game cartridge contains only a normal ROM chip, not a ROM + GROM combination. I hope that simplifies matters in debugging, as it should mean the GROM interface does not have to work perfectly for the game to work. The fonts seen in the pictures above are loaded from GROM to video memory by my boot code, so the GROM data is still initialised.
Stay tuned, hopefully for not too long this time, as I am trying to make progress with debugging. With this long pause it takes a while to get back up to speed. Luckily I've become pretty good at taking notes - I can't trust my memory to serve me right in projects like this, with pauses of several months between work sessions.
 Erik Piehl
Discussions
Become a Hackaday.io Member
Create an account to leave a comment. Already have an account? Log In.
I love debugging stories. All emulators seem to be born with bugs, and need a few rounds of shakedown with software from the wild - unless someone has written a testsuite, which is rare enough.
Are you sure? yes | no