BOM -
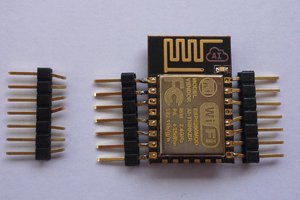
- 2 x cheap "esp-12 adapter" white boards
- 16 x pogo pins
- pin headers
- a piece of FR4 one-sided board
- double-sided proto board (off the shelf part)
- kapton tape
Steps to create -
- First board:
- desolder the resistors on the bottom of the board
- stick kapton tape on left-side holes of a white board
- solder 8 pogo pins to right-side pads of the board
- align and re-solder pins as precise as possible
- TEST CONTINUITY! And avoid any bridges.
- cover the left-side pogo pins above the left-side pads with flux
- solder the left-side pads by adding a bit of solder on top of pogos
- solder a pin header to left-side VCC hole on the bottom
- solder pin headers to right-side holes
- TEST CONTINUITY AGAIN! Yes, again.
- Second board:
- desolder the resistors on the bottom of the board
- stick kapton tape on right-side holes of a white board
- solder 8 pogo pins to left-side esp-12 pads of the board
- align and re-solder pins as precise as possible
- TEST CONTINUITY! And avoid any bridges.
- cover the right-side pogo pins above the right-side pads with flux
- solder the right-side pads by adding a bit of solder on top of pogos
- solder a pin header to right-side GND hole on the bottom
- solder pin headers to left-side holes (reset .. vcc)
- ** solder the VCC pin to the right pad of the desoldered resistor
- TEST CONTINUITY AGAIN! Yes, again.
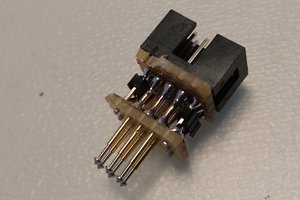
- cut-out a piece of perf. board so that 10 pins are available in the space between the two white boards -- TEST with your pogo pins first.
- remove plastic headers from bottom of pogo pins on the white boards
- push through the pins to the single-side of perf. board that has copper
- solder white boards to be flush (especially on the single header pin side) with the perf. board
- re-inforce the bottom side of the board with a double-sided proto board
- stick some pin headers and solder to give it a good grip on the bottom of the single-sided board.
- add pin headers on the sides and bridge these on the bottom with headers connected to white boards
- TEST CONTINUITY!
- cut off any protruding pins
- ENJOY!
 evgeny.zislis
 MaBe42


 Hulk
Hulk
Great work!