BT's appearance changes a lot through the comic series. I've chosen a single book to build my replica. This is a frame from that comic.
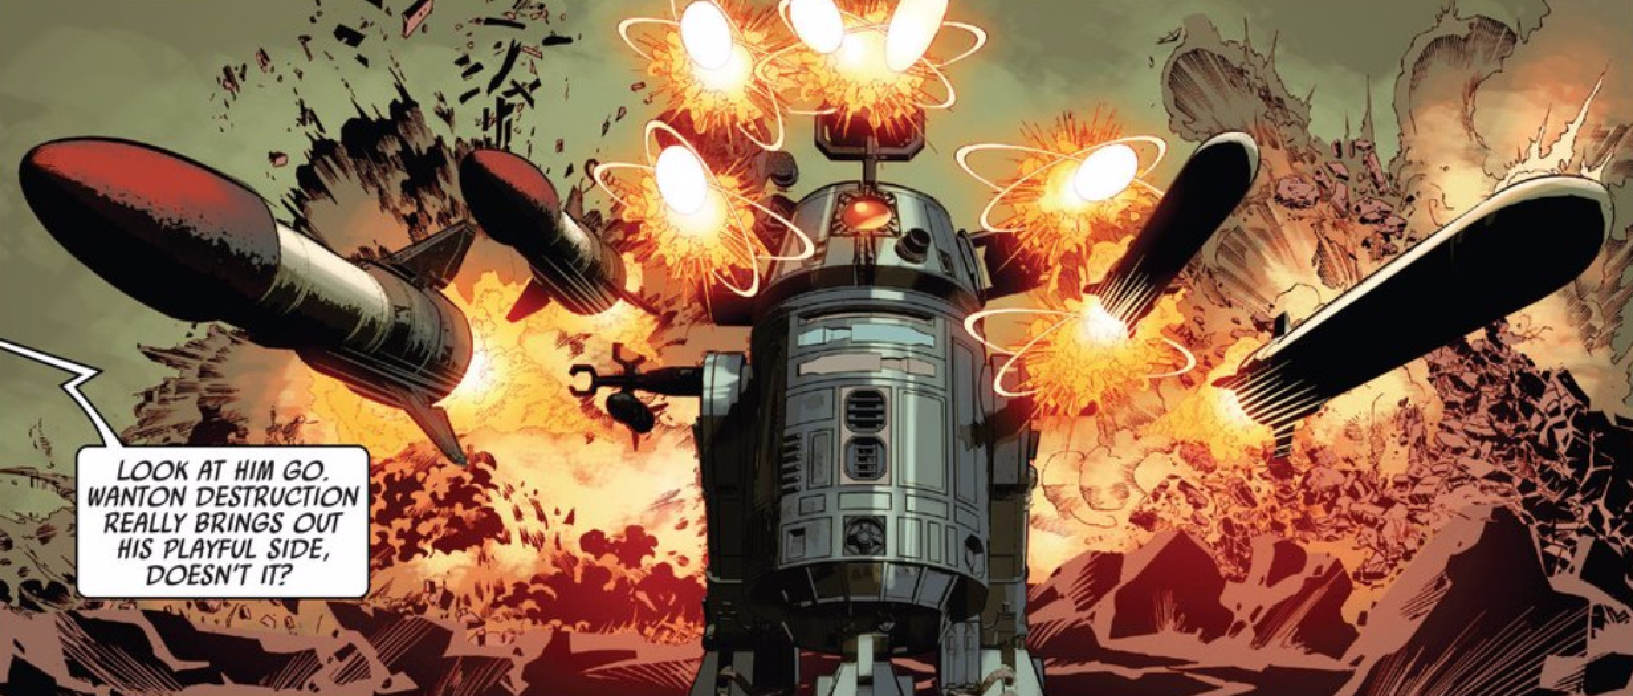
BT-1 was introduced in the Star Wars Darth Vader comic books as a twisted mirror version of R2-D2. BT-1 is the first and only Blastomech.
To make the experience fit your profile, pick a username and tell us what interests you.
We found and based on your interests.
BT's appearance changes a lot through the comic series. I've chosen a single book to build my replica. This is a frame from that comic.
Like all my other projects, BeeTee has been sitting in a corner untouched for nearly 2 years. He did get out for Free Comic Book day in August 2021 but that was it. There's a small event coming up that I'd love to take him too but he can't go without a new weapon, right? Enter the Bubble Gun!
I think I am going to have a blast with this...no pun intended. I can't fire the foam darts at conventions but bubbles have never hurt anyone...I think. I still need to "star wars up" the mounting area but I've got the gun itself wired into the droid and triggered by the same relay I use on the foam dart guns.
I also FINALLY solved his dome spinning issue. My bearing was bent so I ordered a new one, tore it down, cleaned out the heavy grease, drilled, and reassembled it. He can properly look around now. I just need to order some delrin balls to replace the steel ones because it is LOUD.
The big day is finally here. BeeTee gets real ammo (in the form of foam darts) for his chain gun. What does he immediately do with it? Watch and see:
Yeah, he shoots me. A lot. I have the voltage down on that gun and those darts STILL hurt. I will definitely not be firing him at anyone not wearing Stormtrooper armor unless they're a friend that has earned a dart or two. I'm also going to print some orange plugs for the guns so I can be 100% sure he's convention safe.
Since BeeTee was created in a comic book it only seems fitting that he attended Free Comic Book Day.
Thankfully my local comic book shop got in touch with us and had the Pensacola Droid Builders as guests.
Once again BeeTee proved the drive system works well. However, I need to be careful on carpet. He can pull wheelies and nearly topple over. I didn't realize that and nearly had heart failure.
BeeTee made his way to Forward City Con in Foley, Alabama a couple of weeks ago. In between the cons I rebuilt his center foot and replaced his failed motor.
This was also his first con with the chain gun attached. I found a weak spot in my mounting. The glue gave way and the rocket salvo and gun drooped. I already fixed that with a proper application of PVC glue. I did not have his gun "working" for the event. The other droid guys and the 501st group backed out because of the threat of severe weather so I couldn't spare a few moments to reprogram the arduino and route a few new wires.
Here's a short video of BT-1's much improved movements. The only real problem left to solve is the fact his dome doesn't turn very easily now. I am not sure if the bearing is binding or if it is something else.
I've been working to alter the SHADOW system I use in BeeTee to toggle the chain gun. After finding a relay that would not do what I needed I finally found the correct one.
Here's a video of how it actually works.
Next up will be to alter the toy gun to accept the power from the relay through a voltage regulator. The gun only needs 9 volts.
I've only got a few days left until the largest convention in the area and the one where I want to debut BeeTee. I spent a day wiring up all the electronics and motors.
I cut a large cutting board in half and then used scrap aluminum c channel from a shower door that I was given when a neighbor remodeled their bath. The channel was screwed to the frame and then the board fits snuggly in and is screwed. I added an angle bracket at the top to keep it from wobbling.
The current electronics were mounted with room to expand when I get his foam weapons functional.
The electronics were finally finished along with the 12v 20Ah battery. Then I tested BT-1.
I've finally started on the electronics for BeeTee. Various types of logic displays are available on Astromech and they are all worth the money. However, I really wanted to attempt to build my own. I started with a 3d printed base and frame. Then I added 2mm fiber optic cable and a couple of 7x Neopixel disks and Arduino Nano. The original R2D2's logic displays were a color wheel spun by Kenny Baker while he was inside R2. The light went into strands of fiber optic cable. I am trying to mimic this effect.
The strands are cut to length depending on their logic board's location. Then the end is stripped to fit into the printed base. They vary in strip depth to give a 3d effect when lit up.
The KCup is just a prototype light funnel. It works so I can use it to make the final version.
R2-D2 has blue and white logics. For BT-1 I went with purple and orange. I thought about red and purple but I didn't want to take away from the affect that giant red eye was going to have on people.
Speaking of that red eye, my next project was to take that bulky Halloween light and turn it into something more manageable. I also wanted to power it from BeeTee's power source and not the AA batteries.
Before I cut it up I wanted to make sure I didn't break anything by taking it apart.
A rotary tool made quick work of the plastic. I kept one of the octagons as a place to glue down the electronics. Yes, that is a toilet flange. It was unused. It was in my parts bin from a few years ago when I used it for a base for a Mr Fusion on my DeLorean in a Christmas parade. Also, yes. That is a coffee can lid. I make things out of garbage.
I painted BeeTee's body shortly before the cold snap made doing much of anything impossible.
I've also been working on the shoulder mounted weapons systems. This is going to be one very wide droid. I've incorporated a quick connect in the shoulders so I can easily change the loadouts or get him through doorways. You can see how it works in the video below.
I painted one of BT's legs before the temperature dropped suddenly and it was no longer possible.
The shoulder detail and the ankle cylinders need to be painted. I am still trying to figure out what color I want to make them. I also have to cut out a set of ankle brackets out of aluminum.
I'm to the fun part of the painting. I enjoy adding little touches like the gold paint in the indentions.
Create an account to leave a comment. Already have an account? Log In.
Become a member to follow this project and never miss any updates
By using our website and services, you expressly agree to the placement of our performance, functionality, and advertising cookies. Learn More
Brilliant! Absolutely wonderful to see man, great job!