avishorp
-
Towards a Minor Hardware Upgrade
08/19/2014 at 13:20 • 0 commentsPlaying around with ASTROGUN in the last few months, a couple of hardware problems has been revealed. Here's what I'm planning to upgrade in the next few weeks:
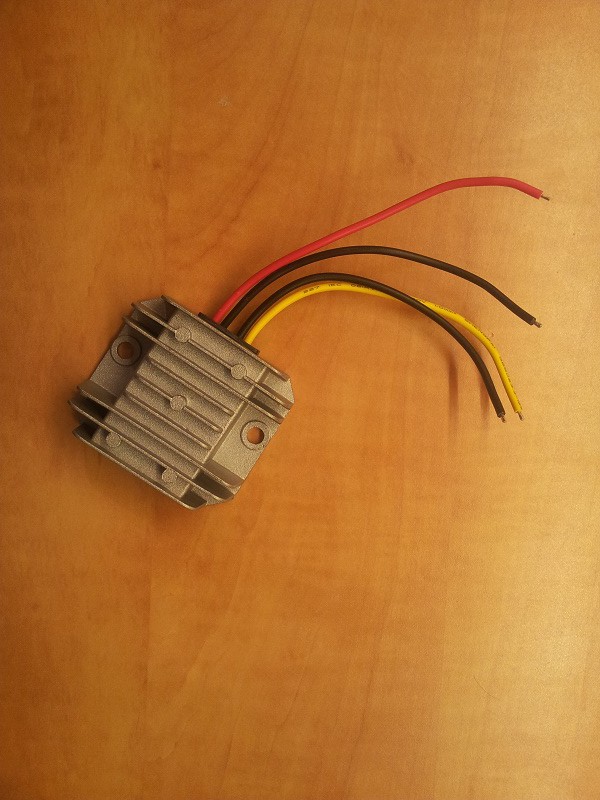
1. Power Supply - I've been using a cheap, ebay sourced, DC/DC to convert the battery voltage (~10-12V) to 5V. The current consumption of the system is around 2.5A (without too much thinking, I ordered a 5V version of the LCD controller instead of a 12V version - this is a major power consumer). While the rated current of the DC/DC is 3A, this is not the kind of component you want to bring to the edge of performance, especially knowing that its failure may take the whole system down with it. So I ordered a new, 25W DC/DC which should have enough margin to push this system, and generally looks much more robust. I just hope it's not big enough to fit in the gun body.
![]()
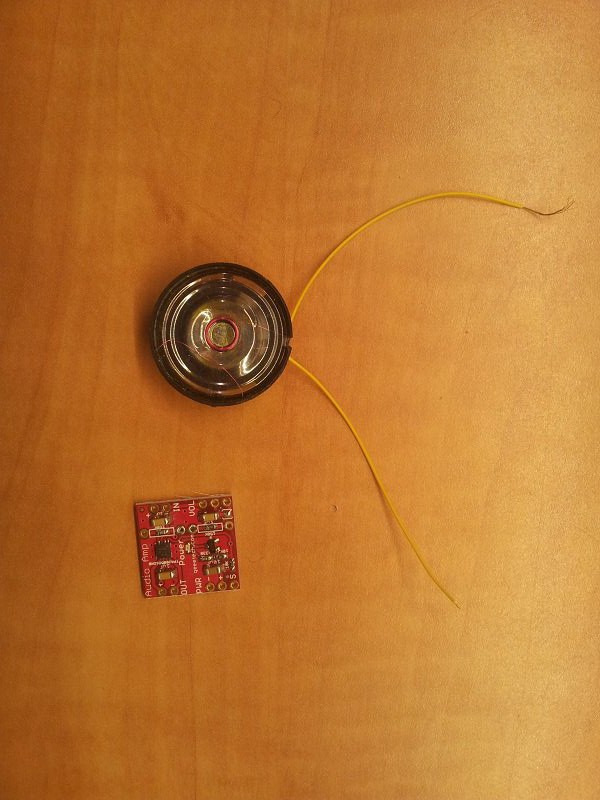
2. Amplifier & Speaker - There are some sound effects played by game (they can be barely heard at the YouTube clip). Until now, the player had to put on headphones to hear it. I'm planning to add a small speaker (which was originally in the gun) with a small, single channel audio amplifier, to enhance the playing experience.
![]()
3. Trigger Button - The trigger in the original toy had an electric contact, which was very convenient. However, the trigger has a long travel which is not very convenient. It also makes a weird noise ("duck being raped" as one of the commenter wrote ...) which can be very well heard in the clip. I'm planning to add a tactile switch to eliminate those two problems.
4. New HDMI cable - I only had a long cable at the time, so I had to wrap it around the barrel. Now I have a new, short cable which I'm planning to install.
-
The Software Stack
08/18/2014 at 10:44 • 0 commentsSoftware documentation is a complex issue, and project log is probably not a best place to do it. Nevertheless, here's a short review of the major software components that were used in the creation of the ASTROGUN.
First of all - the Pi operating system Raspbian. There's not a lot to say about it that already haven't been said. Just copy the image onto an SD card, put the card in the Pi and off you go.
The application was written in the Python language, also an extremely popular choice for Pi programming. All the main logic of the game (Asteroid generation, scores, lives, etc.) were written in pure Python. Some places required a little number crunching. For example, when a shot is made the program calculates whether it would hit an Asteroid or not. Such calculation were made using NumPy. The general logic of the game is quite simple. The player always stands at a fixed point (0,0,0) and Asteroids are randomly generated at various angles and times. Every Asteroid is initially created at a fixed distance (one that is far enough to looks like a single pixel to the player) and moves along a linear course towards the player. If the Asteroid arrives to a certain distance from the origin, it is considered as a hit. When the player moves the gun, an IMU is used to sense the direction (angle) to which the player is looking and adjust a virtual camera, eventually causing the correct graphics to be drawn. When the player squeezes the trigger, a bullet is created with a course opposite to the Asteroid - it starts from the origin and travel in a straight line at the angle the user was looking at when hitting the trigger. If the bullet hits the Asteroid, it explodes and a point is added to the player; otherwise it travels until it hits a certain distance from the origin and disappears.
The 3D graphics task is performed by the Pi3D library which acts as a bridge between the Python code to the GLES interface, which in turn is executed on the GPU. When I started the project, I had no previous experience in 3D graphics (though I was familiar with its concepts) and this library helped me to quickly ramp up fro idea into a full application.
Finally, the gun orientation was calculated, as I already mentioned, from the outputs of an IMU (Accelerometer, Gyroscope & Magnetometer). The fusion of the output of those sensors into an orientation angle (not a trivial task at all) was done using the RTIMULib. During the development, I had to interface that library, which was written in C++, to the main application written in Python. To do this, I created a Python binding module, which was contributed back to the project.
This is not a full list of course. I used PyGame to add sound effects, Blender to post-process the Asteroid models (grabbed from the 3D Asteroid Catalogue), Inkscape to create graphichs and many more. To put it simply, open source is what made this thing possible!
-
Practical HUD Considerations
08/14/2014 at 05:11 • 0 commentsUnderstanding the operation principles of the HUD, we can get down to practice.
First is the beamsplitter glass. It turned out to be one of the hardest components to source, at least in a reasonable price and the in short time frame this project have had. After a long search, we found telepromptermirror.com - a USA vendor that sells this kind of glass, custom cut to the required size. The glass had 70T30R characteristics - meaning it has 70% transparency and 30% reflectivity (70% of the light hitting the glass will pass through to the other side, while 30% will be reflected back). This ratio seem to be quite common, at it perfectly matches our application.
Now to the LCD panel. We targeted 8" panel since it looked like a reasonable size to look through comfortably. There are two main optical properties that are important here - brightness and contrast. High brightness is required since the image brightness is attenuated (30% reflectivity) and then overlaid on a background that is potentially bright. This is a big deal in aircraft application, because the data should be visible in direct sunlight condition. The ASTROGUN is not designed for such harsh conditions, so we can do with considerably less bright display. Making some experiments with the glass, we came to conclusion that brightness of ~400 mcd is sufficient (this is the brightness of many cell phone/tablet screens; for comparison, many computer monitors are around 250 mcd).
High contrast ratio is required to reduce the "gray rectangle" appearing across the whole area of the HUD, due to the light emitted from black pixels.
Finally, we settled down on a HannStar HSD070PWW1 panel. In addition to having all the optical requirements, it also has a resolution of 1280x800 and high quality color reproduction (it's IPS). It looks like a very common model, and it's easy to source along with a controller required to connect it to the Pi.
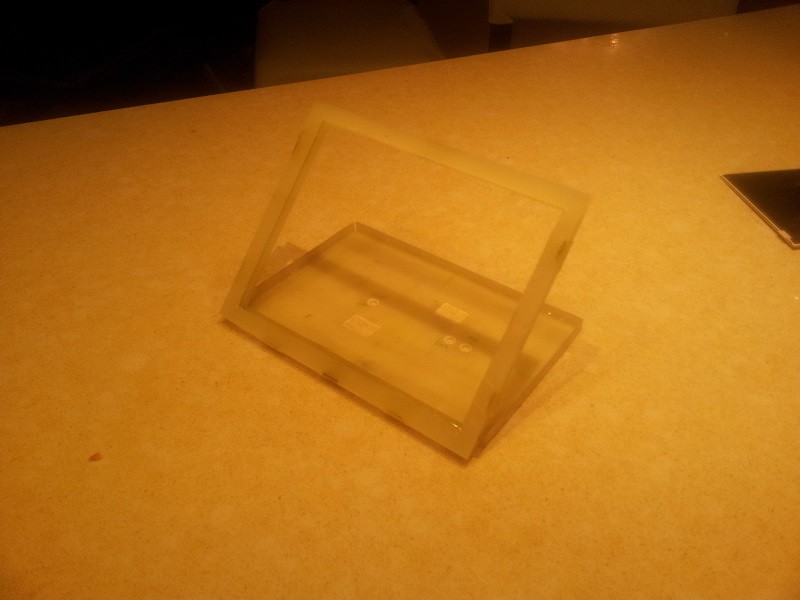
The glass and the panel are mounted using a fiberglass structure made of two parts. The upper one is built from two parallel plates that hold the glass like a sandwich. The lower part looks like a tray and holds the LCD. The panel is glued to the tray with several drops of contact cement. The two assemblies are glued to one each other in an angle of 45 degrees. Additional holes in the tray are used for mounting and, of course, to let the flat cable from the panel out.
![]()
-
HUD Principles and Construction
08/12/2014 at 09:41 • 0 commentsA HUD (Heads Up Display) is a system that was originally designed for combat pilots, allowing them to get vital flight information without having to look away from the window.
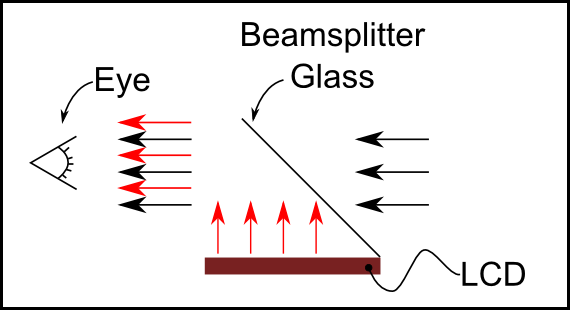
The main component of every HUD system is a combiner glass (also called beamsplitter). It is a piece of glass, that in addition to being transparent, it possesses some degree of reflectivity. That way, when the glass is positioned at 45 degrees, the user can see through it, with additional image being injected from some source (CRT, LCD display etc.). This setup is demonstrated in the picture:
![]()
One major issue with this setup is focusing. When we look towards an object, our eye-brain system focuses the image on the Retina, allowing us to see it sharply. When injecting the additional image, we should take this fact into consideration, otherwise that injected image would not be properly focused, and we will not be able to understand it. The aircraft case (as well as modern use in cars) is relatively simple. Our eye is focused at large distance, "infinity", so all we have to do is to put collimation lens that make the image look as if it comes from far away. In our case the problem is more difficult. When we're in a room, looking around, the distance from the eye to the various objects is small and the eye keeps changing its focal length, so a fixed lens would not be sufficient. Actually, we didn't solve the problem at all. This fact does have an impact on the result. The Asteroid image is not seen as "floating around the room", but rather it gives a feeling of "looking through a computer screen". Nevertheless, the overall experience is pretty good.