Close
0%
0%

Single Chip AVR BASIC Computer V0.3

A computer running BASIC, generating composite video and reading PS/2 keyboard input using a single ATmega microcontroller

danDan
Similar projects worth following
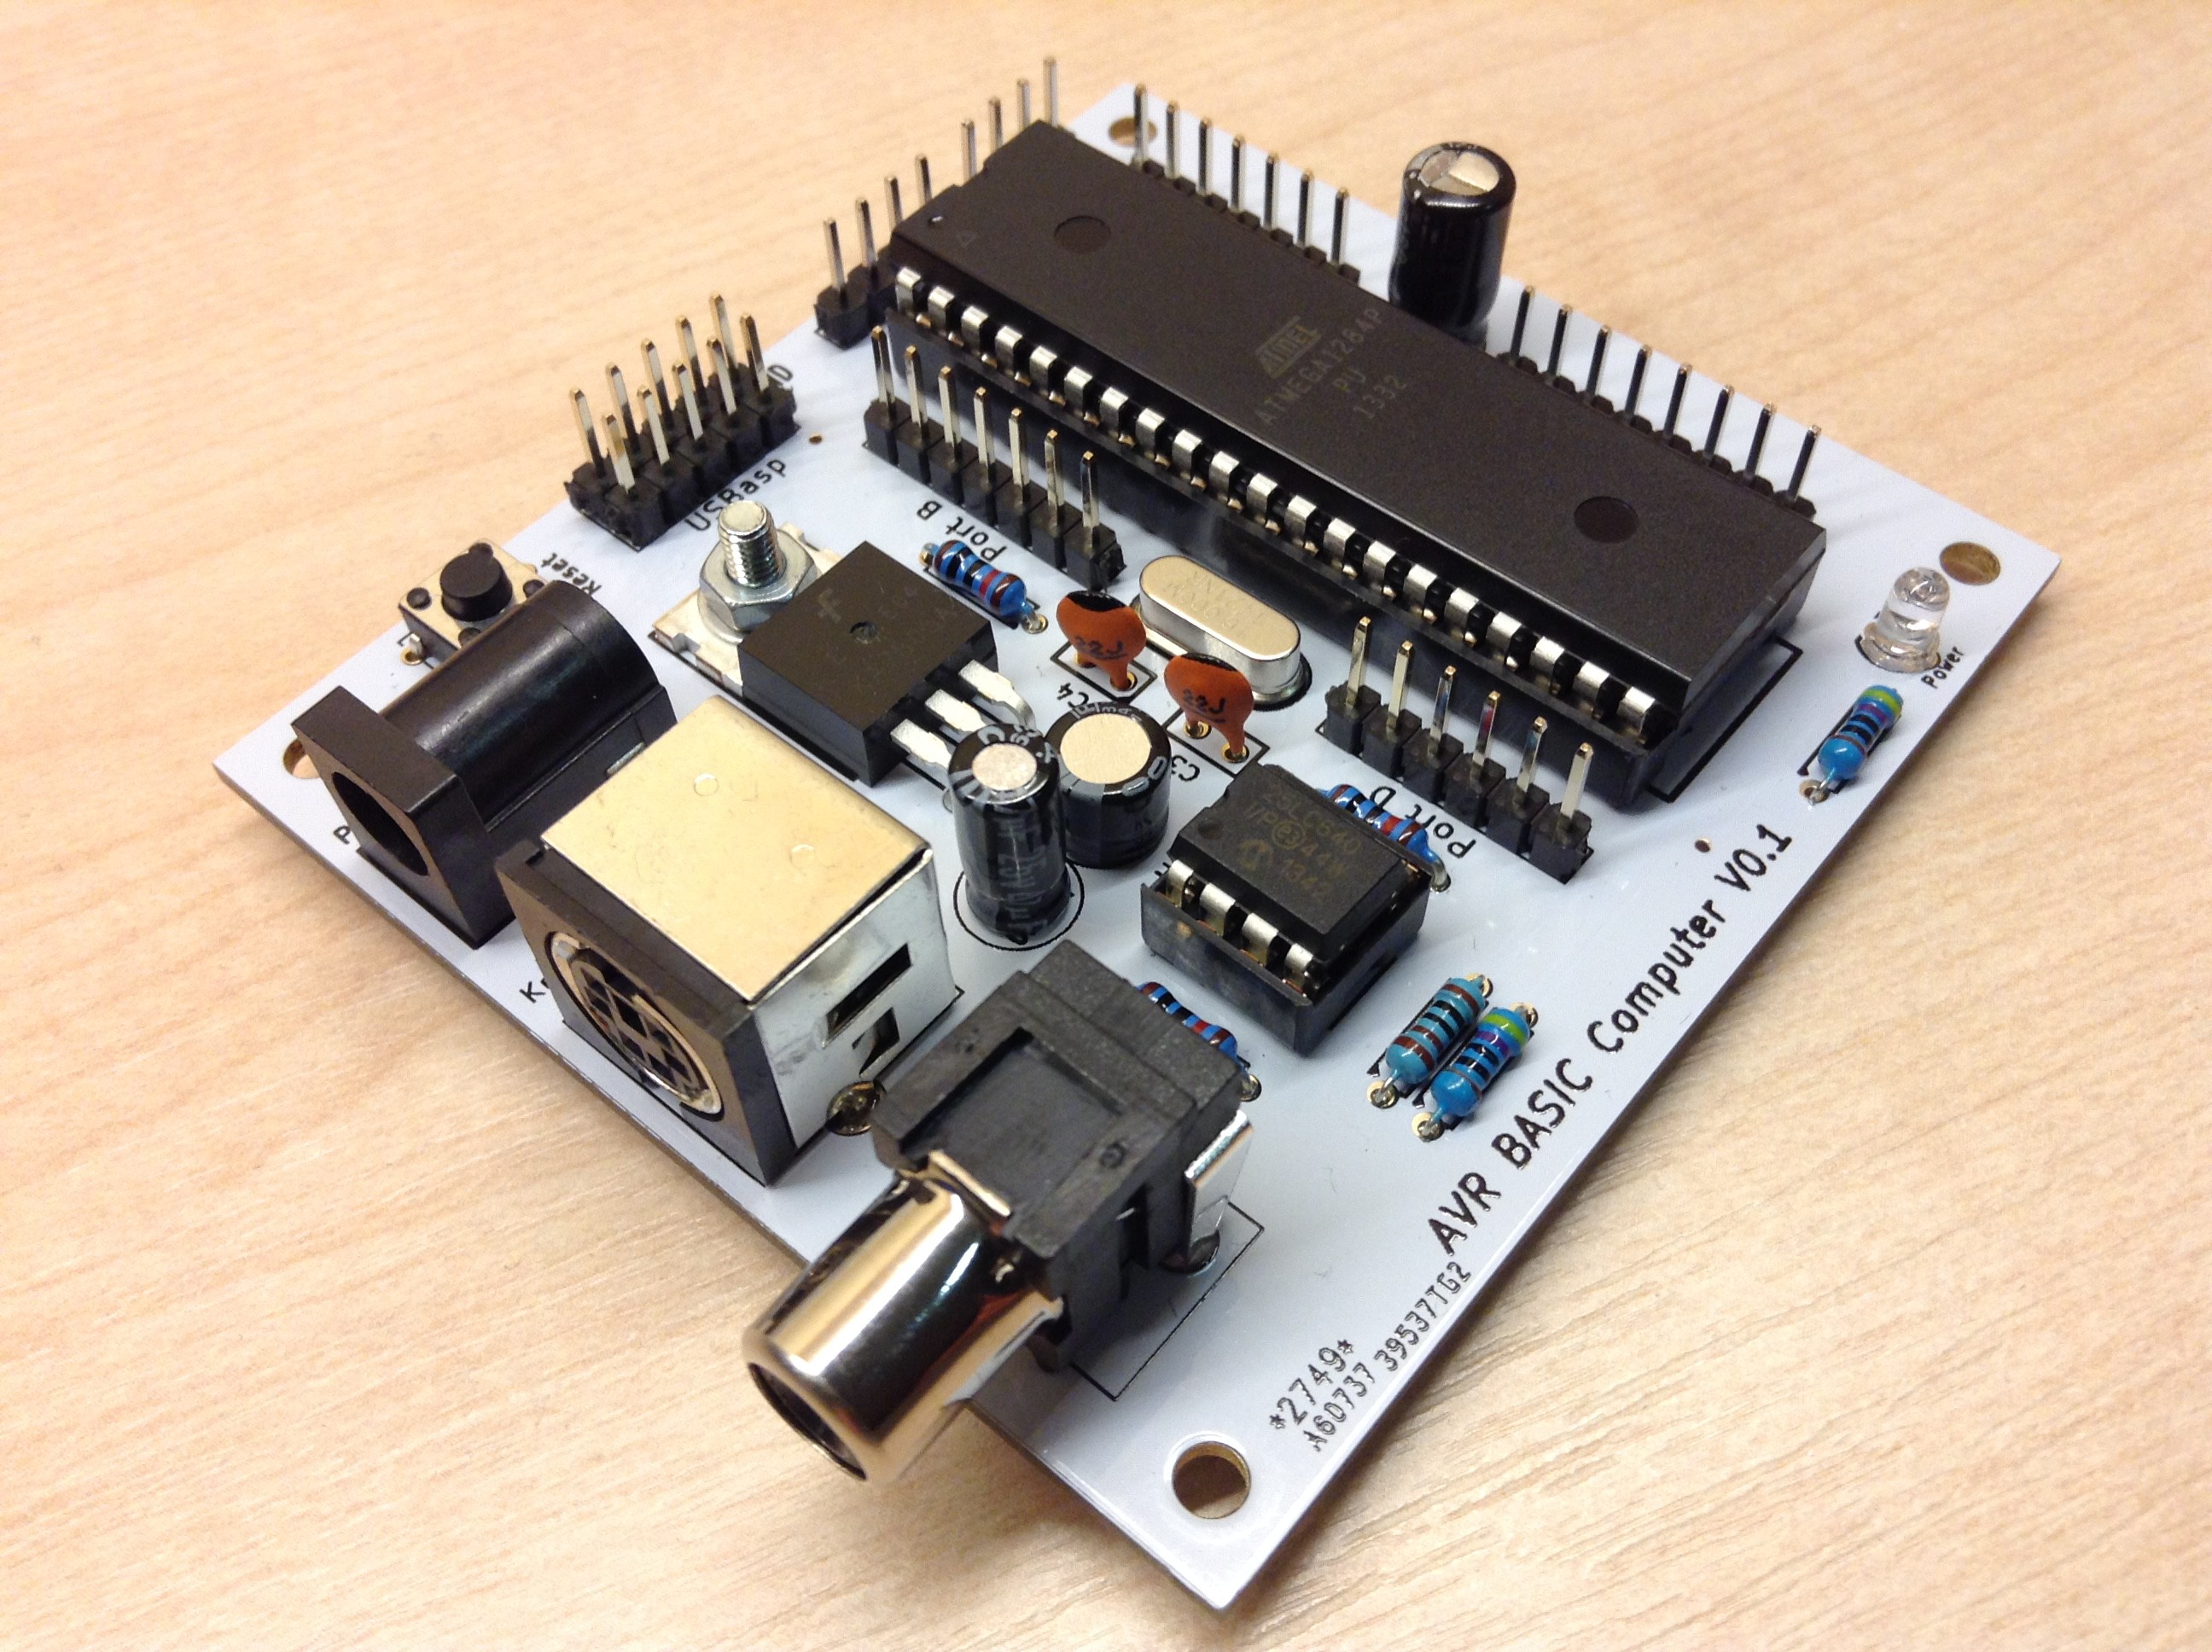
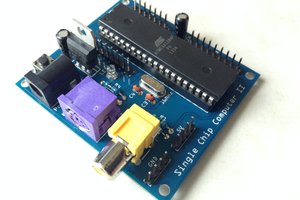
A computer running the TinyBASIC programming language on an ATmega 1284P microcontroller as well as generating composite video signals and reading PS/2 keyboard input. The computer is easy to assemble at home as all components are through-hole. System features include:
- 8bit ATmega microcontroller running at 16MHz (ATmega 1284P).
- Over 7KB of memory available for creating BASIC programs.
- Header for external EEPROM 'cards' which allow full size programs to be saved (using a 25LC640 EEPROM IC); 4KB internal EEPROM available within the microcontroller.
- USBasp programming header allowing easy programming of the computer once assembled.
- Many GPIO pins for connecting to components and other circuits.

This project is a homebrew 8bit computer which runs a BASIC programming language known as TinyBASIC Plus (TBP for short) and can easily be assembled at home. It generates composite video which is supported by many screens (such as TVs) and reads PS/2 keyboard input. Many GPIO pins are available allowing connections to components such as LEDs, potentiometers, sensors and much more. A L7805 regulator is used to make the system more flexible with the power supply which can be used (compared to using no regulator at all) to power the system such as a 9V wall-mounted transformer or a 12V battery. Over 7KB of SRAM is available for writing TBP programs and an 8KB EEPROM card (connected to the storage header) can be used to save full size programs; the ATmega 1284P also has 4KB internal EEPROM available for saving programs to. The system was designed in KiCAD and the following image shows the schematic:

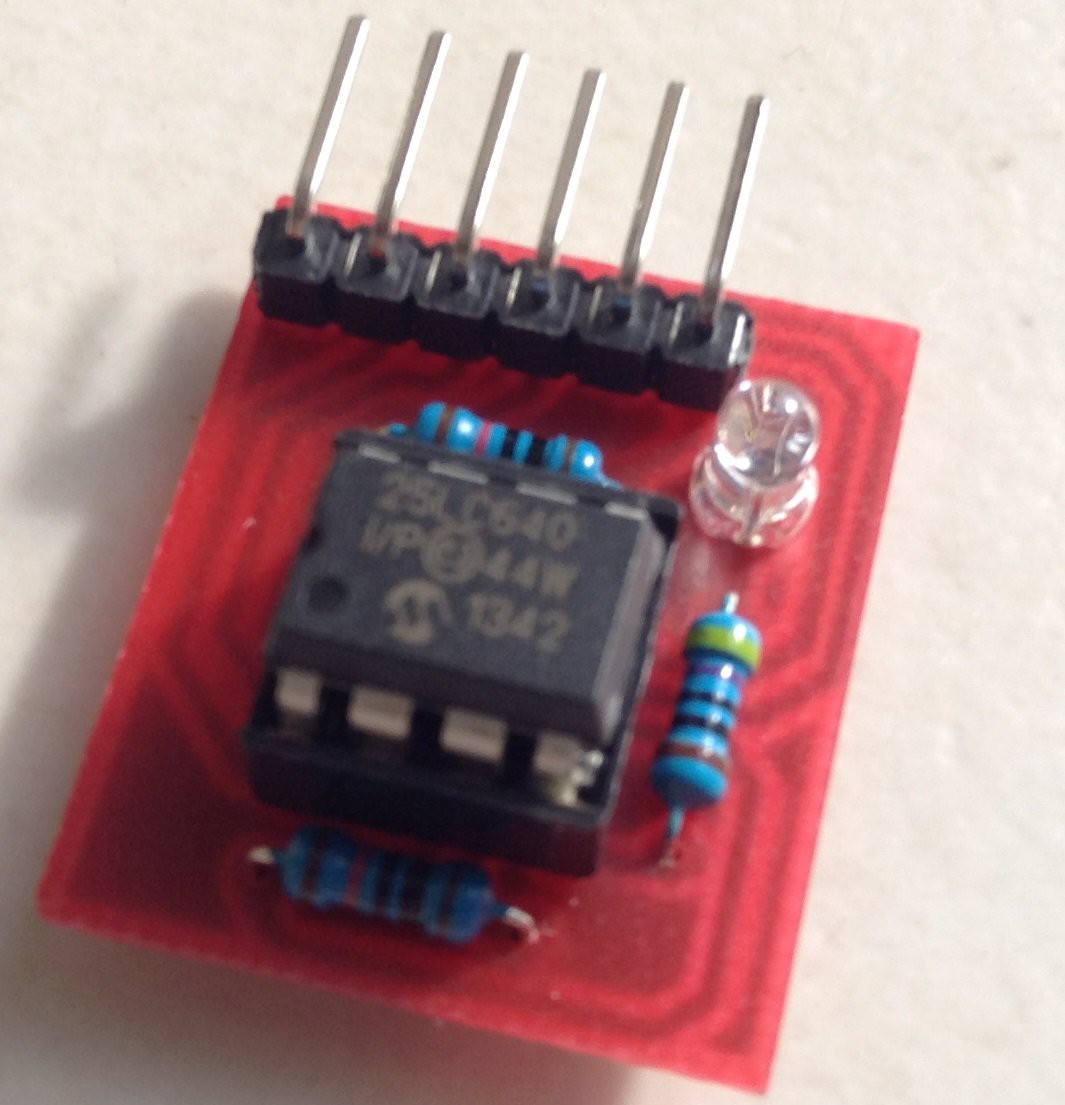
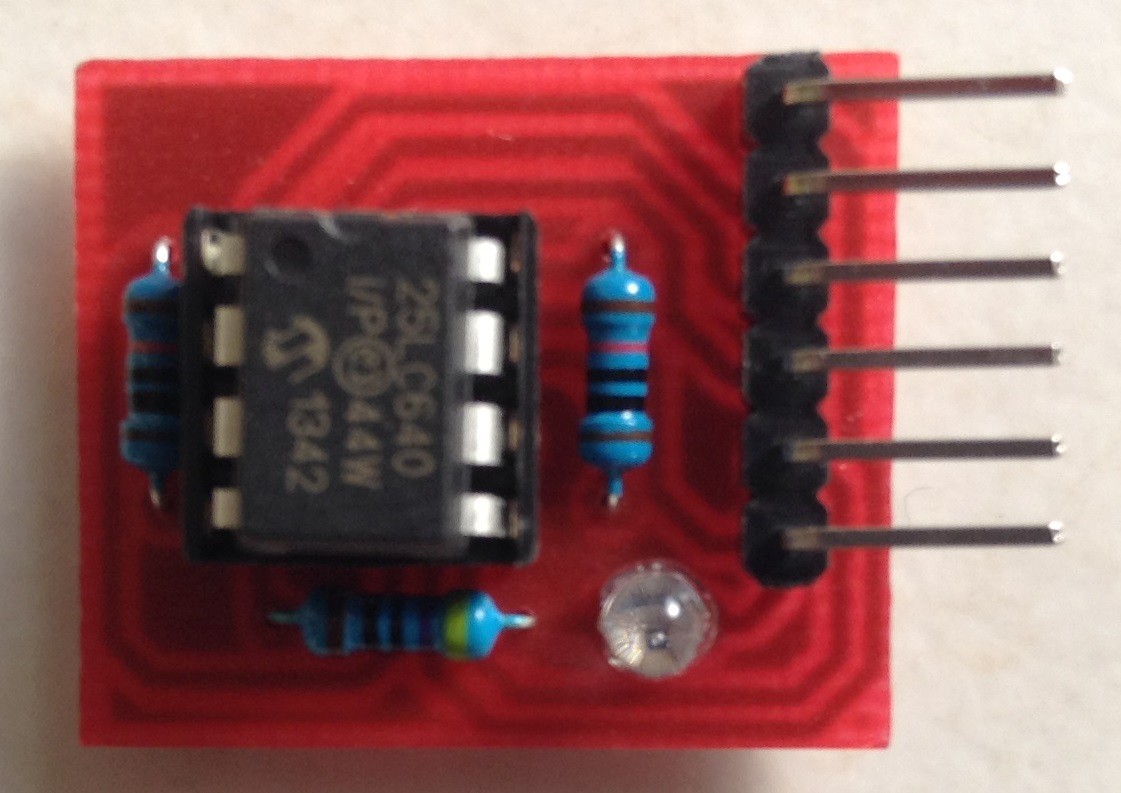
Optionally, a small PCB (EEPROM Card) containing a 25LC640 EEPROM IC can be connected to the system to allow full size programs to be saved. These cards simply connect using a male and female pin header making them easily removable. A header is present on the PCB allowing the user to select which EEPROM to save BASIC programs to (internal or EEPROM card). These cards can be used to transfer BASIC programs between computers, allow other devices (such as an Arduino) to program the cards or to allow full size programs to be saved. The following images show one of the EEPROM cards which was created using the milling process on 0.8mm red PCBs:

The following image shows the schematic diagram for the EEPROM storage cards:

The following image shows the storage header pinout which is used to connect the EEPROM cards to the computer:
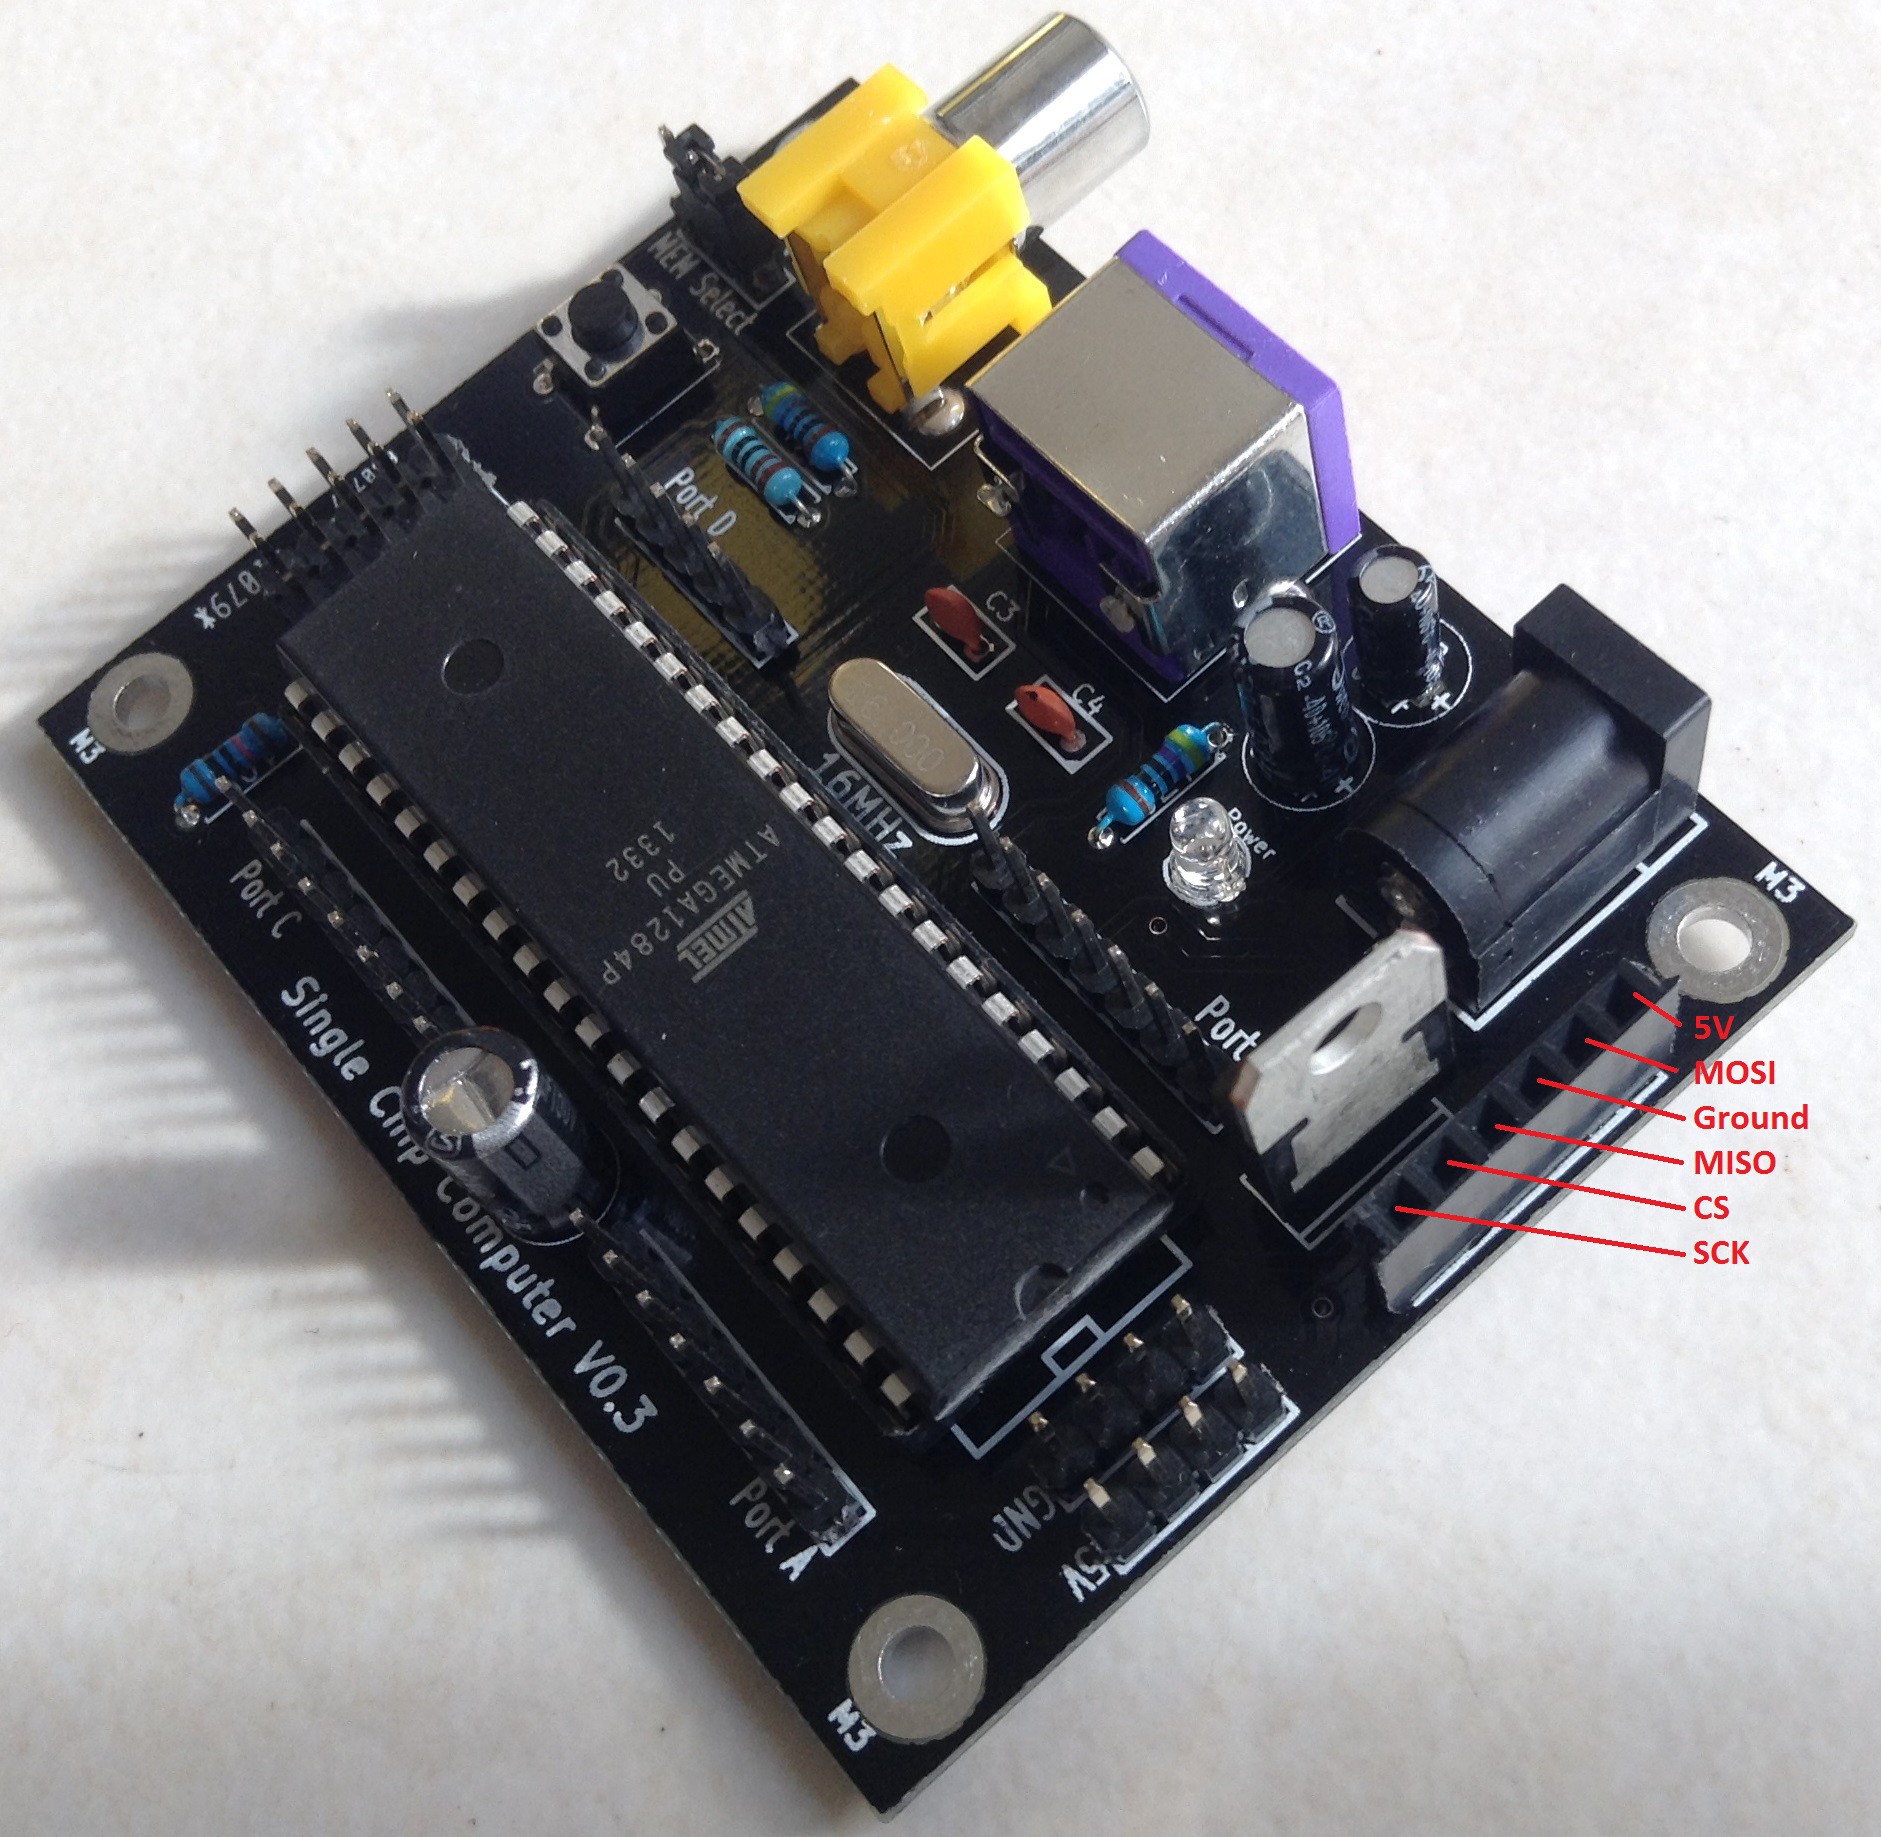
PCBs for the single chip computer (V0.3) are available to buy from me through eBay by clicking the "Purchase PCBs" link at the side of this page. The EEPROM card PCBs can be easily made at home using the photo-etching process or if there is enough interest in these EEPROM card PCBs, I will get some manufactured and also put those up on eBay. The "EEPROM Card Files" link goes to a RAR archive which contains the artwork for the EEPROM storage cards (in an .oxps file), the gerber files and the schematic diagram for the storage cards.

The "Firmware" link on this page goes to a RAR archive which contains the TinyBASIC Plus sketch, the TVout library, the PS/2 keyboard library and the SPIEEPROM library (note, the library folders need to be put into the Arduino IDE libraries folder [within documents on windows]).

Once all the components from the component list have been gathered (note, the male pin headers on the component list can be created by cutting down a long male pin header strip), they can all be soldered into place and the system is then ready for use. Simply connect a TV, PS/2 keyboard and power source such as a PP3 battery or wall-mounted PSU. If an EEPROM card is connected, set the jumper to the 'C' position to allow BASIC programs to be saved to the card or if internal EEPROM is going to be used, set the jumper to the 'I' position (note, the jumper is the same as the type used for IDE hard drive pins used to select master or slave mode so they can easily be found within old computers).

  • 1 × ATmega 1284P 8bit Microcontroller
  • 1 × L7805 Power Management ICs / Linear Voltage Regulators and LDOs
  • 1 × 0.33uF Electrolytic Capacitor
  • 1 × 0.1uF Electrolytic Capacitor
  • 2 × 22pF Ceramic Capacitor

View all 22 components

  • PCBs & Component Kits

    Dan05/16/2015 at 22:32 0 comments

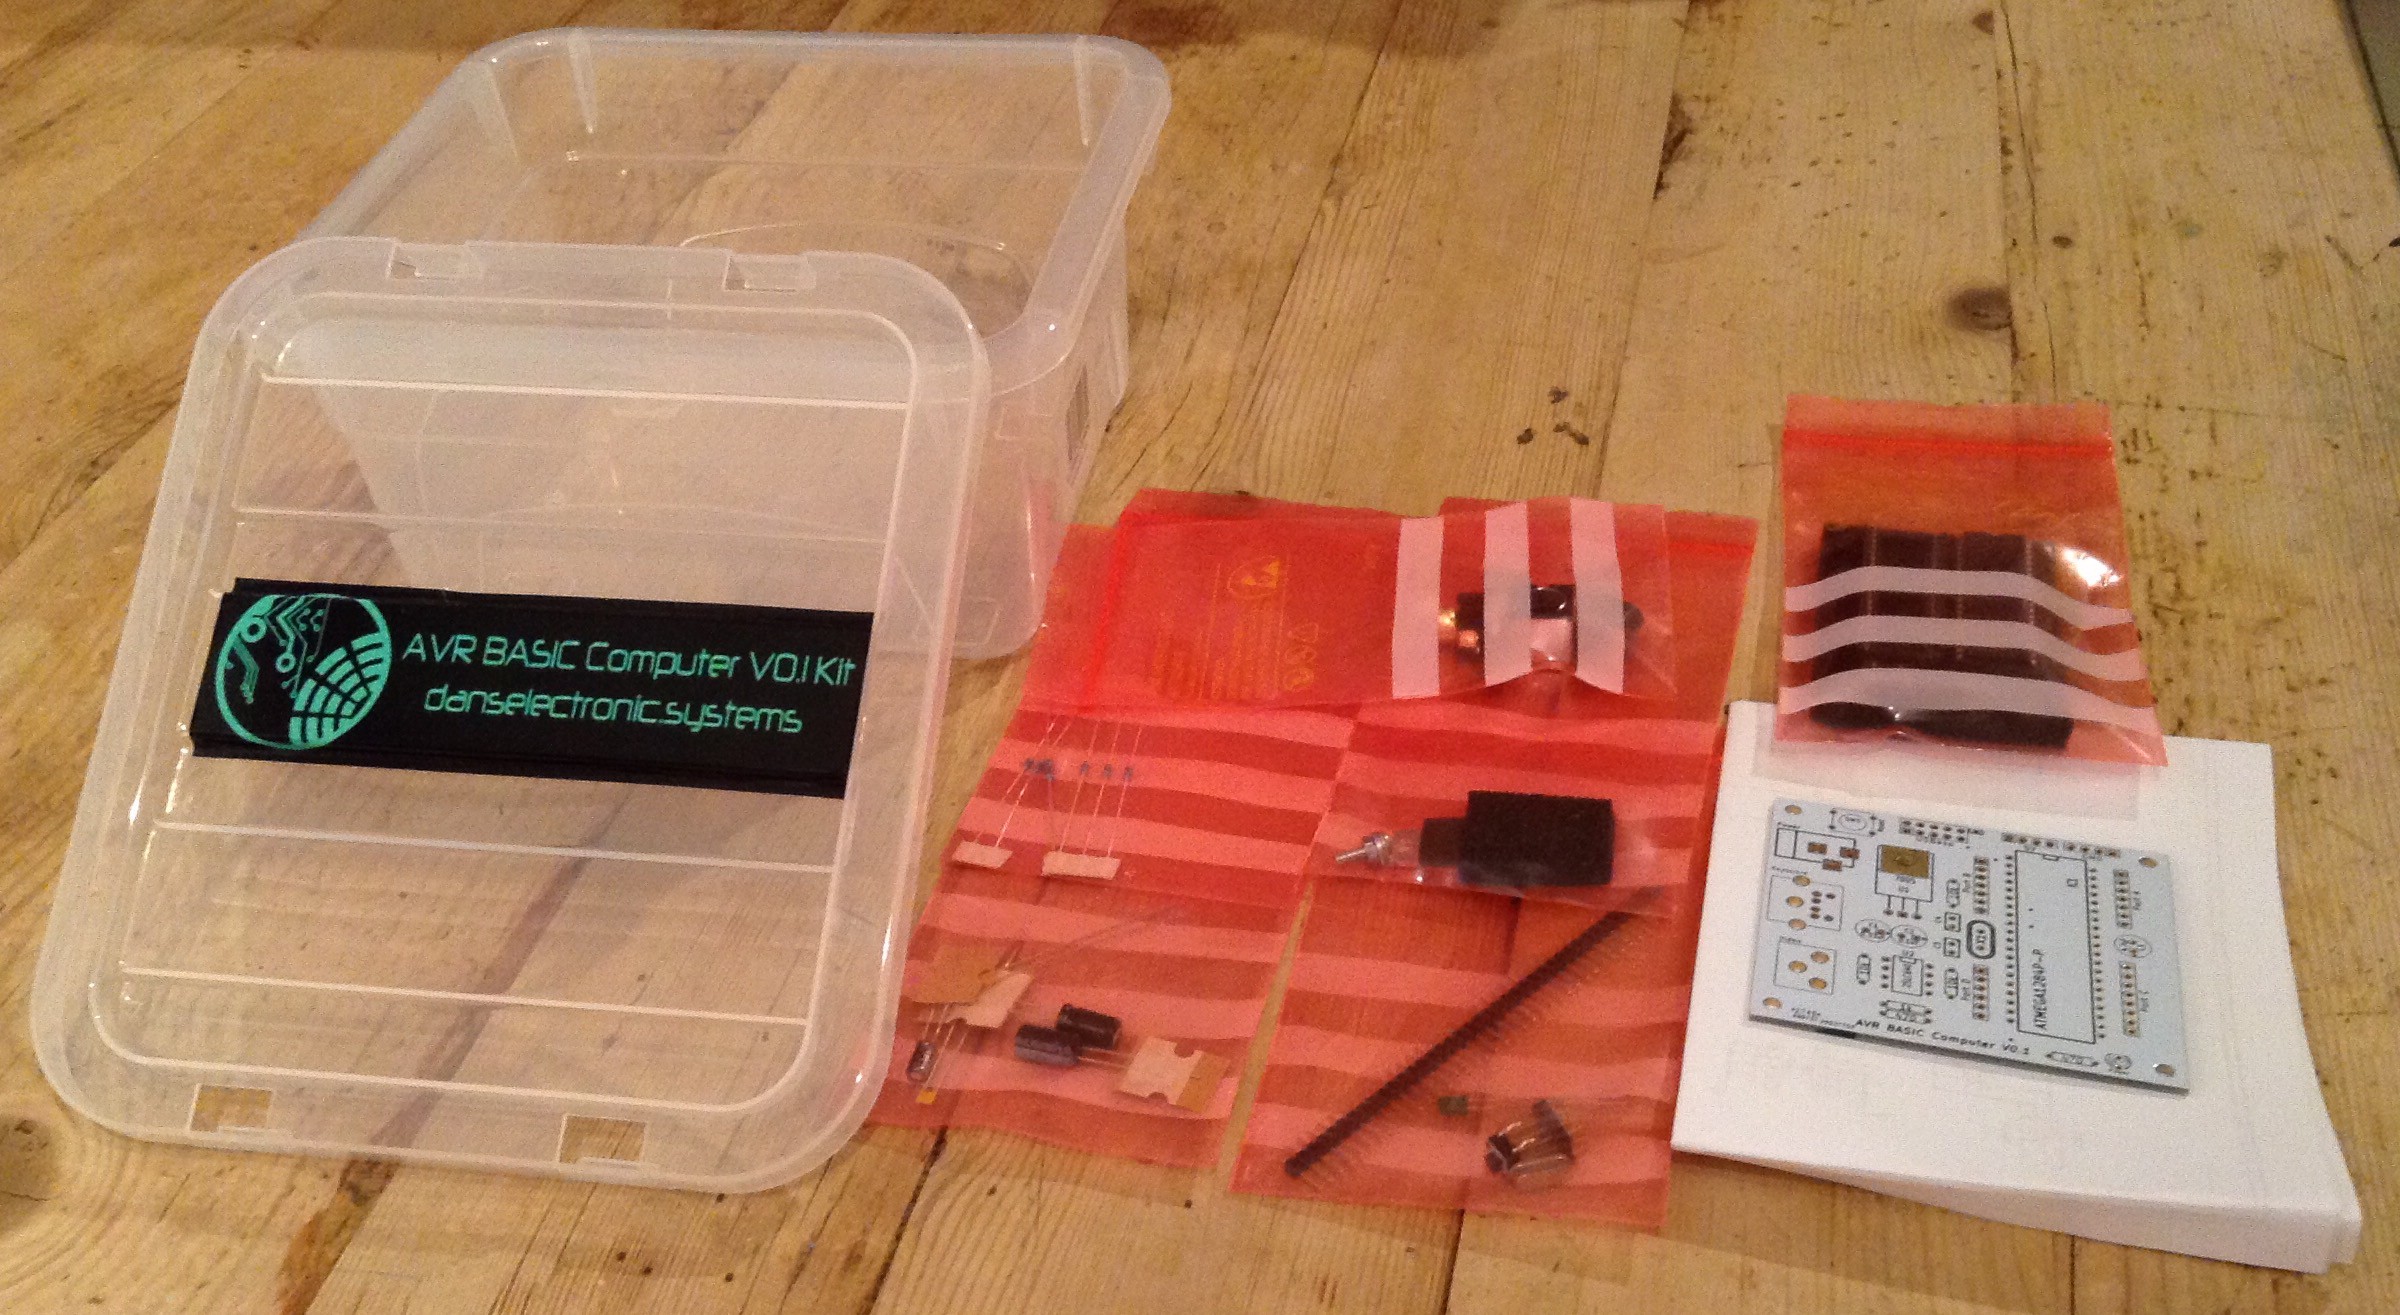
    More PCBs and component kits are now available on eBay and to purchase directly through PayPal. Visit my website for the links: http://www.danselectronic.systems/projects/avr-basic-computer-v0-1/

    I currently have 10 kits available and 15 PCBs.

  • New PCBs

    Dan12/06/2014 at 20:25 0 comments

    The design of this computer has been updated and I have PCBs available for sale through eBay (using the link on the left - "Purchase PCBs"); the direct link: http://www.ebay.co.uk/itm/121510974344

    A new page dedicated to this new computer design has been created: https://hackaday.io/project/3537-avr-basic-computer-v01

    This design includes an additional EEPROM IC to allow full size BASIC programs to be saved. The PCBs are white in colour with ENIG finish.

  • New Boards

    Dan11/26/2014 at 20:01 1 comment

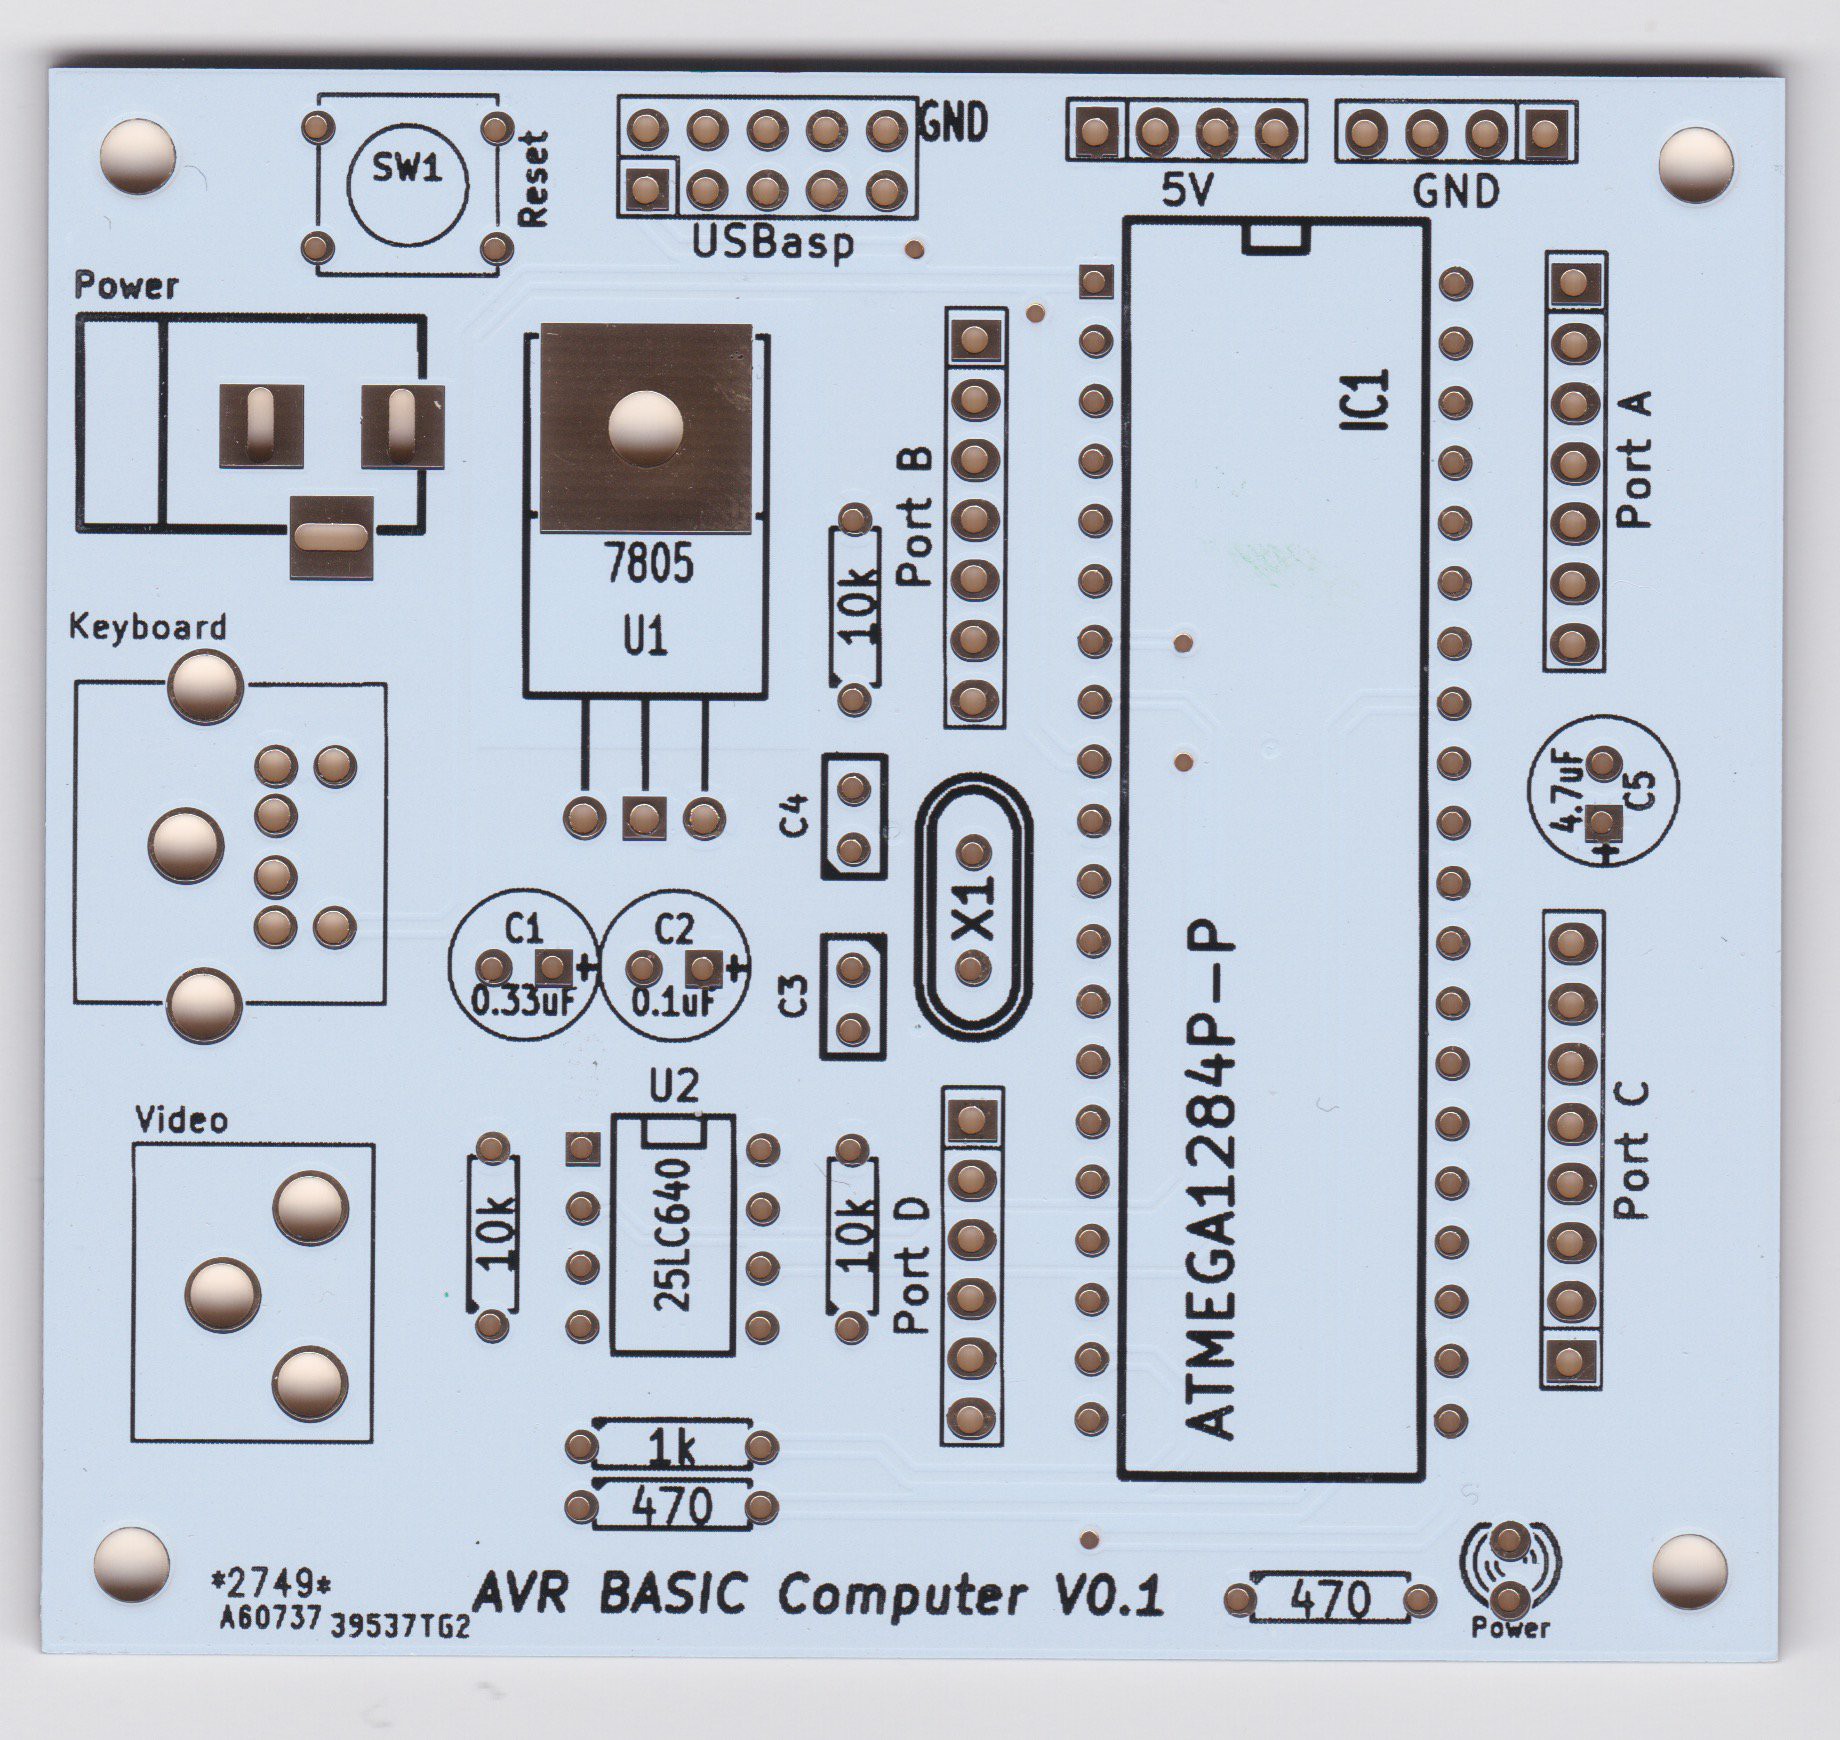
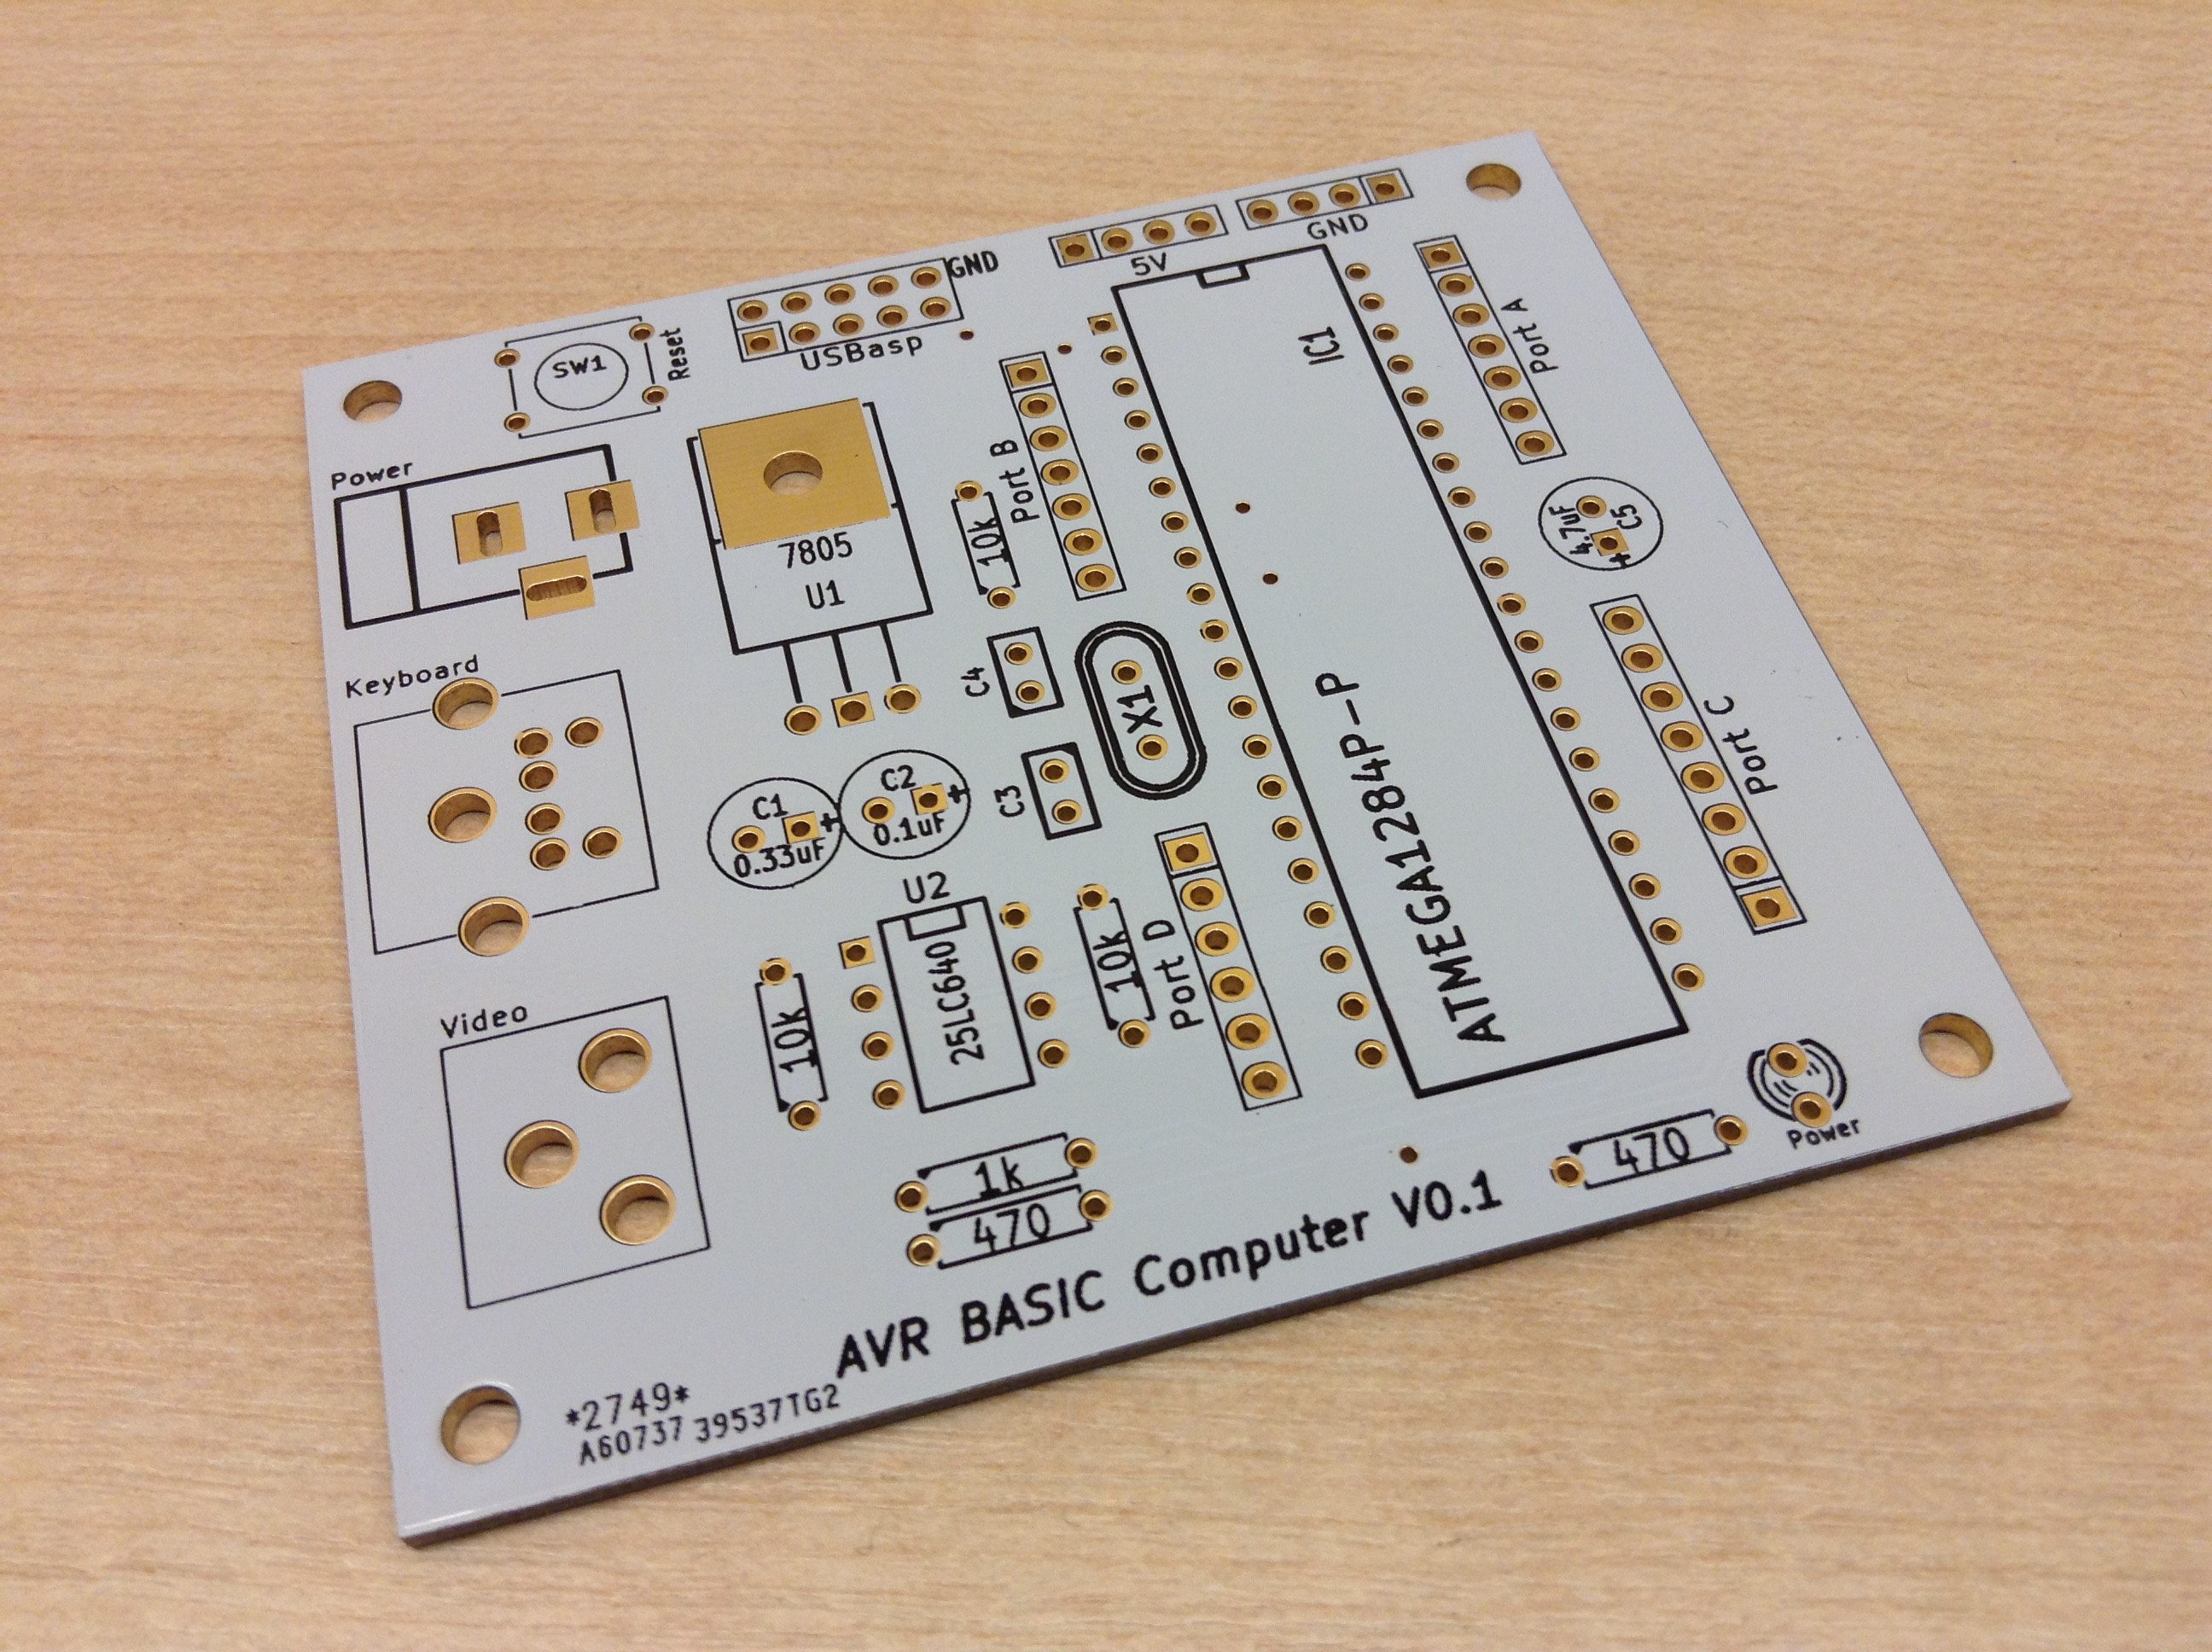
    I received the new boards at the end of last week (one of them can be seen in the image - white PCB with ENIG finish and black silkscreen) and will be assembling one of them this weekend (the plan was to do it today but I haven't received all of the components yet). The remaining boards will be put on eBay once I have assembled one.

    As mentioned in the previous log post, this board is a new design which adds an additional IC (an EEPROM IC) to the single chip computer which allows full size programs to be saved.

    Update (28/11/14): I still haven't yet received the two capacitors for the voltage regulator (C1 and C2 in the picture) but I will be assembling the rest of the board this weekend. Once I receive the capacitors and test the board, the remaining boards will be put up on eBay. Hopefully they will come on Monday so I can have the board completed the same day.

  • New Design & More PCBs

    Dan11/10/2014 at 00:09 0 comments

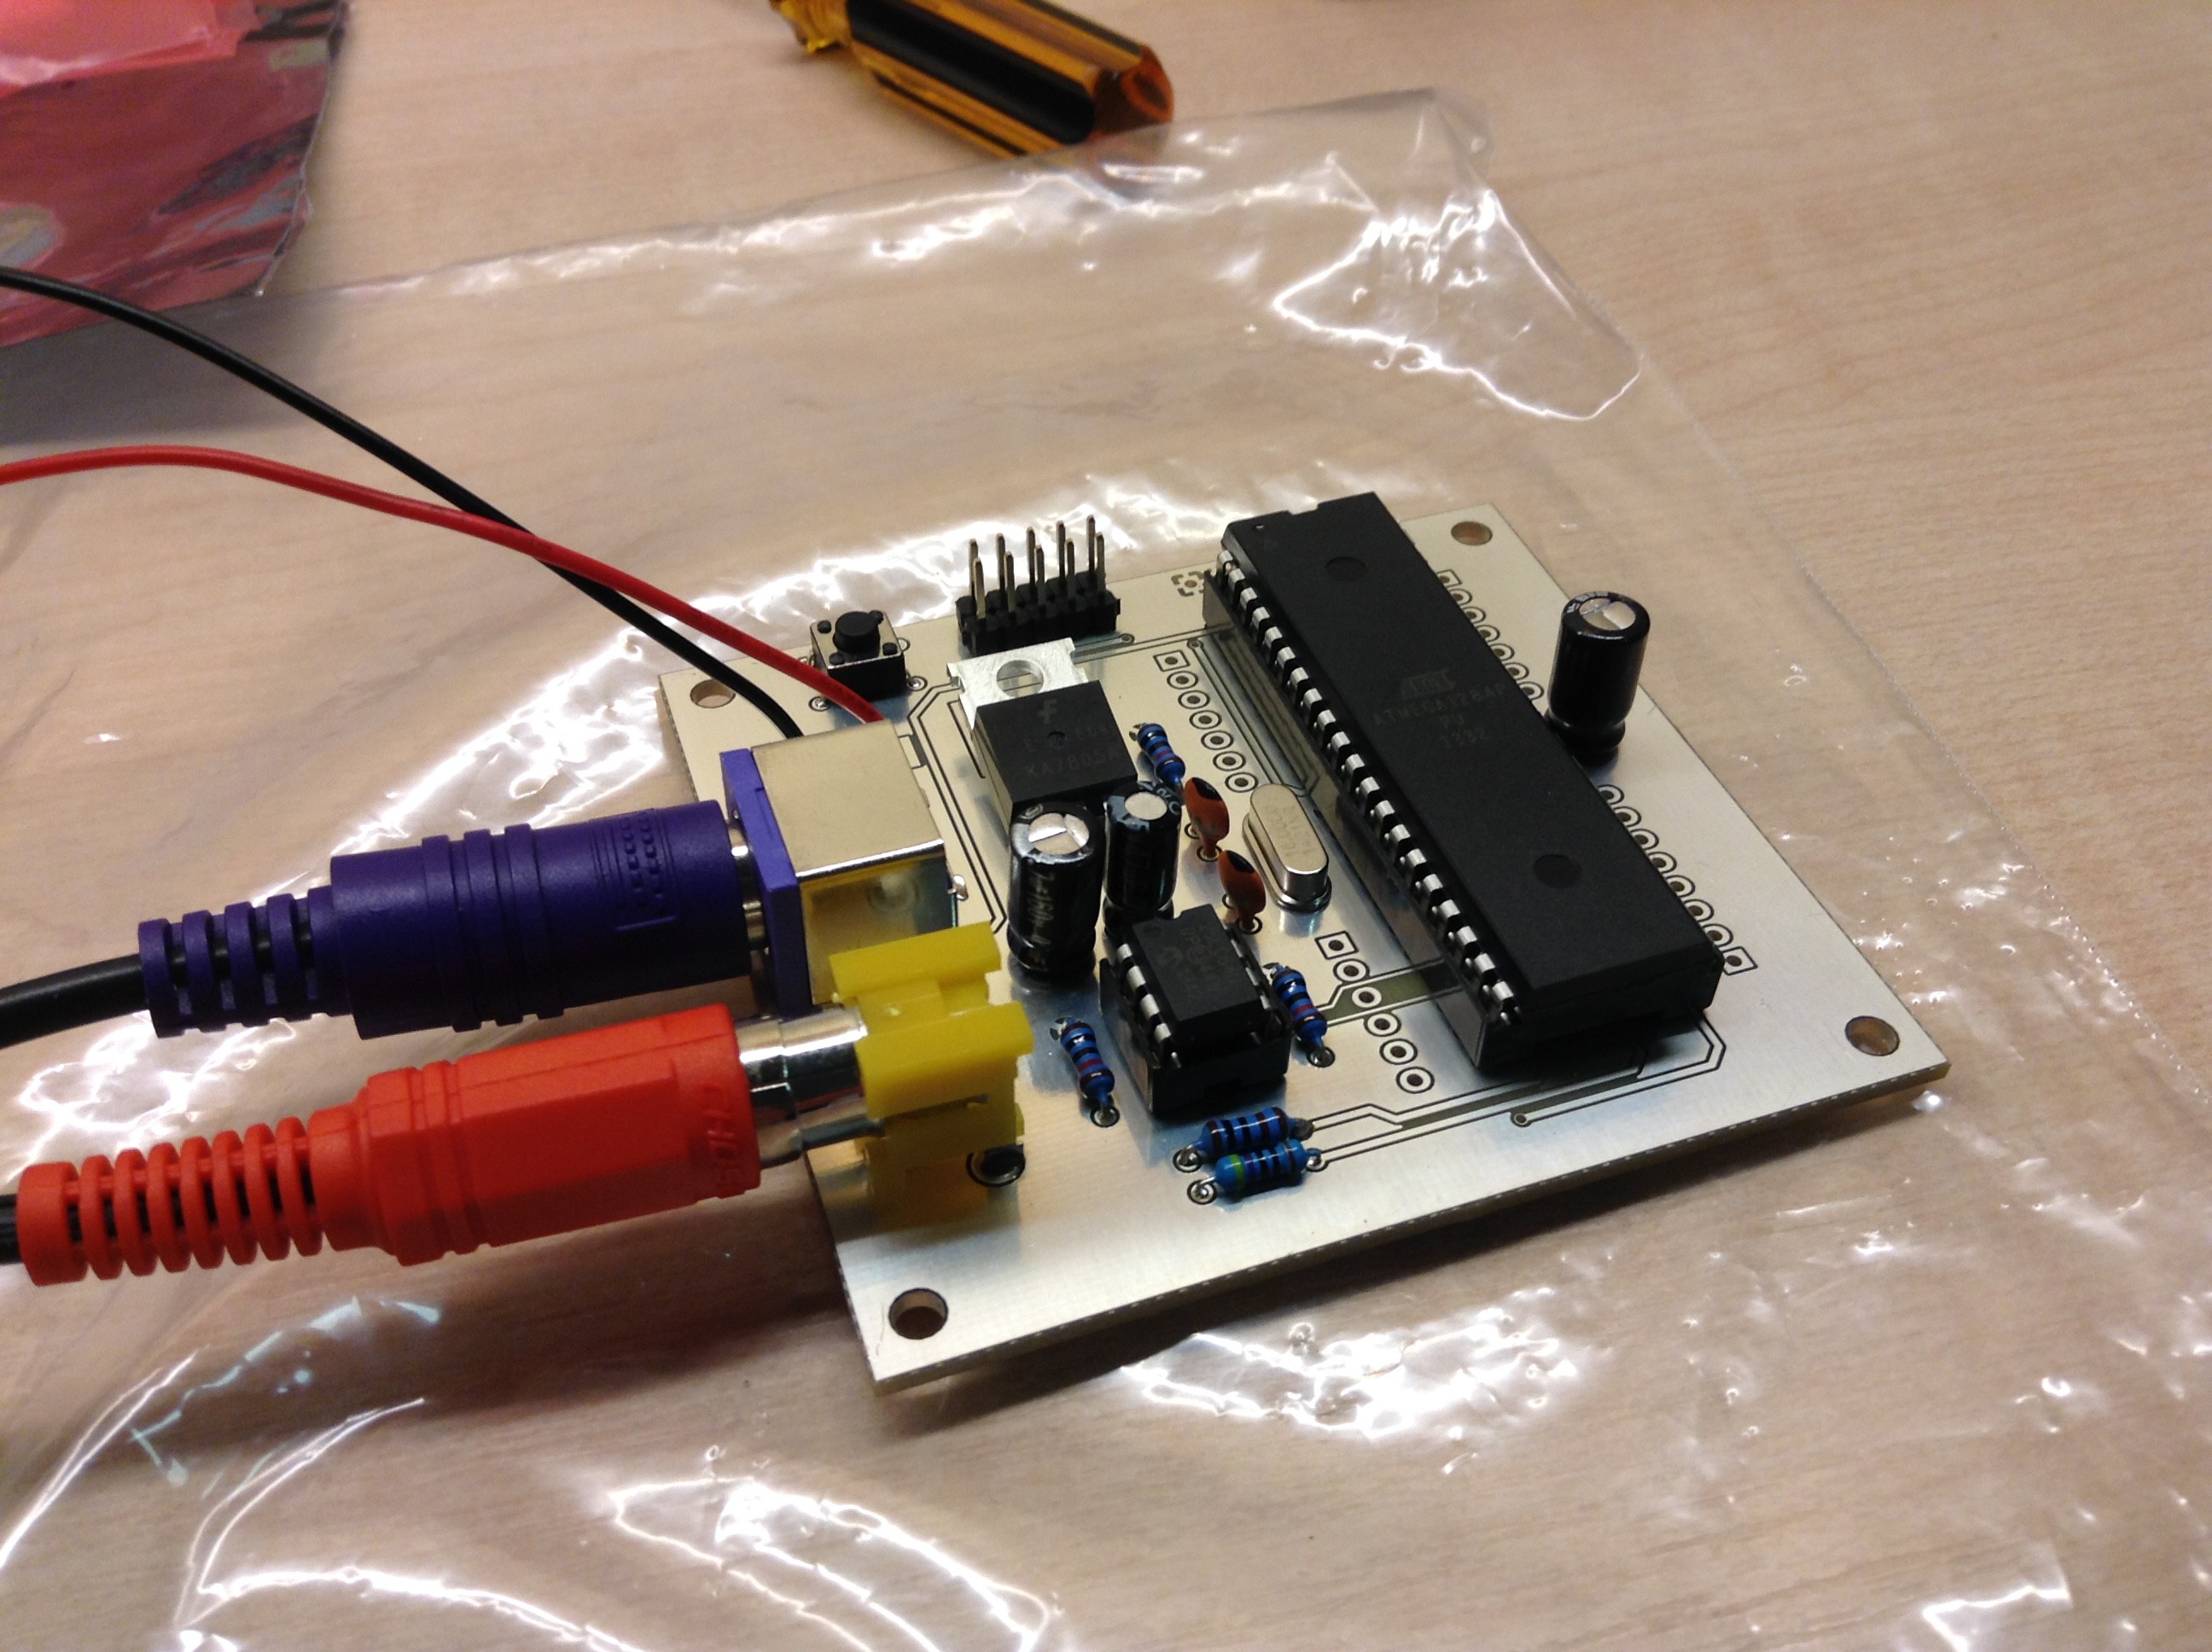
    I have taken the design of this computer one step further and added an SPI EEPROM IC on-board allowing full size (over 7KB) BASIC programs to be saved. The following image shows the prototype PCB of this new design:

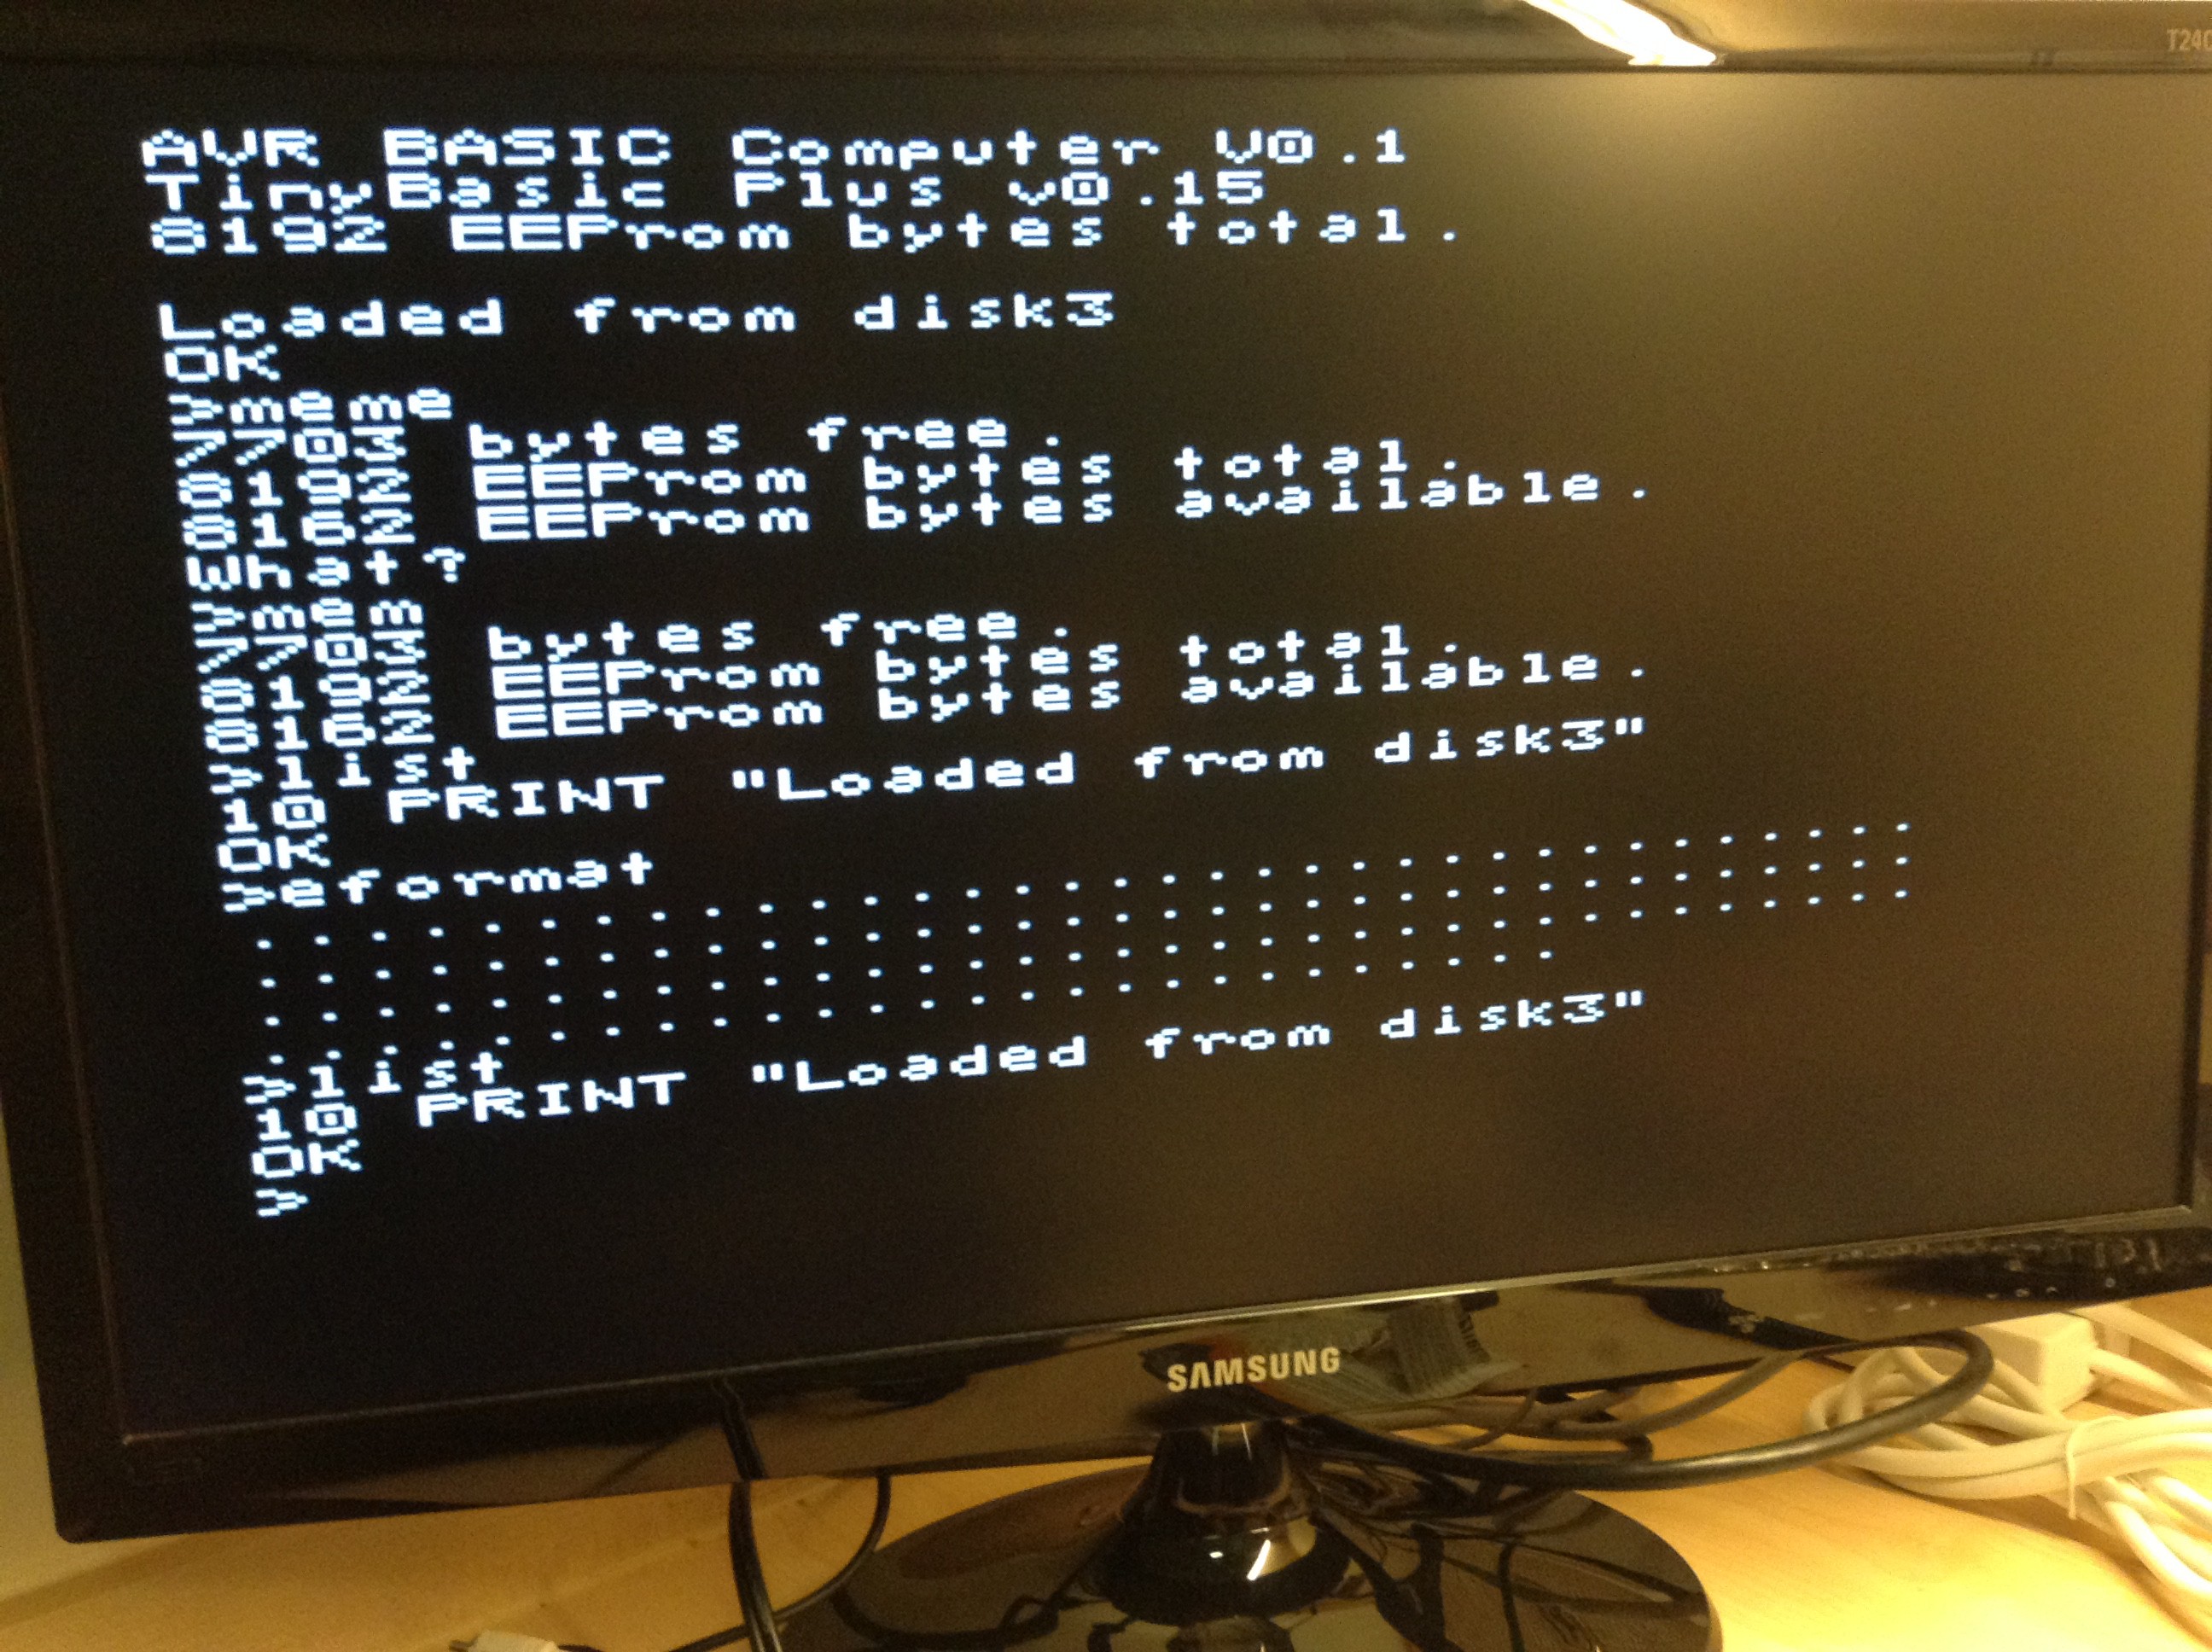
    This PCB was created using the PCB Train 1 day turnaround prototype manufacture service to ensure the new design works (not shown on the above PCB is a power LED which was added after this PCB was ordered). As can be seen from the following image, the new design works correctly so I will be ordering a batch of PCBs and will be putting them on eBay.

    A BASIC program was actually already stored in the EEPROM IC (as I took the IC from the red EEPROM cards shown in the details section of this page) and was loaded upon booting the computer showing EEPROM access works correctly.

    I will be ordering the batch of PCBs now (they will be white in colour with ENIG finish) and will post when they have arrived. Also, the name of the computer has been changed from "Single Chip Computer" to "AVR BASIC Computer V0.1" due to addition of another IC.

View all 4 project logs

  • 1
    Step 1

    These instructions will explain how to program the AVR bootloader and firmware using the Arduino IDE on a Windows system.

    The Bootloader

    After downloading the firmware and the bootloader files (bootlader can be downloaded as a ZIP from the github page), the bootloader files need to placed within the Arduino "hardware" folder and the firmware files need to placed within the Arduino "libraries" folder and the Arduino sketches folder. As can be seen from the image below, copy the ATmega 1284P bootloader folder ("mighty-1284p-master") into the hardware folder within the Arduino directory (Documents -> Arduino -> hardware):

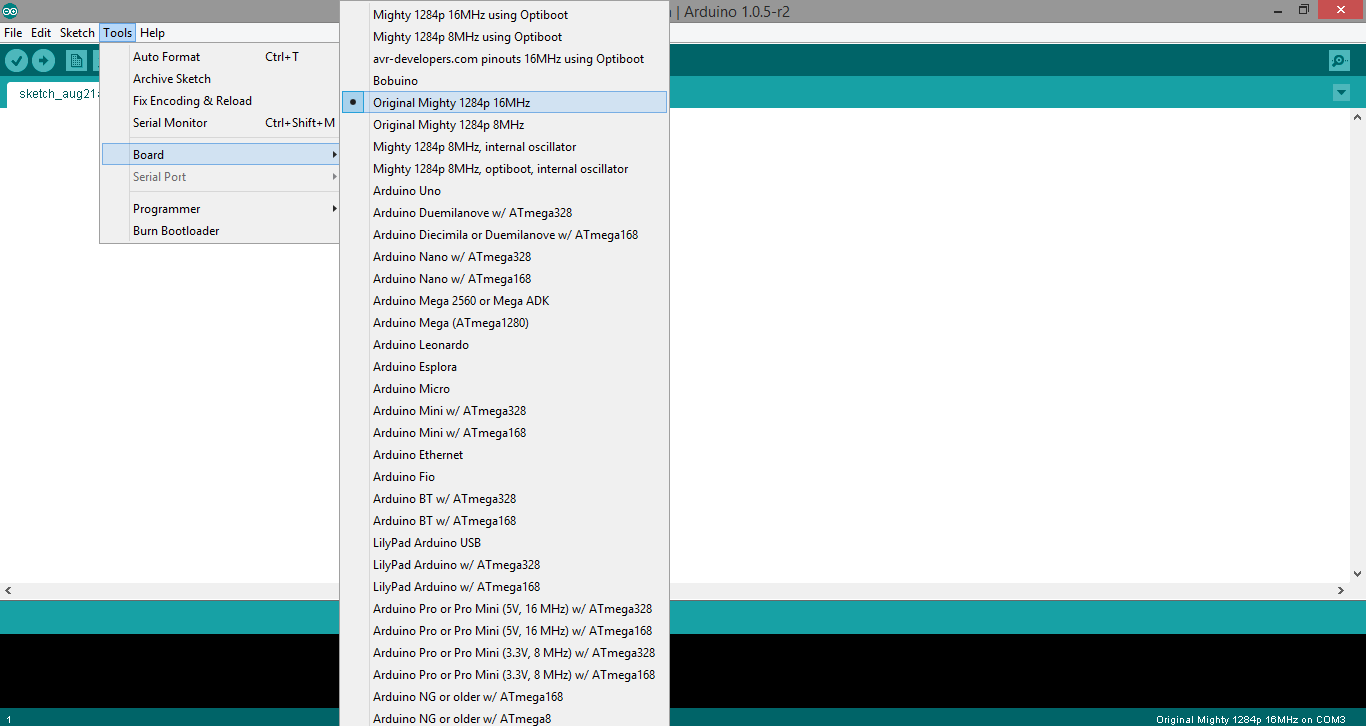
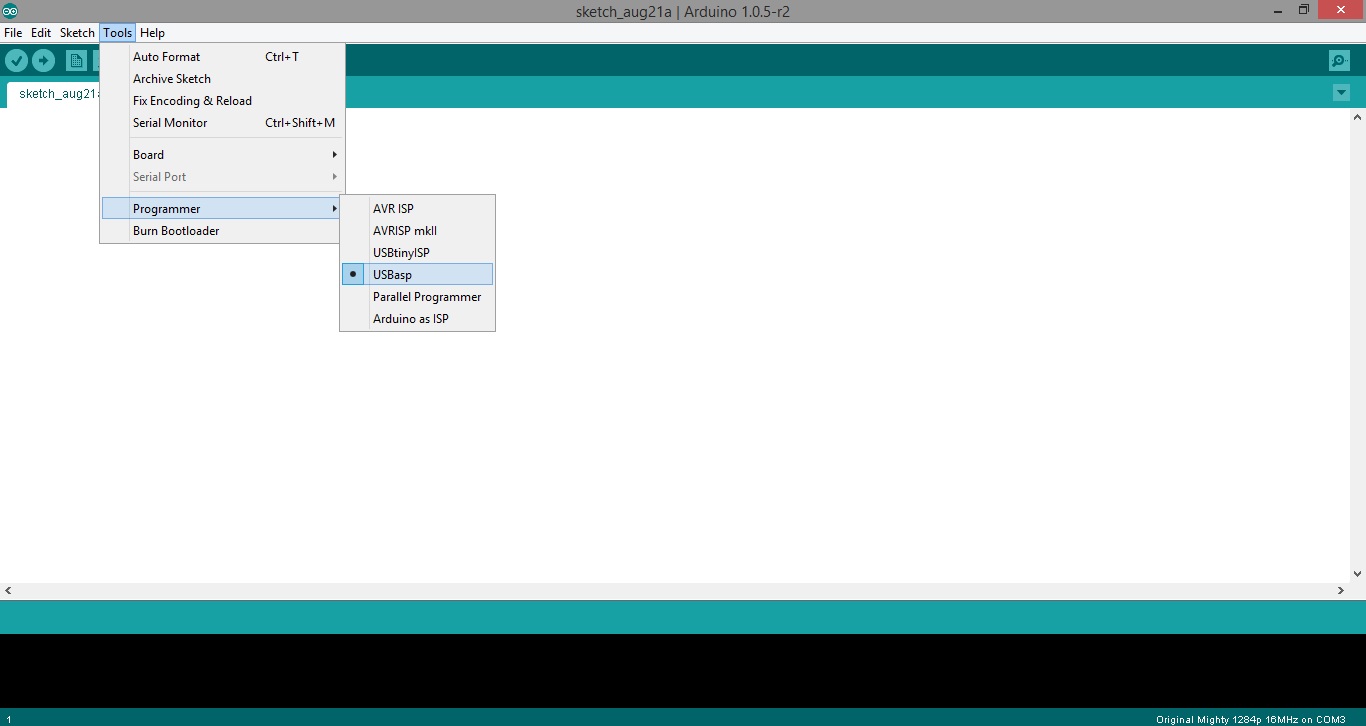
    Next, open the Arduino IDE and set the board to "Original Mighty 1284p 16MHz" and the programmer to "USBasp; both are done under the tools menu as shown in the below images:

    The bootloader which is programmed to the AVR must be "Original Mighty 1284p 16MHz" as glitches with TVout are caused using the optiboot bootloader.

    Note, an Arduino acting as an ISP can be used to program the single chip computer if a USBasp programmer is not available. Google "Arduino ISP" for instructions on how to do this (the SPI pins of the ATmega 1284P are mapped to the USBasp header - pinout for this header can be found by googling "USBasp pinout").

    Once the board type and the programmer have been selected, the single chip computer can be powered up and the programmer connected. "Burn Bootloader" can then be selected within the tools menu; once this is completed the bootloader has been burnt to the AVR.

  • 2
    Step 2

    The Firmware

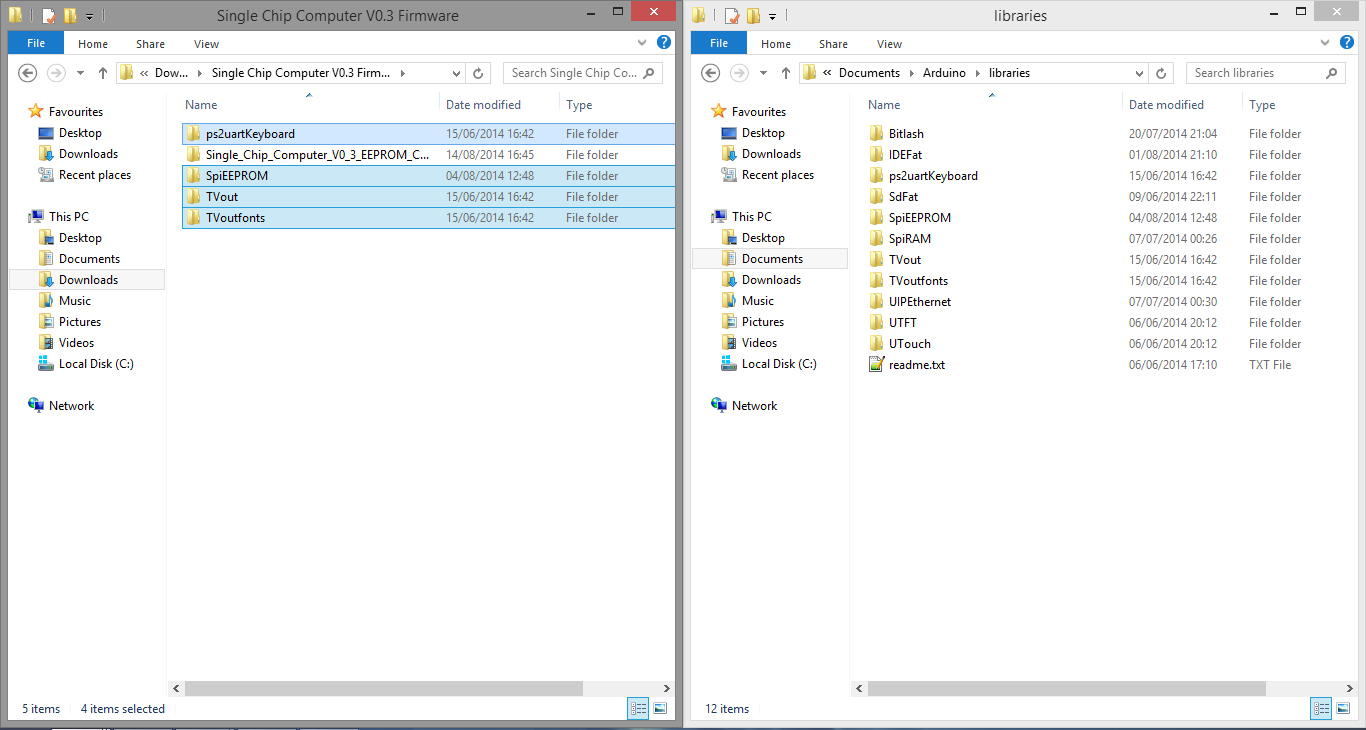
    After extracting the firmware RAR archive, four of the folders have to be moved into the Arduino "libraries" folder (Documents -> Arduino -> libraries) and one of them into the Arduino sketches folder. The following image shows the folders which need to be copied into the Arduino "libraries" folder (highlighted on the left - "ps2uartKeyboard", "SpiEEPROM", "TVout", "TVoutfonts"):

    Next, the remaining folder ("Single_Chip_Computer_V0_3_EEPROM_Cards") needs to be copied into the Arduino sketches directory (Documents -> Arduino) as shown in the following image:

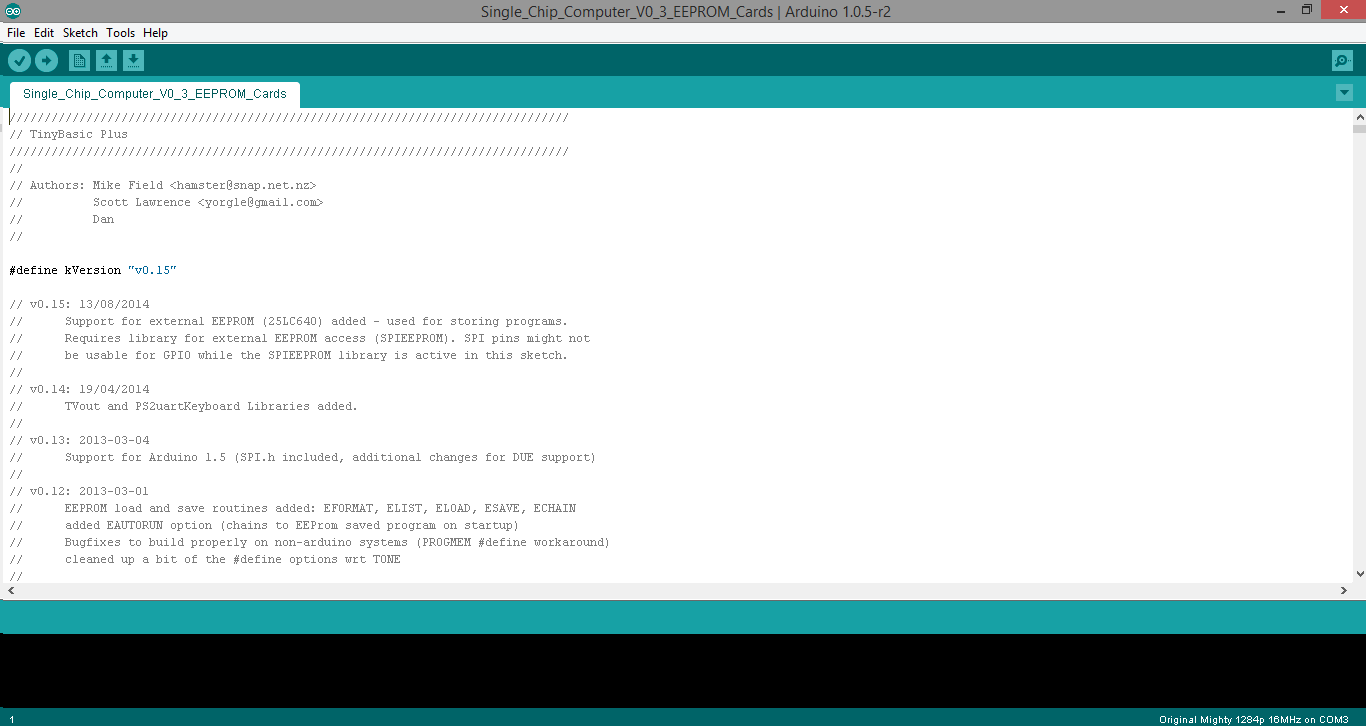
    If the Arduino IDE is already open, close it, reopen it and load the single chip computer sketch:

    To upload the firmware (the sketch), select "Upload Using Programmer" from the file menu:

    Once the sketch has been uploaded to the computer, the programmer can be disconnected. The computer is can then be connected to a TV and a keyboard and used to write BASIC programs.

View all instructions

Enjoy this project?

Share

Discussions

Hacker404 wrote 09/02/2014 at 08:18 point
I was going to get a Atmega1284 for another project and your project seems interesting.
What sort of resolution does the video have and is it NTSC or Pal? I might buy a board and try it.

  Are you sure? yes | no

Andrey Skvortsov wrote 04/28/2017 at 12:13 point

Fantastic project.

I also work on the BASIC interpreter for AVR uc https://sourceforge.net/projects/terminal-basic/, and I was impressed by the complexity of the chipbasic32, forced into 32k controller, which was available through the using of assembly language.

C++ and arduino libs are so heavyweight, that BASIC interpreter, based on them, which can fit into 16k controllers has less power then 4k integers only microcomputer BASICs of 70-80s.

  Are you sure? yes | no

joaboag wrote 08/28/2014 at 18:02 point
I followed this project since it was published in Instructables. Congratulations. You're a hacker.

  Are you sure? yes | no

Dan wrote 08/29/2014 at 15:39 point
Thank you for the comment! Much appreciated :)

  Are you sure? yes | no

diysciborg wrote 08/19/2014 at 15:30 point
Hiya! Nice project!
But it seems to me SD card would be far better way to load, save and transfer programs. Granted, there is the overhead of the SD card libraries to deal with. Do you have the program space?

  Are you sure? yes | no

Dan wrote 08/21/2014 at 12:10 point
Hi, thanks for the comment!
SD card support is included within TinyBASIC Plus and the compiled sketch size is 22,010 Bytes meaning I have plenty of space left for the SD card libraries. A connected SD card is accessed fine and any autorun BASIC programs are loaded but when typing the TinyBASIC command "FILES" (which should display a list of files on the SD), random characters are displayed on the TV but I am unsure what causes this. This issue may be caused by the TinyBASIC sketch trying to store the SD card filenames within a const unsigned char* and then TVout being unable to display this correctly (I have tried changing the variable type but get compile errors). If this issue could be fixed an SD card slot could be included in a future version.
Dan

  Are you sure? yes | no

Similar Projects

Does this project spark your interest?

Become a member to follow this project and never miss any updates