 Andy Castille
-
1Step 1
Set up the Arduino IDE
- Install Arduino IDE 1.6.4 or newer.
- Enable the ESP8266 board:
- Add http://arduino.esp8266.com/stable/package_esp8266com_index.json to File, Preferences, Additional Boards Manager URLs.
- Open Tools, Board, Boards Manager and wait for it to refresh.
- Search for and install esp8266 by ESP8266 Community.
- Choose your ESP2866 module from Tools, Board, ESP2866 Modules. Using my Amazon purchase, this is NodeMCU 1.0 (ESP-12E Module).
- Install libraries:
- Open Sketch, Include Library, Manage Libraries...
- Search for and install PubSubClient by Nick O'Leary.
- Search for and install Ultrasonic by Erick Simões.
-
2Step 2
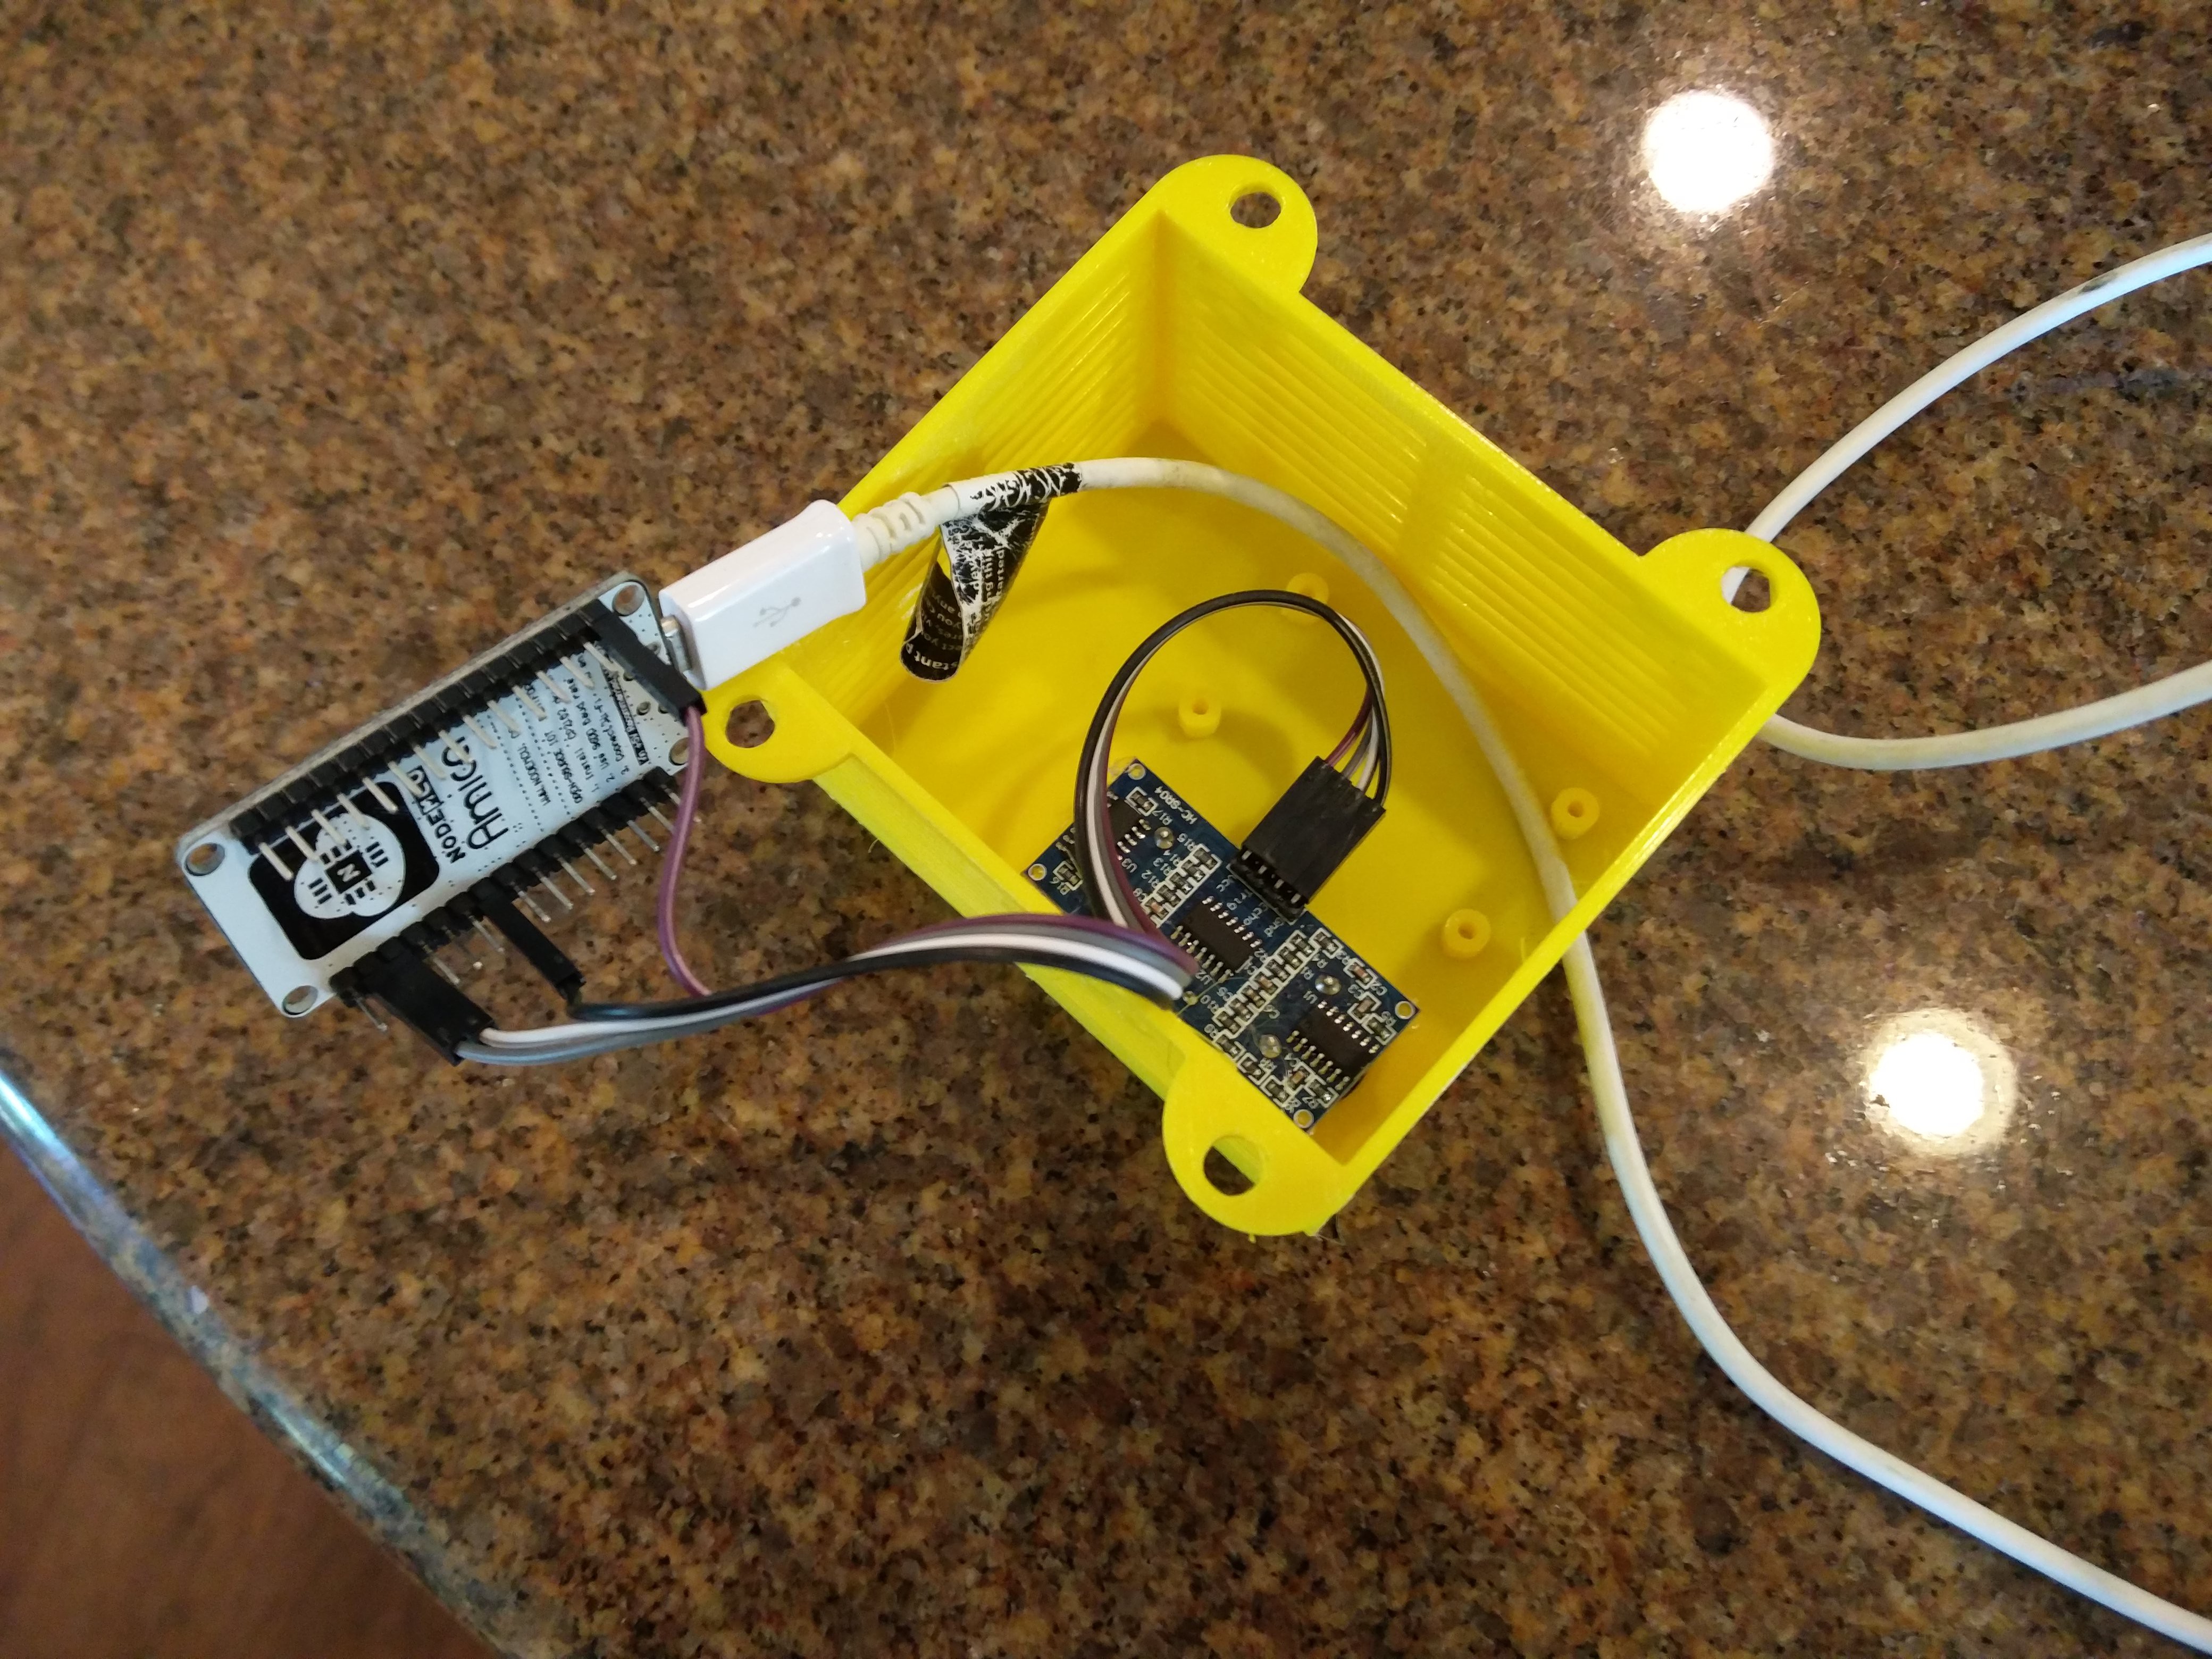
Wire it up
Connect the sensor to the microcontroller board according to my setup so you don't have to remap pins in code. I used prebuilt F2F wires to make it easier on myself.
![]()
-
3Step 3
Flash it
- Connect the microcontroller to your computer using a microUSB cable.
- Download and open GarageDoorSensor.ino.
- Replace the values at the top of the file with your own WiFi network info, MQTT server config, etc. For the distance threshold, choose something a little bit (about 5 cm) higher than the distance between your ceiling and the garage door when it is open.
- If you want an easy way to make sure it works correctly from your computer, set DEBUG to 1 and open the Serial Monitor at 115200 baud. If you're ready to install it in its permanent location, set DEBUG to 0 in order to save some CPU cycles.
- Be sure you have the correct options specified in the Tools menu:
Board NodeMCU 1.0 (ESP-12E Module) if you're using the same board CPU Frequency 80 MHz Flash Size 4M (3M SPIFFS) Upload Speed 9600 - Press Upload and wait for it to flash. Don't worry if it's slow, it normally takes quite a bit longer than flashing a regular Arduino.
-
4Step 4
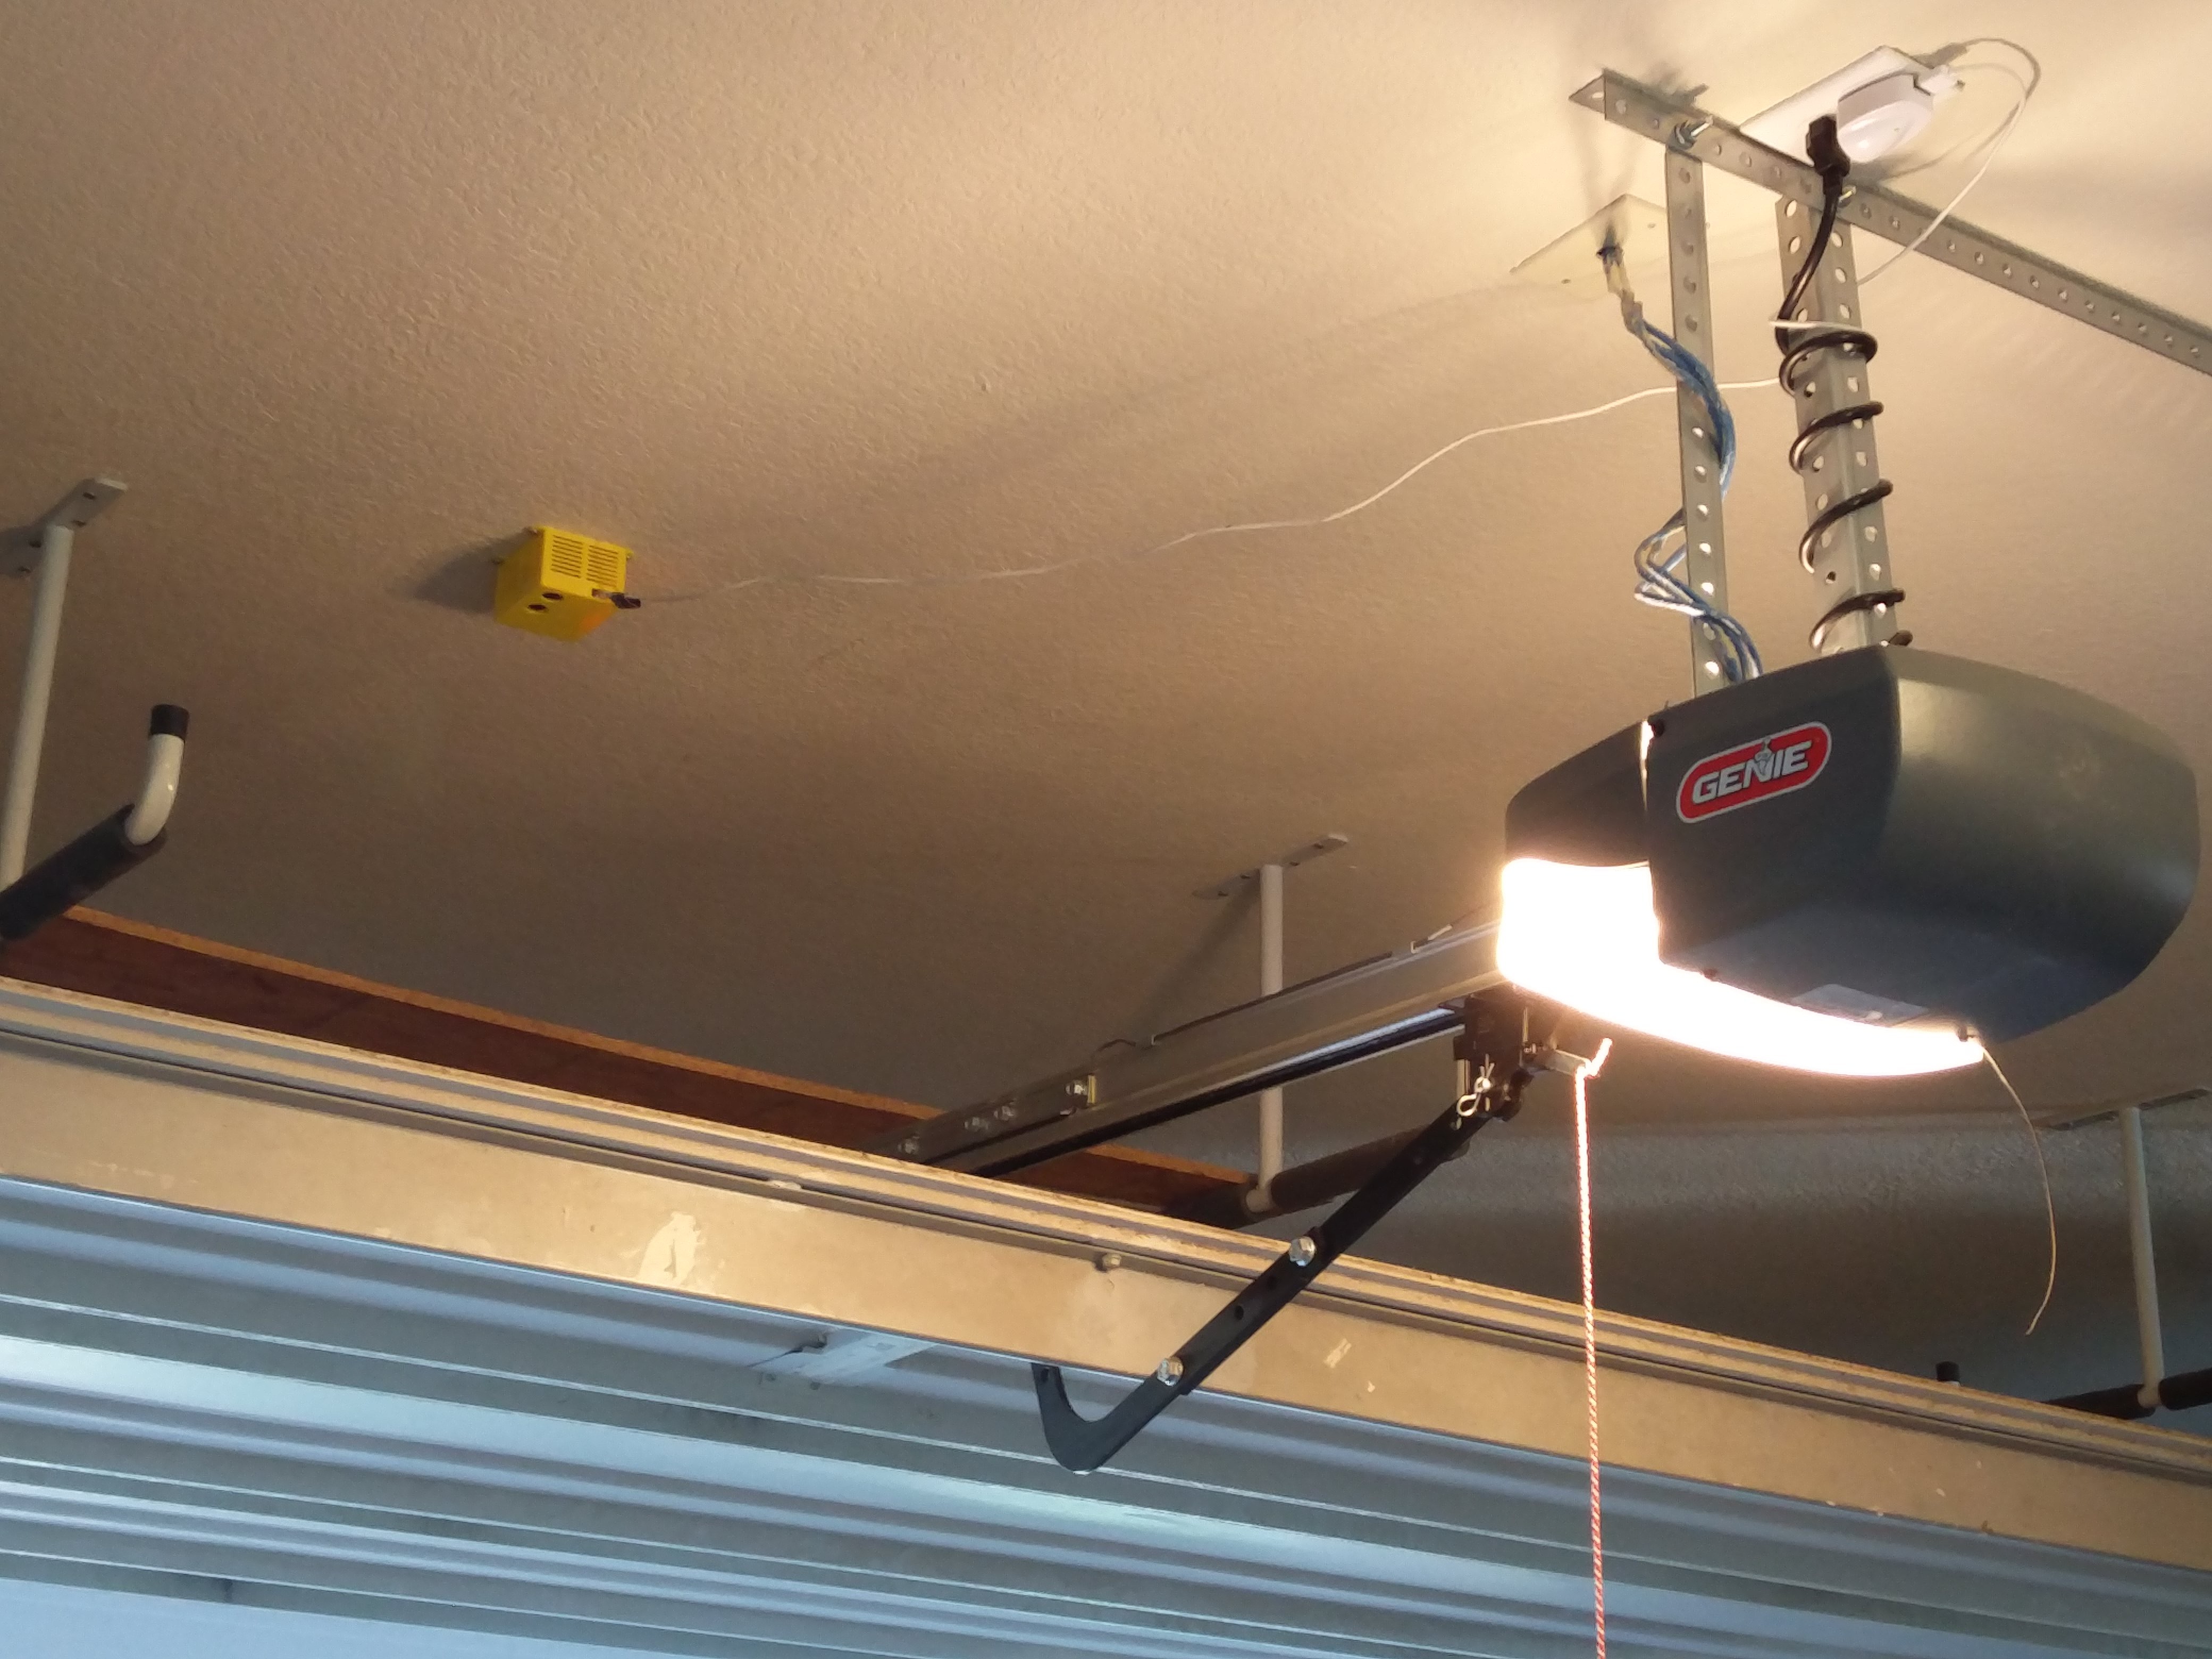
Hang it
- Get 4 screws that will go into the ceiling of the garage.
- Open the garage door and mark the locations of the four screw holes of the housing so that the sensor is above the door.
- Close the door and mount the housing.
![]()
Garage Door Sensor
Using the ESP8266 to broadcast open/close MQTT events over WiFi
Discussions
Become a Hackaday.io Member
Create an account to leave a comment. Already have an account? Log In.
I'm coming back to this project after a few years. By the way, I set this up and it has worked like a charm for three years. Old reliable. :). I was wondering why you used Telnet in the code. Also, I'm wanting to setup a simple door notification using a NodeMCU and a binary sensor.... thought?
Are you sure? yes | no
The telnet server is for remote debugging: https://hackaday.io/project/25090-garage-door-sensor/log/70779-debugging-over-the-network
By binary sensor, do you mean the Home Assistant sensor type? Notifications should be easy to do with a Home Assistant automation that has the door state as a trigger and notification as an action.
Are you sure? yes | no
Thanks for the link on Telnet. I was following this: https://randomnerdtutorials.com/esp8266-nodemcu-door-status-telegram/?unapproved=740203&moderation-hash=64253203bc8d8625f8e596fcd4777d83#comment-740203
and was wanting to integrate it with Home Assistant so that say when the front door opens the kitchen light turns on. I was thinking of adapting that linked tutorial above using the MQTT binary sensor code and just connecting the magnetic switch and adapting it for a door sensor.
Are you sure? yes | no
How does one get the sensor to show up in home assistant... I pasted the MQTT code in my configuration.yaml and it shows up as a badge but how do I get the open / closed to display and update in real time. Thanks
Are you sure? yes | no
It worked!! Thank you so much for this post! As Matt Motherway said, I had to use 115200 to upload.
Are you sure? yes | no
Hi, the .ino link seems broken, I'm getting:
```
This XML file does not appear to have any style information associated with it. The document tree is shown below.
<Error>
<Code>NoSuchKey</Code>
<Message>The specified key does not exist.</Message>
<Key>files/250901073450560/GarageDoorSensor.ino</Key>
<RequestId>BEA271ADC9AA88C6</RequestId>
<HostId>
9C2Qh7JKACR6EQHIKmyYAG4mgYm14QJ2JsIF7Wz2oN4xCf5Hdo3LbxjrOrfaNvBwcPq6P3sr2zk=
</HostId>
</Error>
```
Are you sure? yes | no
Thanks for the great write-up. I was able to get it working with these parts and settings, except I needed to set the upload speed to 115200. My nodemcu never completed flashing with that sketch, even though it completed flashing with other (smaller) sketches.
Are you sure? yes | no
Andy, many thanks for sharing this. It works and you've made it so simple. I've looked at similar projects and somehow they seem overcomplicated.
Are you sure? yes | no