Close
0%
0%

Biological & Environmental Feedback LED Wristband

Wristband that takes in heart rate and music data and creates responsive light show. Share Your Light!

Similar projects worth following
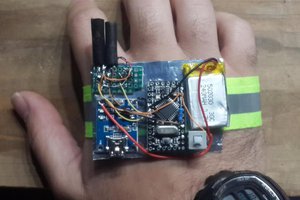
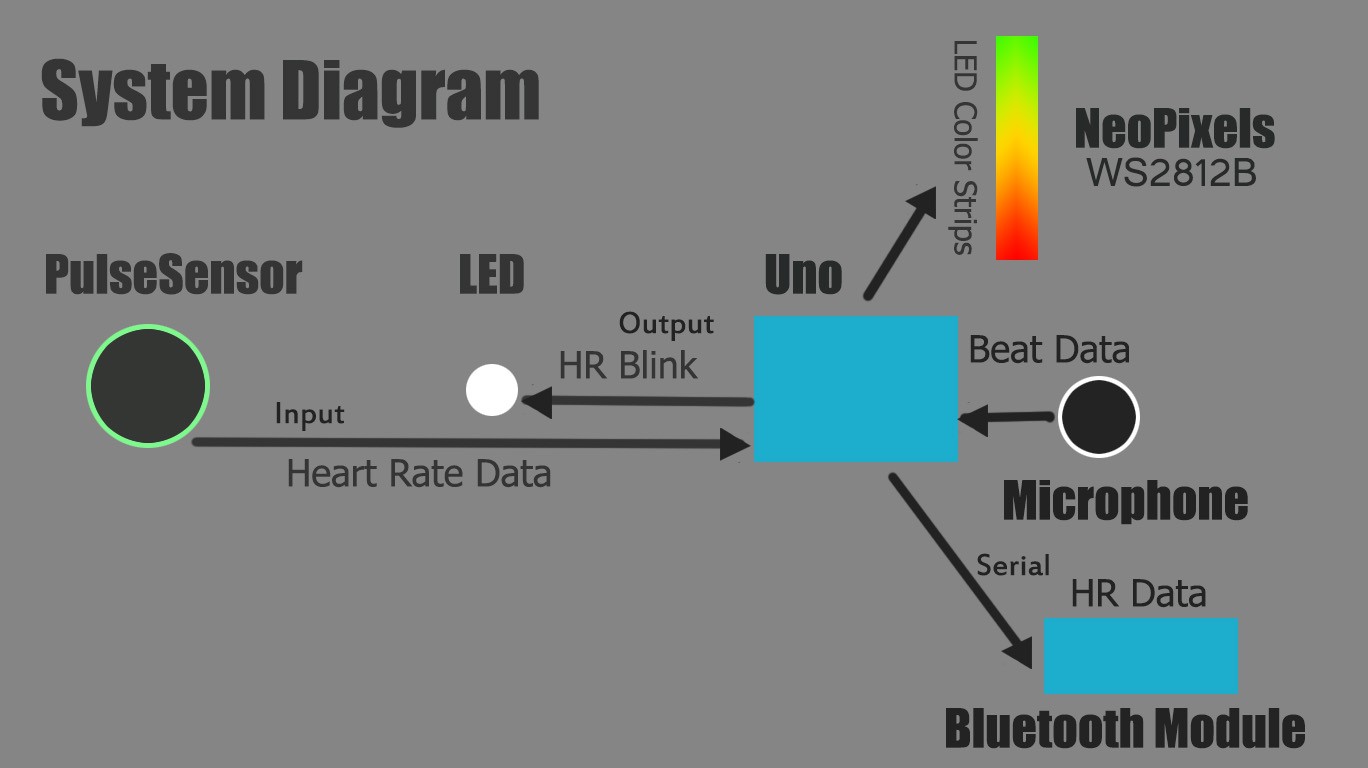
Our project is a LED Wristband that bases its light show on the user's heart rate and the surrounding music. We are using an Arduino Uno and LED Strip combined with a mic to create emergent and dynamic color displays. We see this design as a way to supplement communication and create interesting group dynamics.

I know it is funny to say but the mood ring was ahead of it's time. The ability to communicate mood is a fascinating idea. Putting this idea into practice by taking heart rate (your state) and music (context) we think a much richer experience can be shared via light. We are still prototyping but we have the basic sensors working to take in heart rate and sound and output those rates as lightshow on banded LED strips.  We are also looking at possibly using bluetooth to your phone to control or manipulate your light output. Possibly giving some control via a networked phone app to the DJ (turning them into a light jockey (LJ)).
Vision: 

We want to create wearable lights that reflect where you are and what you are experiencing. Imagine you are at a giant Skrillex EDM show at a festival like Lollapalooza. It would be ridiculously awesome if the audience contributed to and engaged with the music and each other in real time. Instead of fancy lasers and flames the fans could be lit by their love of the music and the power of the music set. 

Challenges:

1. Still working on a finalized form factor to create the most interesting and wearable light display system.

2. We are finding the bluetooth challenging to work with. 

3. We find ourselves wondering with all the edm lights out there why this hasn't been done: Is this a good idea?

Advantages:

1. Our team: Michael has an amazing background as a Masters student at the School of the Art Institute of Chicago. He has done digital light displays before based on machine learning algorithms and knows a lot about electronics. He also loves music and is very passionate about this idea. 

Joseph came up with the idea from a love of electronic  dance music. Joseph does a lot of prototyping and has valuable experiences here at Pumping Station One,  Chicago's largest hackerspace.

2. Our  hardware is primarily serial inputs and outputs. Since we can change most of the visual design with software we can rapidly iterate as our vision clarifies/we add more sensors, use more complex algorithms, or add additionally light display elements.

3. We think this idea is awesome.

Stretch: 

Taking the idea one step further imagine wearing led accessories in different areas of life. At the hospital to show how you feel. At the yoga studio to share your experience. At the sports arena to show your passion for the game or even show players' state and bio stats. Imagine the public art that could be created through networked wearable LEDs. We also have looked at and played with temperature, galvanic response, oximeter data, pupil dilation and other sensors to bring out the individuals state and response to environmental stimulus. We think this could become a supplemental way to communicate with your friend,s loved ones ,and even strangers.  We can imagine having a rfid passive ID chip in the device so that when you get in close enough proximity you can directly share your state and connect in new ways. We want to build out an app that lets the user develop new uses for their sensors and LED peripherals. We are using pre existing open libraries and documentation to facilitate extending the functionality of our prototype today. There are alot of possibilities and this area of biometric and environmental visible response has enormous room to explore.

View all 13 components

  • Merging Light Values

    Michael Fox08/19/2014 at 10:17 0 comments

    This is where the fun really begins for the open-source community. We have been working on merging the heartbeat and audio into one impressive visualization. For all the non-programmers a package with our own visualization algorithms will be included but for anyone with Arduino programming knowledge feel free to edit the code to make a combined visual that makes sense to you. Our current algorithm uses a wheel of color that changes based on heart rate and resets every time the beat hits it's loudest. This allows for an understanding of the wearers heart rate as well as an audio visualization.

  • Microphone Input

    Michael Fox08/19/2014 at 09:17 0 comments

    The microphone input is functioning with the help of a simple LM386 circuit. The following link is the link we used for the amplification from the microphone: http://lowvoltage.wordpress.com/2011/05/15/lm386-mic-amp/. This allowed for a larger range of values from the Analog Input. The simple analog read example can be used to test the circuit. After testing the circuit we added the analog input part of the code to our light strip code. The light strip code now presents the viewer with visualizations of two inputs, audio and heart rate.

  • Power Source

    Michael Fox08/19/2014 at 06:21 0 comments

    Powering three strips of LED's will be up to a Li-Po battery which is recommended for use with NeoPixels by adafruit. We chose a 3.7V 1200maH battery because of its size, weight, and capacity. It is important for the wearer to feel comfortable with the wristband throughout a show. Also, because the lights will be blinking the current draw will be lowered and this will extend the lifetime of the battery. With all three light sequences running (a total of 21 LEDs) off a supply the highest current draw ranged around 600ma with a more regular draw of 170 - 300 ma. With one battery that would make the lights last over 2hrs and just by adding another lightweight slim battery we could extend the time of the lights to well over 4hrs. 

  • LED's, Pulse Sensing, and Color Shift

    Michael Fox08/19/2014 at 03:25 0 comments

    Working on programming the LED strip to visually communicate the heart rate and activity of the user. The example file that you can download from pulse sensor's website utilizes an interrupt that determines a BPM variable. Using this variable we can change the rate of blinking. By setting an average control heart rate we can shift the colors to visualize activity.

View all 4 project logs

  • 1
    Step 1

    Link to Pulse Sensor Code:

    http://pulsesensor.myshopify.com/pages/code-and-guide

  • 2
    Step 2

    Link to LED Code:

    https://learn.adafruit.com/adafruit-neopixel-uberguide/arduino-library

  • 3
    Step 3

    volatile int rate[10]; // array to hold last ten IBI values

    volatile unsigned long sampleCounter = 0; // used to determine pulse timing

    volatile unsigned long lastBeatTime = 0; // used to find IBI

    volatile int P =512; // used to find peak in pulse wave, seeded

    volatile int T = 512; // used to find trough in pulse wave, seeded

    volatile int thresh = 512; // used to find instant moment of heart beat, seeded

    volatile int amp = 100; // used to hold amplitude of pulse waveform, seeded

    volatile boolean firstBeat = true; // used to seed rate array so we startup with reasonable BPM

    volatile boolean secondBeat = false; // used to seed rate array so we startup with reasonable BPM

    void interruptSetup(){

    // Initializes Timer2 to throw an interrupt every 2mS.

    TCCR2A = 0x02; // DISABLE PWM ON DIGITAL PINS 3 AND 11, AND GO INTO CTC MODE

    TCCR2B = 0x06; // DON'T FORCE COMPARE, 256 PRESCALER

    OCR2A = 0X7C; // SET THE TOP OF THE COUNT TO 124 FOR 500Hz SAMPLE RATE

    TIMSK2 = 0x02; // ENABLE INTERRUPT ON MATCH BETWEEN TIMER2 AND OCR2A

    sei(); // MAKE SURE GLOBAL INTERRUPTS ARE ENABLED

    }

    // THIS IS THE TIMER 2 INTERRUPT SERVICE ROUTINE.

    // Timer 2 makes sure that we take a reading every 2 miliseconds

    ISR(TIMER2_COMPA_vect){ // triggered when Timer2 counts to 124

    cli(); // disable interrupts while we do this

    Signal = analogRead(pulsePin); // read the Pulse Sensor

    sampleCounter += 2; // keep track of the time in mS with this variable

    int N = sampleCounter - lastBeatTime; // monitor the time since the last beat to avoid noise

    // find the peak and trough of the pulse wave

    if(Signal < thresh && N > (IBI/5)*3){ // avoid dichrotic noise by waiting 3/5 of last IBI

    if (Signal < T){ // T is the trough

    T = Signal; // keep track of lowest point in pulse wave

    }

    }

    if(Signal > thresh && Signal > P){ // thresh condition helps avoid noise

    P = Signal; // P is the peak

    } // keep track of highest point in pulse wave

    // NOW IT'S TIME TO LOOK FOR THE HEART BEAT

    // signal surges up in value every time there is a pulse

    if (N > 250){ // avoid high frequency noise

    if ( (Signal > thresh) && (Pulse == false) && (N > (IBI/5)*3) ){

    Pulse = true; // set the Pulse flag when we think there is a pulse

    digitalWrite(blinkPin,HIGH); // turn on pin 13 LED

    IBI = sampleCounter - lastBeatTime; // measure time between beats in mS

    lastBeatTime = sampleCounter; // keep track of time for next pulse

    if(secondBeat){ // if this is the second beat, if secondBeat == TRUE

    secondBeat = false; // clear secondBeat flag

    for(int i=0; i<=9; i++){ // seed the running total to get a realisitic BPM at startup

    rate[i] = IBI;

    }

    }

    if(firstBeat){ // if it's the first time we found a beat, if firstBeat == TRUE

    firstBeat = false; // clear firstBeat flag

    secondBeat = true; // set the second beat flag

    sei(); // enable interrupts again

    return; // IBI value is unreliable so discard it

    }

    // keep a running total of the last 10 IBI values

    word runningTotal = 0; // clear the runningTotal variable

    for(int i=0; i<=8; i++){ // shift data in the rate array

    rate[i] = rate[i+1]; // and drop the oldest IBI value

    runningTotal += rate[i]; // add up the 9 oldest IBI values

    }

    rate[9] = IBI; // add the latest IBI to the rate array

    runningTotal += rate[9]; // add the latest IBI to runningTotal

    runningTotal /= 10; // average the last 10 IBI values

    BPM = 60000/runningTotal; // how many beats can fit into a minute? that's BPM!

    QS = true; // set Quantified Self flag

    // QS FLAG IS NOT CLEARED INSIDE THIS ISR

    }

    }

    if (Signal < thresh && Pulse == true){ // when the values are going down, the beat is over

    digitalWrite(blinkPin,LOW); // turn off pin 13 LED

    Pulse = false; // reset the Pulse flag so we can do it again

    amp = P - T; // get amplitude of the pulse wave

    thresh = amp/2 + T; // set thresh at 50% of the amplitude

    P = thresh; // reset these for next time

    T = thresh;

    }

    if (N > 2500){ // if 2.5 seconds go by without a beat

    thresh = 512; // set thresh default

    P = 512; // set P default

    T = 512; // set T default

    lastBeatTime = sampleCounter; // bring the lastBeatTime up to date

    firstBeat = true; // set these to avoid noise

    secondBeat = false; // when we get the heartbeat back

    }

    sei(); // enable interrupts when youre done!

    }// end isr

View all 4 instructions

Enjoy this project?

Share

Discussions

harbin.giuntoli wrote 10/07/2014 at 12:07 point
Hey, for all your adafruit parts, it's cheaper to get them at adafruit.com
Also, I'd look into using the Flora (http://www.adafruit.com/product/659) which is an arduino Uno, but made to be sewn into clothes- the project may be easier as a wearable.

  Are you sure? yes | no

Similar Projects

Does this project spark your interest?

Become a member to follow this project and never miss any updates