Close
0%
0%

Adabox Internet Radio

1-Button Internet Music Box based on ESP8266

Similar projects worth following
Desired Result:
- Music Streaming Box
- WiFi network and playlist configured from files on SD card
- 1-Button Interface
* Short Press to cycle channel
* Long Press to cycle mode ( Off / Low Volume / High Volume )

Introduction

This project evolved from the simple Streaming Internet Radio example included with Adabox004. I had some car speakers and a single red arcade button laying around, so I upgraded! Instead of a power switch, there is currently a single momentary button that cycles through a list of music streams. The volume is currently controlled by a potentiometer on the breadboard. I intend to add long-press functionality to provide the ability to cycle through off, low volume, and high volume modes.

SD Card

The Adafruit MusicMaker Featherwing includes an SD card slot. I had the idea to store the list of stream URLs and network login credentials in files on the SD card. This way, if I want to add channels or connect to the network at a friend's house, I can update text files on the SD card instead of re-flashing the firmware.

Wireless Networks

The sketch looks for wireless networks and passwords in a file called CREDITS.TXT. Each line of the file has the format "SSID,PASSPHRASE". The sketch tries to connect to each network, then moves on to the next f not connected after 10 seconds. If it makes it through the entire list without connecting, then the sketch does nothing, and must be reset.

Streaming Channels

The list of streaming channels is stored in URLS.TXT. Each line has the format "HOST:PORT/PATH", omitting the "http://" at the beginning. For example, one of my favorite lines is "streaming.radionomy.com:80/SKAspotRadio".

Currently you can effectively create an OFF mode by connecting to a host that DOES exist, but requesting a path that DOES NOT exist.

TODO

  • Get the Long-Press functionality to work. It is currently buggy and gets worse as the uptime increases. Might be having memory problems?
  • Add an offline mode that plays music files from the SD card if it can't connect to a network.

multiChannelInternetMusicStreamerNEW.ino

Arduino Sketch to run on Adafruit Feather HUZZAH with MusicMaker Featherwing

ino - 6.21 kB - 06/28/2017 at 15:28

Download

URLS.TXT

List of URLs to stream from. Don't put "http://" at the beginning. Each line has the format: host:port/path

plain - 310.00 bytes - 06/28/2017 at 15:24

Download

CREDITS.TXT

List of known wifi networks. Each line has the format: SSID,PASSPHRASE

plain - 120.00 bytes - 06/28/2017 at 15:24

Download

  • Raspberry Pi Version!

    Matthew Gorr07/02/2017 at 14:52 0 comments

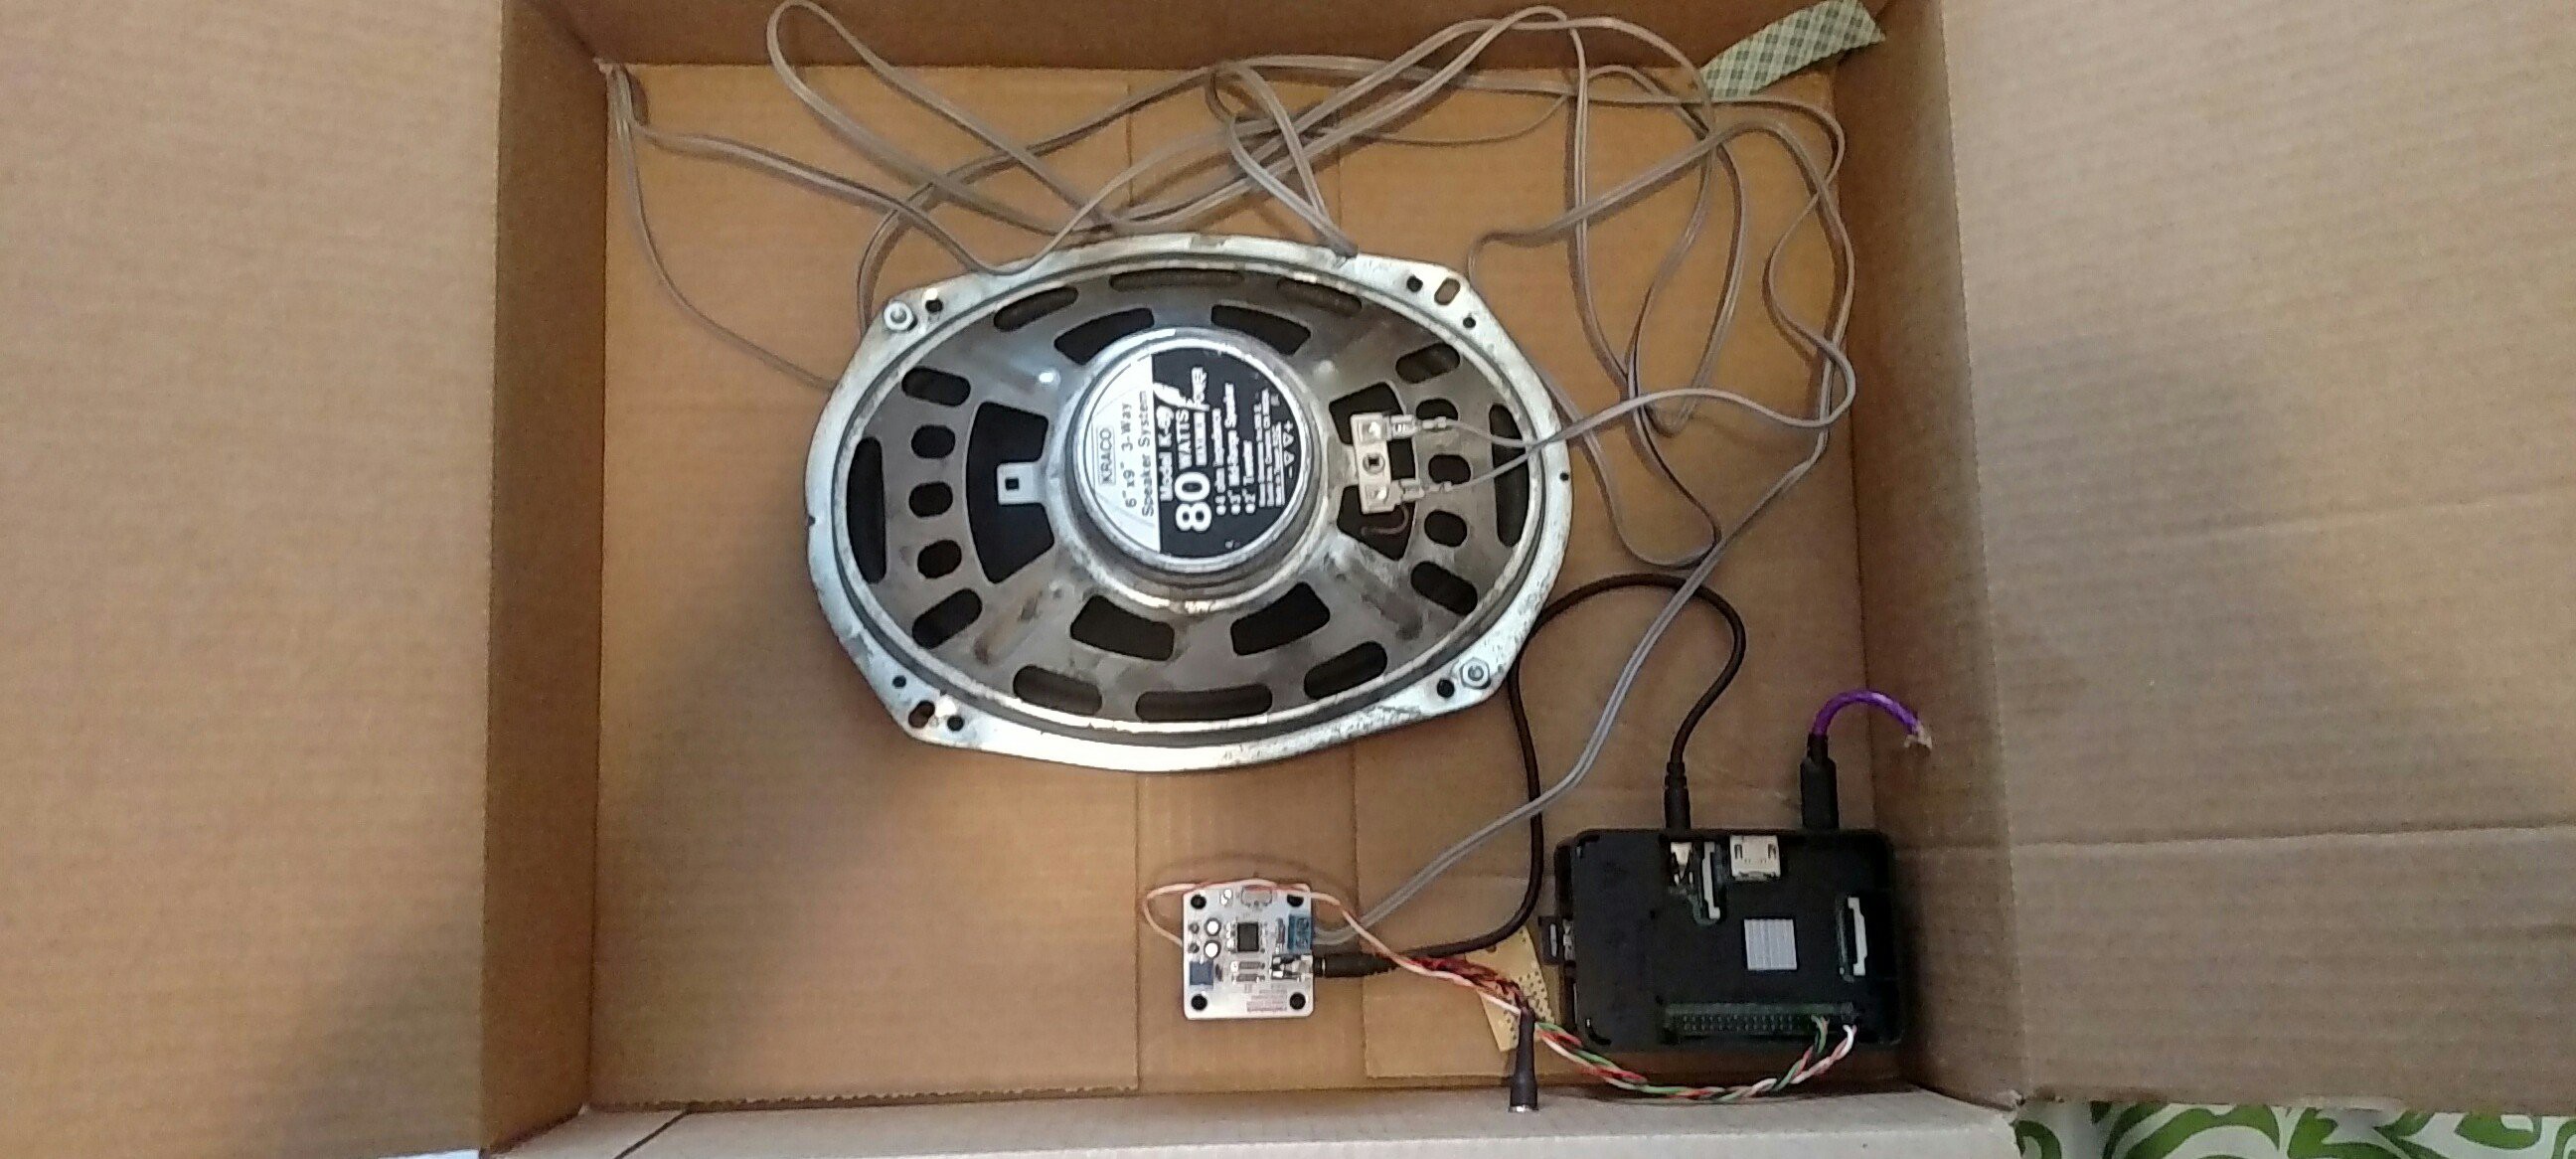
    I implemented essentially the same project using a Raspberry Pi B+ instead of a Feather HUZZAH. This version uses omxplayer to load streams from the same URLS.TXT used by the HUZZAH version. This project still hasn't passed cardboard box phase:

    Introduction

    omxplayer can play internet music streams! Try the command below for yourself!

    omxplayer http://ice1.somafm.com:80/u80s-128-mp3
    The newer versions also include built-in hotkeys, including "q" to quit. I used the Pi Key Daemon make the Pi recognize a button connected to GPIO 4 as the Q key.

    A bash script (shown below) reads the contents of the playlist file into an array, then calls omxplayer with the first stream. When the user presses GPIO 4 Button, omxplayer quits, and the bash script takes care of calling omxplayer with the next stream. Between omxplayer calls, the script also triggers a shutdown call if the button is held down for two seconds.

    Raspberry Pi Radio Hardware Setup

    • Connect button so that pushing the button pulls GPIO4 to ground. I also used an external 10k pull up resistor to 3.3V, but that may be unecessary.
    • (optional) set GPIO17 high to provide voltage for button pull up, because the pins were physically closer on the B+.
    • Connect 1/8" output to external audio amplifier input. I used a half-watt DIY amp I got from RadioShack (RIP)

    Raspberry Pi Radio Software Setup

    • Raspbian Jessie Lite
      • Download/Install
      • Add network info to /etc/wpa_supplicant/wpa_supplicant.conf
      • Force analog audio output in raspi-config
      • Install omxplayer - sudo apt-get install omxplayer
    • PiKeyD - https://github.com/mmoller2k/pikeyd
      • Download/Make
      • Copy pikeyd executable to home directory
      • Edit configuration File to register GPIO 4 as "Q" key
      • Add "sudo /home/pi/pikeyd -d" to /etc/rc.local
    • Playlist
      • Populate /boot/urls.txt with list of stream URLs, one per line.
      • Do not use "http://" at the beginning of line
    • Bash Script
      • code is shown below. I named the file "omxplaylist"
      • make it executable "chmod +x omxplaylist"
      • add "sudo /home/pi/omxplaylist" to ~/.bash_profile
    • That's it for software! Reboot and rock out!

    NOTE: Because the script is executed in .bash_profile, it will try (and fail) to execute a second instance of omxplayer each time you login over ssh. I have been able to avoid system crashes by pressing CTRL+C immediately after entering my password during ssh.

    /home/pi/omxplaylist

    #!/bin/bash
    
    # omxplaylist script
    # Matt Gorr
    # July 5th, 2017
    # Portions borrowed from https://learn.adafruit.com/raspberry-pi-wearable-time-lapse-camera/software
    
    HALT=4                # Halt button GPIO pin (other end to GND)
    HIGHPIN=17
    
    gpio -g mode $HALT up  # Initialize GPIO states
    gpio -g mode $HIGHPIN out
    
    mapfile -t channels < /boot/urls.txt
    gpio -g write $HIGHPIN 1
    
    while :
    do
    	for (( i=0 ; i<${#channels[@]} ; i++ ))
    	do
    		wall ${channels[$i]}
    		omxplayer http://${channels[$i]}
    		currenttime=$(date +%s)
    		while [ $(gpio -g read $HALT) -eq 0 ]; do
    			if [ $(($(date +%s)-currenttime)) -ge 2 ]; then
    				wall "Shutting Down..."
    				gpio -g write $HIGHPIN 0
    				shutdown -h now
    				exit
    			fi
    		done
    	done
    	#echo "****End of While Loop"
    done
    

  • New Enclosure!

    Matthew Gorr07/02/2017 at 14:18 0 comments

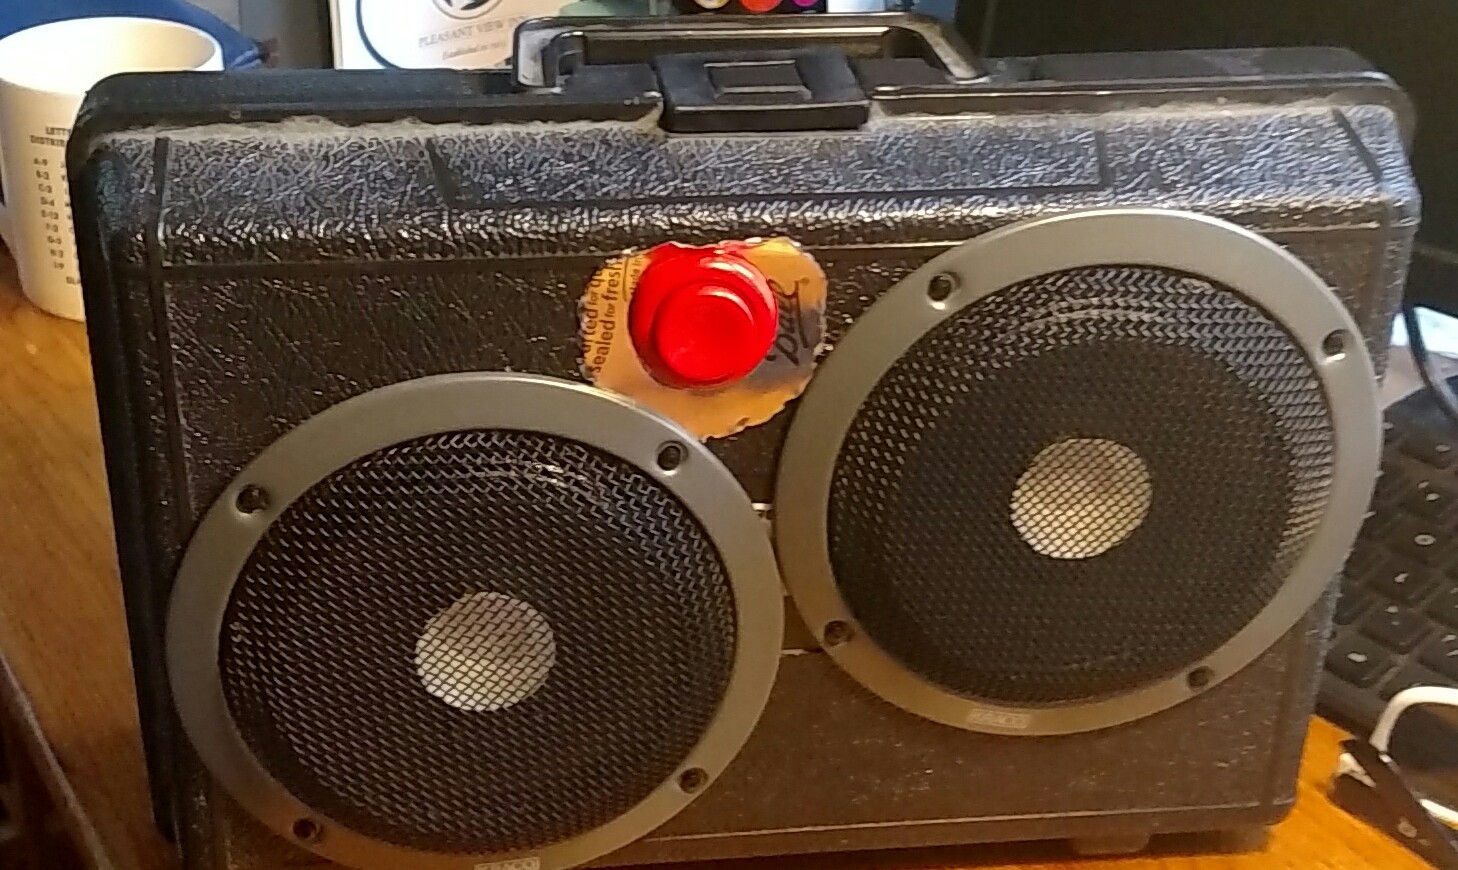
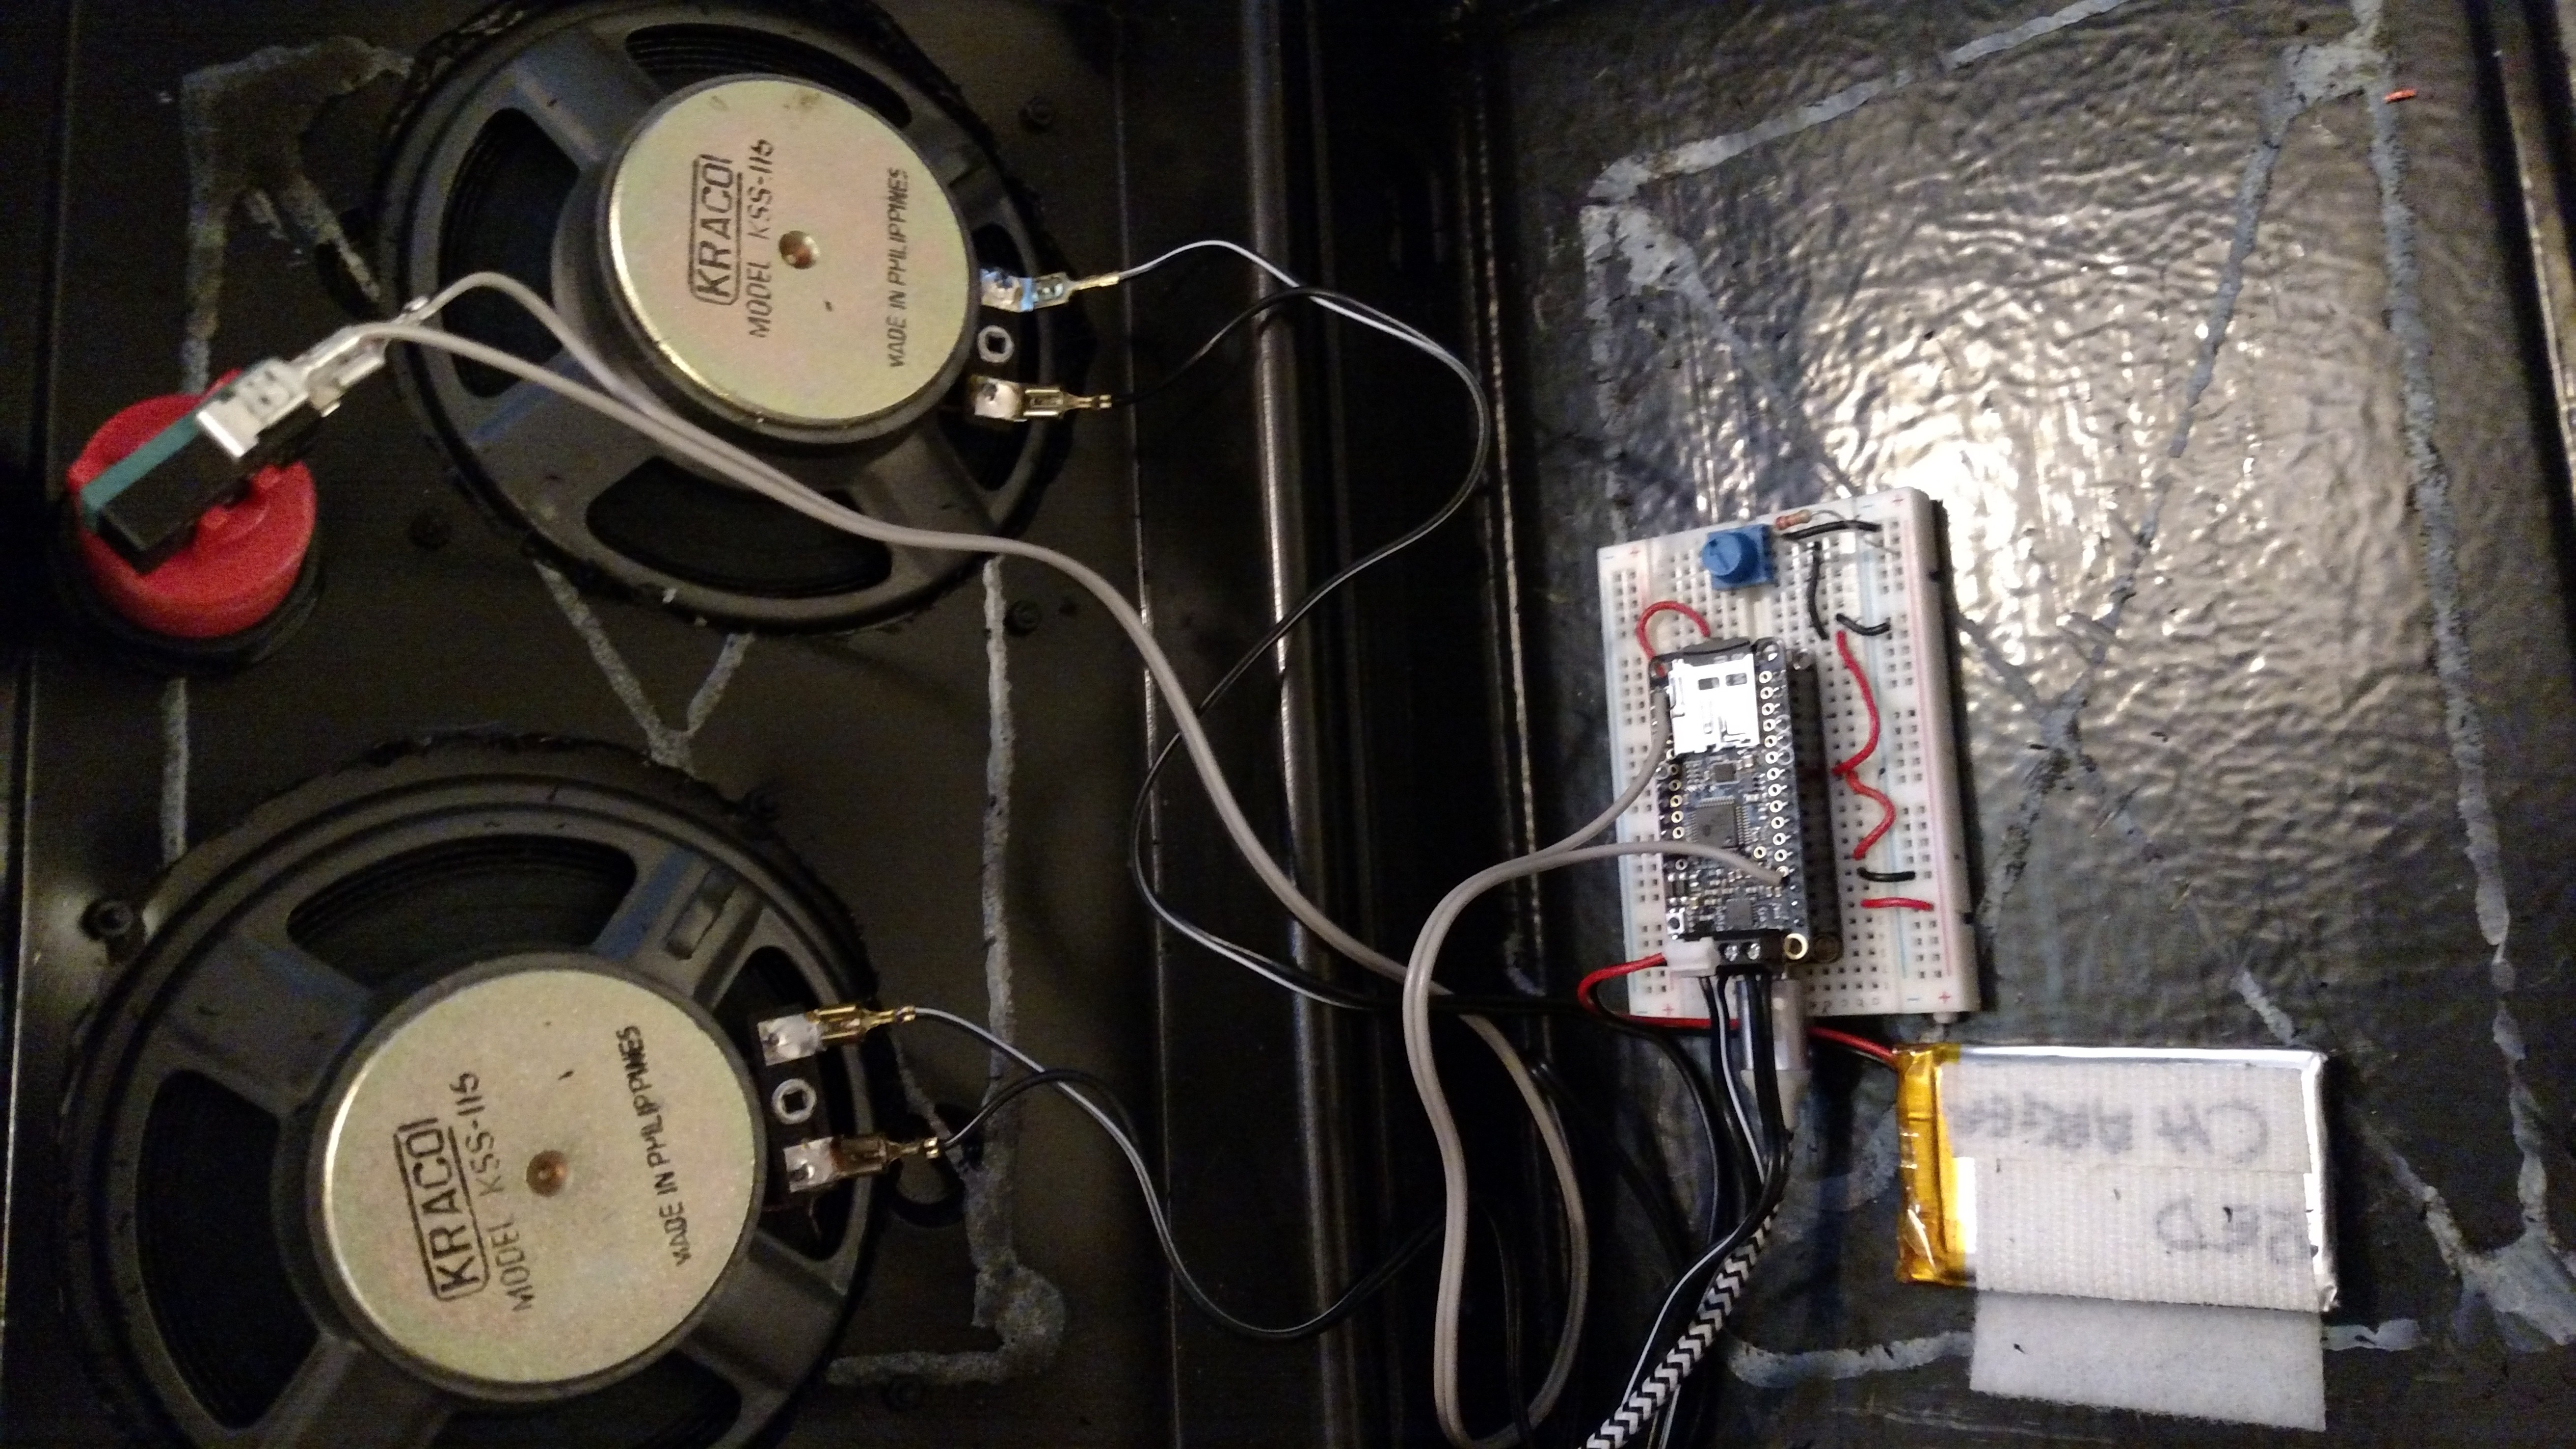
    No new code in this update, but I installed existing project into a new enclosure. I got the box for free from the IT dept. at my work when they were throwing stuff out. This was the plastic case for a network technician field toolkit. I also added a battery to make it portable! There is still no real "OFF" switch or deep sleep mode, so battery should be disconnected when not in use. I think if I put in some work with a hot glue gun, this thing could be essentially weather-proof. Ready to connect to a cell phone hot spot and stream music at the beach!

    I used a dremel to cut holes in the container. I initially made the button hole just slightly too big. So I made a 1" ID washer out of a mason jar lid. To make the washer, I first marked the inner and outer diameters on the lid. I used approx 8/32" drill bit to drill holes ~0.5-cm apart around the circumference of the circle. I then used a hobby knife to slice between the holes. Finally, I used the dremel to clean up the outer diameter a little bit. Once it was installed on the box, I trimmed a little at the top to lessen the likelihood of cutting my fingers on the jagged metal.

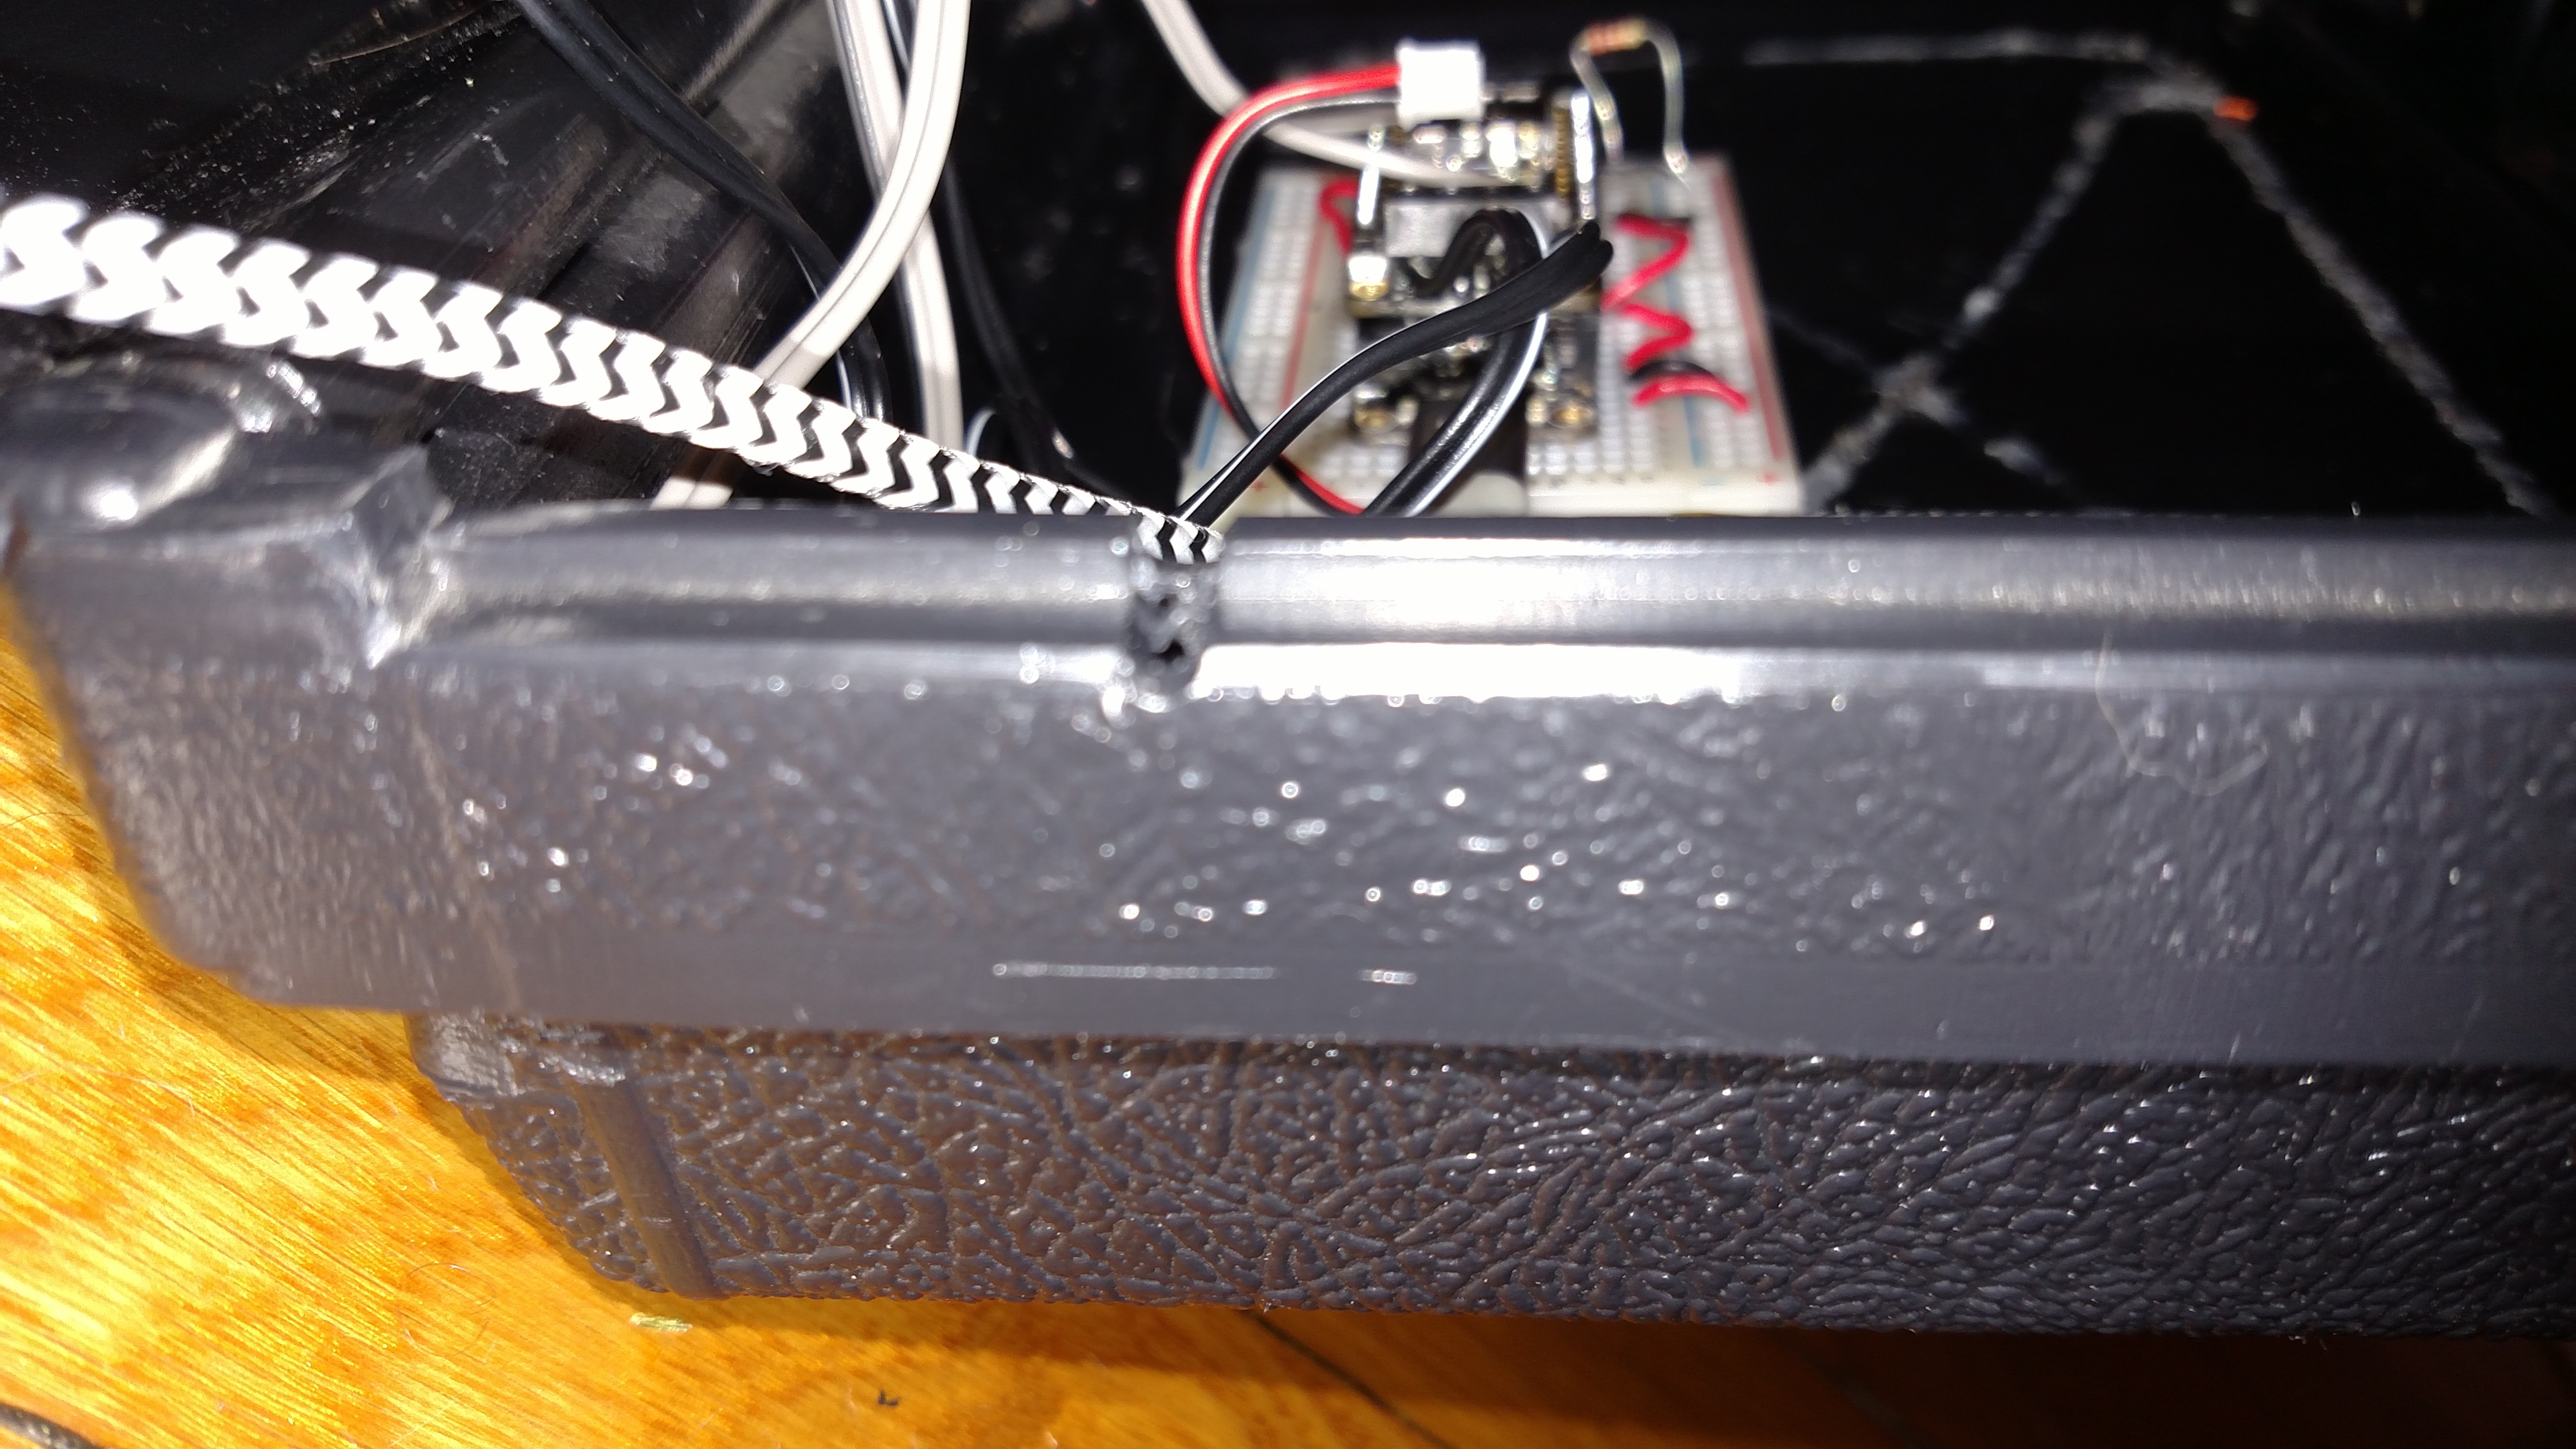
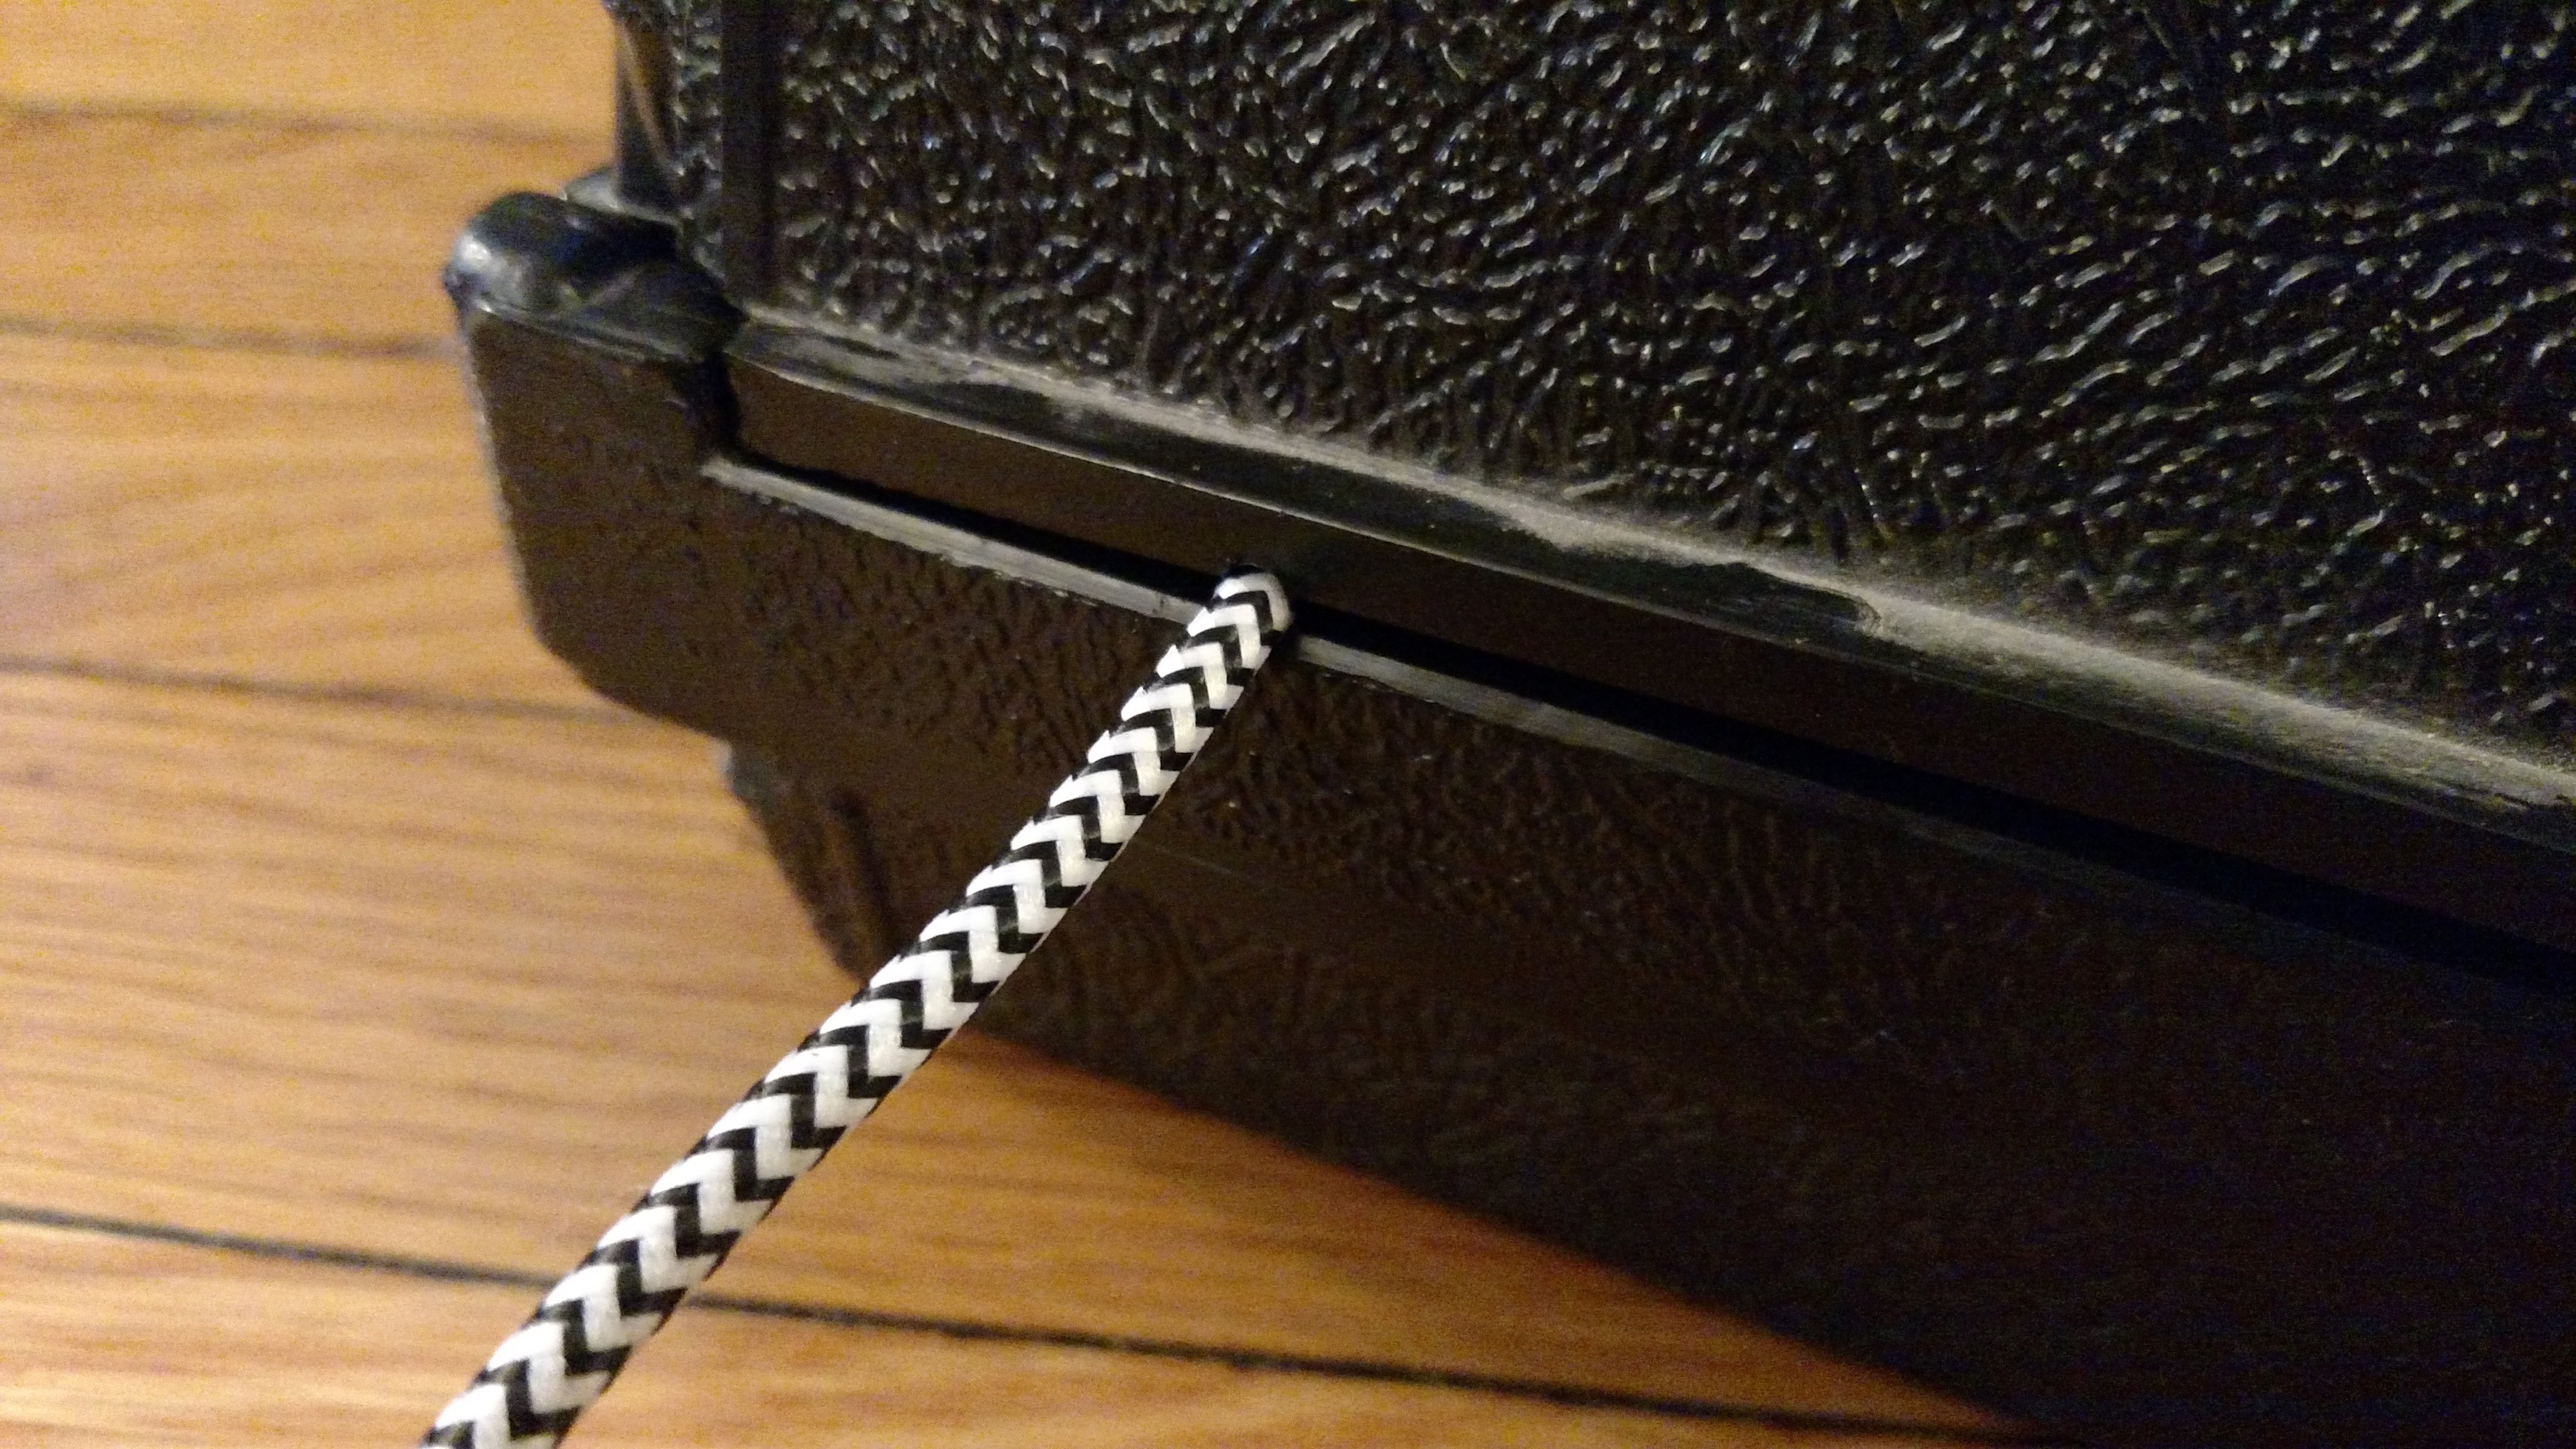
    I matched a drill bit to the diameter of the USB cable I'm using, and drilled a hole in the seam where the two halves meet to provide an inlet for the power cable. I probably could have made the hole wider; In the second picture it looks like the two halves are still being pushed apart by the cable.


    Speaker and button wires were cut to proper length. I do intend to transfer the circuit to a permanent circuit board once I'm done. I'm still deciding on the final control scheme. My original goal was the One-Button interface with short-press to cycle channels and long-press to cycle volume/power. Because of parts on hand, I'm now considering installing a panel-mount potentiometer with built-in switch to control power and volume.

    I also basically cloned this project with a raspberry pi and small audio amplifier. I'll write an update about that soon, as well.

View all 2 project logs

Enjoy this project?

Share

Discussions

Similar Projects

Does this project spark your interest?

Become a member to follow this project and never miss any updates