Matthew Gorr
-
Raspberry Pi Version!
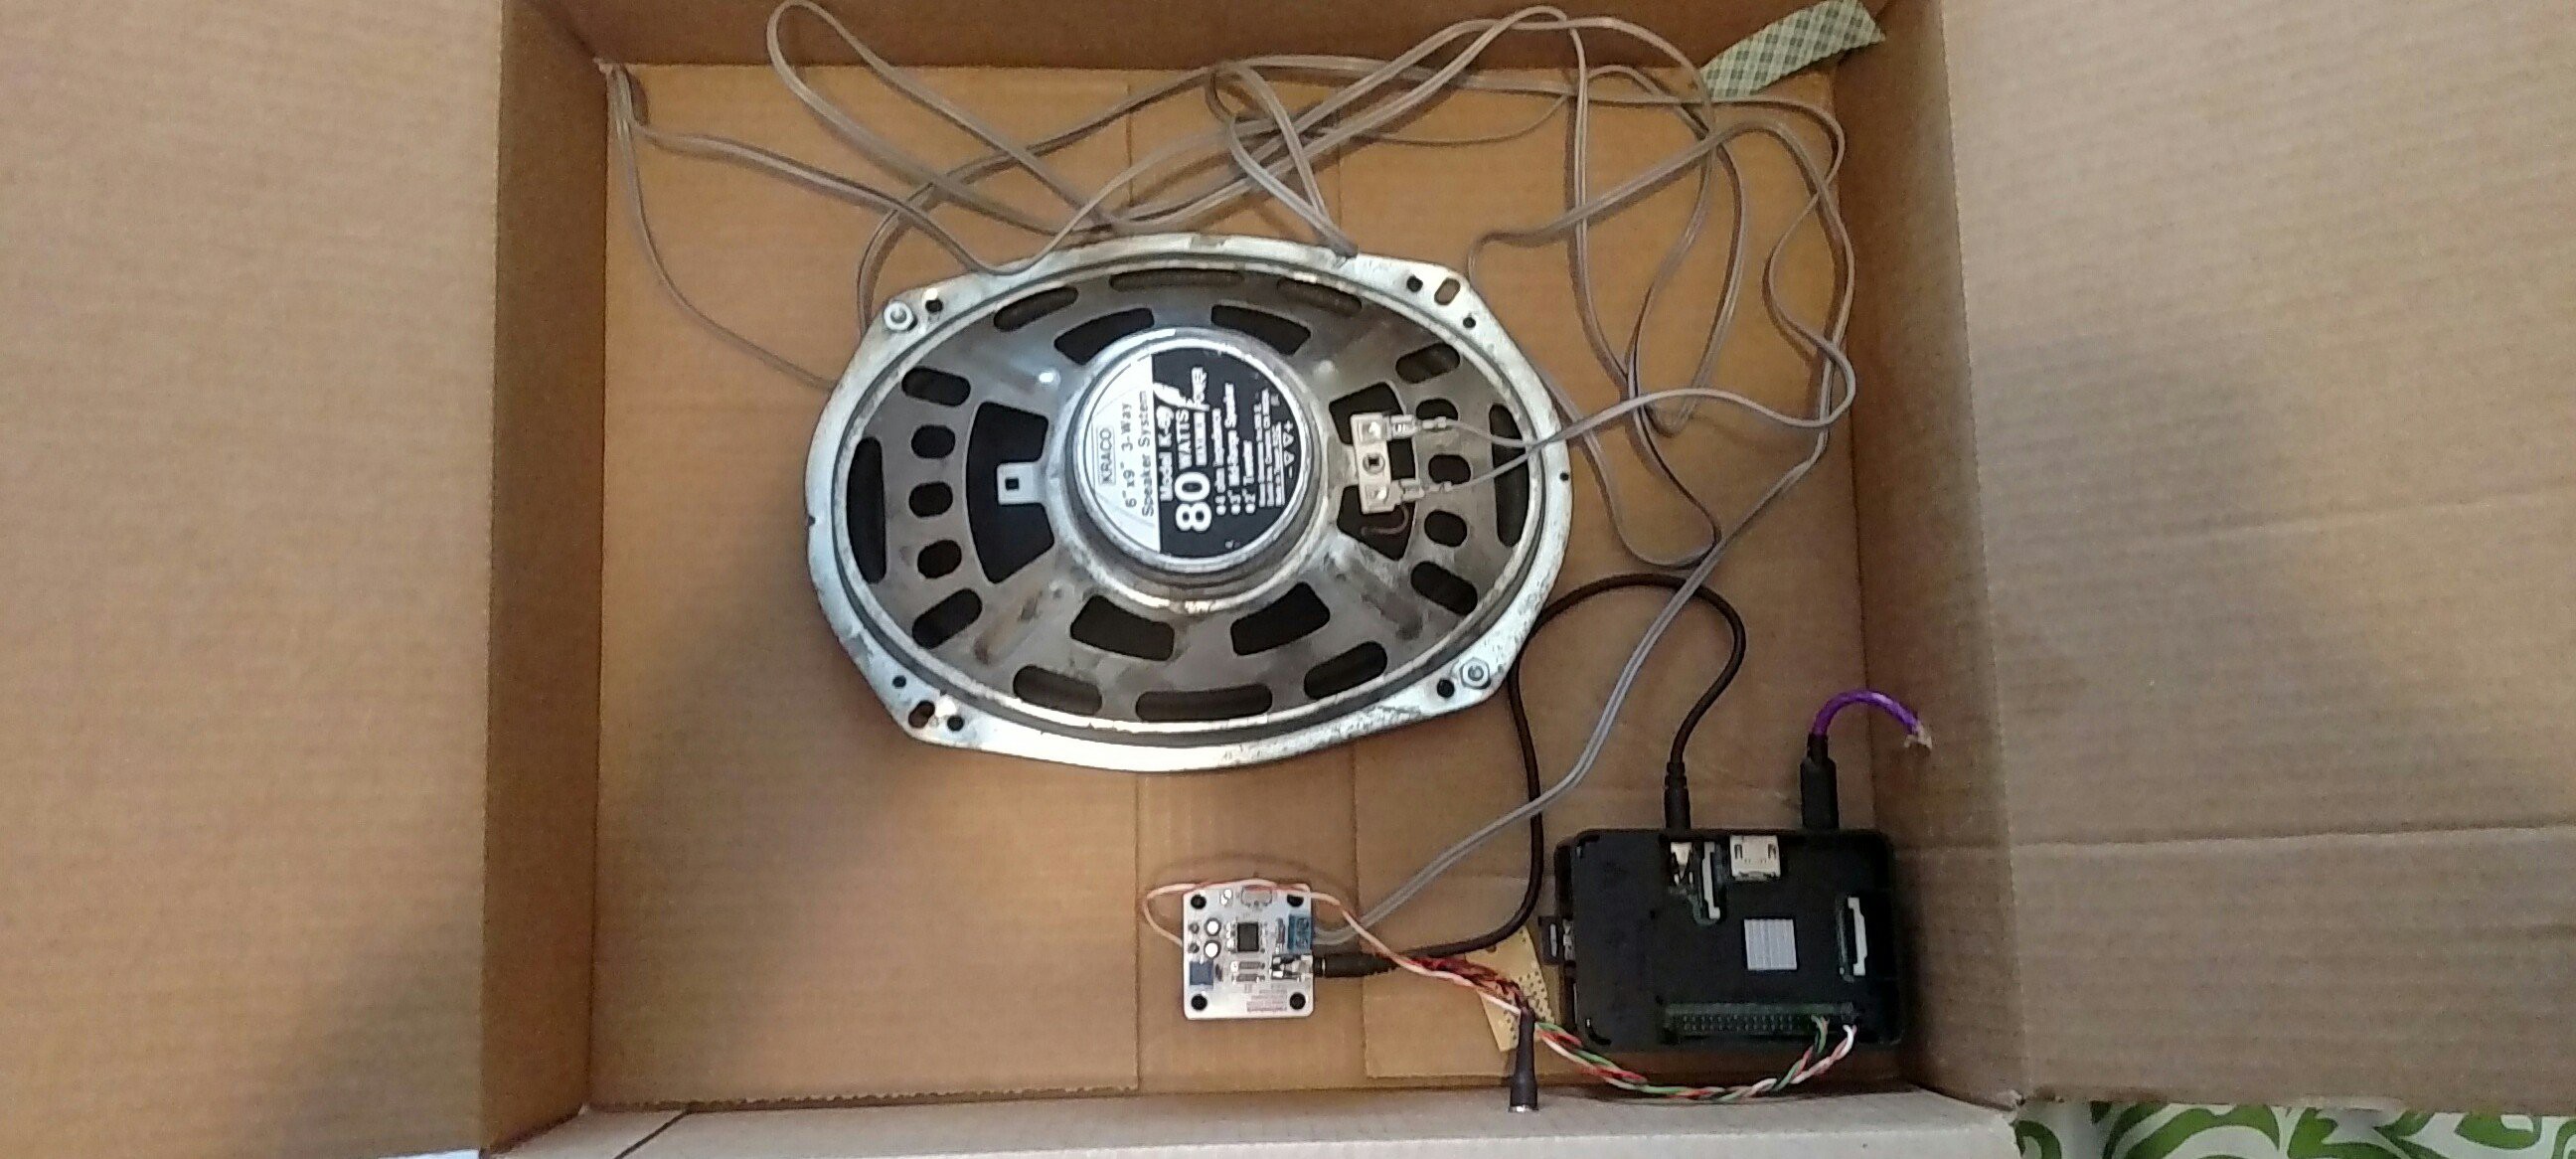
07/02/2017 at 14:52 • 0 commentsI implemented essentially the same project using a Raspberry Pi B+ instead of a Feather HUZZAH. This version uses omxplayer to load streams from the same URLS.TXT used by the HUZZAH version. This project still hasn't passed cardboard box phase:
![]()
Introduction
omxplayer can play internet music streams! Try the command below for yourself!
omxplayer http://ice1.somafm.com:80/u80s-128-mp3The newer versions also include built-in hotkeys, including "q" to quit. I used the Pi Key Daemon make the Pi recognize a button connected to GPIO 4 as the Q key.A bash script (shown below) reads the contents of the playlist file into an array, then calls omxplayer with the first stream. When the user presses GPIO 4 Button, omxplayer quits, and the bash script takes care of calling omxplayer with the next stream. Between omxplayer calls, the script also triggers a shutdown call if the button is held down for two seconds.
Raspberry Pi Radio Hardware Setup
- Connect button so that pushing the button pulls GPIO4 to ground. I also used an external 10k pull up resistor to 3.3V, but that may be unecessary.
- (optional) set GPIO17 high to provide voltage for button pull up, because the pins were physically closer on the B+.
- Connect 1/8" output to external audio amplifier input. I used a half-watt DIY amp I got from RadioShack (RIP)
Raspberry Pi Radio Software Setup
- Raspbian Jessie Lite
- Download/Install
- Add network info to /etc/wpa_supplicant/wpa_supplicant.conf
- Force analog audio output in raspi-config
- Install omxplayer - sudo apt-get install omxplayer
- PiKeyD - https://github.com/mmoller2k/pikeyd
- Download/Make
- NOTE: PiKeyD comes configured for RPi1. If using a 2 or 3, you need to edit the source code before compiling - https://github.com/mmoller2k/pikeyd/issues/3
- Copy pikeyd executable to home directory
- Edit configuration File to register GPIO 4 as "Q" key
- Add "sudo /home/pi/pikeyd -d" to /etc/rc.local
- Download/Make
- Playlist
- Populate /boot/urls.txt with list of stream URLs, one per line.
- Do not use "http://" at the beginning of line
- Bash Script
- code is shown below. I named the file "omxplaylist"
- make it executable "chmod +x omxplaylist"
- add "sudo /home/pi/omxplaylist" to ~/.bash_profile
- That's it for software! Reboot and rock out!
NOTE: Because the script is executed in .bash_profile, it will try (and fail) to execute a second instance of omxplayer each time you login over ssh. I have been able to avoid system crashes by pressing CTRL+C immediately after entering my password during ssh.
/home/pi/omxplaylist
#!/bin/bash # omxplaylist script # Matt Gorr # July 5th, 2017 # Portions borrowed from https://learn.adafruit.com/raspberry-pi-wearable-time-lapse-camera/software HALT=4 # Halt button GPIO pin (other end to GND) HIGHPIN=17 gpio -g mode $HALT up # Initialize GPIO states gpio -g mode $HIGHPIN out mapfile -t channels < /boot/urls.txt gpio -g write $HIGHPIN 1 while : do for (( i=0 ; i<${#channels[@]} ; i++ )) do wall ${channels[$i]} omxplayer http://${channels[$i]} currenttime=$(date +%s) while [ $(gpio -g read $HALT) -eq 0 ]; do if [ $(($(date +%s)-currenttime)) -ge 2 ]; then wall "Shutting Down..." gpio -g write $HIGHPIN 0 shutdown -h now exit fi done done #echo "****End of While Loop" done -
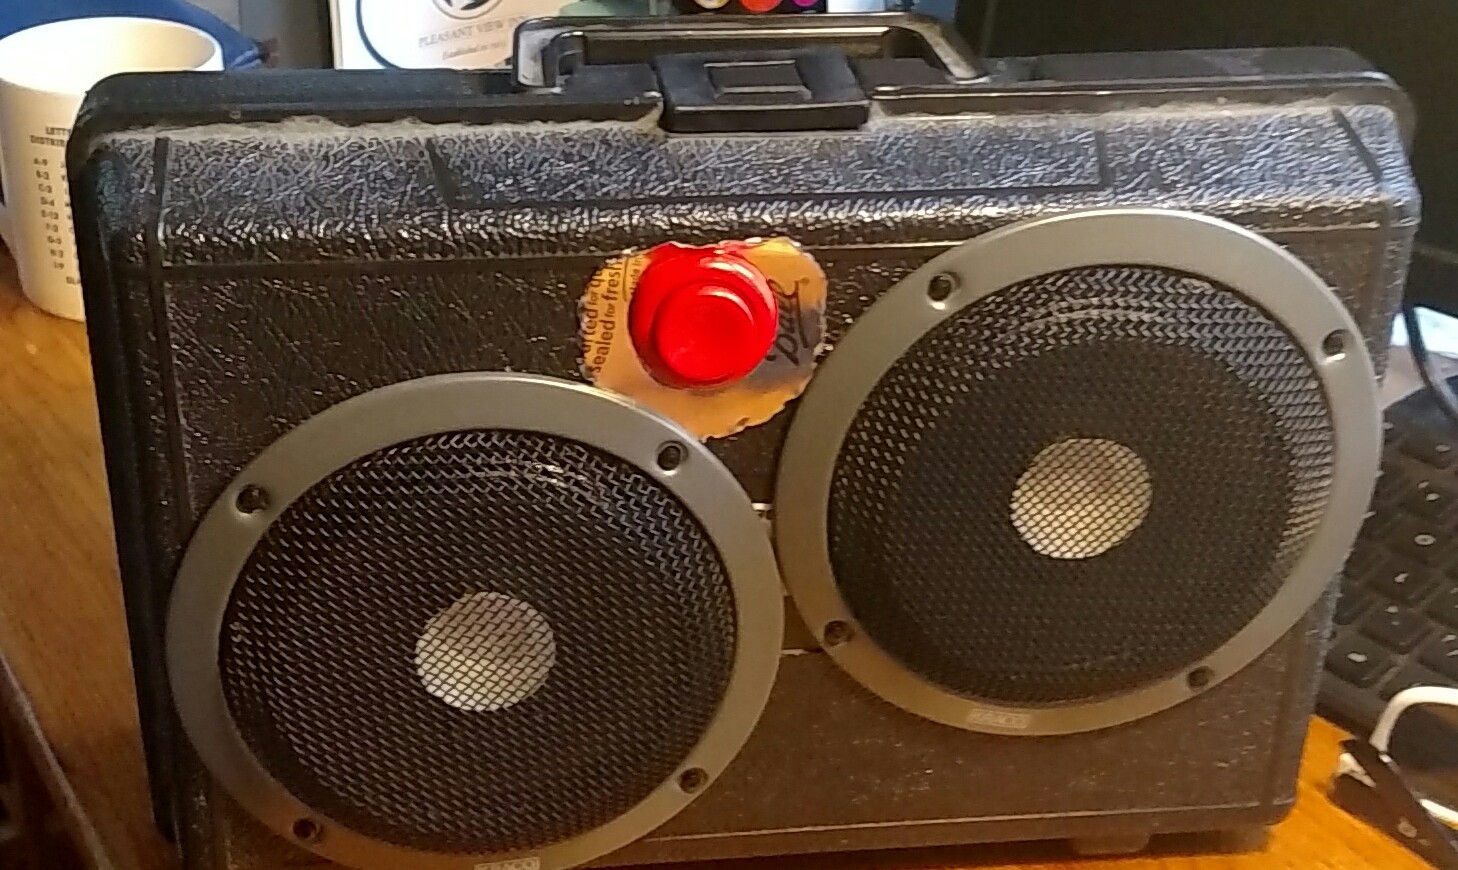
New Enclosure!
07/02/2017 at 14:18 • 0 comments![]()
No new code in this update, but I installed existing project into a new enclosure. I got the box for free from the IT dept. at my work when they were throwing stuff out. This was the plastic case for a network technician field toolkit. I also added a battery to make it portable! There is still no real "OFF" switch or deep sleep mode, so battery should be disconnected when not in use. I think if I put in some work with a hot glue gun, this thing could be essentially weather-proof. Ready to connect to a cell phone hot spot and stream music at the beach!
I used a dremel to cut holes in the container. I initially made the button hole just slightly too big. So I made a 1" ID washer out of a mason jar lid. To make the washer, I first marked the inner and outer diameters on the lid. I used approx 8/32" drill bit to drill holes ~0.5-cm apart around the circumference of the circle. I then used a hobby knife to slice between the holes. Finally, I used the dremel to clean up the outer diameter a little bit. Once it was installed on the box, I trimmed a little at the top to lessen the likelihood of cutting my fingers on the jagged metal.
![]()
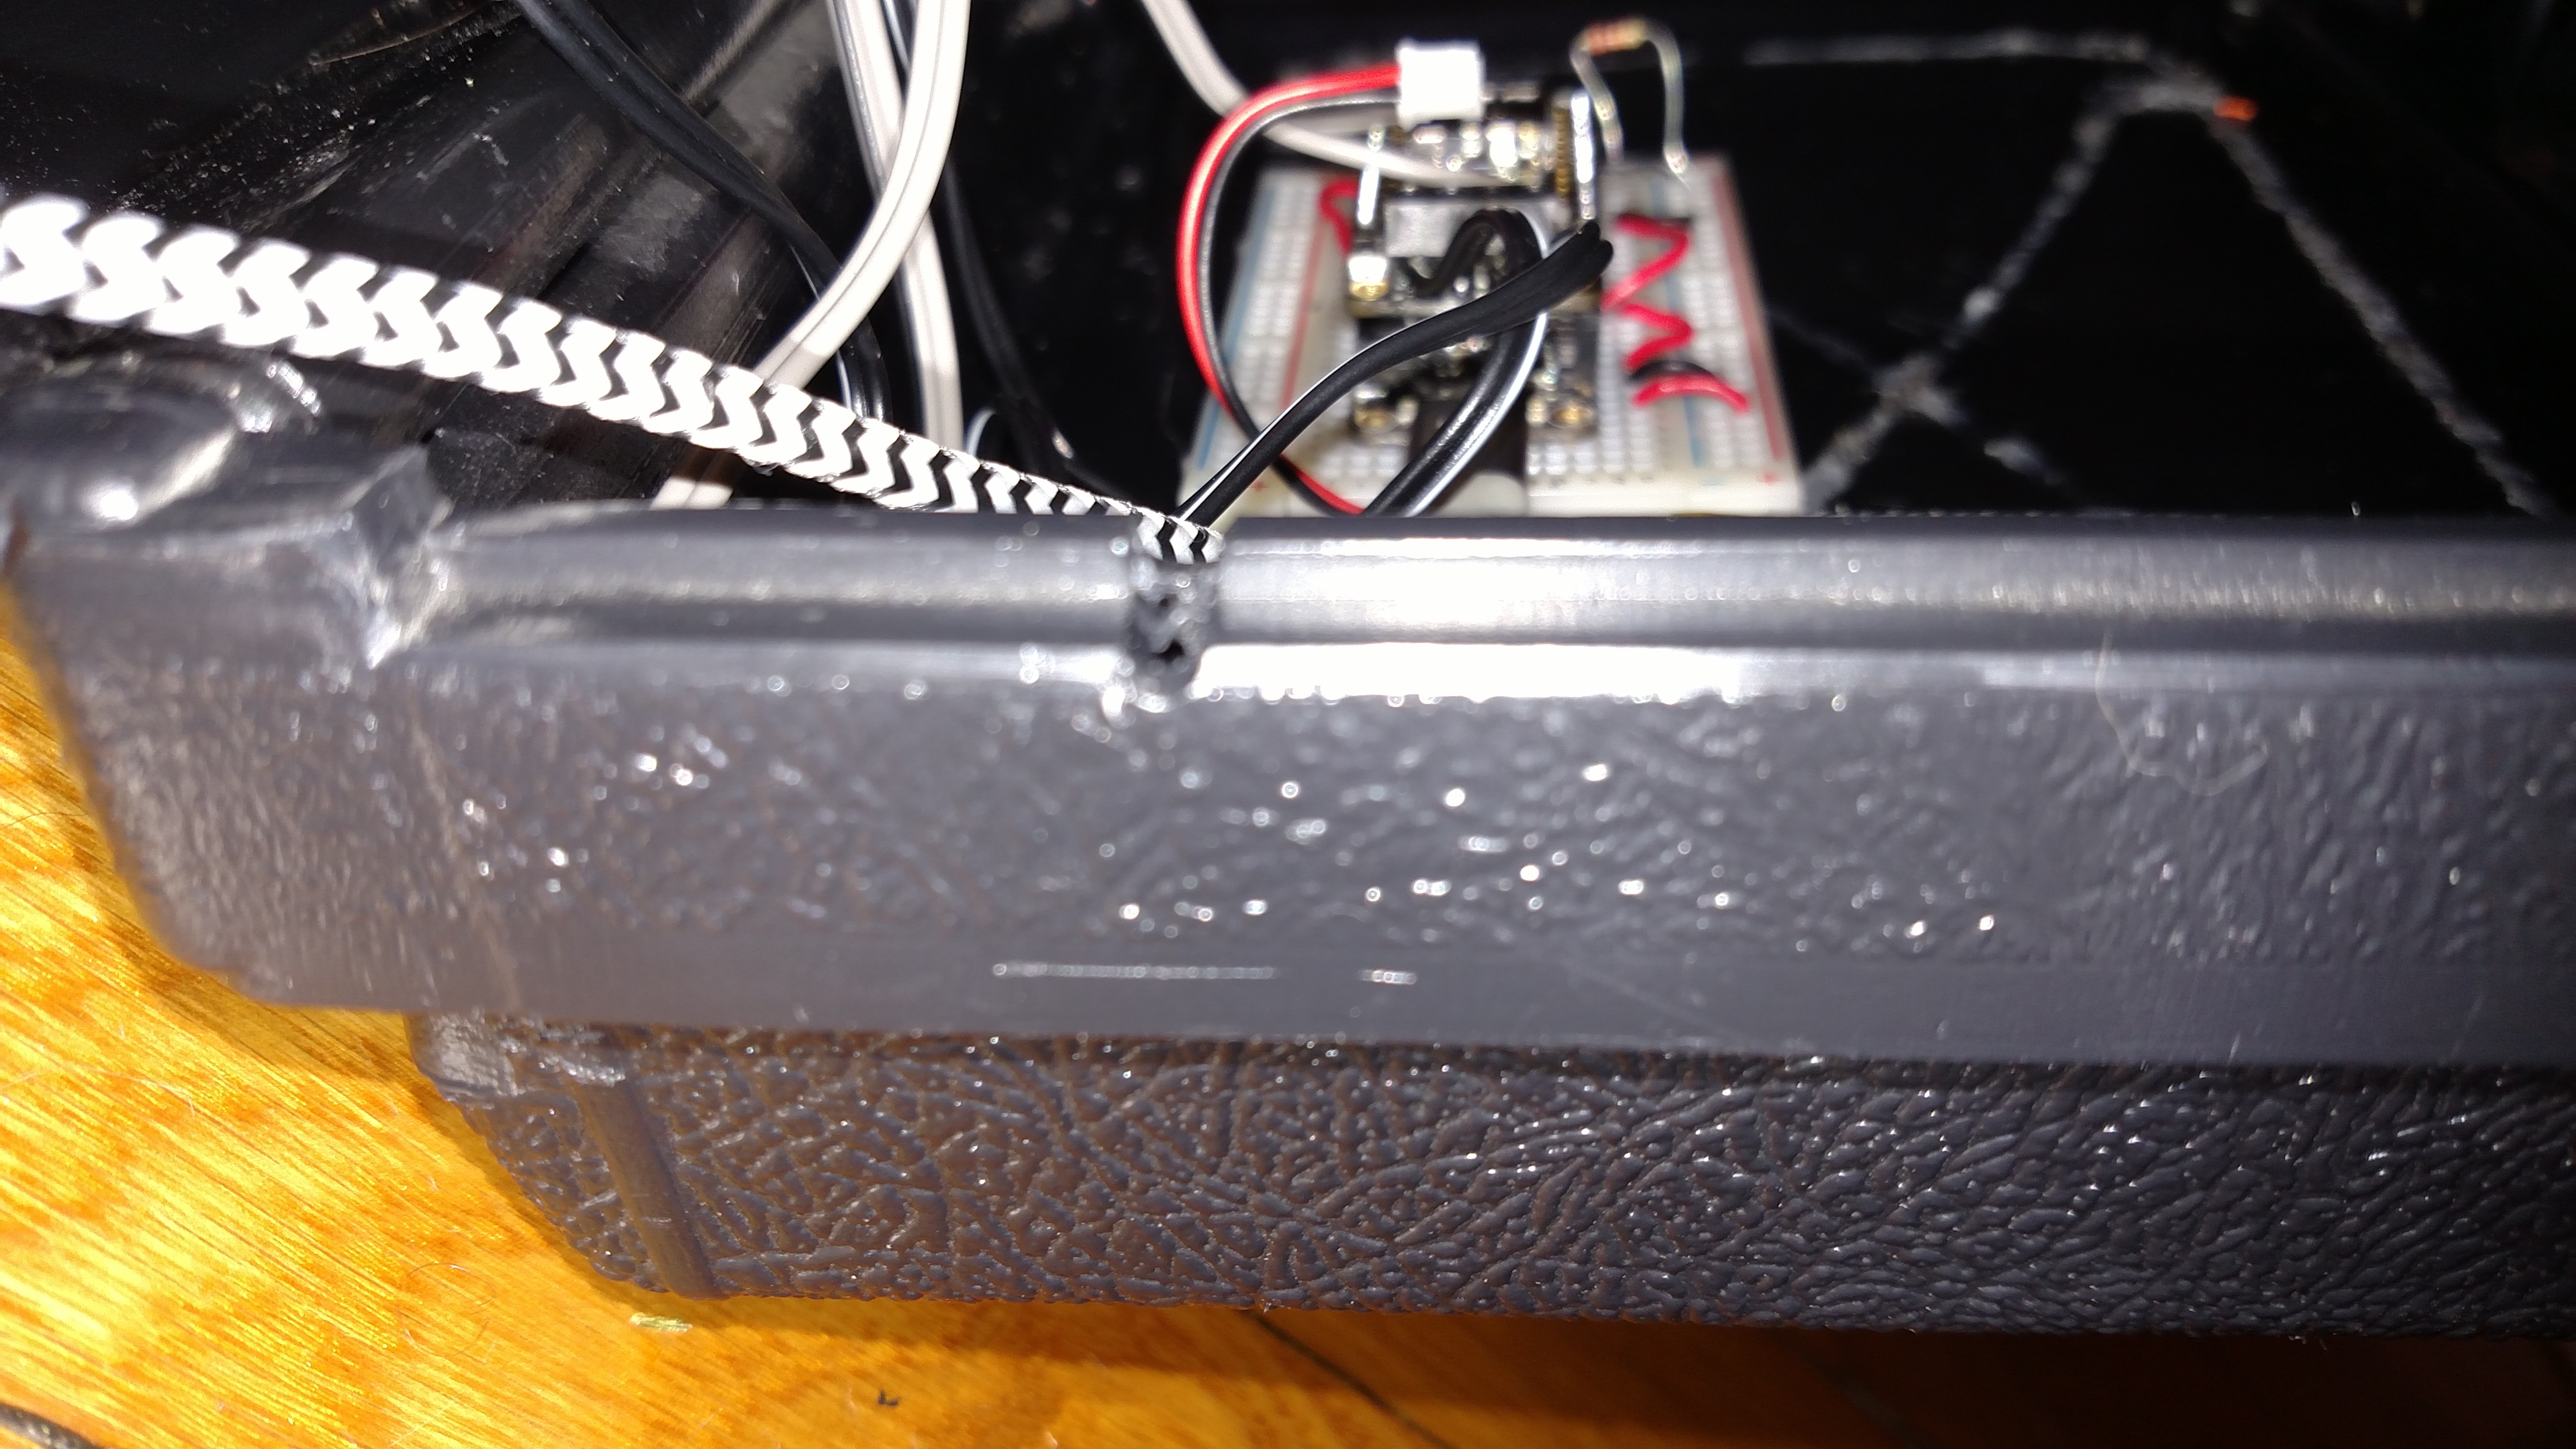
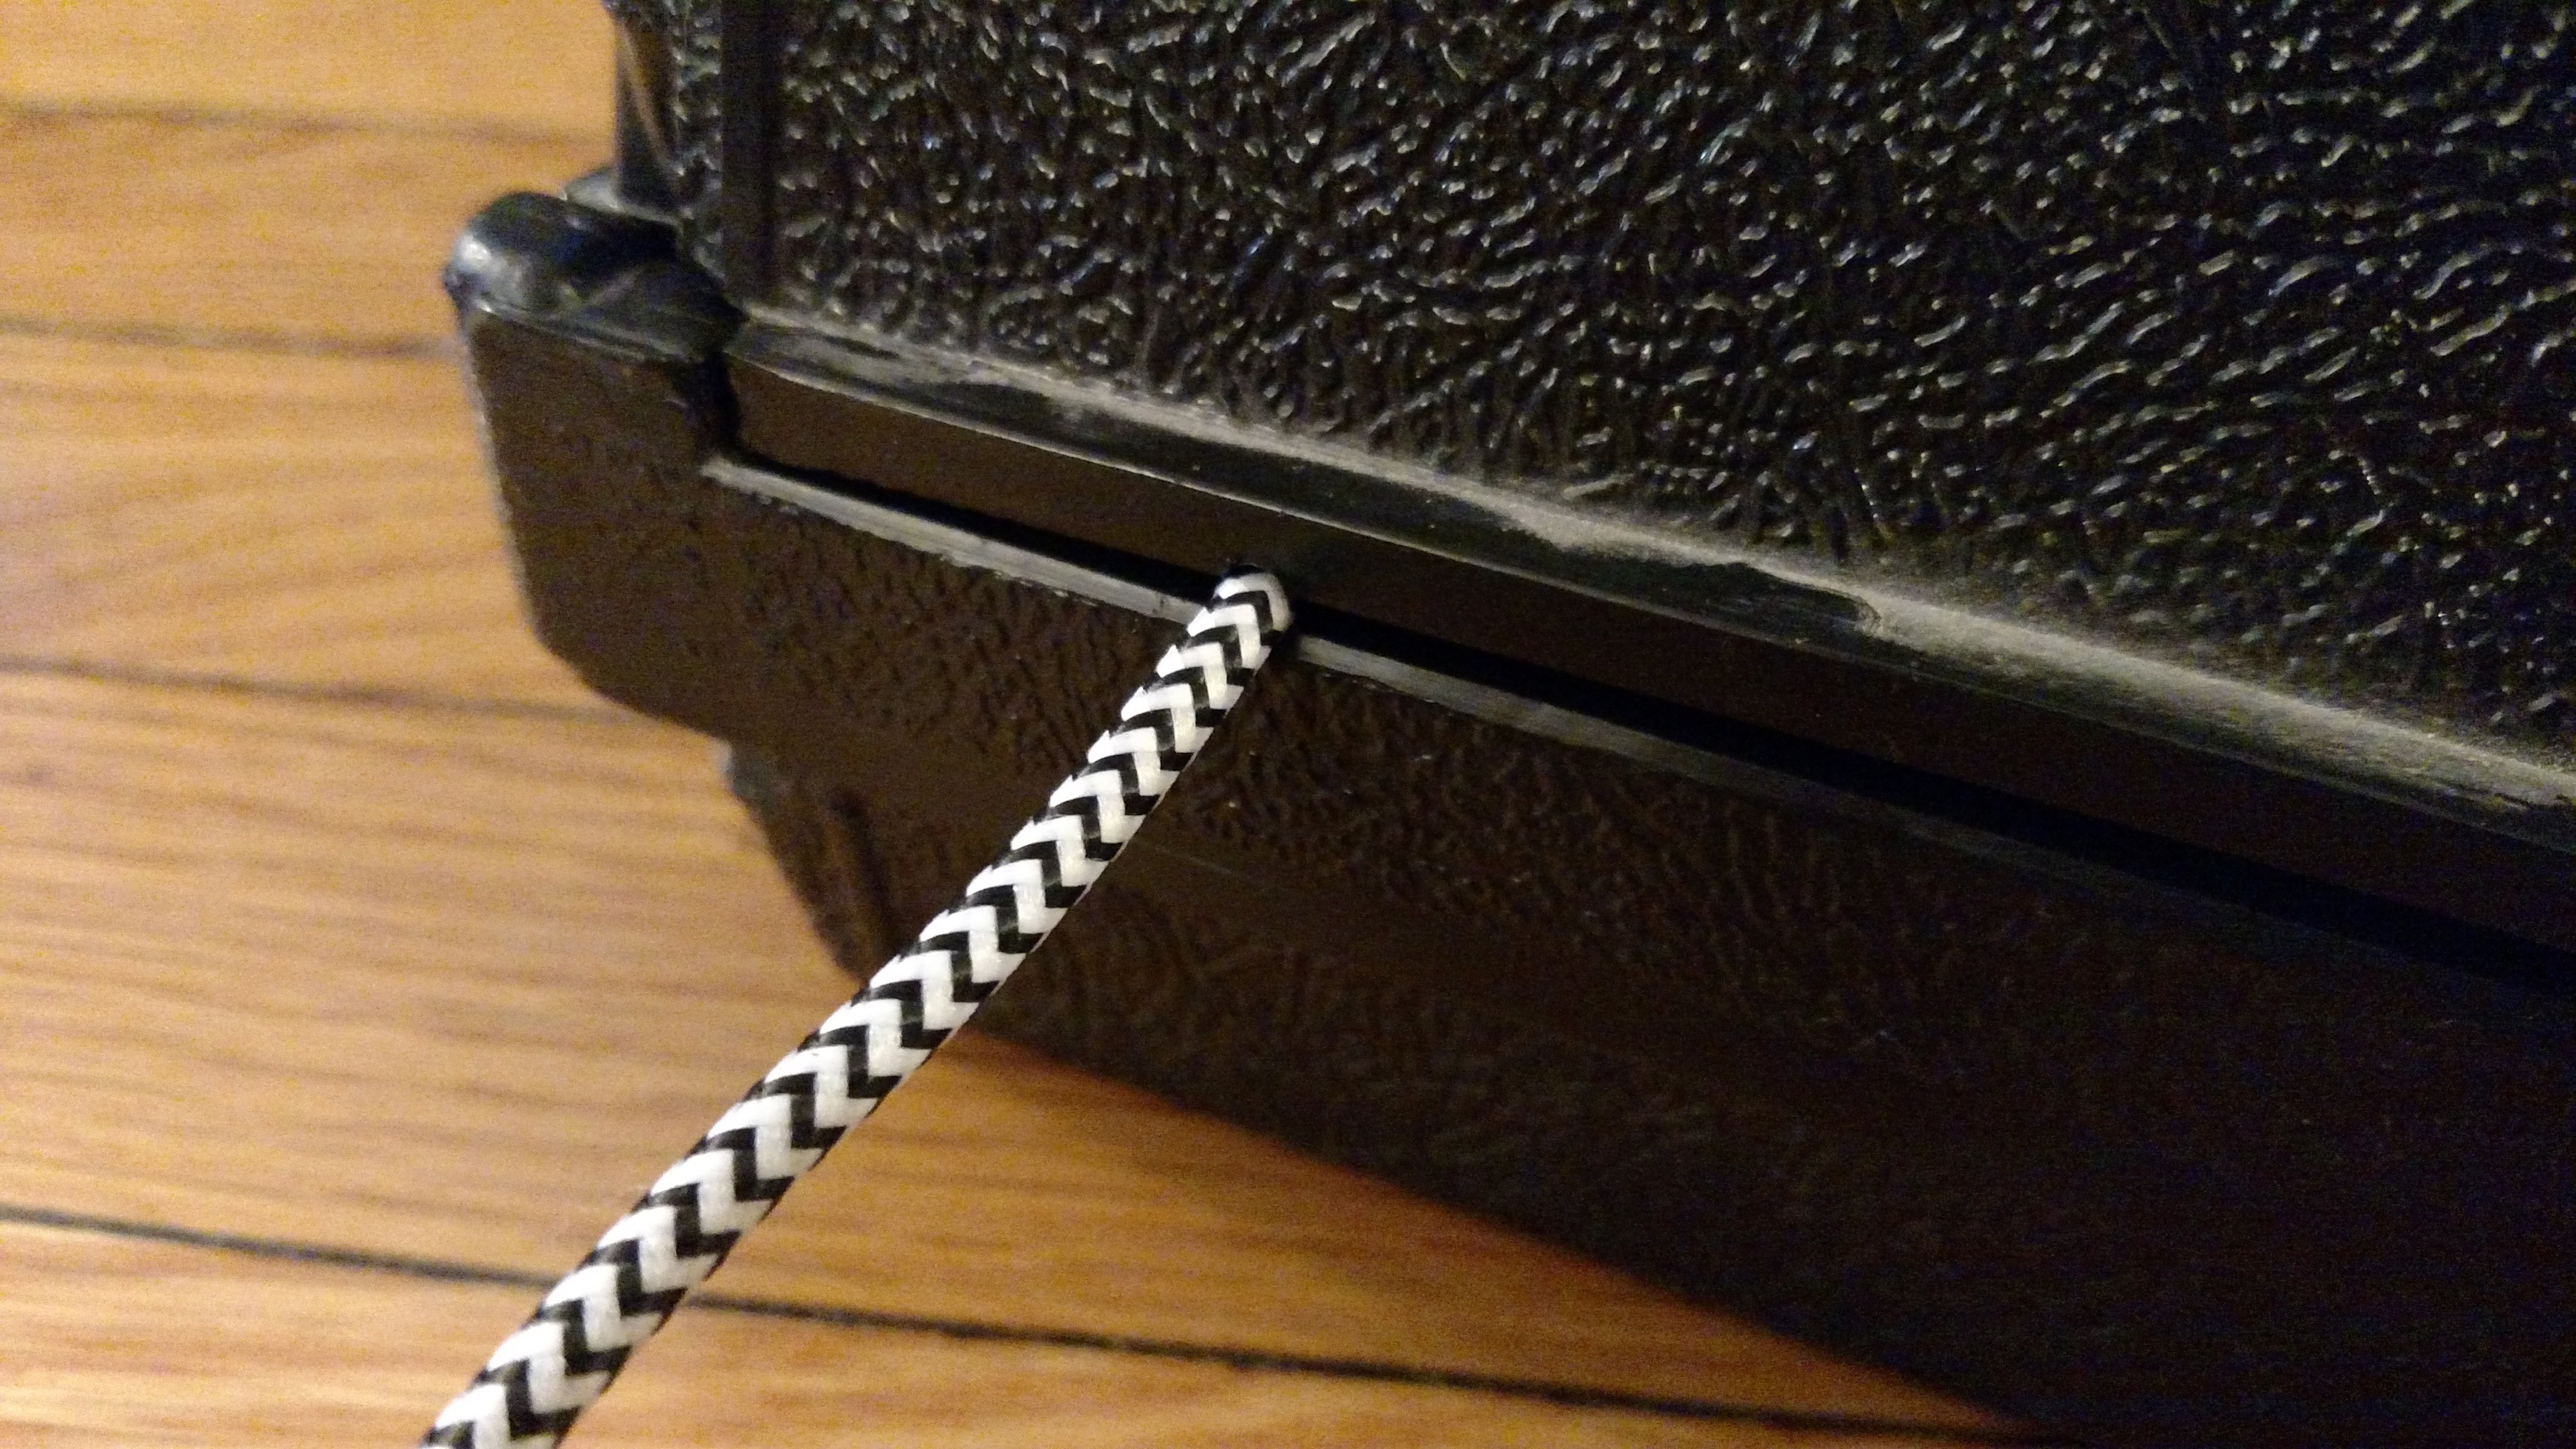
I matched a drill bit to the diameter of the USB cable I'm using, and drilled a hole in the seam where the two halves meet to provide an inlet for the power cable. I probably could have made the hole wider; In the second picture it looks like the two halves are still being pushed apart by the cable.
![]()
![]()
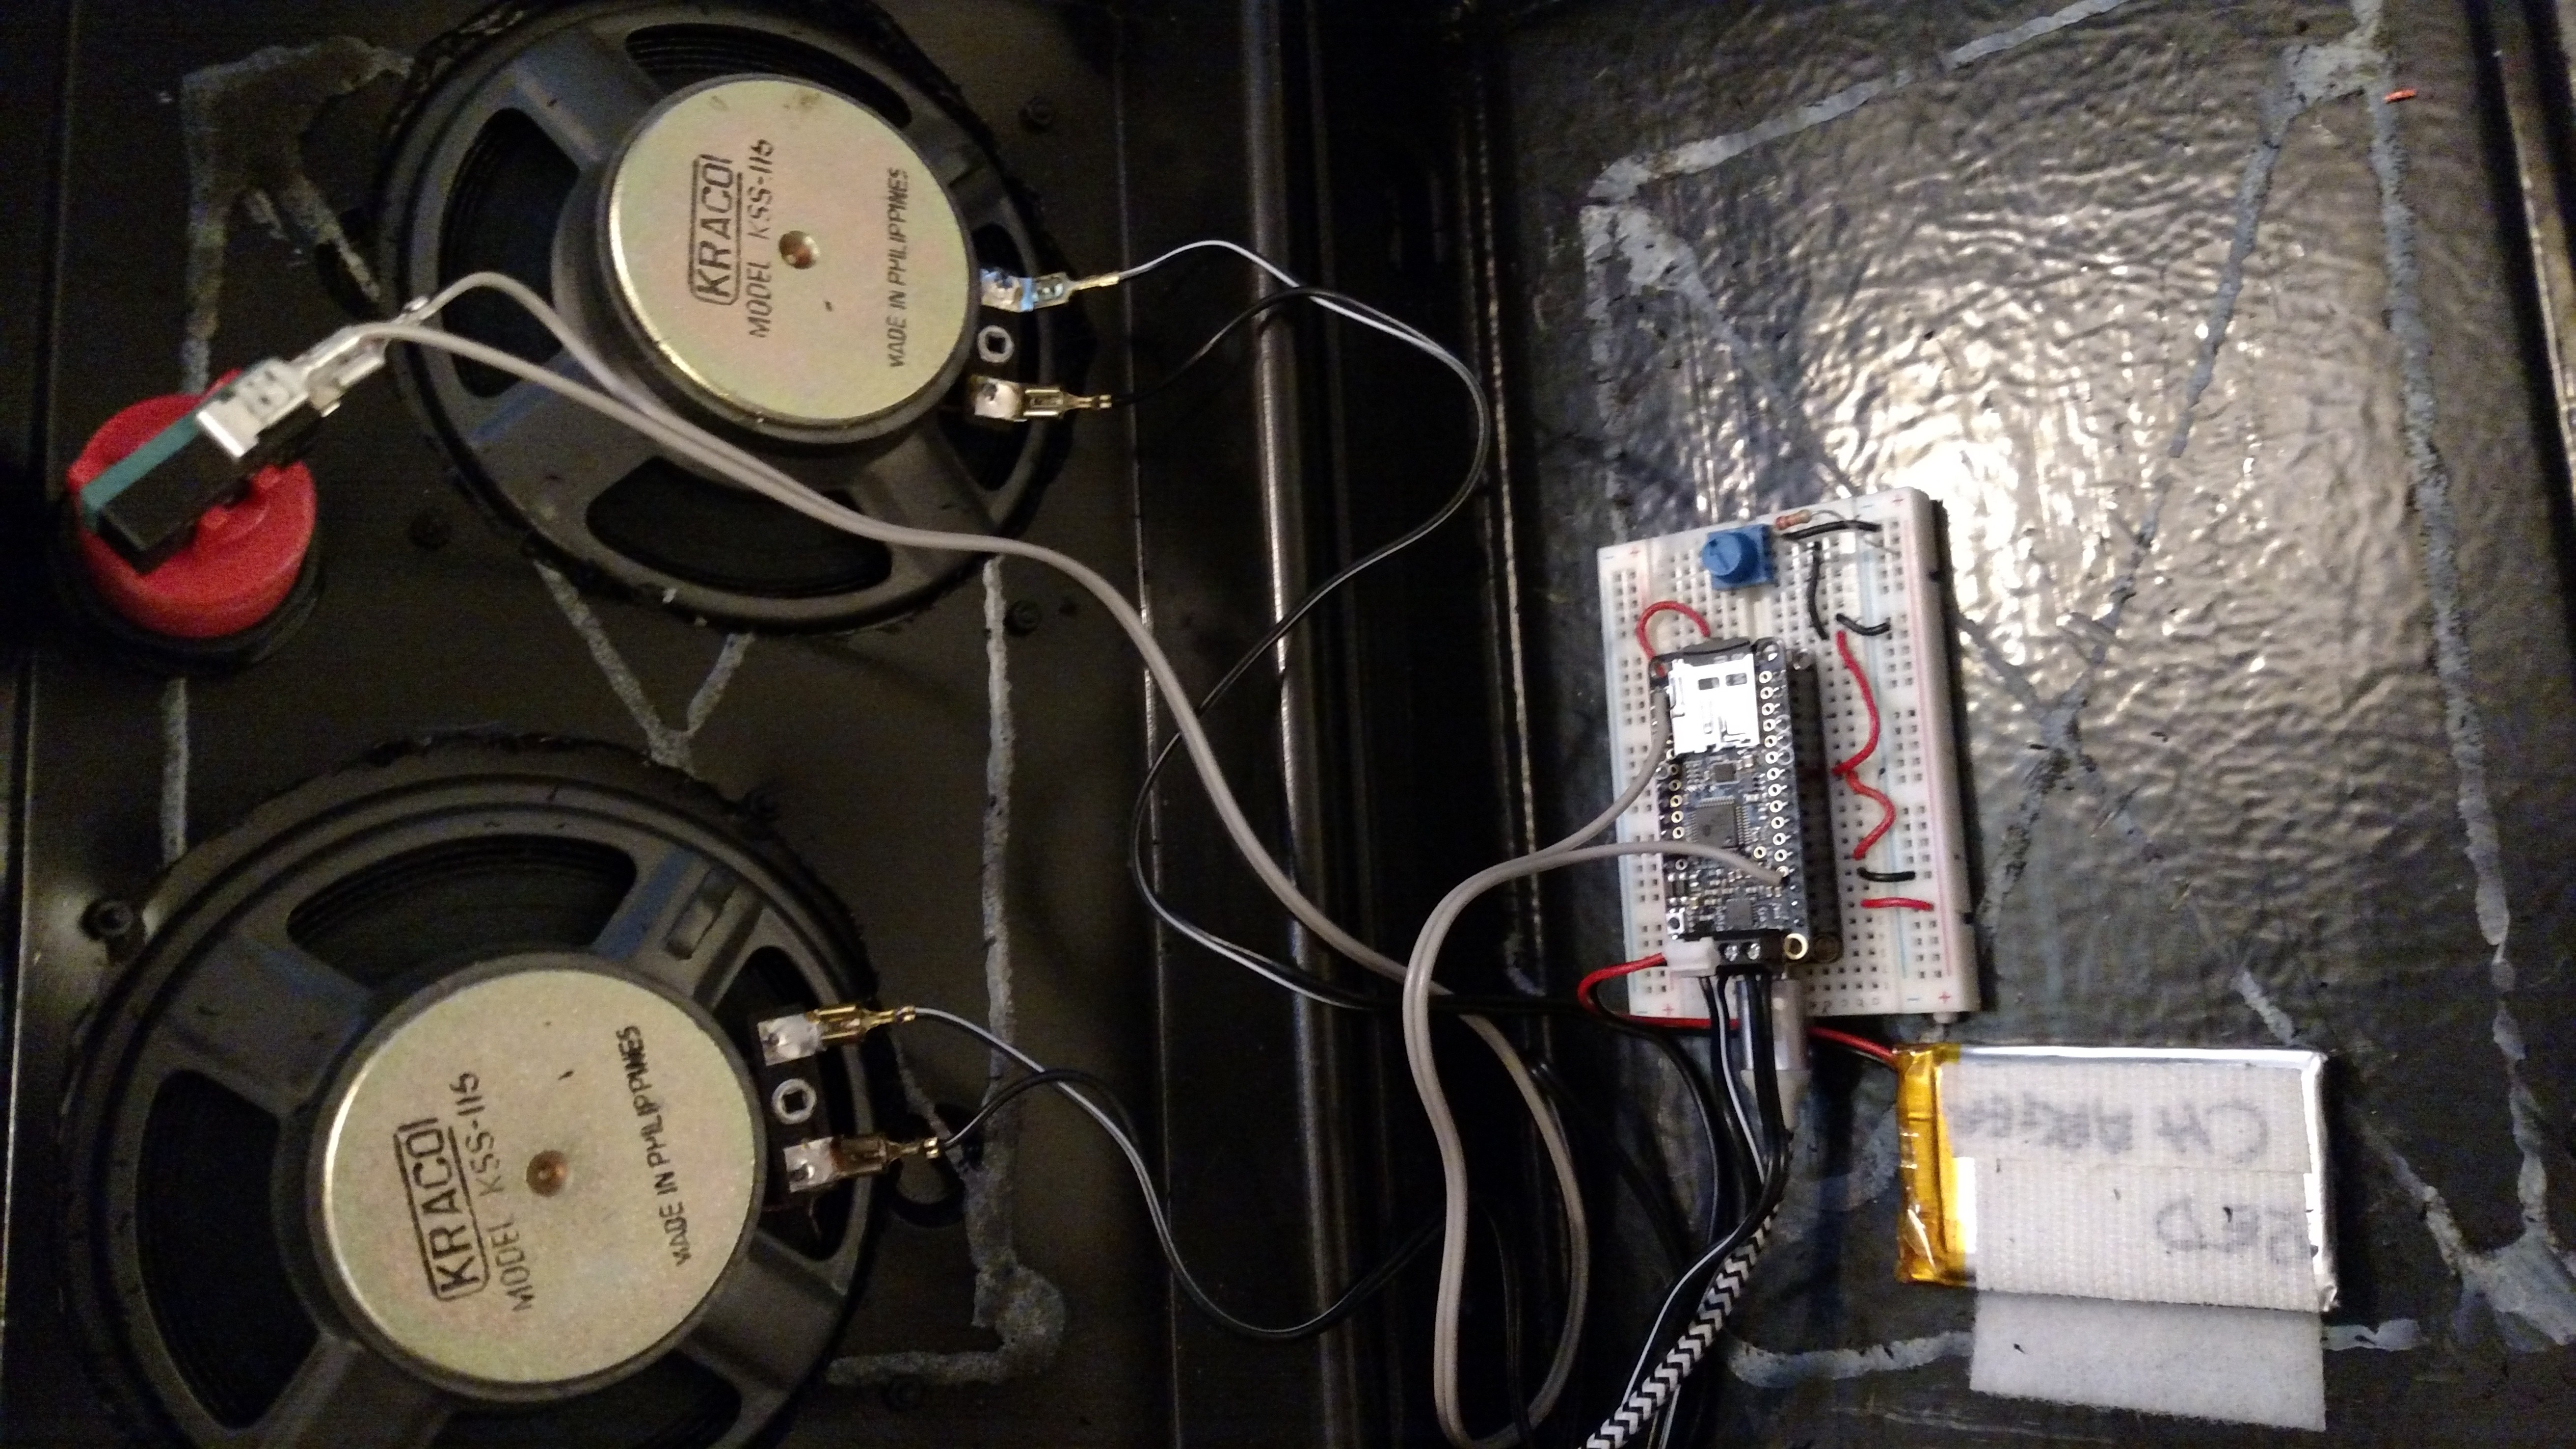
Speaker and button wires were cut to proper length. I do intend to transfer the circuit to a permanent circuit board once I'm done. I'm still deciding on the final control scheme. My original goal was the One-Button interface with short-press to cycle channels and long-press to cycle volume/power. Because of parts on hand, I'm now considering installing a panel-mount potentiometer with built-in switch to control power and volume.
I also basically cloned this project with a raspberry pi and small audio amplifier. I'll write an update about that soon, as well.