Close
0%
0%

Bracelet for the blind

The solution is leveraging from the available stuff, affordable.

Similar projects worth following
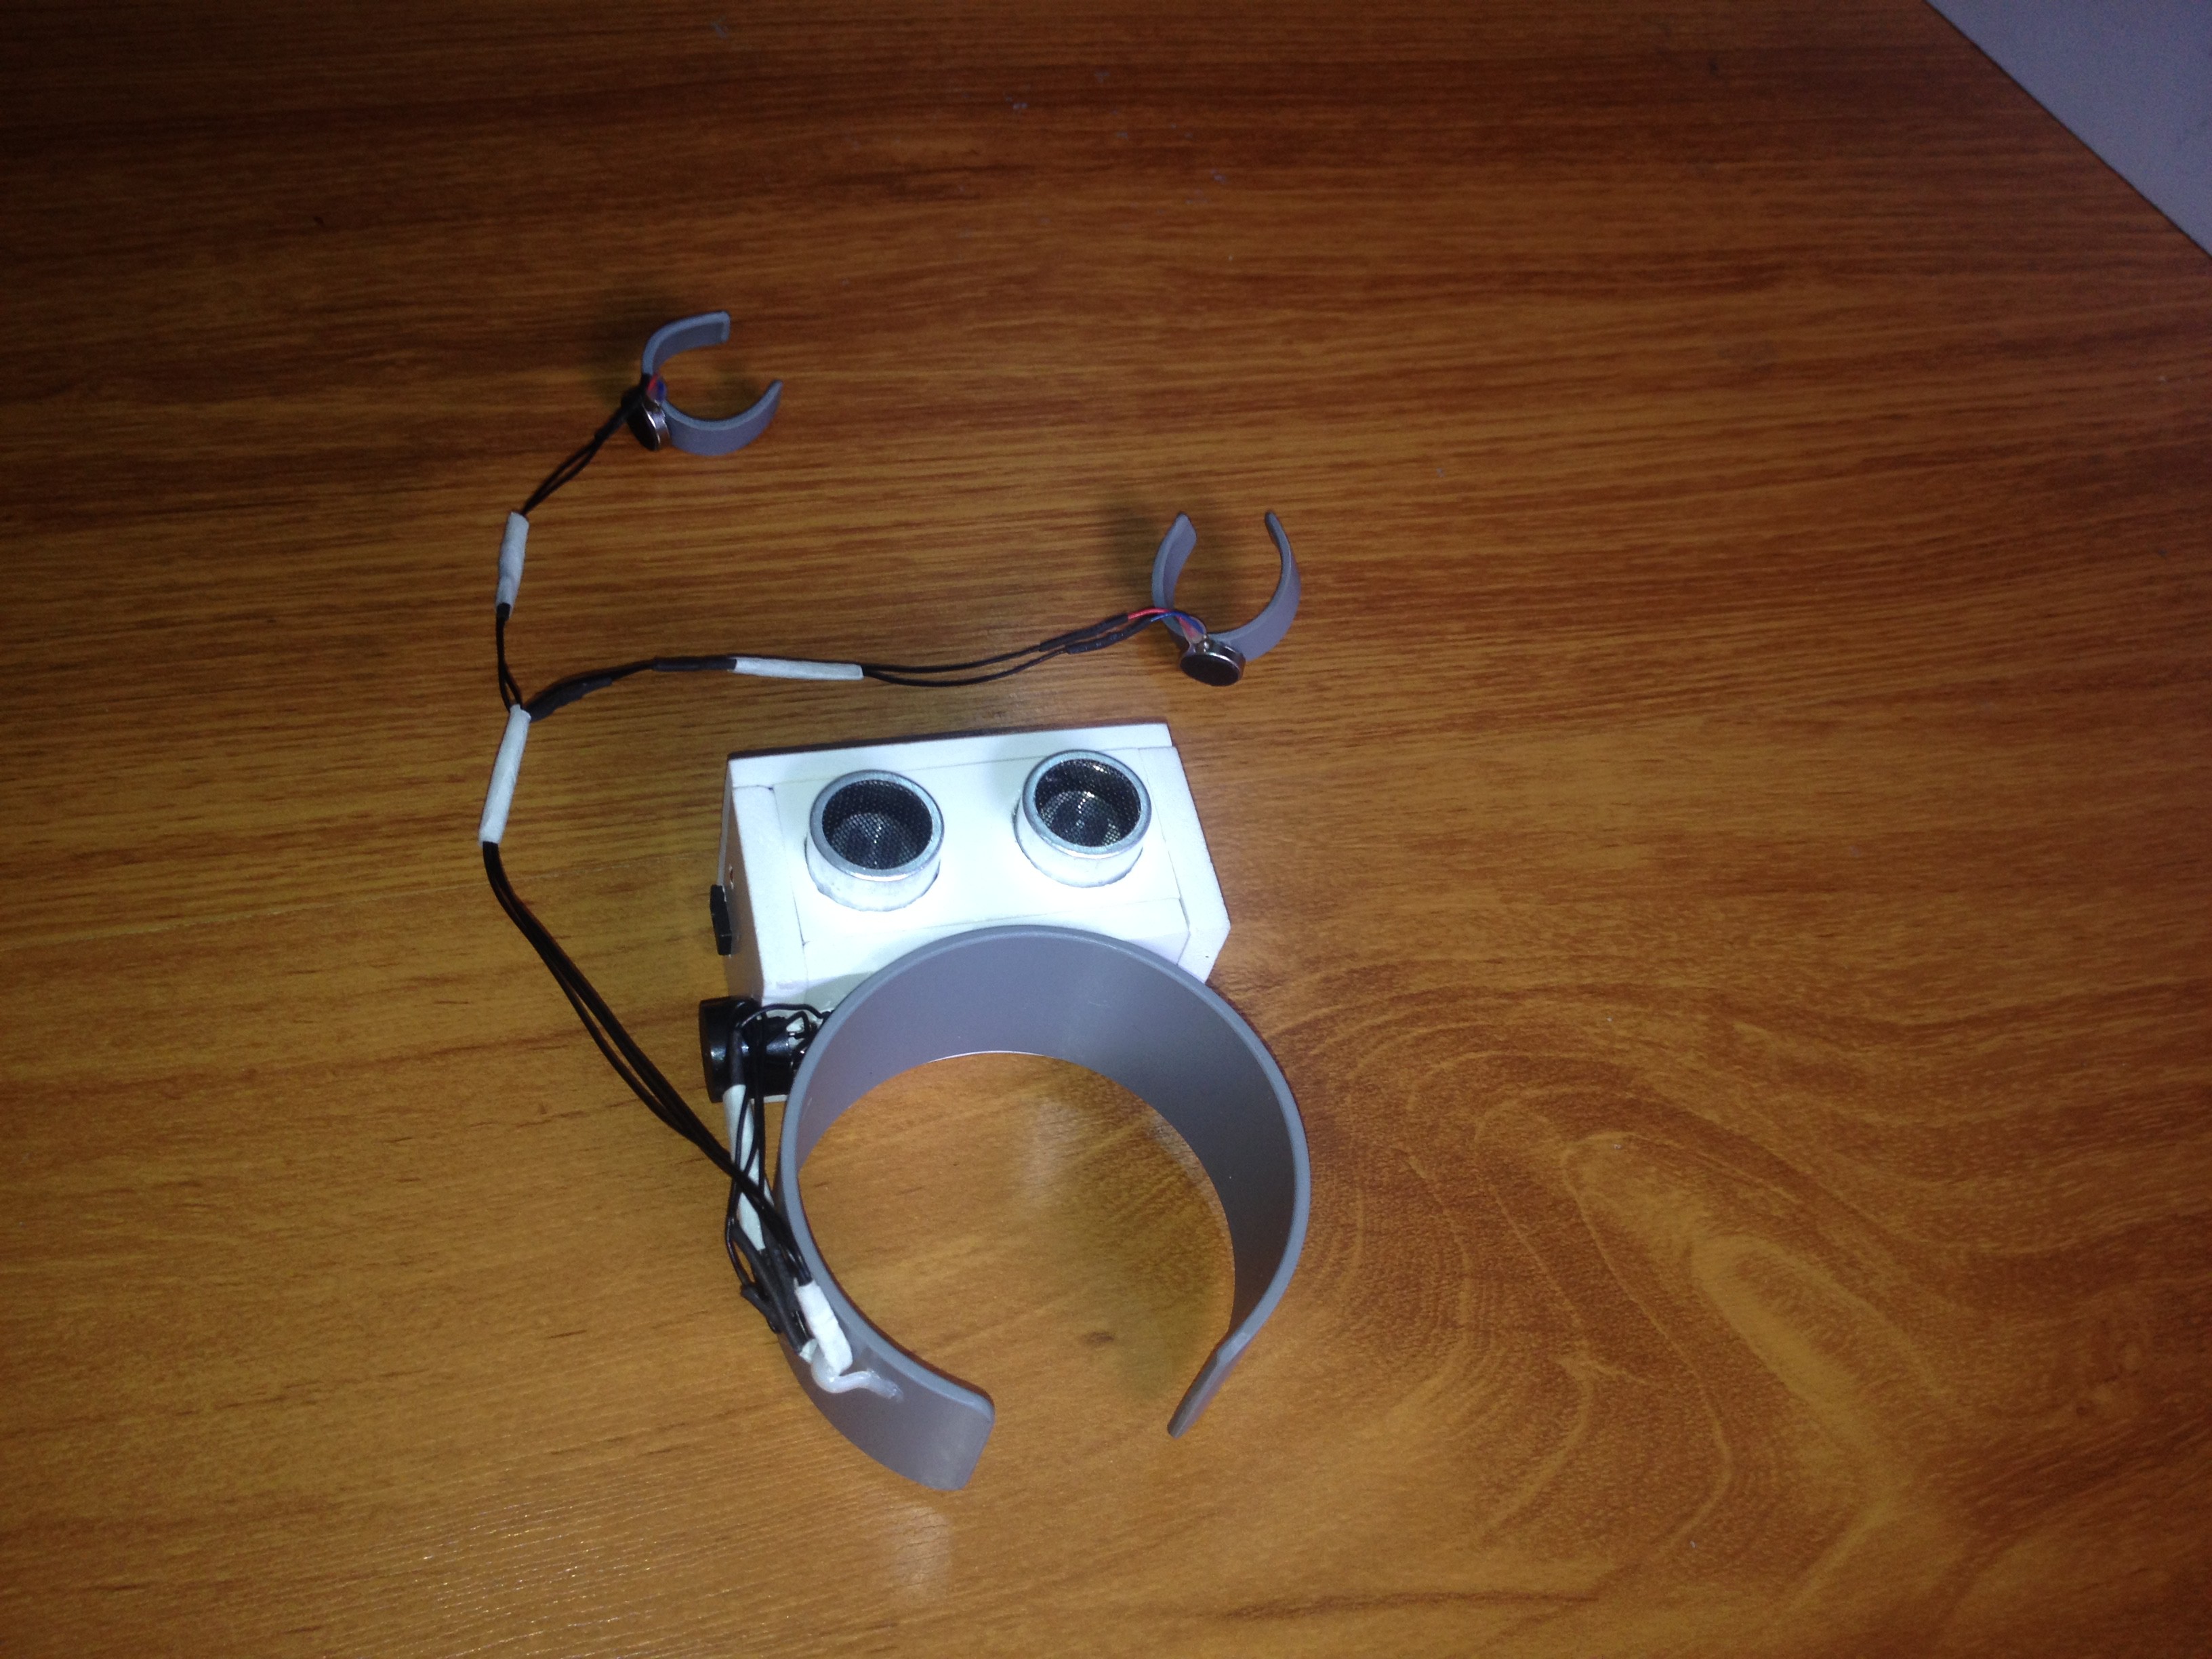
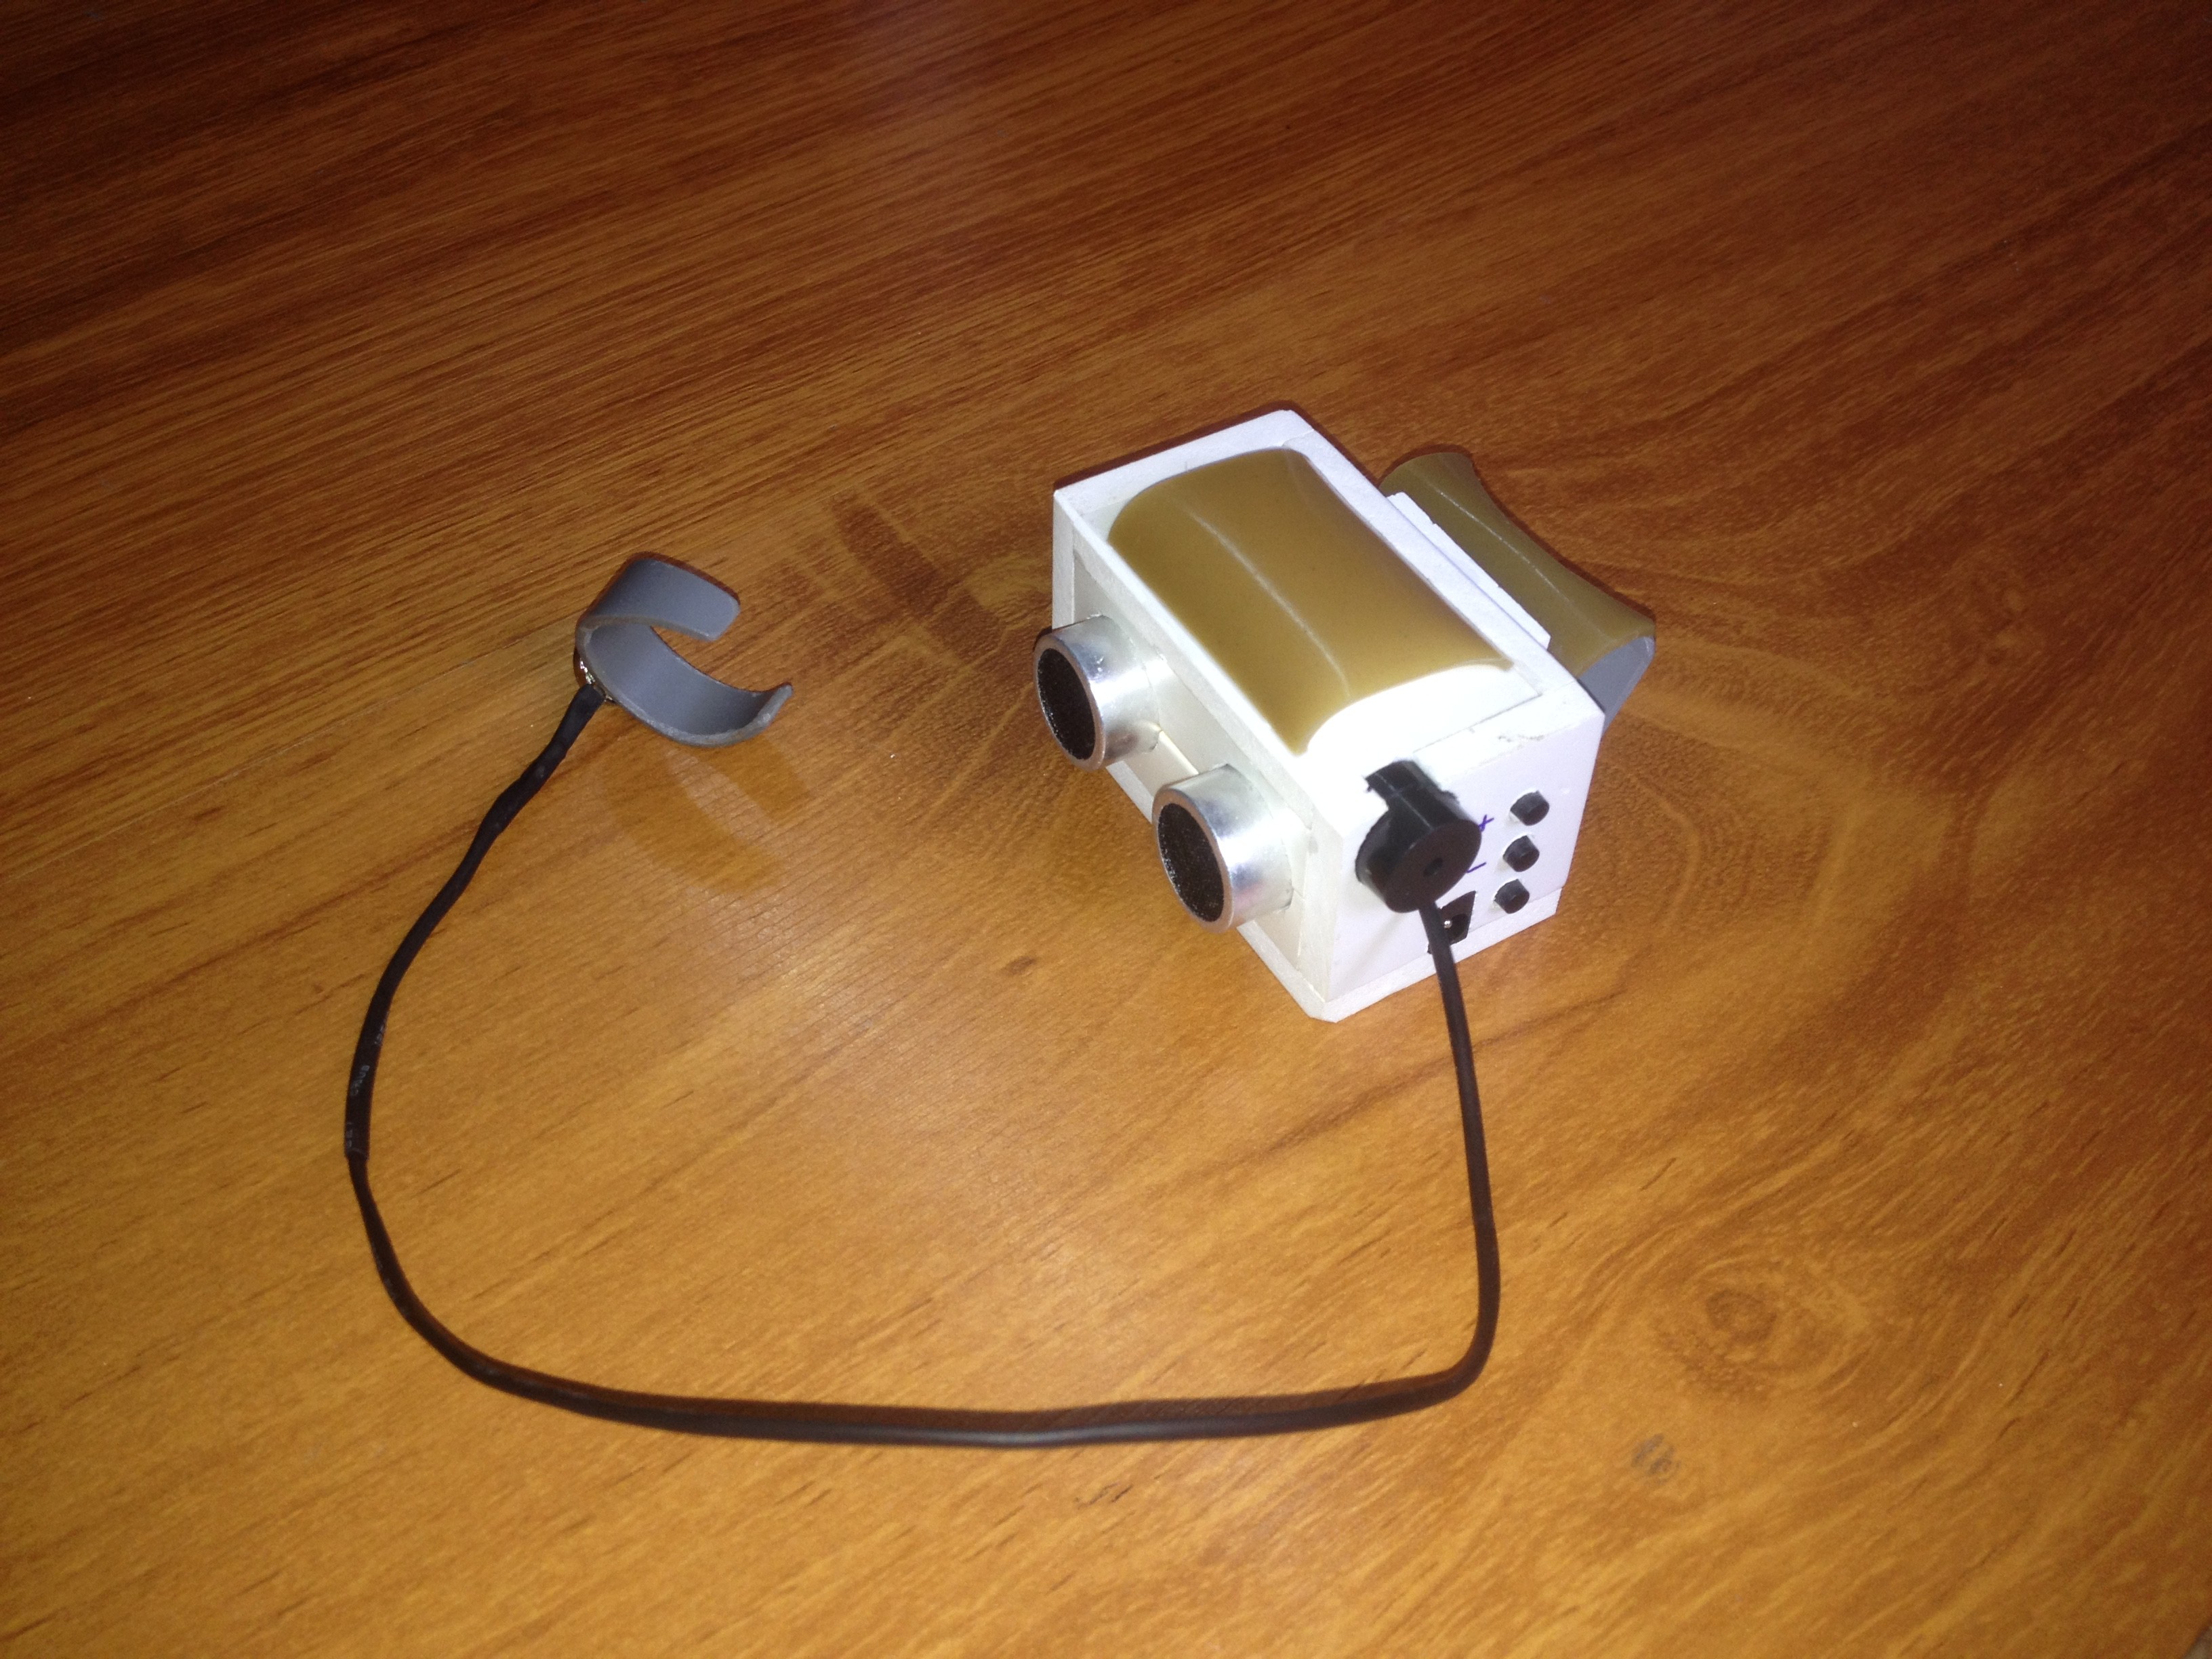
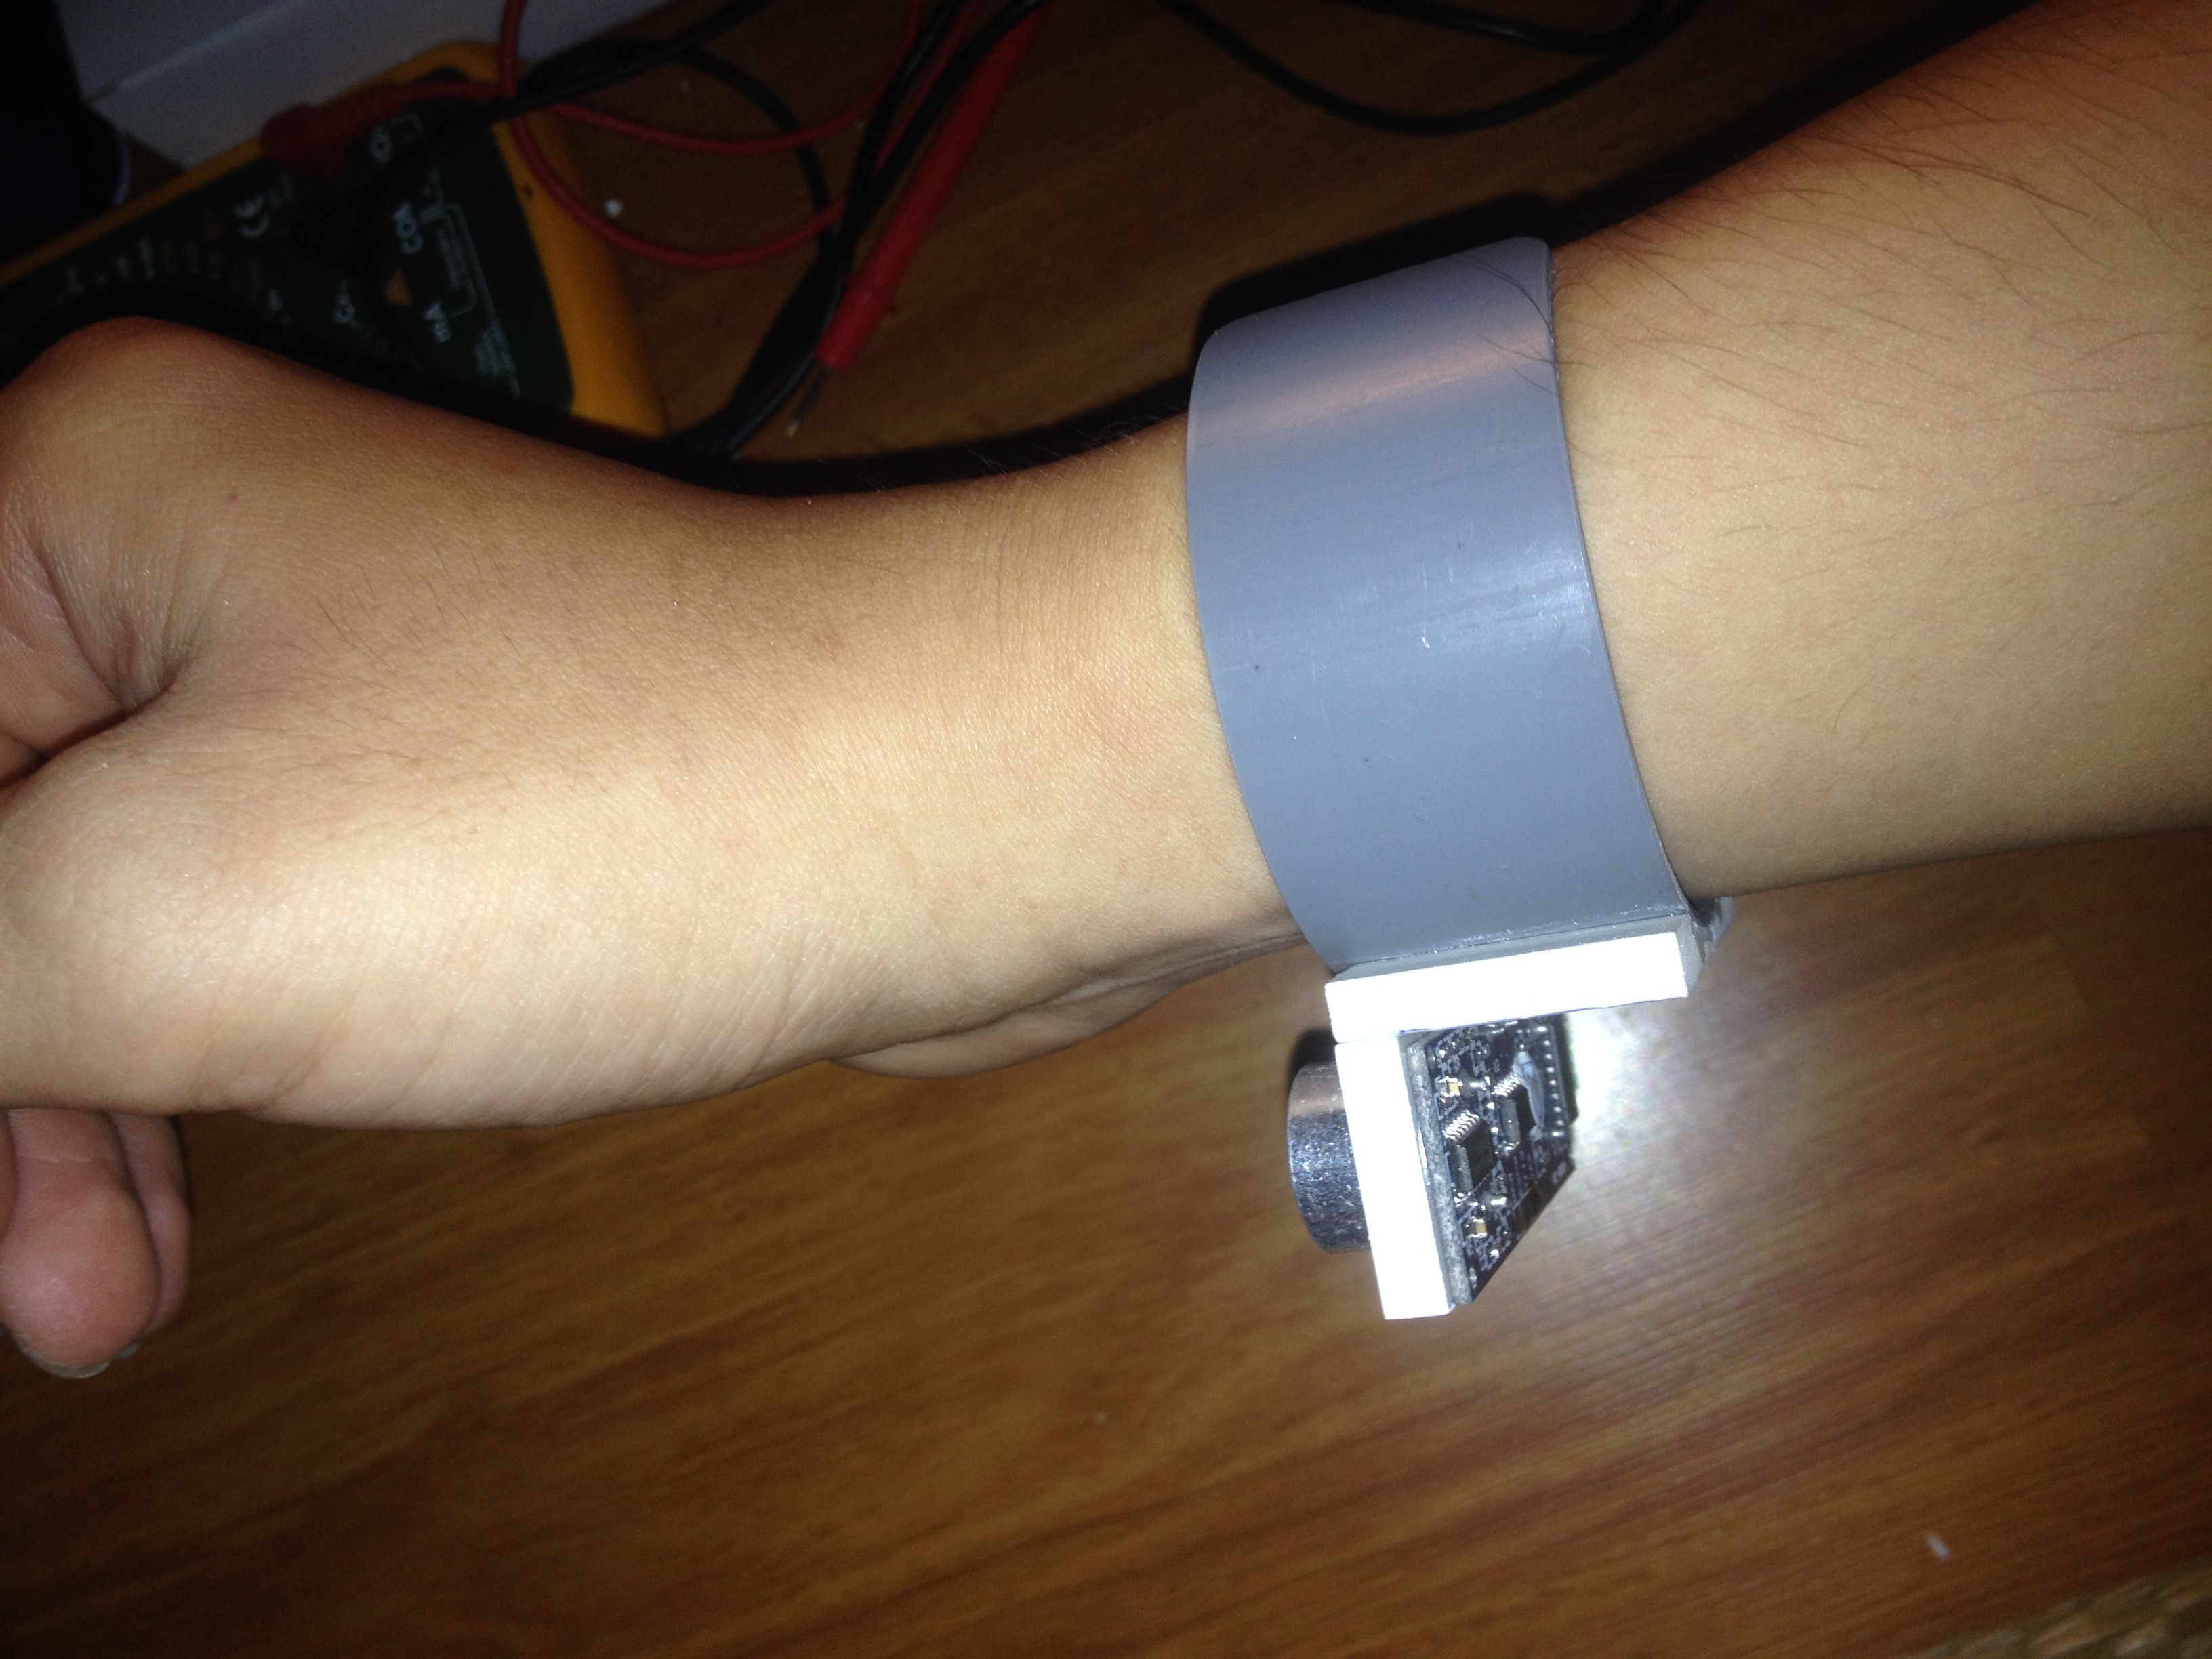
The bracelet helps the blinds people to navigate speed by detecting the nearby obstacles using the help of ultrasonic waves and notify them with buzzer sound or vibration.
The aim of the project is to develop a cheap and more efficient way to help visually impaired to navigate with greater comfort and confidence.

My project is updated at PROJECT LOGS (These are the modifications and improvements of the project)

My project has been shared on http://arduino.vn/result/1621-vong-deo-tay-ho-tro-nguoi-mu (An arduino community site in Vietnam).

With some knowledge of arduino, anyone can do this.

The bracelet has 3 operating modes:

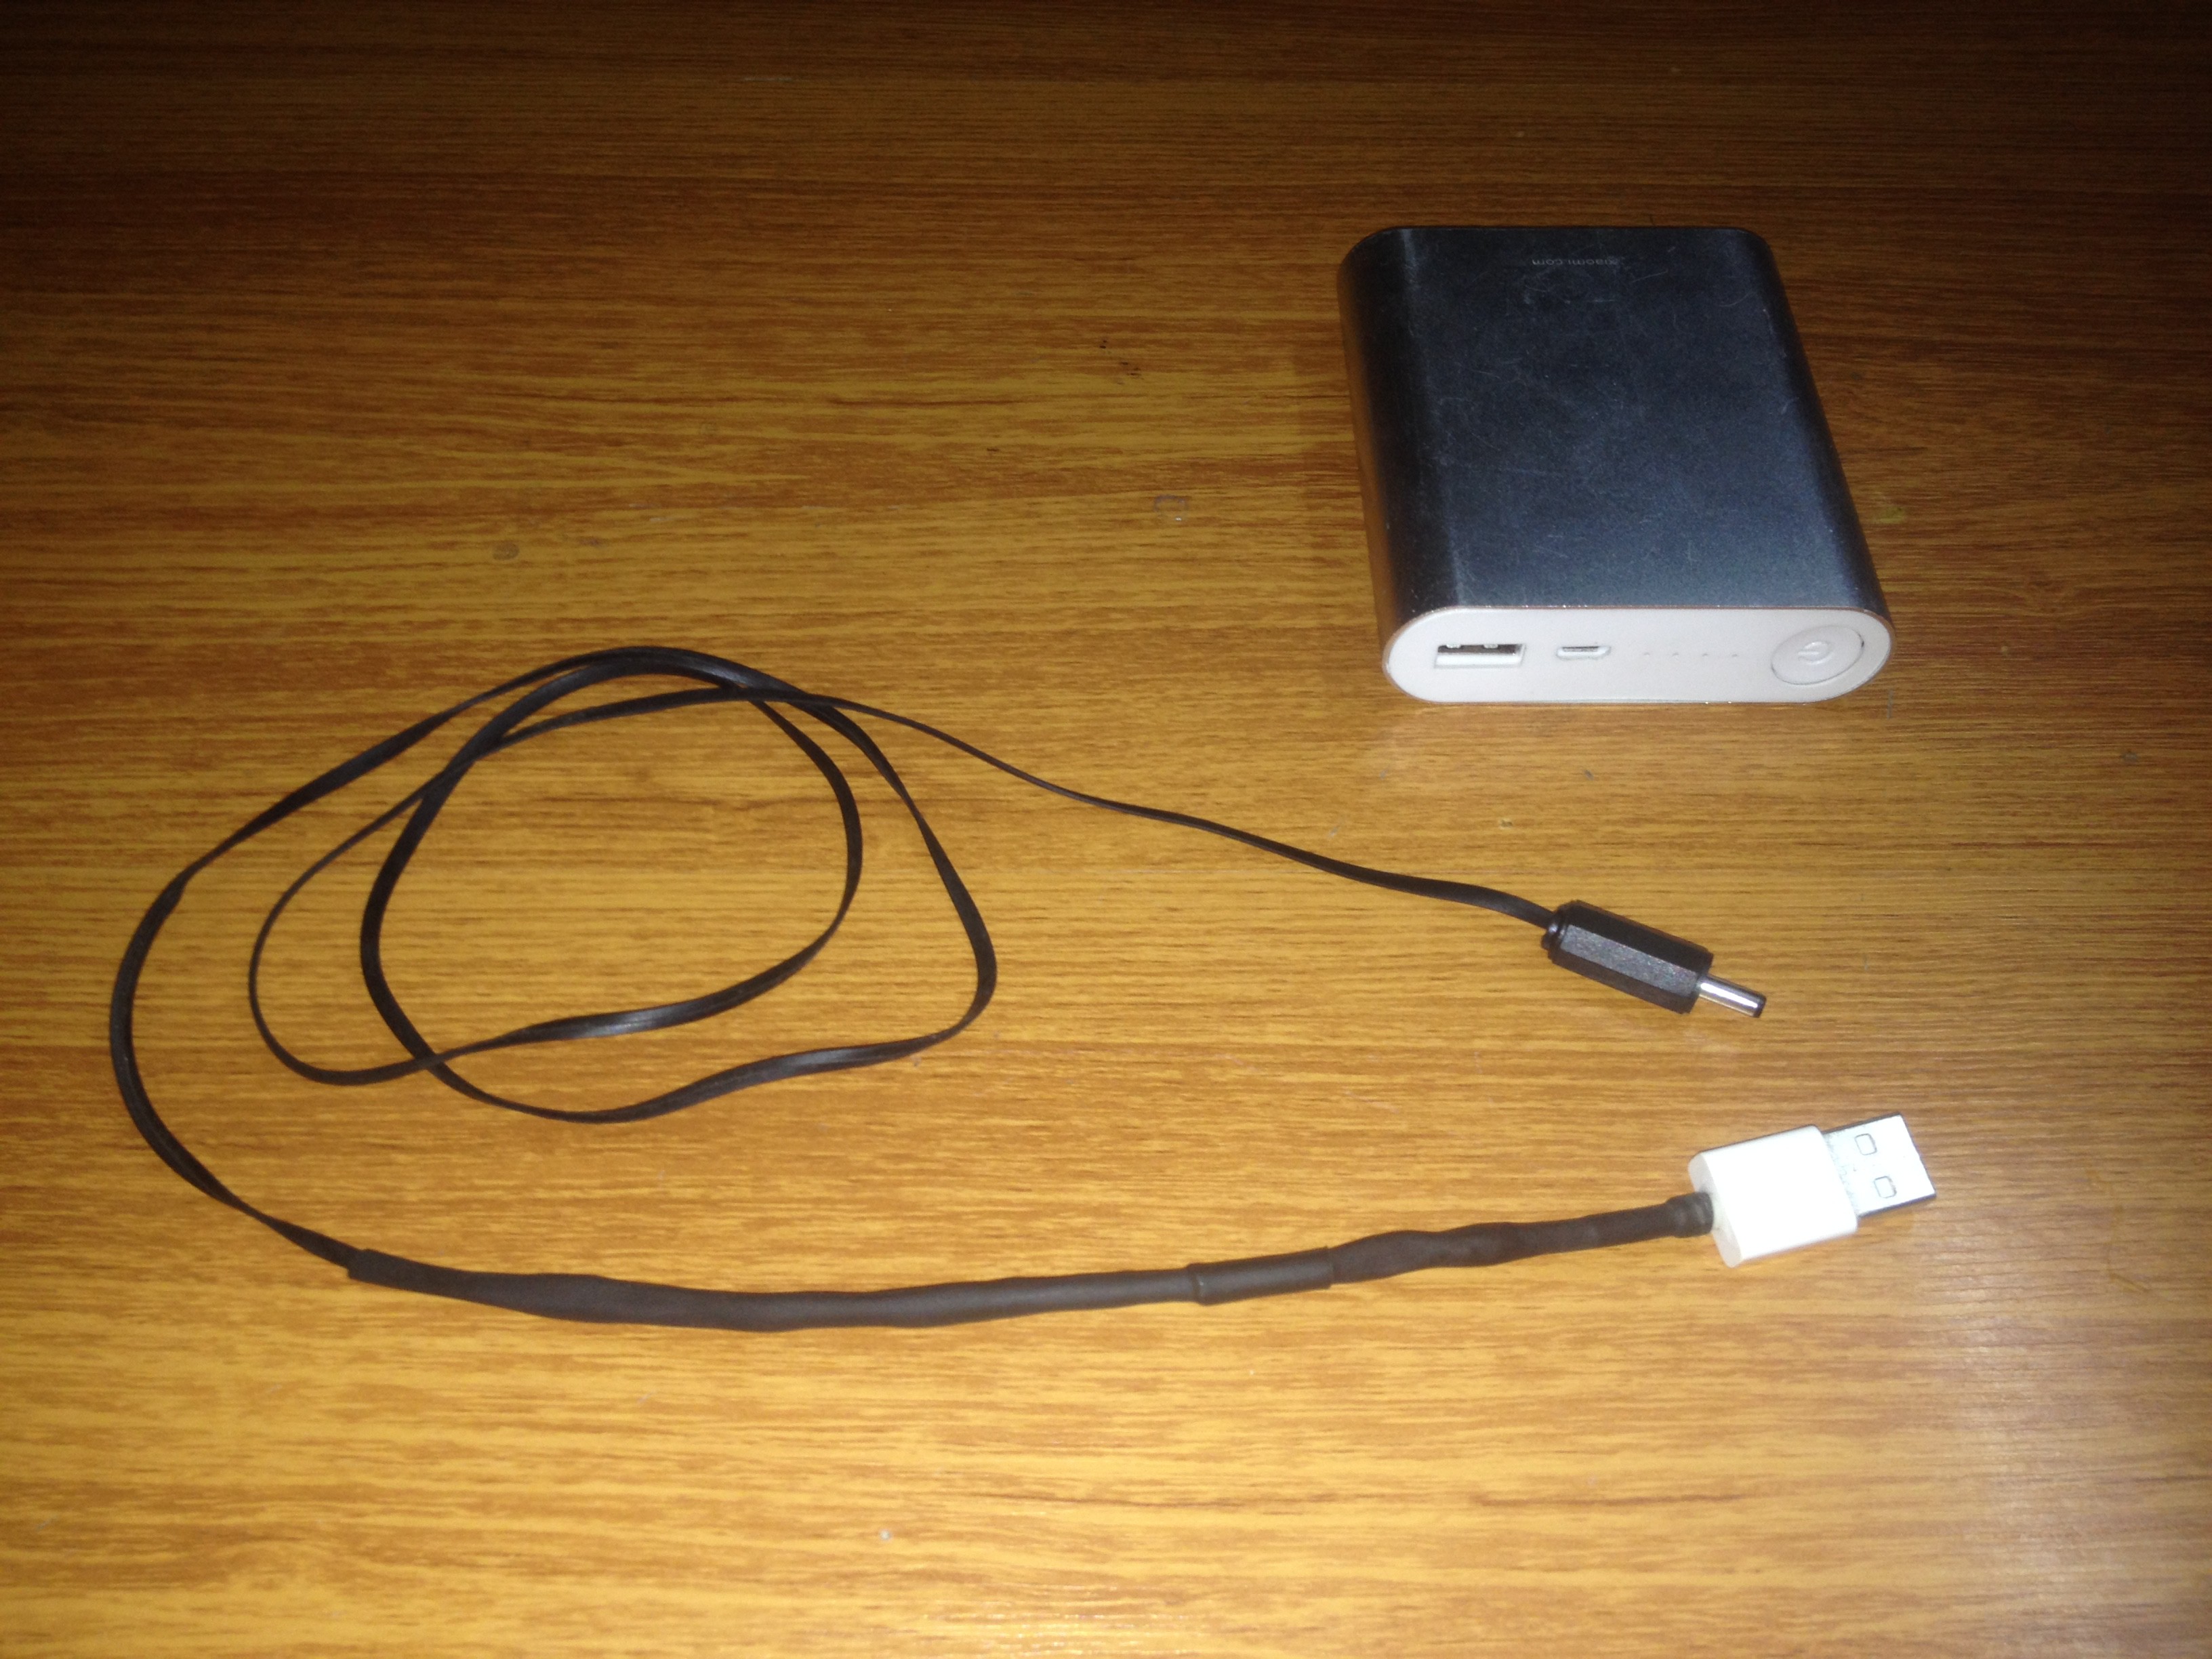
- Battery charging mode: Enabled when plugging the 5 volt charger into the DC Jack. When the battery reaches 4.2 volts, the charging mode will be turned off.

- Finger vibration mode: When the distance to the object is less than 1 meter, the motor on the thumb will vibrate slightly to alert. When the distance to objects from 1 meter to 2.5 meters, the motor on the little finger will vibrate slightly to alert.

- Sound mode: the sound will ring faster when approaching the object. The sound will slow down as you move away from the object.

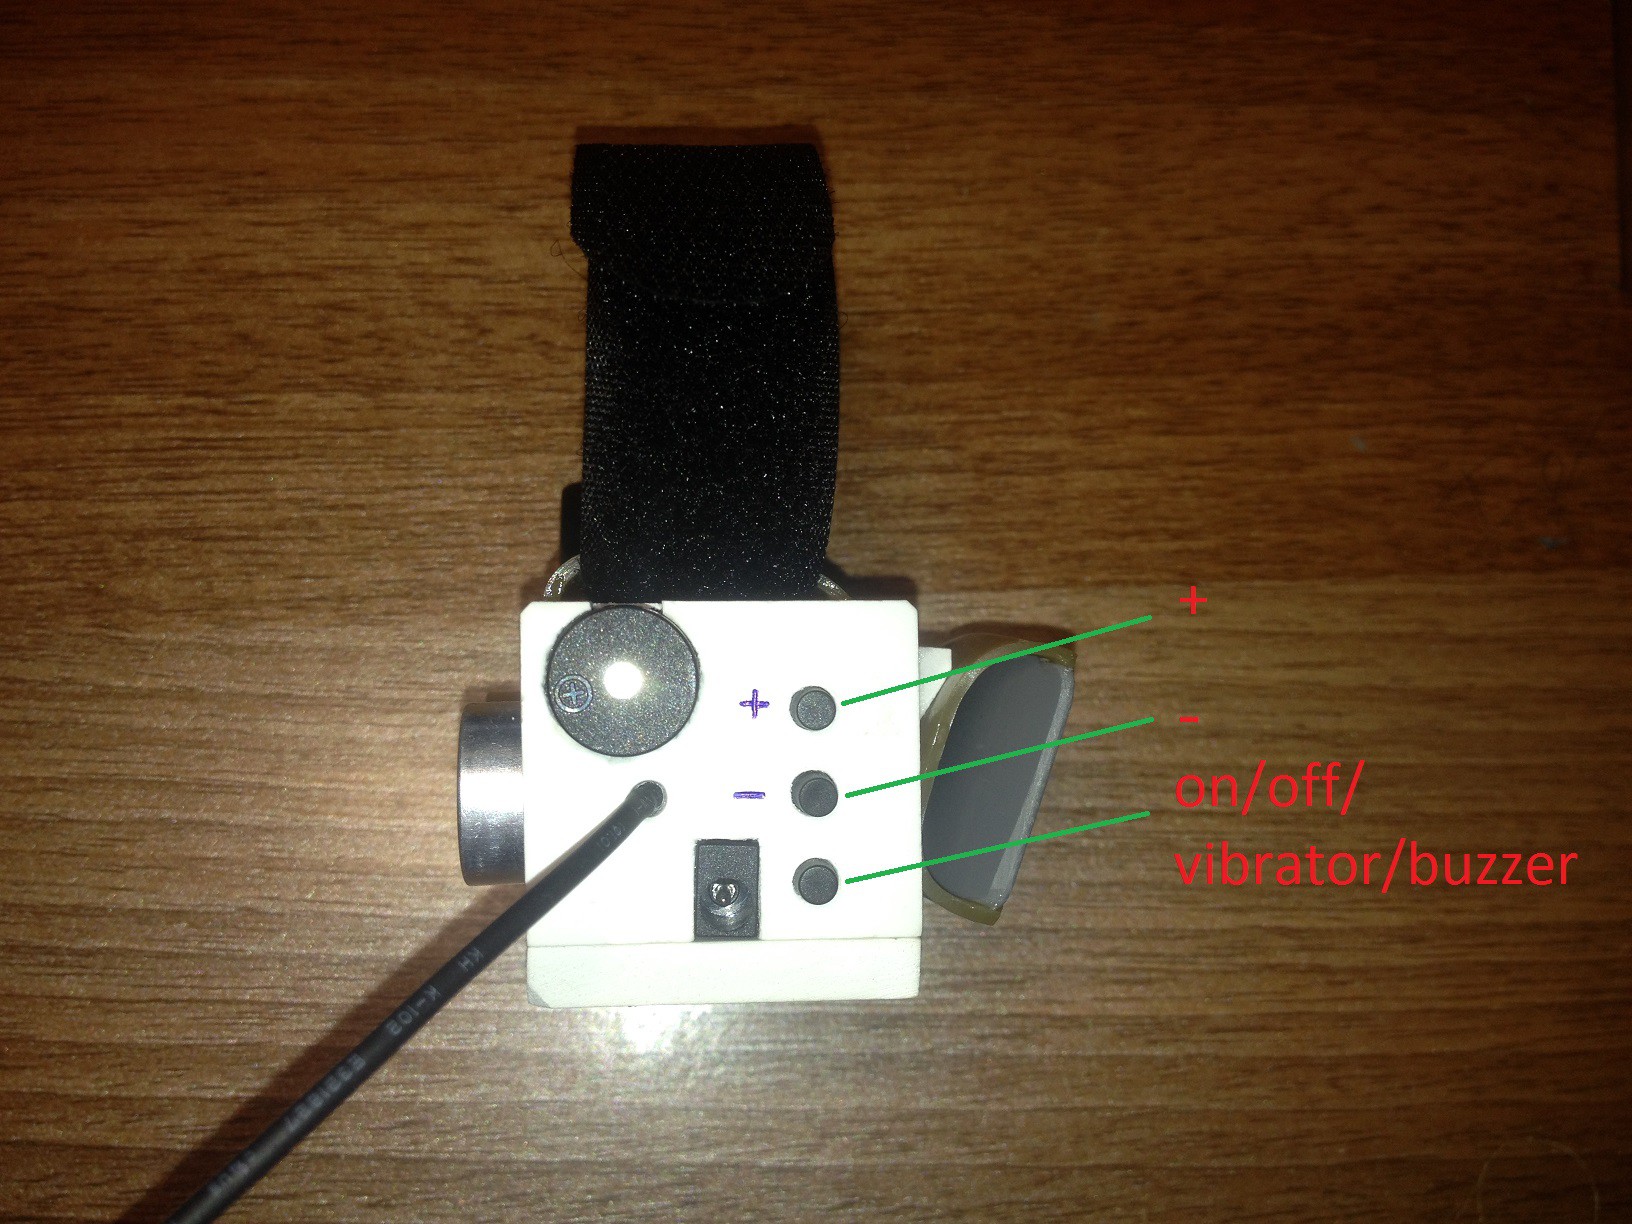
* "Button" is used to turn the device on or off by pressing and holding for 3 seconds. Or to switch between two modes, finger vibration mode or sound mode.

Below is a video showing how to turn on my device and how it works in sound mode.


Below is a video showing the bracelet being charged

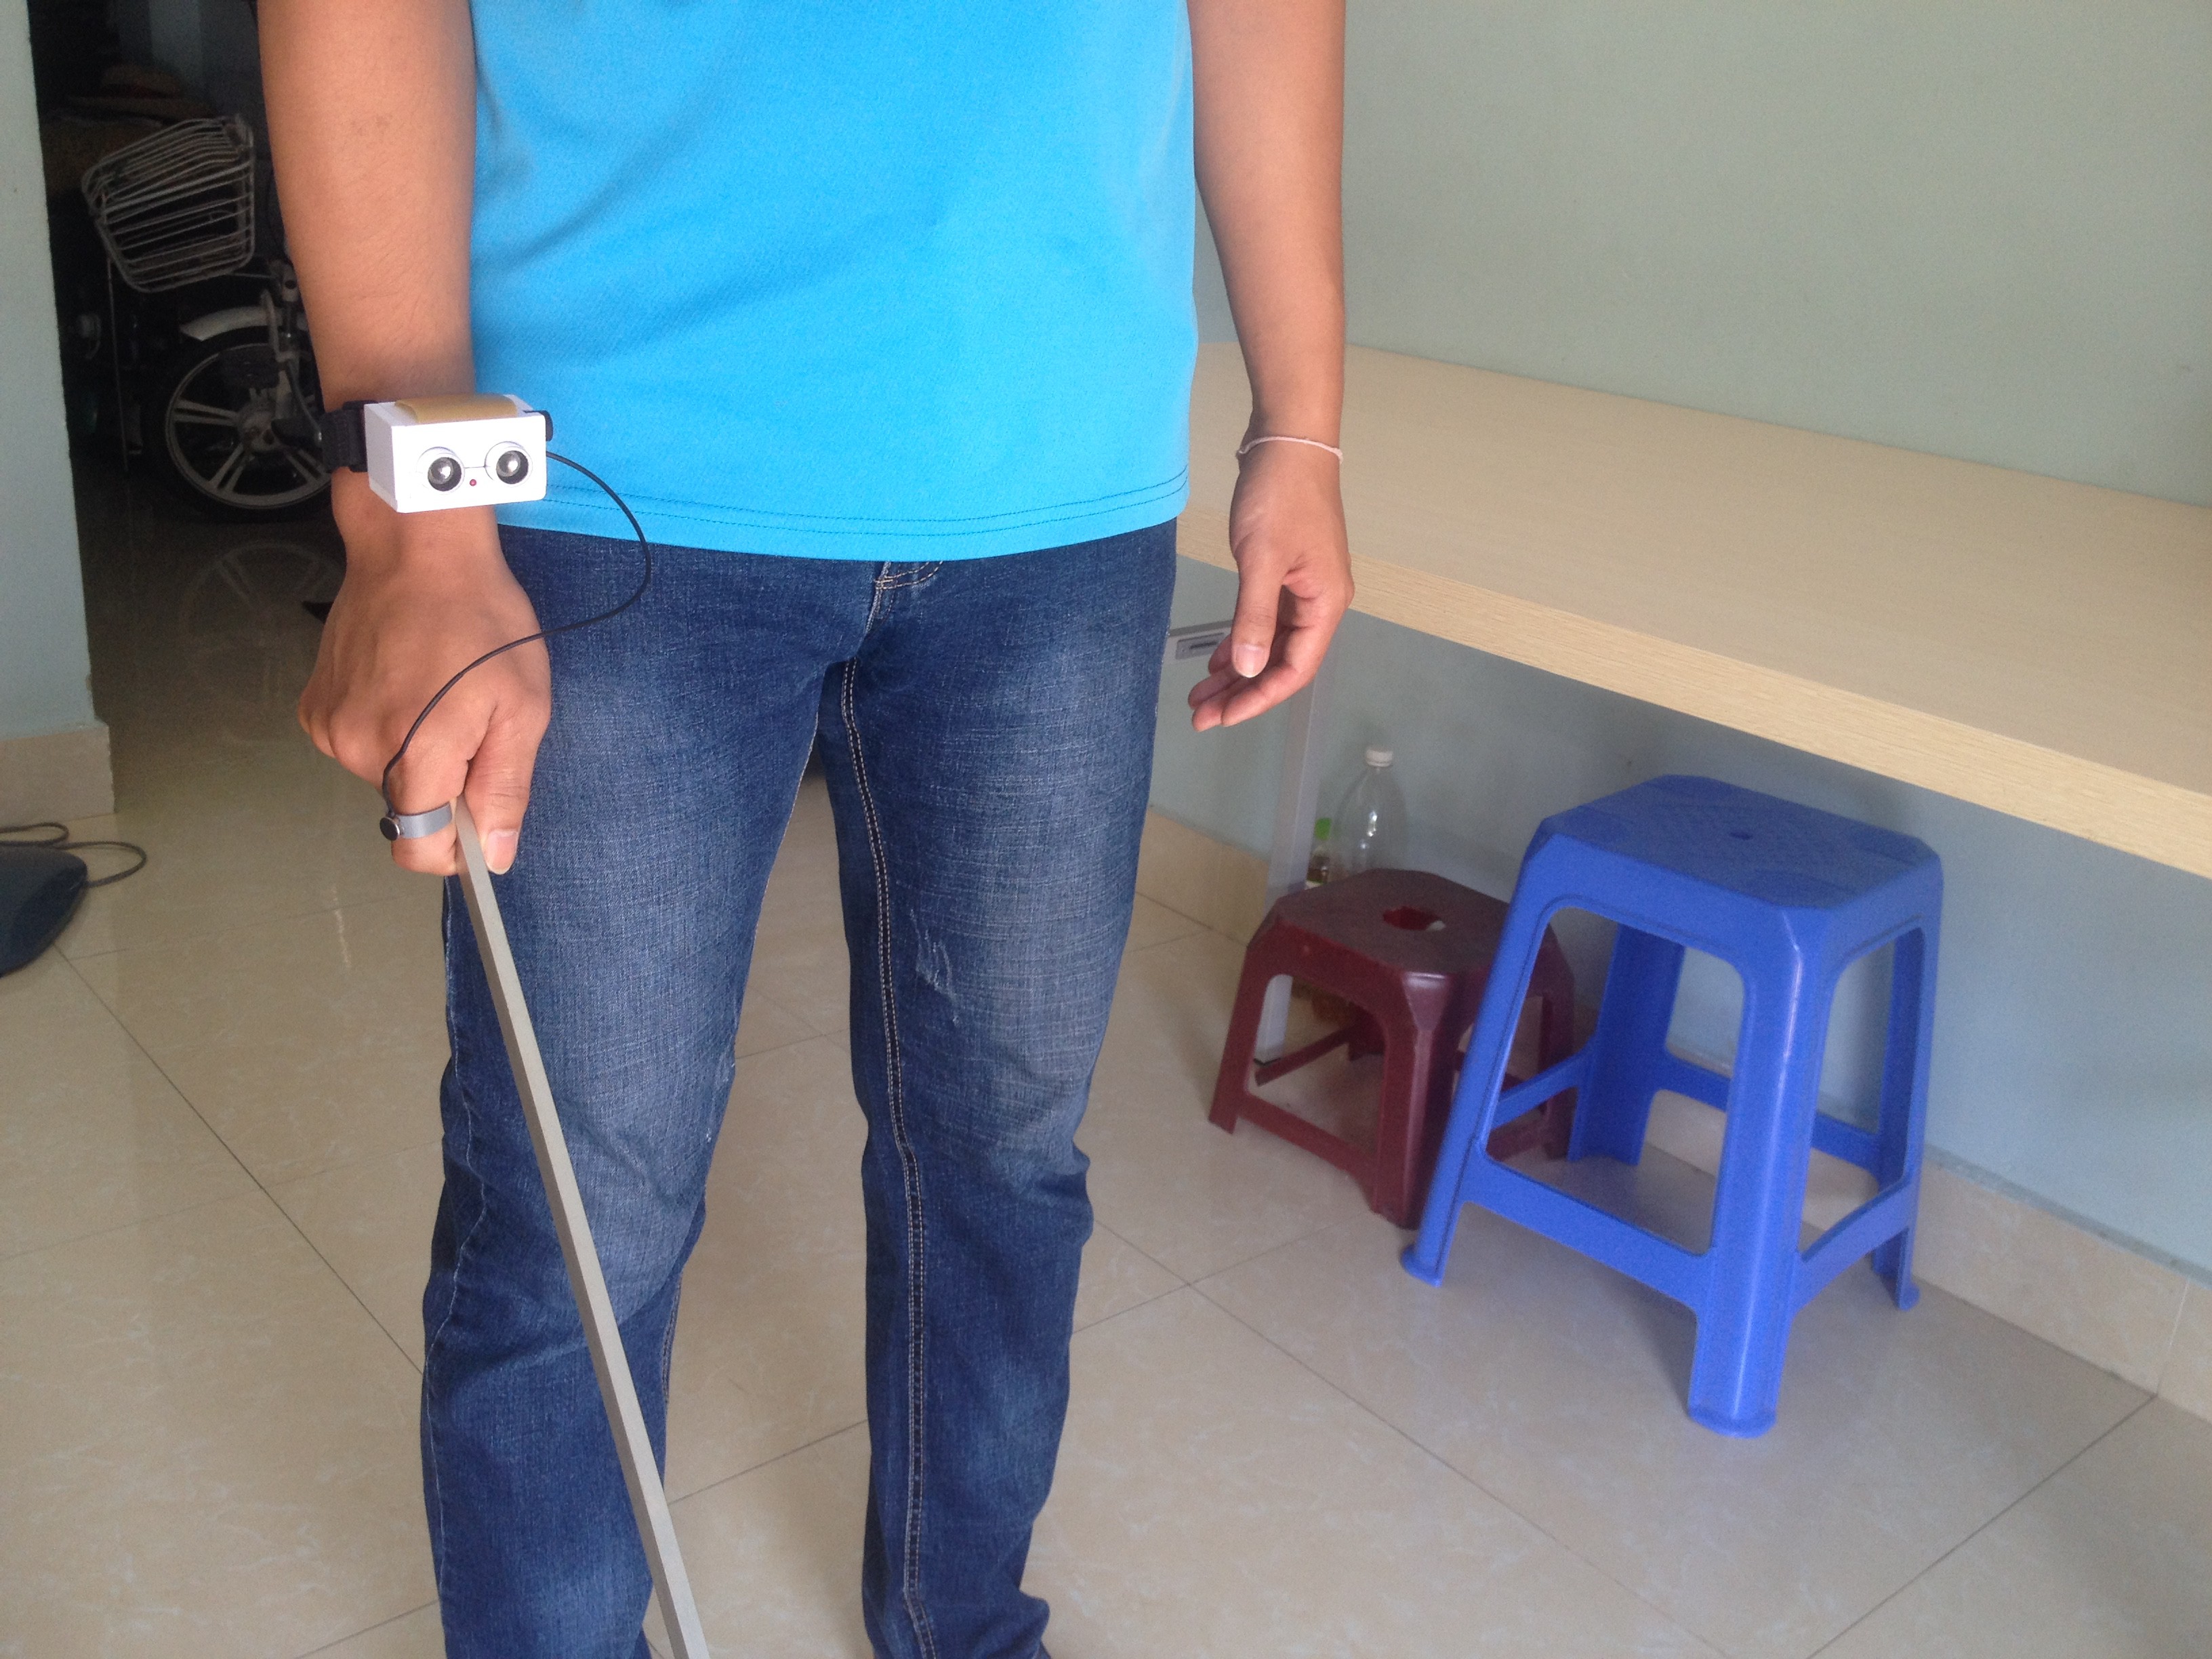
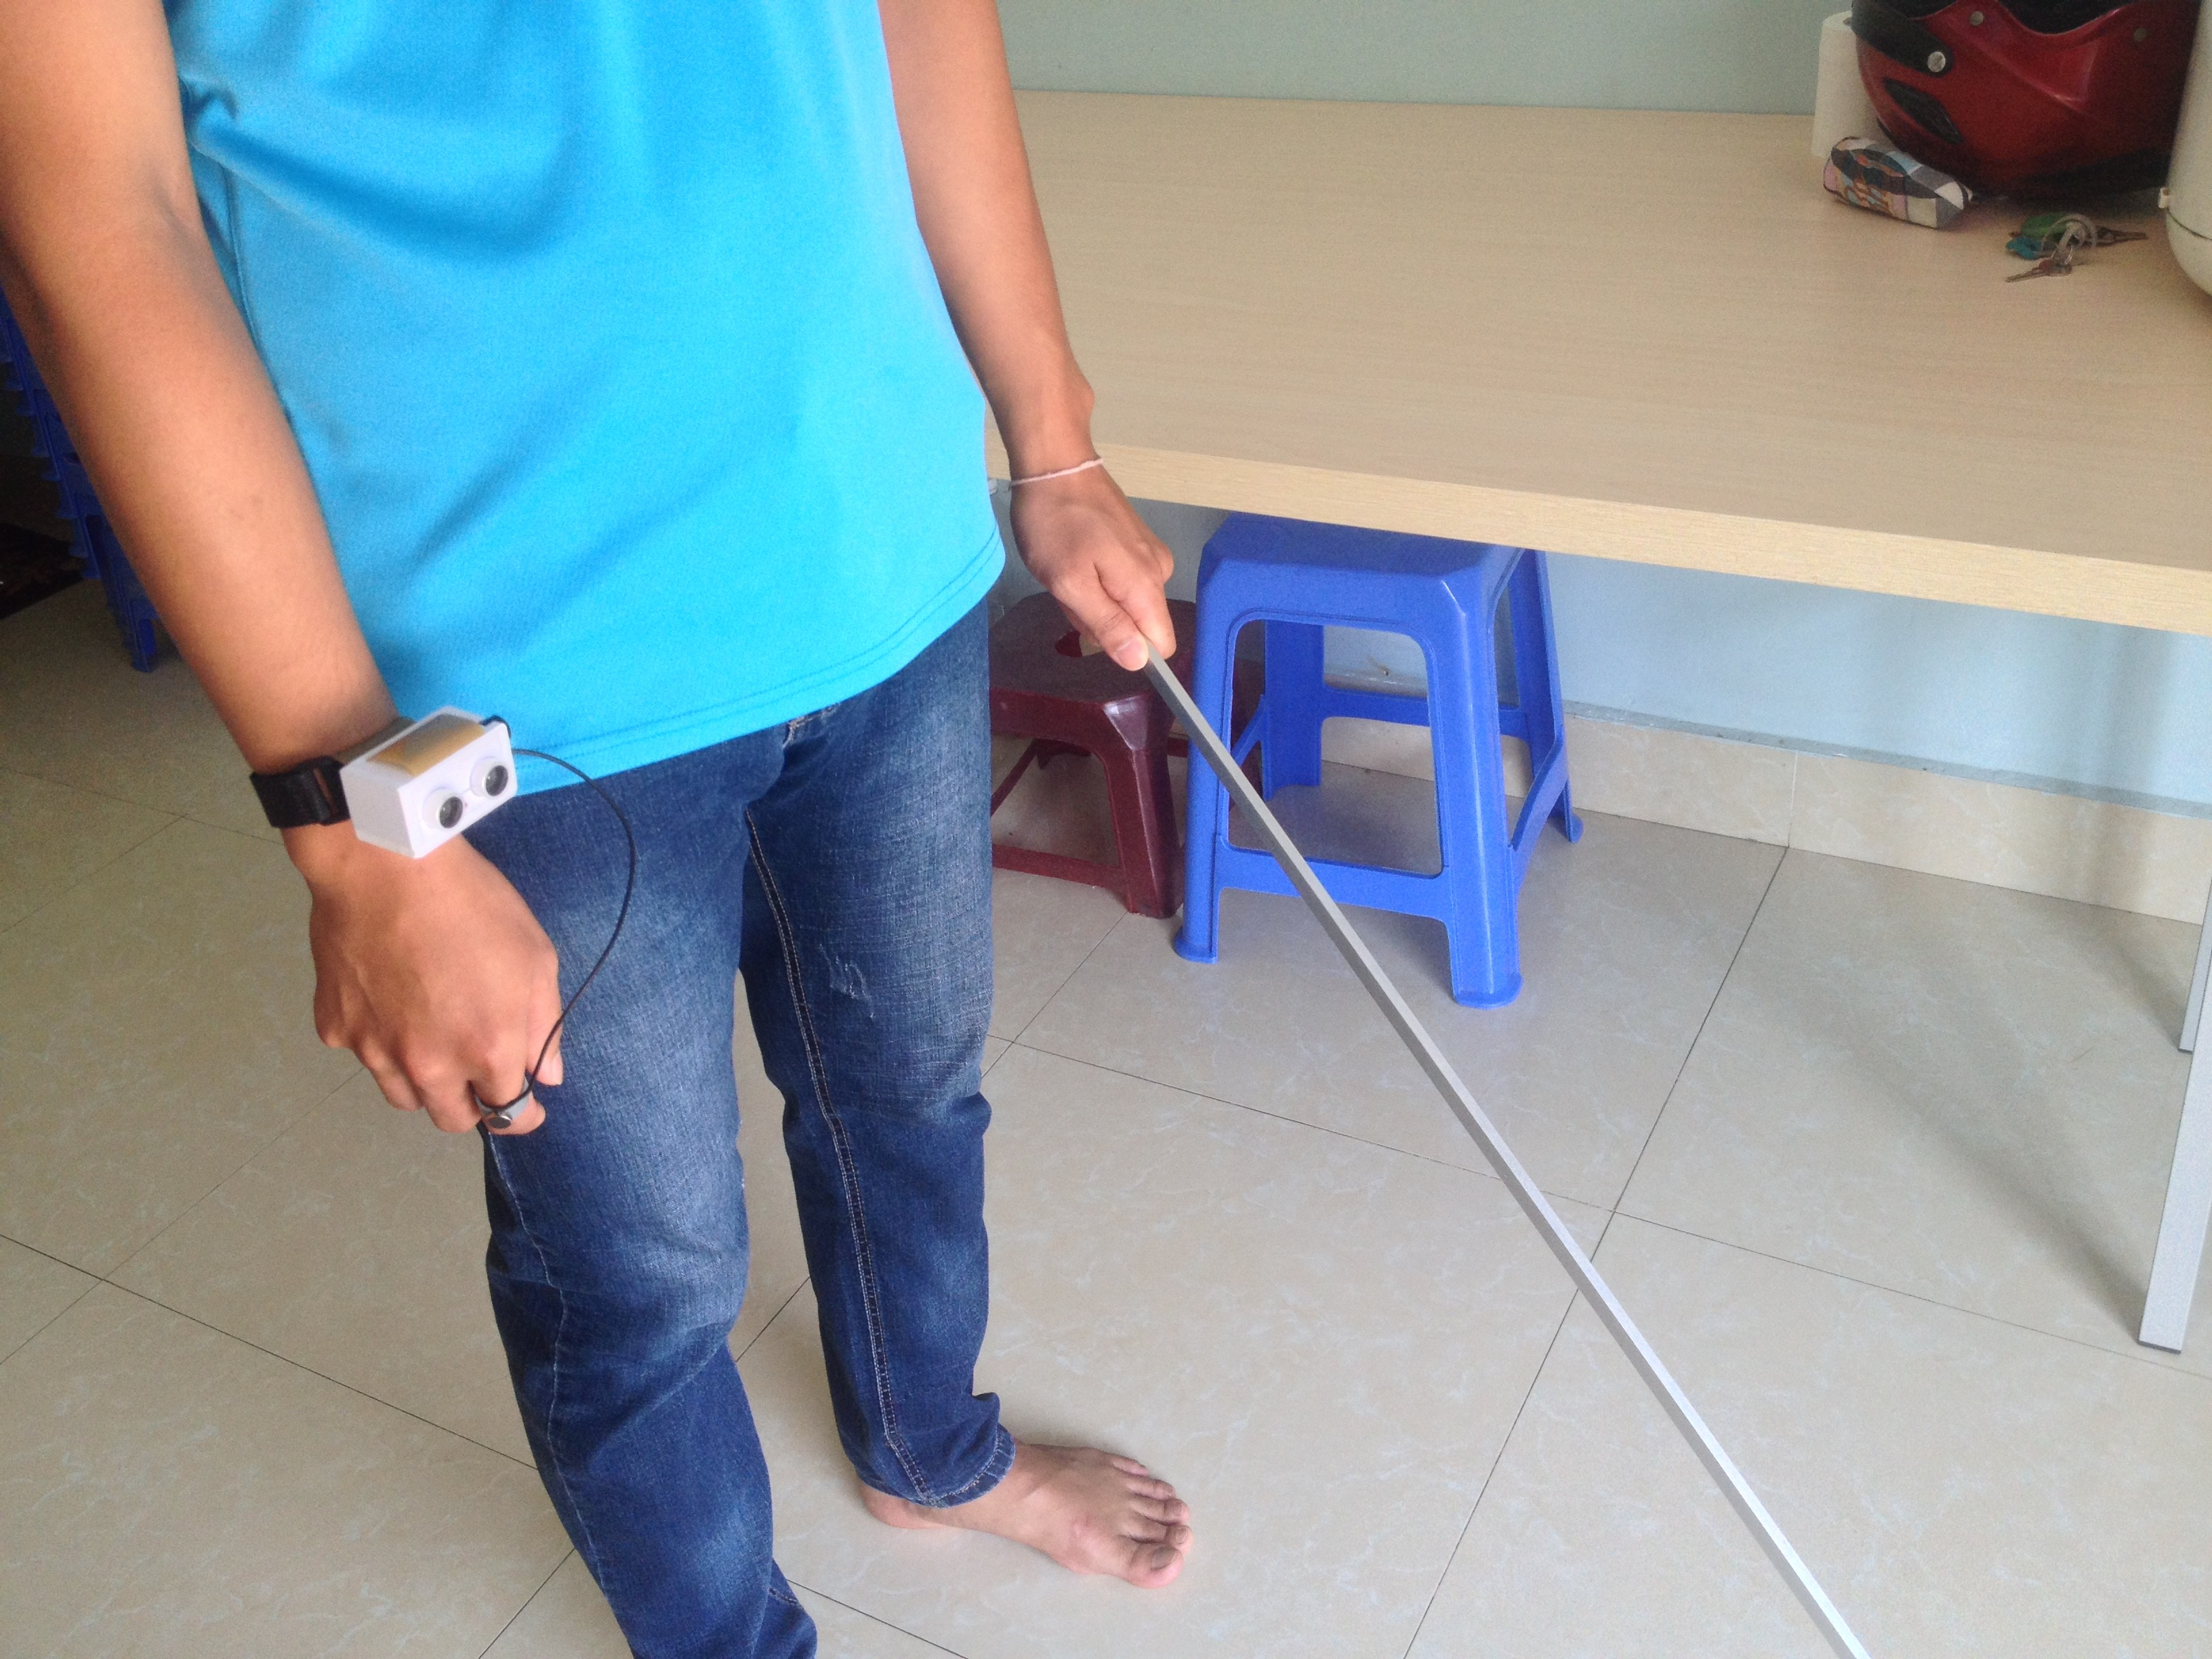
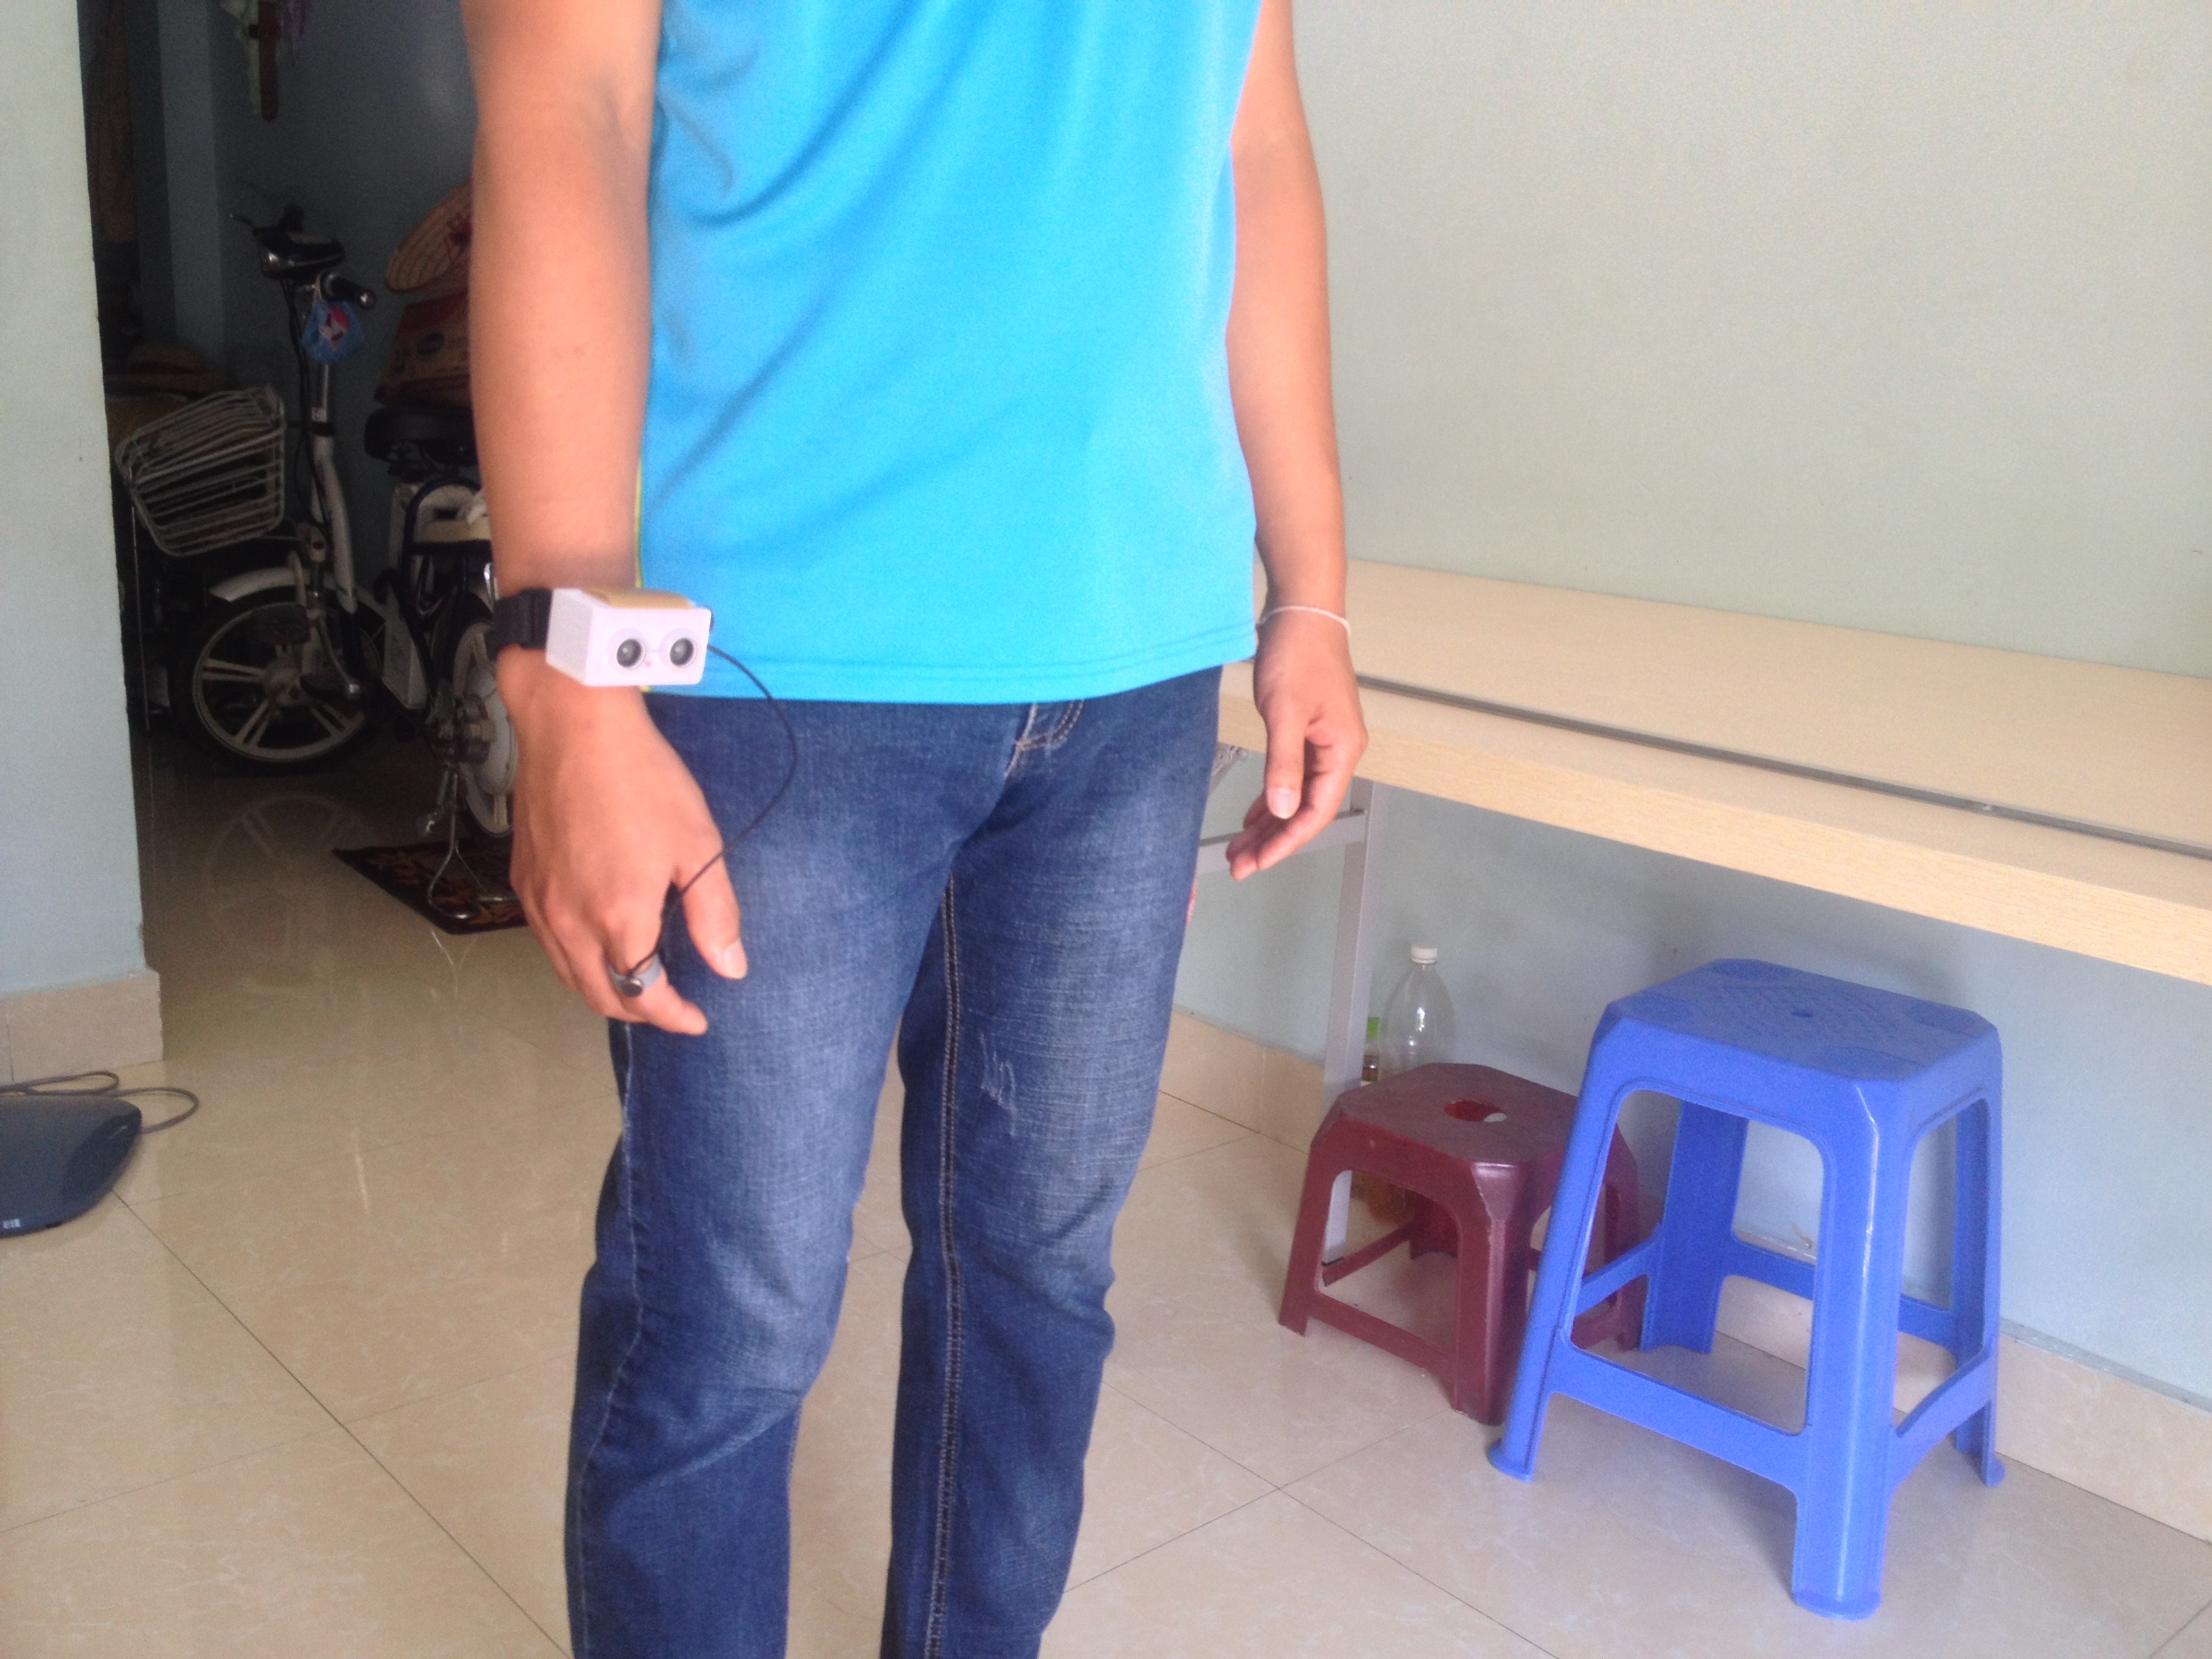
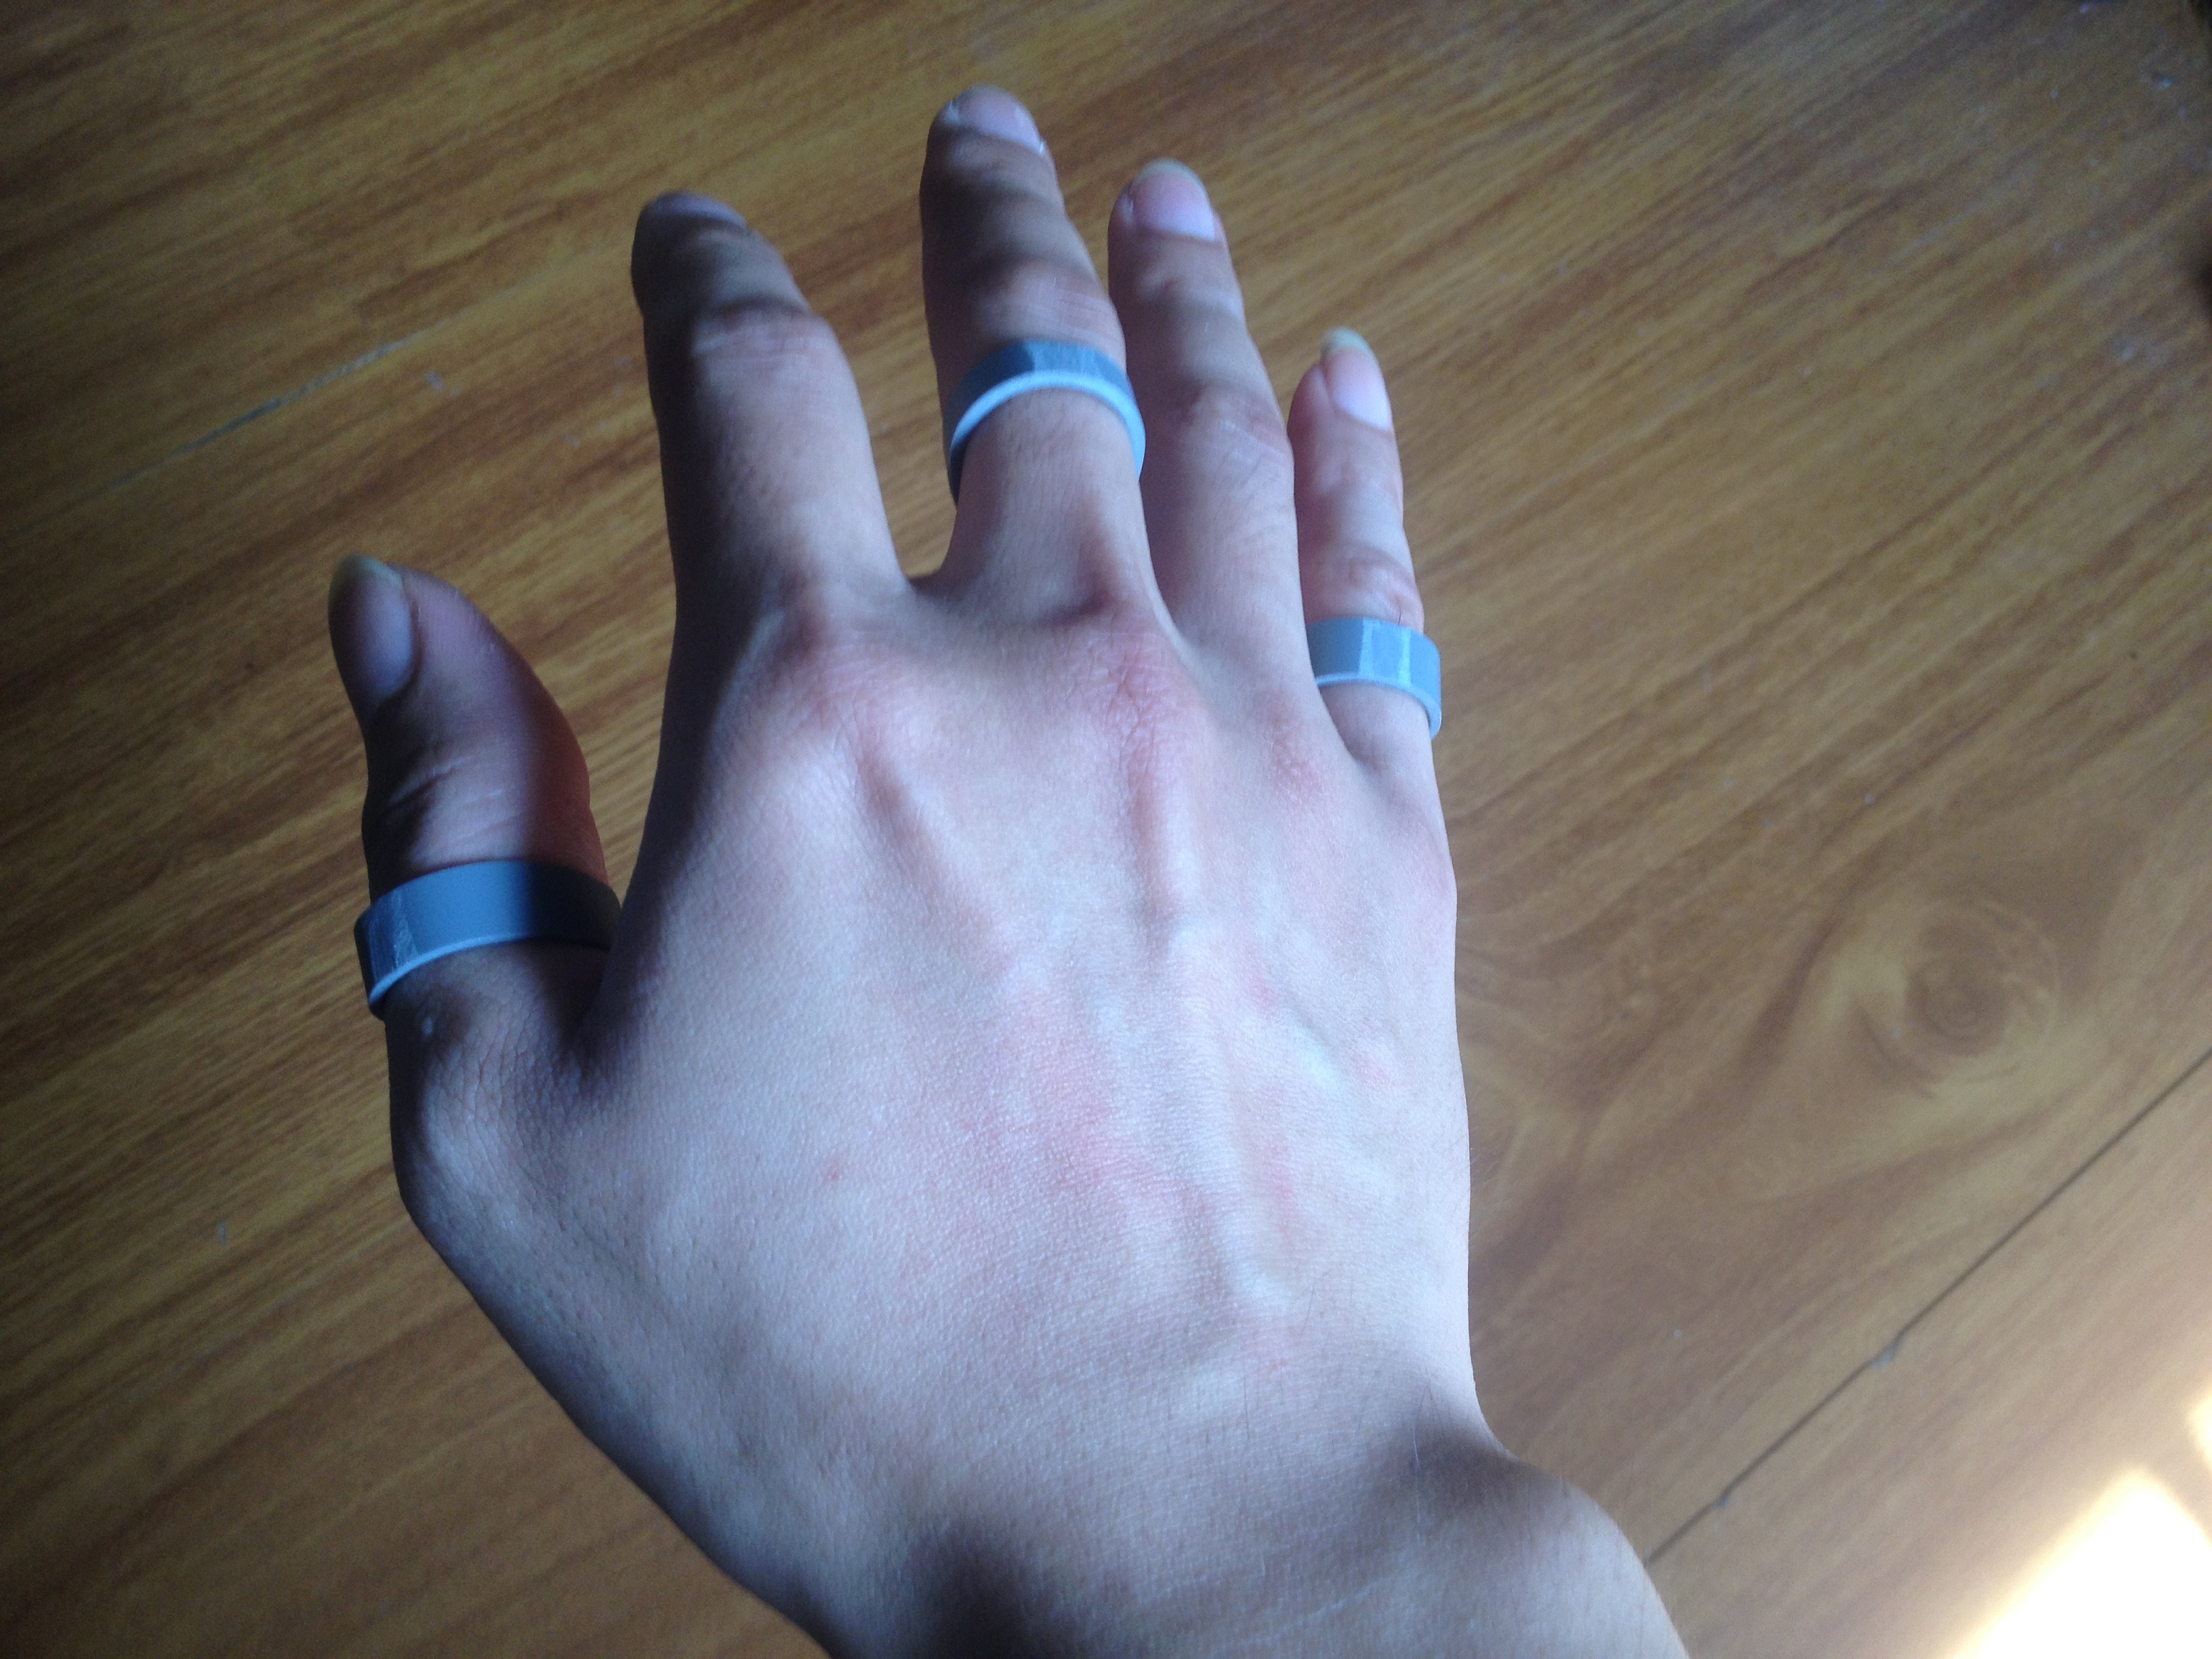
The bracelet weighs about 60g. I designed a wearable device on my hands, it was easily worn on my hands and easily removed from my hand. Another advantage is that, the hand can still hold or grasp other objects normally when wearing the device.

Long-lasting motor vibrations can cause finger pain. So I let the motor only have a slight vibration level, enough for the blind to feel the vibration from the finger.

When in finger vibration mode, the blind can get used to the feeling: The motor vibrates on the thumb, ie the object is near. The motor vibrates on the little finger, which is far away (from 1 meter to 2.5 meters). Both motors are not vibrating when the distance is greater than 2.5 meters.

bracelet_for_the_blind_Upgrade_1.2.ino

Code used in the arduino pro mini board (upgrade version 1.2)

ino - 26.27 kB - 10/15/2017 at 16:09

Download

Circuit diagram upgrade_1.2.jpg

JPEG Image - 1.28 MB - 10/15/2017 at 16:08

Preview

bracelet_for_the_blind_Upgrade_1.1.ino

Code used in the arduino pro mini board (upgrade version 1.1)

ino - 24.16 kB - 09/03/2017 at 09:16

Download

Circuit diagram_upgrade.png

upgrade version 1.1

Portable Network Graphics (PNG) - 213.37 kB - 08/26/2017 at 18:07

Preview

bracelet_for_the_blind.ino

Code used in the arduino pro mini board.

ino - 9.25 kB - 07/05/2017 at 08:18

Download

View all 6 files

  • 2 × water plastic pipe ∅21mm and ∅48mm
  • 1 × Pvc sheet
  • 1 × Plastic adhesive
  • 1 × Arduino pro mini
  • 1 × HC-SR04 Ultrasonic sensor

View all 21 components

  • Can be combined with battery backup (upgrade_1.2.1)

    Tiendo10/26/2017 at 15:43 1 comment

    You can use the phone's spare battery.

    Circuit diagram upgrade_1.2.1

    Press on/off on "Bracelet for the blind" after plugging the spare battery to use.

    Code upgrade_1.2.1

    //bracelet_for_the_blind_Upgrade_1.2.1
    //tác giả(Author): Đỗ Xuân Tiến - Gmail: doxuantiendx07@gmail.com
    #include <EEPROM.h>
    const int trig = A1;     //chân trig của HC-SR04
    const int echo = A0;     //chân echo của HC-SR04
    
    byte ngon_tay_cai_6 = 6;     //ngón tay - finger
    //byte middle_finger = 5;  //ngón tay giữa
    //byte ngon_tay_ut_3 = 3;      //ngón tay út - little finger
    byte mosfet_9 = 9;     //mosfet
    byte coi_chip_5 = 5;  //buzzer
    byte led_4 = 4;       //led
    byte chan_sac_8 = 8;  //chân bật tắt dòng sạc - D8 to on/off charger
    byte button_10 = 10;    //button nguồn: chức năng bat/tat/rung/loa - button: on/off/vibrator/buzzer
    byte button_cong_12 = 12; //button " + "
    byte button_tru_11 = 11; //button " - "
    byte do_volt_pin_A3 = A3; //đo volt pin - A3 to measure the battery voltage
    byte volt_cam_sac_A2 = A2; //nhận biết khi cắm điện sạc - A2 to identify the battery charger
     
    byte rung_cai = 0; 
    byte rung_ut = 0;
    byte rung_cai_1 = 0;    
    byte rung_cai_2 = 0;
    byte rung_ut_1 = 0;     
    byte rung_ut_2 = 0;
    byte che_do_rung = 0; 
    byte khong_lap = 0;   
    byte sau_tha_nut = 0;
    byte khong_lap_12 = 0;    
    byte sau_tha_nut_12 = 0;   
    byte khong_lap_11 = 0;   
    byte sau_tha_nut_11 = 0; 
    //byte khoa_bao_dong = 0;    
    byte loa1 = 0;  
    byte loa2 = 0; 
    byte den1 = 0;  
    byte den2 = 0;
    byte sac_1 = 0;  
    byte sac_2 = 0;   
    byte tat = 0;  //biến giúp khi rút sạc thì tắt - Turn off the power when not charging
    byte EP_1lan1 = 0;   
    byte EP_1lan2 = 0;   
    byte EP_1lan3 = 0;  
    byte EP_1lan4 = 0;   
    byte EP_1lan5 = 0;
    byte hieu_so_bd = 0; 
    byte EP_1lan1_khoangcach = 0;   
    byte EP_1lan2_khoangcach = 0;   
    byte EP_1lan3_khoangcach = 0;
    byte dk_kc = 0;
    byte cau_hinh_kc = 0;  
    byte charging = 0; 
    byte charging_1lan = 0; 
    
    int dovolt_out = 0;
    int dovolt_pin = 0; 
    float volt_pin = 0;
    
    unsigned long pe_rung = 0;
    unsigned long pe_rung_cai_1 = 0;   
    unsigned long pe_rung_cai_2 = 0; 
    unsigned long pe_rung_ut_1 = 0;    
    unsigned long pe_rung_ut_2 = 0;
    unsigned long pe_loa1 = 0;   
    unsigned long pe_loa2 = 0; 
    unsigned long pe_nhanli = 0;
    unsigned long pe_nhanli_12 = 0;   
    unsigned long pe_nhanli_11 = 0;
    unsigned long pe11 = 0;   
    unsigned long pe12 = 0;
    unsigned long pe11_sac = 0;  
    unsigned long pe12_sac = 0;
    unsigned long pe_volt_battery = 0;         
    unsigned long thoi_gian = 0;  // biến đo thời gian - Time variable
    unsigned long khoang_cach = 0;  // biến lưu khoảng cách - Distance variable
    unsigned long khoang_cach_bao_dong = 0; 
    unsigned long tong_khoang_cach = 0;  
    unsigned long so_lan_do = 0;
    unsigned long hieu_so = 0;
    unsigned long pe_hieu_so = 0;   
    unsigned long nghi_sac_15p = 0;  
    unsigned long sac_duy_tri = 0;
    
       
    int GT_button = 0;
    int GT_button_000 = 0;
    int GT_button_cong_12_000 = 0;  
    int GT_button_tru_11_000 = 0;   
    int time_x = 0;
    int GT_button_cong_12 = 0;  //+
    int GT_button_tru_11 = 0;   //-   
    int do_rung = 0; //độ rung mạnh  
    int do_am = 0; //độ to của âm 
    int n_khoang_cach = 200; 
    
    void(* resetFunc) (void) = 0;//cài đặt hàm reset
    
    void delay_0 (unsigned long giay)  // hàm delay mới dùng trong "mode sạc pin"                                          
    {   
      unsigned long pe_delay_0 = millis();
     while(millis() - pe_delay_0 <= giay){         
      GT_button = digitalRead(button_10);
      if(GT_button == 1){charging = 1; nghi_sac_15p = nghi_sac_15p + 600000; delay(1000); tat = 0; break;}  //ấn button để vừa dùng vừa sạc
      }
    }
      
    void tien_sacpin (unsigned long giay)
    { 
      unsigned long peham_sac = millis(); 
      while((millis() - peham_sac <= giay) && (dovolt_out >= 650) && (tat == 1)){
            //đo volt ngoài 
            dovolt_out = analogRead(volt_cam_sac_A2);
            //Serial.println(dovolt_out);                                          
            //nháy...
    Read more »

  • Video on how "Bracelet for the blind" works

    Tiendo10/16/2017 at 08:04 0 comments

    Distance configuration mode: (about 3:50)

    Press and hold the "+ -" button for about 3 seconds to start in the distance configuration mode. Press "+" to increase the obstacle recognition distance, or press "-" to decrease the obstacle recognition distance. The minimum distance to identify obstacles is 2 meters and a maximum of 5 meters. A beep is 0.5 meters (example: when you are in distance configuration mode, press "+" or press "-" to hear two beeps, meaning that the maximum obstacle detection distance is: 2 + 0.5 + 0.5 = 3 meters. Press "+" or "-" to hear a beep, meaning the maximum obstacle detection distance is: 2 + 0.5 = 2.5 meters...)

  • Complete modified version

    Tiendo10/15/2017 at 16:55 0 comments

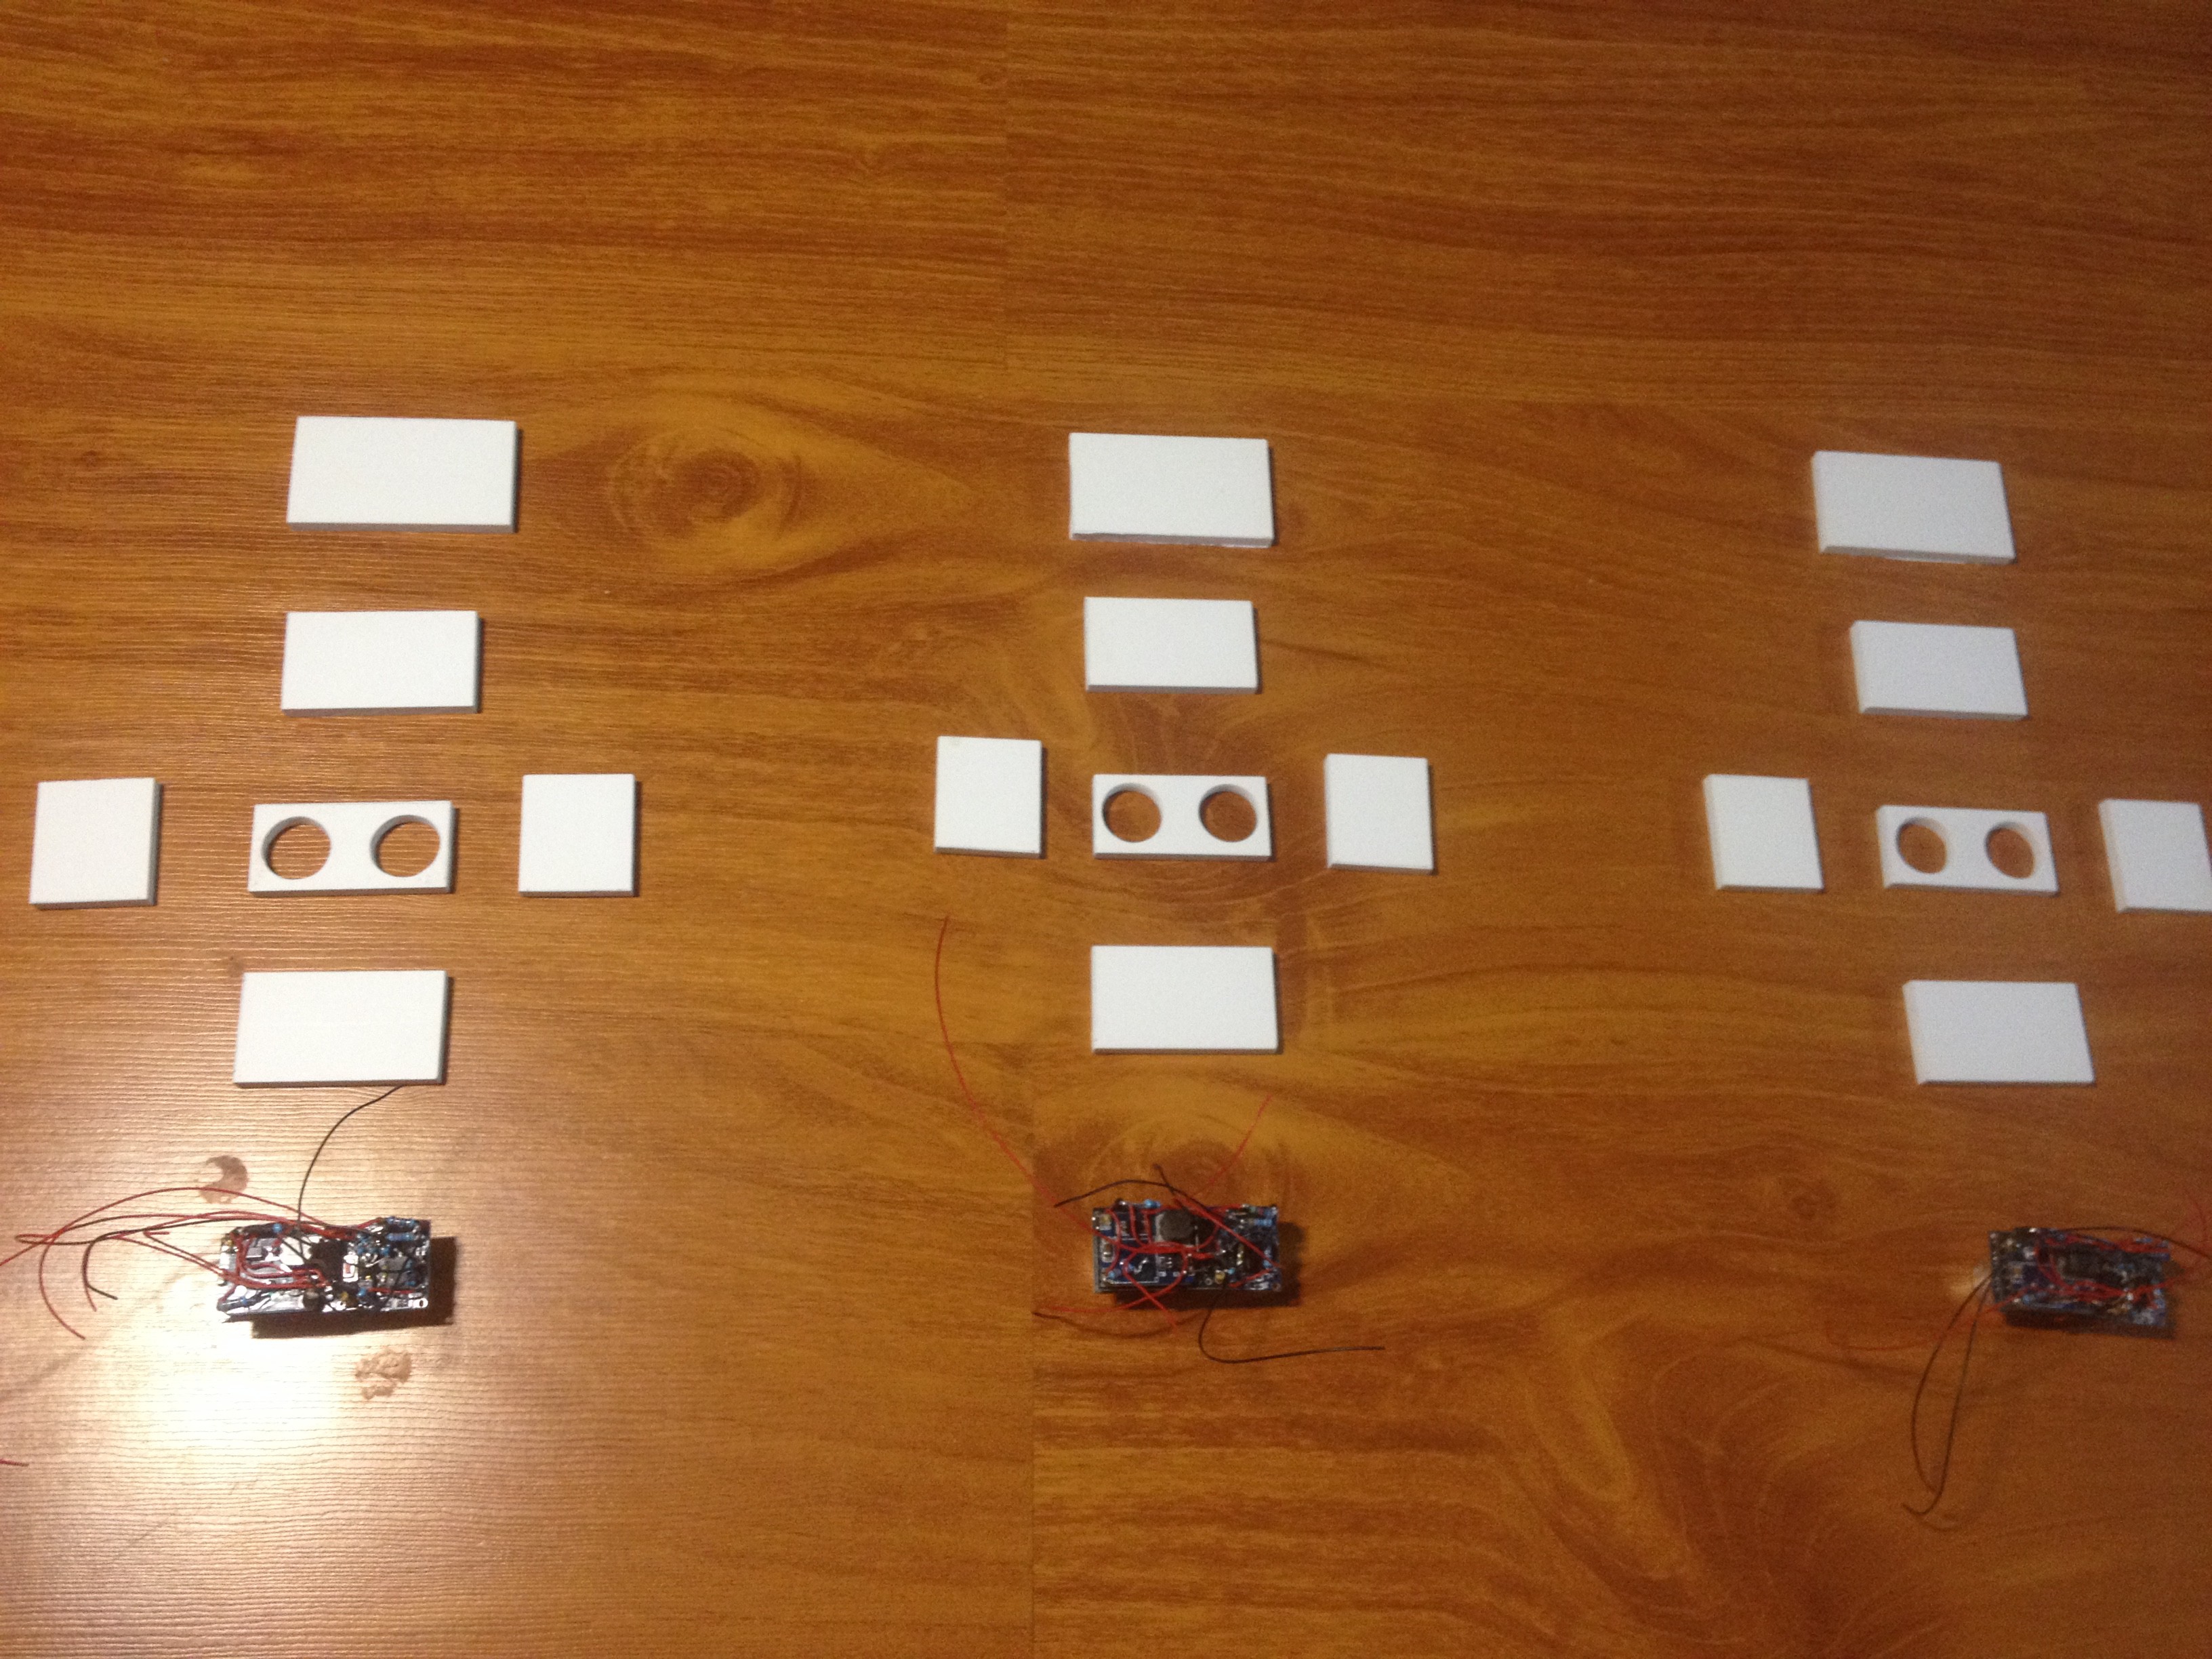
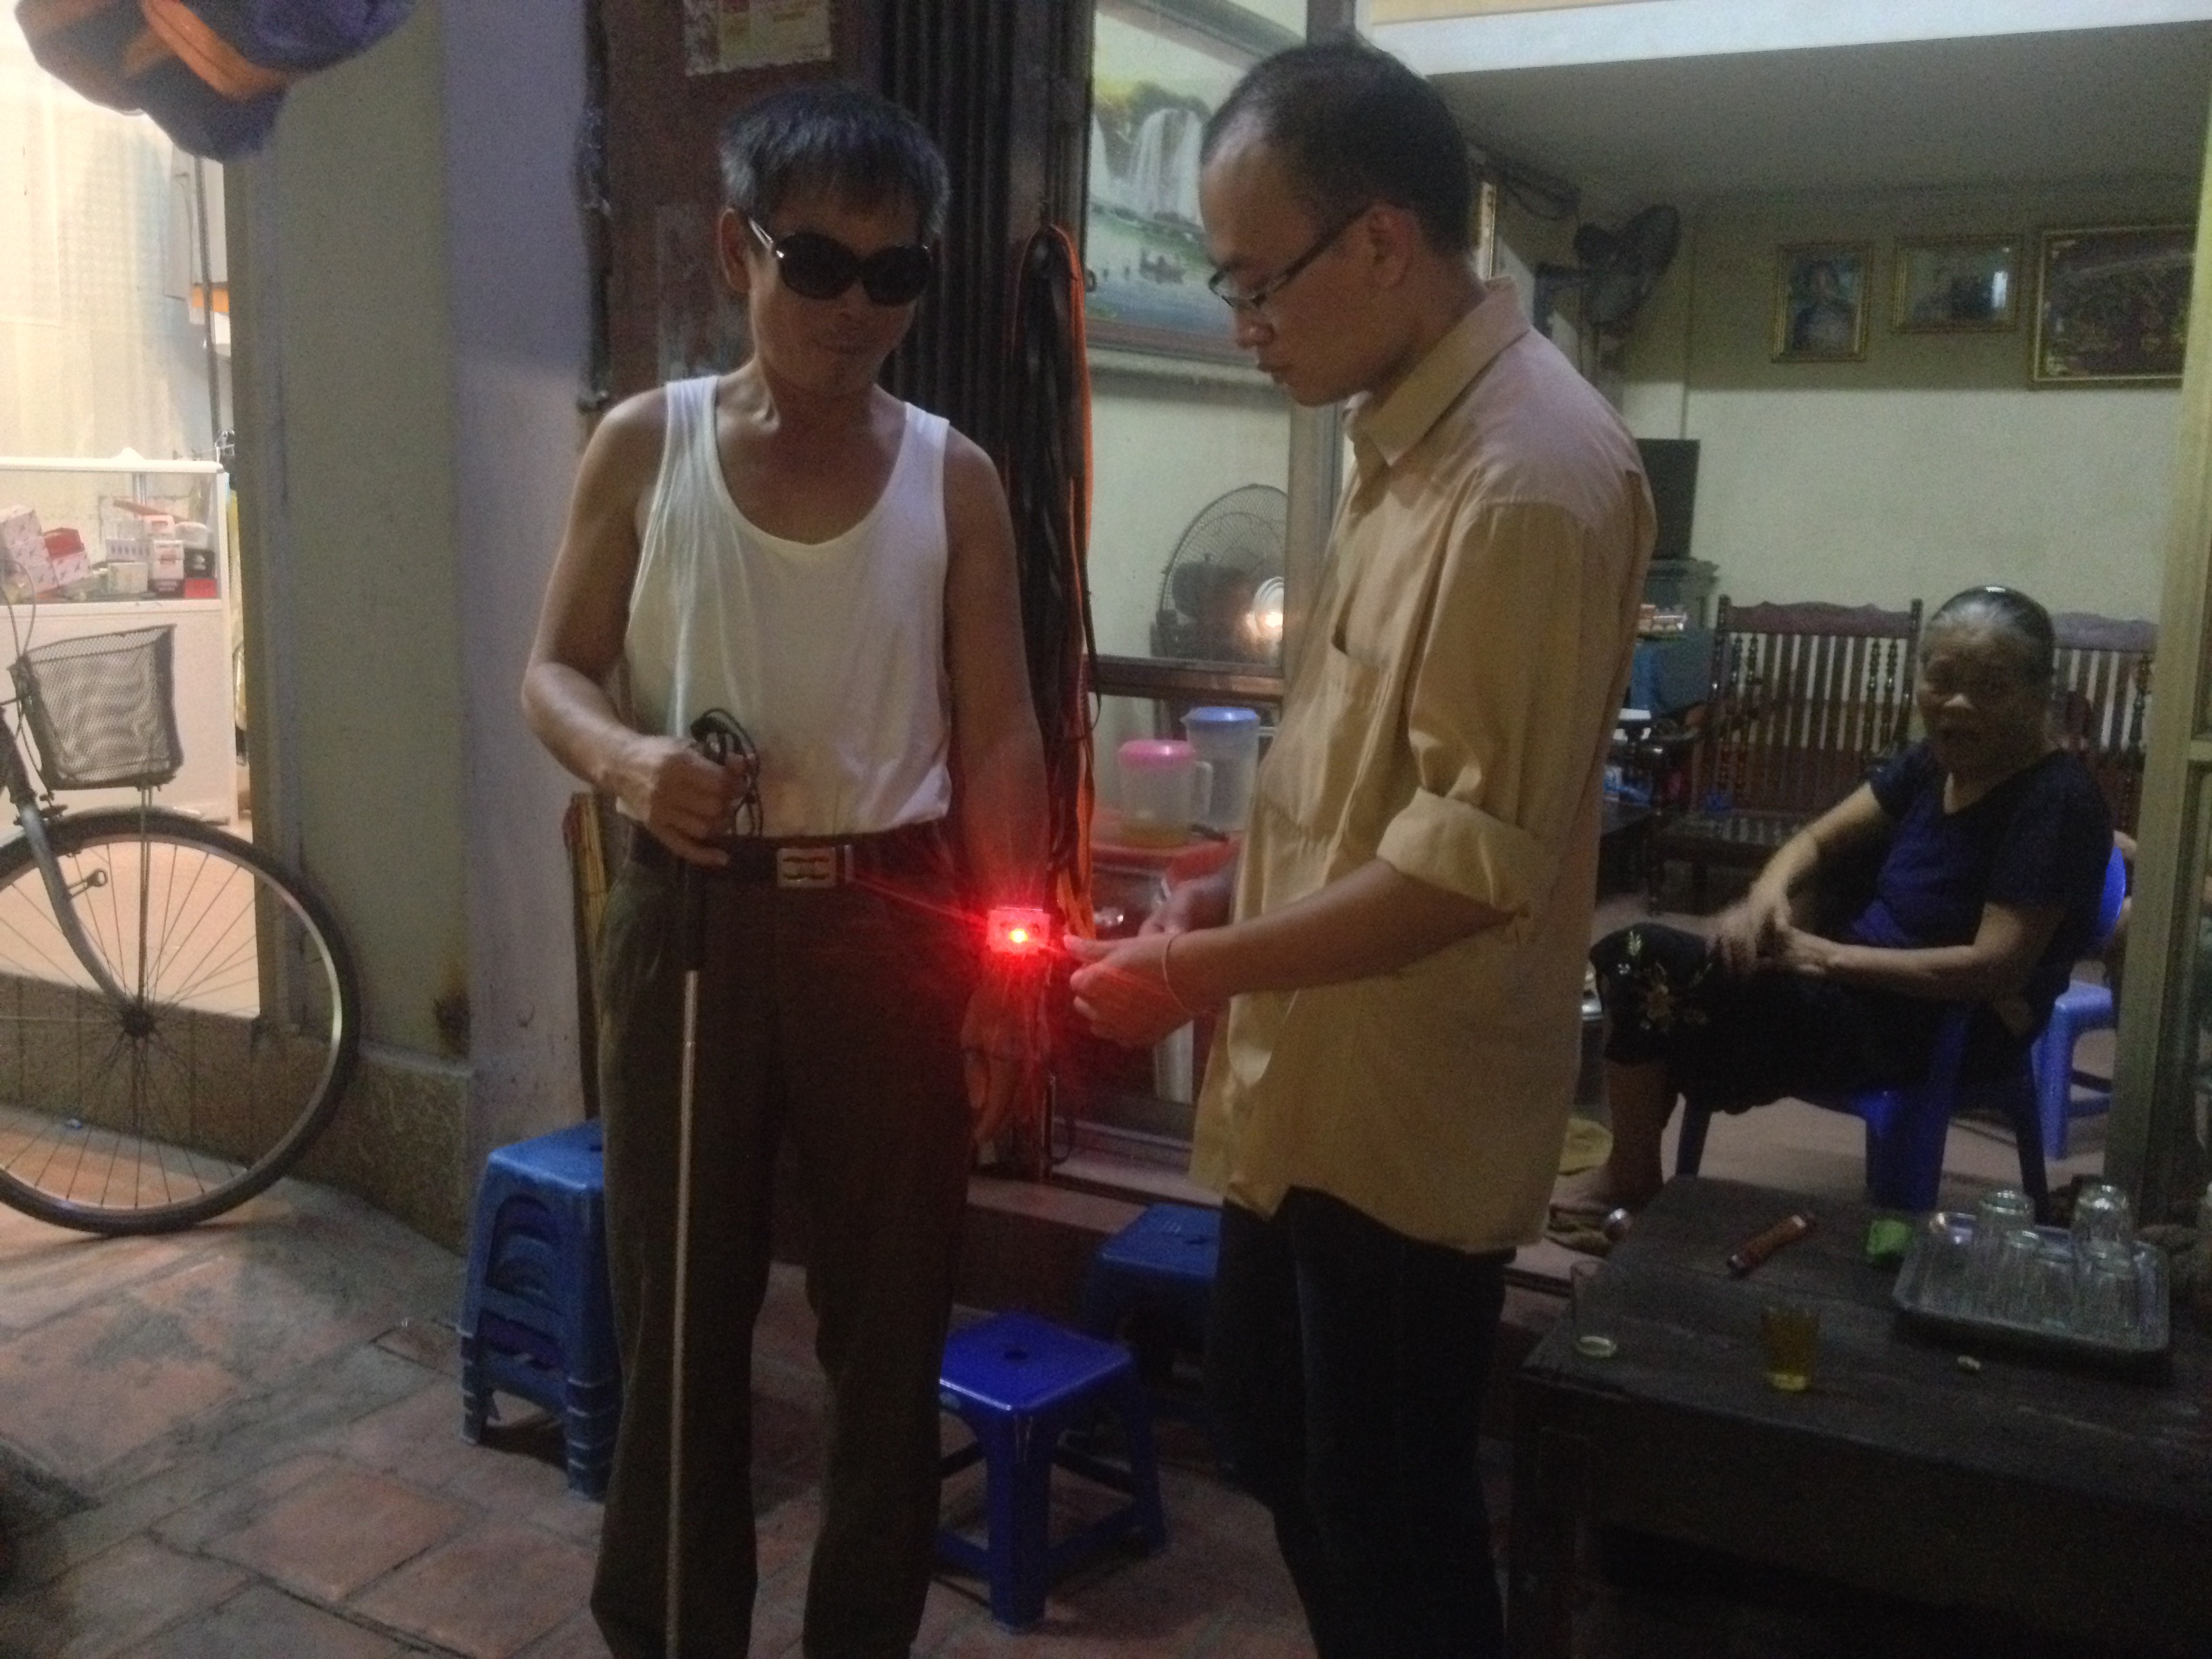
    After 2 working days, I created 3 complete devices. Here are the photos I took during the work. I will create a video on how to use this product after about a day.

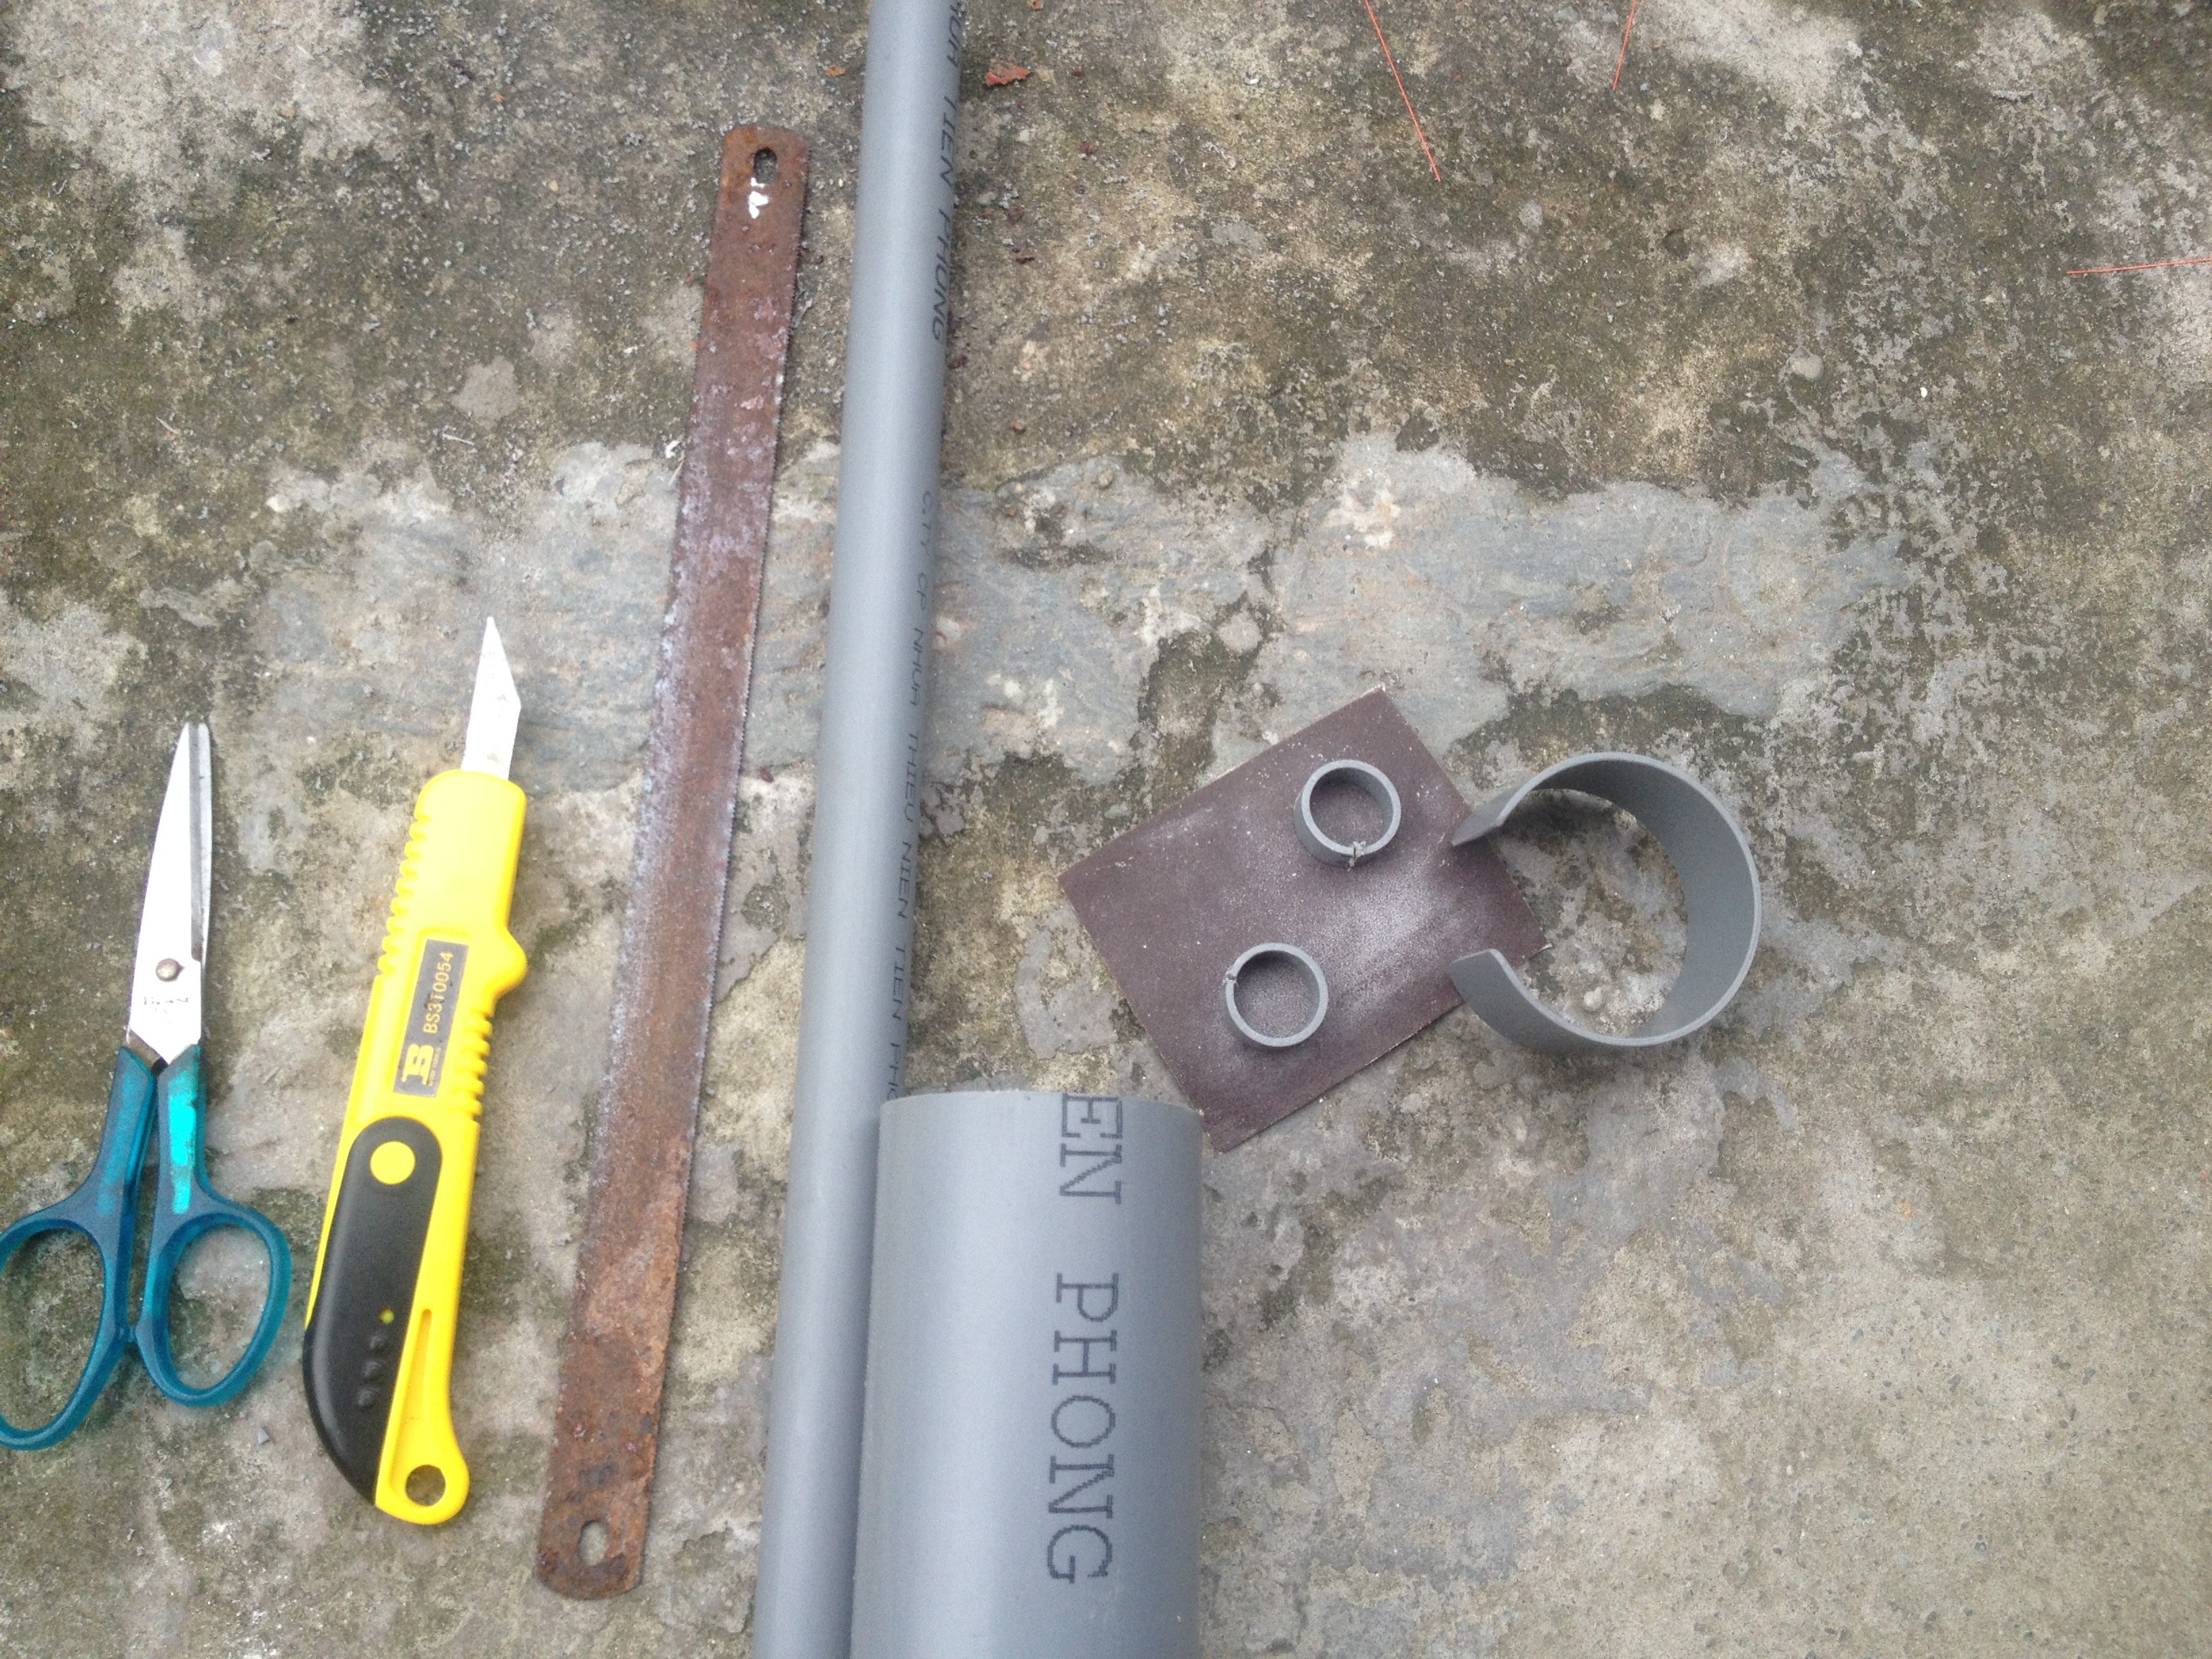
    Tools that help me work.

    I take advantage of a plumbing section.

    Usage 1

    Usage 2

    Usage 3

    Usage 4

  • Circuit diagram upgrade_1.2

    Tiendo10/15/2017 at 15:59 0 comments

    In this diagram there is a difference, the device uses only a vibrating motor.

  • Code upgrade_1.2

    Tiendo10/15/2017 at 14:55 0 comments

    //bracelet_for_the_blind_Upgrade_1.2
    //tác giả(Author): Đỗ Xuân Tiến - Gmail: doxuantiendx07@gmail.com
    #include <EEPROM.h>
    const int trig = A1;     //chân trig của HC-SR04
    const int echo = A0;     //chân echo của HC-SR04
    byte ngon_tay_cai_6 = 6;     //ngón tay - finger
    //byte middle_finger = 5;  //ngón tay giữa
    //byte ngon_tay_ut_3 = 3;      //ngón tay út - little finger
    byte mosfet_9 = 9;     //mosfet
    byte coi_chip_5 = 5;  //buzzer
    byte led_4 = 4;       //led
    byte chan_sac_8 = 8;  //chân bật tắt dòng sạc - D8 to on/off charger
    byte button_10 = 10;    //button nguồn: chức năng bat/tat/rung/loa - button: on/off/vibrator/buzzer
    byte button_cong_12 = 12; //button " + "
    byte button_tru_11 = 11; //button " - "
    byte do_volt_pin_A3 = A3; //đo volt pin - A3 to measure the battery voltage
    byte volt_cam_sac_A2 = A2; //nhận biết khi cắm điện sạc - A2 to identify the battery charger
     
    byte rung_cai = 0; 
    byte rung_ut = 0;
    byte rung_cai_1 = 0;    
    byte rung_cai_2 = 0;
    byte rung_ut_1 = 0;     
    byte rung_ut_2 = 0;
    byte che_do_rung = 0; 
    byte khong_lap = 0;   
    byte sau_tha_nut = 0;
    byte khong_lap_12 = 0;    
    byte sau_tha_nut_12 = 0;   
    byte khong_lap_11 = 0;   
    byte sau_tha_nut_11 = 0; 
    //byte khoa_bao_dong = 0;    
    byte loa1 = 0;  
    byte loa2 = 0; 
    byte den1 = 0;  
    byte den2 = 0;
    byte sac_1 = 0;  
    byte sac_2 = 0;   
    byte tat = 0;  //biến giúp khi rút sạc thì tắt - Turn off the power when not charging
    byte EP_1lan1 = 0;   
    byte EP_1lan2 = 0;   
    byte EP_1lan3 = 0;  
    byte EP_1lan4 = 0;   
    byte EP_1lan5 = 0;
    byte hieu_so_bd = 0; 
    byte EP_1lan1_khoangcach = 0;   
    byte EP_1lan2_khoangcach = 0;   
    byte EP_1lan3_khoangcach = 0;
    byte dk_kc = 0;
    byte cau_hinh_kc = 0;    
    int dovolt_out = 0;
    int dovolt_pin = 0; 
    float volt_pin = 0;
    unsigned long pe_rung = 0;
    unsigned long pe_rung_cai_1 = 0;   
    unsigned long pe_rung_cai_2 = 0; 
    unsigned long pe_rung_ut_1 = 0;    
    unsigned long pe_rung_ut_2 = 0;
    unsigned long pe_loa1 = 0;   
    unsigned long pe_loa2 = 0; 
    unsigned long pe_nhanli = 0;
    unsigned long pe_nhanli_12 = 0;   
    unsigned long pe_nhanli_11 = 0;
    unsigned long pe11 = 0;   
    unsigned long pe12 = 0;
    unsigned long pe11_sac = 0;  
    unsigned long pe12_sac = 0;
    unsigned long pe_volt_battery = 0;         
    unsigned long thoi_gian = 0;  // biến đo thời gian - Time variable
    unsigned long khoang_cach = 0;  // biến lưu khoảng cách - Distance variable
    unsigned long khoang_cach_bao_dong = 0; 
    unsigned long tong_khoang_cach = 0;  
    unsigned long so_lan_do = 0;
    unsigned long hieu_so = 0;
    unsigned long pe_hieu_so = 0;
       
    int GT_button = 0;
    int GT_button_000 = 0;
    int GT_button_cong_12_000 = 0;  
    int GT_button_tru_11_000 = 0;   
    int time_x = 0;
    int GT_button_cong_12 = 0;  //+
    int GT_button_tru_11 = 0;   //-   
    int do_rung = 0; //độ rung mạnh  
    int do_am = 0; //độ to của âm 
    int n_khoang_cach = 200; 
    void tien_sacpin (unsigned long giay)
    { 
      unsigned long peham_sac = millis(); 
      while((millis() - peham_sac <= giay) && (dovolt_out >= 650)){
            //đo volt ngoài 
            dovolt_out = analogRead(volt_cam_sac_A2);
            //Serial.println(dovolt_out);                                          
            //nháy đèn
            if((den1 == 0) && (millis() - pe12 >= 150)){pe11 = millis(); digitalWrite(led_4,HIGH); den1 = 1; den2 = 0;}   
            if((den2 == 0) && (millis() - pe11 >= 150)){pe12 = millis(); digitalWrite(led_4,LOW); den2 = 1; den1 = 0; }  
            //sạc 1000ms nghỉ 100ms(or 1000ms/500ms), giảm nhiệt độ(or 1000ms/500ms)
            if((sac_1 == 0) && (millis() - pe12_sac >= 100)){pe11_sac = millis(); digitalWrite(chan_sac_8,HIGH); sac_1 = 1; sac_2 = 0;}   
            if((sac_2 == 0) && (millis() - pe11_sac >= 1000)){pe12_sac = millis(); digitalWrite(chan_sac_8,LOW); sac_2 = 1; sac_1 = 0; }  
            
            //2 button + -
            GT_button_cong_12 = digitalRead(button_cong_12);
            GT_button_tru_11 = digitalRead(button_tru_11);
            //nhấn lỳ 2 nút + - để khởi động chế...
    Read more »

  • Modification for "Bracelet for the blind"

    Tiendo10/14/2017 at 17:46 0 comments

    After acquiring the opinions of some visually impaired people and experts, I decided to modify the product. Products will have the following features:
    - There are 4 ways to use "Bracelet for the blind"
    - The product can be combined with a stick. (The combination of "Bracelet for the blind" with the stick will be the most effective solution.)
    - The obstacle detection distance can be configured between 2 meters and 5 meters (distance is configured by push button).
    - Will only use a vibrating motor on any finger. The vibration of the motor will gradually increase as you approach the obstacle.
    - Can be combined with an external power source to increase the use time of equipment to many days.

    Mr. Binh is blind, he is blind both eyes due to an accident while working. He often walks with a stick in his hand, to meet and talk to people. The stories always make him smile, he is a optimist love life. and he is a very friendly neighbor.

  • Make the bracelet and the box contains the device (Upgrade version).

    Tiendo09/06/2017 at 10:38 0 comments

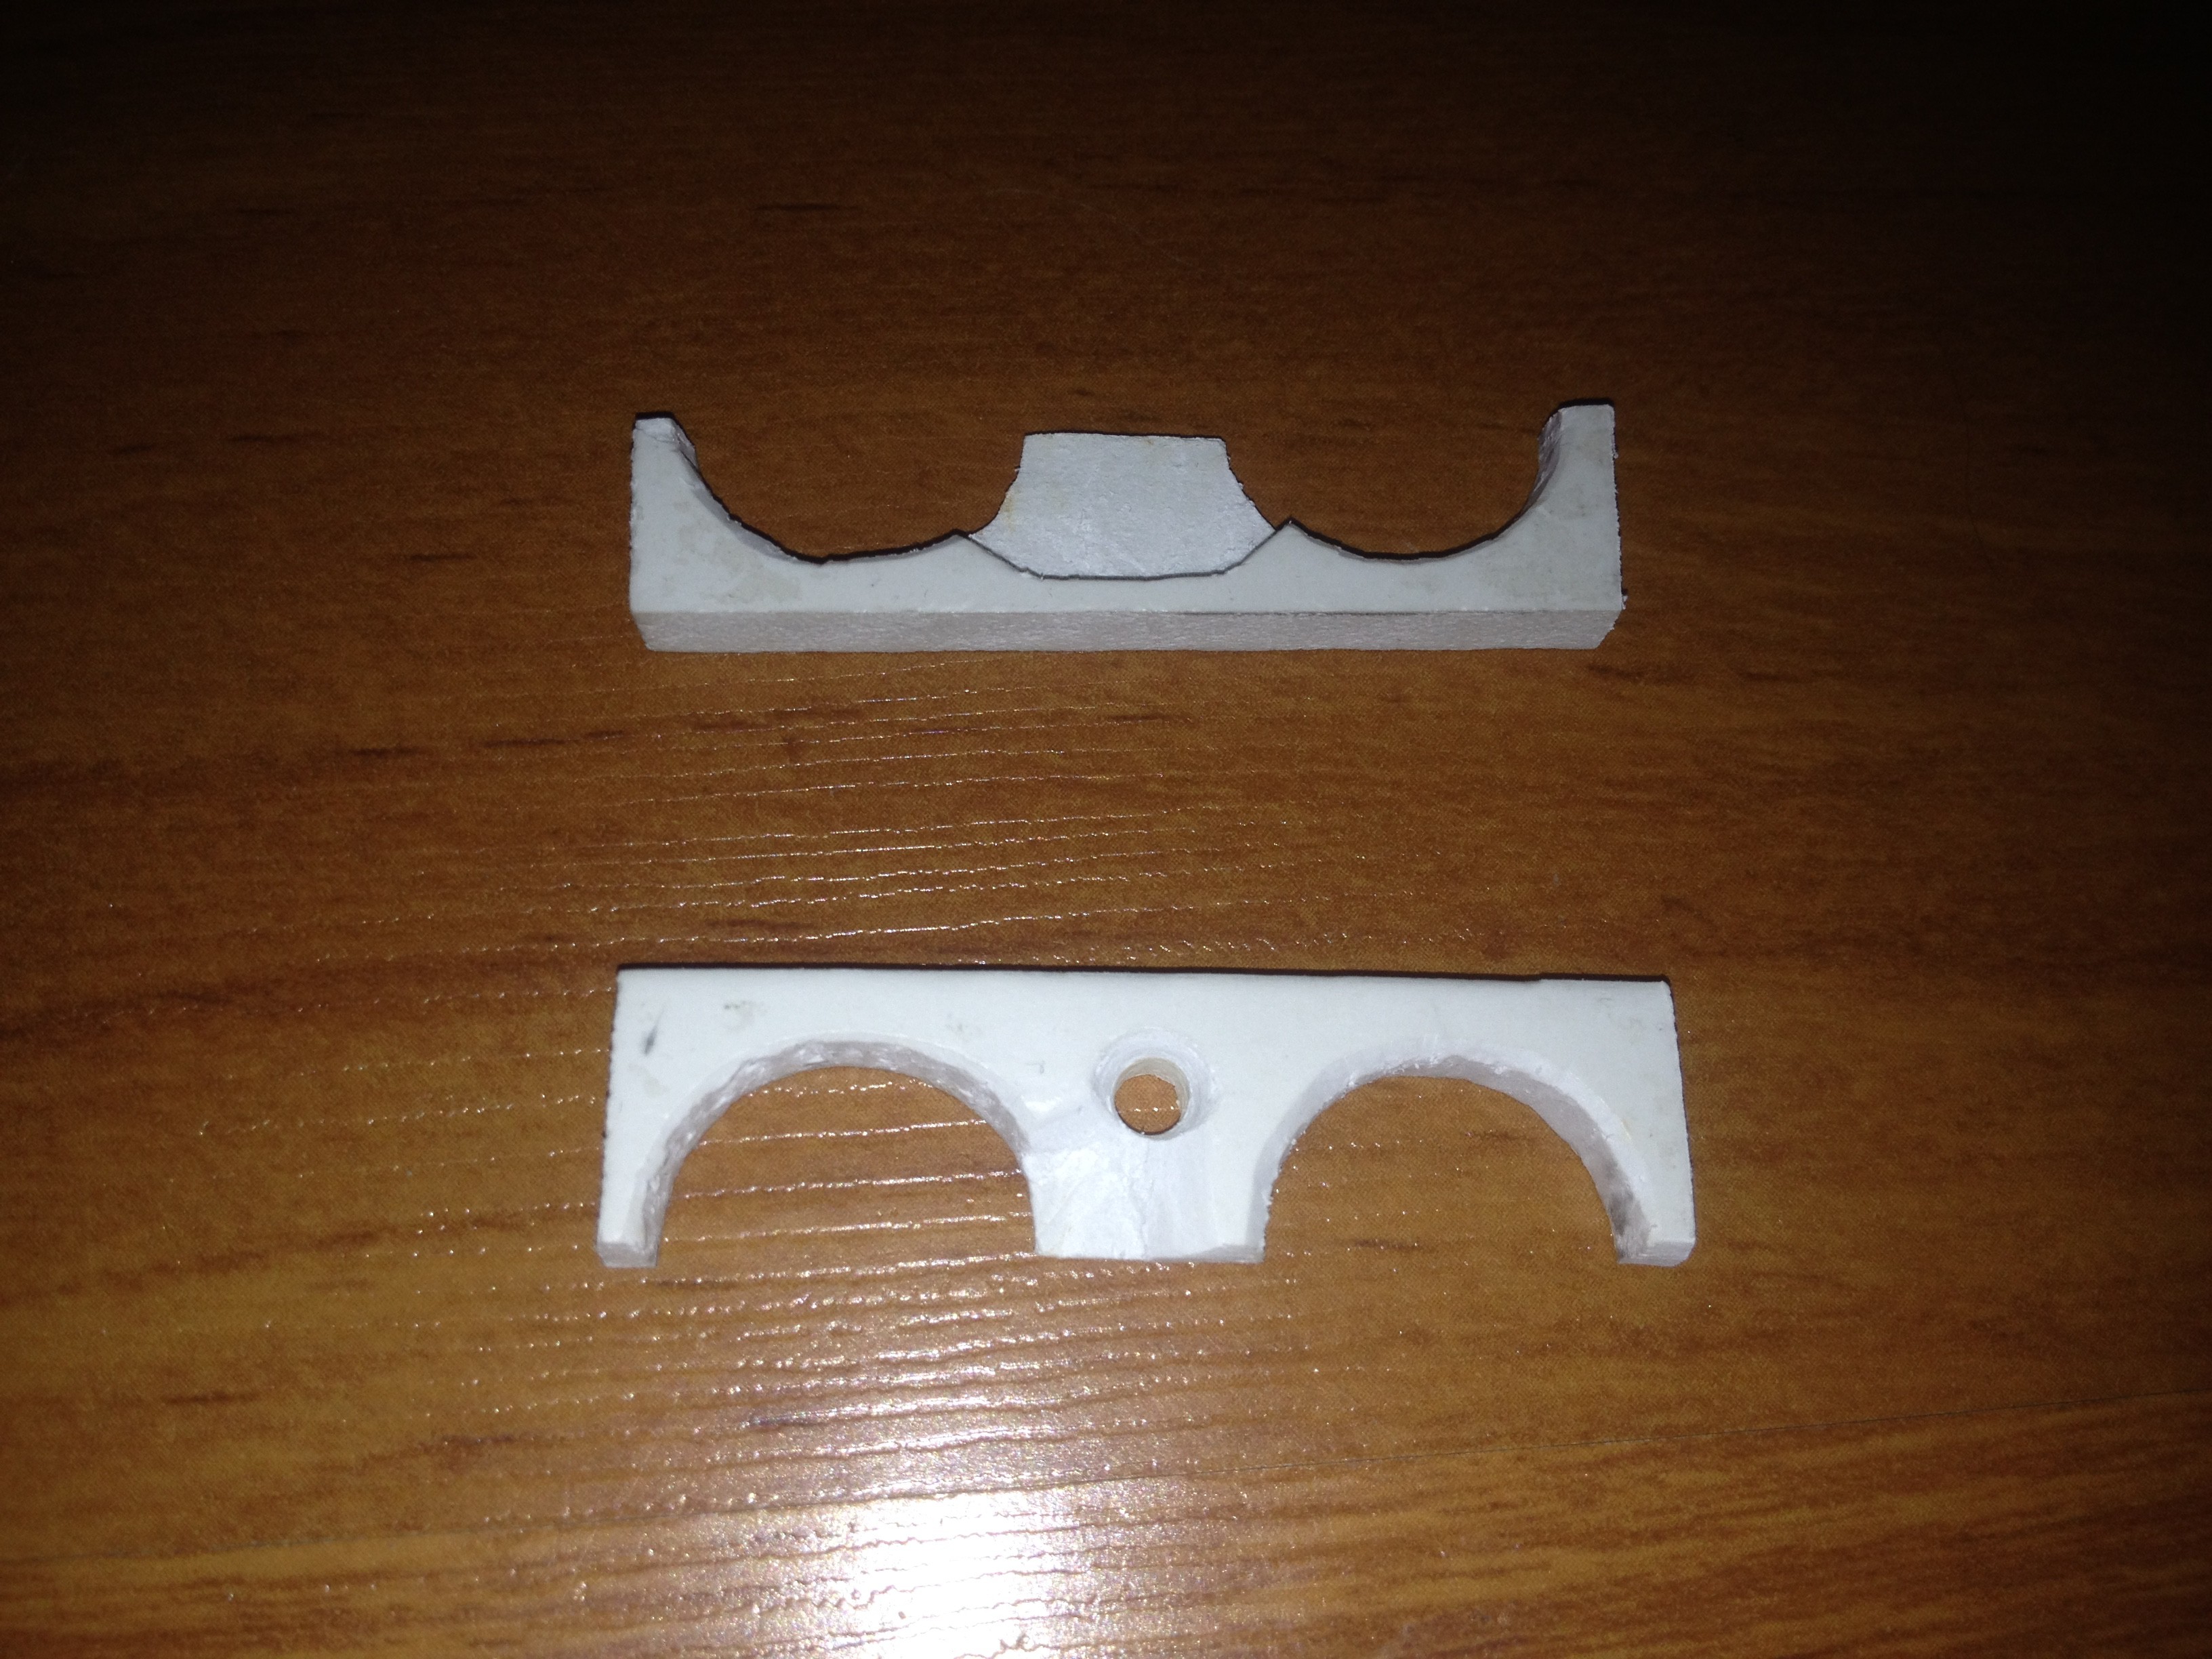
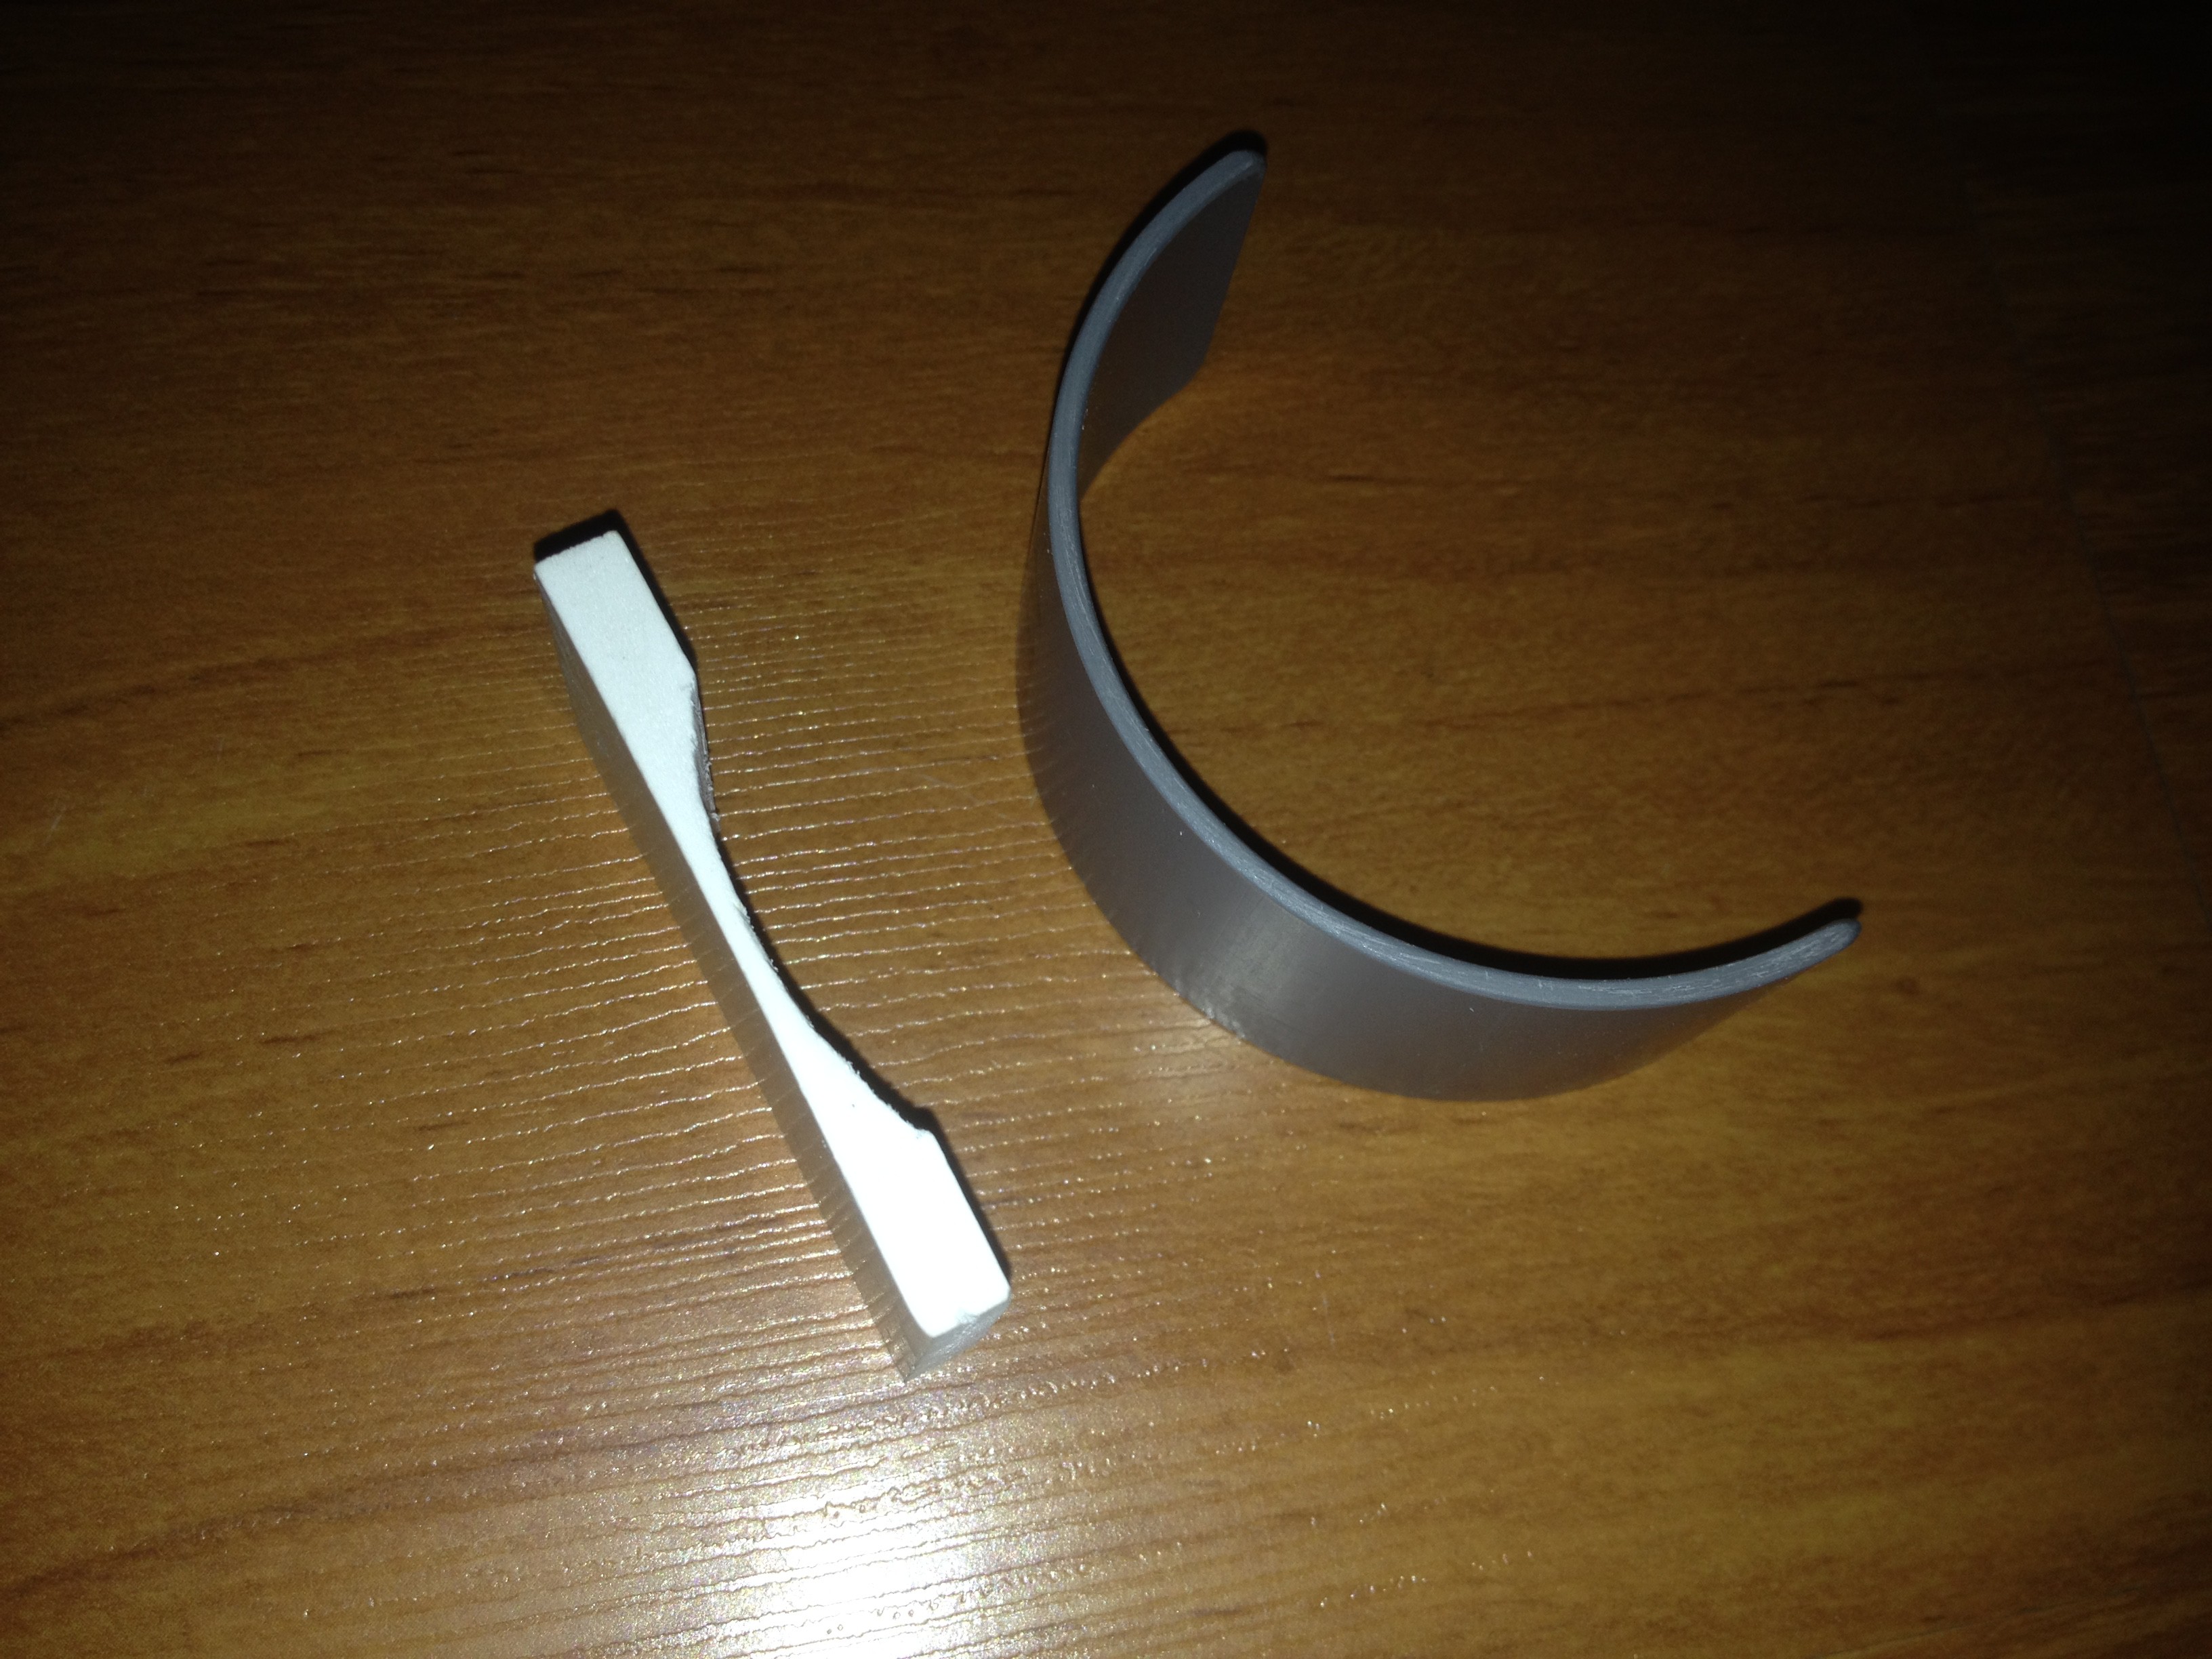
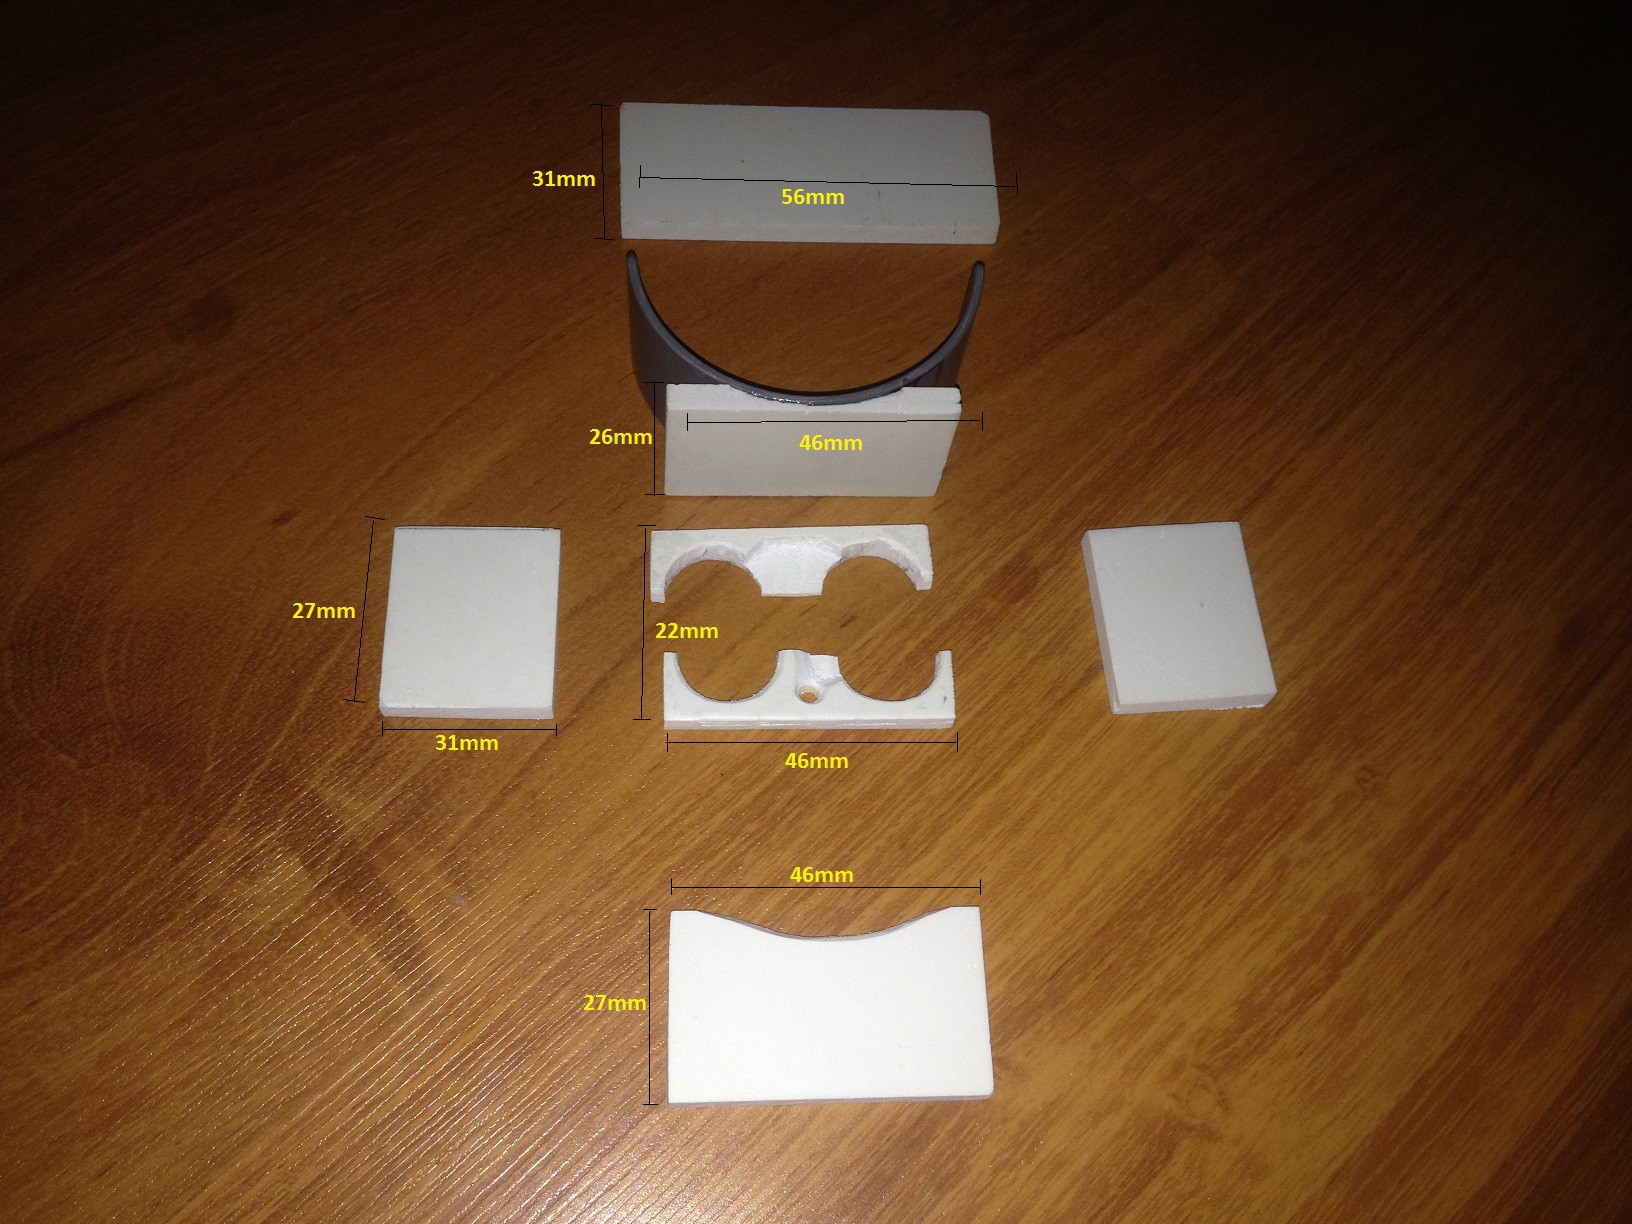
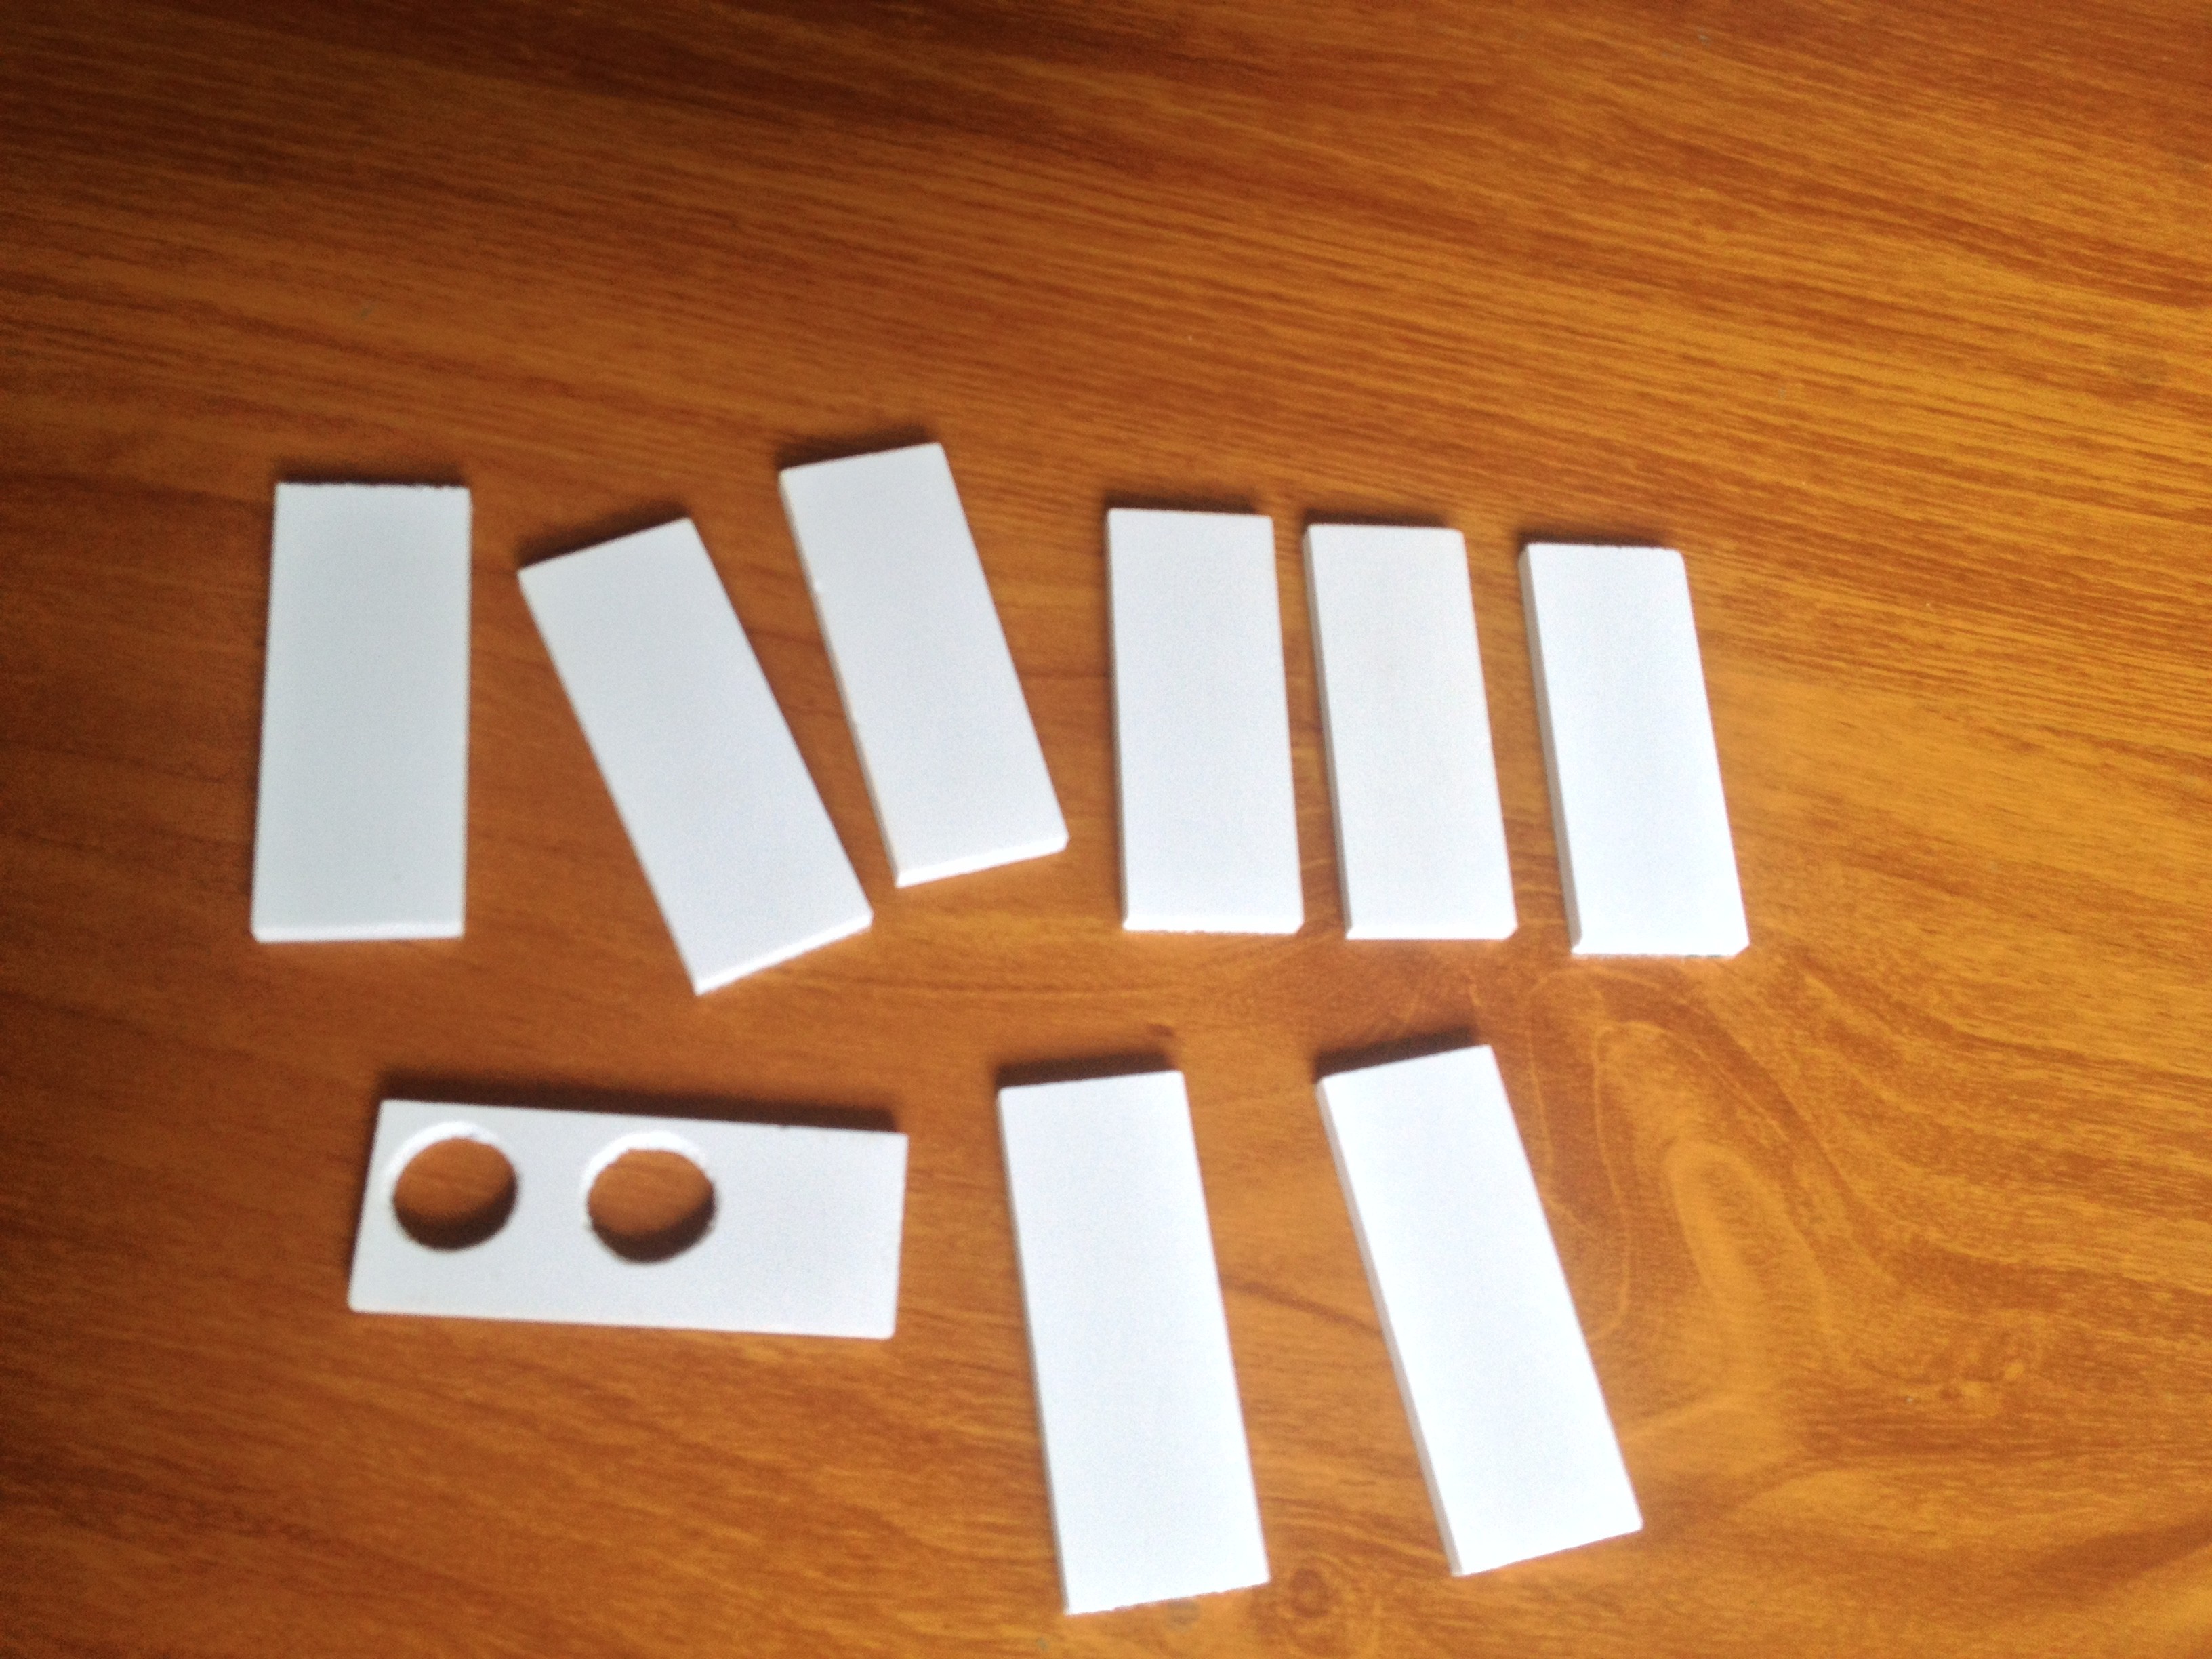
    I have cut some parts, to create some products.


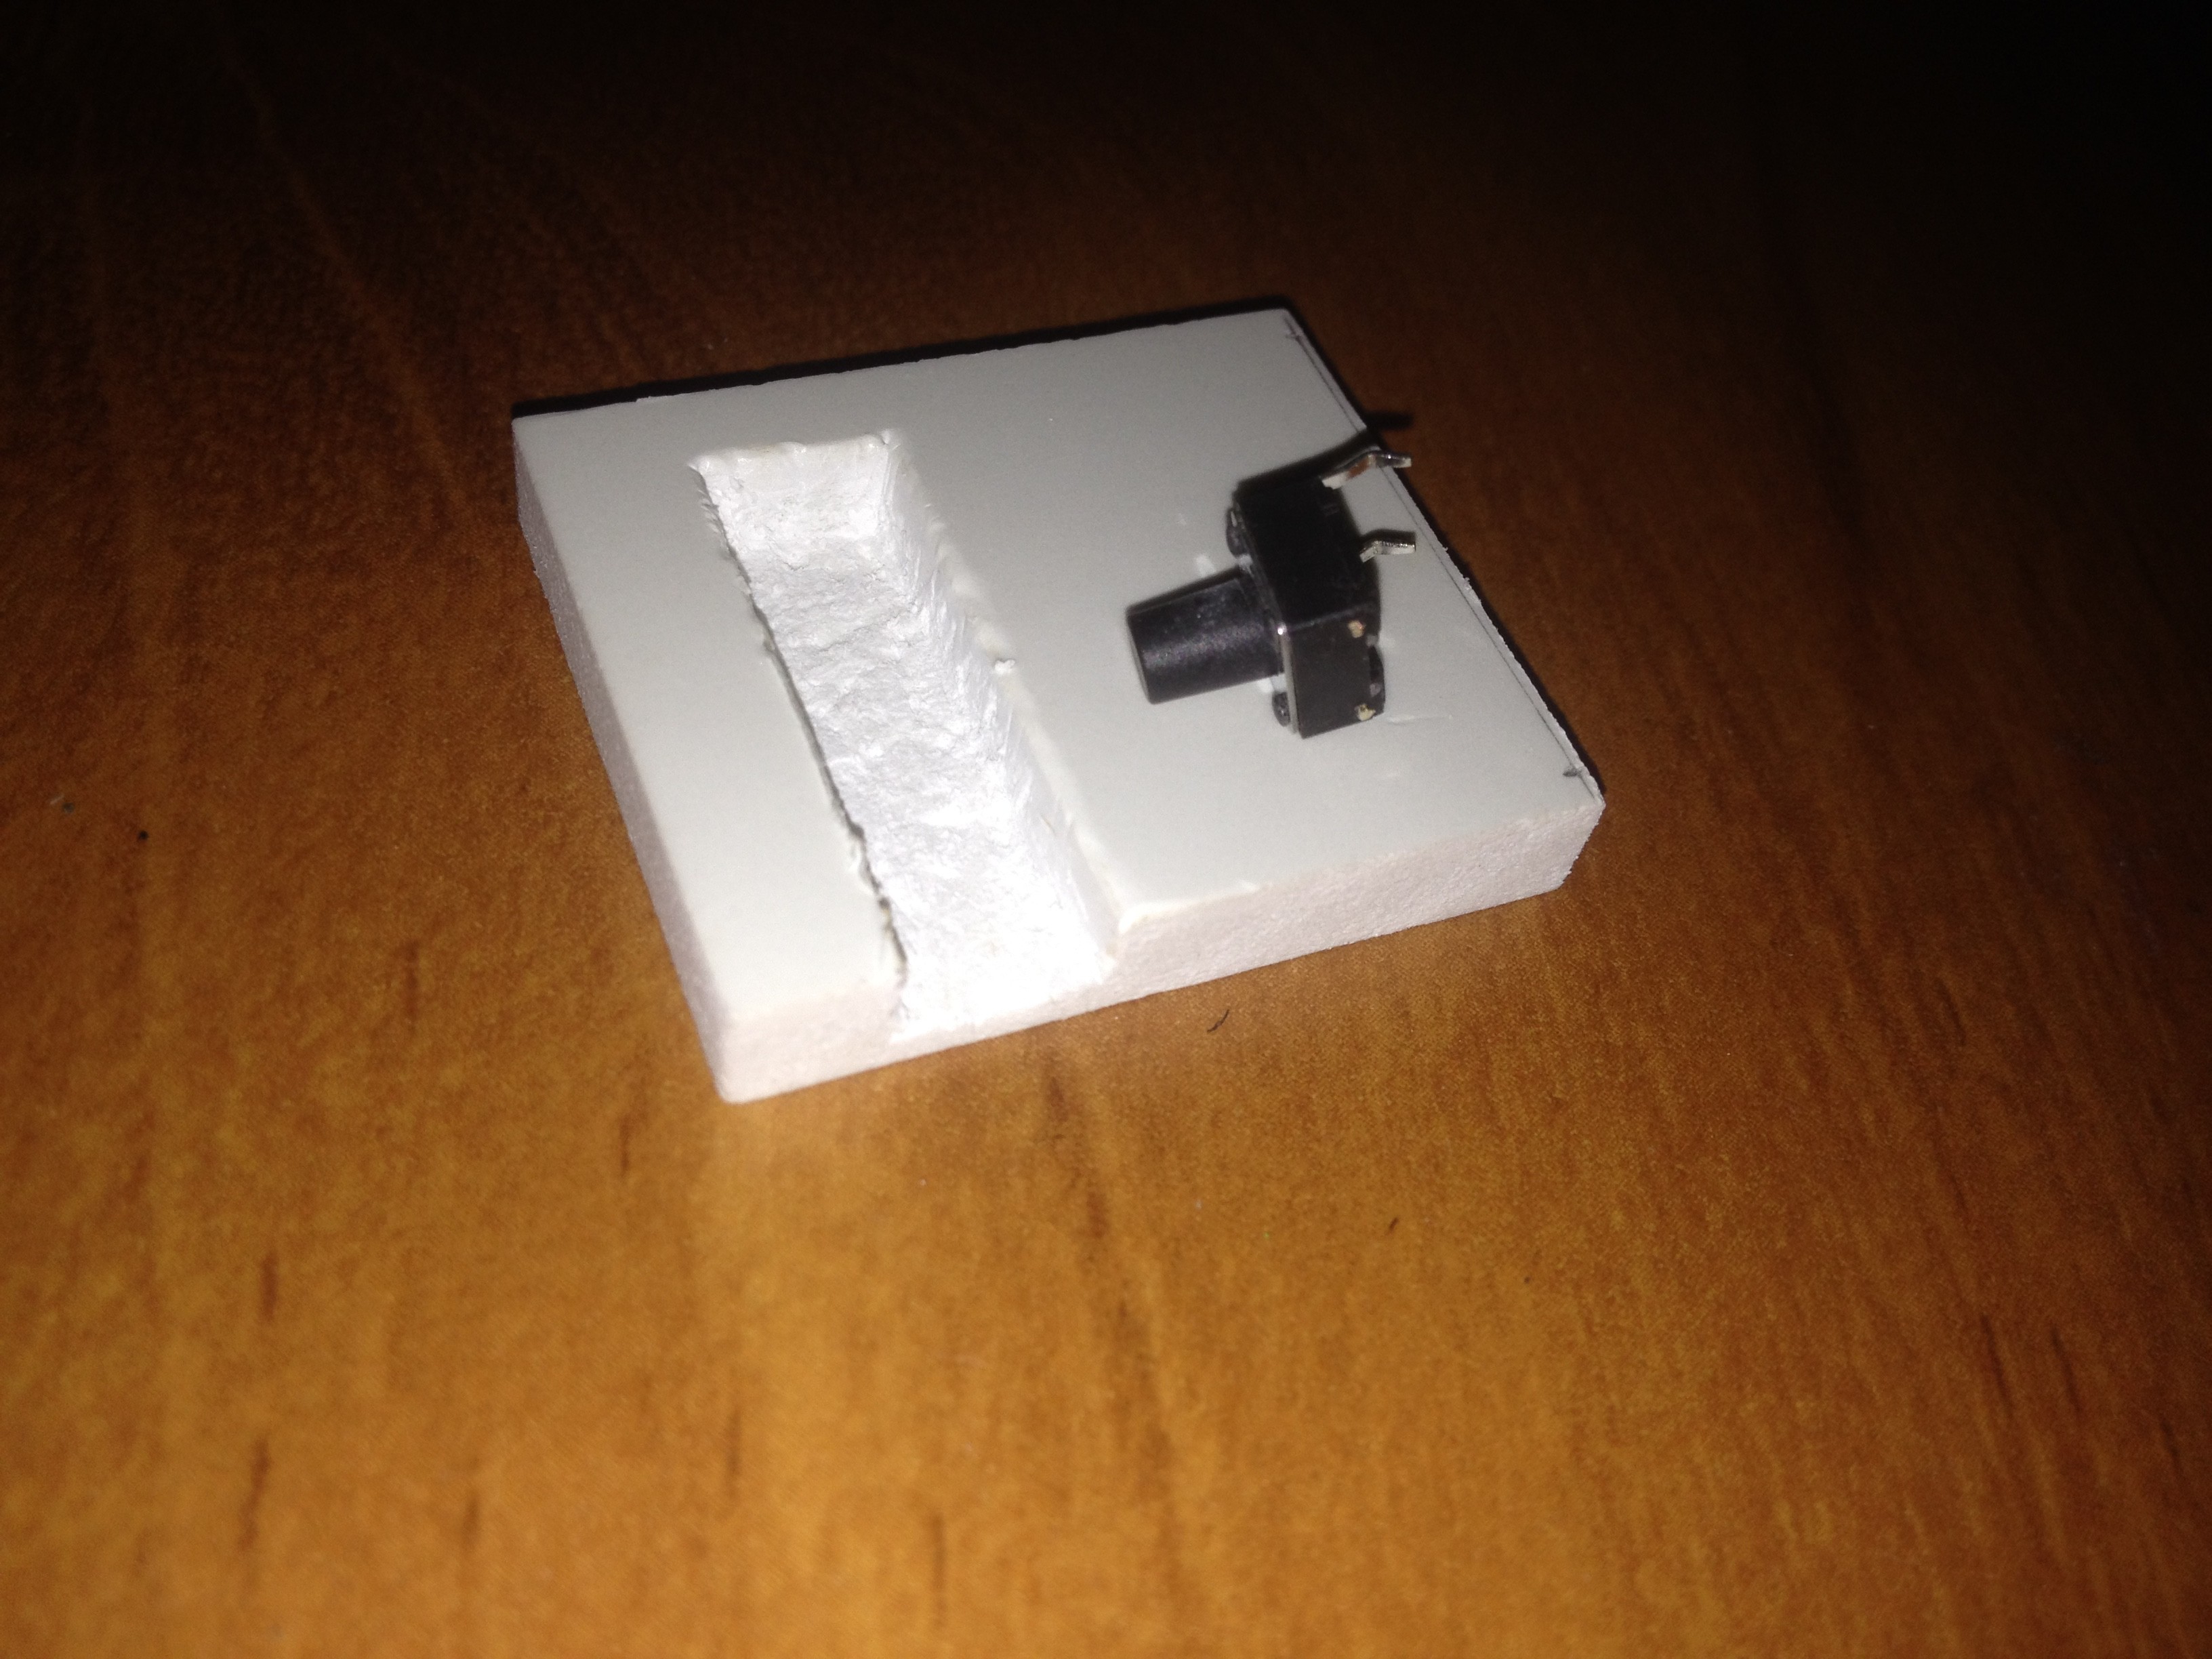
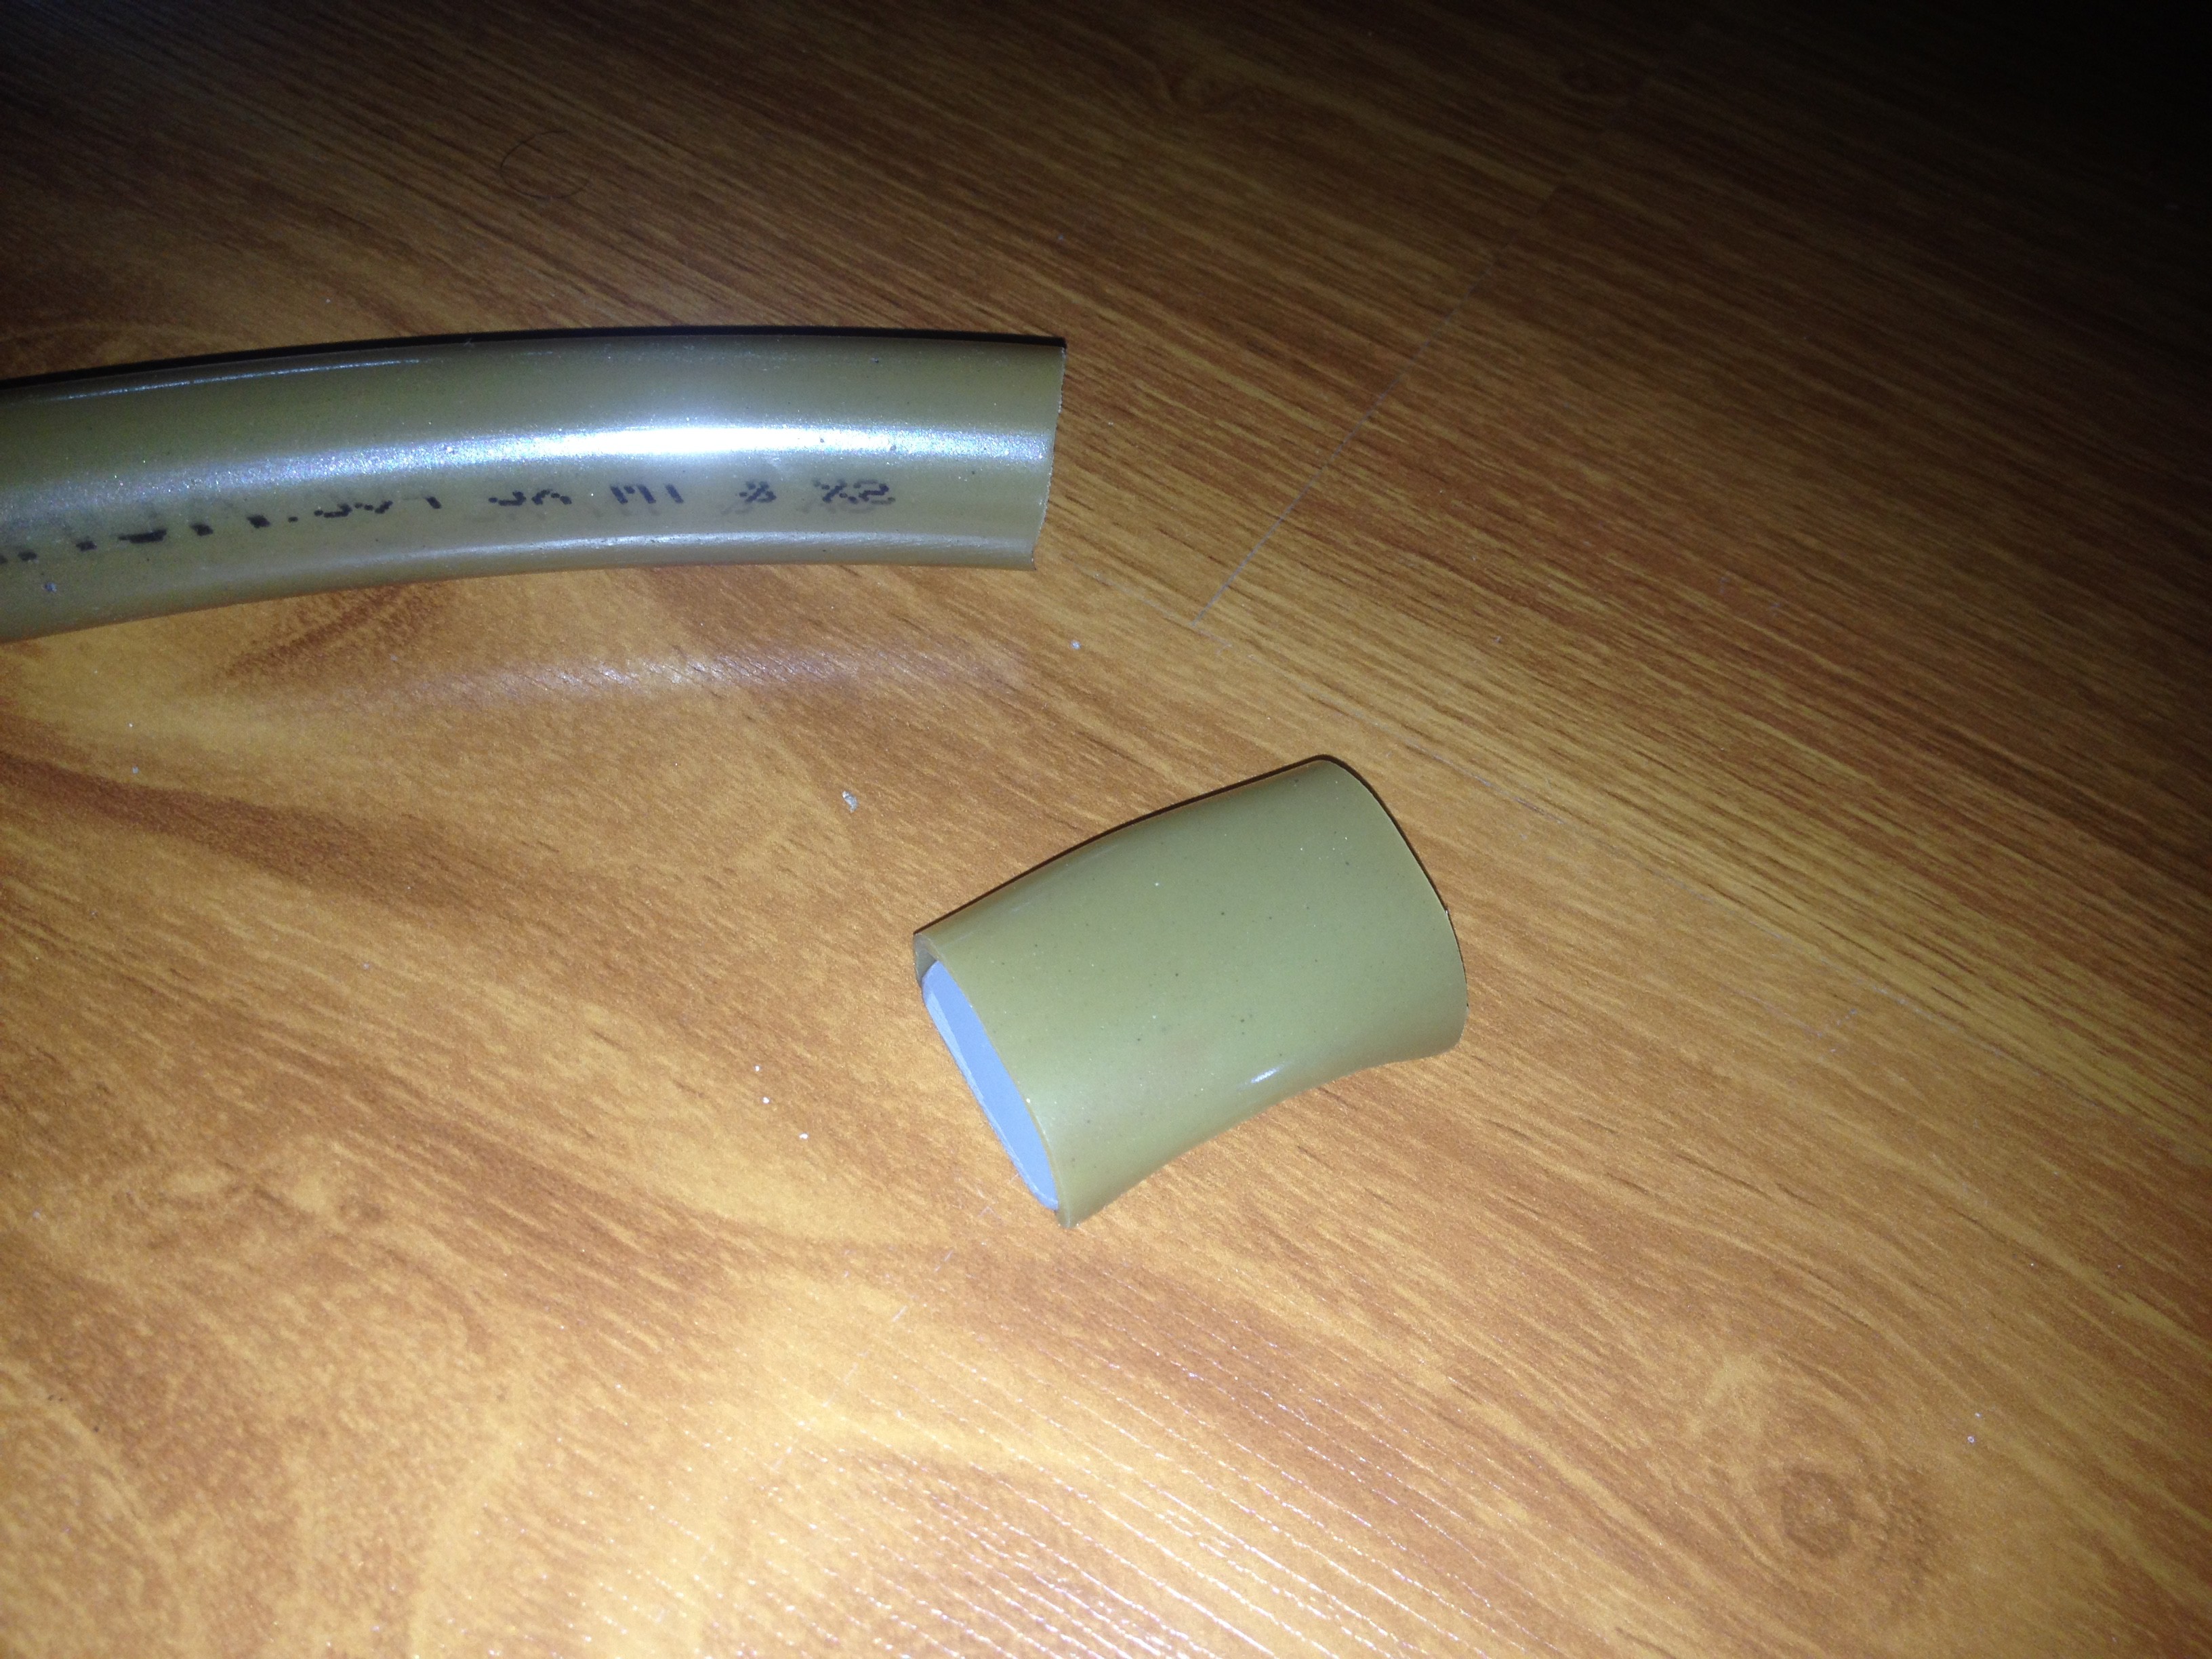
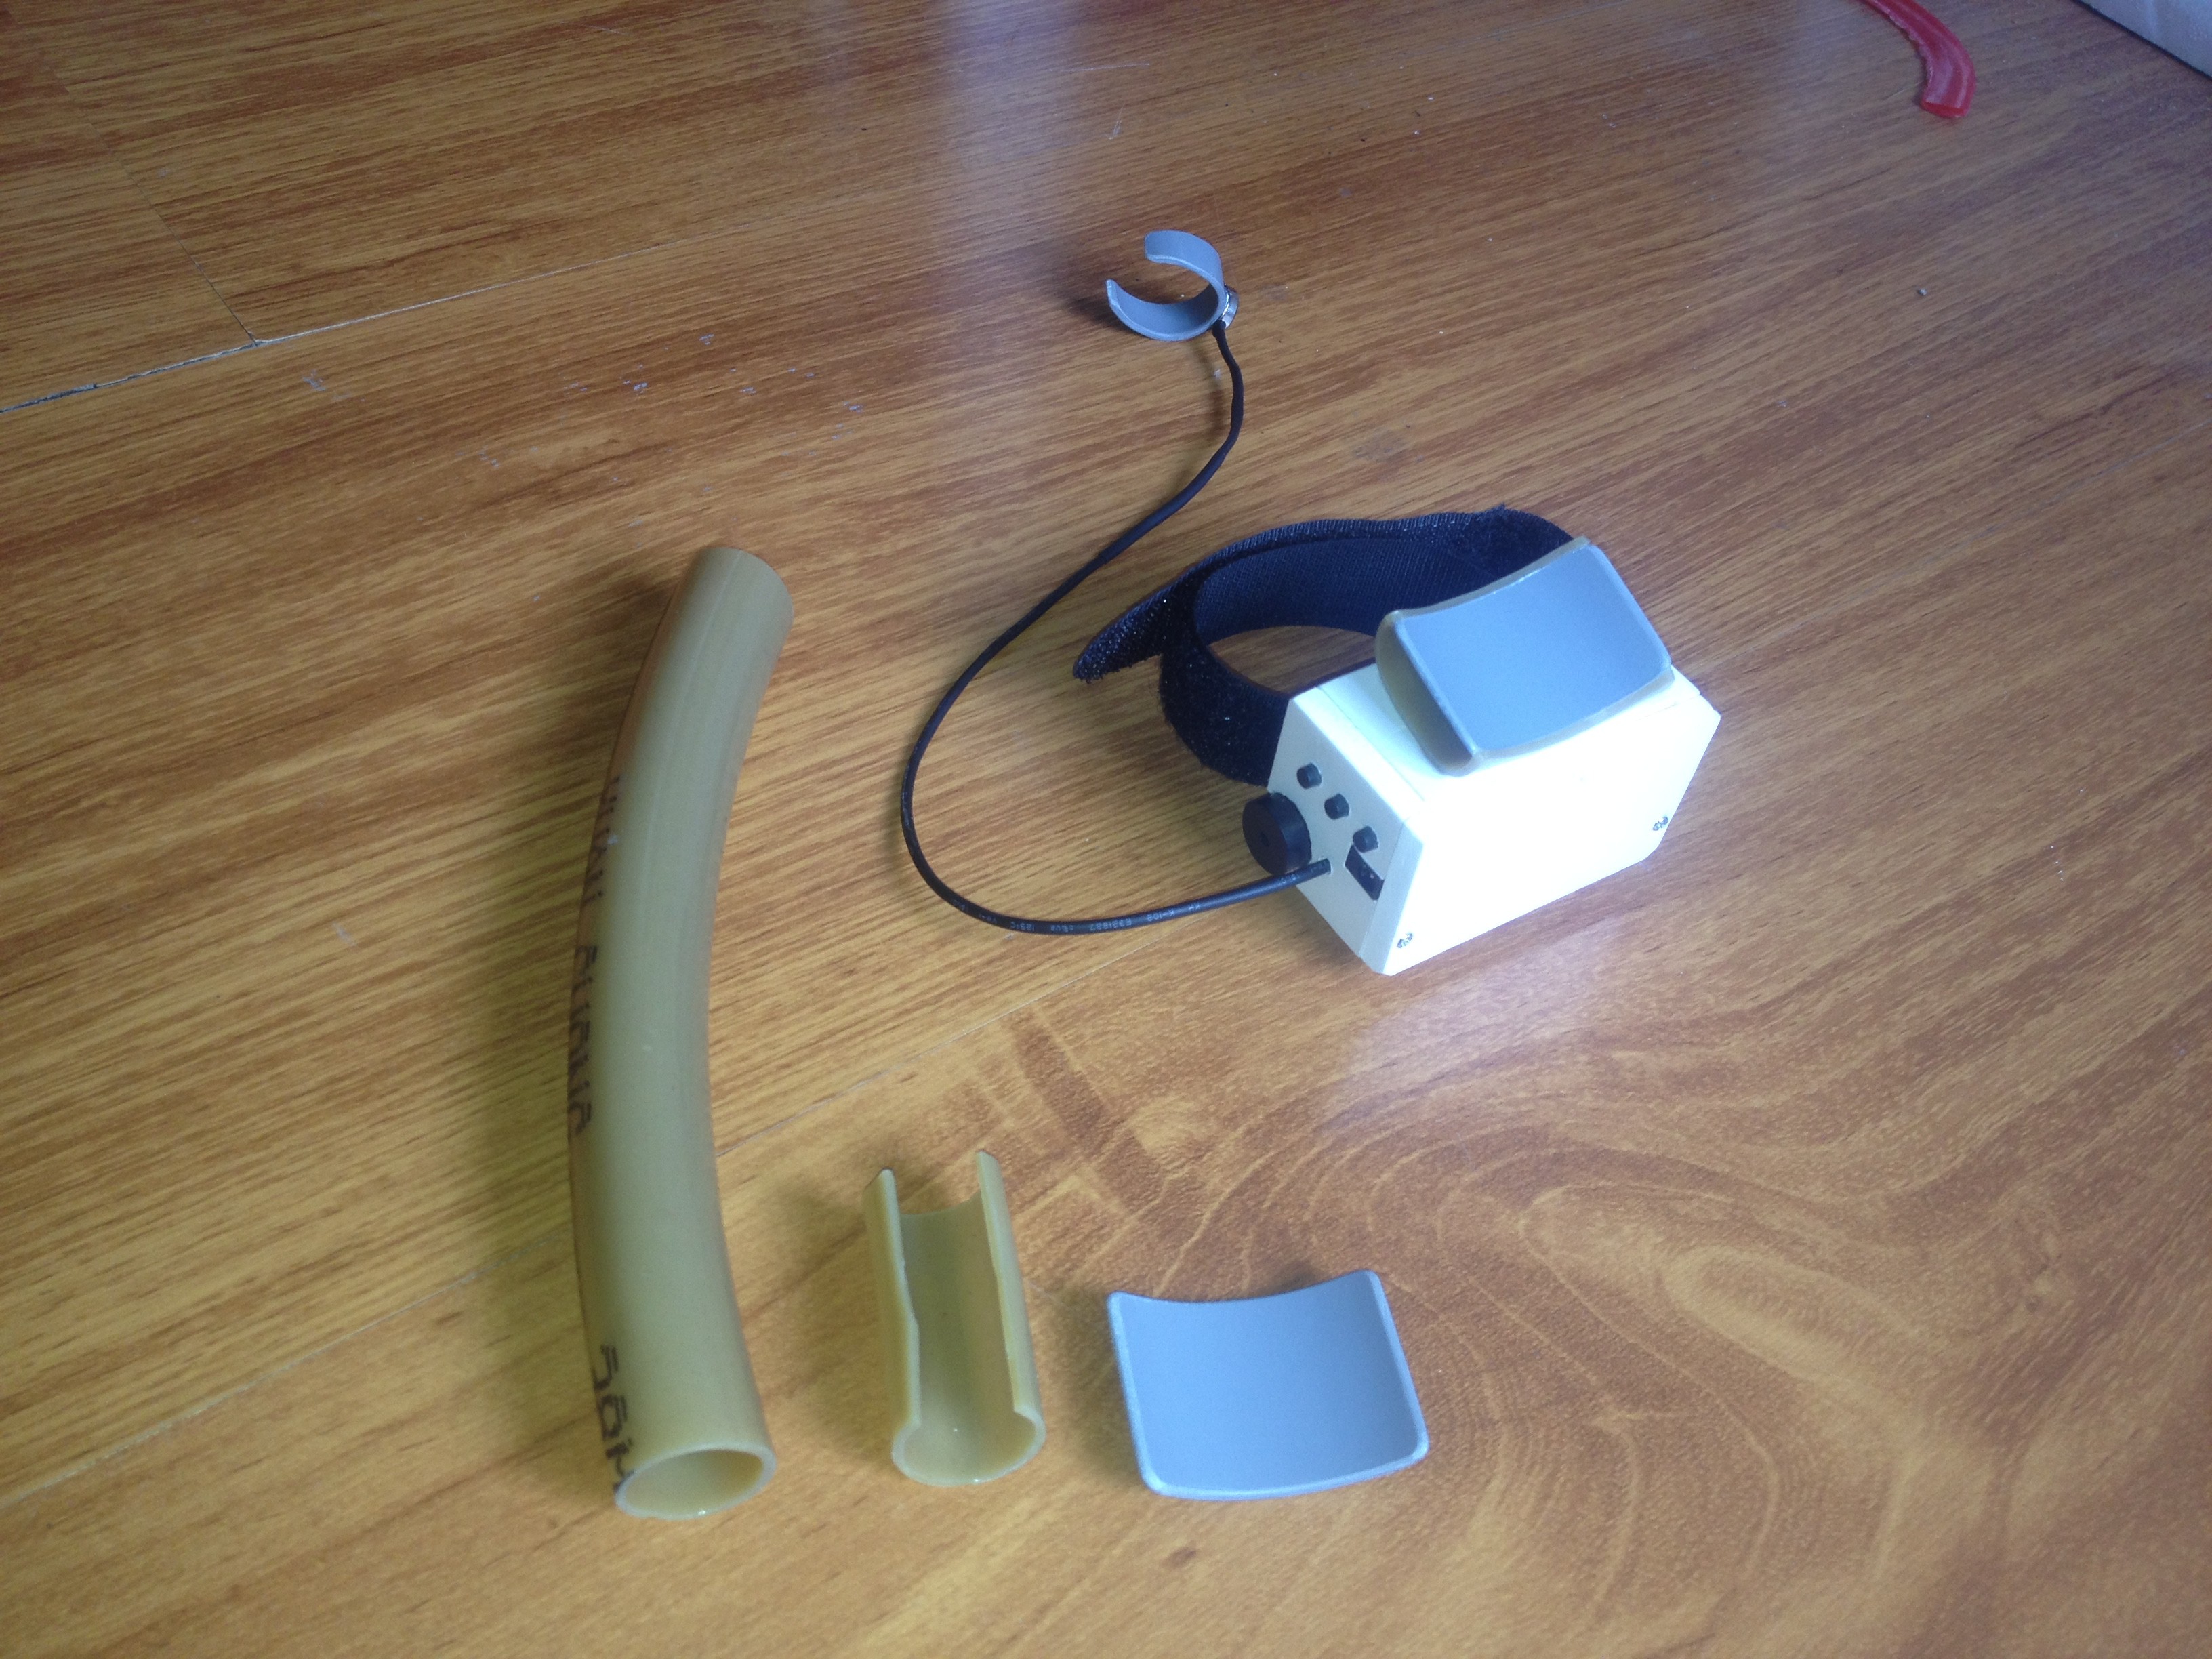
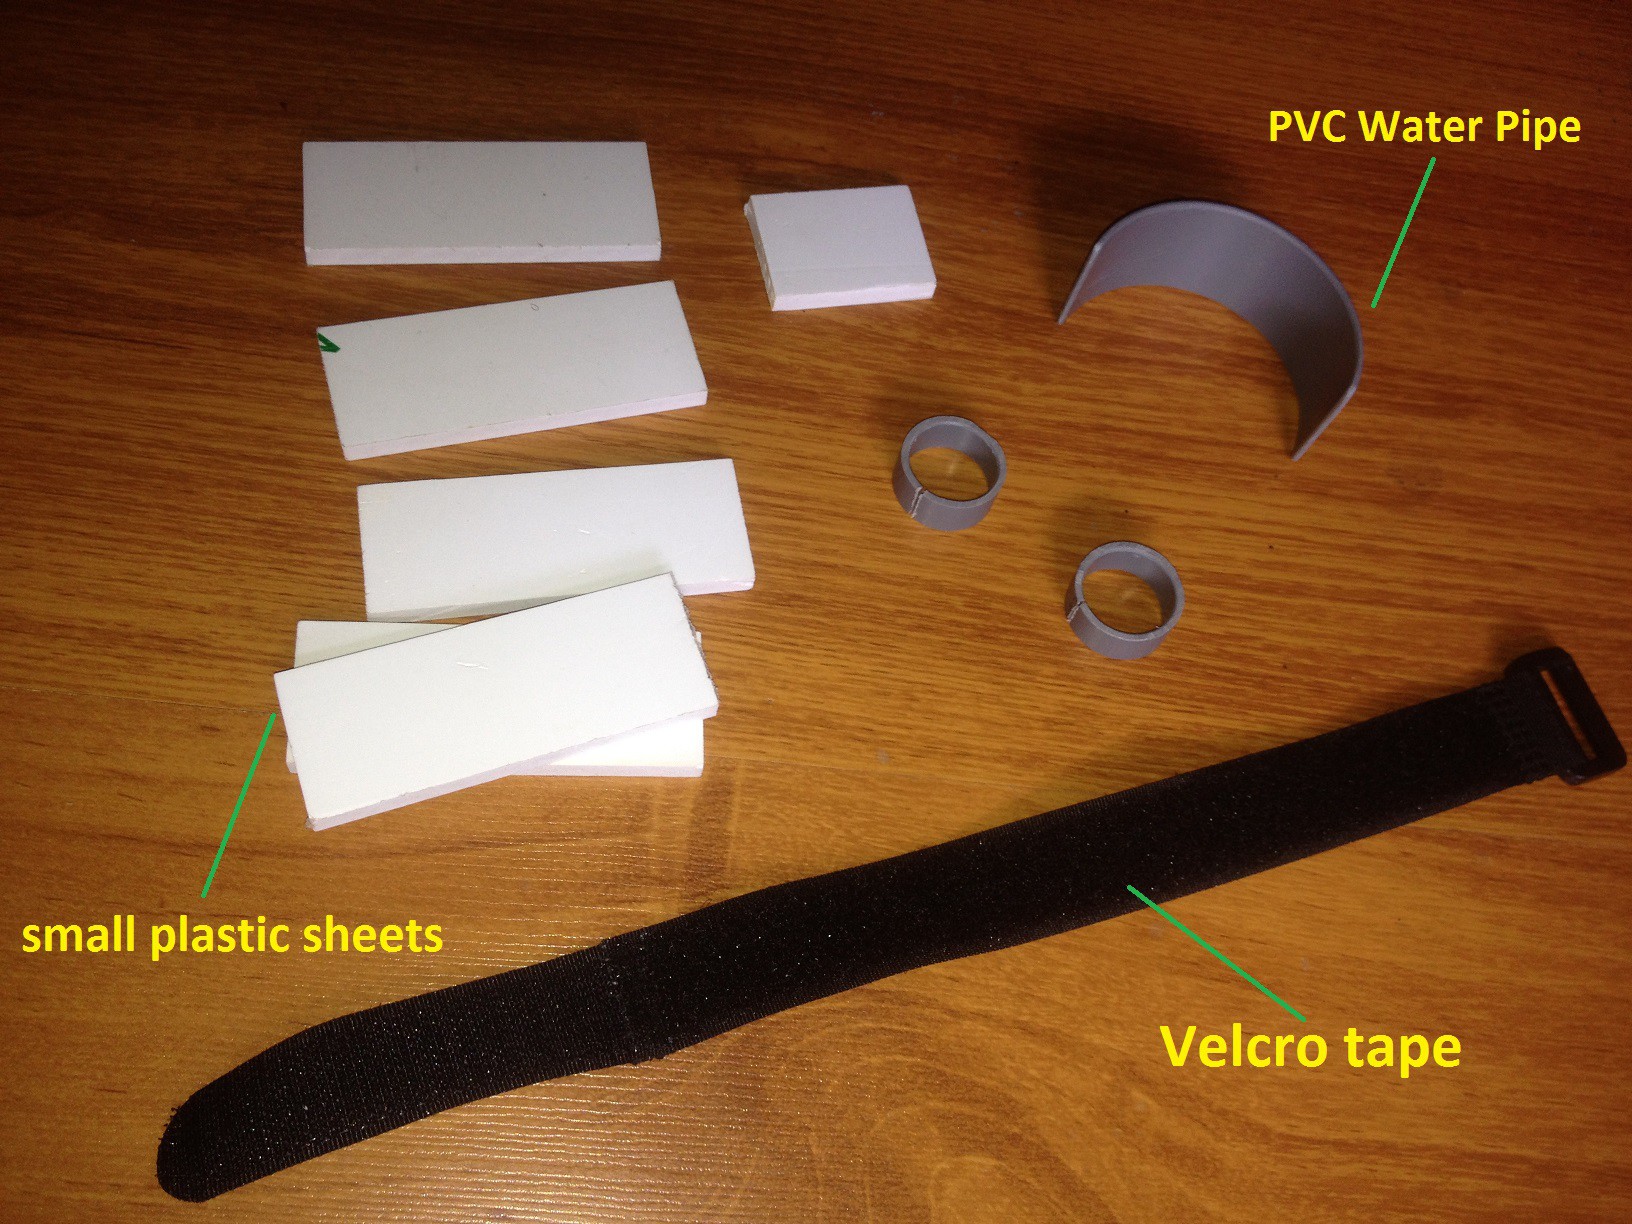
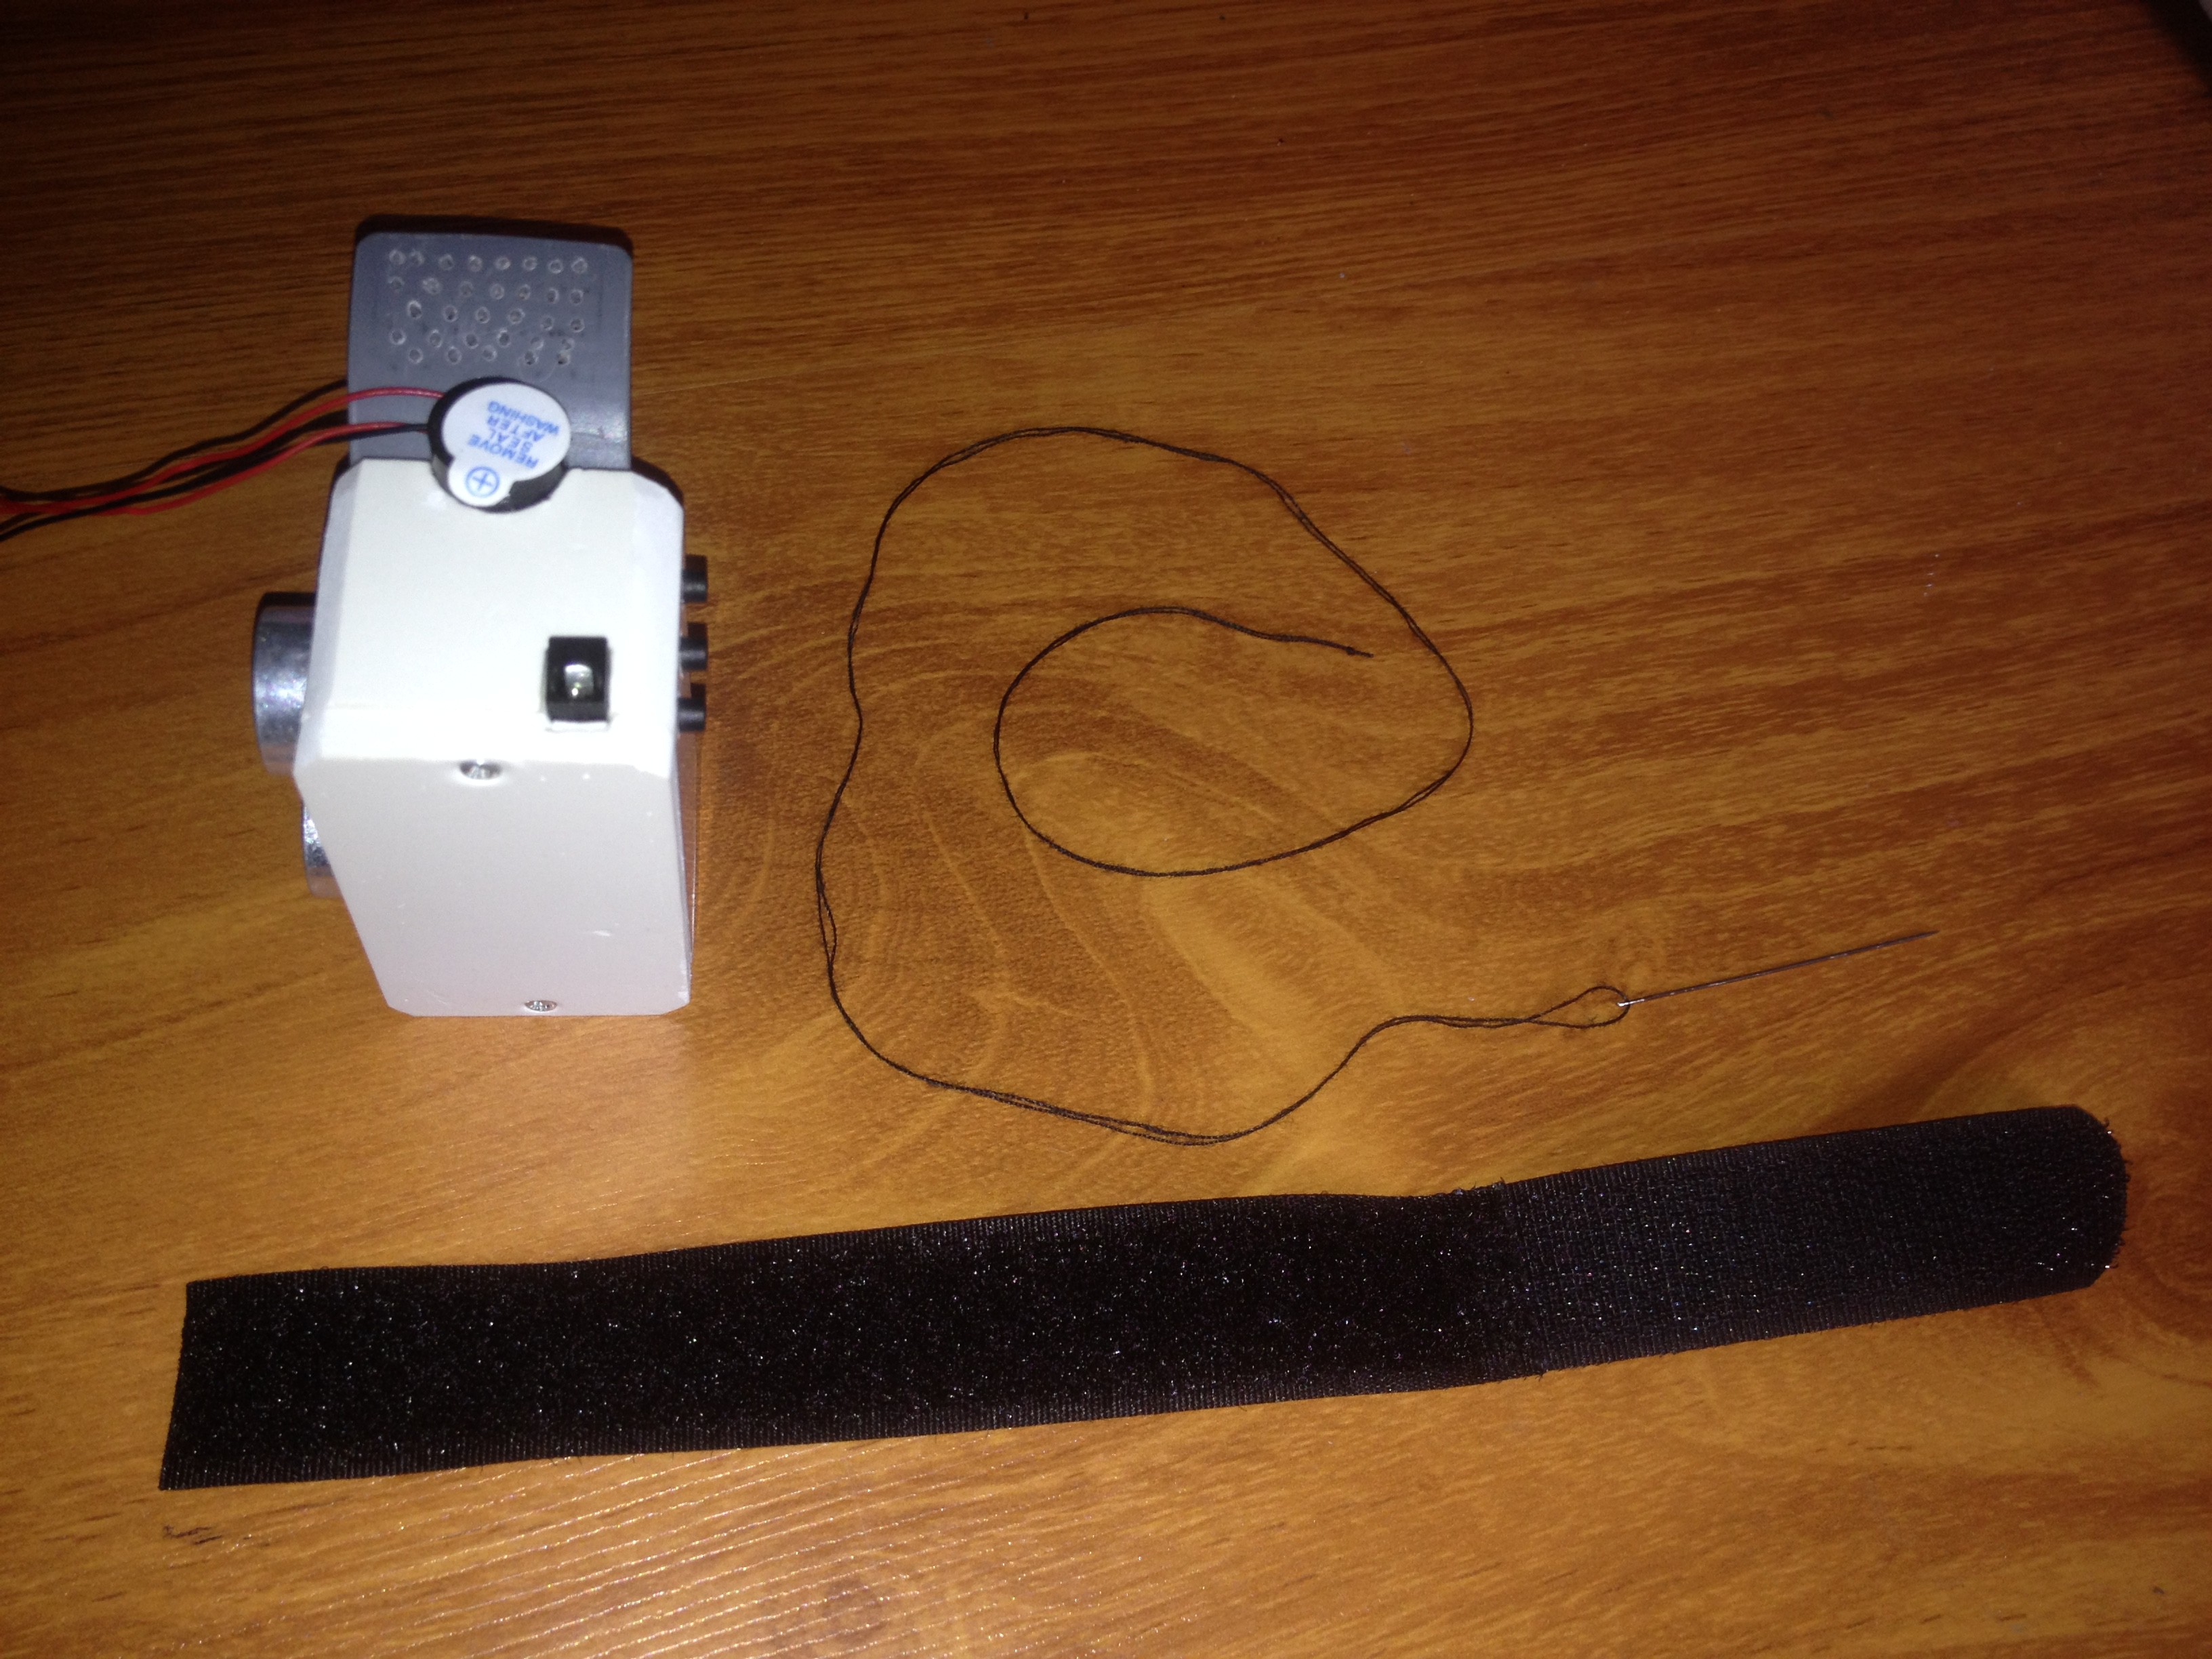
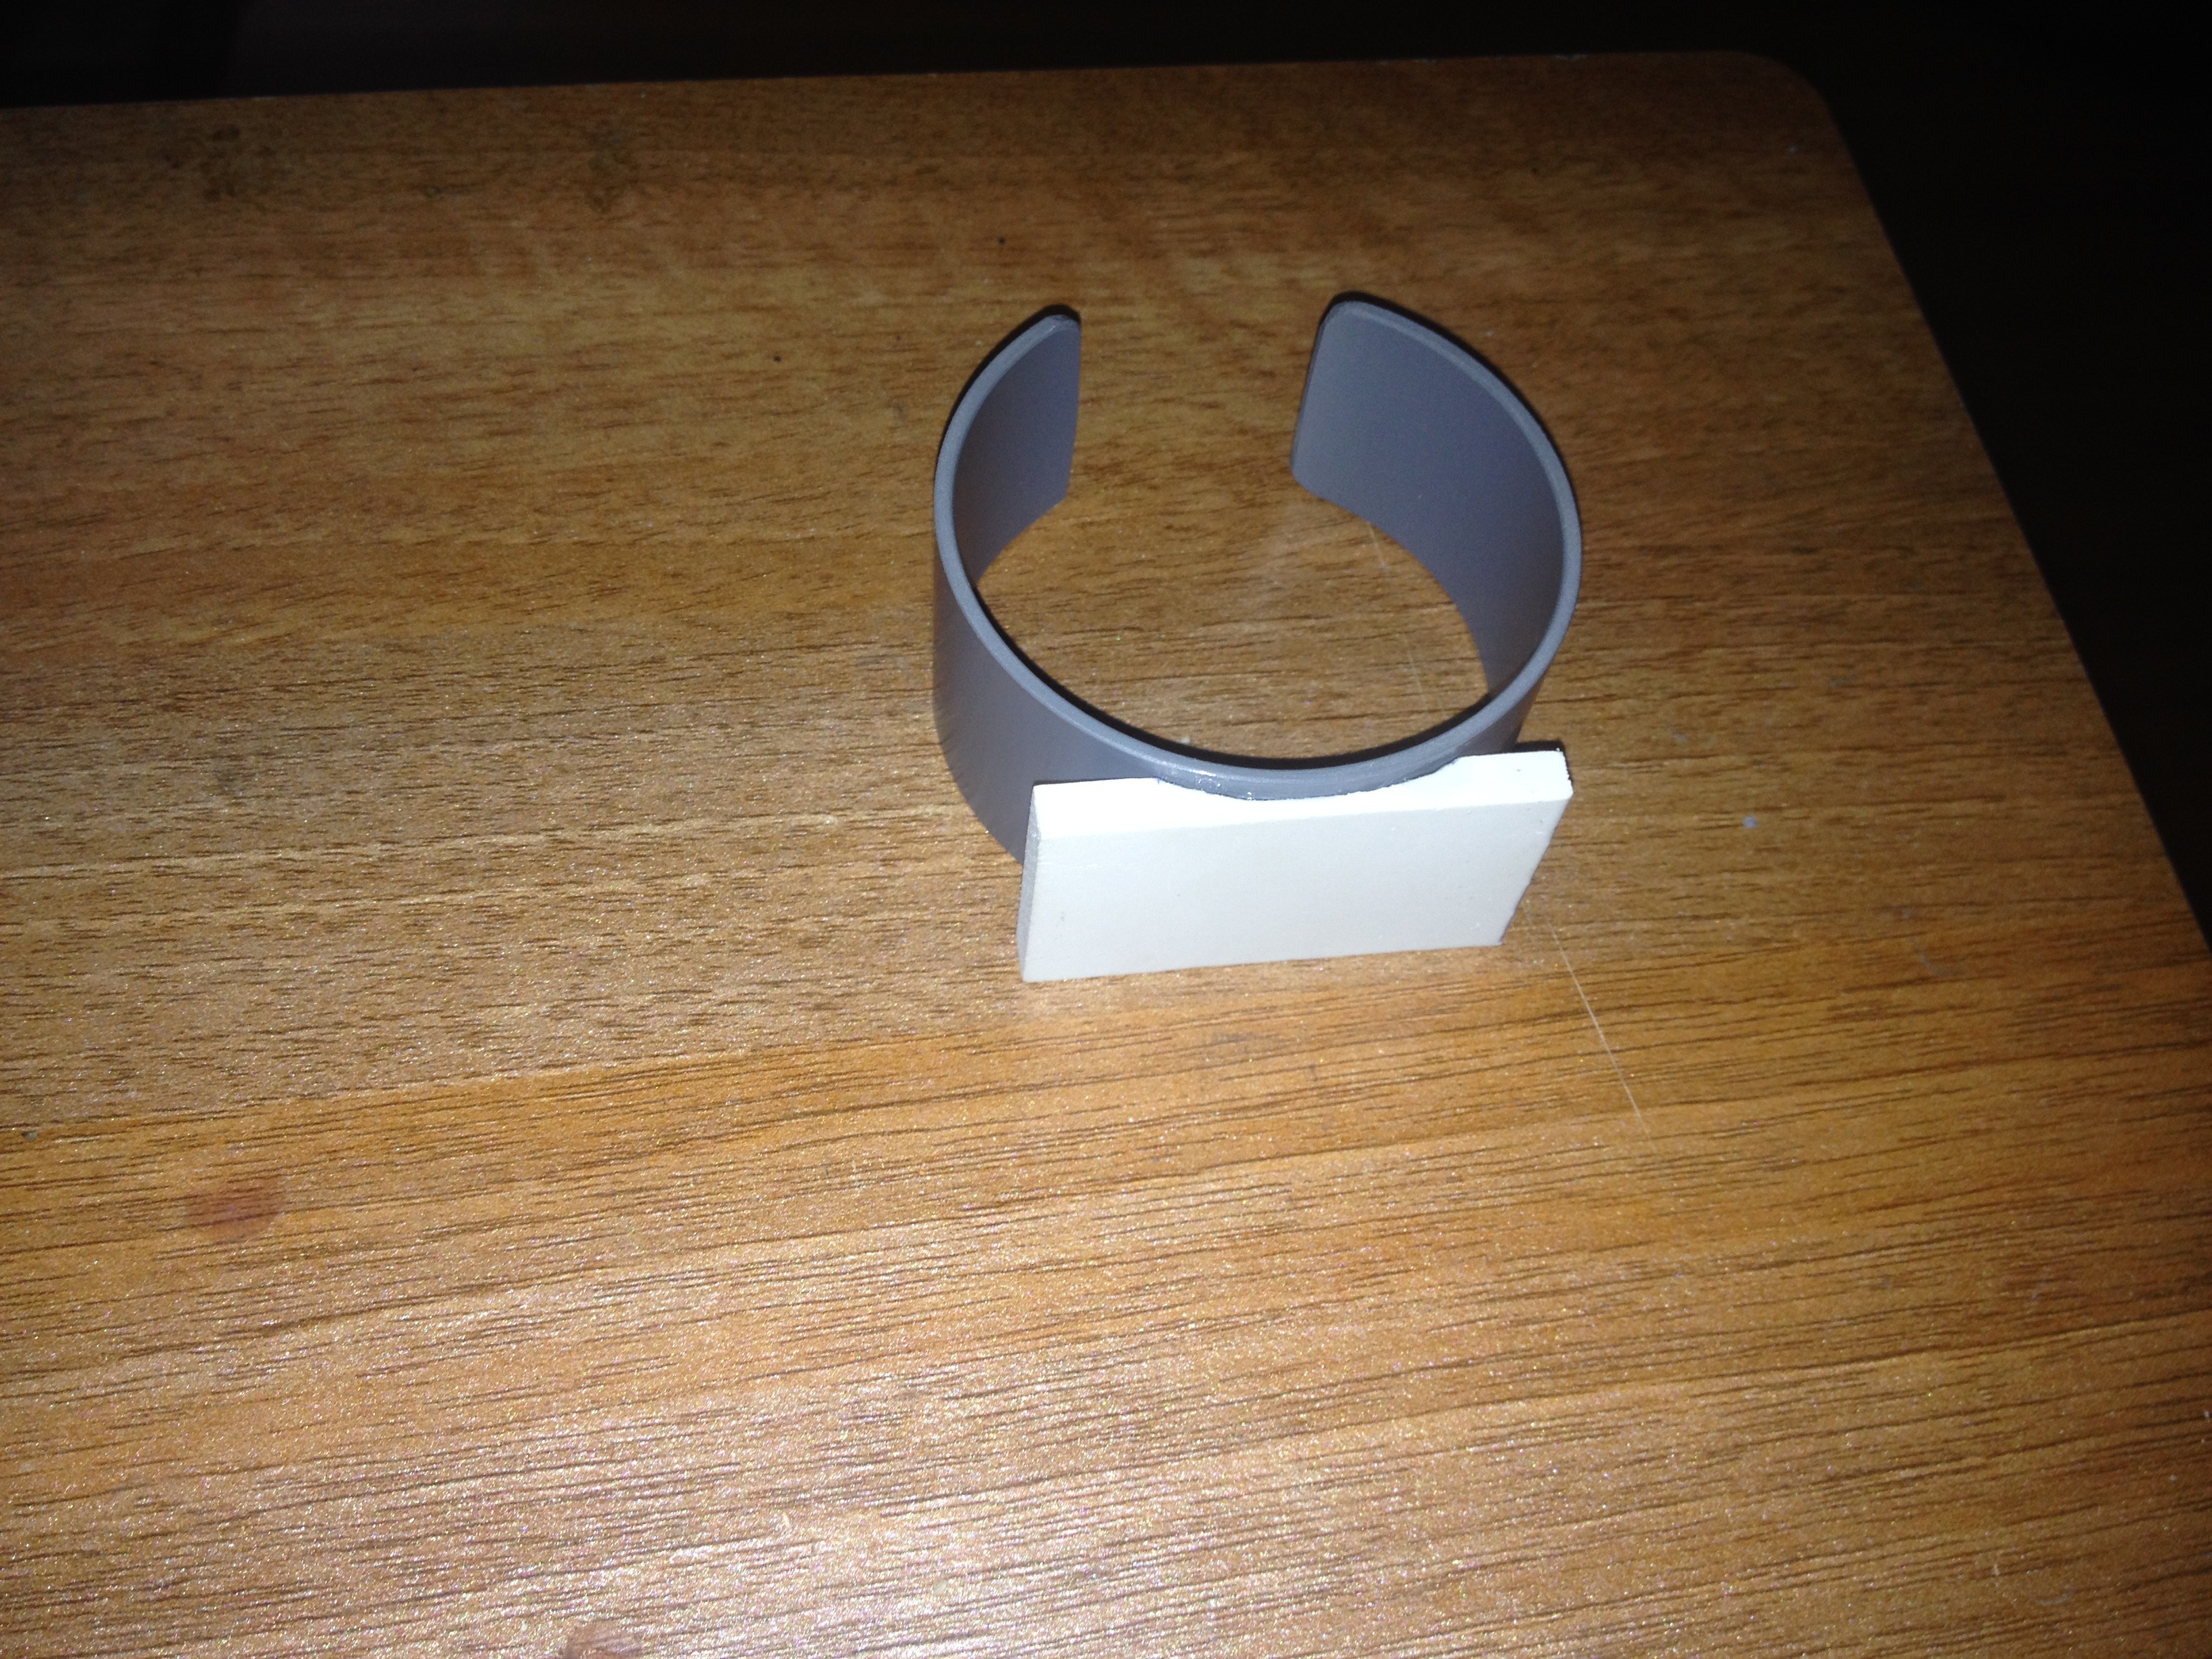
    Parts needed for a bracelet. With "Velcro tape", the bracelet will be more flexible.


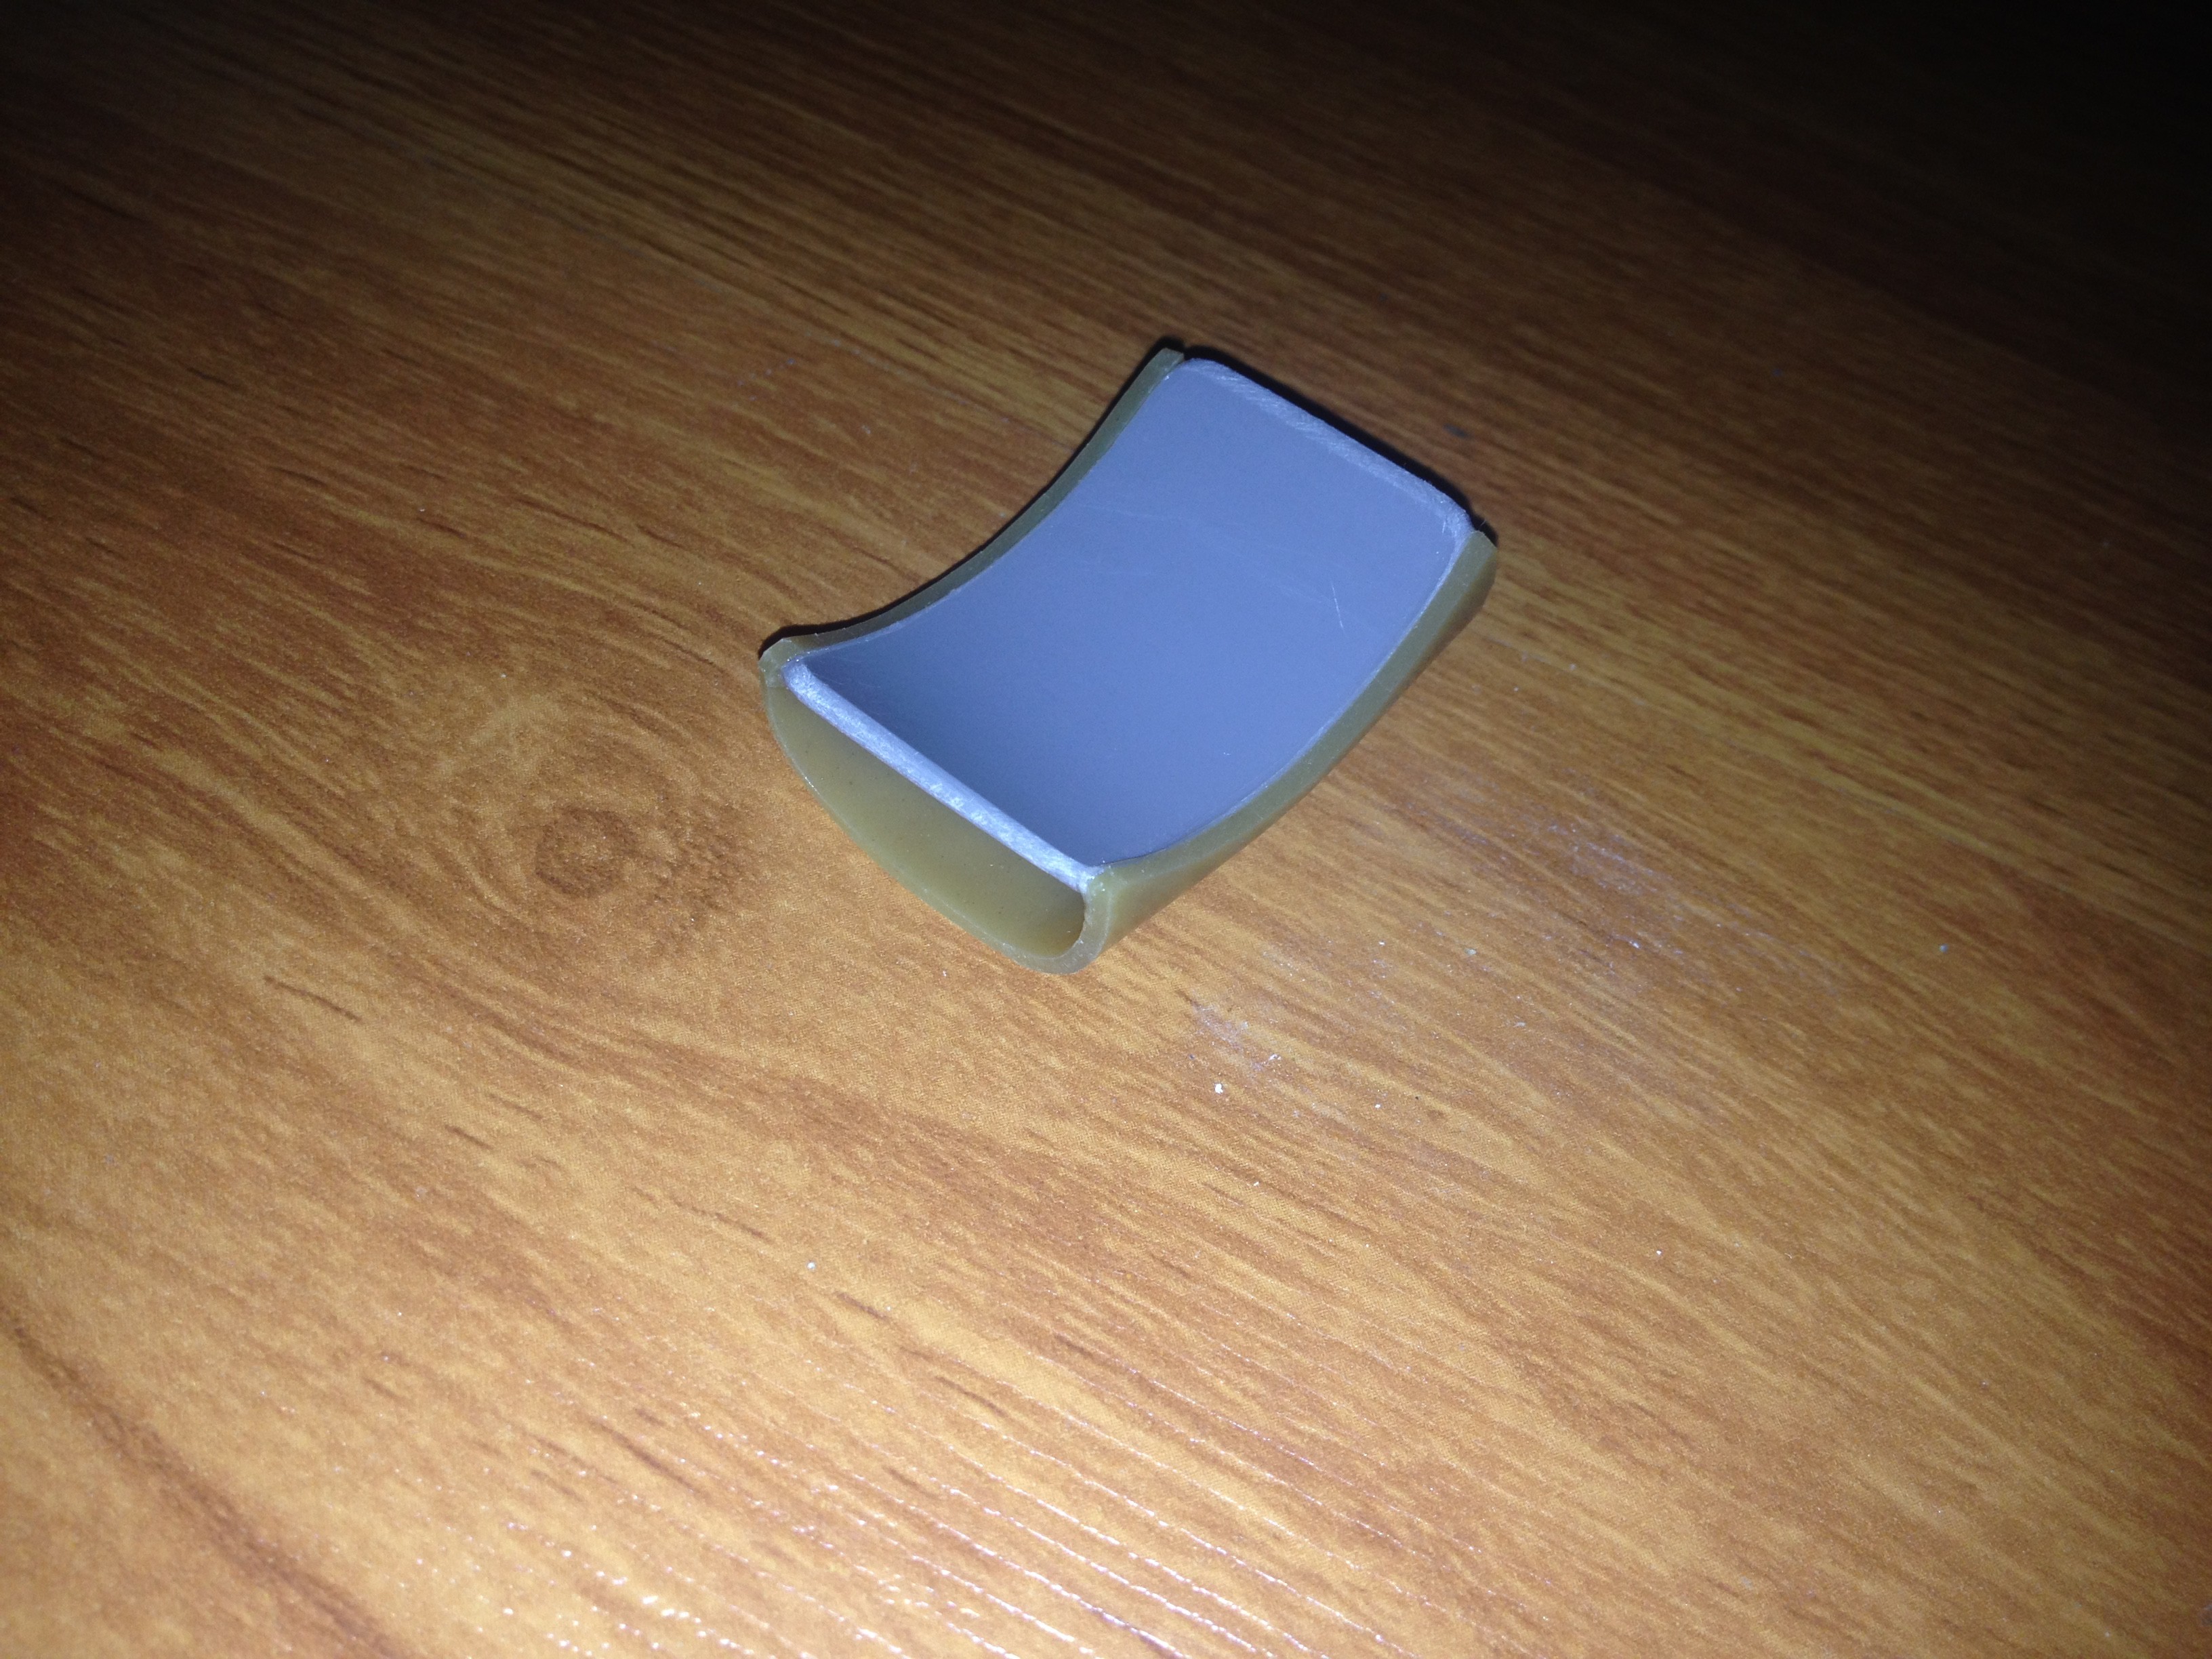
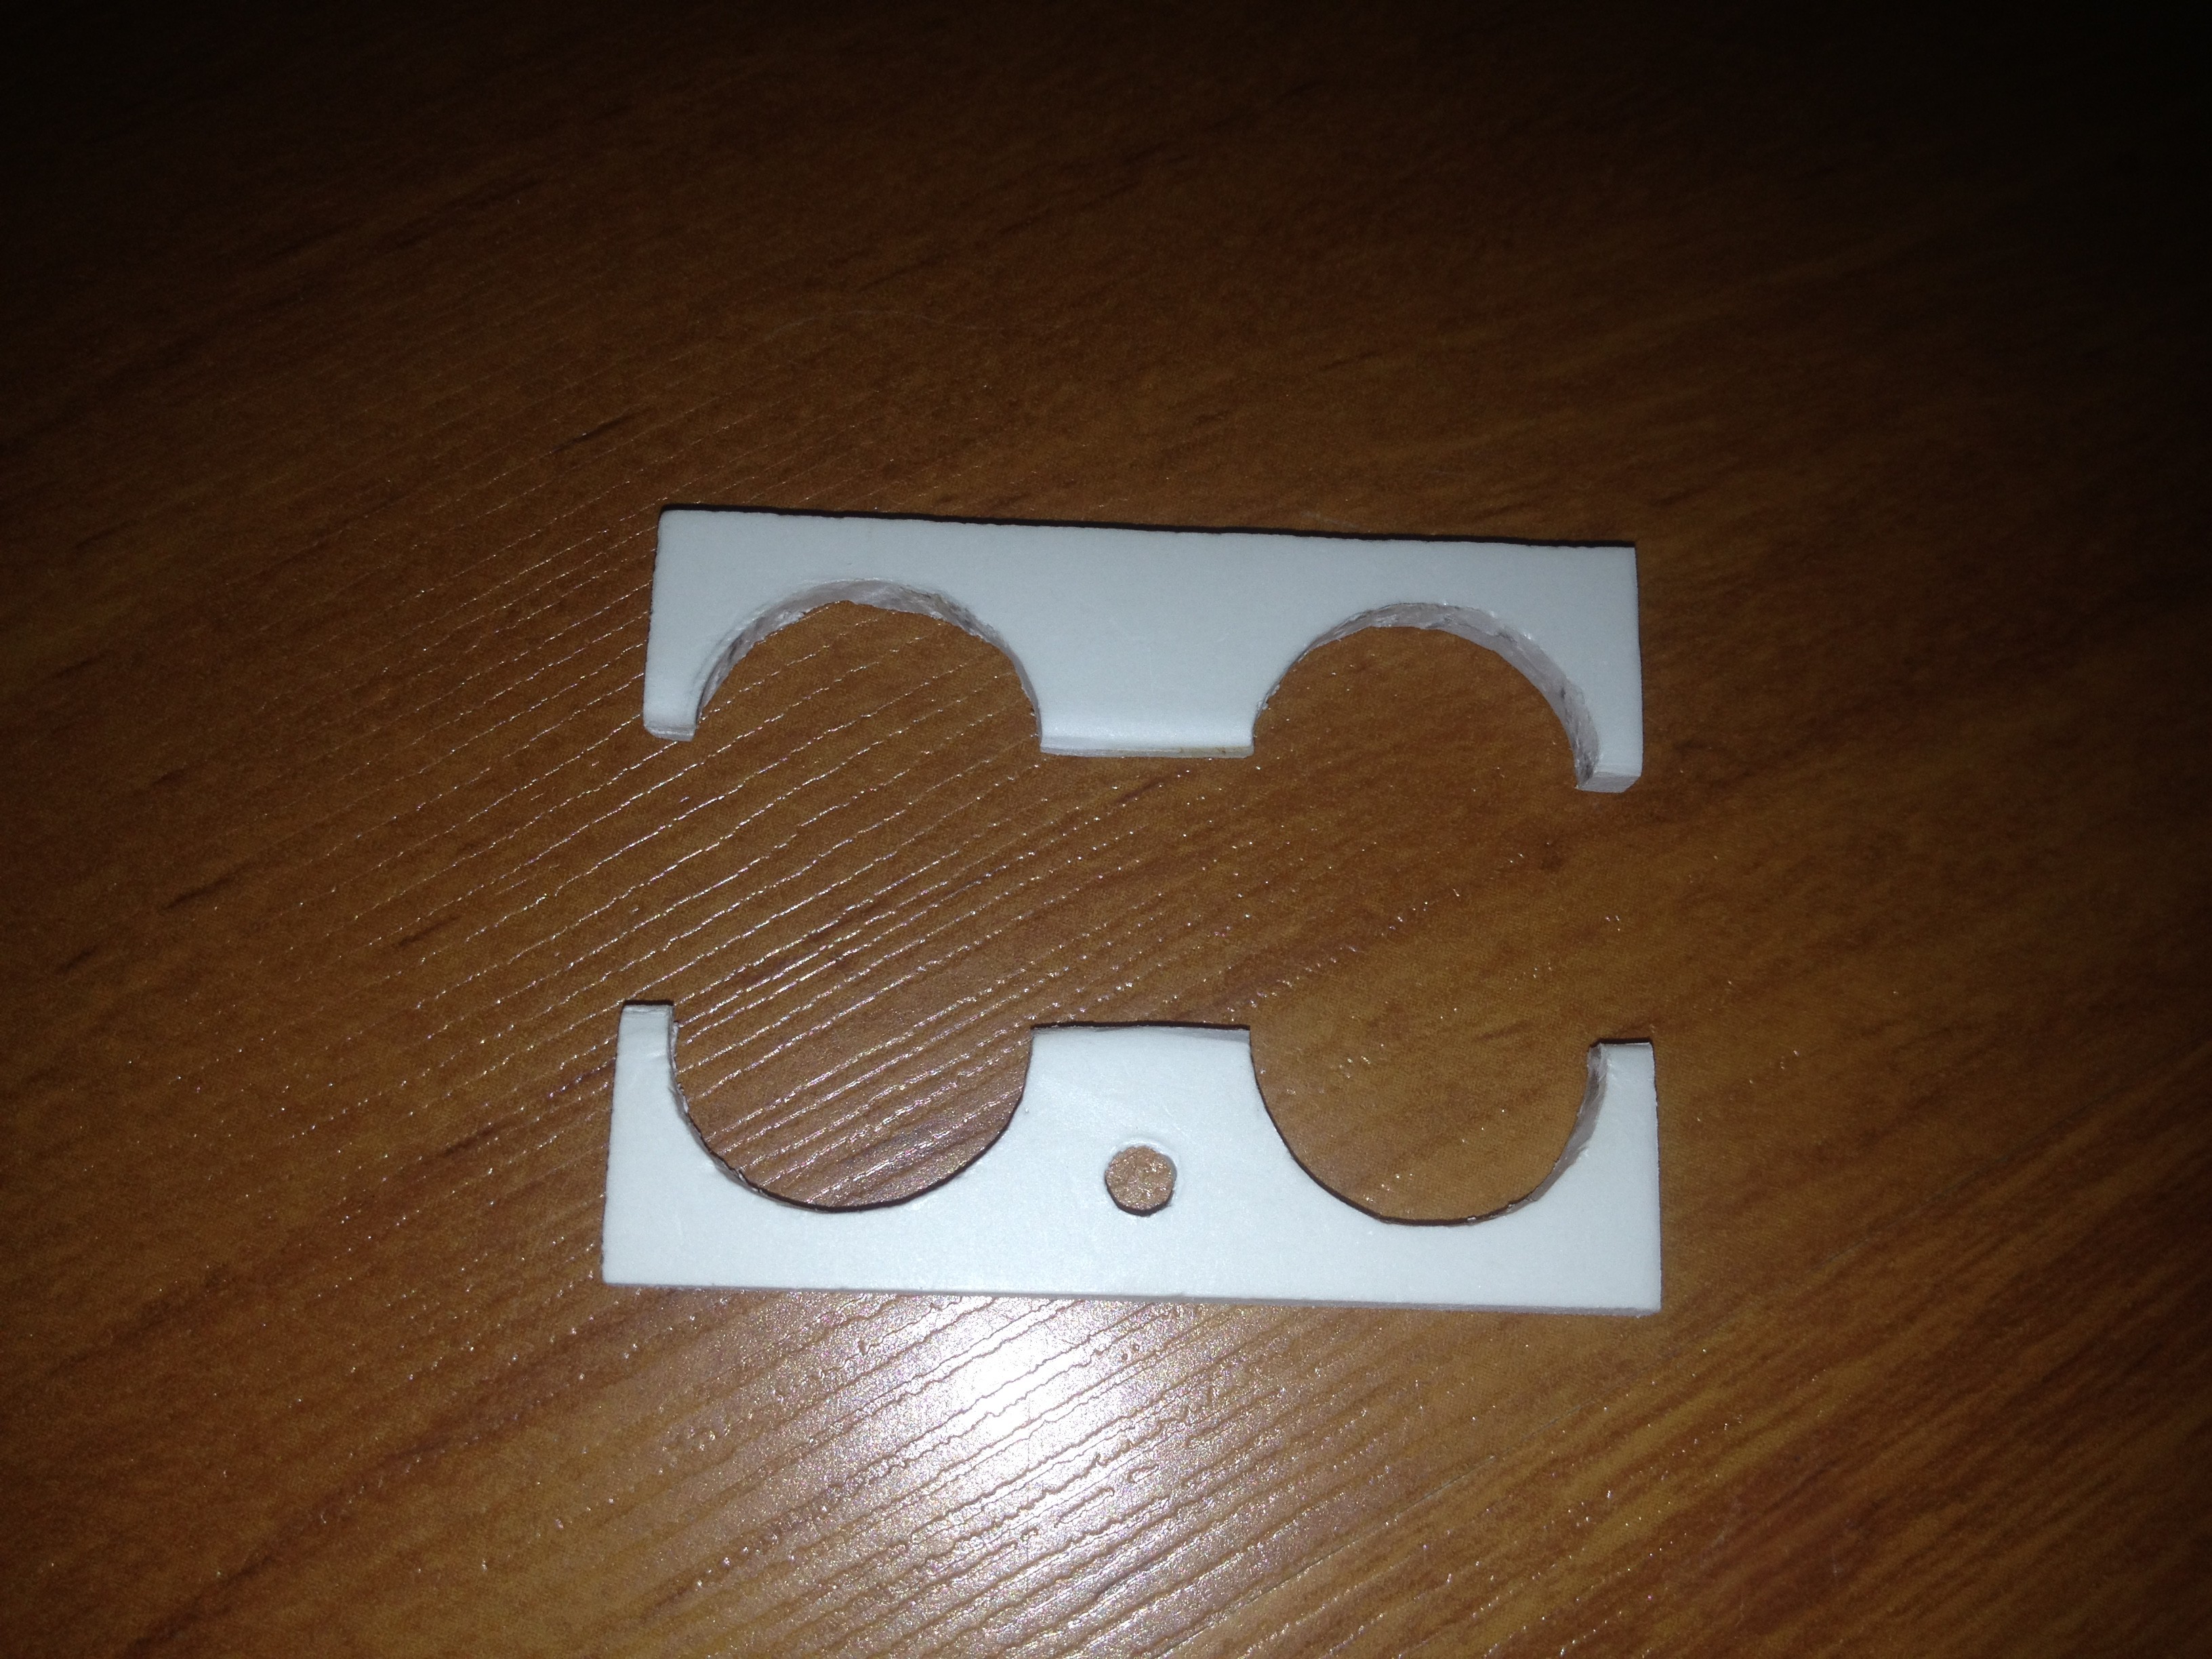
    The plastic part of the front of the device.


    The plastic part associated with the bracelet (use plastic glue).


    Size of parts.


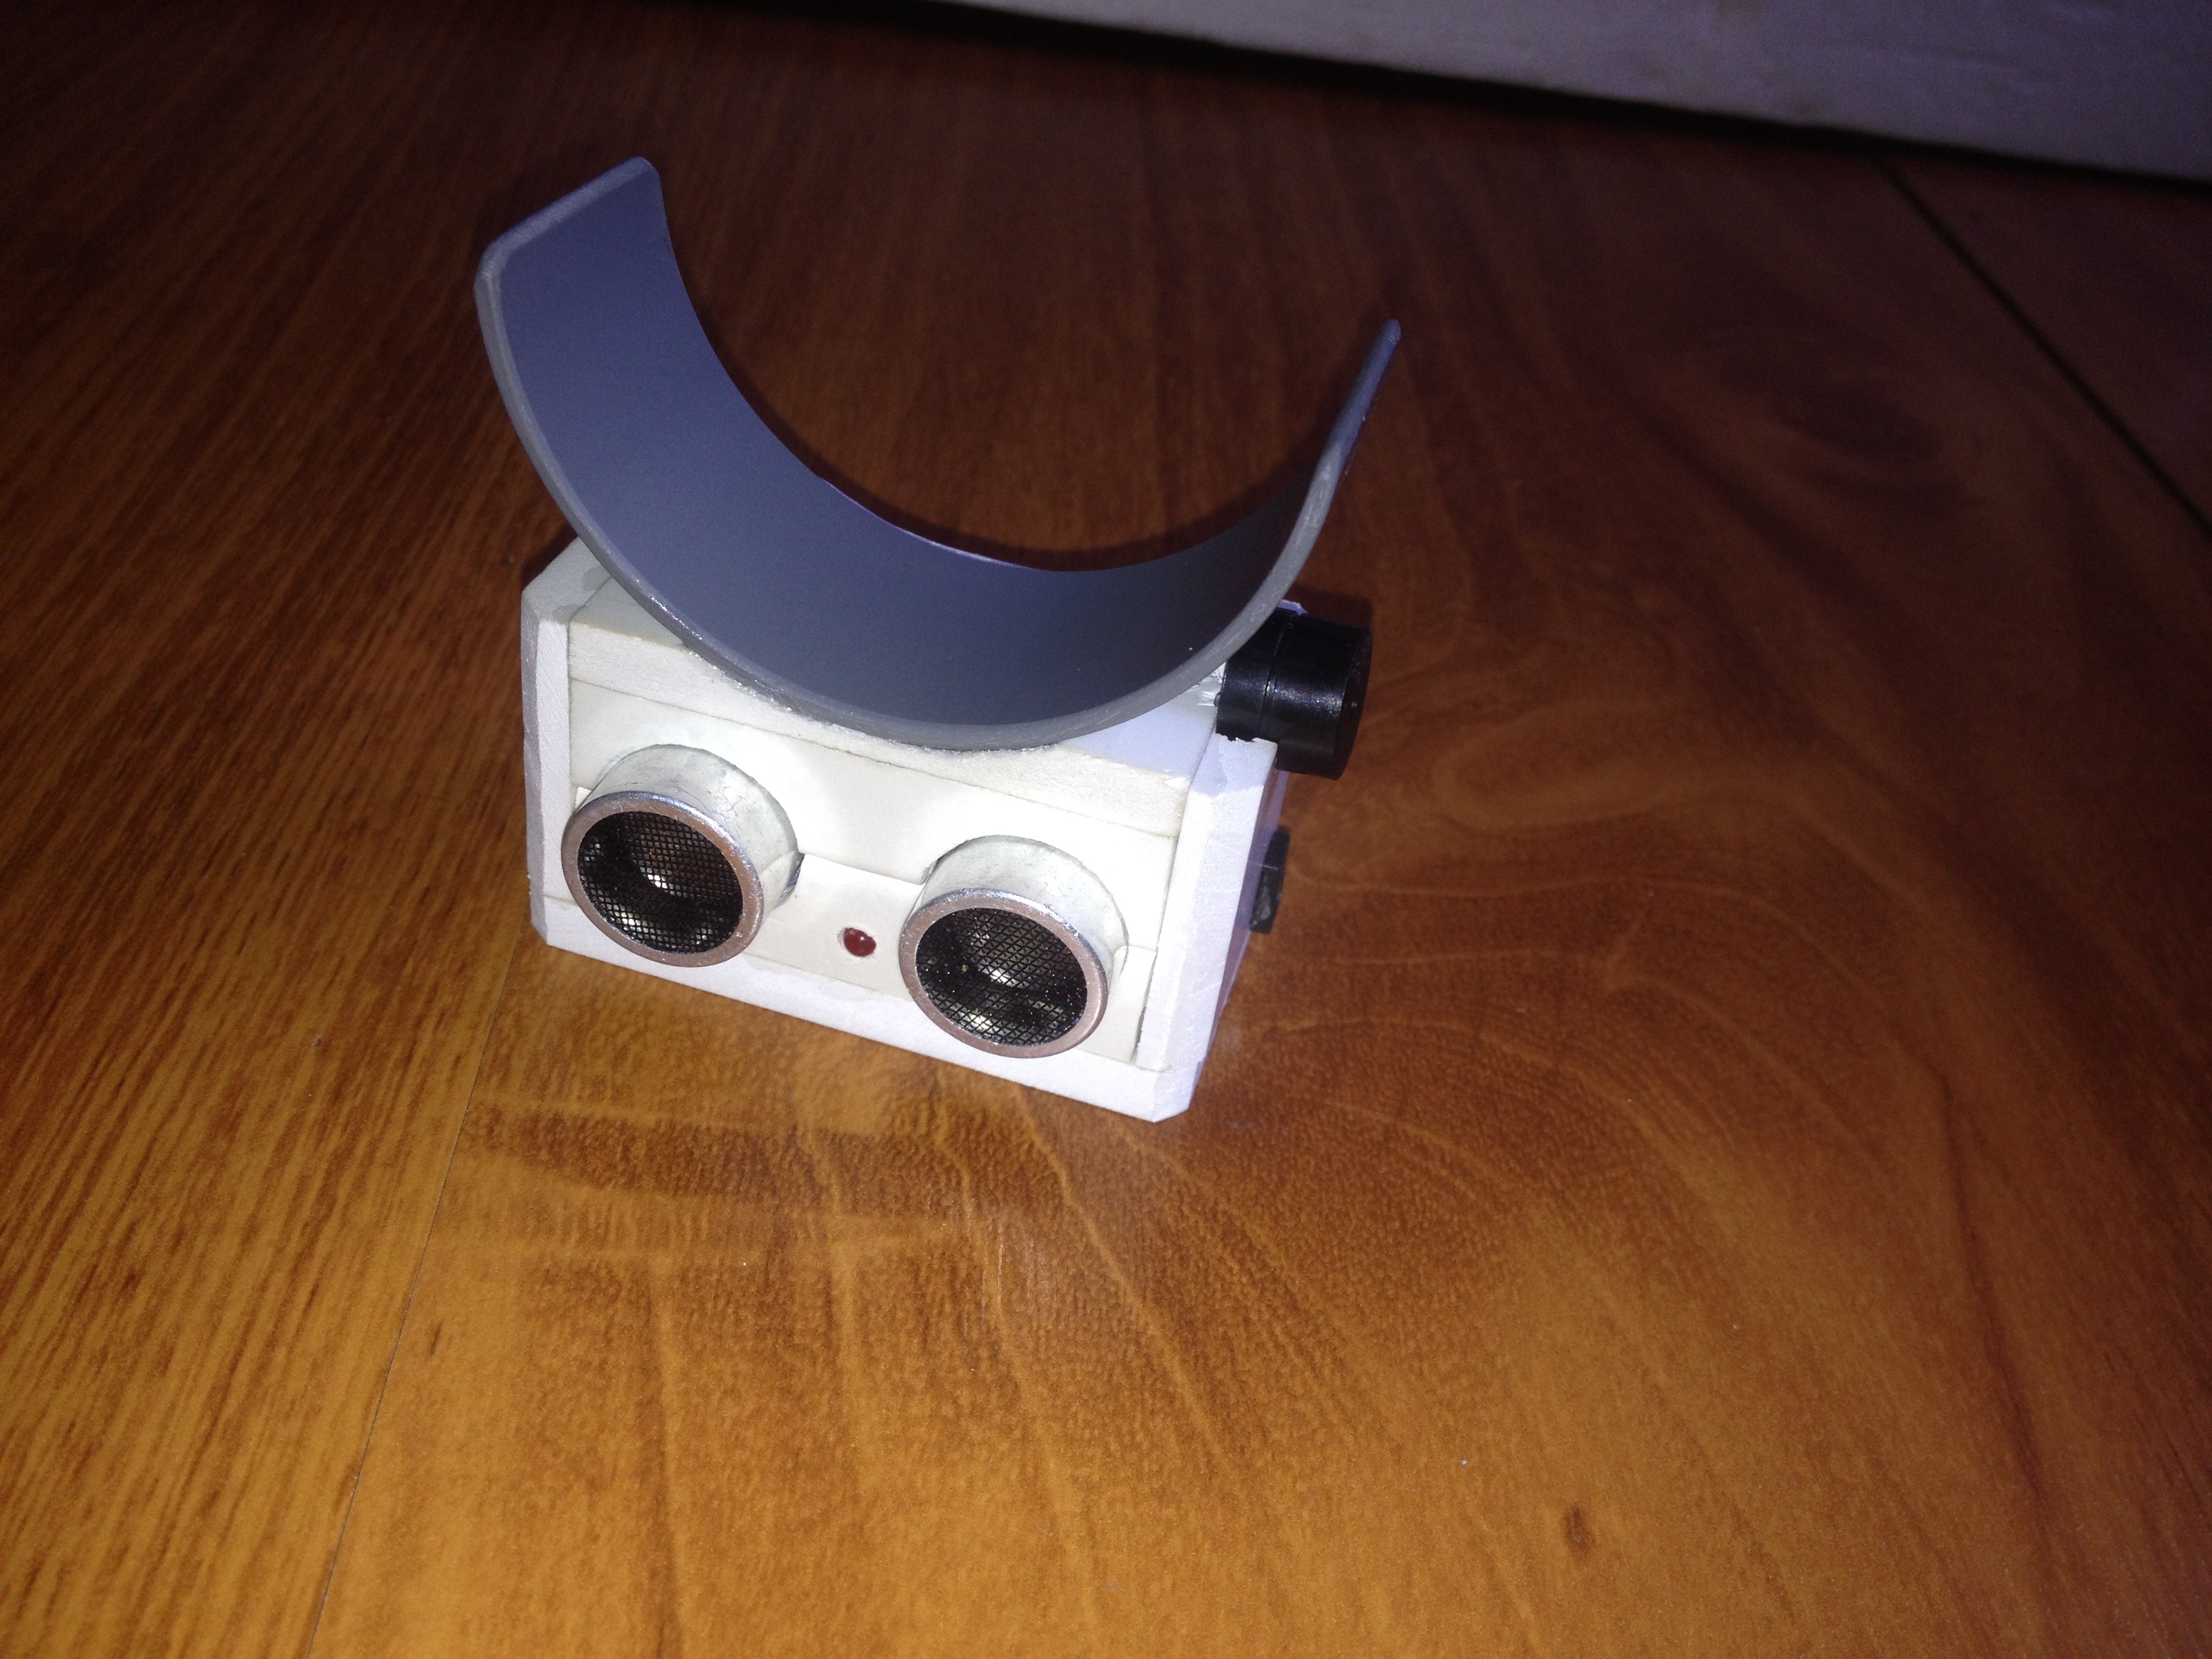
    Complete electronic component box.


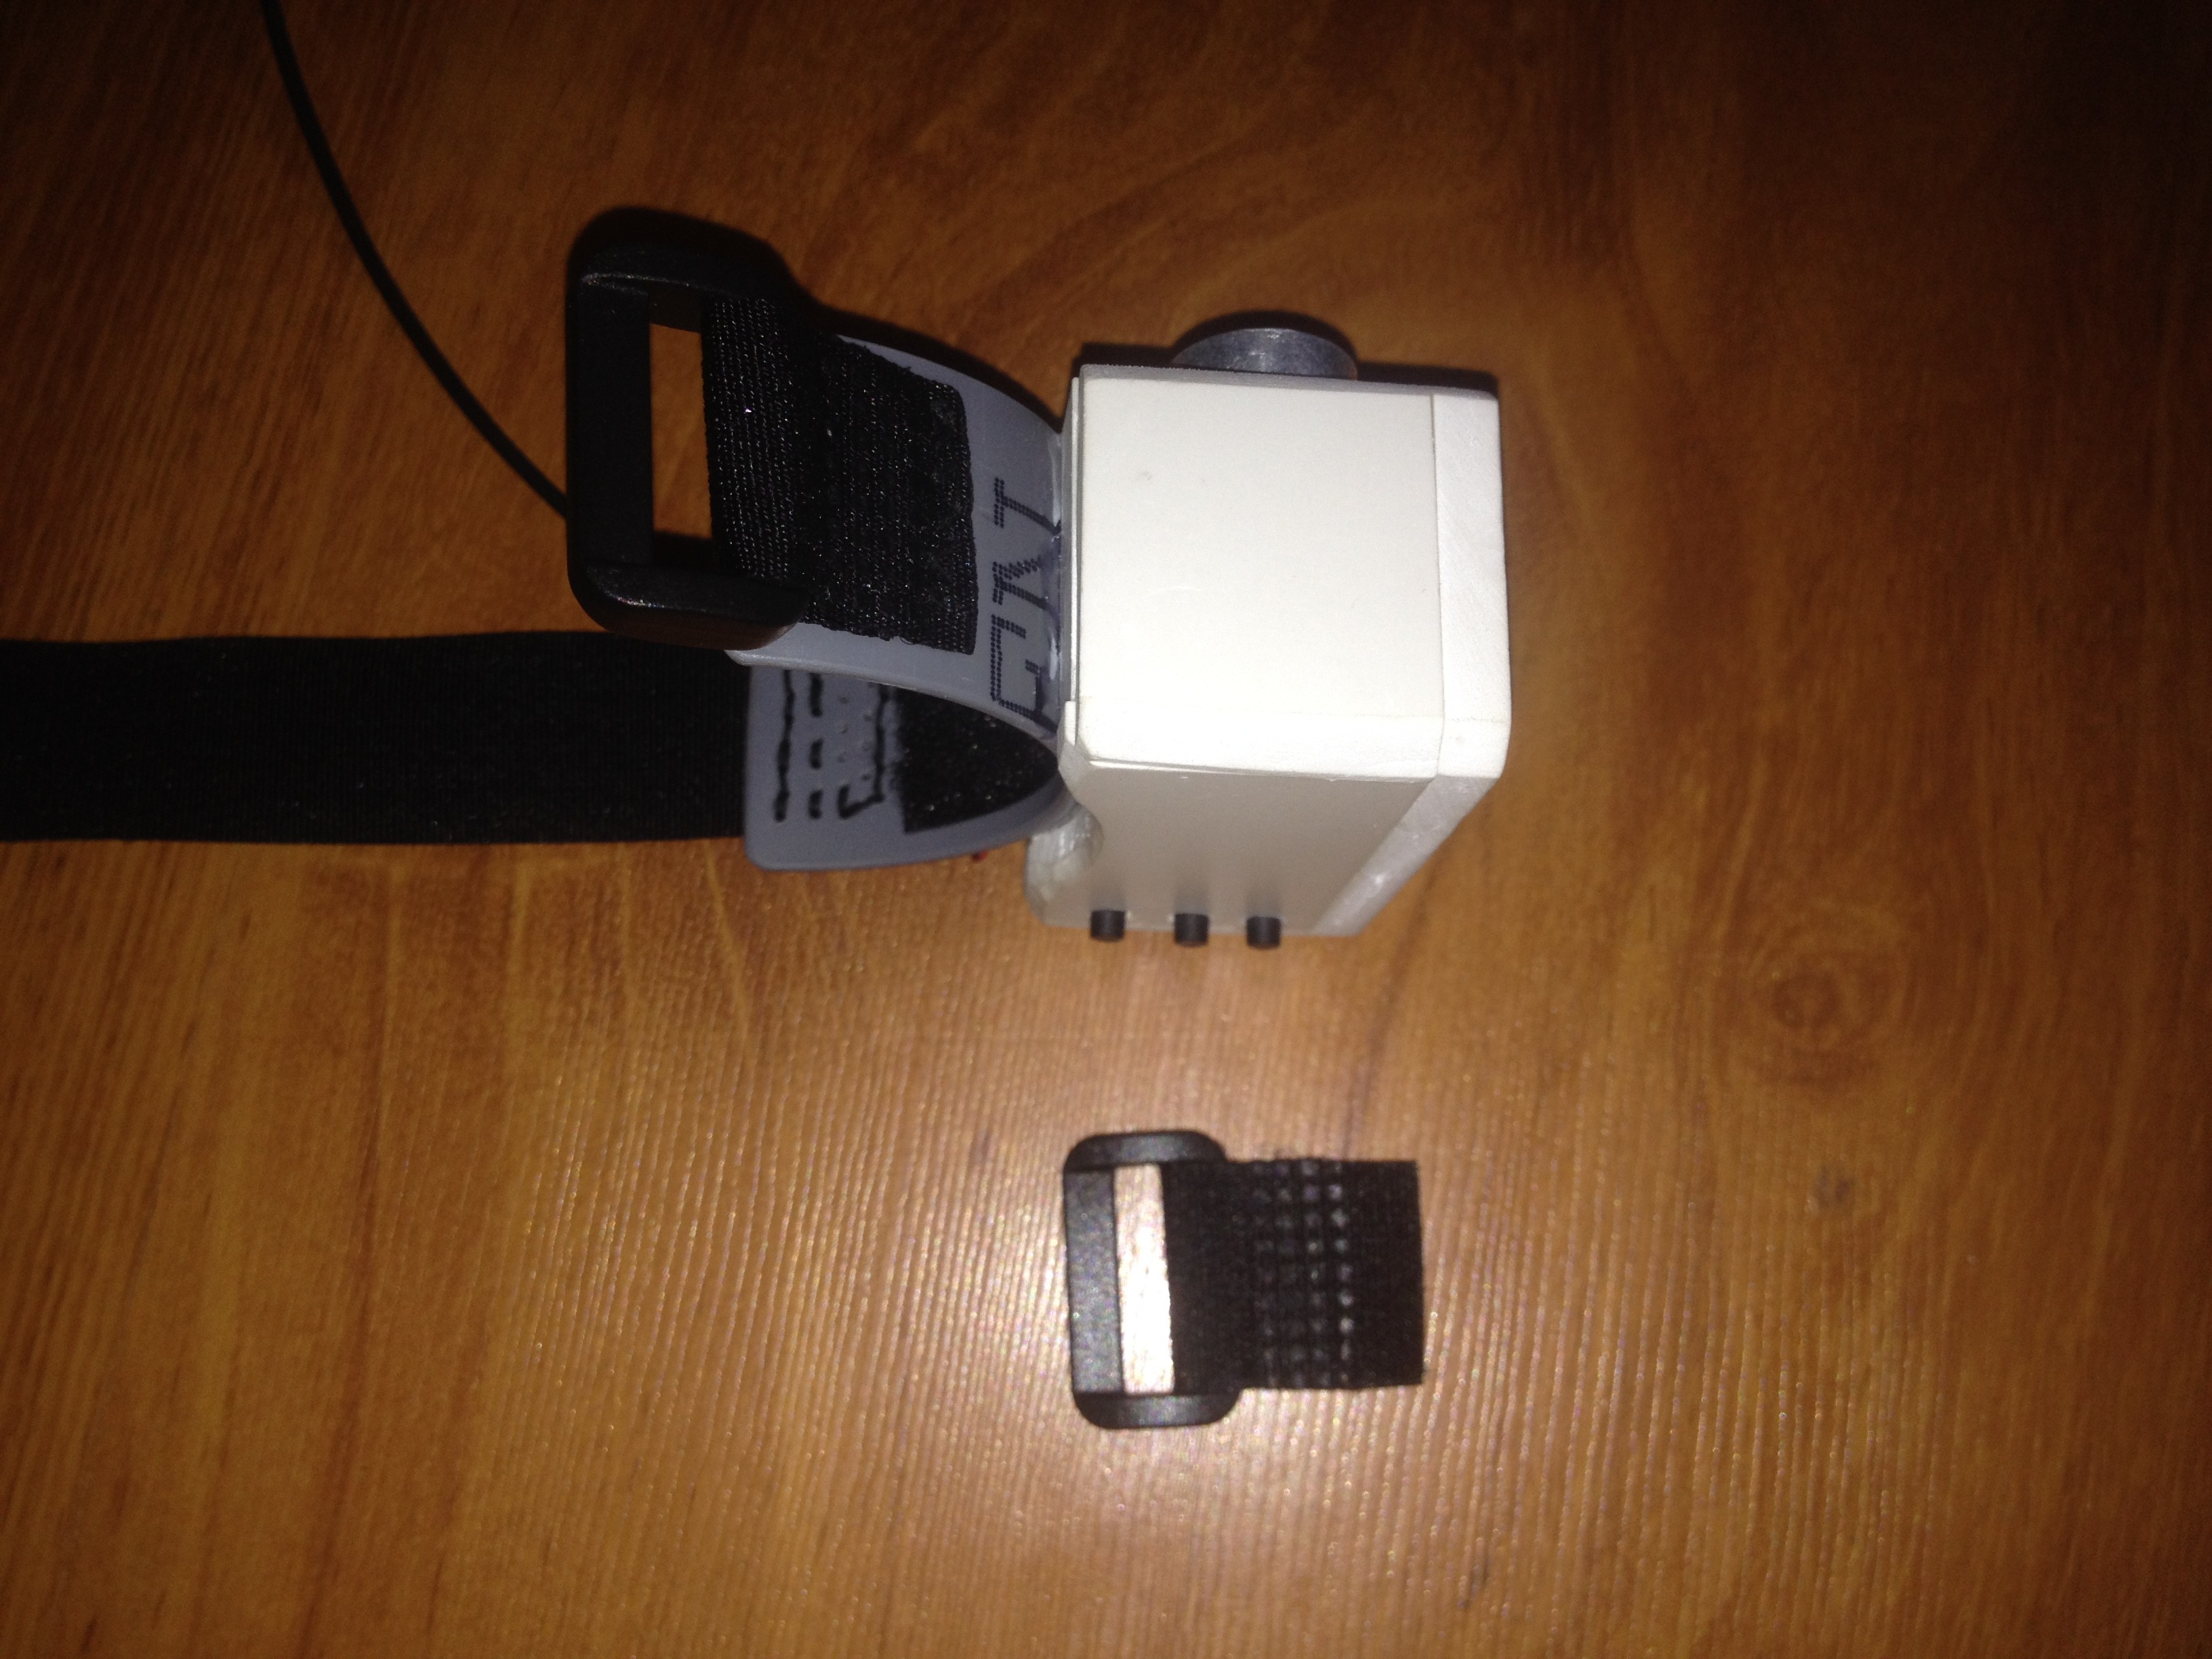
    I drill small holes on the bracelet, and use sewing needle to sew "velcro tape" with "bracelet".

    Do the same on the other side of the bracelet.


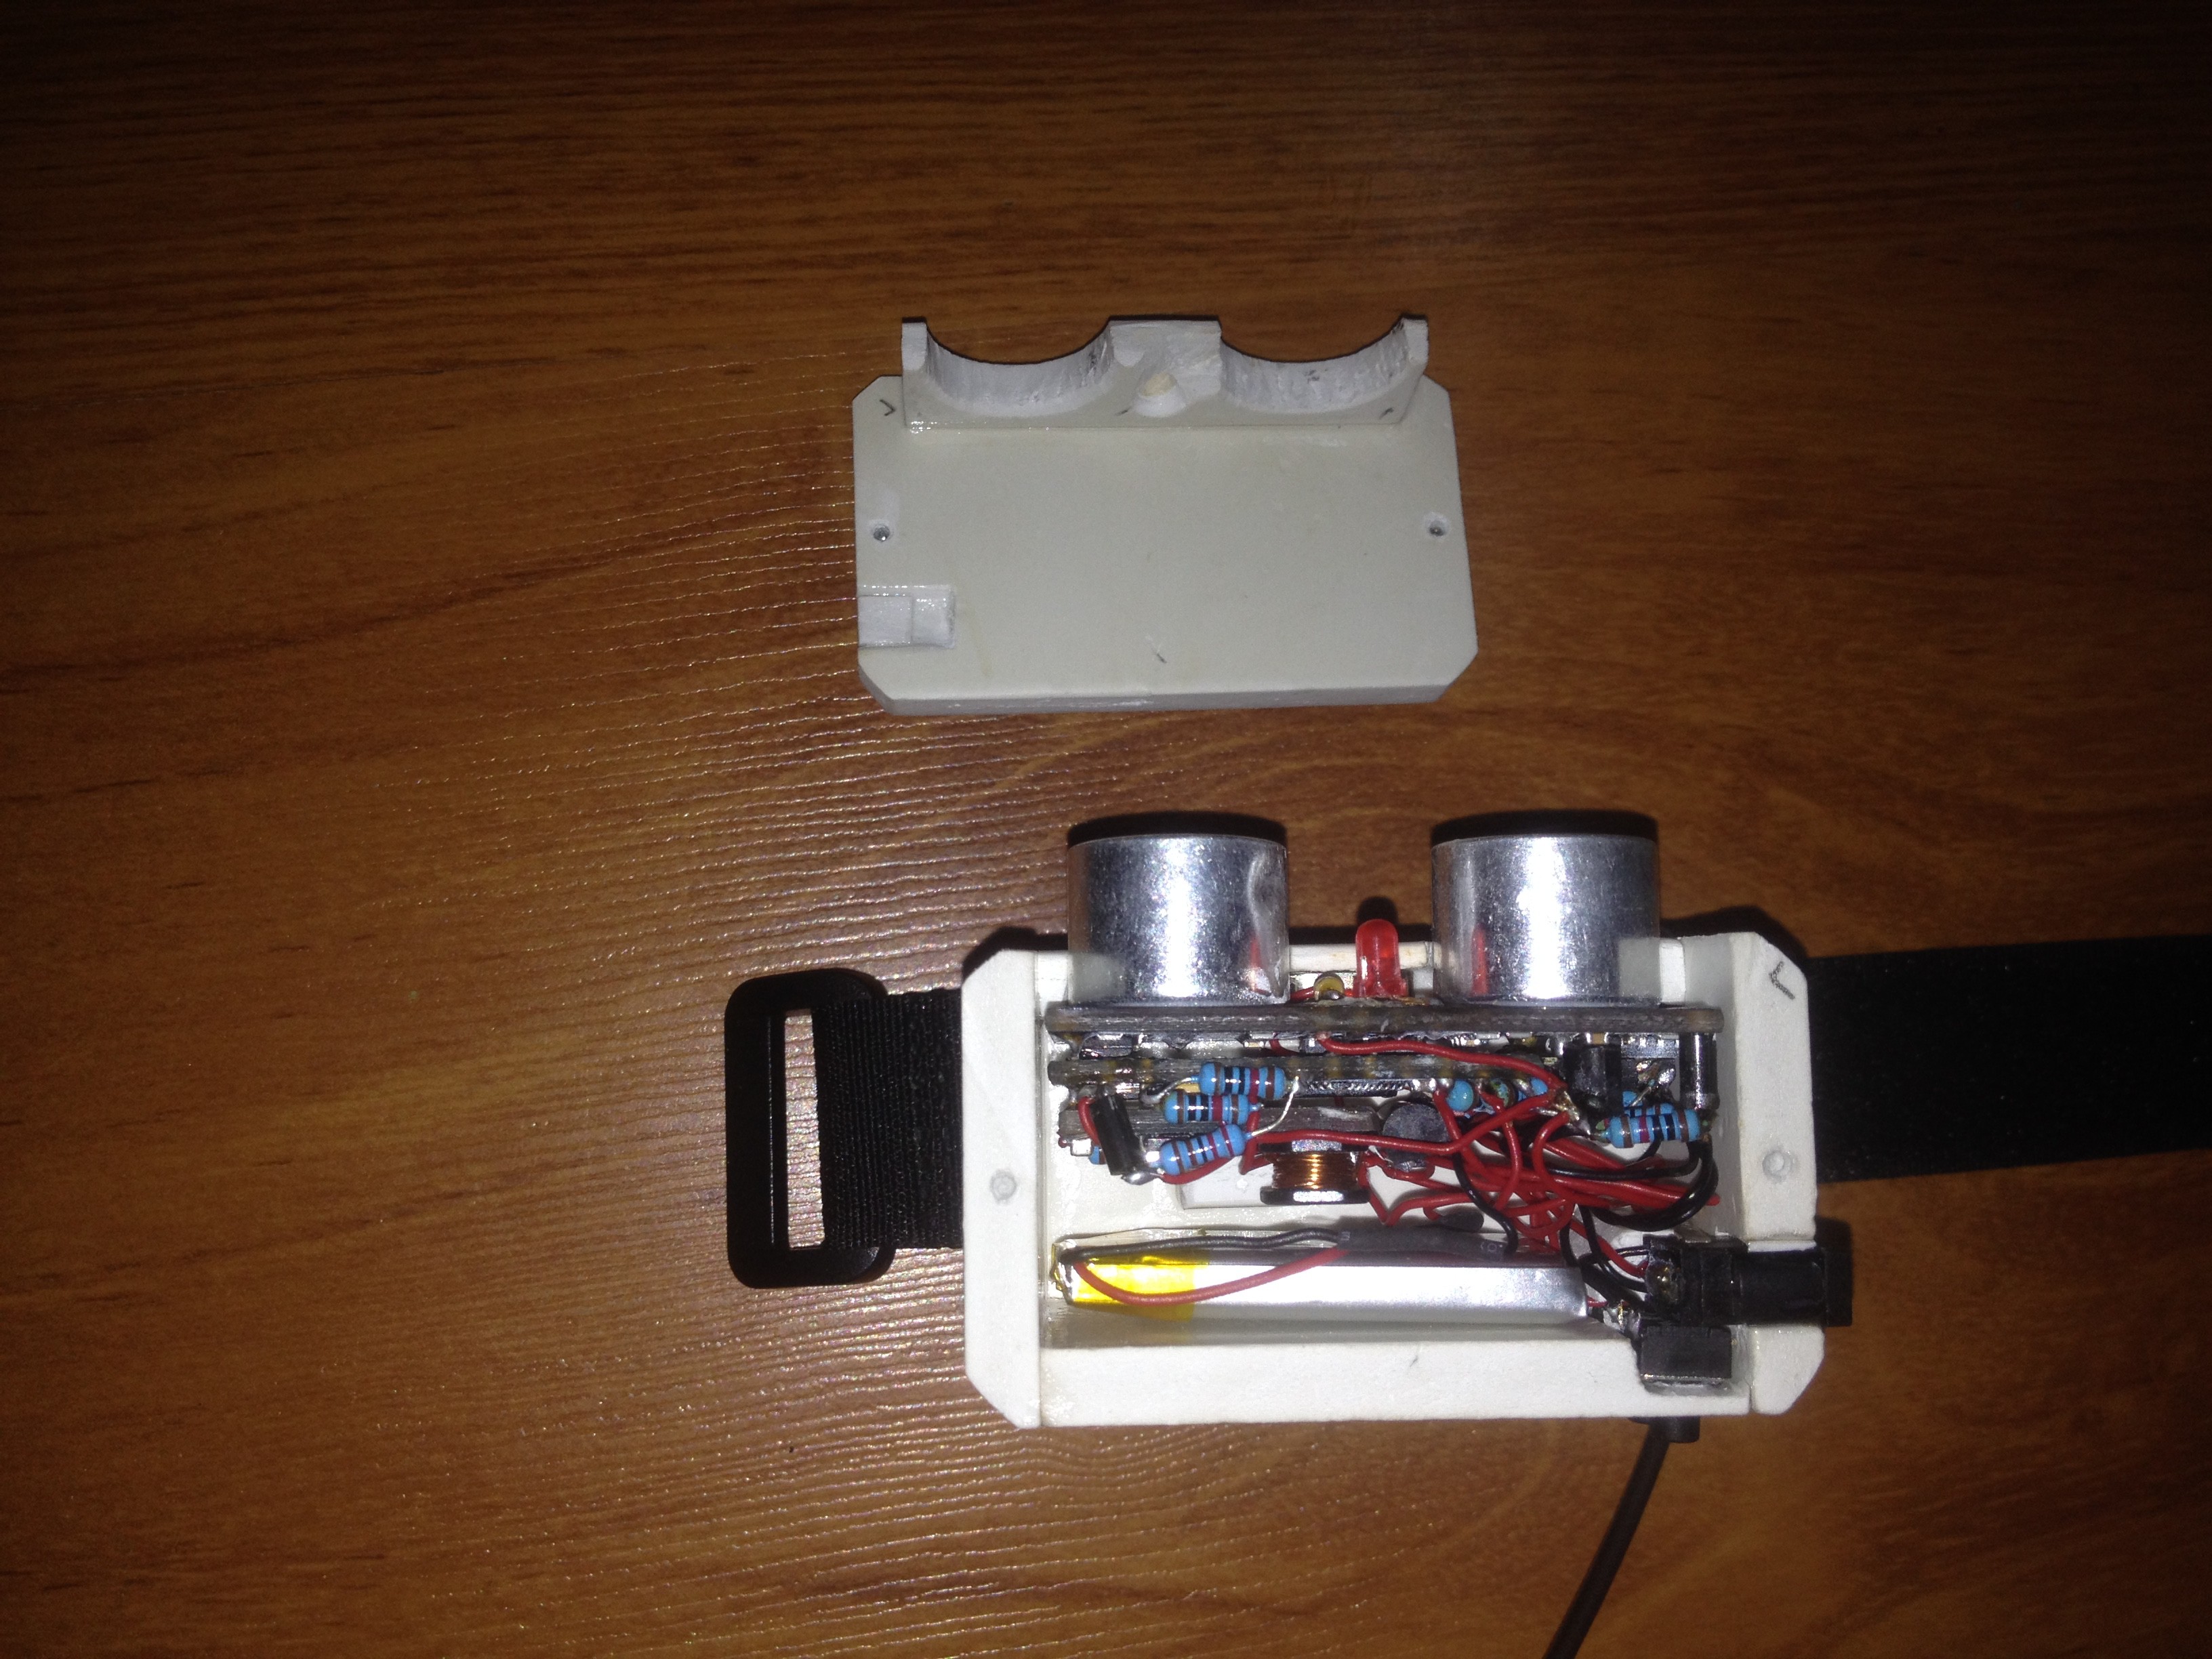
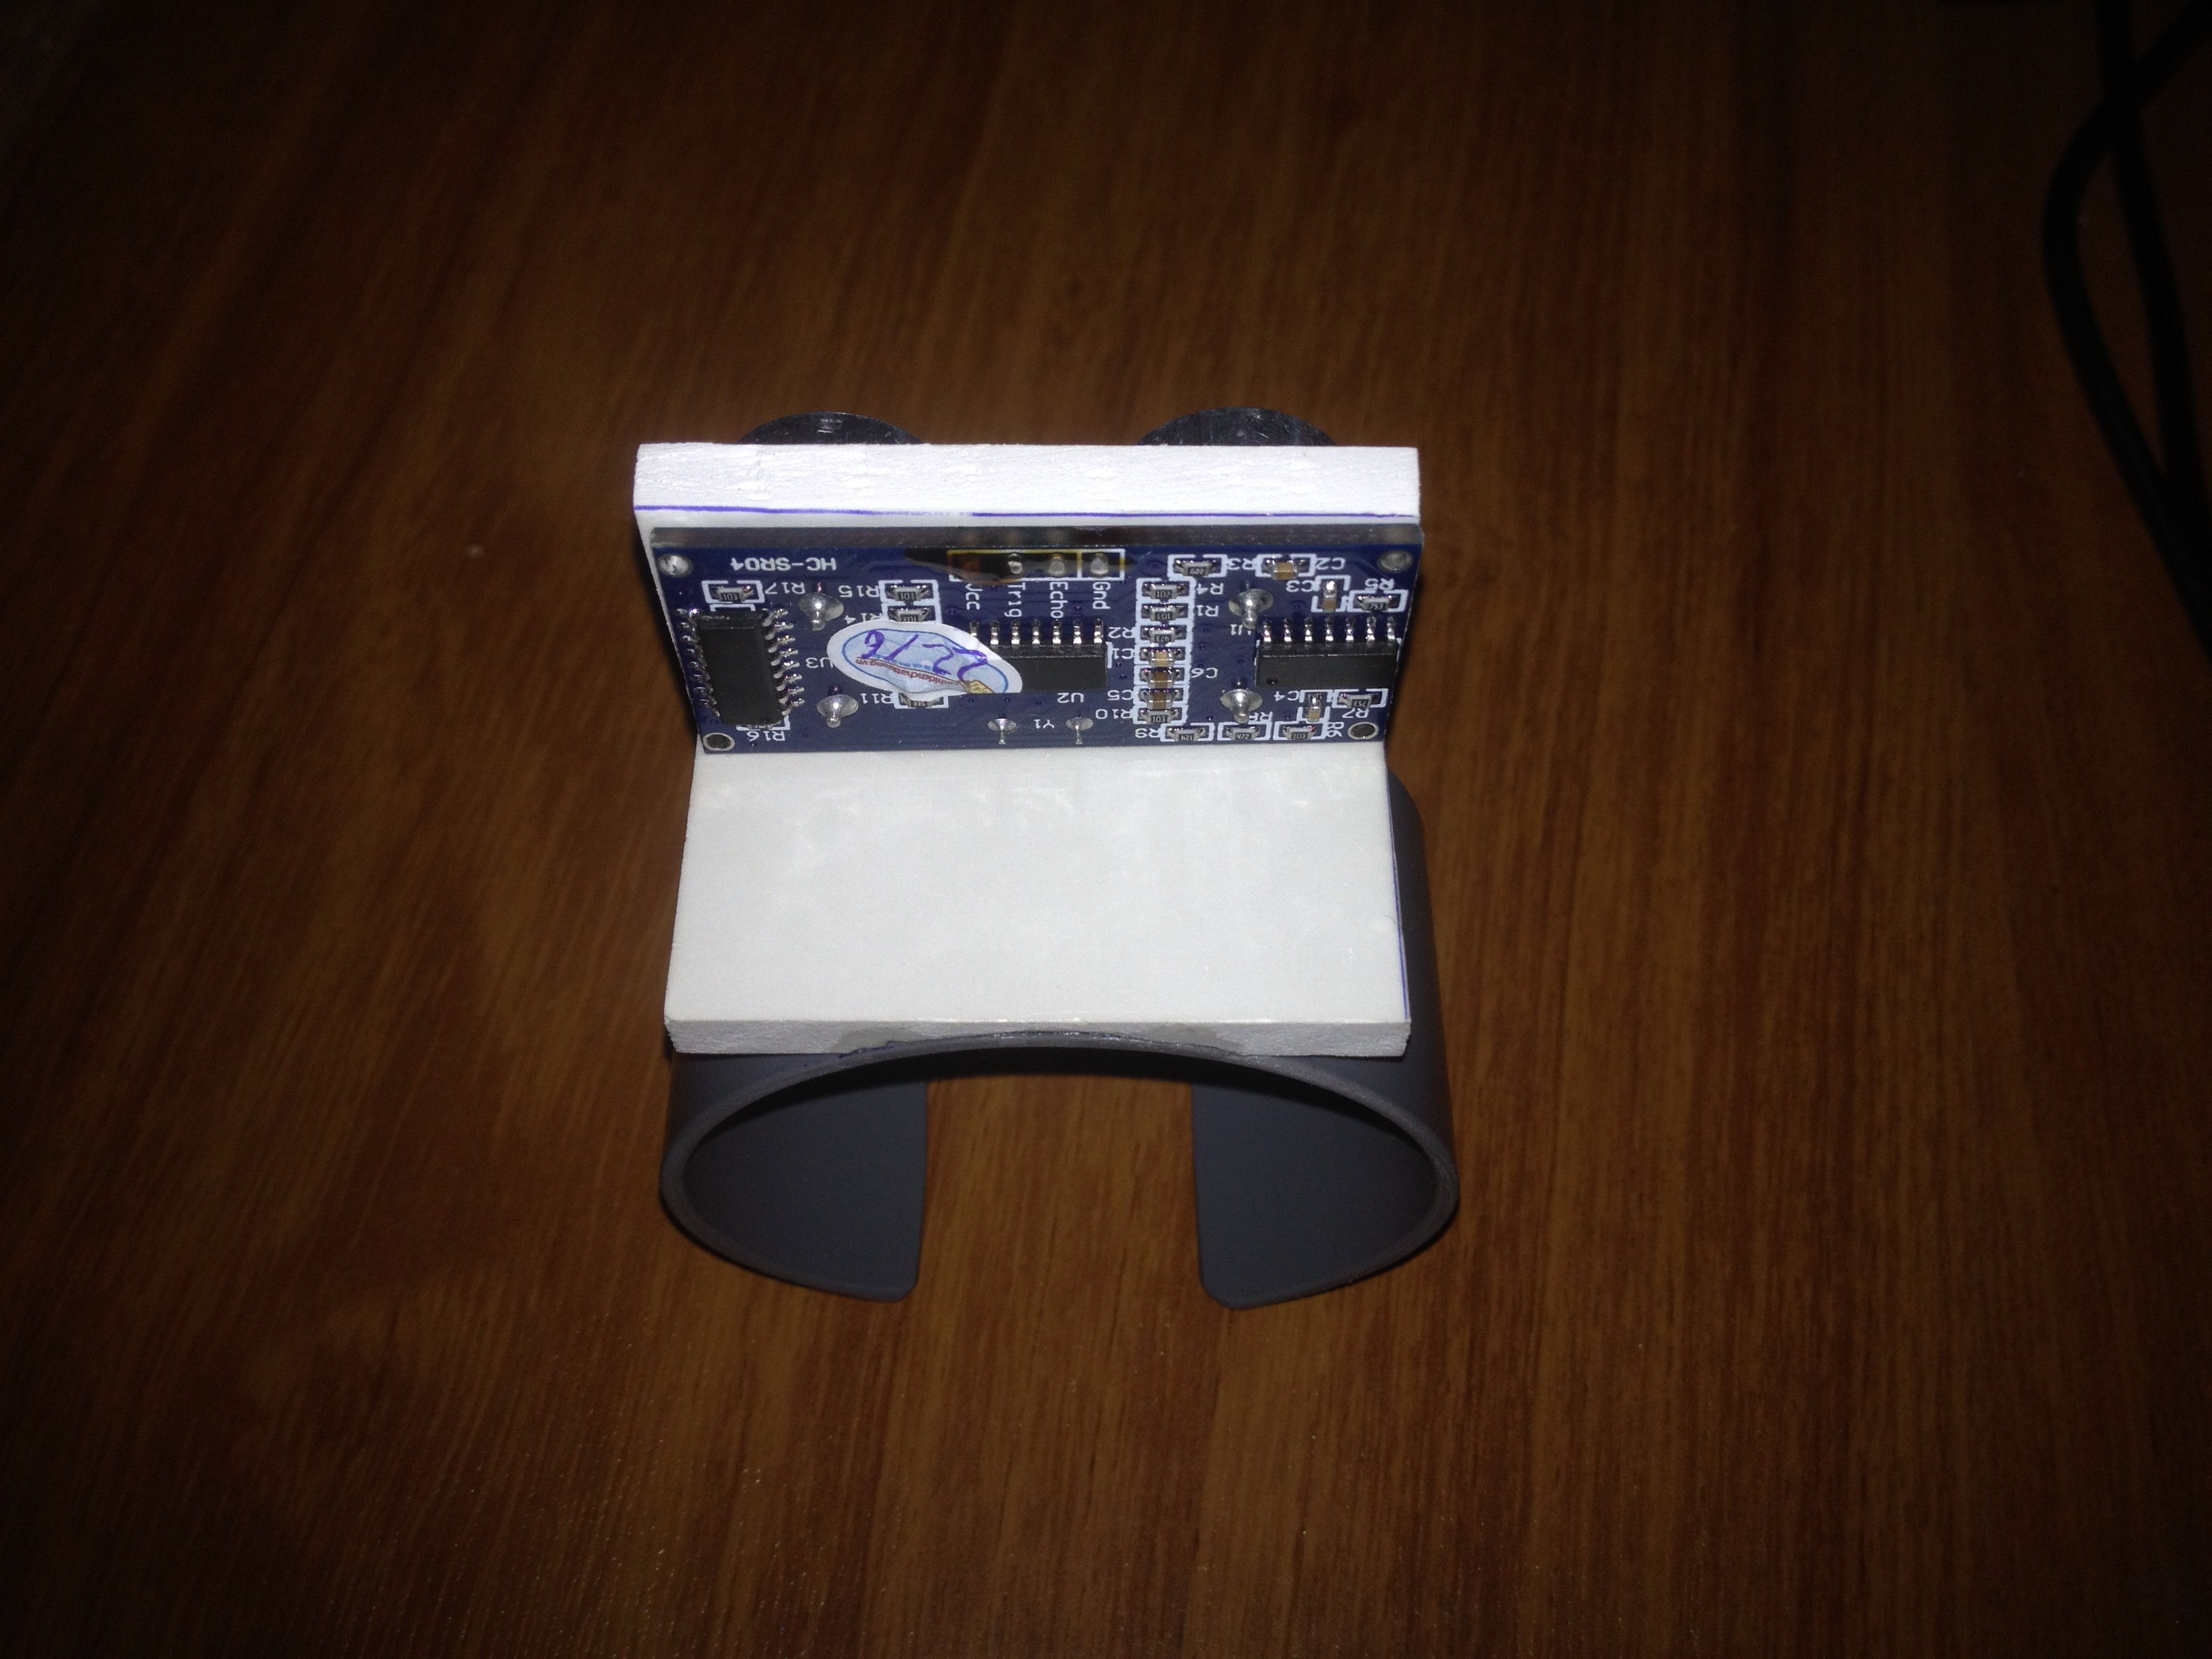
    Inside the box.


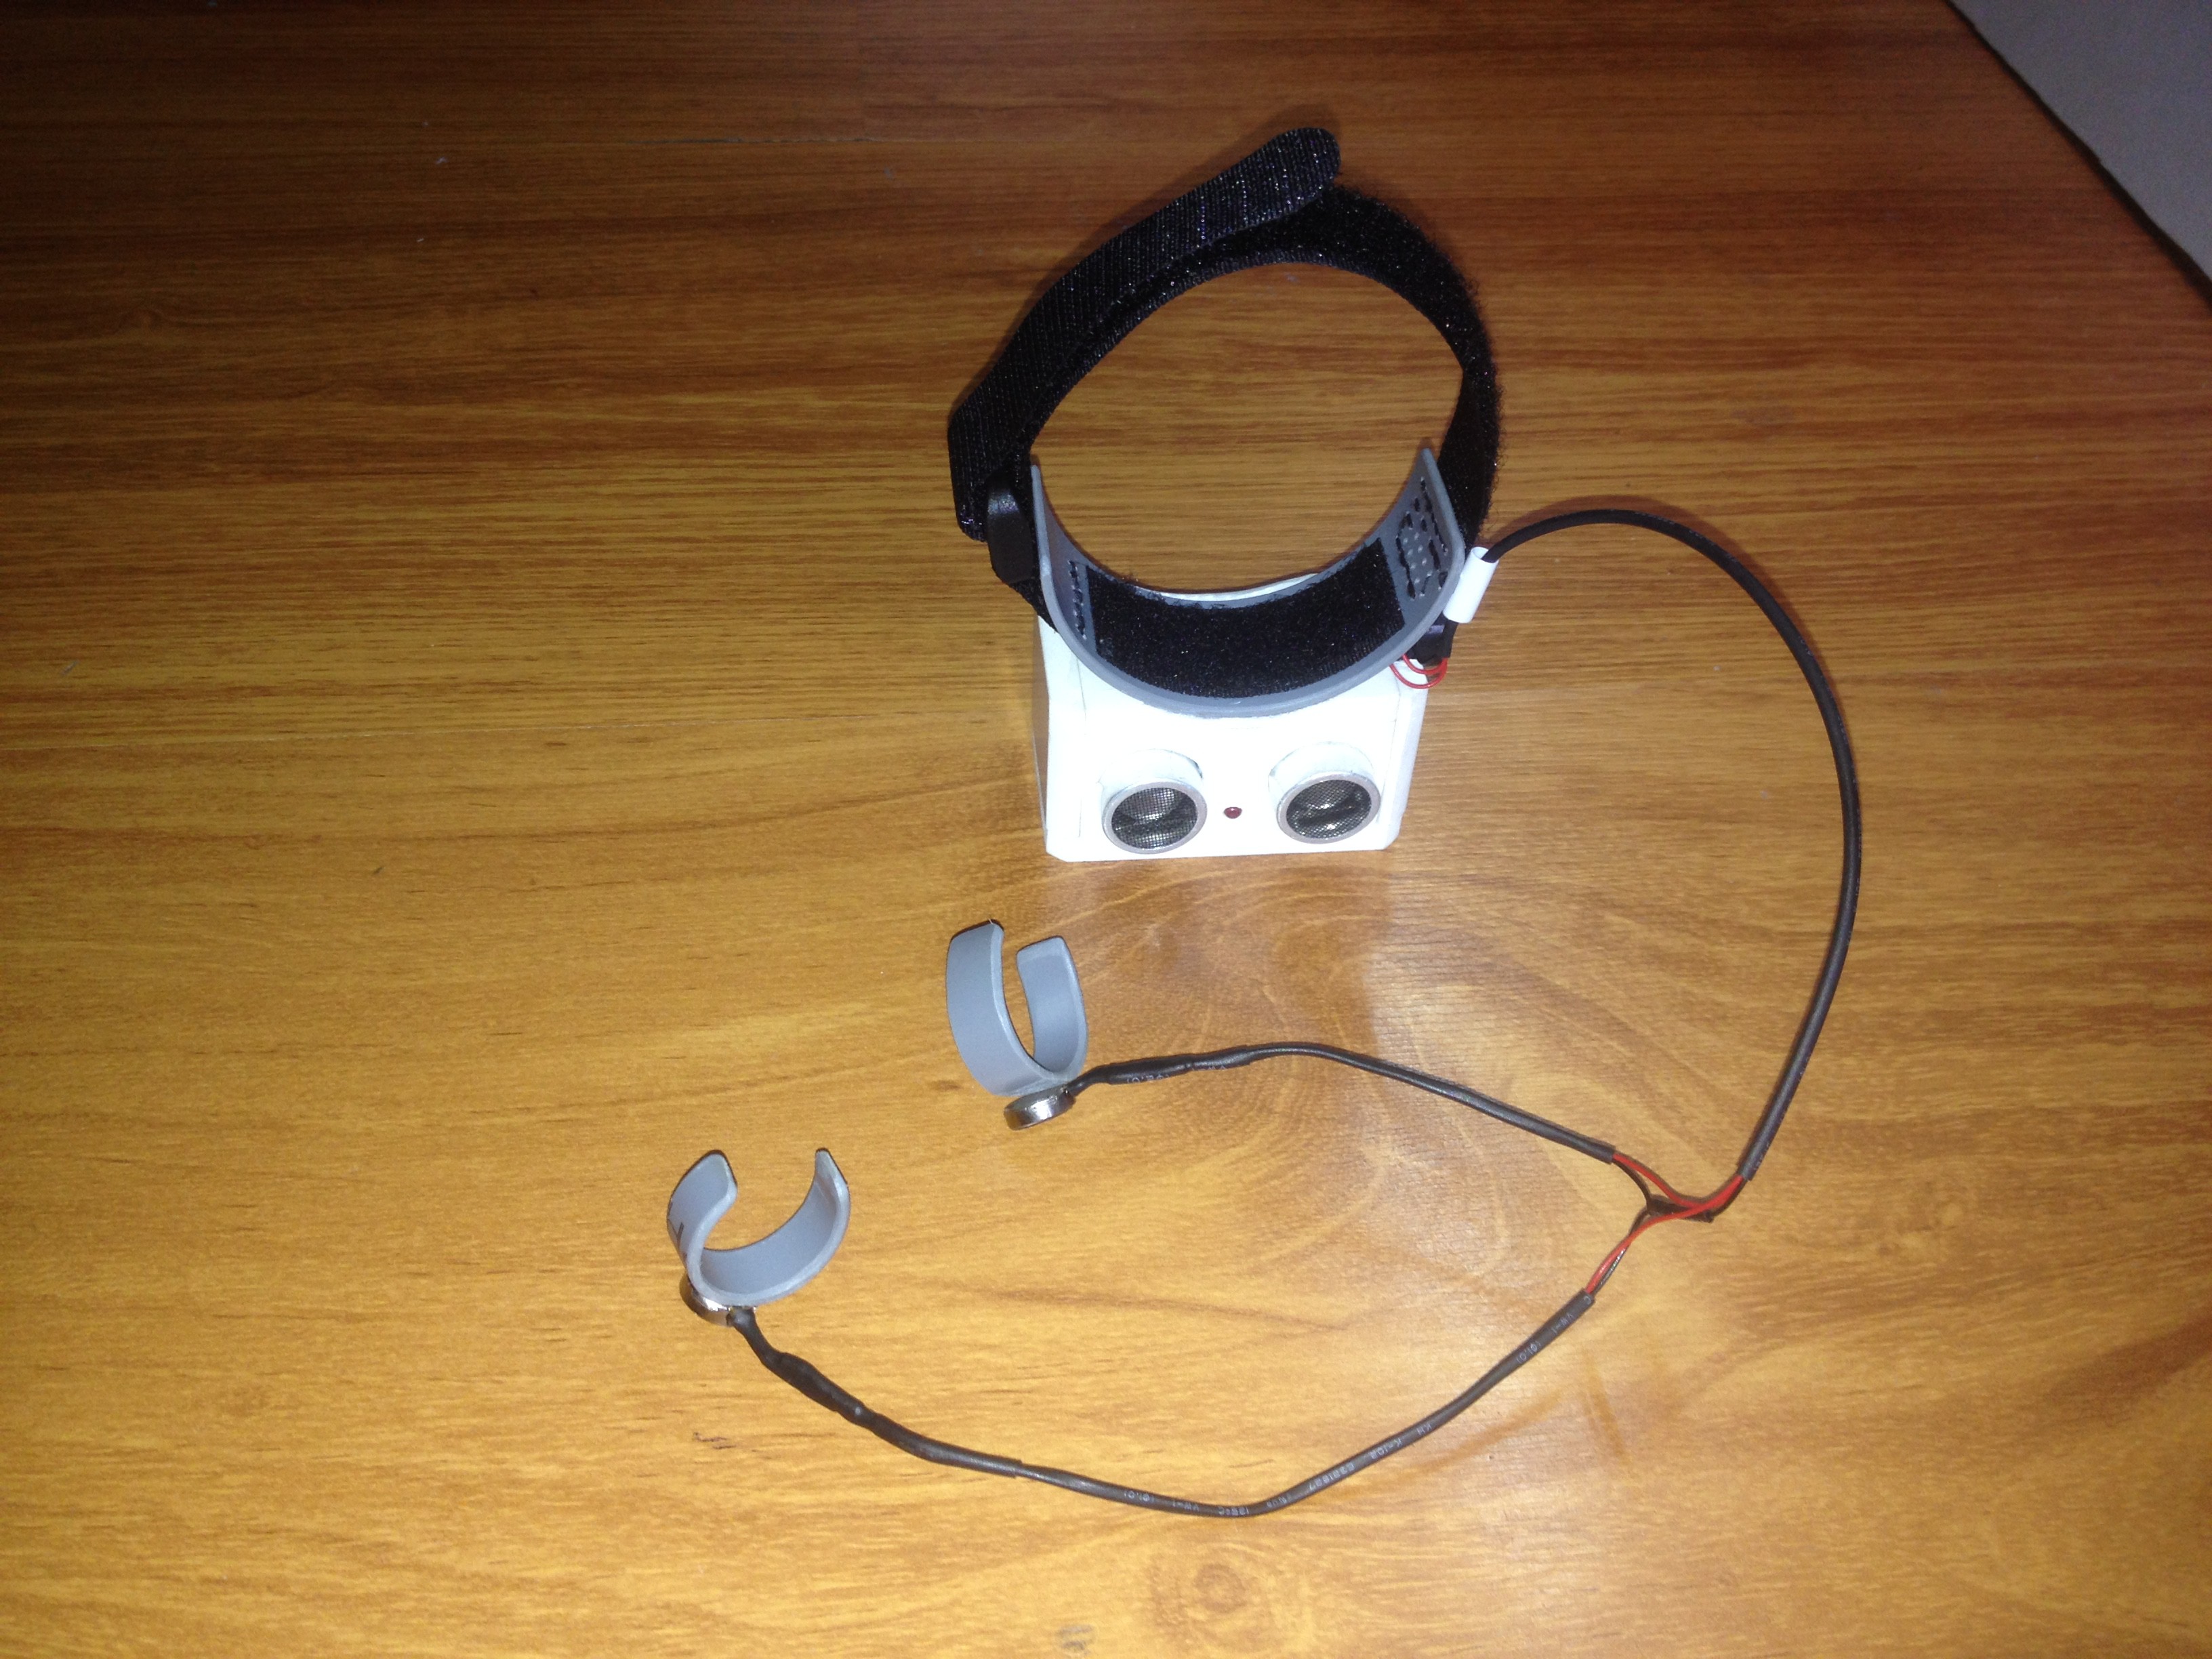
    And this is " Bracelet for the blind " (Upgrade version).

  • Code upgrade_1.1

    Tiendo09/03/2017 at 08:47 0 comments

    //bracelet_for_the_blind_Upgrade_1.1
    //tác giả(Author): Đỗ Xuân Tiến - Gmail: doxuantiendx07@gmail.com
    #include <EEPROM.h>
    const int trig = A1;     //chân trig của HC-SR04
    const int echo = A0;     //chân echo của HC-SR04
    byte ngon_tay_cai_6 = 6;     //ngón tay cái - thumb
    //byte middle_finger = 5;  //ngón tay giữa
    byte ngon_tay_ut_3 = 3;      //ngón tay út - little finger
    byte mosfet_9 = 9;     //mosfet
    byte coi_chip_5 = 5;  //buzzer
    byte led_4 = 4;       //led
    byte chan_sac_8 = 8;  //chân bật tắt dòng sạc - D8 to on/off charger
    byte button_10 = 10;    //button nguồn: chức năng bat/tat/rung/loa - button: on/off/vibrator/buzzer
    byte button_cong_12 = 12; //button " + "
    byte button_tru_11 = 11; //button " - "
    byte do_volt_pin_A3 = A3; //đo volt pin - A3 to measure the battery voltage
    byte volt_cam_sac_A2 = A2; //nhận biết khi cắm điện sạc - A2 to identify the battery charger
     
    byte rung_cai = 0; 
    byte rung_ut = 0;
    byte rung_cai_1 = 0;    
    byte rung_cai_2 = 0;
    byte rung_ut_1 = 0;     
    byte rung_ut_2 = 0;
    byte che_do_rung = 0; 
    byte khong_lap = 0;   
    byte sau_tha_nut = 0;
    byte khong_lap_12 = 0;    
    byte sau_tha_nut_12 = 0;   
    byte khong_lap_11 = 0;   
    byte sau_tha_nut_11 = 0; 
    byte khoa_bao_dong = 0;    
    byte loa1 = 0;  
    byte loa2 = 0; 
    byte den1 = 0;  
    byte den2 = 0;
    byte sac_1 = 0;  
    byte sac_2 = 0;   
    byte tat = 0;  //biến giúp khi rút sạc thì tắt - Turn off the power when not charging
    byte EP_1lan1 = 0;   
    byte EP_1lan2 = 0;   
    byte EP_1lan3 = 0;  
    byte EP_1lan4 = 0;   
    byte EP_1lan5 = 0;
    byte hieu_so_bd = 0;    
    int dovolt_out = 0;
    int dovolt_pin = 0; 
    float volt_pin = 0;
    unsigned long pe_rung = 0;
    unsigned long pe_rung_cai_1 = 0;   
    unsigned long pe_rung_cai_2 = 0; 
    unsigned long pe_rung_ut_1 = 0;    
    unsigned long pe_rung_ut_2 = 0;
    unsigned long pe_loa1 = 0;   
    unsigned long pe_loa2 = 0; 
    unsigned long pe_nhanli = 0;
    unsigned long pe_nhanli_12 = 0;   
    unsigned long pe_nhanli_11 = 0;
    unsigned long pe11 = 0;   
    unsigned long pe12 = 0;
    unsigned long pe11_sac = 0;  
    unsigned long pe12_sac = 0;
    unsigned long pe_volt_battery = 0;         
    unsigned long thoi_gian = 0;  // biến đo thời gian - Time variable
    unsigned long khoang_cach = 0;  // biến lưu khoảng cách - Distance variable
    unsigned long khoang_cach_bao_dong = 0; 
    unsigned long tong_khoang_cach = 0;  
    unsigned long so_lan_do = 0;
    unsigned long hieu_so = 0;
    unsigned long pe_hieu_so = 0;
       
    int GT_button = 0;
    int GT_button_000 = 0;
    int GT_button_cong_12_000 = 0;  
    int GT_button_tru_11_000 = 0;   
    int time_x = 0;
    int GT_button_cong_12 = 0;  //+
    int GT_button_tru_11 = 0;   //-   
    int do_rung = 0; //độ rung mạnh  
    int do_am = 0; //độ to của âm 
    void tien_sacpin (unsigned long giay)
    { 
      unsigned long peham_sac = millis(); 
      while((millis() - peham_sac <= giay) && (dovolt_out >= 650) && (khoa_bao_dong == 0)){
            //đo volt ngoài 
            dovolt_out = analogRead(volt_cam_sac_A2);
            //Serial.println(dovolt_out);                                          
            //nháy đèn
            if((den1 == 0) && (millis() - pe12 >= 150)){pe11 = millis(); digitalWrite(led_4,HIGH); den1 = 1; den2 = 0;}   
            if((den2 == 0) && (millis() - pe11 >= 150)){pe12 = millis(); digitalWrite(led_4,LOW); den2 = 1; den1 = 0; }  
            //sạc 1000ms nghỉ 100ms(or 1000ms/500ms), giảm nhiệt độ(or 1000ms/500ms)
            if((sac_1 == 0) && (millis() - pe12_sac >= 100)){pe11_sac = millis(); digitalWrite(chan_sac_8,HIGH); sac_1 = 1; sac_2 = 0;}   
            if((sac_2 == 0) && (millis() - pe11_sac >= 1000)){pe12_sac = millis(); digitalWrite(chan_sac_8,LOW); sac_2 = 1; sac_1 = 0; }  
            
            //2 button + -
            GT_button_cong_12 = digitalRead(button_cong_12);
            GT_button_tru_11 = digitalRead(button_tru_11);
            //nhấn lỳ 2 nút + - để khởi động chế độ báo động
            if (GT_button_cong_12 != GT_button_cong_12_000)    
     { GT_button_cong_12_000 = GT_button_cong_12;...
    Read more »

  • Solder the electronic components in the box (Upgrade version)

    Tiendo09/01/2017 at 10:49 0 comments

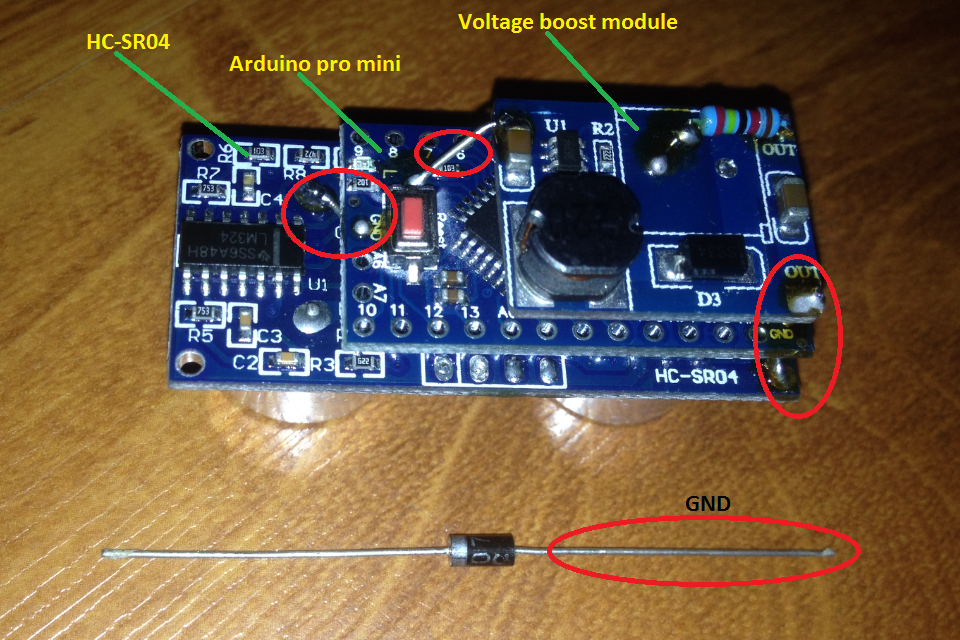
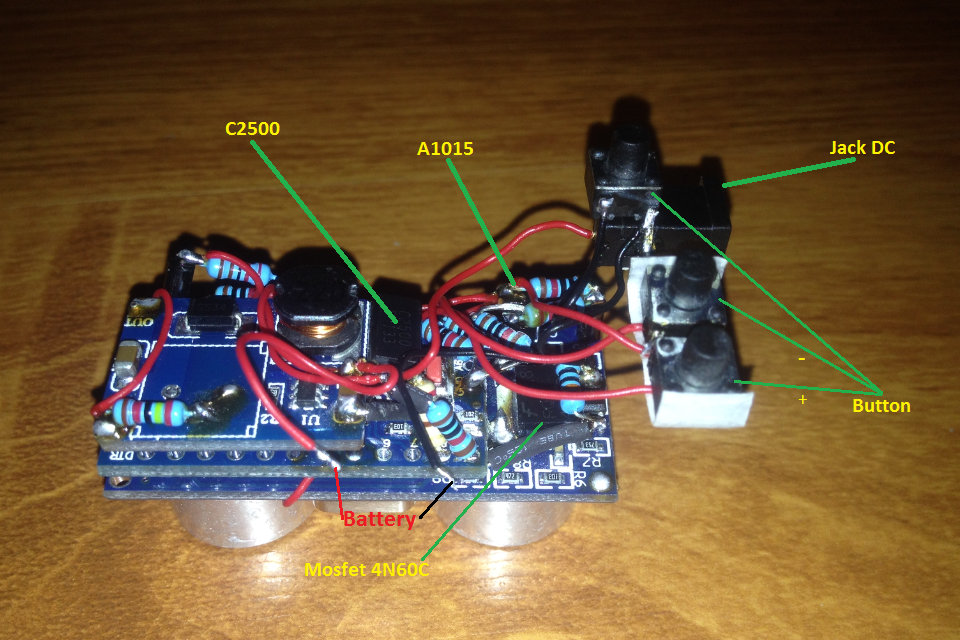
    Solder tin three main circuits on each other, the circuits are linked together by the GND.


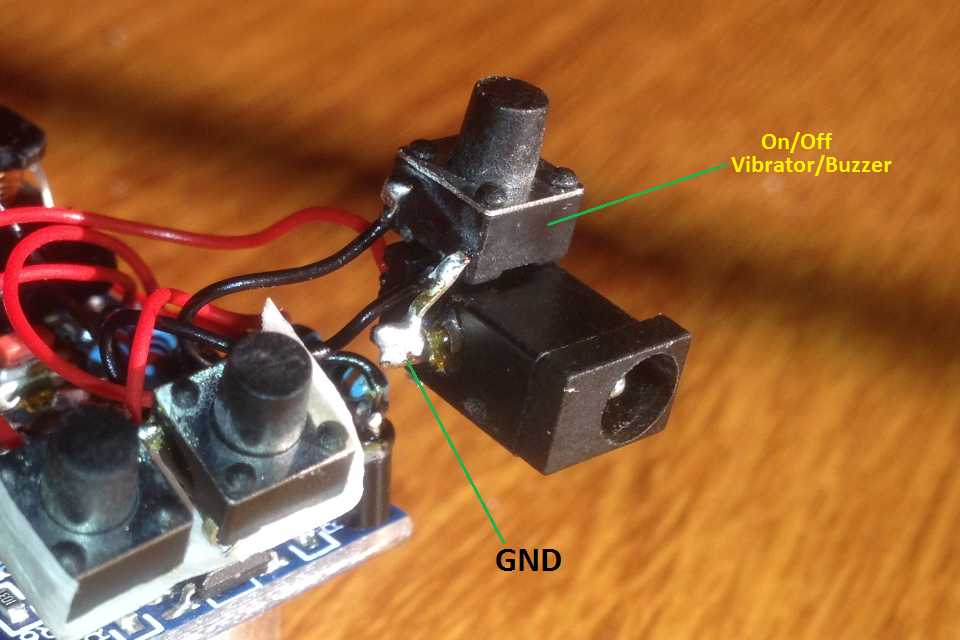
    Solder tin electronic components onto the circuit.


    where to led.


    Jack DC with Button On / Off.


    Video: Observe from four directions.

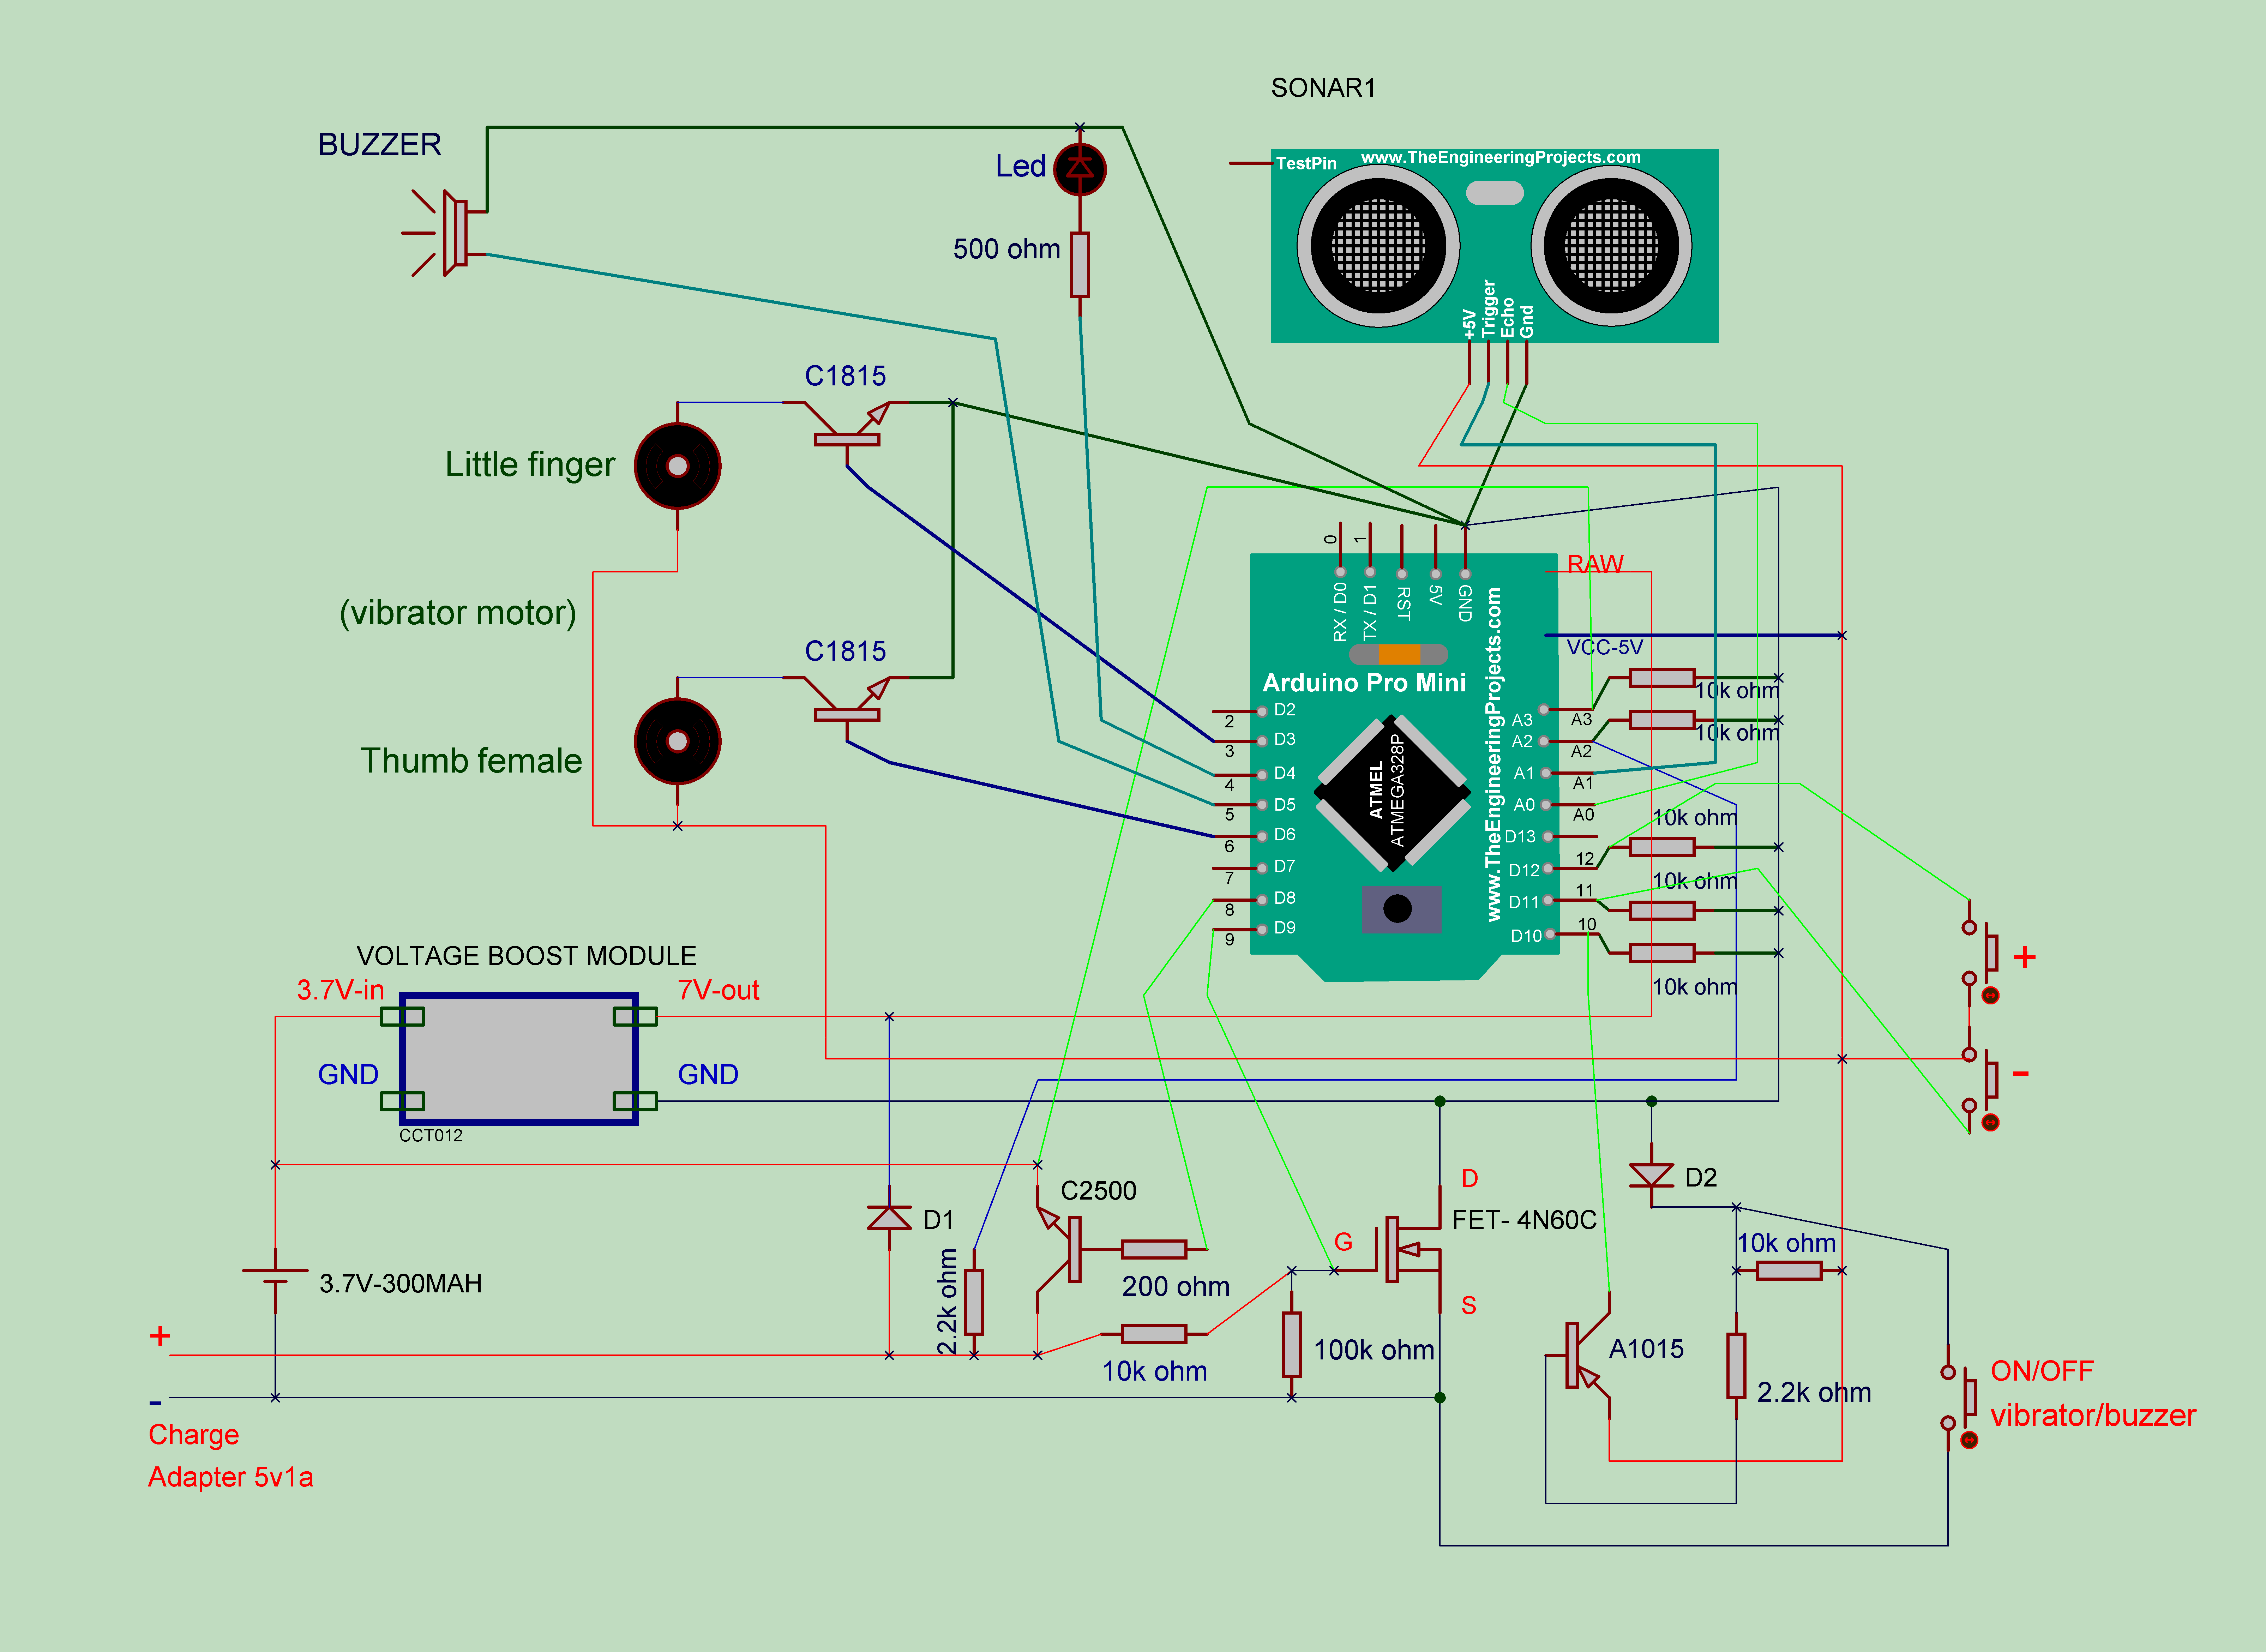
  • Circuit diagram upgrade_1.1

    Tiendo08/26/2017 at 18:02 0 comments

    With circuit diagram upgrade, it consumes less power than before.

    * The mode of operation.

       - Battery charging mode.

       - Finger vibration mode.

       - Sound mode.

       - Alarm mode (Acts as an alarm device in the house. If there is a moving object it will emit sound. Alarm mode is started by pressing hold two " + - " nodes in 3 seconds).

       + The device automatically turns off the power when the voltage on the battery is less than 3.6 volts. 

       + Two buttons " + , - " Used to set, increase or decrease the volume of Buzzer or vibrating motors. (Save settings to EEPROM).

       + Voltage boost module (3.7V --> 7V). Used to power the Arduino pro mini.

View all 14 project logs

  • 1
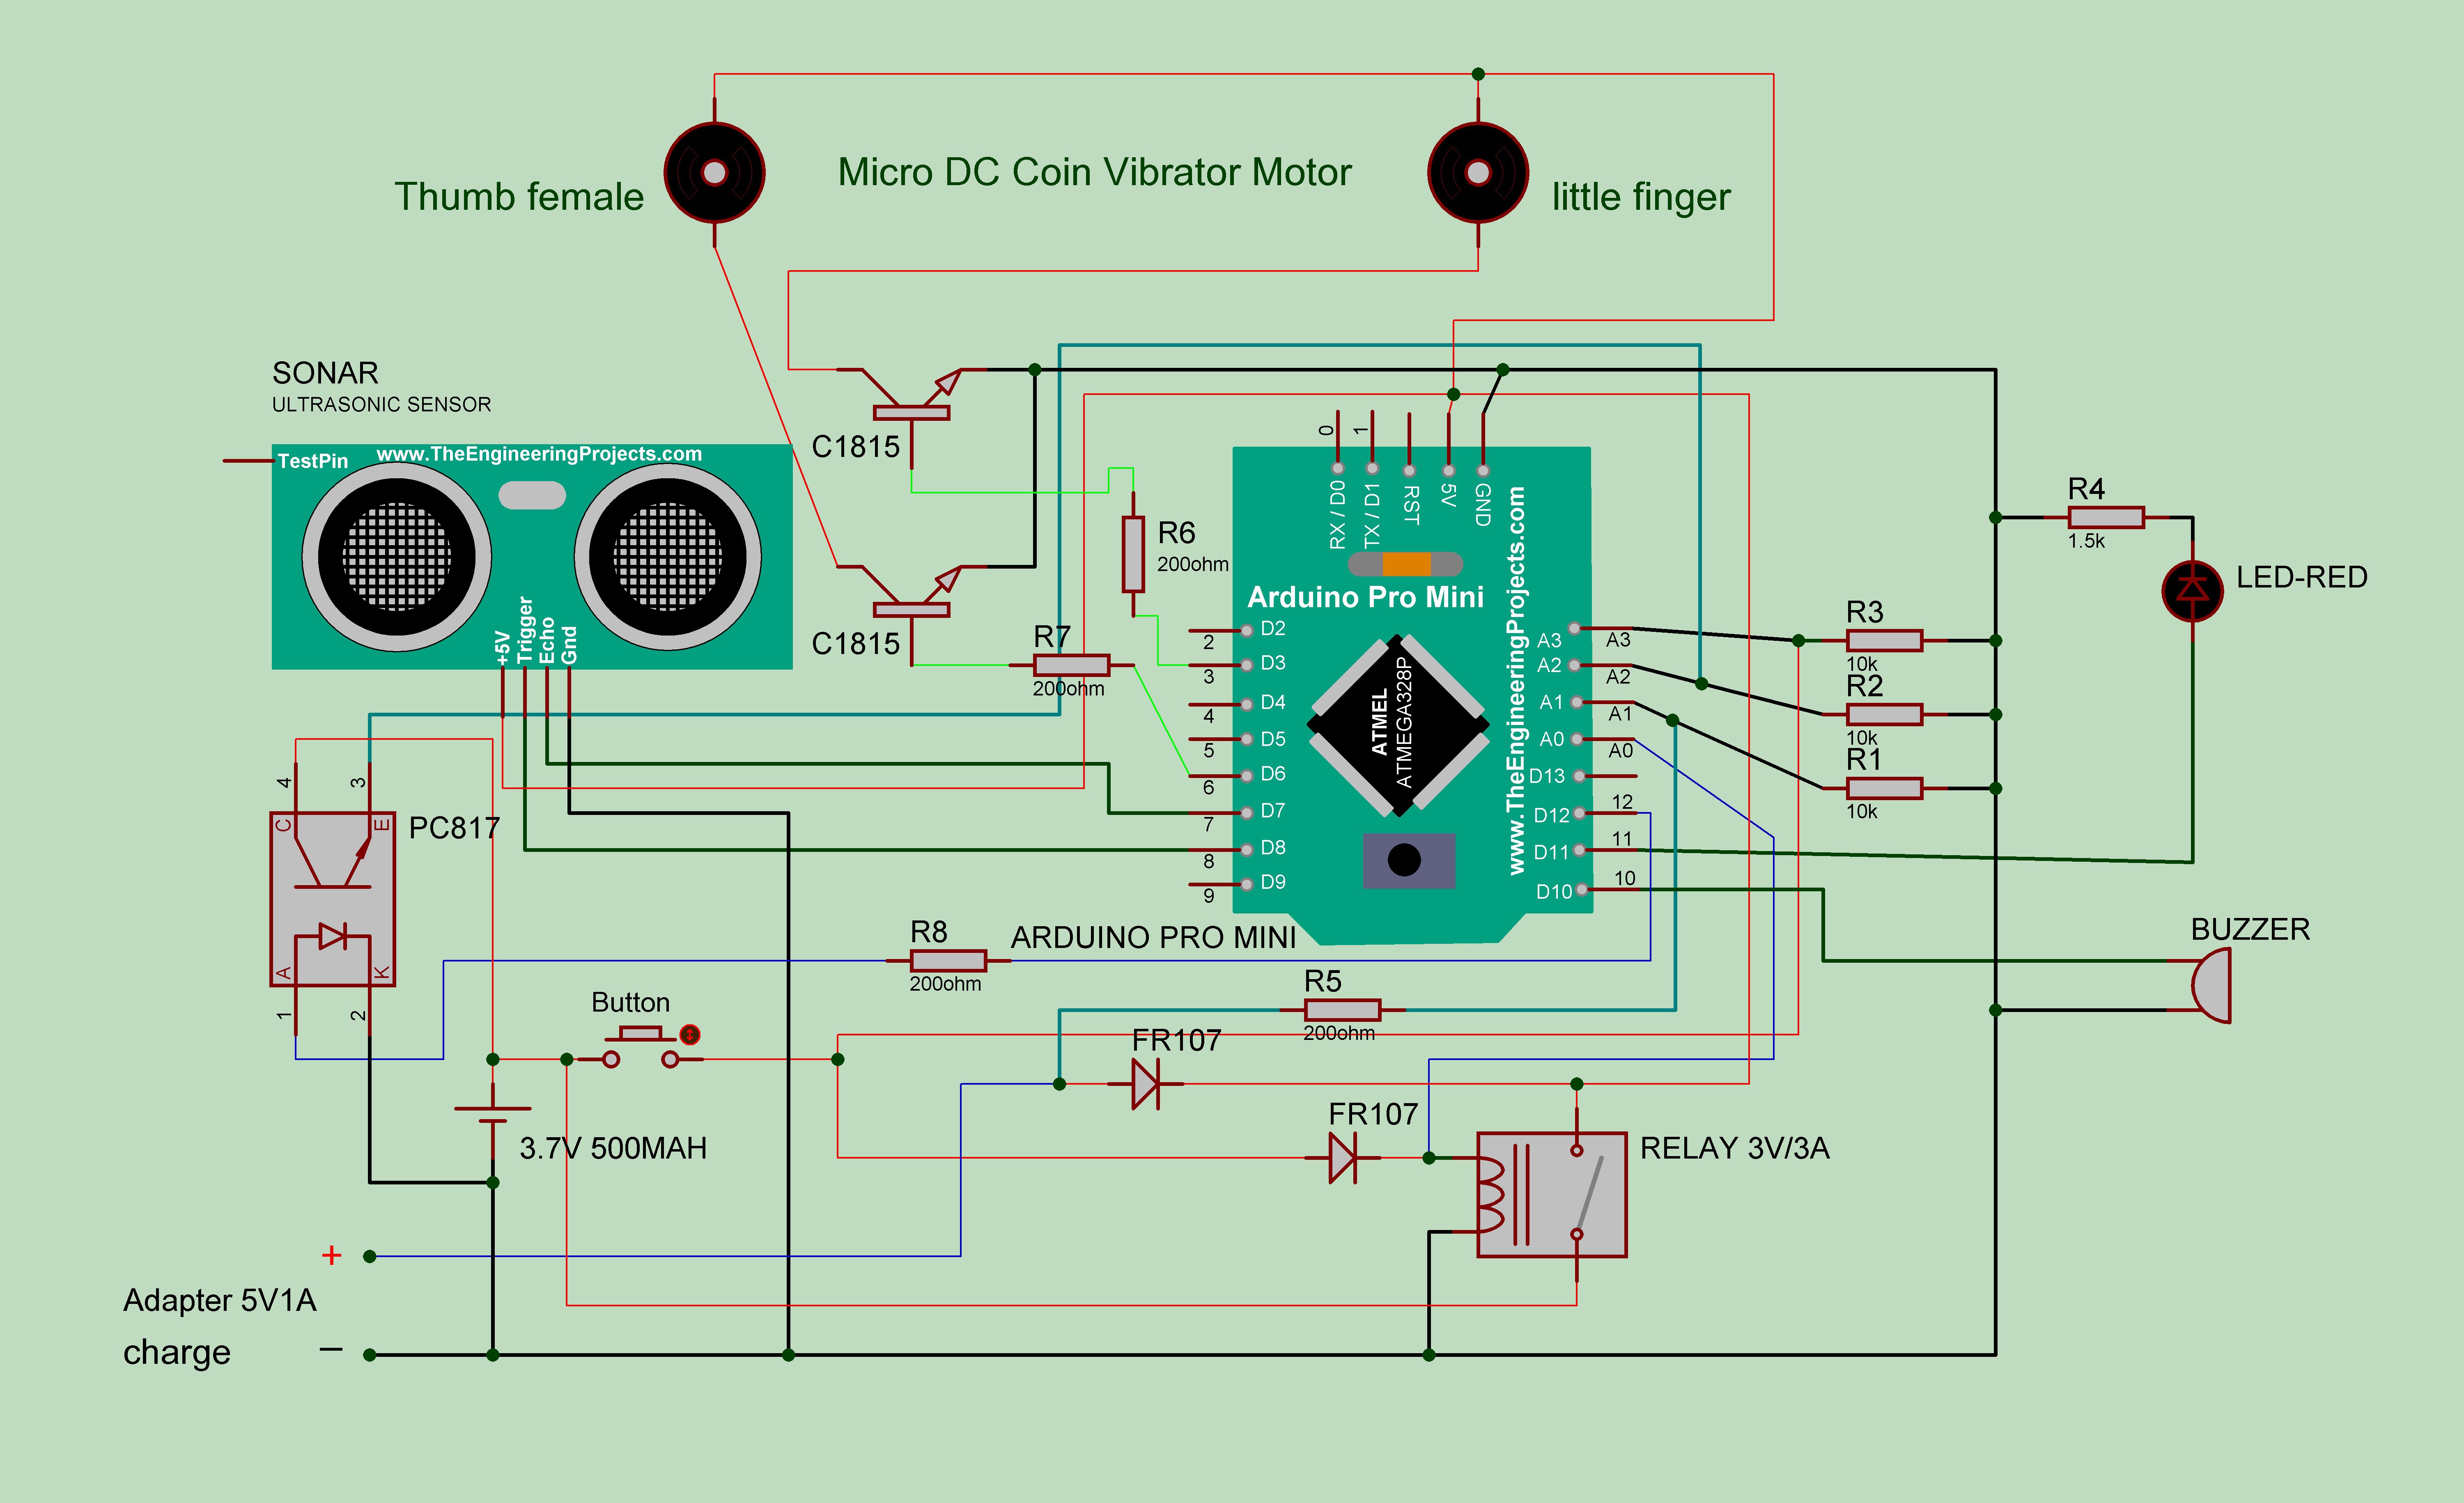
    (These steps are from version 1 , My project is updated at PROJECT LOGS) Circuit Diagram - Descriptions.

    The bracelet has 3 operating modes: Battery charging mode, Finger vibration mode, Sound mode.

    - "Button" is used to turn the device on or off by pressing and holding for 3 seconds. Or to switch between two modes, finger vibration mode or sound mode.

    - Pc817 has function to close circuit to A2 pin measure battery voltage.

    - Relay has a function to turn on / off the power from the battery with charging feet and Arduino.

  • 2
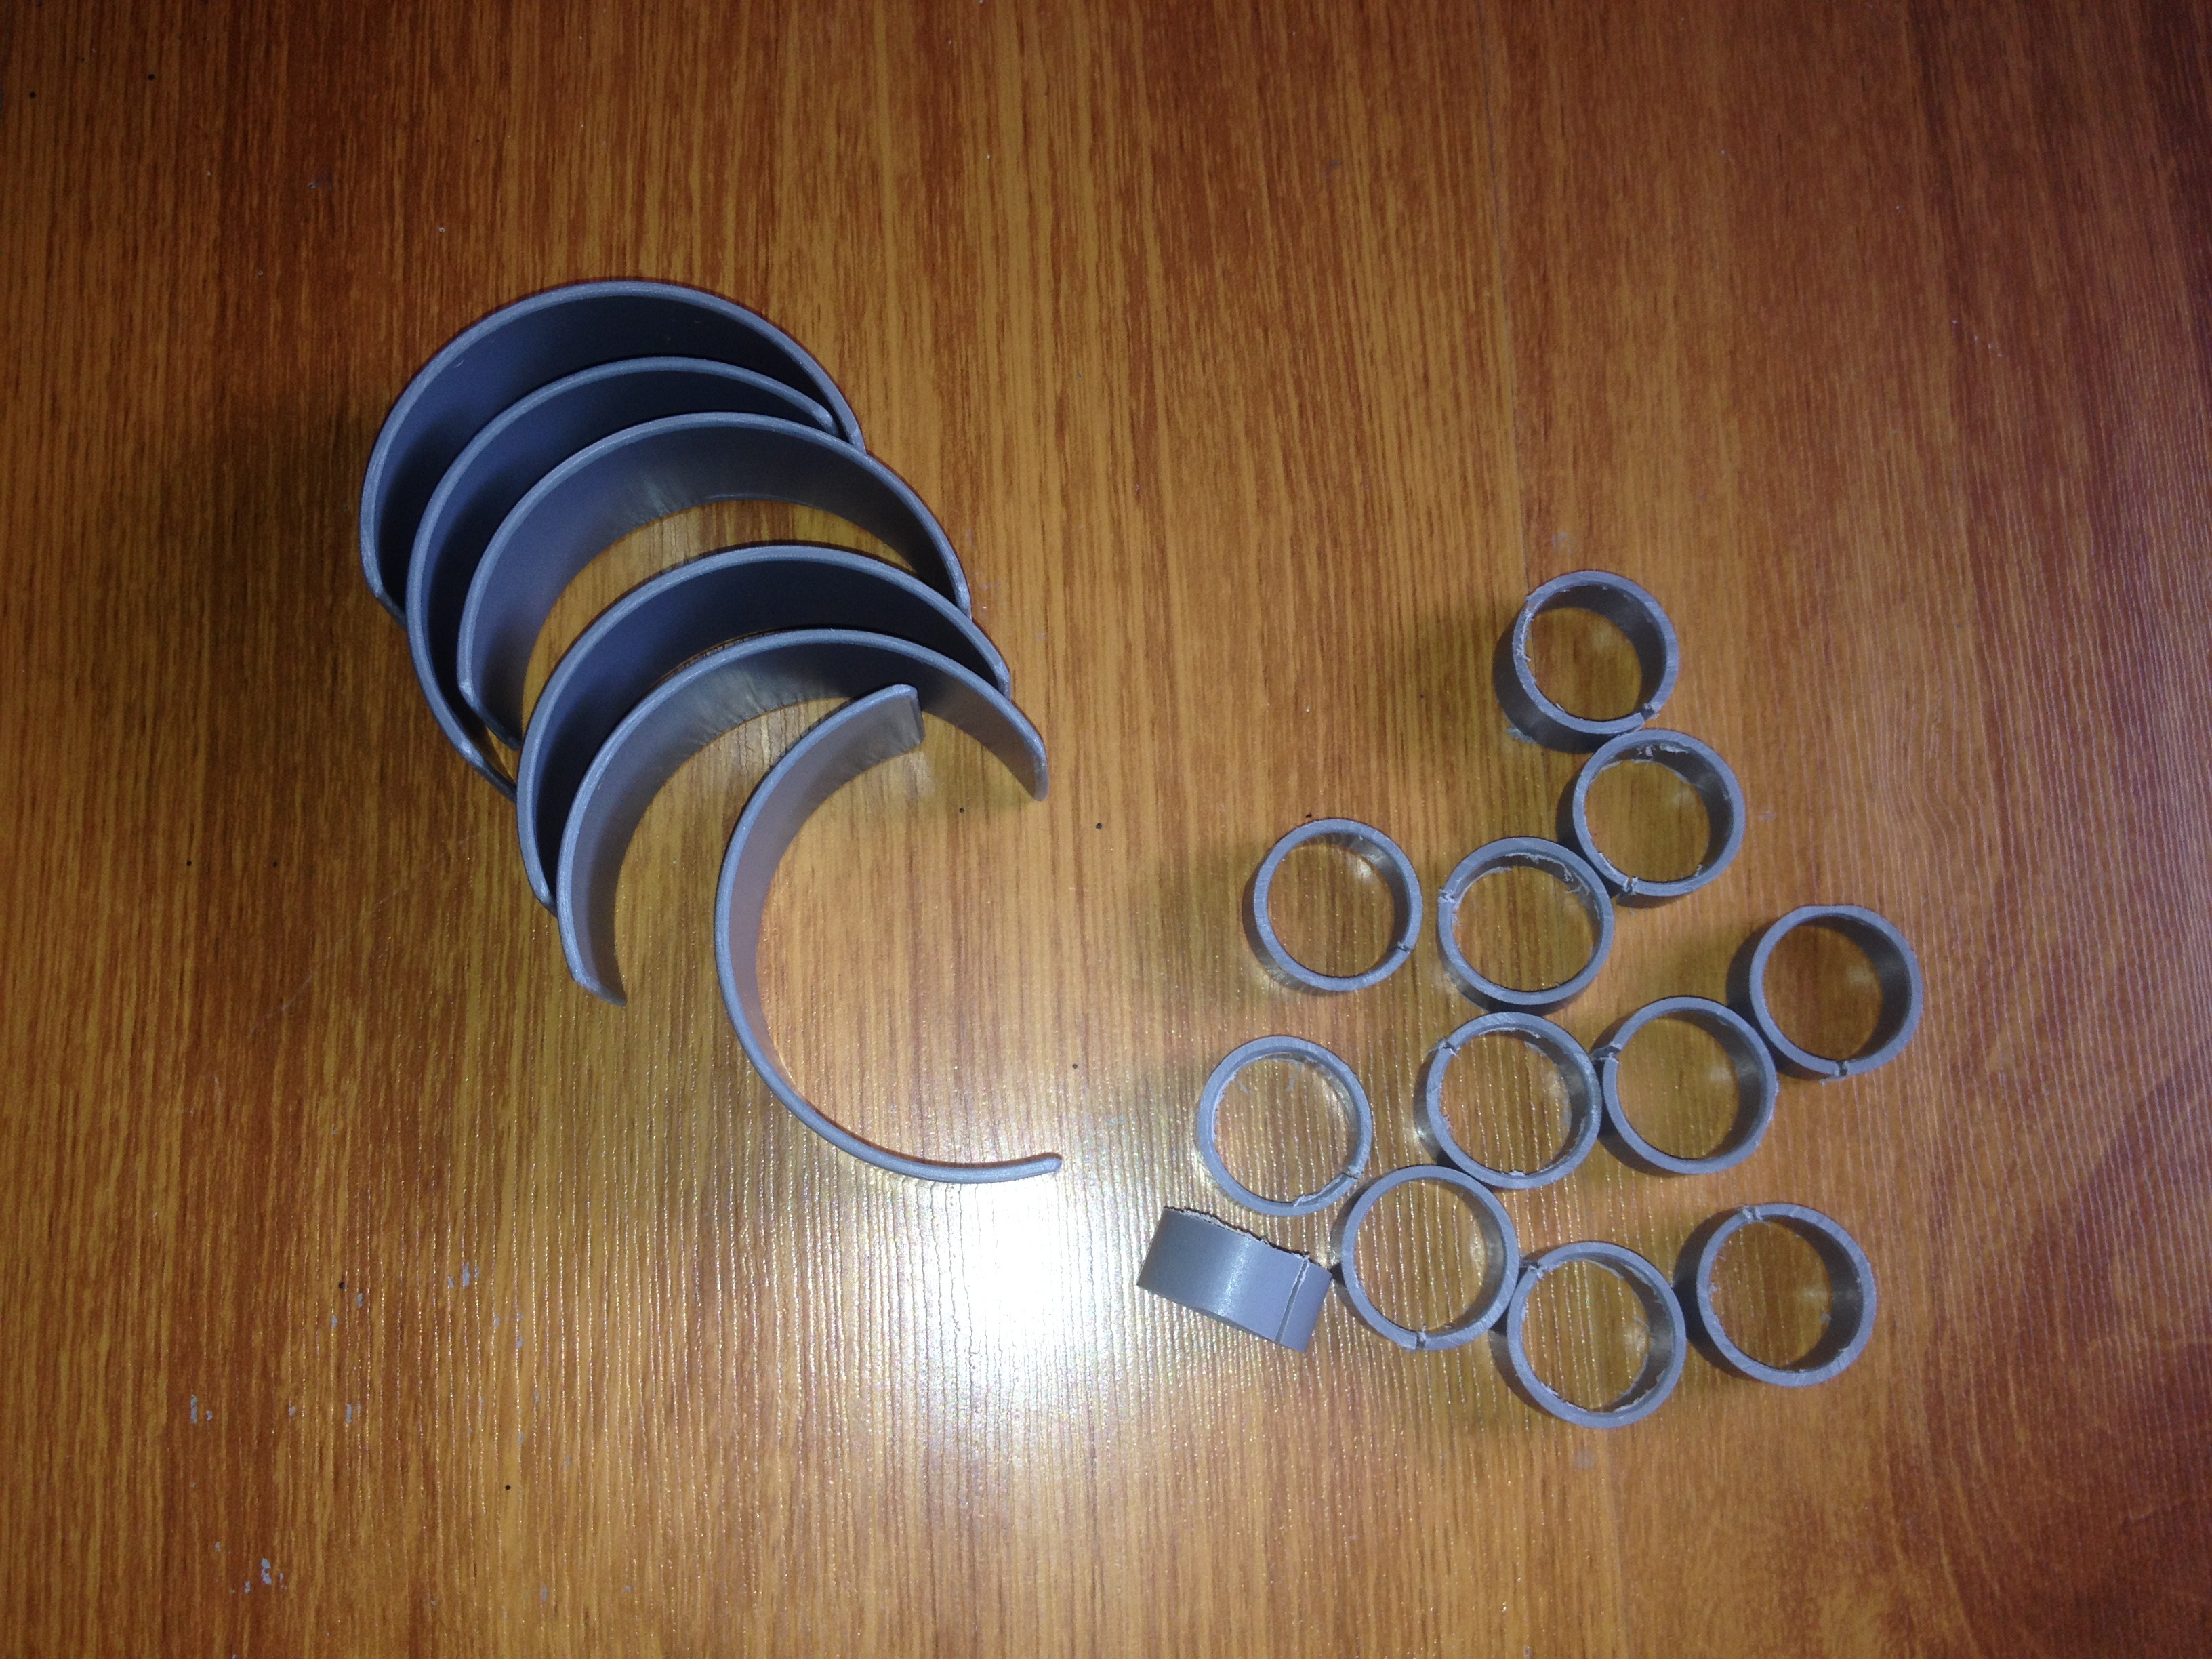
    Make circles from the plastic pipe

    water plastic pipe ∅21mm and ∅48

    And it fit the size of my hand


  • 3
    Make a box containing the circuit

    I cut a lot of small plastic sheets, to fit into the box shape, then use plastic glue to connect them

    Now try wearing it on your hand. Looks pretty okay

    Use plastic glue to connect them.

View all 6 instructions

Enjoy this project?

Share

Discussions

shamaizas wrote 02/09/2023 at 07:48 point

These tips could help me for what's to come. I welcome you to the page where you can assess hypnotizing data on comparable subjects

https://www.peehugoaescorts.com/

  Are you sure? yes | no

Antarvasna wrote 03/11/2022 at 19:16 point

So, if you search a lot to find out some interesting and exciting stories, Antarvasna is available here for you. You just need to click on the link.

https://www.antarvasna.org.in/

  Are you sure? yes | no

Antarvasna wrote 03/11/2022 at 19:16 point

Many people searching to find out some exceptional and lusty XXX Story. Here, we are providing some outstanding stories and you just need to click on the link.

https://www.antarvasna.live/

  Are you sure? yes | no

mcmasterp wrote 08/22/2017 at 23:59 point

Your code is very well written. Have you considered adding an accelerometer? That way you can have the vibration activate on the side the person is sweeping on.

  Are you sure? yes | no

Tiendo wrote 08/25/2017 at 01:07 point
Thank you! I'm thinking of the GPS module and the Sim module for the project. I will try it with accelerometer.

  Are you sure? yes | no

[deleted]

[this comment has been deleted]

Tiendo wrote 08/19/2017 at 20:09 point

Thank you DoraBritton!

  Are you sure? yes | no

mcmasterp wrote 08/15/2017 at 23:24 point

I tried this as well but hit the limits of the sonic sensor when bouncing off angled surfaces. I want to try one if the lidar modules but $150 each is a bit much.

I can't wait to review your code

  Are you sure? yes | no

Tiendo wrote 08/16/2017 at 10:19 point
Thank you!  I will try more.

  Are you sure? yes | no

Similar Projects

Does this project spark your interest?

Become a member to follow this project and never miss any updates