Chris
Chris-
Proof of concept
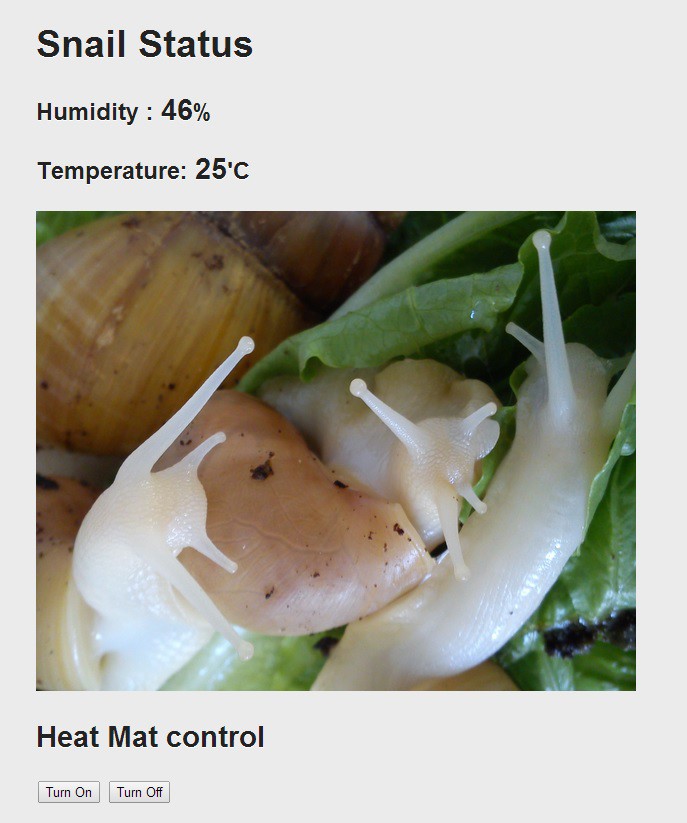
08/19/2014 at 14:06 • 0 commentsWith the sensor ready I I set myself up with an account with Xively and began to hack away at the Xively demo from the Ethernet library. I initially used only one sensor from the DHT11 and sent the data onto the web and started viewing the data. Then adding the second sensor was a simple duplication job.
The next step was to setup the raspberry pi as an Apache web server. Using another Xively demo as a base a simple webpage was created to display this data.
One of the directions was working, the next step was to control one of the sockets from the browser. A couple of Javascript buttons were added to the webpage to run cgi scripts on the server. These Python scripts send a UDP message to the Arduino to initiate the transmission of the codes to the socket.
Add a picture and the concept was proven:
![]()
There is a number of choices made along the way that need to be looked at again.
The message structure used by the sensor only uses two bytes of data. This was done just to avoid the collision with the remote controlled sockets. I need to analyse this to decide on a protocol that is going to avoid this problem and have the ability to be flexible.
The usage of CGi scripts and UDP messages might not be the best way to do it, but this is my first venture into web based programming, so I don't know any better and have just gone with the one I can get to work.
Ideally I think that having the sensor data on the Pi rather than Xively would mean that the server could be in constant communication over the LAN and give me more control of the data
-
Test Sensor
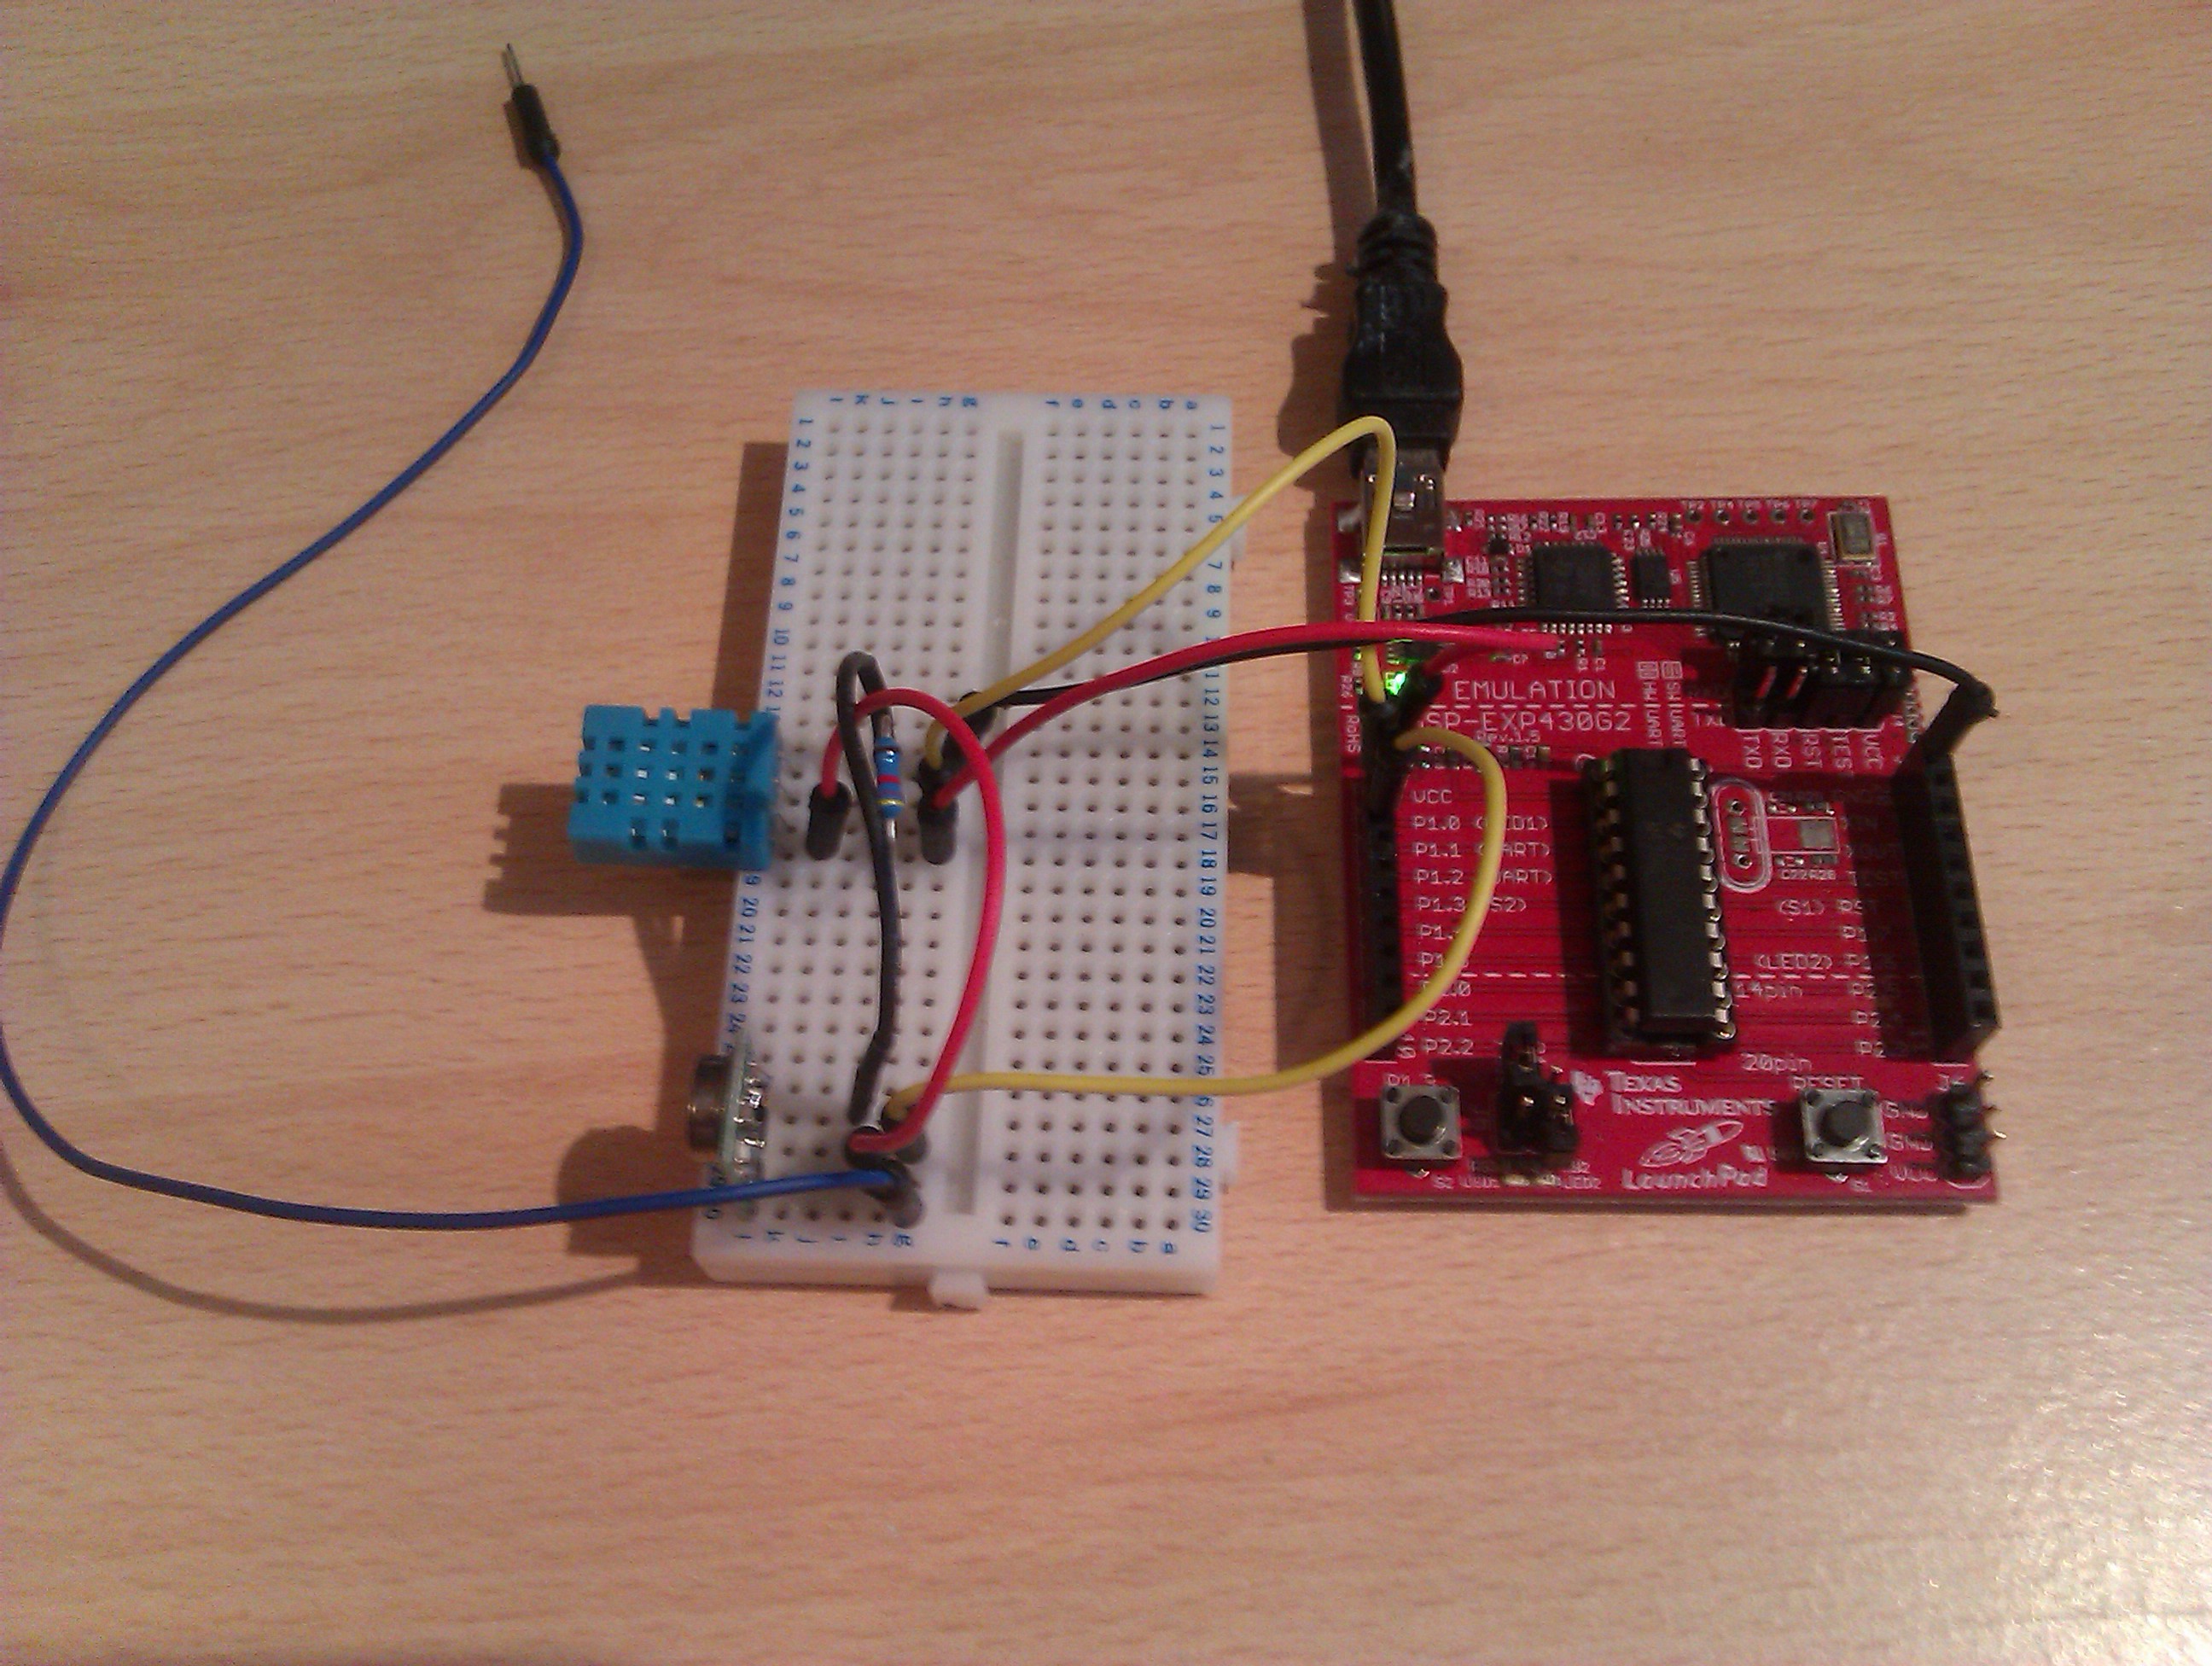
08/19/2014 at 13:40 • 0 commentsTo have any meaningful setup I was going to need a sensor. At the recent UK MakerFaire (In Newcastle) I picked up a DHT11 temperature and humidity sensor. I decided to use this and an msp430 to monitor our pet Snails. Again I used a bread board to prototype the sensor:
![]()
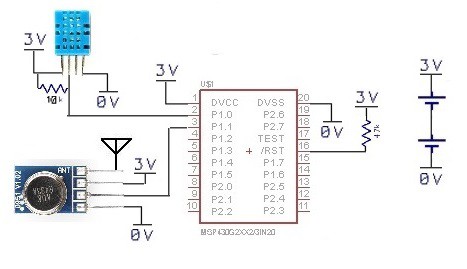
circuit:
![]()
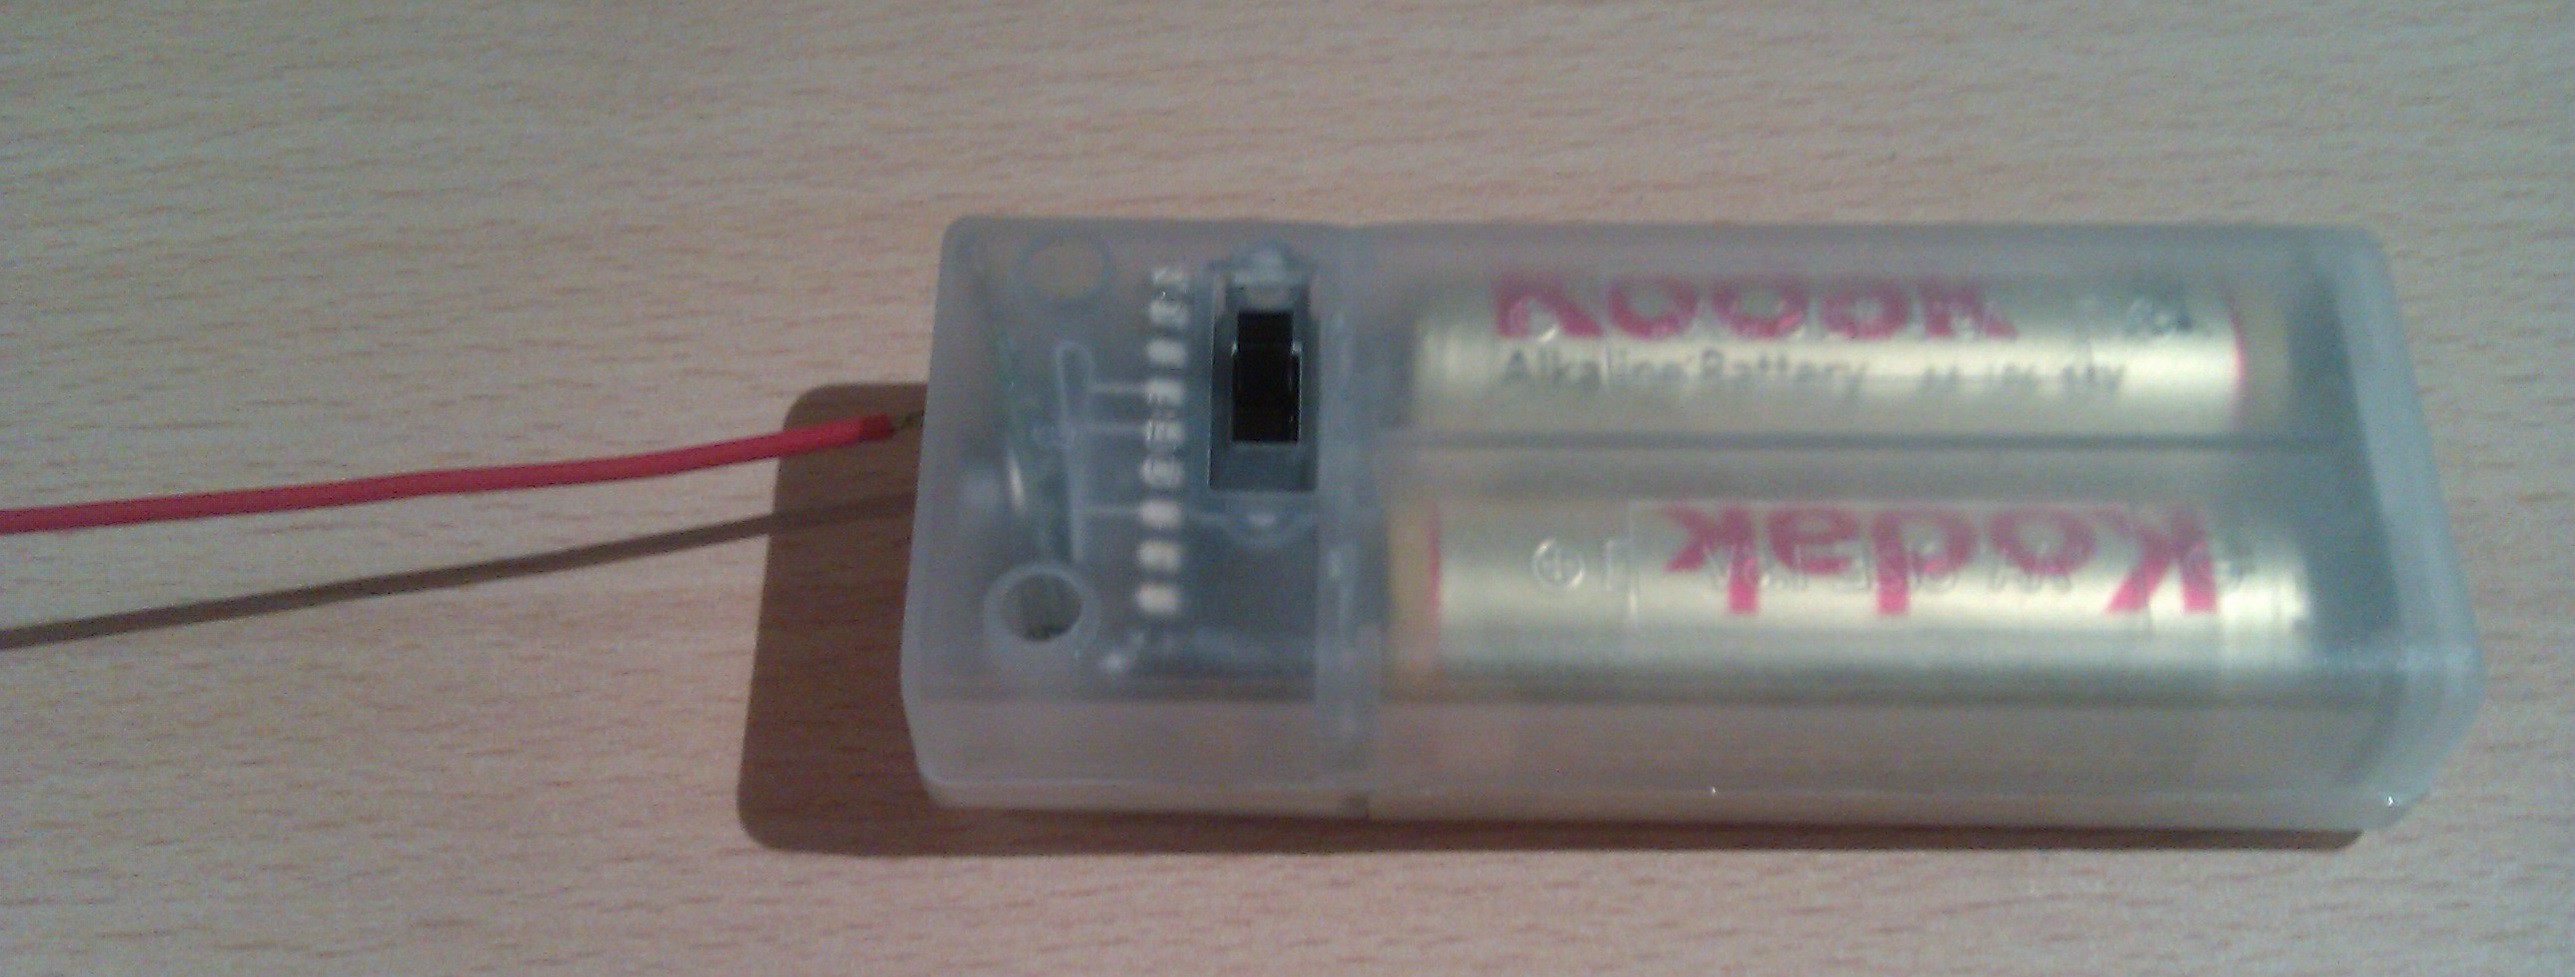
Since this was going to be on the Snailarium, I decided to box it up. a reused battery box and with some tricky positioning fit it all in.
![]()
-
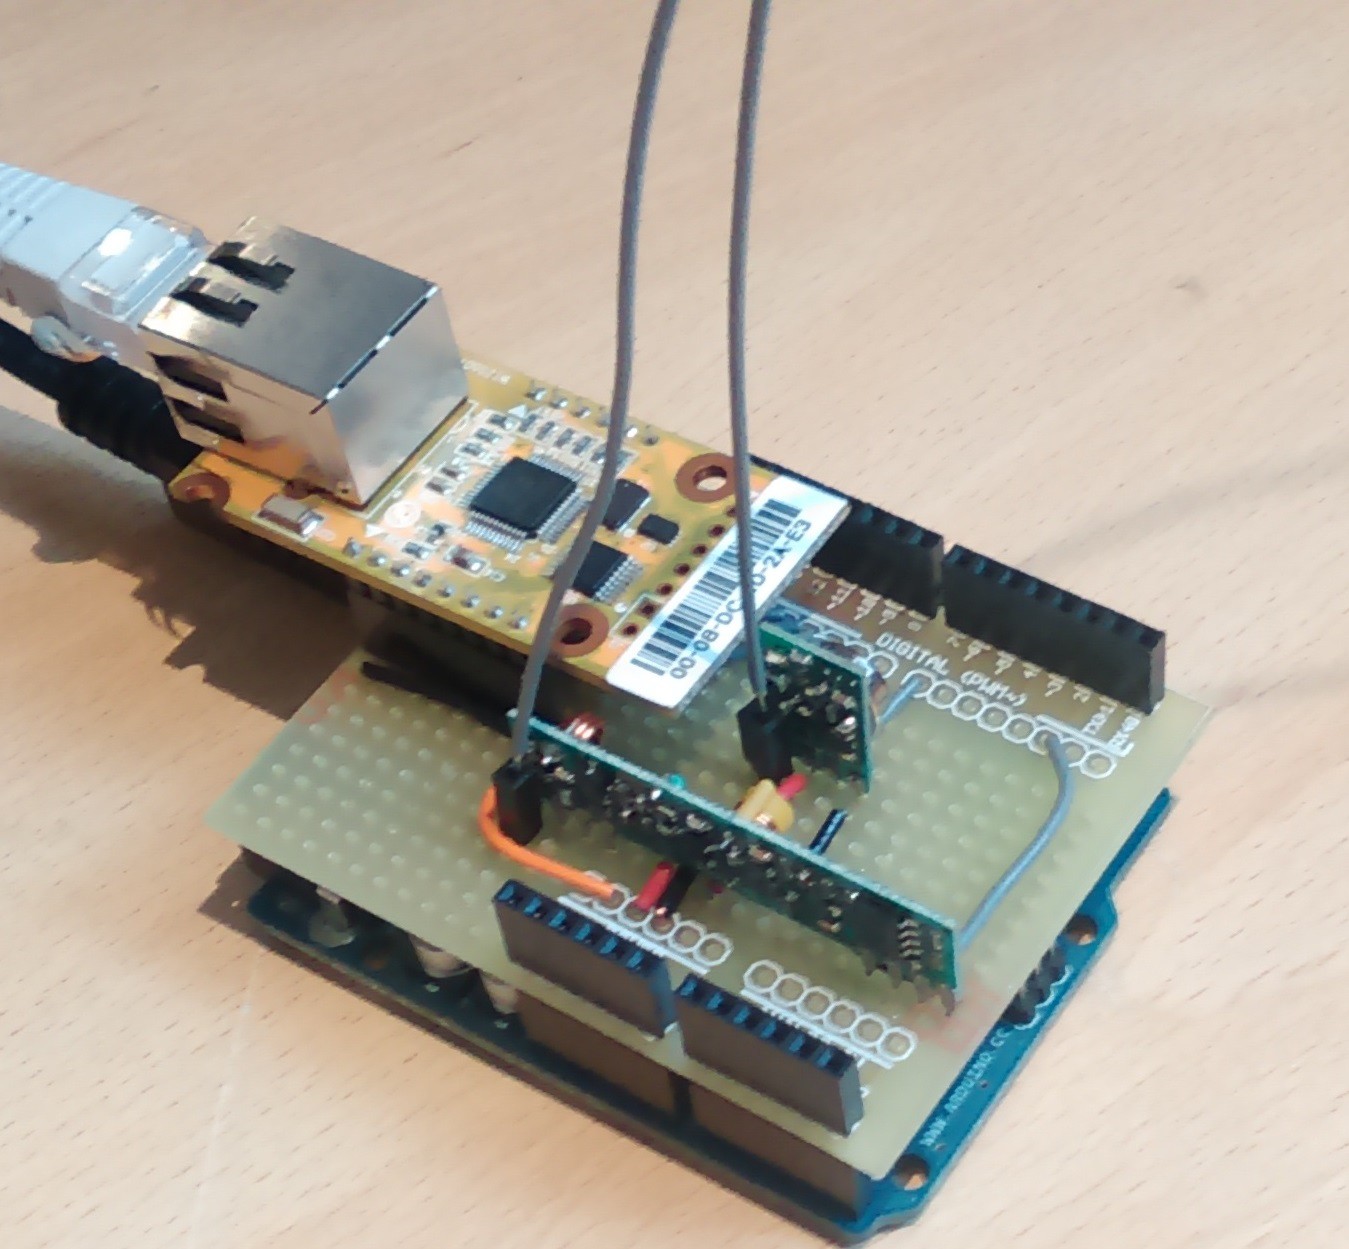
Shield Construction
08/19/2014 at 13:29 • 0 commentsWith the circuit working I could move it to an Arduino shield. I don't think this needs more explanation, Because of the amount of modules used, this is really just a wiring job. I have left enough space on the shield to add a 2.4GHz transceiver at a later date
![]()
-
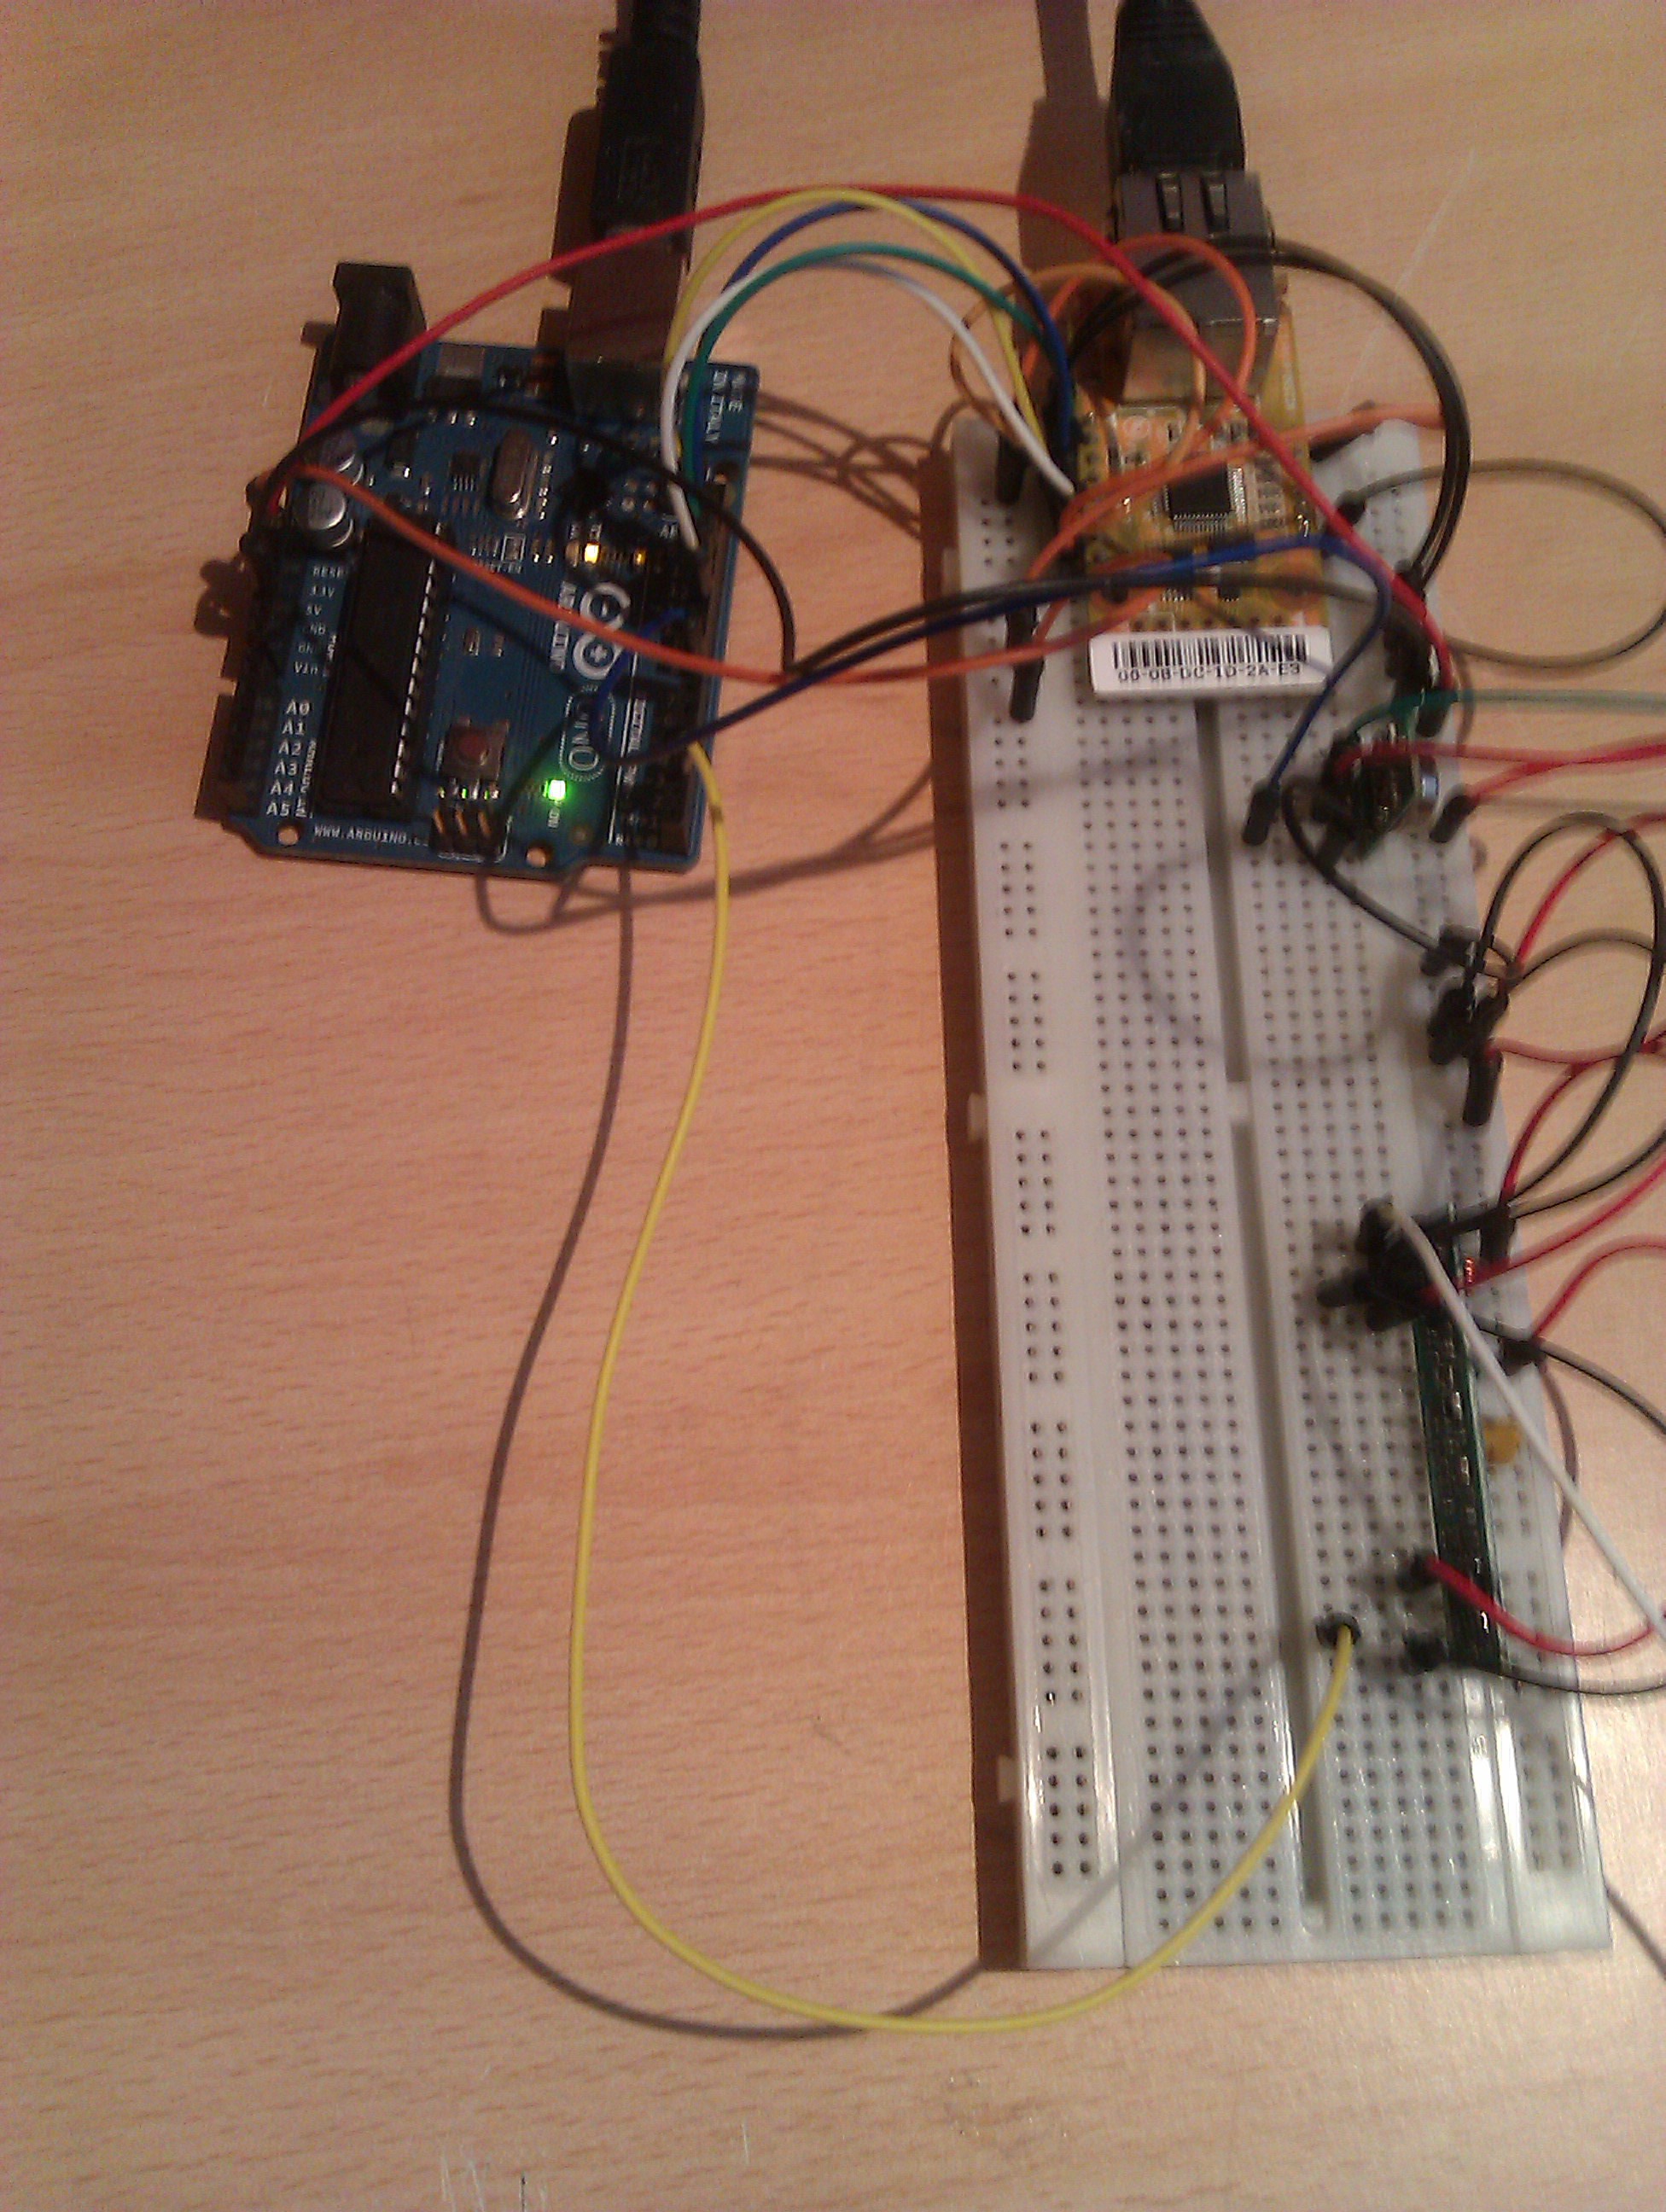
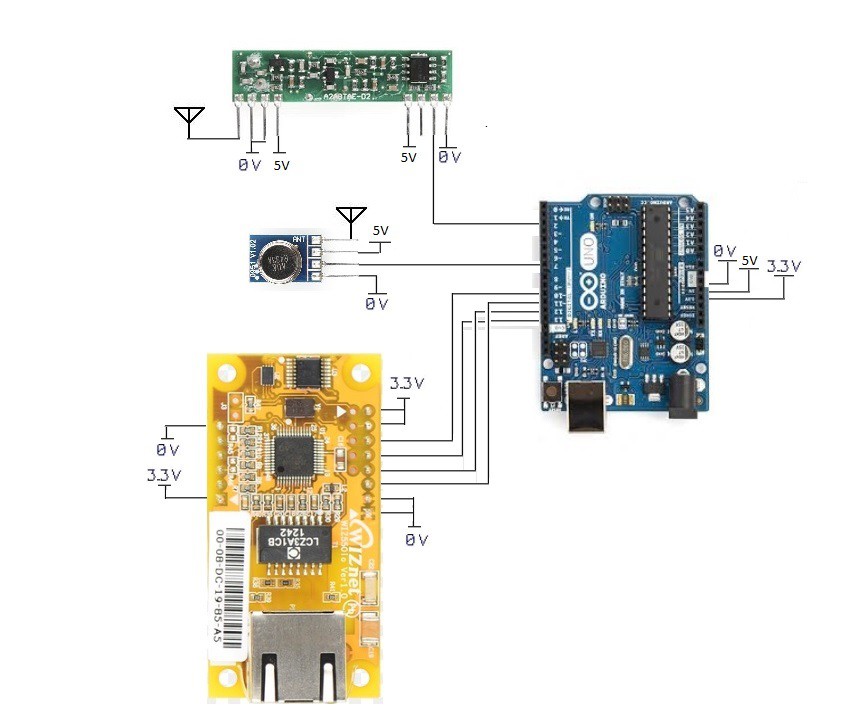
Prototype Hardware
08/19/2014 at 13:24 • 0 commentsThe first task was to prototype the hardware. For this I used the bread board setup shown below. It's a bit of a mess, but let me get each section working on it's own. I started by using the examples for the Ethernet shield to check the internet connection, then used the RCSwitch library examples to send and receive with the 433 MHz modules. While I was using the the receive example I also captured the codes from the remote control for the sockets. This will let me reuse the codes to control the sockets and detect when the remote has been used instead of the web.
![]()
Once the circuit was proven I could finalize it, giving me the following
![]()