Dasaki
-
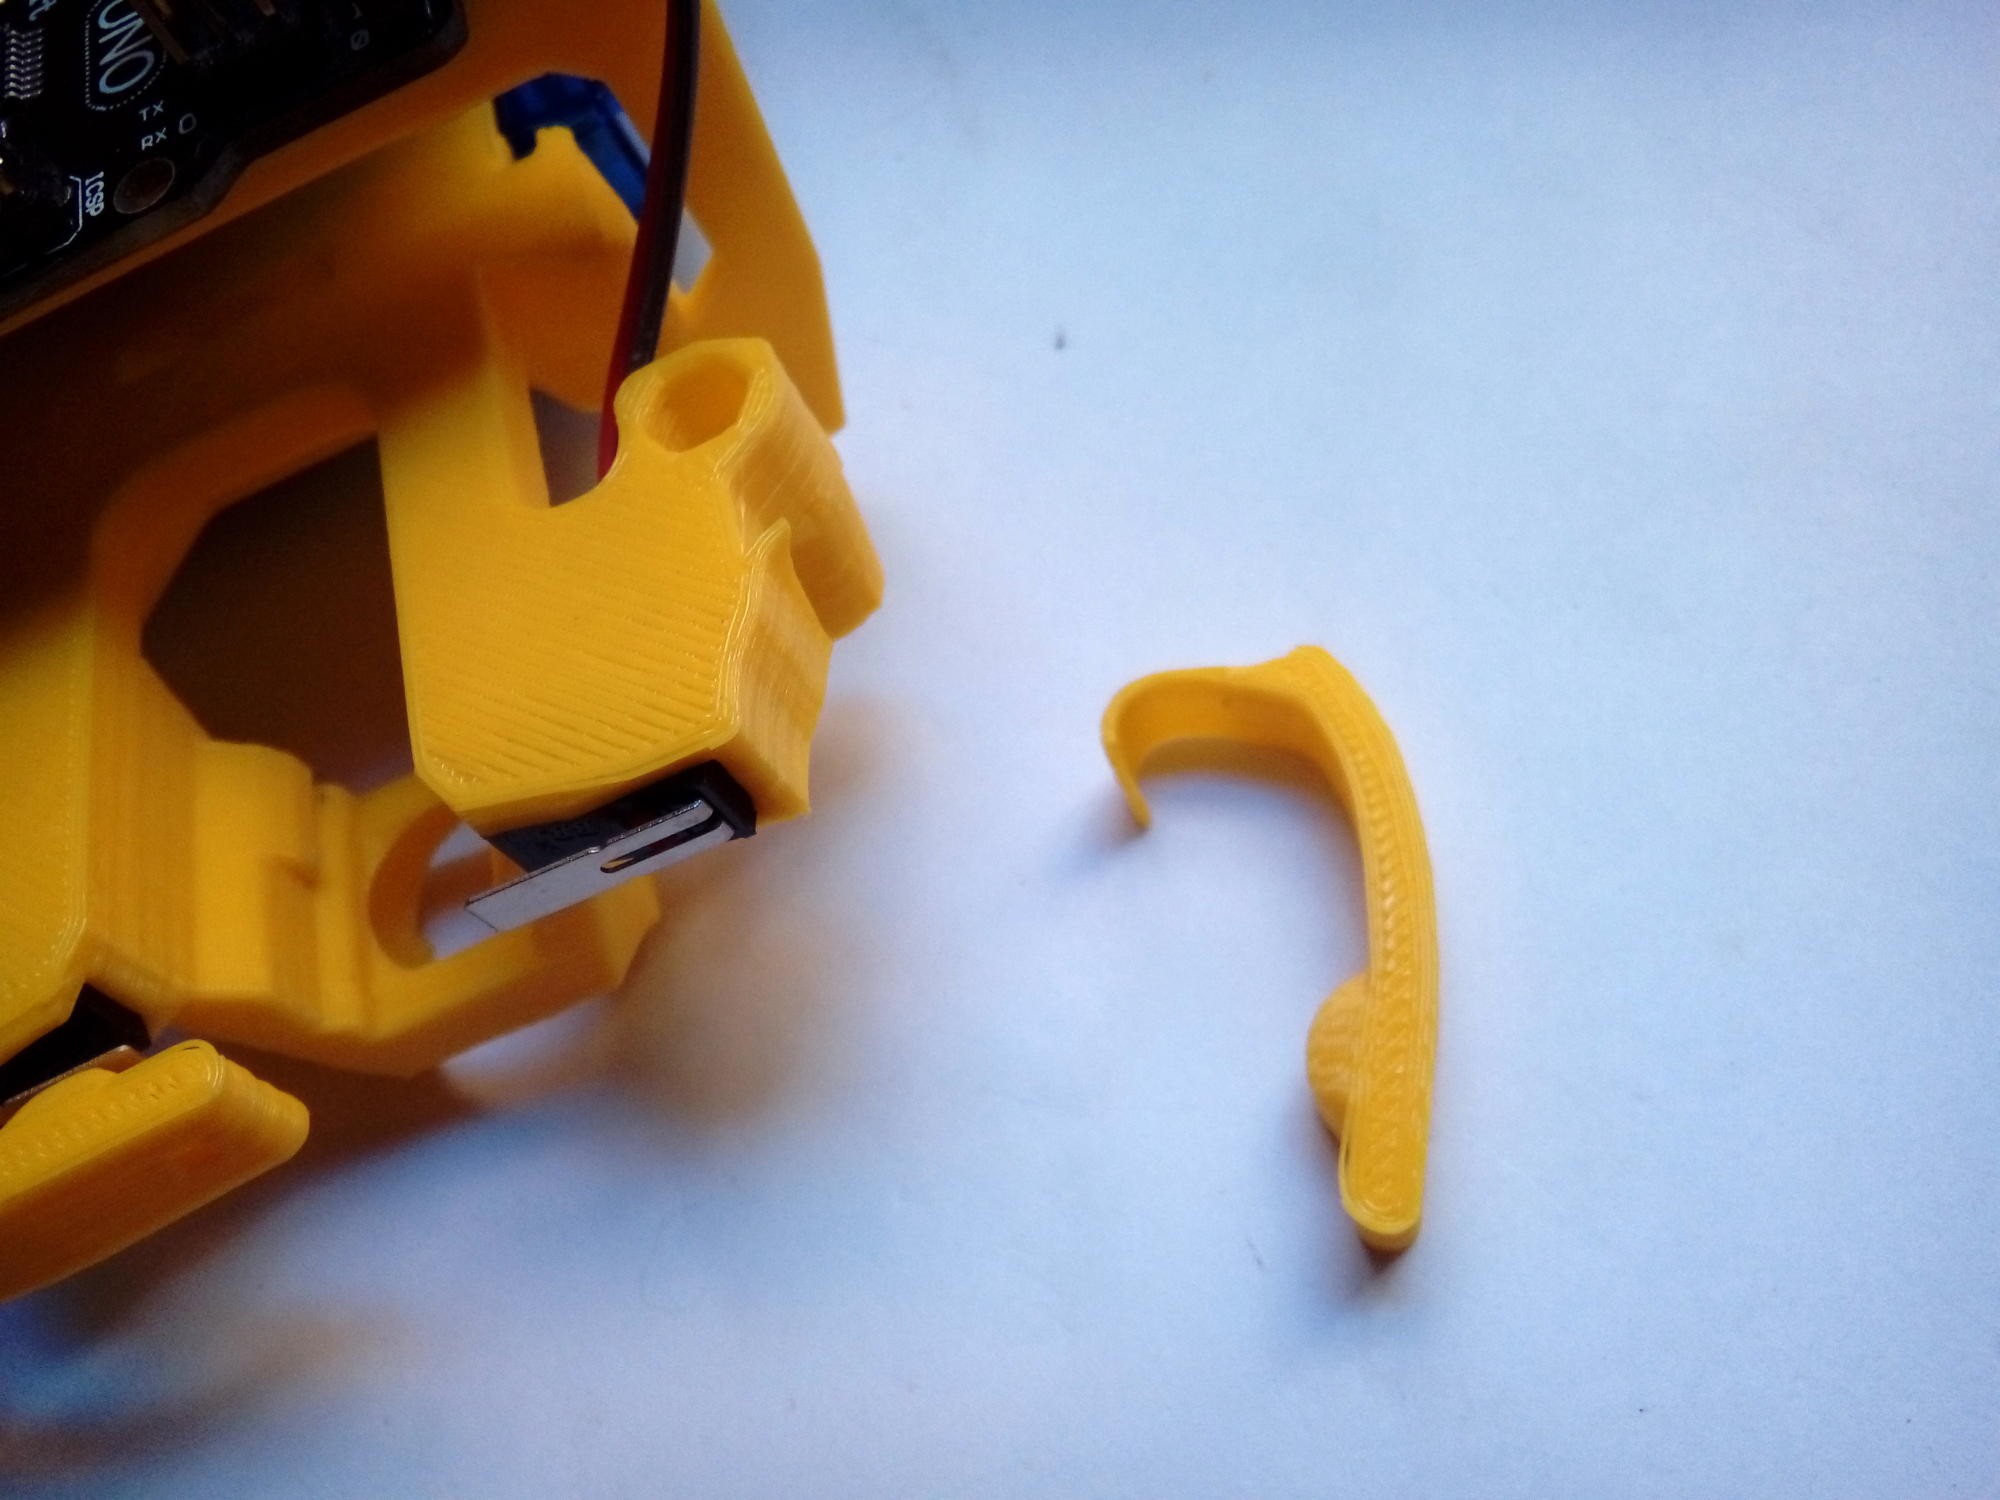
Reinforcing the hinges
07/24/2017 at 07:49 • 0 commentsYesterday the new half mounted version of the rbot fell down the desk and one of the bumpers higes broke.
![]()
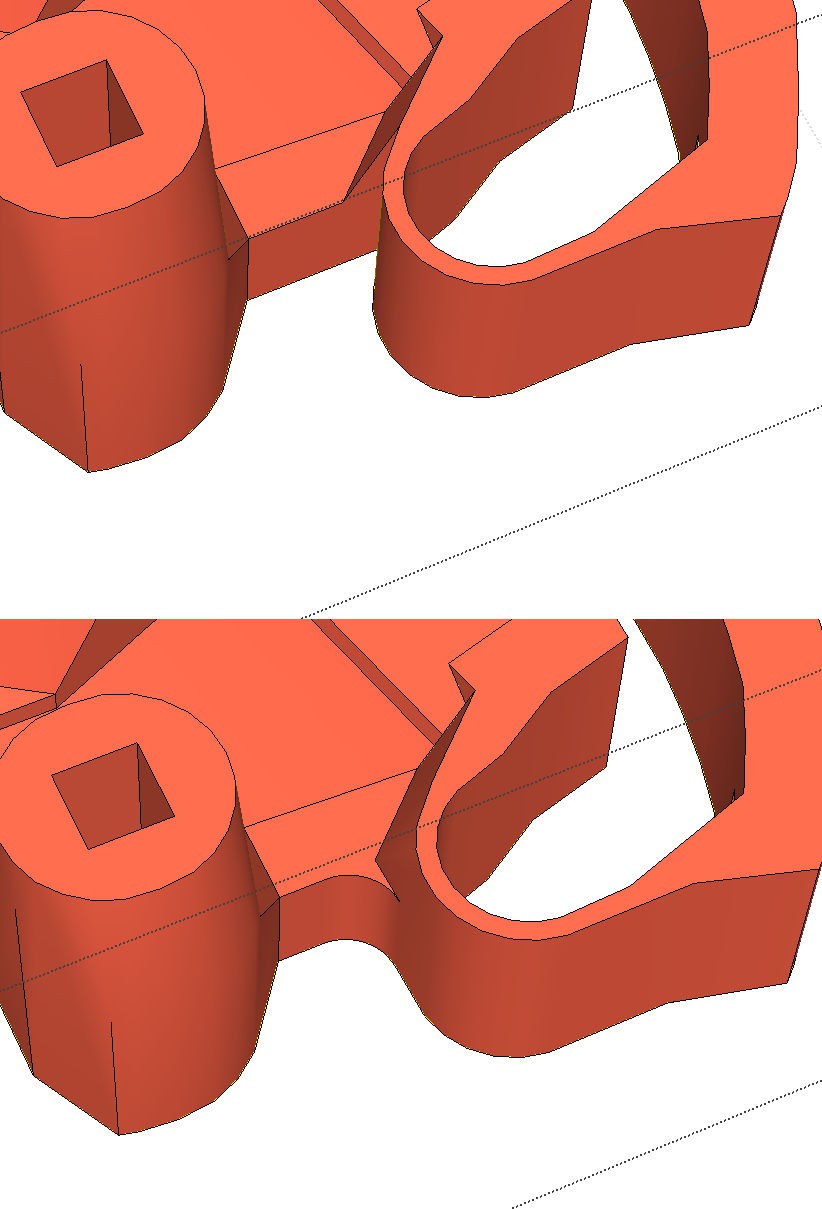
So I did some reinforcement in the design. The top image is the old version and the bottom image is the new version:
![]()
-
Avoiding bumps
07/23/2017 at 14:58 • 0 commentsQuick video showing one of the simplest behaviors: the robot reacts to bumps detected with the microswitches, and changes trajectory accordingly to avoid the obstacle:
I used the previous chassis version (old parts printed in white PLA, one of the new version wheels in gray), before I mount everything on the improved chassis (shown in other logs, in yellow PLA)
-
Screwless (snap-in) servo mount
07/22/2017 at 10:51 • 2 commentsOne of the goal of the design is to reduce the amount of "vitamins" or buyed parts as much as possible, and at the same time to simplify the assembly.
So I modified the main chassis piece some to allow to snap in the wheel's servo motors, hoping they would hold in place firmly. The results are great, four less screws and motors quickly intalled.
-
Testing the bump sensors
07/22/2017 at 10:08 • 0 commentsI've made a quick video showing the microswitches working with the arduino's internall pullups enabled, so you spare an external resistor:
-
Improving the wheels
07/20/2017 at 11:26 • 0 commentsFor better assembly of the rubber band (after noticing the inconvenience of having to remove the wheel to replace the band), I've redesigned the wheels so that the band is easier to put/remove.
Watch this video to learn how to put the rubber bands on the wheels:
Versatile Educational 2WD Robot
This is an affordable Open Source 2WD robot chassis that is 3D printable and can be used to teach robotics and interfacing sensors.